My blog has moved!

You should be automatically redirected in 6 seconds. If not, visit
http://www.unpastiche.com
and update your bookmarks.

Showing posts with label French Recipes. Show all posts

Sunday, September 23, 2012

The best buttery laminated pastry ever - Kouign Amann

If you asked me a couple of years ago if I would ever utter the words kouign amann (pronounced as quiee-ah-mahn) in Singapore, I would have thought you're nuts. But well oh well, with the great number of 'hipster' cafes and patisseries and bakeries popping up in Singapore lately, it appears that pastries like this king of laminated pastry has made its appearance in our sunny little island. 

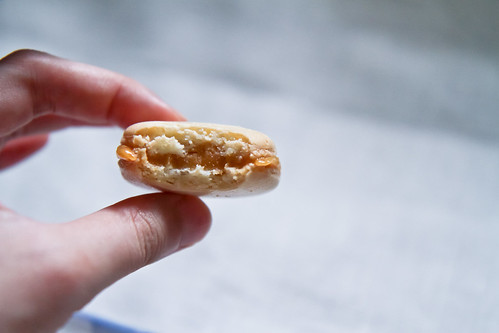
I might be a bit slow on the take up since I never did patronize Tiong Bahru Bakery when it was hip since it was a tad out of the way for me, but when it opened at Raffles City, my kind colleague/roommate got me a croissant and in her words, "this thing that the staff recommended me to get". She couldn't remember the name of the pastry, but when I saw it, I had a little sneaking suspicion that this might be a kouign amann, but I wasn't very sure because from my experience, kouign amanns generally look more rustic and bread like whereas Gontran Cherrier's version looked a tad puff pastry/danish like. Nevertheless when I bit into the pastry, I was sure. Nothing else in this world can taste so sinfully buttery and sugary!


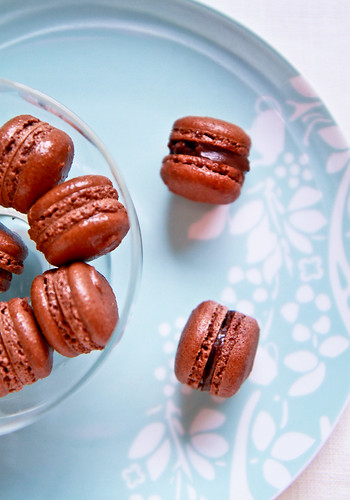
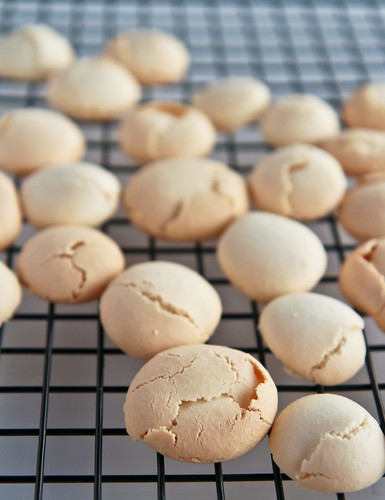
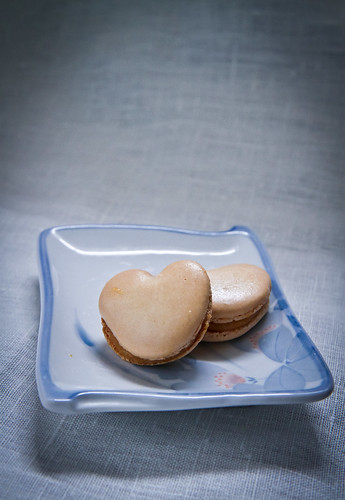
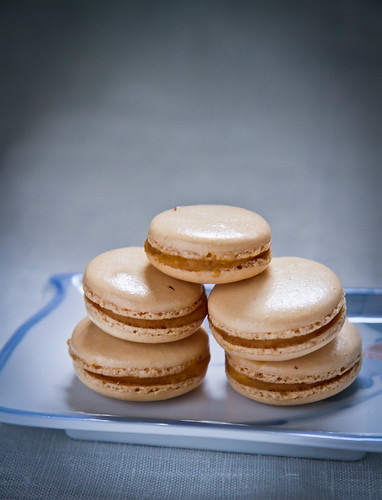
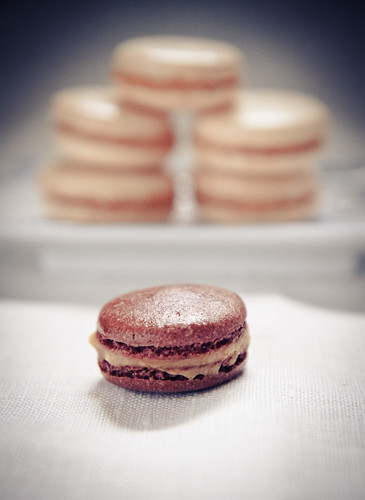
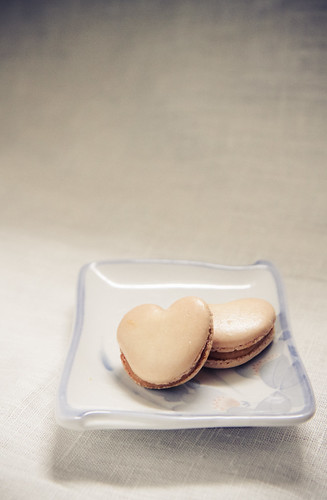
I first got a taste of this heavenly pastry when I was in Paris. I had been stuffing my face silly with macarons, entremets and sweet gâteaux and was growing quite sick of them. Although I like cakes, I'd much prefer pastries and breads. So naturally I did some googling to check what other pastry I should have other than the usual croissants and danishes, and I stumbled upon this mysterious pastry known as the kouign amann. 

Call me crazy but I still remember my first experience of the kouign amann. Jon and I had been walking along Champs-Élysées hunting for a nice leather jacket when we stumbled upon Ladurée. I guess we might have been lucky because the queue was not that long and I even managed to get a couple of photographs of the interior before the staff told me 'no photos'. I got myself the usual - a box of macarons, a croissant, and I pointed to the kouign amann. Back then, I didn't speak French and  naturally didn't want to embarrass myself by massacring the pastry's name. I remember that it smelled delicious, of caramel and butter, and even before I stepped out of the store, I had already slid it out of its paper bag to devour it. My first taste was almost like ambrosia. Until that point in time, I had never ever eaten any pastry that was so deliciously good. I knew I shouldn't have offered any to Jon because he then proceeded to demand that I share this delicious pastry with him. I don't remember where else we went in Paris that day, but I knew that the best memory of the day was walking along the Champs-Élysées, and the Arc de Triomphe whilst devouring the kouign amann. 

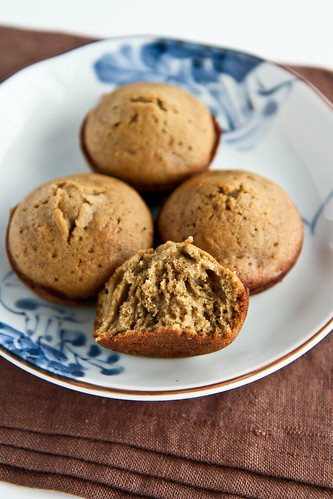
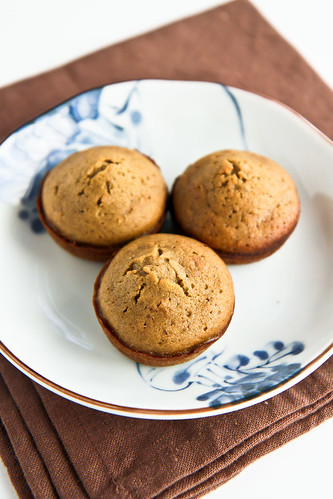
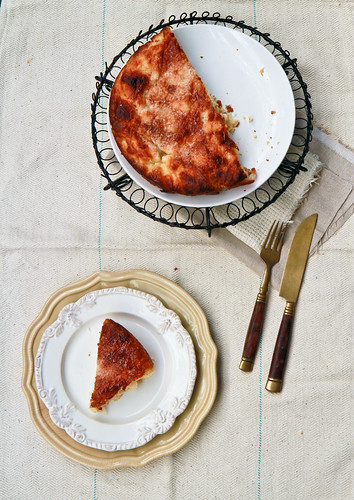
Last year, after mastering the art of laminated dough, I decided it was time that I make my own kouign amann and relieve those wonderful memories. You might notice that my kouign amann looks very different from the one that Tiong Bahru Bakery is selling, but I would think mine is a more accurate version - after all, kouign amann is Breton for butter cake and according to wiki, it is a "round crusty cake, made with bread dough containing layers of butter and sugar folded in" ;p


I finally decided on David Lebovitz's Kouign Amann recipe as opposed to Ladurée's because of the crazy amount of sugar and butter that Ladurée's had.  

Kouign Amann
Fills an 8" round cake pan

12g dried yeast (or 5g of instant yeast)
175g (¾ cup) warm water
260g all-purpose flour, plus extra for rolling out the pastry
½ teaspoon sea salt
200g castor sugar, divided, plus extra for rolling out the pastry
110g salted butter, cut into 2-cm pieces

Method:

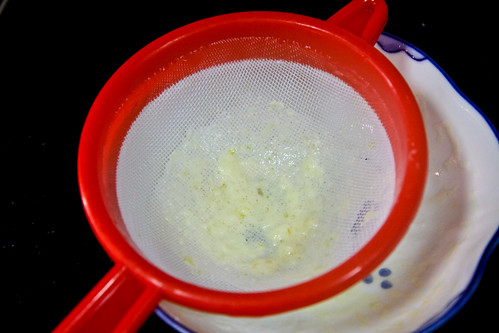
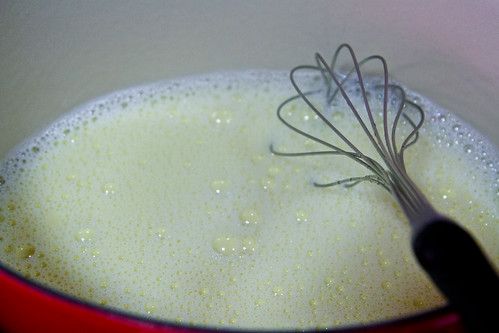
  1. In a mixing bowl, dissolve the dried yeast in the water with a pinch of sugar. Stir briefly, then let stand for 10 minutes until foamy. If using instant yeast, you can skip this step and add yeast together with the flour. 
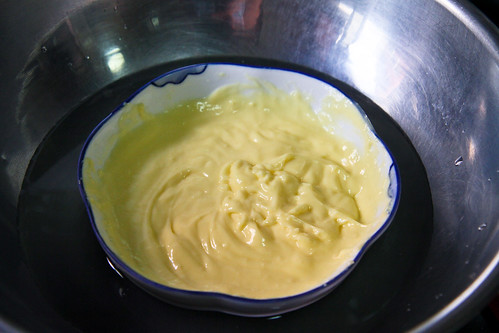
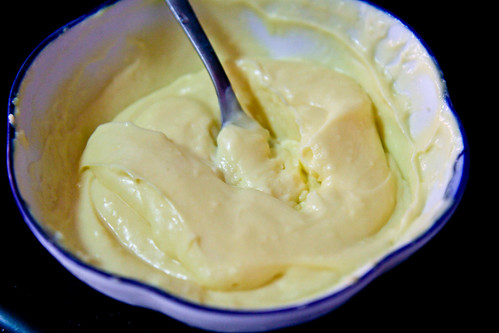
  2. Gradually stir the flour and salt into the mixing bowl. The dough should be soft, but not too sticky. Lightly dust your countertop with flour and transfer the dough onto it.
  3. Knead the dough with your hands until the dough is smooth and elastic, for about 3 minutes. If the dough is very sticky, gradually add more flour, about 10g or one tablespoon at a time, until the dough doesn’t stick to your hands. Gather the dough into a bowl and place it into a lightly oiled bowl. Cover and let it rest in a warm place for about 1 hour, or until the dough ball has doubled. 
  4. Then, on a lightly floured countertop, roll the dough into a rectangle about 12″ x 18″ (or 30 cm by 45cm) with the shorter sides to your left and right. If you would like a step-by-step illustration, do pop by David Lebovitz's page!
  5. Mentally divide the rectangle into three equal portions and distribute all the butter cubes in the centre of the dough. Sprinkle 50g of sugar together with the butter cubes. Grab the left side of the dough, lift and fold it over the center, and do the same with the right side (like a letter). 
  6. Then, sprinkle another 50g of sugar along this rectangle and mentally divide this rectangle (it should be about 15cm by 30cm) into three equal portions again. Fold the left over the centre and the right over the left, like in the previous step. You should get a 10cm by 15cm rectangle. Place this on a lightly oiled plate and place it in the fridge for 1 hour. Once chilled, remove the dough from the fridge.  
  7. Dust the countertop with sugar (instead of flour) and roll out the 10cm by 15cm rectangle into a 30cm by 45cm rectangle again. Sprinkle the surface of the rectangle with another 50g of sugar and fold it into thirds, per step 5 again. Place on a lightly oiled plate and let it rest in the fridge for another 30 minutes to 1 hour.
  8. Preheat your oven to 220°C (425°F) and brush the 8 inch cake pan with melted butter. Remove the dough from the fridge and roll it into a circle about the size of your baking pan. The dough might be sticky, so use sugar to lightly dust your countertop. Sprinkle the top of the dough with the remaining 50g of sugar. You may wish to drizzle some melted butter as well. 
  9. Bake for about 40 minutes, or until the top is brown and deeply caramelized. Remove from the oven and let it stand for 15 minutes before running a knife around the edges to release the Kouign Amann. Let it cool for at least an hour before consuming. 


Janine's jots: 
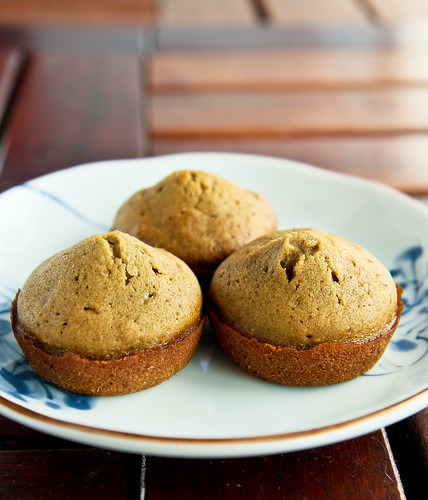
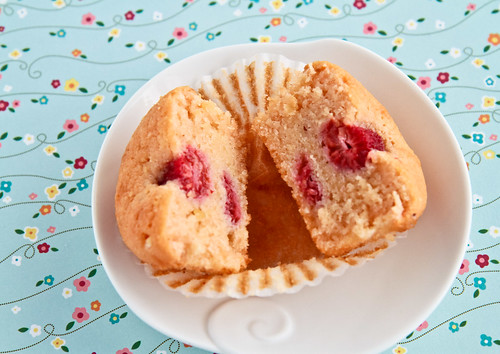
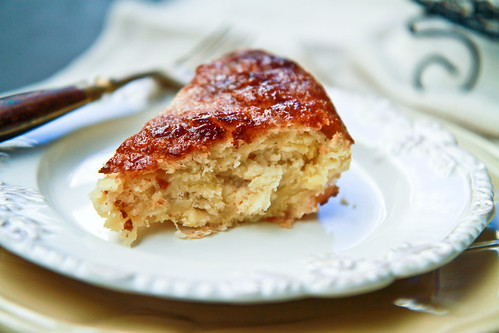
  • Note: Like what David Lebovitz recommended, be sure to use good quality salted butter because it will make a difference. If you don't have access to a good French salted butter (like say Elle & Vire being the most commonly available in Singapore and Malaysia), use normal salted butter and sprinkle some coarse fleur de sel or sea salt on the butter cubes. Also, if you have the luxury of an air-conditioned kitchen, do use it because the dough is very sticky and the sugar melts very quickly, so you have to be quick. As you can see, my layers weren't very prominent because my warm hands caused the sugar to melt soooo rapidly and the butter and sugar just leaked across the layers. 
  • Taste: I found this kouign amann to be slightly less sweet than what I recalled, and definitely not as sweet as Tiong Bahru Bakery's, but it was just nice for me. 
  • Texture: I must admit I deviated from David Lebovitz's method, which was a bad thing. I tried to be ambitious and did the letter-fold four times instead of three as prescribed, and this caused the dough to be slightly more tough and the end product more bread-like. Ideally, this should have less folds than a puff pastry or a croissant. 
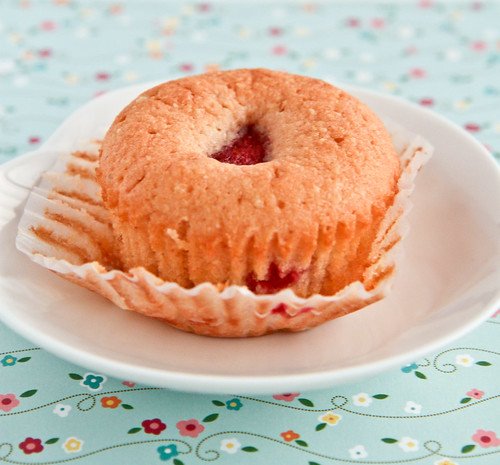
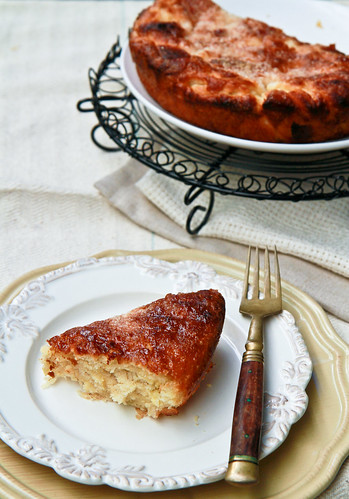
  • Serving size: I'm quite used to seeing the kouign amann in this cake-slice version, but Pierre Herme does it individually in large muffin cups whereas Tiong Bahru Bakery does it like a pinwheel. Naturally, the individual portions means more caramelized bits(!) and more yumminess but this round cake version is equally tasty as well, and definitely more rustic. This recipe will feed 8 people comfortably. 
  • Storage: It keeps quite well for about 3 days at room temperature, but I would definitely recommend storing it in the fridge and heating it up with the microwave. 
  • Would I make this again?: YES definitely! If I had to pick between a danish or croissant or this, I would definitely choose this anyway. Plus, so many people who tried this sang praises of it. Jon's friend called it "the awesome thing" :] There are a couple of methods and recipes to making the kouign amann and after I work off all the extra butter and sugar, I'll get down to experimenting with those recipes, especially Ladurée's version!

Friday, March 30, 2012

Giveaway Results and some Matcha Madeleines

As promised, here are the winners of my strawberry powder giveaway! I know some of you added me on Twitter, but I'm not sure if it's because of the giveaway or otherwise, but because you didn't leave a comment as per the 'rules', I didn't include you in the draw. I used random.org to select the two lucky winners but the problem is I'm an IT noob and I have no idea how to copy and paste the results onto my post?! So you guys will just have to take my word for it - there were 34 comments and the two selected numbers are 7 and 1. This means that Cathy and Angel, you guys are the lucky winners! :]  I'll be emailing you shortly, so do give me your details as soon as you receive my email.

For those who didn't win, don't fret, because I'm going to have another giveaway really soon (hint, it's a fruit and it's freeze-dried and rare in Singapore too!)


So this post was really to abide by the deadline I set myself in the strawberry milk macarons post and I've been so swamped with work that I haven't had time to bake the things that I've wanted to bake. Times like these make me treasure my 'down time' even more - I promise I won't ever complain about having nothing to do! Anyway, last week I was busy bringing my brother's Japanese buddy around Singapore and Malaysia, so I didn't get to bake much, and this week was a busy week, so even mid-week bread plans have been put on hold. In fact, I'm typing this post in between doing work in the office. I'm considering this my rest and 'slack time'.

So like I said, I didn't do much baking, but I thought I'd post these matcha (or green tea)  madeleines which I made some time back, as a tribute of sorts to my brother's Japanese buddy who has since gone home. No, I didn't make these financiers for him to eat, because I'm pretty sure that he would be grossed out by the lack of standard of the matcha powder (the ocha satchets which he gave us produce one of the best tasting ochas I've ever had!) and I mean, serving matcha products to a Japanese would be the last thing I would want to do!

Sorry photos are not particularly imaginative because these were taken some time back.


Matcha Madeleines
Adapted from le livre des fours secs et moelleux de pierre herme
Makes 12
120g caster sugar
20g glucose syrup
120g all-purpose flour
10g matcha powder
4g baking powder
¼ tsp salt
130g eggs
20ml milk
1 tsp vanilla extract
130g clarified unsalted butter

Method:
  1. Heat about 150g of unsalted butter over a saucepan and let it melt until you get white solids on the top. Skim away the foam and allow the remaining liquid to cool. It should smell nutty and appear slightly brown.
  2. Sift together the flour, matcha powder, salt and baking powder. Set aside. 
  3. In another bowl, add together the sugar, glucose, vanilla extract and eggs. Mix until just combined.
  4. Fold in the dry ingredients, followed by milk and clarified butter. Refrigerate the mixture for at least 1 hour, or overnight.
  5. Brush your madelein moulds with melted butter and dust lightly with flour, tapping out any excess. Fill the mixture into the mould until about 2/3 full.
  6. Bake in a preheated oven of 180°C for 12 minutes until golden brown. Remove the madelein from the mould and allow it to cool on a wire rack. Best consumed when cool to allow the matcha flavour to show through.
You don't need madeleine moulds to get that distinctive hump ;)

Janine's jots: 
  • Note: I know that these are not the typical madeleine shapes, but I didn't have the moulds where I was, so I simply used a muffin pan. Just grease the muffin pan before use and fill it to about 2/3 full as well.  
  • Taste: I usually find madeleines too sweet for my liking, but I really liked how the matcha cut through the sweetness.
  • Texture: I overbaked my madeleines a little (as seen from the brown bottoms, so the bottoms were a tad tougher than usual, but the tops were delicious!
  • Modifications: I would probably try adding some adzuki beans to vary the textures and tastes, and because adzuki is a perfect complement to matcha :] 
  • Storage: The baked product keeps very well. Keep in an airtight container and it'll last you a week! Also, I baked some after refrigerating it for an hour and baked the rest after keeping some of the batter overnight in the fridge and the resulting baked product tasted the same and had the same texture as those baked immediately.
  • Would I make this again?: Probably not because this produces a lot of madeleines and most of my family members aren't fans of matcha, so I've to eat all of it myself :[ If you're a fan of matcha, this would be right up your alley, because matcha really is cast into the limelight here.

Tuesday, March 20, 2012

Ferrero Macarons for Macaron du Jour

Today’s Jour du Macaron or Macaron Day in France, and a couple of other places around the world. If you’ve never heard of Macaron Day, well now you have. It’s created by none other than Pierre Hermé, in a collaboration with members of the Association Relais Desserts to raise awareness for a charity. This year, the charity is Autistes sans frontiers, or Autism without Frontiers. What happens is that you can pop by any participating Pierre Hermé Paris boutique and receive a couple of macarons completely gratuit (free). All you have to do is to drop a donation of any amount in the boxes available at the boutique. Pierre Hermé also has a macaron he creates specially for Macaron Day. What’s interesting is that in the recent years, there is a ‘map’ of the participating Pierre Hermé boutiques and if you pop by every one of them, you will get a complimentary box of 25 macarons! And mind you, there are probably that many macaron flavours available at each outlet!


I really enjoy the message behind Macaron Day. While it might have stemmed from a selfish desire to promote his macarons and his boutiques (I’m just speculating here), it does promote a good cause. And I’m hoping that one day, all the macaron-selling patisseries across Singapore can band together and celebrate Macaron Day as well, whilst promoting a good cause. However, knowing how stingy Singaporeans are, the macarons cannot be sold completely free. Not that I’m shaming Singaporeans but honestly speaking, I know of many who cheat the honor system when taking transport in Europe (most transport systems there require you to buy your own ticket and random checks are done). Can you imagine selling newspapers based on the honor system? Many Swiss cantons have a newspaper box where you can grab a newspaper and drop the appropriate amount of money in the box for it. I can imagine many people paying less or even not paying anything for the newspapers! I guess our society just has not progressed to that stage of development yet? Anyway, I digress. What I mean to say is that even though macarons cannot be sold completely free, I’m sure something can be done this time next year to promote the patisseries selling the macarons as well as a chosen charity. Hopefully someone’s listening? ;)


So anyway, this being Macaron Day (it's Macaron Day over at Mactweets as well!) and Macaron Month over at Aspiring Bakers (Aspiring Bakers #17 is March Macaron Madness! hosted by Alan of Travellingfoodies), I decided that it was appropriate for me to try something more interesting. And I decided to make myself some Ferrero Macarons! :] Okay, I know that this perhaps isn’t too spectacular, but this is a step up from what I usually attempt. Instead of just ground almonds, I used a bit of ground hazelnuts and instead of just one ordinary ganache, I used two! Yes nothing too fantastic but who cares, it’s my prerogative; p I love hazelnuts and chocolate (otherwise known as gianduja), and I love Nutella (which is gianduja paste) and Ferrero Rochers, so it’s only natural that I make macarons modelled after them. In fact, I guzzled down jars of nutella when I was studying in Europe, where jars were humongous and it was dirt cheap. I also have fond memories of unwrapping the gold-foil wrappers of ferrero rochers and slowly eating it layer by layer, until I got to the hazelnut at the heart of the sphere.


So without further ado, I present you my ferrero macarons (aka gianduja macarons)!

Ferrero Macarons
Adapted from David Lebovitz
Makes about 40 2-cm large macarons shells 

For the shells: 
80g icing sugar, or confectioner's sugar
20g ground almonds
20g ground hazelnuts
20g cocoa powder

50g egg whites
50g castor sugar 

For the hazelnut praline or gianduja: 

Method 1 (the lazy person method): 
30g chopped hazelnuts, toasted
50g cream
30g milk chocolate 

Method 2 (making hazelnut praline): 
30g hazelnuts
20g castor sugar
50g milk chocolate 
10g neutral oil (grapeseed or canola or olive oil)
Pinch of salt 

For the chocolate ganache: 
90g cream (at least 35% fat)
70g bittersweet chocolate (I used a mix of 66% and 70% chocolate)

Method:
  1. For the macaron shells: Toast raw whole almonds and hazelnuts (without skin) on a tray at 150°C for about 10 minutes. Allow the nuts to cool before grinding them separately. Sift the nuts individually and weigh about 20g of each. The ground nuts can be stored in the fridge for at least a week. 
  2. Sift the ground almonds, hazelnuts and icing sugar together. Sift at least twice before setting aside. 
  3. Beat the egg whites (which are at room temperature) with the castor sugar. You can put in the castor sugar right from the start. Beat until you obtain stiff peaks. This should take slightly less than 10 minutes, depending on the strength of your mixer. 
  4. Using a spatula, dump in all of the dry mixture into the stiff meringue. At first, the mixture will seem clumpy and impossible to fold, but do press on and continue to gently fold the mixture. After about 25 folds, all the dry ingredients will 'magically' be incorporated. The mixture will still seem clumpy, so continue folding until you get a shiny, viscous mixture which 'flows like magma'.
  5. Spoon the mixture into a pastry bag fitted with a plain tip and proceed to pipe 2 or 3-cm large rounds onto baking sheets lined with nonstick liners. After piping the shells, be sure to rap the baking sheets against the counter to get rid of any excess air. 
  6. Let them sit at room temperature (or air conditioner temperature would be fantastic) until they are dry to touch. You need not actually touch the shells because it will be rather obvious when they dry and form a 'shell'. This should not take more than an hour. 
  7. In the meantime, preheat the oven to 140°C (fan-assisted), with the rack in the middle, with top and bottom heating. Bake the macarons for about 16 minutes, making sure to open the oven door at around the 8th minute (or after feet have formed) to let out excess hot air and to turn the tray from front to back. Once the shells are firm to touch, remove the trays from the oven and let them cool on the trays for at least 15 minutes before proceeding to cool them on cooling racks. If you use a nonstick liner, they should be easily removed, if not, use a knife or metal spatula to release the macaron. Store the shells in an airtight container until ready to assemble. 
  8. For the chocolate ganache: Chop the chocolate into small pieces and place them in a heatproof bowl. Heat the cream in a saucepan until it starts to bubble. Take it off heat and pour the hot cream over the chocolate, making sure to mix quickly until all the chocolate has melted and you get a homogenous mixture. The mixture will appear very liquid but it will thicken after you allow it to cool for at least 30 minutes. 
  9. For the gianduja #1: Follow the same method as the chocolate ganache above by heating the cream and pouring it on the chopped milk chocolate pieces. Then, add in the chopped hazelnut pieces. For convenience, toast these hazelnuts together with those in step 1 and in fact, just use the hazelnut pieces which are too big to sift through for varying sizes. 
  10. For the gianduja #2: You first have to make a hazelnut praline, which requires you to heat the sugar in a saucepan. In the meantime, make sure you have got toasted whole hazelnuts (without skin) neatly lined on a baking tray lined with nonstick liner. Once you get a caramel, i.e. when the sugar turns a medium brown, pour the caramel on the hazelnuts and allow to cool. DO NOT TOUCH THE CARAMEL because it is very hot! If the caramel is at the right temperature, it will harden almost immediately. After it hardens, remove the praline from the nonstick liner and break it up into pieces. Place the pieces into a food processor and process until it breaks into very small pieces. Do not process too much because you still have to add in your chopped chocolate pieces and oil. What I did was to remove some of the processed praline and dumped in the chocolate, salt and oil, and processed until I got a smooth paste. I then added the processed praline back into the mixture to get those chopped pieces of hazelnut praline. 
  11. To assemble: You can choose to use a piping bag or use the lazy method and spoon the ganaches onto the macaron shells. I spooned a teaspoon worth of the chocolate ganache on one side of the shell, and about quarter a teaspoon worth of gianduja on the other shell. Match the shells together and store the shells for at least a few hours (preferably a day) before consuming. Remove the macarons 5-10 minutes before serving for the best experience :]


Janine's jots: 
  • The gianduja: I have included two recipes and methods for the gianduja which I tried. The first method can be accurately called a gianduja paste whereas the second would be more accurately called a hazelnut praline paste. For the trouble undertaken for method #2, I would definitely not recommend making such small portions. I actually made a triple batch of hazelnut praline (to use as a layer in my entremet) - it keeps very well in the fridge. Of course, the second recipe is sweeter (because of the caramel) than the first recipe. 
  • Notes on the ingredients: If you notice, I haven't used cream of tartar or salt with the egg whites in this recipe, as compared to the previous strawberry macarons. Also, I used freshly cracked egg whites here. I have found that there really is no need to dry them out or add egg white powder although that would definitely help in stabilizing the meringue. After numerous attempts at making macarons, I can safely say that it's the macaronage or technique that determines if you have feet or not, because you can use any nut (or not) with varying amounts of sugar and add-ons. So really, practice makes perfect!
  • Taste: The shells by themselves were awesome, because the toasted nuts added a different dimension. For my under baked shells (i.e. those which stuck to the paper), I felt as if I were eating chocolate hazelnut paste because the hazelnut taste was so prominent! I also enjoyed the combination of bittersweet chocolate with milk chocolate and chopped hazelnuts. Deliciously sinful! For more chocolate-hazelnut sinfulness, you can add in some Nutella in the chocolate ganache. 
  • Texture: The macarons were also undermixed this round, because they were bumpy but on the plus side, they dried out in less than 10 minutes, and I could bake them almost immediately. I enjoyed the crisp chewy shells coupled with the chocolate ganache, added to that was the fact that the gianduja paste had chopped hazelnuts in it. To really replicate a ferrero rocher, I'd suggest adding half a hazelnut in the centre of the macaron :]
  • Serving size: I got about 20 paired macarons, but my macarons were about half the standard size - about 2 cm or slightly more than an inch.
  • Modifications: As I said earlier, this is my go-to chocolate macaron recipe, but I would definitely try reducing the amount of sugar in the recipe as the shells were very sweet (too sweet for my liking). I would probably begin by reducing the castor sugar used to about 40g. The bittersweet ganache helped in cutting down the sweetness, but the gianduja had milk chocolate, so that didn't help with the sweetness. 
  • Storage: Because the filling is a ganache, the macaron lasts pretty well at room temperature - it starts to soften and slide apart only after half an hour or so.
  • Would I make this again?: Definitely! This is my 4th or 5th time using this recipe :]

Matched up, unfilled shells :]

If you're looking for another method of making macarons - i.e., the Italian meringue method, do check out my other post on salted caramel macarons. And don't forget to participate in my strawberry powder giveaway!

Wednesday, March 14, 2012

Strawberry Milk Macarons and a Mini Giveaway!

I've been on a kick to use "all natural ingredients" or ingredients that are as unprocessed as possible. This of course translates to less refined flours and sugars, and more wholemeal flours, non-wheat flours, as well as different forms of sugar, such as molasses. This has also translated into using only 'natural food coloring' in my foods, and thus far, I've only experimented with red and green, mainly because they are the most easily accessible colors - for green I use pandan, and for red, I stick with my favorite strawberry (and raspberry).


That, plus my recent infatuation with Sadaharu Aoki (I gorged on his cakes when I was in Taipei) meant I was hooked when I saw Pook's strawberry milk macarons which used strawberry powder AND was a recipe by Aoki. 

For those who might not know who Sadaharu Aoki is, do check out his website and be amazed. In fact, a couple of his pastries (including the black sesame eclair) are rated as one of the top few pastries to try in Paris by Adam. Aoki excels in making French pastries and if I'm not wrong, he is probably one of the few Japanese patissiers to make it big in Paris, which is quite telling. He also has outlets in Japan as well as in Taipei, and I was extremely lucky (well actually not really since I purposely made a few trips down to the outlet in Taipei to eat my fill) to have tasted his cakes. He really does excel in pairing Japanese flavors in the French pastries, and one of his best and most famous works has got to be the Bamboo, a matcha and red bean Opera-like cake. The best thing is that the cakes are not overly saccharine or cloying (which tends to be the case when Europeans at making pastries), which is perfect for the Asian tastebud. 

So suffice to say, anything Aoki is a sure-win, and I was quietly confident that these strawberry milk macarons would be fantastic. I was not wrong. 


Strawberry Milk Macarons 
Makes 50-60 shells

For the macaron shell
65g   ground almonds
90g   icing sugar
5g     strawberry powder

50g   egg whites
15g   castor sugar 
Pinch of salt or cream of tartar

For the strawberry milk buttercream
3g     all purpose flour
60g   fresh milk
65g   unsalted butter
8g     castor sugar

Method:
  1. Sift the ground almonds and icing sugar separately. Next, sift them together with the strawberry powder. Set aside. 
  2. Beat the egg whites (which are at room temperature), and cream of tartar or salt together with the castor sugar. You can put in the sugar right from the start. Beat until you obtain stiff peaks. This should take slightly less than 10 minutes, depending on the strength of your mixer. 
  3. Using a spatula, sift in a third of the almond-flour mixture into the stiff meringue. You need not fold but do mix the ingredients in gently. Sift in the remaining almond-flour mixture in two batches and gently fold to combine. You should get a shiny, viscous mixture which 'flows like magma'.
  4. Spoon the mixture into a pastry bag fitted with a plain tip and proceed to pipe 3-cm large rounds onto baking sheets lined with nonstick liners. After piping the shells, be sure to rap the baking sheets against the counter to get rid of any excess air. 
  5. Let them sit at room temperature (or air conditioner temperature would be fantastic) until they are dry to touch. You need not actually touch the shells because it will be rather obvious when they dry and form a 'shell'. This should not take more than an hour. 
  6. In the meantime, preheat the oven to 140°C (fan-assisted), with the rack in the middle, with top and bottom heating. Bake the macarons for about 12-16 minutes, making sure to open the oven door at around the 8th minute (or after feet have formed) to let out excess hot air and to turn the tray from front to back. Once the shells are firm to touch, remove the trays from the oven and let them cool on the trays for at least 15 minutes before proceeding to cool them on cooling racks. If you use a nonstick liner, they should be easily removed, if not, use a knife or metal spatula to release the macaron. Store the shells in an airtight container until ready to assemble. 
  7. For the strawberry milk buttercream, sift the all-purpose flour into the milk and place into a small saucepan. Bring the mixture to a boil over low heat and stir until the mixture thickens. Once a roux is formed, remove the pan from heat and allow it to cool. In the meantime, beat the butter and sugar together until light and fluffy. Pour the cooled milk roux and gradually beat to combine. Beat in the strawberry jam until you get a homogenous mixture. 
  8. To assemble: Place the buttercream into a piping bag and proceed to pipe it onto matched macaron shells. You may have to chill the buttercream for a few minutes before piping if it is too 'soft' for piping. Refrigerate the sandwiched shells for an hour or until the buttercream has firmed. Remove the macarons 5-10 minutes before serving for the best experience :]


Janine's jots: 
  • Note: I have to admit that the macarons were severely under filled - in fact, you can't even see the filling for most of them. But I've a good reason - the filling wasn't enough because I kept filching it and it's oh so yummy with the sponge cake I made. So well, I didn't have enough for the macarons ^_^ I didn't mind though, since I don't particularly like too much filling in between my macarons. I would definitely recommend making more of the strawberry milk buttercream because it is simply delicious.  
  • Taste: On the buttercream, it wasn't overly sweet because I used less of the strawberry jam and in fact, my homemade strawberry jam is more tart than sweet, which perhaps explains why I loved it so much. This went together very well with the macaron shells, which were slightly flavored due to the use of the strawberry powder.  
  • Texture: Although the macarons were not perfect - I undermixed the macarons for fear of no feet, so you can still see bumps and 'nipples' on some of the shells. Nevertheless, the shells turned out pretty shiny and I'm pretty happy with the sideway feet. One other reason why I liked the recipe is because the shells were just the right level of 'crispiness' and the inside was sufficiently moist when paired with the buttercream.
  • Serving size: I got about 35 paired macarons, but my macarons were a little on the smaller side - about 2.5cm or slightly more than an inch.
  • Modifications: I would definitely want to try this same recipe but with a reduced amount of icing sugar. I've actually tweaked the ingredients quite a bit from the original, and the macaron shells themselves are not overly sweet as in some recipes because of the tanginess of the strawberry powder but for the sake of my waistline, I shall see if I can reduce the sugar even more without sacrificing on the feet! Also, without using red coloring, it is impossible to get the vibrant red colors that Pook got with her macarons. Nevertheless, this dusty rose color found favor with me and the people who ate them. In fact, these macarons were more popular than the salted caramel macarons! 
  • Storage: My only gripe is that the buttercream softens wayyyy too quickly! It is very moist and goes very well with the shells, but you'll have to consume the filled macarons almost immediately to get the best mouthfeel, otherwise the filling will be too soft and 'oily' to eat. Do only fill the shells that you will consume the next day or two (macarons have to be filled at least 24 hours to let the moisture and taste from the filling 'diffuse' into the shells). If not, keep the shells and filling separate until ready to eat.
  • Would I make this again?: Definitely! I foresee using the same recipe with other fruit powders to get different colors and flavours!

Playing around with the 'aged' effect - what do you think? 


Anyway, I previously tweeted about using my strawberry powder in my macaron shells (it really does give a superb tangy strawberry flavor to the shells), as well as in my mom's birthday layered cake. Some of you have asked me where I got this powder from, and sadly, I've to say that I got a friend to purchase it for me from an overseas organic store. It's basically 100% natural powdered freeze-dried organic strawberries, so it perishes pretty quickly even in freeze-dried form. The recommended use-by date is actually in May 2012, and since I've quite a bit of it, I thought to share the love :] 


I'm giving away 10g of strawberry powder each to two lucky persons, which will be packaged in a clean, tiny ziplock bag. This amount should be sufficient for those interested in trying out the strawberry milk macarons above (the original only requires 3g of powder). You can also use them to flavor cake (like what I've done), so simply sprinkle them on your plain yogurt (which is what I've been doing too). It also works well in coloring icing too!

I know it sounds like a tiny amount, but in my defense, let me remind you that it's organic, unavailable in Singapore and pretty costly :S Anyway, this is just a tiny way of saying thank you for reading my blog (silent or not), and if you aren't picked for this giveaway, please do stay tuned because I've a few more small giveaways in store, mainly because I've some 'exotic' ingredients which I bought in bulk to save on costs and I know some of you out there would love to try out these ingredients. If you're really desperate to get some strawberry powder yourself, Pook shared where she got her strawberry powder from here

So to participate, all you have to do is just to leave me a comment below, with your email address and name. It's that simple ;) I'll be opening this giveaway to readers in Singapore and Malaysia, because it's a tiny item which is easily shipped. I'll close the giveaway on 29 March 2012 at 11.59pm. The winner will be randomly selected and contacted via email the next day.

If you're kiasu and want to increase your chances of winning, you can do the following for an extra entry each (please post a new comment for each of the below): 

  1. Like my blog on Facebook and leave an extra comment below. The page is still bare, but I'm working on it!
  2. Share this giveaway on Facebook. 
  3. Follow me on Twitter (@notkitchensink) and retweet this giveaway on Twitter!
  4. Follow my blog by clicking on the "Follow" bottom at the top left corner of this page. 


This macaron post is also in support of Aspiring Bakers #17 – March Macaron Madness! (Mar 2012) hosted by Alan of Travellingfoodies. I'm also posting this over at the #27 edition of Mactweets! If you haven't made macarons before, do use this opportunity to try them - they might be finicky things to make, but I can assure you that your spirits will lift tremendously when you see the little frilly skirts/feet emerging from the shells and they look and taste super yummy too :] 

Wednesday, October 26, 2011

Pink Salted Caramel Macarons for Breast Cancer Awareness Month

This post has been long in the making. Like 8 months kinda long. Ever since my first post on macarons more than half a year ago, I've been making macarons on and off, experiencing more failures than successes. I'm experimented with technique, temperature, equipment, ingredients and a whole lot of other variables, and have come to the conclusion that macarons are indeed iffy little creatures and having a humid and cramped kitchen to work in is definitely not the most ideal of places. I say this with a caveat of course, since I know that bakers in similar situations have churned out beautiful macarons but let's face it - you do get better results if you work in an air-conditioned (or low humidity) environment. Also, let's just say that I impose exacting standards on myself and even the 'successful' macarons you see below still don't pass muster in my books - the feet are a tad too short and the tops are not flat and shiny enough.


I'm still experimenting with different recipes (you might say, just stick to a darn recipe girl! But I'm fickle minded that way), and am still determined to get my french meringue technique right - I'm still in the process of tweaking the different variables to see where I'm going wrong.

Like I mentioned previously, I tried making macarons using the french method for a consecutive five times, and each time, the macarons turned out feet less. I was so dejected and disappointed - at that point, I knew that I had to turn to the italian meringue, which had given me results on my first attempt. And to that I turned, and it did give me results as promised. You might query why the hesitation in using a successful method? Well, for one, I find the steps tedious, and you do need a candy thermometer in order to make the italian meringue and second, I really wanted to get my french meringue method right. Suffice to say, after having successful macarons with the italian meringue, I have given up on making macarons for a while and have focussed instead of using up those macaron shells. Once I've cleared my fridge of all those shells, it'll be back to more macaron experiments for me!

For those interested, these are what my failures looked like:- volcano and cracked tops as well as undercooked bottoms for some.


***
After reading MANY troubleshooting posts (see Not so Humble PieMiso Hungry, Duncan, Vivian for some imminent examples) on why my macarons turn out the way that they do, I have concluded that it was a combination of several factors, including:

1. Not allowing the 'crust' to develop sufficiently, hence the mega cracks
2. Too humid weather and too high baking temperatures (see this useful post by Silvia and Ivan on dehumidifying)
3. Over folding the batter.


Check out the difference in the bottoms of the macs - the left ones are using a generic silicone mat and the right ones are made using baking paper. 

***

Nevertheless, I was sick of getting failures, so I escaped by using the italian meringue method (yes I'm escapist) and I ended up with this bunch of macarons you see here:

Finally, some successful macarons.

Macarons with relatively smooth shells but super tiny feet. Well, at least they had feet right? And strangely enough, I ended up with salmon pink macarons, even though I used brown coloring. I thought, hey, that might just be serendipity, since I was dying to come up with macarons to qualify for this month's Mactweets Mac Attack Challenge #24, Pink October Macarons. For those not in the know, Mactweets is a monthly macaron challenge started by Jamie and Deeba, both of whom have wonderfully written blogs. This month's Mactweets is special, because it is the second time they are supporting a wonderful cause, since October is also Breast Cancer Awareness Month. I was actually hoping to have some failures which looked like breasts (i.e., those with nipples), but as fate would have it, I didn't get that particular type of maca-fails. So normal pink macarons it is!

I've been wanting to talk about Breast Cancer Awareness this entire month, but time just seems to have passed me by and all my pink-related bakes weren't successful enough to be blogged about. Anyway, I'm at that age where the idea of having breast cancer seems foreign, but I've come to realize that although the risk of getting breast cancer increases with age, being young doesn't mean there is no risk. Women as young as in their early twenties have been diagnosed with breast cancer! I know that many older women have the mentality that this can't happen to me (a friend of my auntie was diagnosed recently and she was in denial, refusing treatment for months before she got some sense knocked into her) - but it does and can happen to ANY of you, male or female! Yes, it does occur in males, though less than 1% of the population. And you can help yourself by doing your own self-examination, and going for a mammogram, especially if you're 40 years or older. Early detection does save lives! I mean, come on - self examinations are free and it costs $50 to go for a mammogram in Singapore. For more information, especially for people in Singapore, please do check out the Breast Cancer Foundation website, where you can get information about breast self examination and other useful information related to breast cancer!

So, if you're female, give yourself some self-love today (terrible pun to tie in the photo below, I'm sorry), and do a self-check to reassure yourself that you're breast cancer free! :]


Alrighty, and back to my macarons. I shall be providing you with Pierre Herme's Italian Meringue recipe, which I translated from his Macarons book which I have in French (yes, the English version was just released). I also used his recipe for caramel fleur de sel (salted caramel buttercream filling), which was awesome (as usual). Because I upped the saltiness a little, the filling matched the sweet shells perfectly. 

Macarons with Salted Caramel Buttercream, using the Italian Meringue Method

For the Macarons
150g   ground almonds
150g   icing sugar
55g     egg whites
1 tsp   egg yellow food coloring (I used 2 drops brown coloring)

115g   castor sugar
40g     mineral water
55g     egg whites

Method: 
  1. At least a day (24 hours) before attempting the macarons, separate the egg whites from the yolks and let them rest in the fridge (it is too humid and hot here for them to rest on the counter for more than a few hours) to age and 'liquefy' (in the master's words). 
  2. Sift the icing sugar and ground almonds individually to get rid of the large lumps. Then, sift the icing sugar TOGETHER with the ground almonds. This is known as your "tant-pour-tant" (literally, so much for so much or equal parts). Mix in the food coloring into the first 55g of egg whites. Then, combine these colored egg whites into your tant-pour-tant. Mix well and leave this aside. 
  3. For the remaining 55g of egg whites, place it in a clean mixing bowl. Next, heat the castor sugar and water in a saucepan over a medium heat. Do use a candy thermometer - allow the mixture to boil until it reads 118°C. However, once the syrup reaches the 115°C mark, start whisking the egg whites. The sugar syrup should read 118°C just as the egg whites reach a soft peak (the timing is pretty accurate). Pour the sugar syrup down the sides of the bowl and continue whisking the egg whites until you achieve a stiff peak. The egg whites should read about 50°C when stiff peaks are achieved. 
  4. Fold in the egg whites in 3 additions into your tant-pour-tant mixture, gently folding the batter until it is glossy and 'flows like magma'. I generally use the indicator of how long a fold takes to 'dissolve into itself' - about 15 to 20 seconds to check if my batter is ready. 
  5. Pour the batter into a pastry bag filled with a plain tip (about 10-15mm in diameter should be just right) and begin piping the mixture into circles of about 3cm in diameter onto your baking sheets lined with parchment paper. If you have problems piping evenly sized shells, do print out a template or you can trace out 3.5cm rounds on the back of your parchment paper. Since the shells will spread out a little, do pipe the shells a little smaller than the circles you have drawn. Leave a 2cm space in between each shell. After you are done piping, rap the baking sheet against your work surface to ensure that there are no air bubbles trapped in the shells. 
  6. Allow the shells to develop a 'crust' - this crust is simply a skin that ensures that the shell will not stick to your finger. It literally feels like a thin membrane. For a humid environment like Singapore, try to work in an air-conditioned environment or you can place the shells in front of a fan. My shells took about 1 hour to develop a crust.
  7. Preheat the oven to 160°C (some recommend 180°C but I find that 160°C works best for my oven). Place the tray in the middle rack of the oven and bake for 12-15 minutes. At the 5th minute, the feet should have developed. At the 8th and 11th minute, do open the oven door a little to release the build up of steam. If your macaron shells start to brown, your shells are overcooked. What I do is to remove the tray from the oven at the 12th minute and flip one shell over to check if it adheres to the baking paper. If it does, put the tray back to bake for a few more minutes; if not, the shells are done. 
  8. Once out of the oven, remove the shells from the baking sheet (still on the parchment sheet) and allow them to cool on a cooling rack. This will ensure that the shells don't continue to cook on the hot baking sheet. Once the shells are cool enough to handle, remove them carefully from the parchment sheet (ideally they should not stick at all) and pair them up. 
  9. Fill the shells with your desired filling and store in the refrigerator for at least 24-48 hours before consuming, to allow for an 'osmosis' of the buttercream to the shells. 

For the salted caramel buttercream filling
100g sugar
115g whipping cream
15g butter 

1 tsp fleur de sel, or any sea salt. 
70g butter, softened. 

Method: 
  1. Add half of the sugar to a saucepan and allow it to melt before adding the remaining half of the sugar. Do not stir the mixture and allow all the sugar to melt to a amber color. 
  2. At the same time, bring the cream to a simmer. 
  3. Once the sugar has turned a dark amber color, remove from heat and add the first 15g of butter. Stir quickly and be careful as the mixture might splatter. Then, add in the cream which has been simmering and stir quickly to incorporate. 
  4. Put the saucepan back onto a medium heat and allow it to boil until it reads 108°C on the candy thermometer. Pour the mixture into a heatproof dish to stop the mixture from cooking and allow it to cool. 
  5. Once the caramel mixture has cooled, stir in the sea salt, making sure it dissolves. Begin beating the softened 70g of butter for about 5-10 minutes, or until it becomes soft and fluffy. Add in the cooled caramel mixture in two additions, making sure that the caramel is fully incorporated into the fluffy butter. Place the mixture into a piping bag and your salted caramel buttercream is ready to be piped!


Janine's jots: 
  • Note: Veron from Kitchen Musings has this delightful series on Macarons which you should read - more relevantly, her comments on Pierre Herme's italian meringue method here come in handy should you wish to attempt this recipe. For a photo tutorial, do check out Edd's post for this exact same recipe. If you wish to look at local bloggers attempting the italian meringue method, do check out Swee San's step-by-step tutorial for Wendy, both of whom had beautiful macarons with frilly skirts :]
  • Taste: I enjoyed the saltiness of the caramel but it might be a tad salty for people unused to the taste of sea salt. I would recommend starting with half a teaspoon and working your way up through tasting (you can do that with the cooled caramel). The sweetness of the macaron shells were thus countered with the salted caramel. 
  • Texture: For the best experience, DO allow the filled macarons to rest in the fridge for at least a day or two, because the part of the shell in contact with the buttercream yields more easily and this gives you a crisp and chewy mouthfeel, the hallmarks of a good macaron. 
  • Serving size: I halved both the macaron shells and buttercream recipe, so that I got a smaller number of shells (about 30 pairs). 
  • Modifications: I didn't get my hands on salted french butter or creme fraiche, so I changed that to normal unsalted butter but used instead an extra teaspoon of sea salt to adjust the saltiness to my liking. Creme fraiche was substituted with whipping cream as well. I did reduce the sugar in the sugar syrup by quite a fair bit - the original calls for 150g of sugar and 37.5g of water but I found that reducing the sugar a little worked as well. 
  • Storage: The macarons keep extremely well in the refrigerator - you can even freeze them for a month, but note that the shells will soften and lose its crispiness. 
  • Would I make this again?: Definitely! The italian meringue method requires much more work than the french, but it promises results each time, so I know which recipe to turn to when I have a macaron craving! However, I intend to tweak the recipe a little to see if I can use less sugar for the sugar syrup in order to reduce the sweetness of the shells. 

Well, I had ONE successful chocolate macaron from the batch of chocolate failures.
The texture of the shells were pretty good - slightly crispy with a chewy interior. There are also no visible air pockets whee! :]

Alright, this post is getting a tad long, so I shall end with a final picture of some heart-shaped macarons I attempted. As you can see, I'm still quite bad at filling the macarons, but I try! ;p

Till my next macaron adventure!

Playing around with colors. I quite like the washed out look here. What say you?

Thursday, September 29, 2011

Pierre Hermé's Ispahan Cupcakes

Ever since I anointed Pierre Hermé as my pastry god, I've been wanting to try out this particular flavor combination, but didn't because raspberries were always so expensive and I didn't want to splurge on them. Well, I'm glad I did because raspberries were on sale and boy oh boy, was my cake ispahan delicious! I really have to thank heavens for the day Pierre Hermé dreamed up of this flavor combination, because just having rose and raspberry in the cupcake was enough to make me beam from ear to ear, so I cannot imagine what I'd be like with the addition of lychees :]

I like how the sunken raspberry looks vaguely like a heart.

I've always wanted to make an Ispahan-inspired cake, one chockfull of raspberries and roses and lychees, and I wanted an authentic recipe from the god himself. There are many ispahan-inspired desserts online, and some of my favorite (bookmarked) ones are from Swee San and Rachel, who used the interesting flavor combination to make their own versions of Ispahan petit fours. For those not in the know, well, Ispahan is both a name of a city in Turkey Iran (Isfahan) (I know it's in Iran but don't know why I wrote Turkey hmm) as well as the name of a damask-colored rose. I've read bits and pieces that Pierre Hermé was inspired by the rose to include it into his macarons, and it was at Laduree where he first combined raspberries, rose and lychees and named it the Ispahan. And he never looked back of course. The Ispahan is now synonymous with the name Pierre Hermé and I do think that in decades to come, this combination will become as commonplace as the cakes like black forest, tiramisu, opera, etc.

This was also the first recipe I tried from my newly bought Pierre Hermé book, Le livre des fours secs et moelleux de Pierre Hermé, which loosely translates to the book of petit fours and treats of Pierre Hermé. Interestingly, this book is not available in English or French, but only in Japanese and Chinese. It was of course originally in Japanese to cater to the Japanese market where Pierre Hermé has the second greatest number of stores (after France/Paris) and the Chinese being Chinese, translated it into this Chinese version I have. It's perhaps one of my cheapest Pierre Hermé's books, costing me NT$300, which amounts to around S$15/US$10. And besides this recipe, I've also tried his madeleine recipes (which can be found in his other books as well), which of course taste delicious as well. There is also a recipe for madeleine ispahan, but I need freeze-dried raspberries for that, so that's currently shelved at the moment. When CNY rolls about the corner, I'll definitely be spamming this book quite a lot for all the cookie recipes for my CNY cookie fix.


As you can see, I couldn't resist modifying the recipe into making cupcakes instead of a normal cake. The tiny bits of white you see in the picture above are actually bits of almond, which I've explained below that I left intentionally coarse for textural purposes.  

Now, having finally tried my hand at the infamous ispahan combination (and having tasted the original before), I've to say that I've got lots more work to do! Perhaps a pricier (and more exotic) rose essence (a la Yumeiro Patisserie) is in order! ;p


Pierre Hermé's Ispahan Cupcakes
Adapted from Le livre des fours secs et moelleux de Pierre Hermé
Makes a 16x5cm (6-inch) round cake or 6-8 cupcakes

Ingredients


85g     unsalted butter
60g     icing sugar
85g     almond meal/flour/powder
35g     egg yolk (about 1.5 egg)
20g     whole egg
15g     milk
3g       rose essence
45g     cake flour

45g     egg white (about 1.5 egg)
20g     castor sugar

25g     raspberries 

Method 

  1. Cream butter until fluffy. Add the icing sugar and ground almonds together, mixing until well combined. 
  2. Add in the egg yolk, followed by the whole egg. 
  3. Add the rose essence into the milk, and add red coloring if desired. Add this milk mixture into the butter mixture above, combining well. 
  4. In a clean mixing bowl, beat the egg whites until foamy. Add the castor sugar and continue beating the egg whites until stiff peaks are achieved. 
  5. Add a third of the stiff egg whites into the milk-butter mixture to lighten. Then, fold in the remaining egg white until no white streaks are left. 
  6. Pour the batter into your prepared pans. Pour until the pan is half full, before adding the raspberries in the centre and filling the pan to about 80% full. 
  7. Place the rack at the middle tier and bake in a preheated oven at 160°C for about 45 minutes for the cake or 20 minutes for cupcakes. When the top turns a light golden brown and a cake tester comes out clean, the cake is done. 

Janine's jots: 
  • Taste: Unlike other Ispahan desserts created by Pierre Hermé, this doesn't have the litchi (lychee) that we're so familiar with, and I reckon that an additional of lychee in the centre together with the raspberry would definitely complicate the flavor profile, in a totally awesome way of course. For those hoping for a stronger rose taste, you might want to increase the rose essence by a gram or so, because it's rather subtle in this cake. I like it that way though, and if you want a stronger whiff of rose, consume the cake the next day. The rose flavor is more prominent then. 
  • Texture: My almonds were ground at home and not store-bought, and I intentionally left a portion of it more coarsely ground, so this could be tasted in the cake. It tastes almost like not as dense financier. 
  • Serving size: Makes a 6-inch cake or 6-8 cupcakes, depending on how many raspberries you fill the inside with and how large your cupcakes are. I prefer the cupcakes because they're easier to consume and cuter of course. 
  • Modifications: As usual, I reduced the icing sugar from an original of 85g to 60g and I still found the cupcakes quite sweet, but note that if you have tart raspberries or you are intending to use more than 2-3 raspberries in the cupcake, you might want to increase the sugar to counteract the tartness. 
  • Storage: I wouldn't advise storing the cake at room temperature for more than a day because the raspberry inside will turn soft and gross. It stores well in the refrigerator for 3 days or more. Do warm it up before consuming to get the best flavor out of it. 
  • Would I make this again?: Yup definitely, it beats having the usual chocolate and vanilla cupcakes. But I am definitely trying out the lychee idea as well. 
  • Other comments: The original recipe calls for a fondant glacage to be poured over the top, but as I was intending this to be a un-fancy teacake, I skipped it. 

Check out the delicious innards. 
I probably shouldn't have sliced the cupcake while it was still hot because it appears rather wet and dense. Truth is, it actually is not as dense as in the first picture after letting it cool. In fact, it tastes better the next day! 
The ones with more raspberries definitely tasted better. 

One last lingering look at my beloved ispahan cupcake.

Wednesday, August 3, 2011

Baking Basics: Pastry Cream (or crème pâtissière)

I've been wanting to do a series of posts entitled Baking Basics for a long time, because I know that I only started seriously baking (or rather, baking anything at all) since last December and since then I do believe I've improved by leaps and bounds and I know that this invaluable experience should be shared, so that other novices like myself can learn and not commit the mistakes I did, and at the same time, have in their repertoire basic recipes for anything. BUT, I somehow never got around to doing it because ... I don't know why. I have many of such posts saved as drafts on my dashboard but none of the photos I took made the cut. I figured that number 1, with the insane number of photos I took of my process making my pastry cream, or crème pâtissière, there was a higher chance of nicer photos and number 2, since I'm hosting Aspiring Bakers #10: Easy as Pie (August 2011), and many would be attempting tarts, it would be selfish of me not to share this wonderful recipe that I love.

This recipe is from my pastry idol, Pierre Hermé. I've tried a number of his recipes including puff pastry, macarons, mousses, and he has never failed me. I have tried quite a few recipes for pastry cream, mainly because I make a small amount each time (see the one by Donna Hay here), but I find myself returning to this recipe time and again. I especially like the silkiness and lightness of this cream.

Anyway, to share a little bit of happy news, I've also started taking up French lessons, which has been a dream of mine since forever! I've always wanted to learn French, in fact I still remember when I fell in love with the language - it was the first time I heard French being spoken in Switzerland. The fascination continued when I actually stepped foot into Paris and the rest of France. And the fascination has grown. I love the culture, the food (especially the pastry!), the romanticism of the language and especially the history. Although France is no longer the superpower that it once was decades ago, singlehandedly building up the European Union with the other 'pioneer members', vestiges of France still remain - you see it in the bakeries in Vietnam and the straight wide roads in Cambodia.

So, digression aside, I actually translated the recipe below (just the ingredients since the method is entirely in my words) from the French tome which I'd bought earlier this month. My dad called it counting my eggs before they're hatched, but I call it a culmination of a childhood dream. Having a huge expensive French book lying around and me unable to understand it just forces me to want to know more French, so that I can understand and unlock the mysteries of the recipes before me. I know it'll be some time before I'll be able to read or write fluently, but I know I'm getting there, and for that, I'm really happy that I finally bit the bullet...after a decade of procrastination. (Really, I myself can't believe it's been 10 years?!) Previously I didn't have the money nor the time to learn, but now that I do (not really actually but who cares, I'll fit it in anyhow), no one's going to stop me! In fact, if I'm lucky, I just might be able to visit Paris again sometime this year or next, so I'll have opportunity to practice my French!

Till then, here's the step-by-step (kinda) photographic method followed by the somewhat bastardized version of the recipe below!

In a saucepan, heat up your milk until it boils. 
In another bowl, combine the yolks together with the sugar and cornstarch. Here, I've already begun to temper my boiling milk with the yolk mixture. Do whisk continuously to prevent the yolks from cooking!
Having whisked it all the boiling milk, strain the mixture back into the saucepan. See the scrambled bits left on the sieve!
Continue whisking the mixture again, bringing it up to a boil. 
Remove the mixture from heat the moment it reaches this texture. I placed the mixture into a bowl and into the ice bath to stop the cooking. 
This is the mixture after adding the butter. See that the mixture is lighter in color and slightly thicker than the previous photo. 

And here's what NOT to do. The white balance in the photo is a little off because I had to take it with flash and it's really blur since it's my phone photo. Anyway, this is the result if you try to speed up the process by using a medium-high heat - which is an absolute NO-NO because the pastry cream thickens way too fast for you to control the heat and it basically just clumps like what you see below. Now you know!

Fully cooked eggs in the pastry cream :/

Pastry Cream
Makes 2½ cups or 900 g
Translated from La Larousse du Chocolat by Pierre Hermé

2 cups (500 g) whole milk
4 egg yolks (about 80g)
6 tbsp (75 g) granulated sugar
3 tbsp cornstarch, sifted
2½ tbsp (40 g) unsalted butter, at room temperature
½ tsp vanilla extract


Method:
  1. In a small saucepan, bring the milk to a boil.
  2. In another bowl, combine the yolks, sugar and cornstarch together and whisk well.
  3. Once the milk has reached a boil, temper the yolks by whisking in a small portion of the boiling milk into the yolk mixture.
  4. Continue whisking in the rest of the hot milk into the tempered yolk mixture.
  5. Strain the mixture back into the saucepan using a sieve to remove any scrambled bits of egg.
  6. Heat the saucepan over a medium fire and whisk vigorously until the mixture returns to a boil.  Continue whisking for 1-2 more minutes over medium heat until the cream thickens. You will notice your whisk leaving trails in the cream. Once the cream has thickened, take it off heat and pour it into a bowl in an ice bath to stop it from thickening further. Continue whisking the mixture until you get a smooth mixture.
  7. Once the cream has cooled to about 30°C (use your finger to test and it should be slightly warm – around your body temperature), slowly add in the cubed butter gradually in a few portions and stir in the vanilla extract.
  8. Once the butter is fully incorporated, cover it with plastic wrap and store it in the fridge until you are ready to use it. Make sure the plastic wrap touches the surface of the cream so that a film will not form over it.

Janine's jots: 
  • Taste: I like the small addition of vanilla and I find it indispensable because I'm not an avid fan of an eggy test. HOWEVER, I do have to say that the addition of the butter does help and I've tried skipping out on the vanilla and the cream doesn't taste as eggy as other recipes. 
  • Texture: Silky, smooth, creamy, what more should I say? 
  • Serving size: What you see above is the full recipe which I actually seldom follow since I don't bake that much anyway. I have tried halving and quartering the recipe and it stills works perfectly! A word of caution though, make sure you use an appropriately sized saucepan for the smaller amounts otherwise it'll be pretty hard. 
  • Modifications: None really. 
  • Storage: This can be made 2-3 days in advance and stored in the fridge. I do not advance freezing it or keeping it for more than a week in the fridge.
  • Would I make this again?: Definitely - it's my go-to recipe for pastry cream and I've been using it in tarts, in profiteroles, eclairs, etc!
PS: If you've read till this part of the long post, thank you! I tend to write rather lengthy sentences sometimes and I apologize!
Related Posts Plugin for WordPress, Blogger...