My blog has moved!

You should be automatically redirected in 6 seconds. If not, visit
http://www.unpastiche.com
and update your bookmarks.

Showing posts with label Donuts. Show all posts

Tuesday, May 10, 2011

Cinnamon ronuts? (Cinnamon rolls made with donut dough)

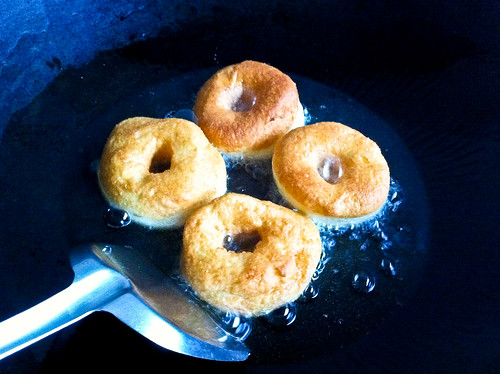
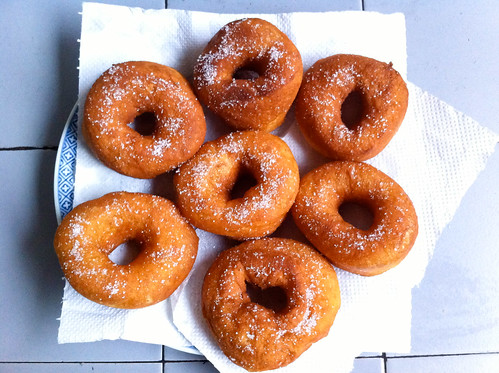
The other day, I made myself some donuts. I ate a whole bunch of them, but one can only eat that many donuts, so I decided to freeze up a third of the donuts and brought it along with me back to Singapore. Like I said earlier, my mother enforces the no-frying rule in Singapore with an iron spoon, so frying donuts were not an option. I can't say that it took a large amount of brainstorming because sticky buns were on my mind and have been for some time now (I love cinnamon rolls from a local bakery and from St Cinnamon which is extinct in Singapore and only has one outlet that I know of in Mid Valley). It was no surprise that I decided to make myself some cinnamon rolls, using the frozen donut dough. Having made cinnamon rolls before, I knew that the dough required was a sweet enriched one, and I figured that the donut one would be a good substitute. Indeed it was :]

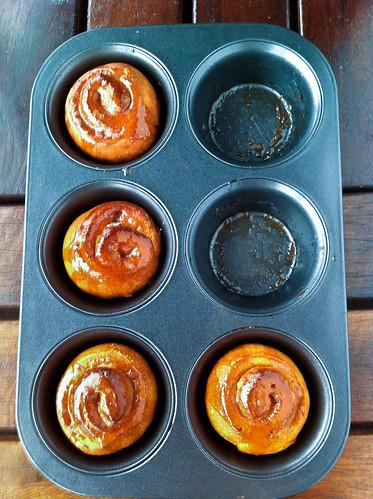
I wasn't left with that much dough, so I could only make myself 6 cinnamon rolls, each roughly about the size of a large muffin since these were made in my large muffin pan. 


Cinnamon Rolls
For the dough
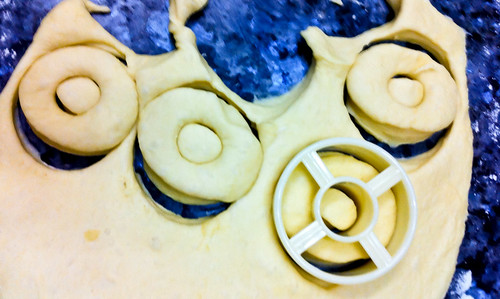
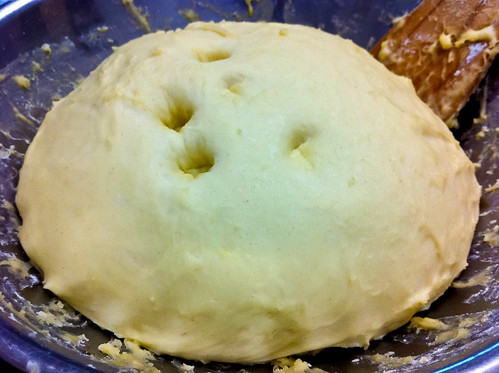
Use the donut dough recipe here

For the cinnamon filling
100 g brown sugar 
10 g ground cinnamon 
35 g butter, melted  

For the glaze
Loosely adapted from Peter Reinhart's Caramel glaze for sticky buns 

50 g castor sugar
50 g brown sugar 
1 g   salt 
40 g butter, at room temperature 
40 g corn syrup 


Method: 
  1. Make the cinnamon filling: Combine the sugar and cinnamon in a small bowl and set aside. 
  2. Shaping the rolls. Remove the dough from the freezer and allow to thaw until room temperature, for about 30-45 minutes. Once thawed, roll out the dough into a rectangle on a well-floured surface. Brush the dough with the melted butter, leaving a 1-cm border along the edges. Sprinkle the cinnamon-sugar filling over the melted butter. Beginning with the longest edge nearest to you, roll the dough into a tight cylinder, and firmly pinch the seam to seal the cylinder. Place it seam side down and using a dough scraper or serrated knife, slice the cylinder into even rolls. 
  3. Arrange the rolls cut side down in the muffin pan, and allow to proof for 30-45 minutes, or until doubled in size. 
  4. Bake the rolls in a preheated oven for 15 minutes at 170°C, or until the rolls turn golden brown. 
  5. Make the glaze: Combine the sugars, salt and softened butter. Cream for 2 minutes on high speed, and gradually add in the corn syrup. Continue to cream for 5 minutes, or until the mixture turns light and fluffy. 
  6. Remove the rolls from the oven and spread the glaze onto the tops of the rolls and allow to cool before serving. 

Janine's jots: 
  • Taste: The cinnamon filling recipe gives an extremely 'spicey' roll - do halve the cinnamon proportions if you prefer a less pronounced cinnamon taste - the original recipe calls for a 5% cinnamon ratio to sugar (ie, 5 g of cinnamon to 100 g of sugar).
  • Texture: The dough makes a drier than usual cinnamon roll, which wasn't too surprising given that the dough was meant to be fried as donuts. Thankfully, the syrup saved the rolls from being overly dry, and on the whole, the rolls were more than passable :]
  • Serving size: A third of the donut recipe makes 6 cinnamon rolls comfortably. The frozen dough thaws very quickly as well, so everything was made and done within 2 hours. 
  • Modifications: The original recipe calls for the caramel glaze to be baked together with the rolls - it should be placed at the bottom of the pan and the rolls placed on top for a true sticky bun, but I didn't do so. In fact, I cheated slightly by using the excess cinnamon-sugar that I had, and mixed it together with some melted butter as well as additional icing sugar and a squeeze of a lemon to make a glaze for my cinnamon rolls. There are other recipes which call for a cream cheese or white icing glaze - both of which will also taste delectable with the cinnamon roll.  
  • Storage: The cinnamon rolls do not keep well unrefrigerated (and they invite lots of ants too), so keep them refrigerated if you are unable to consume them within the day. 
  • Would I make this again?: I prefer the normal cinnamon roll recipe that I use (either the Pioneer Woman's or Peter Reinhart's), but this is a handy alternative should I be attempting donuts again and have excess dough!

In pictures: (taken as usual, with the iPhone)

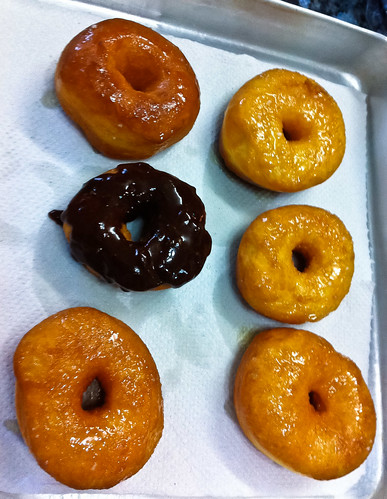
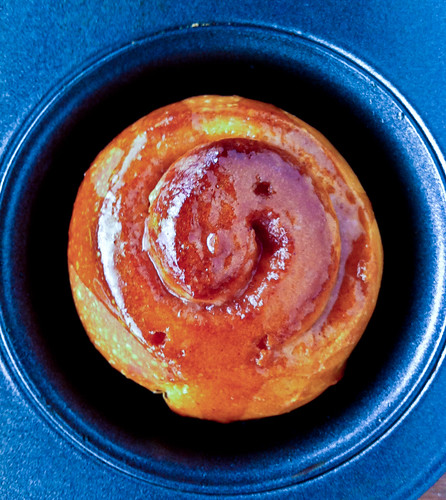
Thoroughly glazed ronuts :]

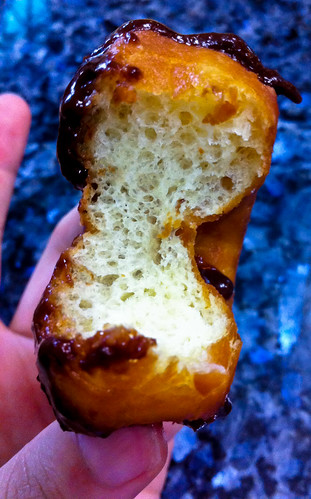
Oops I needed two of them for the energy to take photos!
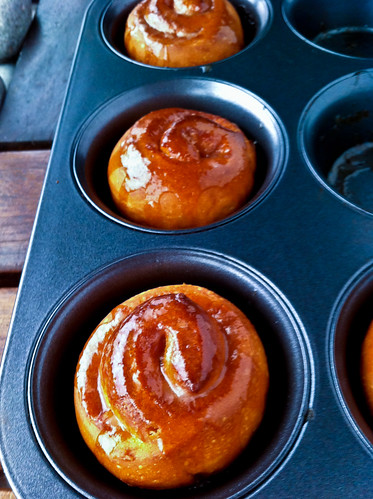
If you compare them to the donut 'innard' in the earlier post, you'll realize that this looks less holey. It certainly is more dense than the donut, because this was baked rather than fried, but nevertheless, it is still one tasty cinnamon roll!


This is actually a scheduled post while I'm away in Cambodia, so do bear with me if there are no replies to the comments cos there's no internet connection where I'm at! :)

Thursday, May 5, 2011

Light-as-air Donuts

I like donuts. A lot. And I like you tiao and ‘butterfly buns’ too. I used to go for long runs just so that I could treat myself to a butterfly bun and you tiao and ham chim peng afterward. So after salivating over many a post on donuts, I decided to finally take the plunge and try my hand at making them when I knew I was going back to Malaysia for the weekend. This was because of two main reasons – my mom abhors any form of frying while we’re in Singapore (the ventilation in our small kitchen is horrible), so there is absolutely no frying allowed. Back in Malaysia however, we have an outdoor wet kitchen, so I could fry my heart's out (to quote my mother). Second, I knew that I'd be bored out of my senses while in Malaysia because there’s no internet connectivity, so making some donuts for tea would be the perfect excuse to while some time away!

The donut-cutter in action!
Naturally, something had to go wrong. First, I had no donut cutter, and there was no other form of round sharp instrument which I could use as a substitute. Thankfully, I managed to get myself a smallish plastic donut cutter in the nearby Giant for a mere RM2.50! Second, I realized that I was out of bread flour only minutes before making the donuts, so I had to make do with all-purpose flour. I merely kneaded the dough a little longer to try to compensate for the lower gluten content. Lady Luck has been on my side for these last few bakes, because my forgetfulness gave rise to yet another happy mistake. The donuts turned out to tiny fluffy clouds and were a joy to consume. I shall not deny that I finished 8 donuts in a single sitting – I had donuts that were cinnamon-sugar coated, sugar glazed and also chocolate glazed. And ALL of them tasted oh so delicious! And because they were so light, I didn’t feel the greasy after-taste that you’ll sometimes get after consuming too many fried goods. 


Fried Donuts 
Lightly adapted from allrecipes and Lara’s recipe 
(PS Lara has a book all about doughnuts! Lovely recipes accompanied by lovely photographs - do check it out!)

Makes 27 donuts with a 9-cm wide donut cutter

For the donuts
7 g        yeast
30 ml    warm water
180 ml  warm milk
25 g      sugar
½ tsp    salt
1 whole egg + 1 yolk
25 g      shortening or butter
320 g    all-purpose flour

For the sugar glaze 
25 g    butter
80 g    icing sugar
½ tsp  vanilla
30 ml  water

For the chocolate glaze 
Adapted from Alton Brown's recipe, made only 10% of the given quantities


Method: 
  1. In a bowl, dissolve the yeast into the warm water until foamy, for about 5 minutes. 
  2. Add milk, sugar, egg and yolk, salt, shortening and 160g of flour into the bowl, mixing well. Once a smooth paste is achieved, add in the remaining flour. 
  3. Knead the dough, for about 15-20 minutes, or until a smooth dough is achieved. Cover the bowl and let it rest in a warm spot for 45 minutes or until doubled in size. 
  4. Punch down the dough and roll it to about 3-cm thick before using the donut cutter to cut out the donuts. Place the doughnuts on the baking sheet at least 3-cm apart and cover with plastic wrap. 
  5. Allow the donuts to rise until doubled in size, about 30-40 minutes, testing at five-minute intervals. To test whether the dough is ready, touch lightly with a fingertip. If it springs back immediately, it needs more time. If it springs back slowly, it is ready. If it doesn’t spring back at all, it has overproofed and you should punch it down and re-roll it. 
  6. Using at least 10-cm of oil, heat your wok or pot up to 175 degrees and gently drop the donuts into the oil. Fry for about 1 minute per side, until they rise to the top and turn golden brown. 
  7. Remove with a slotted spoon and drain on a wire rack over a paper towel, and let cool slightly before glazing. 

Janine’s jots: 
  • Taste: I’ve reduced the amounts of sugar required in the donut, so by itself the donut is pretty much very plain and not sweet as all – in other words, not too palatable if you eat it on its own. I highly recommend a glaze or sugar coating at the minimum to enhance the flavor profile of the donut. The sugar content in the glaze is also greatly reduced, do feel free to add up to 125g of icing sugar into the glaze. 
  • Texture: The all-purpose flour definitely gave the donut its ‘airy’ texture, much like how Krispy Kreme and J.Co donuts taste like, so for those who prefer more bite in their donut, you’ll have to substitute the all purpose flour for bread flour instead. 
  • Serving size: I'd probably halve the recipe in the future, because 27 donuts are a tad too many for a family to have for tea, but then again, the dough freezes rather well, so it makes sense to make an entire recipe and keep some for a quick fix next time!
  • Modifications: Egg whites provide structure, while egg yolks provide tenderness – so since I went the route of all-purpose flour and ‘cloud-like-ness’, I decided to use an extra yolk instead, to further add to the tenderness of the donut. You can see that in Lara’s recipe, she uses a maximum of 3 yolks to tenderize her donuts, but her recipe calls for bread flour, so do note the subtle differences! 
  • Storage: Although the dough freezes well (you can freeze it before the first proofing, but it's best if you freeze after the punch down so that you save time on proofing the next time), the quality of the fried donut deteriorates rather rapidly after a day. I tried a day-old donut and it just didn't taste as good as when it was eaten hours after it was fried. So, do consume these babies asap!
  • Would I make this again?: I would probably not repeat this any time soon, not because I didn’t like it, but because it’s way too addictive. Like I said previously, the lightness of the donut is rather deceptive and makes you eat more than you should! 
  • Other comments: Do feel free to substitute a bread machine or electric mixer for the first few steps of the recipe. You will realize that it’ll take some time for you to achieve a smooth dough because all-purpose flour has less gluten content and will take longer to form those gluten chains. 


In pictures: (photos again taken with my trusty sidekick, the iPhone)

After the first rise - to check if the dough has sufficiently proofed, press a finger into the dough. If the dough bounces back, it is not sufficiently proofed. If the indentation remains, you can begin punching down the dough and shaping :] As you can see, I was a little over-zealous with the checking :p
Using my donut cutter. I removed the donut holes and actually re-rolled them into sheets for more donuts because I don't really like donut holes :p I don't think the textures of the donuts were affected much by the re-rolling.
All cut and ready for the 2nd proofing. They kinda look outta shape cos they're pretty fragile with the holes in the centre and I don't exactly have a light touch =X
I chose to fry them in a wok instead of a pot because my mom says that woks use less oil than required.  My oil is a little too hot here because some of the donuts wrinkled immediately after I slid them into the oil and are turning wayyyy too brown!
Ooooohhhh look at these lovely donuts - all brown and sugary :] And look at the difference between this shot which is taken outdoors and two photos before this which was taken indoors. Bleh :/
Here's a close-up - my donuts are a tad too brown because I can't control my fire properly - it's my first time frying something! 
Not a pretty picture with icky shadows, but just wanted to show you the sugar and chocolate glazed donuts. Those are not oily donuts but my sugar glazed ones! Really really good - I like the glazed ones better than the normal sugar sprinkled on ones. 
And a picture of the inside before it disappears into my tummy. Look at those holes - LIGHT AS AIR I tell you!

I actually only made 18 donuts with my dough, because I kept a third of the dough in the freezer since I felt that 18 donuts were way too many for a family of 5 to have for tea (I was wrong). Like I mentioned, I combined what I thought was good about both recipes to get the recipe above. I thought that it was a pretty good primer into the world of making donuts, and I definitely have much more to learn - but I'll have to wait until I can get my hands on a wok of hot oil again (in Malaysia), so that I can fry myself some more donuts! If you're wondering about the excess frozen dough - here's a hint, I didn't fry it and no, it wasn’t donuts! ;p
Related Posts Plugin for WordPress, Blogger...