My blog has moved!

You should be automatically redirected in 6 seconds. If not, visit
http://www.unpastiche.com
and update your bookmarks.

Showing posts with label Cupcakes/Muffins. Show all posts

Tuesday, December 25, 2012

Two Years On...and I'm migrating (virtually)!

Merry Christmas everyone!

I decided that I should repeat the tradition of updating on Christmas. This year's Christmas is markedly different from last year's, mainly because I'm spending it overseas in Perth with another loved one of mine and I just had a 'barbie' on the beach. That's Aussie for BBQ! It was a novel experience, spending Christmas by the beach, enjoying the gorgeous sunset and the tasty food prepared by yours truly.

I decided that I should repeat last year's post by doing another walk down memory lane. The pickings this year are quite slim, because as compared to 102 posts in 2011, I only wrote 35 posts this year! That's a third but I guess it's understandable considering 2012 was when I got a full-time job which occupies probably 80% of my time.


My Most Beautiful Post and The Post That I Am Most Proud Of 
I guess macarons do photograph very beautifully. Last year's "most beautiful post" was my pink salted caramel macarons and this year, it's my ferrero rocher macarons. Not only were they beautiful, they were delicious too. The only thing I hate about macarons is how finicky it is. Perhaps I haven't got my technique right, but it always seems to be a hit-or-miss deal with me when I'm making macarons.


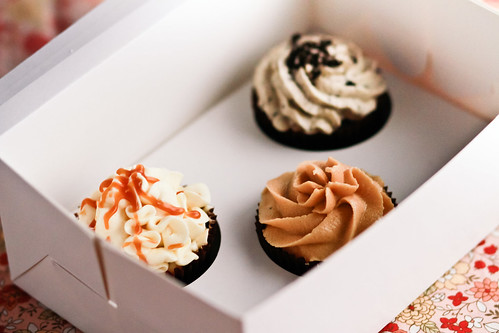
However, the post that I am most proud of, albeit not a complete post (ie without recipe), is my recent post on what I've been up to. So many reasons why I'm proud of it - I baked 300 cupcakes across 3 weekends, iced them with 12 different types of frosting, baked trays and trays of cookies, and single-handedly raised a sizeable amount for charity! I would definitely want to repeat this next year!


My Most Popular Post 
Again, the list of baking places in Singapore remains the most popular post. However, for a post done in 2012, that would have to be my list of Pizza Places/Pizzerias in Singapore. Come to think of it, my "lists" tend to be really popular, which I guess is good testimony to my information gathering skills (which is an important skill I cultivate on a daily basis thanks to my job).

I do have a few more lists in the pipeline, but as usual, I want everything to be almost perfect before I upload them, hence the delay. 


A Post I Feel Didn’t Get the Attention It Deserved 
Maybe because the photos I took were not spectacular but these chocolate sables were my best selling cookie during the Christmas Charity fair and has been my best cookie so far, according to both friends and family. It is also known as the "World Peace Cookies" by Dorie Greenspan, so do try them out for yourself if you haven't. I can assure you that you will definitely not regret it.

*****

With that, I have a very important announcement to make. For those of you who might have been clicking on the links above, you might have realized that you get sent to a domain called "un pastiche". That is my new domain =] The website is not completely up yet - I still have some remaining things to do like the header and updating the older posts which got screwed up in the process of migrating but I've decided to introduce you guys to my new home on 25 December because of the significance of the date :]

I had a few reasons for migrating, even though it meant losing some readers and the rankings for some of my top posts. One of the main reasons was that I wanted to have a brand which I could use on the products I am selling, which I am increasingly doing, and "not the kitchen sink" sounded a little odd on cake boxes and labels. I also wanted the freedom of my own domain, so well here we go! I spent a good part of the year looking for designers who was willing to do what I wanted within my budget, and boy did I get lucky with Kaiyi. She is a local blogger/designer whom I got to help me design my new blog. I was working with a really tight budget, but I wanted lots of frills for a small budget, and Kaiyi was the only one who fit the bill. And the end result was fantastic :]

I will be updating the blog on unpastiche.com from now on, so please bookmark that page or change your feeds to my new page. I will be holding a couple of giveaways soon in my new home as part of my 'housewarming', so please head on down and keep your eyes peeled! The giveaways are one of my biggest yet and will come from stash bought from Australia!

I'm tucking in early tonight for Boxing Day sales tomorrow - catch you guys around my new home at un pastiche!

Saturday, September 1, 2012

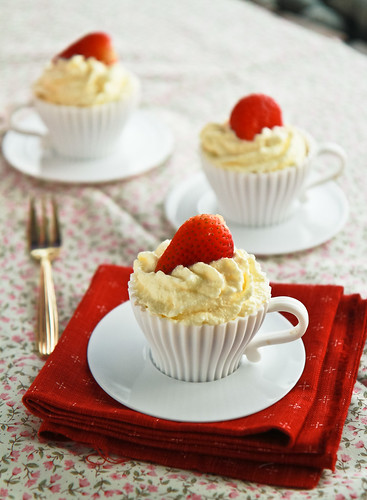
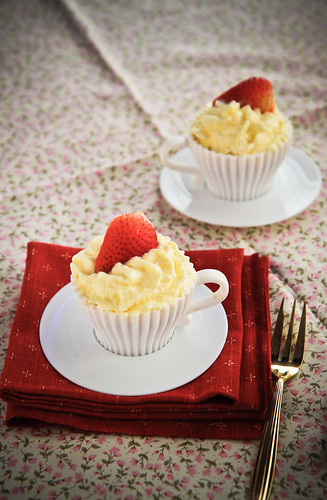
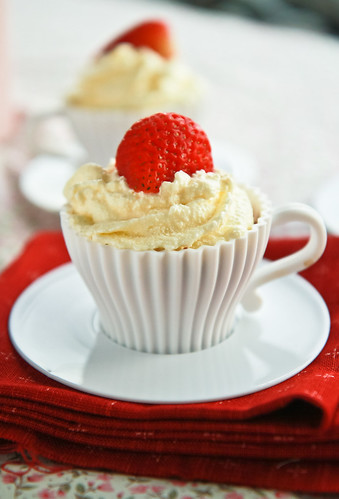
Strawberry Cupcakes with Cream Cheese Swiss Meringue Buttercream

It seems like eons ago when I last posted on my vanilla sugar cookies and I thank you out there for emailing me, showing me support and asking me about ordering the cookies :] Things have been a tad busy lately - the first week of August I was busy baking for a huge wedding order of 200 petit-four sized cakes, and in the second week, I was baking up a storm for a dessert table for a grand-dame's birthday ;p and in the third week, well, I was away in Bangkok for holiday! In between, I haven't had the urge to bake anything new, because well, facing the oven for two whole days (8am to 8pm days) can make you quite sick of baking.

I wouldn't be surprised if no one visits here, because I've been swamped at work, and haven't been able to even find time to check my email or even visit the blogs I frequent. Hopefully, I'll find time to blogsurf next week. This last week, I've been 'working hard for my money', as my dad likes to term it. Having enjoyed two holidays in a row, I've had quite a bit of backlog, and have had to put in 12 to 15 hour days just to catch up. The only light at the end of the tunnel is that I've received my first proper pay check, and today is actually the anniversary of my second month at work! The first month anniversary of forever, if one is pessimistic. I'm finding it harder to keep up blogging and working, because if I don't have to work during the weekends, I tend to sleep and laze through them instead. Baking, if any, is the usual few things - my favorite cookies, sourdough breads, and the usual cupcakes and muffins. Nothing unusual and nothing fantastic. In fact, I haven't touched my camera in a long while. I really hope to get out of this lazy cycle of mine and bake something interesting to post about soon!


This was something simple I baked nearly two months ago, when strawberries were hitting the supermarkets at about S$5 per half-kilo punnet, and I was busy munching on them sweet morsels as well as making them into jams. Out of all the berries, I think I like strawberries the most, because they are the only berries which I find sweet enough to munch on (as compared to say raspberries) and I love strawberry-themed desserts.


So anyway, because I had an abundance of egg whites and strawberries, I decided to make this particular strawberry cupcake recipe which I've tried countless of times and loved. It uses only egg whites, which means that if you have lots of egg whites and don't feel like making macarons with them, you can try these instead! It's actually a very typical white cake recipe, but instead of milk, strawberry puree is used.

I sometimes use a strawberry milk buttercream to up the 'strawberry-ness' of this cake, but this time, I opted for a cream cheese swiss meringue, just because I had extra cream cheese and I like how nicely it goes with strawberries.


Strawberry White Cake
Adapted from Smitten Kitchen's Pink Lady Cake
Makes 6 cupcakes

65g all-purpose flour
40g castor sugar
1 tsp baking powder
⅛ tsp salt
60g butter
¼ cup strawberry puree (about 60g)
40g egg whites (from about 2 medium sized eggs)
30g milk 

Method: 
  1. Place the dry ingredients (flour, sugar, baking power and salt) in a mixing bowl and mix it on low speed for about 30 seconds. 
  2. Add the butter into the dry ingredients and continue mixing on low speed until the butter turns into pea-sized bits. Then, pour in the strawberry puree and mix on medium speed for about 30 seconds until the mixture is well combined and fluffy. 
  3. In a separate bowl, combine the egg whites and milk together. Add the egg white and milk mixture to the mixing bowl in three parts, making sure to beat at least 10 seconds between each addition. Divide the batter equally among the cupcake liners/silicone cupcake moulds, making sure to fill the liners to about slightly less than 2/3 full. 
  4. Bake in a preheated oven at 170°C for about 20 minutes, or until a wooden skewer inserted into the centre of the cupcake comes out clean. Allow the cupcakes to cool for about 30 minutes or until the tops are cool to touch before decorating them with buttercream.
Cream Cheese Swiss Meringue Buttercream
Makes enough to frost 6-8 cupcakes 

35g castor sugar
30g egg whites
50g unsalted butter
30g cream cheese 

Method: 
  1. Cut the butter and cream cheese into cubes of 3cm and allow to soften. They should yield slightly to touch but not completely give way. 
  2. Add egg whites and castor sugar into a mixing bowl of an electric mixer. Place over a pot of simmering water (not boiling), and whisk constantly until all the sugar granules have dissolved. The mixture should feel slightly warm to your finger (about 50-60°C). 
  3. Remove the mixing bowl from the bain marie, and begin to whip with a whisk attachment until the mixture becomes thick and glossy (almost stiff peaks). 
  4. Switch to the paddle attachment and add the softened butter and cream cheese one cube at a time, until fully incorporated. Mix until you achieve a silky smooth texture. You can also add vanilla, salt or any other flavorings you want at this time. 
  5. Use immediately, or refrigerate for up to 2 weeks. Whip it again until silky smooth before using. 


Janine's jots: 
  • Note: You can actually see that my buttercream was not silky smooth, but quite curdled. That is because I didn't whip the butter until it was fully incorporated - it will take about 10 minutes, so be patient!
  • Taste: I have taken the liberty of reducing the sugar in the cake quite a bit, so I think it tastes just nice with the frosting. Make sure to taste the strawberry puree and ensure that it is not too sour, because you will have to increase the sugar amounts to counter that.   
  • Texture: Do not try to add anymore liquid to the cake batter, because the cake might turn out gummy if you do. I find that this combination of dry vs wet ingredients gives me the best moistest cake possible.  
  • Storage: Without frosting the cakes, they keep well at room temperature for about 3 days, but store it in the fridge and they can last for 2 weeks. 
  • Would I make this again?: Definitely! Like I said, this is a cake I always make whenever I have excess strawberries!


Sunday, February 12, 2012

Valentine's Day Roundup 2012

Once again, the much-hated or much-awaited (depending on whether you're single or attached) Valentine's Day is here. It's a day for girls to receive free gifts from their admirers or loved ones, and for boys to spend bucketloads of money buying roses and whatnots. For those who are very much single and available, don't despair, because this is a day to celebrate your beautiful friendships with your friends, or to even celebrate your love for your family.


There's a million things I love about this picture, from pinterest 

Valentine's need not be stressful - I remember back in my secondary school days, I was in an all-girls school, so we would give each other thoughtful gifts for Valentine's - I still remember a bunch of us making trips down to Ikea and various crafts shops just to make handwritten and handmade gifts for our classmates and friends. And that is still the message of Valentine's that I carry with me today. For the past few Valentine's that I can remember, I still make it a point to have a Valentine's meal (which usually isn't on the 14th) with the best girl friends one can ever have. Besides, even if my boyfriend were here with me on Valentine's Day, I wouldn't want him to give me roses or bring me to a special restaurant to eat. For many reasons, first being everything is exorbitantly expensive on Valentine's, and there really is no purpose is trying to show off how much you love your other half on this Day and treat her/him like crap on the other days. So there. In any case, I love handmade stuff, and here are some quick last-minute gifts you can make (as cheesy as they may seem):


These are both fantastic ideas from Disney's Family Fun, and are really simple gifts, especially for children and students as gifts.

And while I'm on the topic of children and things that they can do/have, parents - you can make these for your child or even make it into a Valentine's project!

Heart shaped bento by Lisa

Teddy Bear Taco Tart by Beth

I'm not sure about you, but this meringue candy necklace reminds me of those candy I used to have as a kid - they had holes in them and were pastel colored and you could whistle through them! Anyone knows what I'm talking about?

Meringue Candy Necklace from Bakingdom

Okay, so I did a Valentine's Day roundup of some of the available ideas and recipes on the internet the last year, and I thought I'd do the same this year, because I am using some of the ideas to make some edible desserts for my family and friends and I thought it might be helpful for some of you, to perhaps spark some creativity in you for you to make your own edible gift! So bring on the reds and pinks and chocolates!

Again, starting with breakfast, what about some:

 Here are some more ideas:

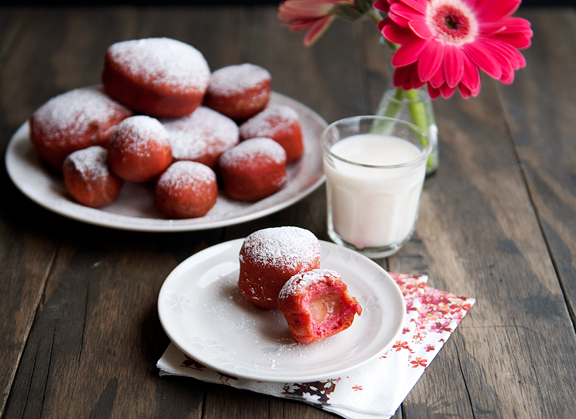
blood orange curd filled beet donuts? naturally red :]
Heart shaped french toast with stewed berries by Marina 
Heart-shaped breadsticks by mealpod
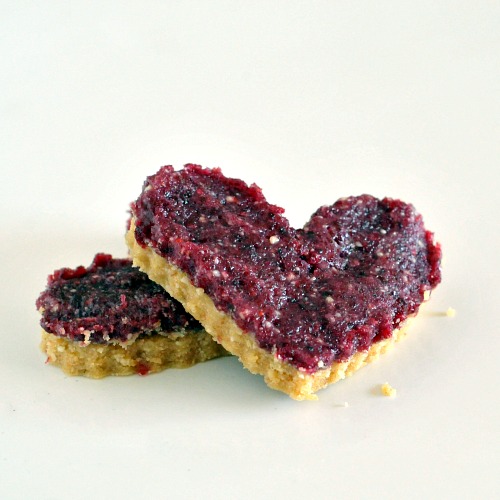
Or it could be a healthy heart-shaped granola bar!

For my gluten-free friends, there's a round-up specially for you here!
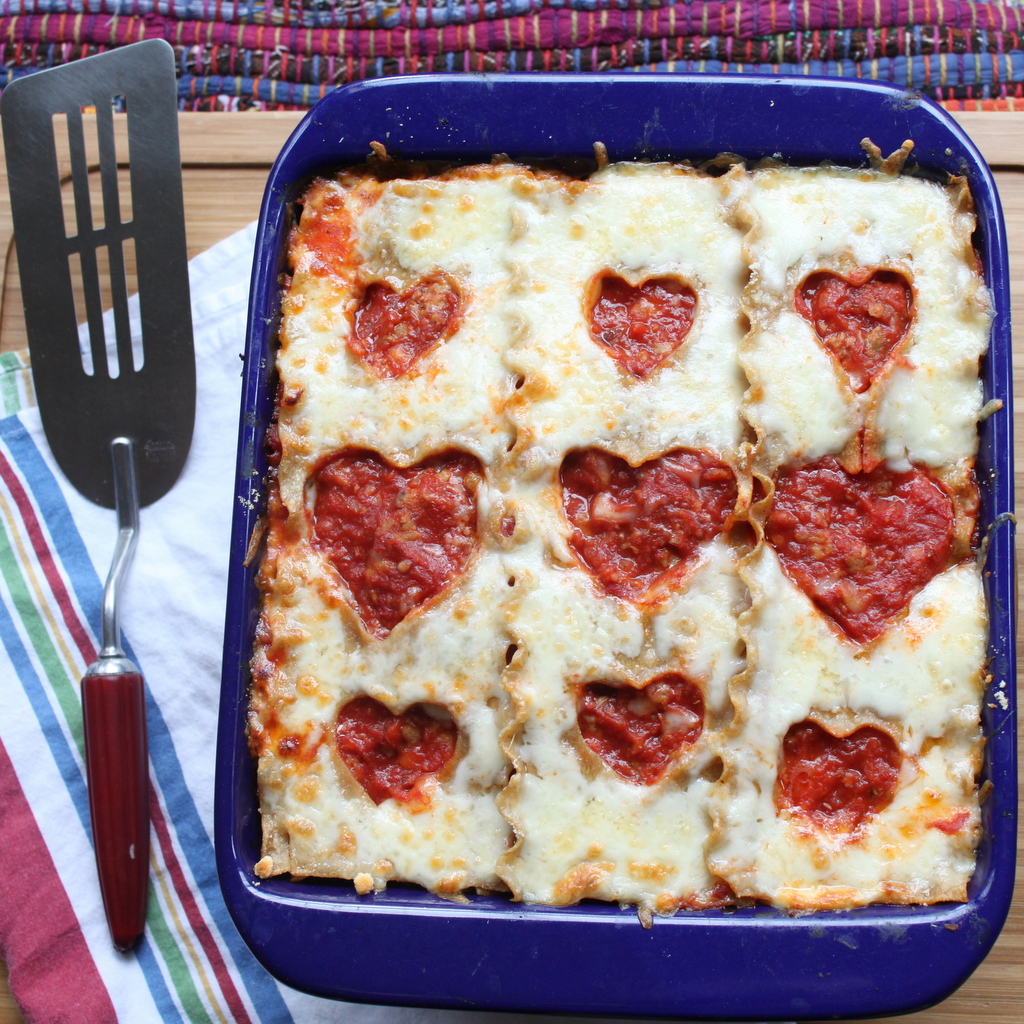
And moving onto lunch! My favorites - pizza and lasagna :]
Pizza in the shape of a heart :]

And a hearty lasagna, pun intended ;p
And this by Haniela, is ingenious. Simple, and my favorite carbohydrate.


And onto my favorite meal/dish - DESSERT :D
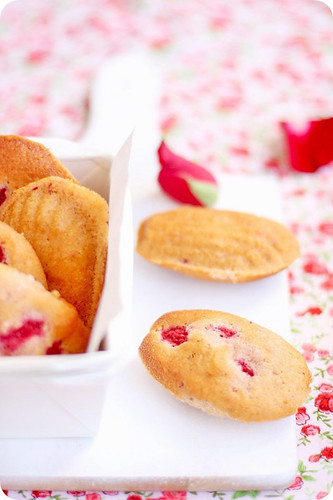
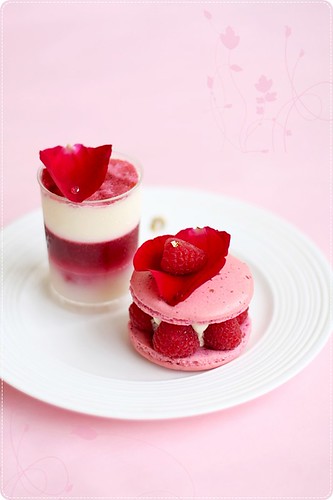
one of my favorite flavor combinations,  madeleines ispahan by Evan
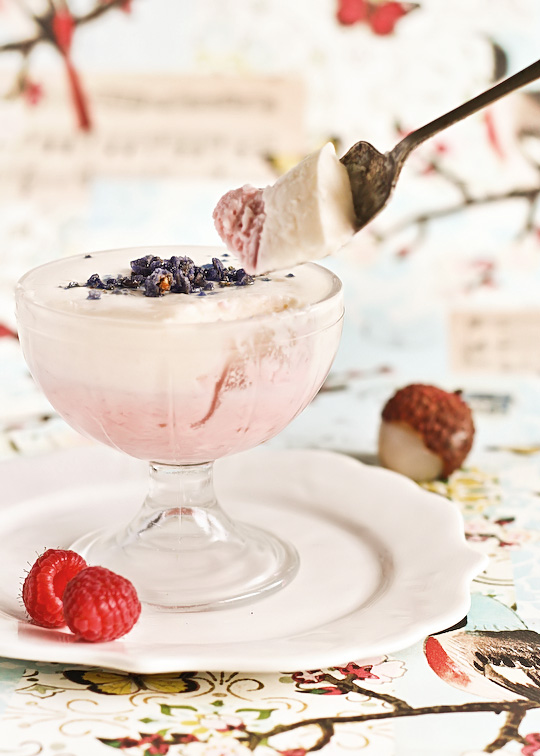
similar flavor combination - raspberry lychee mousse perhaps? 
Intertwining ring cookies - how's that for something unique?
you cannot get any cuter than with domokun hearts!
A hidden heart in a heart cupcake! From Veronica who got her idea from Desert Living Today

My favorite linzer hearts

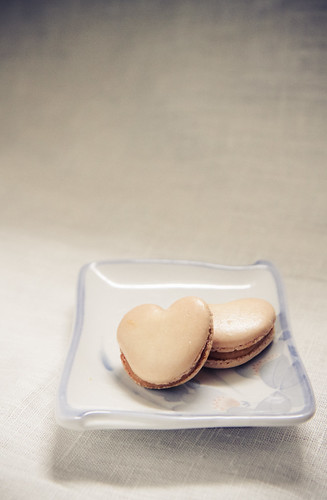
Moving onto the not so easy now, how about some heart-shaped macarons made by yours truly?


white chocolate raspberry cheesecake with hearts!
A healthy pomegranate cranberry heart?
Not forgetting a red velvet cake!
blackberry no-bake cheesecake by Yelena

And if you have the time (and skill) to make more elaborate stuff, do consider these!


lulu's rose heart cake - simply ethereal
red velvet cupcakes with roses
Another lovely entremet by Pook

Yet another one by Evan - same flavors, but in different forms


I also love these cakes - a valentine cake with a surprise and a rustic chocolate valentine cake!

And finally, my favorite ingredient of all time - chocolate. Here's a photograph of a cake I've been wanting to try from one of my favorite photographers/stylists. It's simple, fudgy and rustic, just the way I like my chocolate cakes :]

Chocolate Fudge cake by Katie

As always, all pictures are credited to their rightful owners - I don't own any of them besides the macaron photo. So get those creative juices flowing because Valentine's Day is just two days away! :]

Tuesday, November 29, 2011

One-bowl Ultimate Chocolate Cupcakes

Today's a very special day for me, because it's my mom's 50th birthday =D Happy Birthday Mummy - may you look younger as the days go by and have less worries because I'm going to start work soon and you'll have more pocket money (from me) soon hehe ;p

Although reaching the big five-oh is a pretty big deal, we didn't celebrate much, because it was a weekday and with one brother in the army and absent, and the other going to have exams and me having exams, we didn't really bother with a celebration. I also did not have the time to make anything (cake or otherwise) for my mom's birthday, because I'm in the midst of having exams (final exams in my life, before I begin work), and because these are really important exams, I banned myself from baking and excessive internet-usage during these two weeks. In fact, this blog post is the product of many 'short breaks' I took while studying, heh. However, that being said, I will endeavor to make something for my mom once my exam ends, just so I can play in the kitchen once more. 

Nevertheless, my brother's birthday is also around the corner, on 10 December, so we are definitely going to feast once my brother and mine exams end. I have some pretty grand ideas in mind, so hopefully I'll be able to execute them! 

I actually drafted those two paragraphs in the morning, but hey hey, things change and change they did! By a stroke of luck, my brother managed to get a day out from army, having done duty over a festive holiday; the other brother came home from school early; my dad took leave, and why - I took time out to make a cake for my mommy dearest =D


This is the photo I took, via instagram, hastily taken again, because we were all hungry and I was SO happy to see that the cake turned out so well. This is my first time making a 4-layered cake, and I must say that dreaming about it helps - it didn't turn out too bad. Yes I know the layers aren't equal and there are huge holes in my cake, but hey - it's my first try okay! In fact, for the first 2 layers, I used natural coloring (strawberry powder), and had to resort to red coloring only for the last two layers because the strawberry powder wasn't intense enough. And you know what's the most awesome part about the cake? It's made using my 3-ingredient sponge cake.

Yes, I'm not kidding you - I used just eggs, flour and sugar, with some coloring for this cake. And whipped cream of course. Hopefully I'll find time to blog about this cake soon-ish, because I completed the entire cake in less than 90 minutes. The cake layers take 15 minutes to bake each, so everything was chop-chop. And best thing of the day was, the cake was finished by everyone. Like how rare is that? I've mentioned previously that my brothers don't eat my cakes because they think they are horrible, but they finished this cake :] My mom had seconds and my dad too. WHEE :] And I'm the happiest person of all. I think my mom was pleasantly surprised because all her children are home and she got a double surprise birthday cake (it was an all-white cake and I told her that there's a surprise inside) hehe.

***


Now, onto these cupcakes. Over the past year, I have experimented with more than enough chocolate cupcake recipes - in fact, I think I have experimented with close to 20 different recipes! I have a few favorites, but I always forget to take photographs of the cupcakes, so the recipes are not posted yet. These cupcakes are the result of last week's experiment, and the recipe is in my top-three chocolate cupcake recipes. The original recipe received over 600 rave reviews, and having made it a few times (to experiment and for my cousin's baby shower), I have simplified the method to a one-bowl recipe. This is perfect, because the other recipes I have use the creaming method, and since I'm usually very lazy, one bowl is definitely the way to go. 


One-bowl Ultimate Chocolate Cupcakes
Very loosely adapted from BBC Good Food’s Ultimate Chocolate Cake
Makes 6-9 standard cupcakes, depending on how much you fill the cupcake

50g     dark chocolate, of at least 50% cocoa solids
50g     unsalted butter, cubed
¼ tsp  instant coffee granules, dissolved in 25ml water
45g     all-purpose flour
½ tsp   baking powder
⅛ tsp   salt
⅛ tsp   baking soda
35g     soft brown sugar
40g     fine granulated sugar (or castor sugar)
7g       cocoa powder
1         egg
20ml   buttermilk


Method:

  1. Preheat the oven to 140°C (fan-forced) or 160°C (conventional).
  2.  Place the coffee granules in a large metal bowl over a pot of simmering water. Add in the cold water to dissolve the coffee granules. Add in the chocolate pieces, together with the butter. Add in the cocoa powder to dissolve as well. Stir gently until everything is melted and well combined. Alternatively, you can microwave the mixture on low for about 3 minutes. Allow the mixture to cool. 
  3. Meanwhile, combine the flour, baking soda, baking powder, salt and sugars. 
  4. Stir in the buttermilk into the melted chocolate mixture and mix well. Test the mixture to see if it is warm (should be slightly warm to your finger). Then, crack in the egg and mix well. The mixture should not be too hot otherwise the egg will cook. 
  5. Once the egg is fully incorporated, add in the dry ingredients and mix well. 
  6. Spoon the batter into prepared cupcake liners, filling to about half full only. Place in the oven for about 20 minutes, testing at the 18 minute mark with a cake skewer. Allow the cupcakes to cool in the tins for about 10 minutes before removing to cool on a wire rack. 
  7. Once the cupcakes have cooled, you can proceed to decorate them with a ganache or buttercream frosting. 

Janine's jots: 
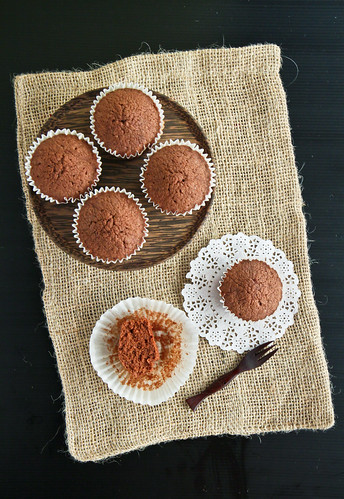
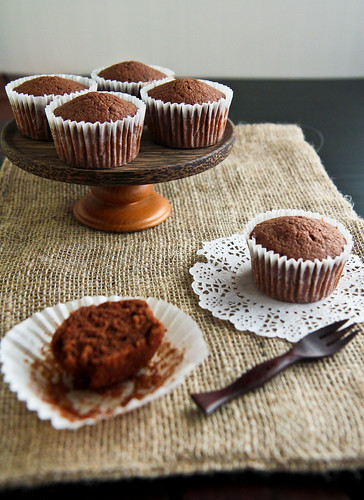
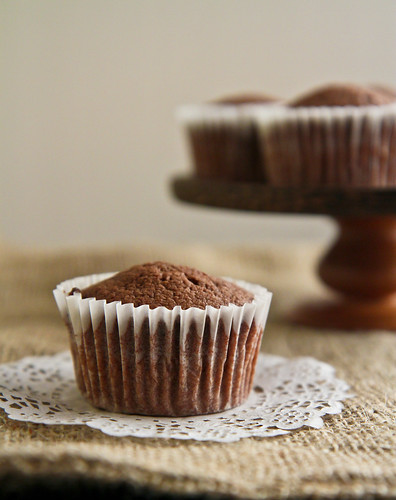
  • Note: Do not worry if for the first 8 minutes you do not see the cupcakes rising. The cupcakes have a slow rise, but once they do, they go crazy. My less than half filled cupcakes gave me the results you see here. They all have domed tops. 
  • Taste: Just a tip, if your chocolate has a lesser cocoa content but you still want that bittersweetness to come through, increase the amount of cocoa powder to a maximum of 15g – this will mimic the bittersweet chocolate, but make sure your cocoa powder is of good quality. Also make sure you use good quality instant coffee, because the taste of coffee (very slight but is discernible) and chocolate will linger on in the mouth after eating the cupcake. 
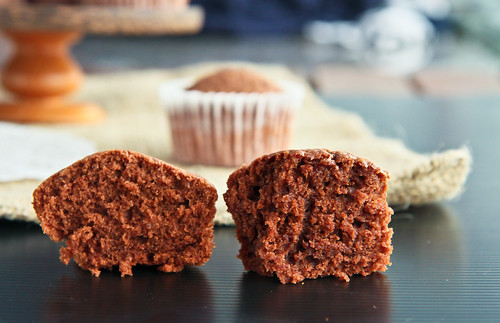
  • Texture: The cupcakes are sufficiently moist, with a fine crumb. They are not too crumbly, which is what I prefer. 
  • Serving size: This is the quartered version of the original recipe, and I have tweaked the baking agents proportions to reflect that. I have tried this recipe and it works very well. Depending on how much you fill the cupcake liners, you can get a maximum of 10 cupcakes (filled about 40% each), with the cupcakes doming slightly above the cupcake liner, or if you want a huge naked cupcake, fill it to 75%, and you will get 6 huge domed cupcakes/muffins. 
  • Modifications: The original recipe called for buttermilk, but I didn’t have that, so I substituted it with milk and vinegar. I used the proportions of 18ml milk with 5ml vinegar, which is more vinegar than usual, but it worked well. I also drastically reduced the amounts of sugar required (50g each) to 35g and 40g. I tried this recipe another time, further reducing the sugar to a total of 60g and it was still okay for me, but some tasters (ie family members) thought that it should be a tad sweeter since the chocolate taste was rather intense. I originally used less water and milk in the recipe, but I have found after trying this a few times that you can use quite a large amount of liquid in this recipe – it is pretty forgiving – to get a more moist cupcake. I have used a total of 60ml liquid instead of the 45ml total. 
  • Storage: The cupcakes keep well at room temperature for a week, although the tops get a little sticky towards the end of the week. You can also keep them in an airtight container in the fridge, they do not dry out dramatically. 
  • Would I make this again?: Definitely! The reviewers and the title did not lie, it really is an 'ultimate chocolate cake' recipe. I made this for my cousin's baby shower and many people liked them, preferring them to the ordered cupcakes which had shortening frosting :X That being said, I still have another favorite chocolate cupcake recipe which I have yet to share. I prefer the texture of that recipe.  

Tiny dome from filling the cupcakes to 50%

Left: BBC; Right: Taste recipes


In this picture, you can see a comparison of yet another chocolate cupcake recipe I tried. It is meant to be a normal cake recipe, but I made them into cupcakes instead. There are very very slight differences to both recipes - even as I look at the photo above, I can't really tell which is which. As you will see, proportions are almost similar, with very slight variation, but as will be explained in my jots below, I preferred the ultimate recipe to this recipe below. 

Classic chocolate cupcakes
Very loosely adapted from Taste.com.au, first sighted at Ju's
Makes 6 standard cupcakes

50g     all-purpose flour
¼ tsp   baking powder
⅛ tsp   salt
⅛ tsp   baking soda 
5g       cocoa powder 

50g     dark chocolate, of at least 50% cocoa solids
56g     unsalted butter, softened
55g     castor sugar
¼ tsp   vanilla extract
1         egg
32ml   milk


Method:
  1. Preheat the oven to 160°C. 
  2. Melt the chocolate over a bain marie or in a microwave oven and let it cool. 
  3. Sift the dry ingredients - flour, baking powder, salt, baking soda and cocoa powder together. Set aside. 
  4. Beat the softened butter together with the sugar, until creamy and fluffy. Add in the vanilla extract, followed by the egg. 
  5. Add in the cooled melted chocolate. Next, add in half of the dry ingredients, making sure to incorporate all the dry ingredients before adding in half of the milk. Add in half of the remaining dry ingredients (25% of the total), alternating with the final half of the milk and ending with the addition of dry ingredients. Beat until everything is well incorporated. 
  6. Spoon the batter into prepared cupcake liners and bake for 18-25 minutes, checking at the 20th minute to see if the cupcakes are done. Allow the cupcakes to cool in the tins for about 10 minutes before removing to cool on a wire rack. 
  7. Once the cupcakes have cooled, you can proceed to decorate them with a ganache or buttercream frosting. 

Janine's jots: 
  • Note: For both recipes, I used the exact same butter, chocolate and cocoa powder, as well as weight of eggs and other dry ingredients. This was to make sure that this mini taste test would be a fair one. 
  • Taste: I felt that the chocolate taste was not as strong in this recipe, perhaps because there was no coffee to enhance the flavor of the chocolate and because there was 2g less cocoa in this recipe. I thought the addition of brown sugar in the BBC recipe helped enhance the chocolate flavor as well, bringing a slight maltiness which is very slightly discernible (I used Muscavado). 
  • Texture: I thought that this recipe was slightly more crumbly than the BBC's one, which I didn't like. The cupcakes did not rise as much as the BBC ones as well, probably because of the smaller amount of baking powder used. 
  • Would I make this again?: Not really, because I far prefer BBC's recipe. Also, although crumb might be finer for this recipe, this recipe is troublesome if you consider that you can get equivalent or better results with a one-bowl recipe. I don't have to wash extra beaters ;p Nevertheless, this is not a bad tasting recipe, but I would definitely use homemade buttermilk, and add coffee to the recipe the next time, to up the flavors a little. 


I'll be submitting these two recipes to Min for Aspiring Bakers #13: Enjoy Cupcakes! (November 2011). If you do try these recipes, do drop me a comment and let me know how you like them! 

Tuesday, November 22, 2011

Hokkaido Chiffon Cupcakes (北海道戚風蛋糕), and how to get to JB

I've had a number of emails asking me about how to go to JB, or specifically, how to get to certain baking shops in JB. As much as I love Malaysia, I must admit that public transport options in JB are pretty sucky, and taking buses to these baking shops I've listed can be quite a feat/hassle - since the bus stops are not exactly near those places (you have to walk across roads, etc) and there are no proper bus stops (you might know what I mean if you've seen Malaysian buses stop at the weirdest points on the road). I had initially wanted to list down a number of transport options to get to JB, seeing how qualified I am to do so - before my family decided to stay in Singapore, I travelled to and fro JB and Singapore every single day (yes, every day no joke) for over a decade. Whenever I tell people of how much time I took to commute every day (4 hours to and fro), people go, "Wow - how did you manage to do well in school while spending so much time traveling?" Well, I've to admit that I've no idea - even I feel amazed that I managed to find time to study and have a number of CCAs (after-school activities for those who are unfamiliar with the Singaporean love for acronyms). So yes, I am more than qualified to tell you how to get to JB. Back then, there were only a few buses plying the Singapore-JB route - meaning you had to wait really really long if there was a traffic jam. Today, so many buses - CW1, CW2, 160, 170, 950, TS2, etc ply the route and stop at so many more stops in Singapore and JB, making things much more convenient.

If you want more information on travel options to Johor Bahru (JB), do look at this Wikitravel entry on JB - it is really very informative and saves me from having to explain.

I also wanted to clarify certain misconceptions that readers might have got from the list of shops:

  1. Although some of the shops have addresses listed as 'Larkin' - these are not at the Larkin Bus Terminal that some JB-SG buses stop at. They are quite a distance away and I wouldn't advise walking there!
  2. For Ng Ming Huat, you can try taking a bus there - it is next to Crowne Hotel and relatively near to Pelangi Mall and Holiday Plaza and KSL City, but for the life of me, I have no idea which buses stop near it because I have never taken a bus there myself. 
  3. For the shop Perling Indah - it is NOT near Taman Bukit Indah at all. Taman Bukit Indah is another terminal for the buses CW3 and CW6. Perling Indah is actually in the row of shops next to Perling Mall, which is the mall that you might see when exiting the Second Link at the Taman Perling exit. Perling Indah is the second last shop and is next to a 24-hours Indian Muslim eatery Sayed. For the intrepid, you can choose to take CW3 and tell the bus driver "Perling Mall" - this will deposit you on the road across Perling Mall, after which you have to jaywalk across two two-lane road with a rather huge drain separating them. (The pedestrian crossing at one end of the road doesn't really work and I wouldn't advise you trying to cross there because most cars ignore the red light anyway, making it really dangerous to attempt crossing at the pedestrian crossing. Ironic yes?) Then, you still have to cross another small two-lane road (with little traffic) before getting to Perling Mall, then walking the width of the mall before reaching that row of shops that Perling Indah is on. Note that the Perling Mall stop does not have a bus stop, but there is a makeshift 'terminal' for the CW3 buses which head to Bukit Indah first before heading to Second Link via Bukit Indah and then terminates at Jurong East. Pretty confusing so yup - only for the courageous!  


Causeway link
Like I've mentioned previously, I seriously do not advise traveling around JB by bus - it is difficult and a waste of time. Either go by car or taxi if you wish to head to these places. I hope this helps those who have been wondering! For your information, the CW3 and CW6 I'm talking about is this bright yellow bus on the right. I have linked up the buses which head to Singapore in the hyperlink underneath.

***

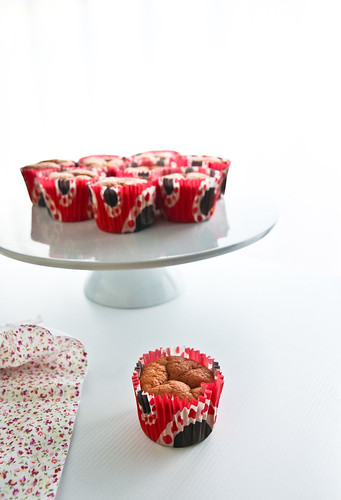
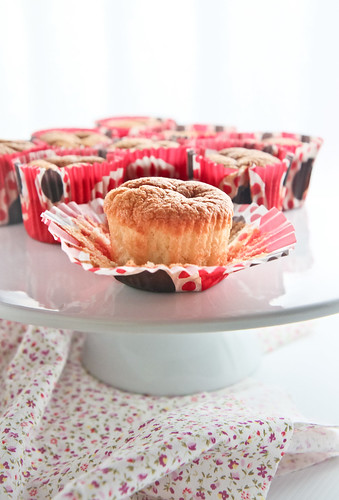
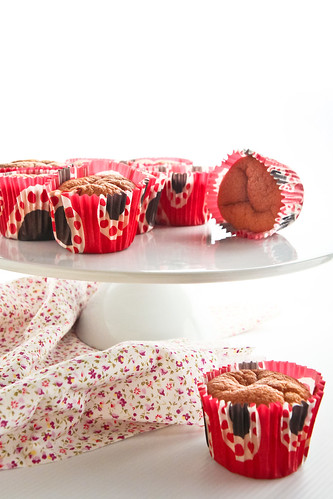
Alright, now that I've said my piece, it's onto the post proper. I'm making Hokkaido Chiffon Cupcakes (北海道戚風蛋糕) today :]


I know quite a few people have raved about it, and I don't want to be a wet blanket, but this recipe really is in fact a chiffon cake recipe, albeit made into cupcakes. I actually don't get the Hokkaido in the title, but like SD - I reckon that it's probably because of the Hokkaido cream or milk used in the filling of the cupcake (which I've omitted here). And to be a bigger wet blanket, this recipe actually resembles most of the chiffon cake recipes I've seen and yes, I've also used this recipe in a chiffon cake tin and the cake turns out fine - without the falling and wrinkly top. In fact, I've actually tweaked this recipe to make it pandan flavored as well as reduced the amount of egg whites used (which is my mom's chiffon cake recipe) and it works fine. So erm, sorry but there's nothing much to rave about BUT I caveat this to say that it is still quite a good recipe, albeit a little on the not-so-sweet side (which is suitable for me but not people with sweeter preferences). It also kinda cheats on the usual chiffon recipe because baking powder is used (the real authentic/old school chiffon cake recipes (or at least my mom's) don't use baking powder), which explains the extra lift. 


Hokkaido Chiffon Cupcakes (北海道戚風蛋糕)
Adapted from Jessie who got it from the book 不用模型做点心
Makes 12-14 tall cupcakes 

Ingredients:
4 egg yolks (about 80g)
70g castor sugar
1 tsp vanilla extract
80ml fresh milk 
60ml odorless oil

135g all-purpose flour (or cake flour if you prefer)
4g (1 tsp) baking powder

6 egg whites (about 180g)
50g castor sugar


Method:
  1. Preheat your oven to 180°C.
  2. Place the egg yolks in a bowl and whisk them together with the 70g of sugar until yolks turn a pale yellow. Add the vanilla extract, followed by the milk and oil. Whisk well to combine. 
  3. Next, sieve in the flour and baking powder, making sure to incorporate all the flour into the mixture. 
  4. In another bowl, beat the egg whites on high for about 30 seconds until foamy, before adding the remaining 50g of castor sugar. Beat the egg whites until firm peaks are achieved (but not overly stiff). 
  5. Take a third of the egg whites and fold it into the egg yolk mixture to lighten it. You don't need to be overly gently with this one-third portion of egg whites. Continue folding in the remaining egg whites, making sure to fold all the whites gently until you get a very pale yellow batter. Fill the cupcake liners until about 70%, making sure not to over-fill the liners as the batter will rise quite a bit before falling when cooling. 
  6. Bake the cupcakes for about 20 minutes, or until the tops turn a golden brown and a cake skewer comes out clean. Cool for 10 minutes in the tin before removing it onto a cooling rack to cool. The cupcakes will fall and wrinkle, but that's normal - you can top it with a dollop of cream or sieve icing sugar on it to cover the 'wrinkles' up. 


Janine's jots: 
  • Taste: As mentioned by Rima in her post, this cupcake is a little on the not-so-sweet side (perfect for me) but not so for someone look for that sugar hit. I'd definitely advise increasing the sugar amounts by at least 10% if you want something sweeter, or just top the cupcake off with a dollop of whipped cream or fill it with curd for that little something extra. 
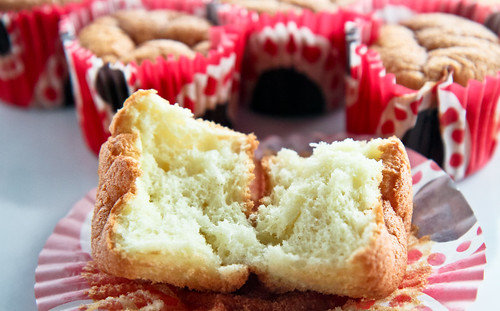
  • Texture: It's almost as if you are 'eating clouds' actually - it is very light, (even though I used all-purpose flour and not cake flour), and each cupcake is easily consumed in three bites or less, without that 'heavy' gelat filling you get after eating a slice of pound cake. You can probably finish two or three of these at a go! Also, I prefer to bake these a little browner so that I get the 'crust' but if you want an overall soft chiffon, do bake it for a shorter time (start checking at 15 minutes), and once you get a golden color, you can remove the cupcakes! 
  • Serving size: I made about 14 cupcakes with the full recipe and 8 cupcakes with the halved recipe - probably because I filled the cups slightly less the second time around. 
  • Modifications: I have also made a halved portion of this recipe and it works fine. You can also bake this recipe in a normal 23-cm chiffon cake tin. 
  • Storage: The cupcakes stored well for a day or two (beyond that I've no idea because they were gone) but I'd presume that they should keep well in the fridge for at least a week. 
  • Would I make this again?: Definitely - it is a rather standard chiffon cake recipe which I turn to once in a while anyway :]
  • Note: I would advise using slightly higher cupcake liners to enable the cake to rise (it looks visually more appealing too). However, normal liners are fine too!

In pictures: 


PS: That crusty golden brown part is actually my favorite part of the cake. I ate a few of those tops and left the bottoms for my family...which led my mom to exclaim, "Which rat bit the cupcakes?" --> Of course she knew I ate them - I've this weird habit where I like to eat crusts - I like the last slice of the bread because it's the crust, same for the ends of the spring roll, etc... you get my drift. 


Oops the white balance is a little off here :/ 
As you can see, the inside of the cupcake still remains soft and fluffy, with a nice golden brown crusty exterior :] Since this is a chiffon cake in a cup, I'll be submitting this to Min for Aspiring Bakers #13: Enjoy Cupcakes! (November 2011)
Related Posts Plugin for WordPress, Blogger...