My blog has moved!

You should be automatically redirected in 6 seconds. If not, visit
http://www.unpastiche.com
and update your bookmarks.

Showing posts with label Local delights. Show all posts

Tuesday, May 1, 2012

Green Ombre Pandan Chiffon Layered Cake

I have been in a blogging rut of sorts this past week. No oomph to post anything even though I have got a couple of recipes that I've tried later that I should blog about. The other reason is work I guess. I’ve been going home at about 10pm everyday, which means I’ve only got energy left to bathe and sleep when I get home. Even exercise plans have been put on hold because I can’t bring myself to wake up at 6am for my run. And plans to run near the office have not materialize because I much rather complete my work and get home than run and work later. Like today, I slept in late till 8am (because of my darn body clock) and finally am going out for lunch with the girls later. But after that, it's back to work - yes, even though it is Labour Day :/ 

Anyway, I really wanted to support Aspiring Bakers this month in April (cos it's 1 May today!) because layered cakes are really a favorite of mine to make, and I had a couple of birthdays this month to bake cakes for, but sometimes the best laid plans of mice and men go awry. Plans to make a chocolate entremet were also put on hold, even though I've already got the joconde and feuilletine layer done. As Benjamin Franklin once said, diligence overcomes difficulties, sloth makes them.


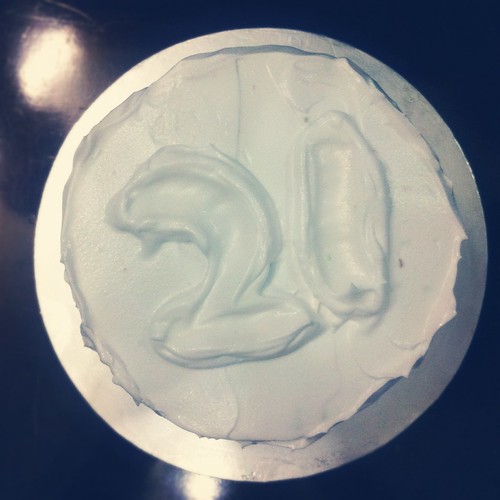
SO even though I've missed the deadline for Aspiring Bakers, I have decided to exercise some diligence by posting up some instagram photos (with various effects) of this layered chiffon cake that I made for my brother for his 21st birthday earlier this year. This was when I was in my ombre craze - cue the pink ombre layered cake I made for my mom and perhaps a ton other color gradients (brown, blue, yellow, etc) which I experimented with :]

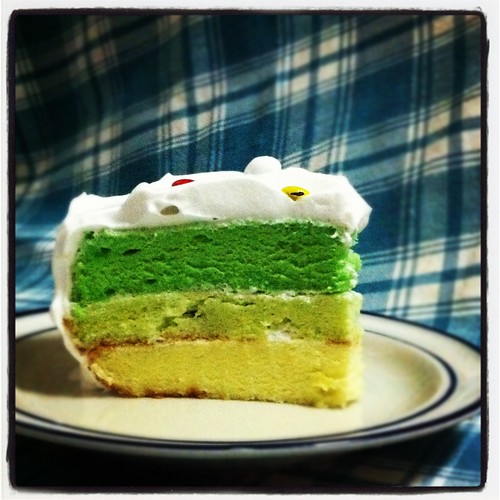
Since my brother doesn’t usually like to eat my cakes, I actually had no plans to make any for him, but I was back at home idling and itching to make a cake, so I decided to make him one anyway even if he didn't want it. I don't have much baking equipment back in my home in Malaysia, so I had to make do with what I had. So that meant that chocolate cakes were out since I didn't have any cocoa powder back home. What I had however, was lots of pandan because my mom has a pandan plant in the garden. So I decided on a green ombre cake, made using pandan leaves and a tad of green coloring for the darkest green layer. This was perfect, because I know my brother loves traditional flavors and since he's in the army, what better color to represent him that green? :]

I try to stick with as natural coloring as possible, so the bottom two layers are made completely with natural pandan extract pounded with a mortar and pestle whereas the final layer had a little help from a few drops of green coloring. I know the cream sandwiching the layers are very meagre, but that's really because my brother is not a fan of cream of any sorts, and would scrap off any cream he sees on a cake, so I decided to save him the trouble by putting minimal cream in between and very 'scrapable' whipped cream on the outside. 

My Mother's Pandan Chiffon Cake 
Makes 3 x 6 inch round cakes or a 23cm chiffon cake 

5 egg yolks
60g olive oil or melted butter
70g castor sugar
 ¼ tsp salt
110g pandan juice*
125g all-purpose flour
Green coloring, where required

6 egg whites
140g sugar
⅛ tsp cream of tartar

*Make pandan juice by pounding at least 20 pandan leaves with 100g of water or milk. I make mine with milk. You can blitz the leaves if you don't have a mortar and pestle. 

Note: I have not compared my mom's recipe with other recipes, but I'm pretty sure that this recipe is similar to many other pandan chiffon recipes out there. Nevertheless, I still stand by this being my mom's original recipe because the amounts are derived from my mom's twenty years of experimentation in the kitchen. Also, the method below outlines the traditional method of making the pandan chiffon cake. How I actually made the layered cake will be outlined in my jots below. 

Method:  
  1. Preheat the oven to 170°C. 
  2. Place the egg whites, sugar and cream of tartar into a mixing bowl and beat with an electric mixer until stiff peaks form. This should take about 5 minutes or more depending on the power of your mixer. You should be able to overturn your bowl without anything falling out of it. 
  3. In another large mixing bowl, mix the egg yolks with oil, salt and sugar. Do not add the sugar directly onto the yolks because it will turn lumpy. Mix the yolks with oil first before adding the salt and sugar. Then, add in the pandan juice and all-purpose flour. Mix well until you have a smooth paste.
  4. Spoon a tiny portion of the egg white mixture (about ⅛ or 2 spatulas worth of egg white) and mix it into the egg yolk mixture to loosen the mixture. Then, lightly fold in ⅓ of the egg white into the yolk mixture. Continue folding in the remaining egg whites, making sure that it is well combined and you get a homogeneous pale green batter.
  5. Pour the batter into 3 6-inch round tins (ungreased and unlined) or a 23cm chiffon tin. Give the tin a few raps against the kitchen counter to ensure that there is no trapped air. 
  6. For the 6-inch rounds, bake for about 25 minutes. For the 23cm chiffon, bake for about 35-40 minutes. The top of the cake should be a light brown and an inserted skewer should come out clean. 
  7. After removing the tins from the oven, invert the tins immediately over a cooling rack. Allow the cake to cool for at least 20 minutes before unmoulding and serving. 


Janine's jots:  
  • How to make a layered ombre cake: If you are lazy like me and don't wish to repeat the same processes above three times just to get three different colors, you can opt for the lazy method by making the above recipe and dividing it into three batters. First, you have to make a 'concentrated pandan juice'. I did this by pounding the pandan leaves with 50g of water, which gave me a very dark green liquid. I then diluted this with varying amounts of milk to get three different color gradients. What I did then was to combine the egg yolk mixture with all the ingredients except the pandan juice, then dividing the portions equally into three bowls before mixing in the pandan juice. For the darkest mixture, I added in a few drops of green coloring to get the dark green color. You cannot get such a color with just natural pandan extract, trust me. As for the egg whites, I was lazy too, so I measured the weight of the bowl before and after mixing the whites and then apportioned the stiff egg whites between three bowls and folded them in gently. Bake as per above. As for the whipped cream in between the layers on the outside, you can use a stabilized whipped cream recipe or you can opt for the lazy method (like I did here) and whip 200g of cream together with 30g of icing sugar. Whip until you get almost stiff peaks and you're done. 
  • Taste: I'm not quite a fan of pandan chiffon - I tend to prefer orange chiffons, but I could tell that my brother and my family enjoyed the cake a lot and I thought the pandan flavor was not too overwhelming. Just perfect :]
  • Texture: Because I used round tins instead of the standard chiffon tin, the chiffon cake was slightly more compact than usual, mainly because the cake requires metal in the centre to assist it in rising. Nevertheless, the chiffon cake was still delicious. 
  • Serving size: This makes a 3 layered 6-inch cake, which is just enough for a family of five to have about 1-2 servings each.
  • Modifications: None. If you want a more traditional taste, you can opt for coconut milk instead of normal fresh milk. Or you could use kaya to sandwich the layers.  
  • Storage: The cake was consumed right after I constructed it, but usually chiffon cakes without any cream can last a couple of days at room temperature.  
  • Would I make this again?: Definitely! This pandan chiffon cake is one of my mom's hand-me-down recipes to me, and is definitely something I treasure because no further tweaking to it is needed :]
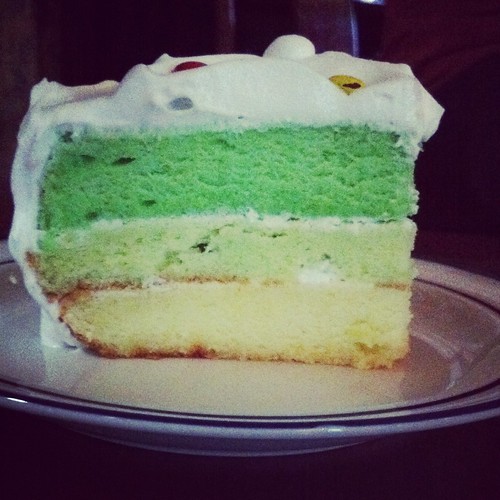
I know the picture quality is rather crappy but in my defence, these are iPhone pictures captured in low light and were extremely hastily taken. I'll come back with nicer pictures of other cakes next time! If I can find the time to...

Tuesday, February 7, 2012

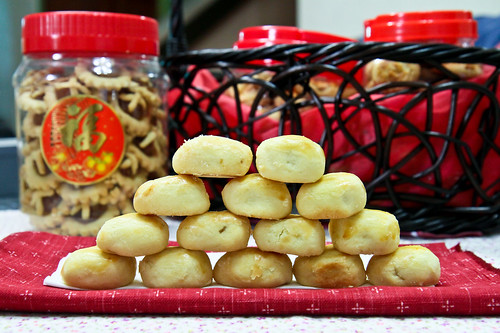
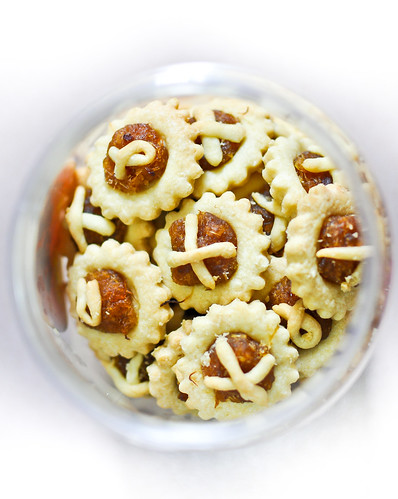
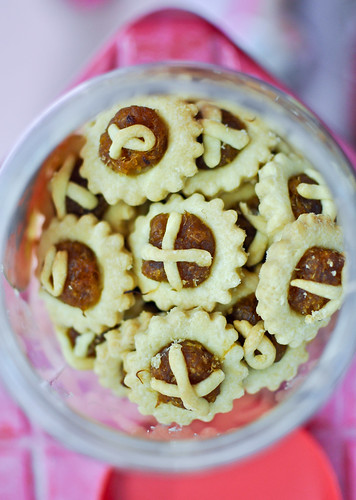
A Review on Pineapple Tarts - attempting 6 different recipes and many batches

I had wanted to post this yesterday, on Chap Goh Meh, or the 15th day of Chinese New Year to round up the last of my CNY themed posts, but work came up and I couldn’t finish the post in time.

So here it is, one day after the last day of CNY, which is rather apt as well since this is my concluding and round-up post for all the festive baking I’ve been doing. I know many people do their cookie baking in December, because Europeans and Westerners in general tend to associate cookies with Christmas. For myself however, the cookie mania starts the month before Chinese New Year, whenever that is. This year, I’ve actually baked about 20 varieties of cookies, playing around with different recipes. Eventually I think I went back to my kampong bringing 16 types of cookies, most of which had good reviews from my relatives. I still have loads more cookies I want to attempt, but I’m shelving them for next year, and who knows, I might come up with even more ideas the next time.

Some of the cookies packed in jars ready to be brought back to my grandma's

So anyway, I started making pineapple tarts about one month ago, slightly after Christmas. This year, I had a goal – to find the best pineapple tart cookie by trying as many recipes as I could and deciding upon the best. I’ve to admit that I’ve failed in this endeavour, because there were pros and cons to each recipe, but I’m glad I tried that many recipes, because it helped me distill what I liked and didn’t like for each recipe. This I believe puts me in better stead of pineapple-tart making next year :]

These are the sum total of recipes that I tried, which I've divided into two categories:

Recipes with 'melt in the mouth' texture, suitable for enclosed tarts:
  1. Youfei's recipe
  2. Agnes Chang's recipe (similar to Lai Kuan's and SSB's
  3. Little Teochew's recipe
Recipes with a more solid sturdy texture, suitable for open-faced tarts:
  1. My mom's friend Karen's recipe
  2. My grandaunt Rita's recipe
Along with these recipes that I've tried, I had also bookmarked a couple of other recipes, but I wasn't able to try them because well, I didn't have that much pineapple paste for that many tarts. Here's a short list of recipes that I'll probably try next year:
  • Anncoo (uses rub-in method)
  • Wendy (uses cream and cream cheese)
  • Sonia (uses condensed milk)
  • Tracie (uses rub-in method as well)
  • Ah Tze (uses only ghee)
  • Peng/HHB (uses creaming method)
  • ZY (uses rub in method)


I'll just start by saying that although I did make and try 6 different recipes, I don't believe I've found 'the one' yet, because there are things that I both liked and didn't like with each recipe, but I think with some tweaking any of these recipes could easily be it. There are basically two methods of making pineapple tarts, the creaming method and the rub-in method. I'll start by writing in detail how each of these methods work, because besides the difference in ingredients, everything else will be identical.

Creaming method:
  1. Sieve dry ingredients (which may include flour, corn flour, salt, baking powder, milk powder, custard powder) together. Set aside.
  2. Beat butter and cream together with sugar until lightened and fluffy. Add in vanilla extract.
  3. Add in the egg yolks and mix until well combined.
  4. Slowly beat in the flour mixture until just combined. Once the flour comes together, stop mixing. Shape the dough into a disc shape and leave it to chill in the fridge for at least 1 hour, or until slightly firm.
  5. In the meantime, divide the pineapple paste into equal sizes, rolling them into balls.When ready to make the tarts, remove the dough from the fridge.
  6. For enclosed tarts, weigh and roll the dough into equal sized balls. Flatten the balls into a round disc and place the ball of pineapple paste in the centre. Pinch the seams of the dough disc together and give the ball a quick roll. You can choose to shape the ball into a spherical ball, or make it slightly elongated and rectangular, or slightly oval to mimic pineapples.
  7. For open-faced tarts, make sure that the dough is quite firm after at least an hour of chilling. Roll out the dough on a clean work surface (you don't need to flour the surface if the dough is buttery and firm enough) until you get the desired thickness. I tend to roll it to about 1 cm thick. Using your desired cutter, cut shapes into the dough. Then, proceed to place your ball of pineapple paste in the centre of the shape. You can also choose to put designs on the tarts as I've done.
  8. Once you're done, give the tarts an egg wash and bake in a preheated oven at 170°C for 18-20 minutes, or until golden brown. Make sure to turn the tray 180° at the 10-12 minute mark, to make sure there is even baking/browning all around.
Rubbing-in method:
  1. Sieve dry ingredients (which may include flour, corn flour, salt, baking powder, milk powder, custard powder) and sugar together. Set aside.
  2. Dice the butter into 3-cm large cubes and place them in the fridge until ready to use. Make sure the butter is really cold. Using a pastry cutter or a fork or your fingertips, rub the butter cubes into the dry ingredients until you get flattened pieces of butter coated with flour and the mixture resembles bread crumbs.
  3. In another bowl, beat together the egg yolks, vanilla and cold water (if any). Add it into the butter mixture and using your fingertips, gently combine the wet and dry ingredients, pressing gently until a dough is formed. Do not knead the dough excessively because you do not want the butter to melt! Wrap the dough in plastic wrap and chill in the fridge for at least 30 minutes to 2 hours.
  4. In the meantime, divide the pineapple paste into equal sizes, rolling them into balls.When ready to make the tarts, remove the dough from the fridge.
  5. For enclosed tarts, weigh and roll the dough into equal sized balls. Flatten the balls into a round disc and place the ball of pineapple paste in the centre. Pinch the seams of the dough disc together and give the ball a quick roll. You can choose to shape the ball into a spherical ball, or make it slightly elongated and rectangular, or slightly oval to mimic pineapples.
  6. For open-faced tarts, make sure that the dough is quite firm after at least an hour of chilling. Roll out the dough on a clean work surface (you don't need to flour the surface if the dough is buttery and firm enough) until you get the desired thickness. I tend to roll it to about 1cm thick. Using your desired cutter, cut shapes into the dough. Then, proceed to place your ball of pineapple paste in the centre of the shape. You can also choose to put designs on the tarts as I've done.
  7. Once you're done, give the tarts an egg wash and bake in a preheated oven at 170 degrees for 18-20 minutes, or until golden brown.

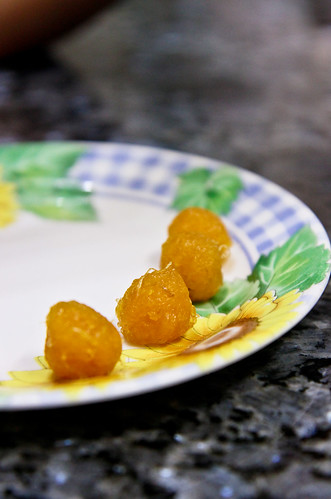
Very importantly, I forgot to add that I use my mom's recipe for the pineapple paste and she does it the old-fashioned way - grating the pineapples by hand (no blender please!) so that you can the fibrous strands that you can see in the enclosed tart photo below. Here's the link to my mom's recipe. I'm really can find no fault with the recipe, so I haven't really bothered with trying other recipes floating about the internet. And don't get put off by the fact that pineapple jam takes long to make - it is in fact exactly like any other fruit jams and it really doesn't take a whole day. If you cut and grate the pineapples quickly enough, then cook the jam right after, it'll only take you say 4 hours at the most? It's best if you have a side-kick like me and my mom, so one person does the cutting and grating and the other does the constant stirring on the stove :]


Preliminary notes: There were things I both liked and disliked about each recipe, and I'll be briefly jotting them down below.

Recipes with 'melt in the mouth' texture, suitable for enclosed tarts:

Youfei's recipe
(rub-in method)

180g butter
¼ tsp salt
250g all-purpose flour
20g corn flour
10g milk powder
50g icing sugar, sifted

1 yolk
¼ tsp vanilla

Comments: I actually made two batches of this recipe, because I liked the melt-in-the-mouth texture that this provided. However, I found it too sweet, so I decreased the icing sugar to just 20g for the second batch and upped the vanilla to half a teaspoon. Definitely a recipe that I'll turn to again next year.

Agnes Chang's recipe
(uses creaming method)

220g unsalted butter
50g castor sugar (or icing)

½ tsp vanilla
2 yolks

360g all-purpose flour
10g corn flour
8g milk powder
¼ tsp salt

Comments: I thought the sugar amounts here was just right, although I would increase the vanilla to 1 teaspoon because I personally don't like the taste of yolks. I would also increase the milk powder slightly more the next time around. This recipe got quite a lot of raves from my relatives for its tenderness and melty texture, although I'm personally not a fan because I thought it stuck to the roof of my mouth too much. 

 Little Teochew's recipe
(rub-in method)
400g all-purpose flour
50g corn flour
¼ tsp salt
280g cold, unsalted butter
3 egg yolks, beaten
½ tsp vanilla
3 tbsp cold water
6 tbsp icing sugar

Comments: I found the dough too soft because too much water was added. Next time round, I'll decrease this to 1 tablespoon instead. Taste-wise, I didn't think there was much of a difference between this recipe and the previous one above.  

Recipes with a more solid sturdy texture, suitable for open-faced tarts:

Lily's Open-face Pineapple Tart Recipe
(uses rub-in method, or use a food processor)

280g flour
1tsp baking powder
¼ tsp salt
1 tablespoon sugar

110g butter
56g margarine

1 yolk
½ tsp vanilla

2-4 tablespoons chilled water

Comments: This produced one of the sturdiest tarts ever, but the tarts were way too bland. I thought a little bit more sugar and some milk powder would help. Definitely like it because it handles very well for open-faced tarts.

Karen's Pineapple Tart Recipe
(uses creaming method)

140g margarine
120g butter
40g icing sugar

2 eggs

370g all-purpose flour
40g corn flour
¼ tsp salt

Comments: Since this is my mom's friend's recipe, I'm quite biased towards it because I thought it was a pretty good recipe to begin with. I did more tweaking for it the second time around, using 220g butter and just 40g of margarine to give it that crispiness. I also substituted some corn flour with milk powder to enhance the taste. Another recipe that I'll try again next year for open-faced tarts.


Rita's Nyonya Pineapple Tart Recipe
(uses rub-in method)

400g all-purpose flour
250g salted butter
1 egg
40g sugar
(optional: ½ tsp vanilla)

Comments: This is probably a recipe which is more than 50 years old. My grandaunt has been using this recipe since a long long time ago, and you can probably tell that it is an old recipe because it doesn't contain much frills. The original recipe has just 4 ingredients - butter, flour, egg and sugar. And this was the recipe that my mom used for a decade or more, before I stepped in with my experiments ;p This is definitely a versatile recipe for both open-faced and enclosed tarts, and I believe most other nyonya or nastar rolls will use similar recipes. In fact, the original recipe makes use of margarine, which gives it a very crisp texture. In my attempts using this recipe, I used unsalted butter with a half teaspoon of salt, and a teaspoon of vanilla, and substituting 20g of flour with milk powder. Delicious!


Janine's jots: 
  • Serving size: Most of these recipes make use of a block of butter or thereabouts, and with this amount, you can probably make 80-100 pineapple tarts, depending on whether it is the enclosed or open types, and how large your tarts are.
  • Storage: Separately, you can store the pineapple paste in an air-tight container in the fridge or freezer for up to a year. The paste does not freeze in the freezer because of the sugar content and yes, I've tried using a year-old paste which my mom made the previous year. You cannot tell the difference after it's baked. For the dough, you can make it up to a week in advance, although I would advise making it a maximum of three days before lest the 'fridge' smell seeps into the dough. After you've baked the tarts, wait for them to cool completely and store them in air-tight containers. They will laste for about a month before they lose their crispness or tenderness.
  • Would I make this again?: Definitely! And I'm going to go about it more scientifically next year so that I can definitively come up with "the best" pineapple tart recipe!
  • Other comments:
  • You will realize that actually, the proportions are largely similar. In fact, I did a brief calculation of the proportions of butter to flour, which I think is the main factor affecting taste and texture in the tarts, and the recipes range from a 0.58-0.65 ratio of butter/fat to flour. Of course, within these ratios itself, you could probably play around with using shortening, margarine, ghee or butter or even cream cheese, all of which will impact upon the flakiness and 'shortness' and tenderness of the tart. I haven't tried all combinations, but I personally like using all butter for the enclosed version, and using some margarine or shortening when I need the open-faced tarts to be more crispy.
  • The other difference of course is choosing to use corn flour to substitute for some of the all-purpose flour. I think there is a difference in how sturdy the tart turns out, but I also believe that using cake flour, or triple-sifted all-purpose flour might also do the trick. Custard powder is actually yellow-colored cornstarch/flour, so please don't be fooled and go all the way to buy custard powder. You can actually use the same amount of cornstarch together with 1-2 drops of yellow coloring to get the same effect.
  • Another thing about the dry ingredients or flour proportions is that I like the addition of milk powder because I find that it gives the tart a nice milky flavour. You can substitute about 5g of milk powder to every 100g of flour required in the recipe, or you can experiment and find which quantities you like best. Alternatively, if the recipe requires the addition of cold water, you can substitute that with cold milk. I've tried that in some of the recipes above and it works the same, although the milky flavor is not as intense because so little milk is added.
  • If you notice, there are varying amounts of egg being used - some use the whole egg, while most tend to use just the yolks. From what I know from food science, the yolk provides the moistness and tenderness, whereas the white provides the structure; so if you use the whole egg, it is likely that you'll get a sturdier crust whereas if you use just the yolk, you'll get a more tender crust.
  • For sugar, you can use icing sugar if you want a meltier texture, but otherwise, castor sugar works fine as well. I don't like my tart crust to be too sweet, because the pineapple paste is already sweet, so I tend to use about 30g of sugar to 250g of butter for the recipes.
  • I have no idea how the creaming or rub-in method affects the tart, because I didn't actually attempt making a single recipe using varying methods. I can probably generalize it by saying that it is likely that rub-in method gives you a melt-in-your-mouth, tender texture, but then again, the creaming method can also provide the same results (see Agnes Chang's recipe above). So the method probably does affect the end-product to some extent, although I'm not sure what. Anyone has any idea?

Tuesday, January 31, 2012

On the 9th day of Chinese New Year, I had ... Cashewnut Cookies
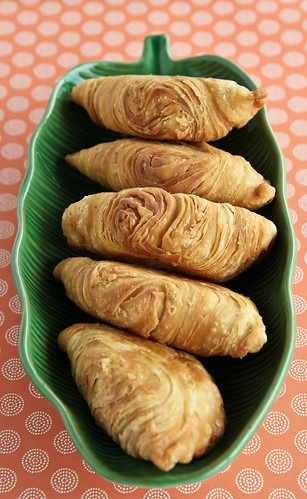
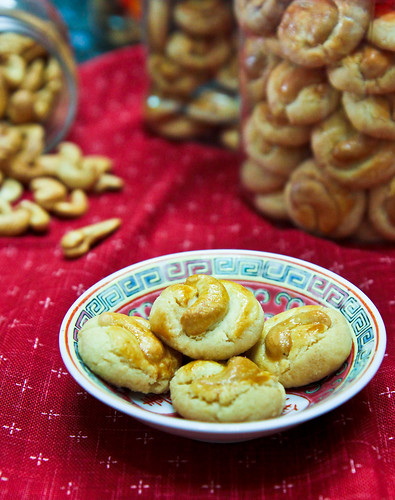
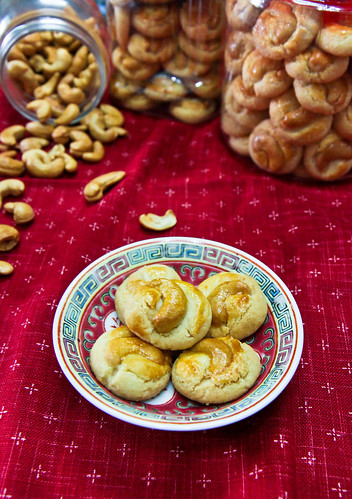
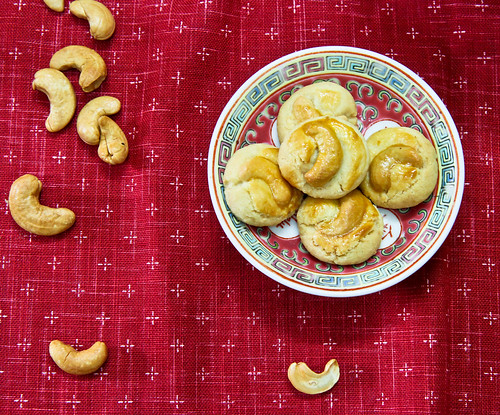
If you check in every Singaporean or Malaysian mother’s recipe book for Chinese New Year cookies, I bet you'll find a recipe for cashew nut cookies. These cookies are ubiquitous during Chinese New Year and I’ve never had one go past without seeing and eating these cookies. It is also mainly during this period that my mom fries up kilograms of cashew nut cookies and packs them into glass jars for relatives to snack on. Why so? Well, knowing how superstitious Chinese people are, we have associated symbolisms and meanings even to food we eat. I mean, the entire process of lo hei (捞起) yu sheng or yu sang (鱼生) is filled with symbolism - check out this website for the 'prosperous words' to say when you're in the process of making the prosperity salad and tossing it.


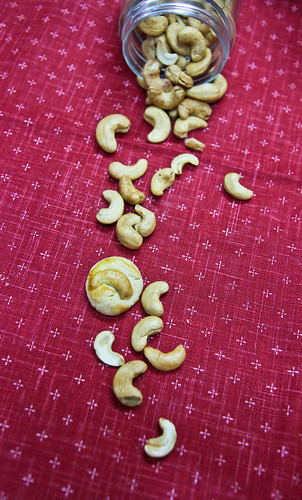
As for cashew nuts (腰果), we Chinese believe that the nuts resemble gold ingots from days long gone, and so we eat them in a bid to get wealthy. Ironic much? In any case, you can choose to roast the cashews by placing them on a tray in a preheated oven, but from experience, these are not as nice as compared to fried ones. All you need to do is to use some oil (olive oil is good) and continually toss and 'fry' the cashews. They turn a lovely golden brown (as you can see above), and taste better. And because you're making this snack yourself, you can choose NOT to salt them. And they are cheaper if you buy them raw and fry/roast them yourself rather than buy them packaged and salted, ew. The healthier option of course is to roast them in the oven, but I justify it by eating less of these nuts. Another good thing about these cashews is that they have a lower fat content than most other nuts and more than three-quarters of their fat is unsaturated fatty acids. They contain high quantities of oleic acid, which is the same fat which promotes good heart health. But as with any foods, eat in moderation! About 20 cashews (35g) count as one serving, and as with most nuts, do not eat more than one serving a day. It's best to eat less than 3 servings per week. Most importantly, cashew nuts are rich in minerals, such as zinc (important for growth and development) and copper (important for your joints and antioxidant defenses) among others. I learnt this recently, and I've been encouraging my mom to eat more cashews because she suffers from low blood pressure and has a weak constitution, so iron and minerals in any natural form is most welcome!


So as I was saying previously, oldies are goodies, and these are my mom's super good cashew nut cookies recipe. I'm not sure where the original was from, but I'm pretty sure both the ingredients and instructions have been modified enough over the decades for my mom to call it her own. I find it rather astonishing (and amusing) at how similar my mom and I are in terms of recipe jotting – my mom crams a few recipes on a page, which I do now without knowing she did the same, and she writes comments such as “very good” on the side of recipes she tries, which I do as well. 

If you recall, I also baked this last year, but I used the original recipe and didn't post the recipe up. So here it is: 

120g butter
120g shortening
125g sugar
1 tsp vanilla
1 tsp salt
1 cup ground cashew nuts
155g self-raising flour
125g plain flour
Some cashewnuts for decoration


This year however, I had to do some modifications. As usual, I only decided to bake this very last minute (ie, on the eve of New Year’s eve), so I didn’t have all the ingredients I needed. I didn't have the shortening and self-raising flour that was required, so I replaced it with margarine and normal flour with baking powder instead. So here is 2012's modified recipe:

Cashewnut Cookies
At least 100 cookies

120g unsalted butter
120g margarine
125g castor sugar
1 tsp vanilla extract
1 tsp salt
120g ground cashew nuts
280g plain flour
1½ tsp baking powder

Some cashewnuts for decoration
1 egg yolk for egg wash 

Method: 
  1. Preheat the oven to 160°C. 
  2. Choosing the smaller sized cashew nuts, split them into half along their seams and place them face up on a baking tray. Place the tray in the preheated oven for about 10-15 minutes, making sure that the cashews DO NOT turn too golden brown. You just want them less raw so that they can bake in time with the cookies later. 
  3. Weigh the discarded or weird shaped cashew nuts (until you get 120g) and place them in a food processor. Grind them up and set it aside. 
  4. Sift the plain flour together with baking powder and set it aside. 
  5. Let the butter and margarine both sit at room temperature until softened. Cream butter and margarine together, then add sugar, salt and vanilla extract. Cream until pale yellow and fluffy. 
  6. Add in the ground cashew nuts and give the mixture a quick stir. Next, add in the sifted flour and stir the mixture until all traces of flour has disappeared. 
  7. Next, proceed to measure out small balls (depending on how large you want your cookies to be - mine were about 7-9g each). Place them on a greased baking tray and leaving about a thumb's space between each ball, because you will have to slightly flatten them and the cookies do spread a bit. After flattening your cookie balls, press in your pre-roasted cashews. Use an egg wash over each cookie if you want them to have a golden brown hue (much like gold ingots). 
  8. Bake at 160°C (fan-forced) or 175°C (conventional) for about 18-20 minutes, or until golden brown. Remove the cookies when they're done, and allow to them to cool before storing them in airtight containers. Do resist the temptation of eating them immediately, because the cookies taste better the next day. 


Janine's jots: 
  • Note: This recipe can be easily modified by substituting any other ground nuts, and I'm sure it'll taste equally good. In fact, I think it will be a really good base for a gluten-free cookie (though not nut-free).
  • Taste: I love cashew nuts, so these cookies taste perfect for me (and all my relatives). They are also not as sweet as those you get from shops, and hence are the perfect sweetness. I didn't have to experiment with the sugar amounts because this sugar amount has been tried and tested, and derived after many years of baking them (by my mom). 
  • Texture: These cookies are an absolute delight - crispy with an extra crunch from the cashew nuts. Everyone who ate these cookies loved them. I believe the crispiness is derived from a mixture of margarine and butter, because I can't seem to get this same texture with an all-butter recipe. But I might be wrong. More experiments next year ;p
  • Serving size: I can't recall how many cookies I made, but I could fill 3 large containers with cookies, so perhaps 100 cookies at least? 
  • Modifications: NONE. They're perfected well enough already, in my book. 
  • Storage: These cookies store really well in an airtight container. It has been almost two weeks since I last made them and they still are as crispy and yummy. 
  • Would I make this again?: Definitely. My aunt made me promise. And among all the cookies I made for CNY, this was one of the more well-received ones, because it was traditional, and because it was yummy. Also, I loved making it because it was so simple - I got the dough made and the cookies baked in less than three hours. And this is taking into consideration that my oven can only bake one small tray at a time!


Anyway, today's the ninth day of Chinese New Year, and it's the day that Hokkiens pray to the Jade Emperor (or 天公). There are varying stories of why this is so grandly celebrated by the Hokkiens, but the common thread is that the Hokkien people were forced to hide in sugarcane plantations by their enemies during the Chinese New Year, and when it was finally safe, it was the 9th day of Chinese New Year already. So these Hokkiens went back to their homes and celebrated this 9th day as if it were the 1st day, hence the grand celebrations and the act of giving thanks. Not sure how true this story is, but at least it explains the grand feasts that some have on this day (roast pig, et al).

I don't exactly celebrate Chinese New Year besides the first and second day, because that's all the holiday I get from the Singapore government, so these cashew nut cookies reminiscent of gold ingots are all that I'll be offering to 天公 for now :]

And yes, I took these photos the same time as I did the gluten-free orange poppy seed cookies the previous post, and was still experimenting with indoor flash. I'm still not too pleased with the photos but I was in a rush as usual, so I can only grumble and learn from my mistakes now, after post-processing. 

Wednesday, January 11, 2012

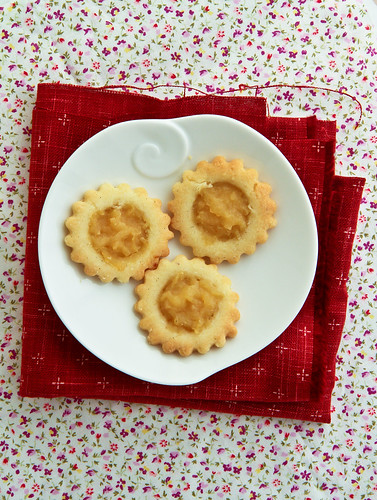
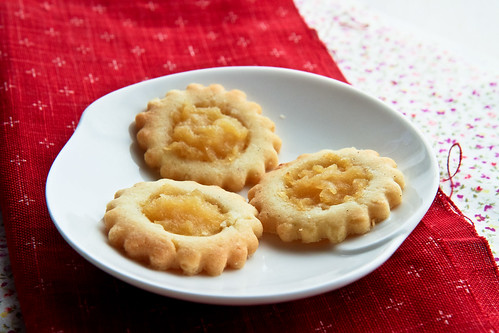
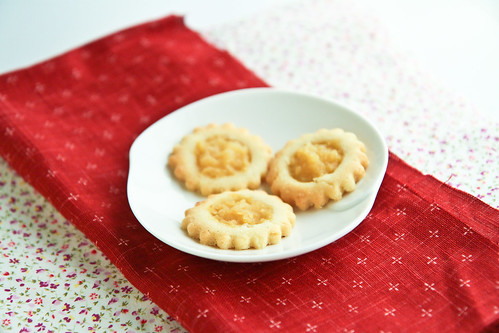
Healthy CNY cookies #1: Pseudo-Pineapple Tarts for Diabetics - Apple Tarts

As the Chinese New Year (CNY) draws near (it's 23 and 24 January this year for those still in the dark - which means yet another long weekend :D) and my CNY cookie making frenzy heats up, I’ve been thinking about not only the different types of cookies I'm able to experiment with, but also cookies fit for everyone in my extended family to eat. This means that cookies fit for diabetics, celiacs, as well as persons with high or low blood pressure. This also means that I have to experiment with cookie recipes by making some sugar free, some gluten free, and some full of the good stuff (fibre, nutrients, etc), especially for my elders who are getting on in their years ;p

I've decided to start simply - by adapting tried and tested recipes to fit these new requirements. This will be the first of a few 'healthy' CNY cookies that you too can choose to make if your family suffers from the same afflictions as mine.

I've started things off with the most important ‘cookie’ for CNY (in my opinion) – the pineapple tart. We all know that pineapple tarts contain an inordinate amount of sugar – just the pineapple paste itself will contain enough sugar to kill a diabetic (figuratively, not literally I hope). I’m not sure how true this is, but my mom always warned me against eating too many pineapple tarts because according to her, 3 tarts has enough calories for a meal! So I’ve always restricted myself to not more than 3 at a sitting ;p


Now, the use of refined sugar in making the pineapple paste is definitely bad for a diabetic, but I wasn't too daring to make the paste with sugar substitutes (and also because it would be expensive to do so). So instead, I I decided to substitute pineapple paste with a fruit already rich in fruit sugars – apples. Apple paste, or apple jam or more properly called applesauce is definitely way easier to make than pineapple paste. My applesauce contains no additives and no extra sugar. Any sweetness is derived from the natural sweetness of the apple you use. As such, I highly recommend the use of Royal Gala or Fuji Apples which are ripe and sweet, as well as one Granny Smith, to mimic the tartness of the pineapple.

For the crust, to make it diabetic friendly, you can opt for a sugar-substitute such as Equal or Stevia or xylitol, and mix it with some whole grain flours instead of the refined white flours that we usually use. Why whole grain flours? Well, highly refined products like enriched white flours are not good for diabetics because first, it lacks natural nutrients and it gets translated into the blood sugar very rapidly, causing a spike in blood sugar levels. This is not good because diabetics do not have enough insulin to regulate their blood sugar. So whole grains, are definitely a good choice to go with that sugar-free option when you wish to indulge but don’t want to run the risk of elevating your blood sugar level overly.


Apple Tarts
Makes about 60 pieces, depending on how large or small they are and what decorations you put on top

For the crust:
Adapted from Pierre Herme's Pâte Sucrée recipe

125g   all-purpose flour
15g     almond flour/meal
45g     icing sugar (or equal amounts of powdered sugar substitute)
75g     unsalted butter, room temperature
¼ tsp   salt
½ egg  (about 25-30g)
Seeds from an inch of vanilla pod

Method:
  1. Sift the flour and icing sugar separately.
  2. In a mixing bowl, cream the butter until it softens.
  3. Then, add the following: icing sugar, ground almonds, salt, vanilla seeds and beaten egg. Lastly, add in the flour. Use your mixer on the lowest speed until the pastry comes together in a ball. As soon as it does, stop and flatten it into a disc. You can also choose to use a food processor. Clingwrap it and chill for at least 3 hours before use.

For the Apple Jam:
See my applesauce recipe here

To assemble:

  1. Make the crust first, and place it in the refrigerator to chill for at least 1-3 hours before using. In the meantime, prepare the apple jam. Basically, use any applesauce recipe and be sure to cook down the applesauce until it is relatively drier than usual.
  2. After it cools, remove the crust from the refrigerator and proceed to roll it out, to about 3-5mm thick, depending on how thick you like your tart.
  3. Portion the jam onto the tarts before decorating with more dough (optional). You can place the tarts relatively close to one another on the cookie tray because they do not spread/expand that much. Before baking, you can choose to use a egg yolk glaze on the tarts. I did not do this as I was lazy.
  4. Bake in a preheated oven at 170°C for about 20-25 minutes or until the tart is slightly golden brown. Note that if you don't use an egg yolk glaze, your tarts will look like mine below - slightly on the pale side.


Janine's jots: 
  • Taste: If you like, you can also add some cinnamon to the applesauce, to bring out the apple flavour more.
  • Texture: I would definitely cook down the applesauce a little more since I used my normal method and it was still quite liquid. I thought the applesauce would dry out in the oven when baked with the crust, but it did not and was rather wet still. This meant that the tarts had to be consumed on the day itself, otherwise the tarts turned a tad too soggy.
  • Serving size: The recipe is a quartered version of the original, and will definitely make about 1-2 trays worth of tarts, but the exact number is hard to determine because your tarts may be of different sizes.
  • Modifications: If you want a more healthy option, you can definitely up the almond flour, and substitute the all-purpose flour with a bit of rice or millet flour. This also means you can mix/process the dough longer since there's no gluten in these flours. Millet also adds a wonderful sweet taste (and browness) to the tarts as well.
  • Storage: My tarts only kept well for 3 days, because it started getting soft on the third day and that's not the texture you want for a pseudo-pineapple tart.
  • Would I make this again?: I would definitely want to try this again, but making the enclosed version this time because I think the moist apple jam is more suited for a crumbly, melt in your mouth enclosed tart :]


Disclaimer: Please do note that I am not a nutritinoist or medical professional. All recommendations made above are based on what I've read on the internet and in books, so please do consult your doctor if you have any doubts.

I am merely stating that this might be a suitable alternative for diabetics craving for that ubiquitous pineapple tart during CNY. The tart might not be safe for diabetics to consume in large quantities, because it still does contain fruit sugars as well as refined flours and sugars. Please do consume at your own discretion, and always remember, everything in moderation!

PS: I know my tarts aren't very well-made (the filling is so horrible looking) and I have been quite stingy with the filling but this was merely an experiment which went well ;p

Monday, October 31, 2011

Malaysian Monday #8: Ang Koo Kueh (红龟粿)

The bad thing about blog surfing, at any time of the day, is the food porn that greets you each time you visit a blog. I'm an extremely visual person, and am definitely susceptible to good food photos, so I try to blog surf after meals, so that I don't get too tempted. Alas, I still do and I sure do salivate when I see my fellow bloggers' posts - and when I mean I salivate, I literally DO salivate - the salivary glands under my tongue get activated and saliva pools in the lower cavern of my mouth - no joke!

Now, I've been craving for ang koo kueh ever since I saw Lena's post with purple sweet potatoes, but it became progressively worse because I was met with a deluge of ang koo kueh posts, no thanks to this month's Aspiring Bakers #12 - Traditional Kueh. For some mouthwatering versions, check out Edith's yellow sweet potato version and Ah Tze's red ang koo kuehs using beetroot.

I told my mom about making some for ourselves, to which she told me to just go and buy some. And so I did. I bought them because I don't own any ang koo kueh moulds, and because I didn't have glutinous rice flour and was too lazy to steam my own sweet potato. BAD bad decision. In a bid to satisfy my craving, I bought 5 ang koo kuehs from 5 different sellers (with different fillings) at the pasar pagi (morning market) when I accompanied my mom to the wet market, and with the exception of one, all the others disappointed me to no end - they were too oily, not tasty enough, the filling was too grainy, the gripes just go on...


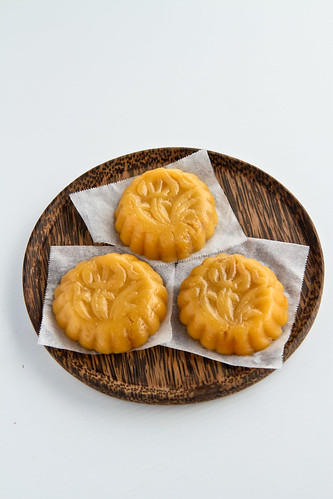
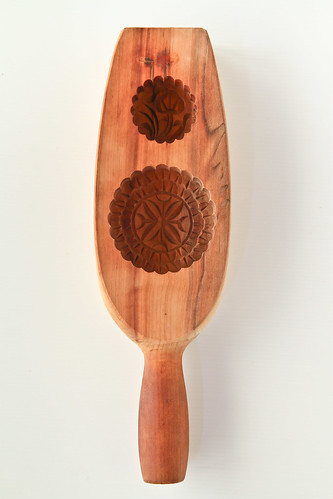
Then I saw Sharon's post on MacGyver ang koo kuehs and I thought, hey, if she can make it with her silicone muffin cups over in Sydney, shouldn't I in Singapore do better, especially since these ingredients are so easily available? So I got myself some sweet potato, glutinous rice flour and decided that I shall save money and use my moon cake mould. It's the same one I used to make my mini snow skin moon cakes. I didn't have enough chopped peanuts at home, and I was far too lazy to go out and get some, so I substituted part of it with peanut butter. Worked like a dream I'd say! 

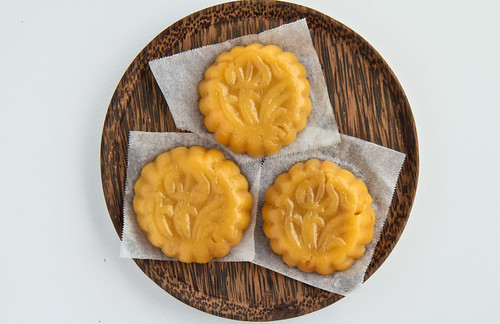
For those of you readers outside of Southeast Asia, this might look and sound a little foreign. Basically, kuih muih (plural for kuih or kueh) are traditional delicacies of Nyonya origins (Nyonya or Peranakan refers to the Straits Chinese in Singapore and Malaysia - the interracial marriages between the local indigenous people and the mainland Chinese - this marriage also brought about a marriage of chinese and malay and other local pastries, giving us the assortment of kuih muih we have today.) Ang Koo Kuehs (or Ang Koo Kuih) literal means 'red turtle cake' in hokkien, in my case, I guess I should probably name them Ung Ge Niu Kueh (Hokkien for yellow moon cake) since they're not red and not made using the special ang koo kueh mould that is usually used for making them. Anyway, ang koo kuehs traditionally are round or oval, and have soft sticky skin made of glutinous rice flour or rice flour or a combination of both - sometimes, mashed sweet potato (like what I've done here) is used too. Another feature of the ang koo kueh is its filling - traditional fillings include mung bean paste, sesame and peanut. This kueh is then steamed on a square piece of banana leaf. The most important feature must of course be its bright red color and tortoise shape/imprint on the kuih. Why tortoise and why red you might ask? Well, it's no secret that we Chinese are a very taboo bunch - so the color red is meant to welcome the good fortune and luck during an auspicious occasion; and because tortoises are known for the longevity, and we Chinese want to emulate that, so we print a tortoise on the red kuih to make it decoratively more pretty. 

Ang koo kuehs are definitely a popular item during ritual offerings and a baby's first month shower. Again, Chinese have this tradition of celebrating a baby's first month (or full moon, 满月) by giving out a set of goodies including dyed red eggs, ang koo kuehs, glutinous rice, and more recently, cakes. And just an interesting tidbit - ang koo kuehs were used to tell recipients of the baby's gender - if you got domed shaped ang koo kueh, the baby is a boy, and if you get flat ones, the baby is a girl. I'm not sure if this tradition still prevails but it's definitely something interesting to know :]

Cracked mooncake shaped ang koo kuehs! :]

Sweet Potato Ang Koo Kueh Recipe 
Adapted from Florence
Makes 10 moon cake sized kueh

For the skin
100g   sweet potatoes, steamed and mashed.
150g   glutinous rice flour
15g     oil
80g     water

For the peanut filling 
140g   roasted peanuts
50g     peanut butter
60g     granulated sugar
20g     water

10 pieces of baking paper or oiled banana leaves.

Method: 
  1. Steam the sweet potatoes until soft. In a bowl, mash the sweet potatoes with a fork or potato masher. Add in the glutinous rice flour, oil and water and mix well. Knead until you obtain a smooth dough. Cover with a damp cloth and leave aside to rest while you prepare the peanut filling.
  2. After roasting the peanuts, allow them to cool before putting them in the processor. Add the water and granulated sugar before processing it for a few seconds. Then, add in the peanut butter and process until you get your desired consistency. The filling should come together because of the peanut butter. 
  3. Brush the mould with some oil for ease of removal of the kueh from the mould. A good thing to do first is to take a portion of dough, roll it into a ball and press it into the mould. Add or subtract from the ball until the entire ball is smooth and flattened into the mould. Weigh that piece of dough - that should be the total weight of your kueh. Depending on how much filling you prefer, subtract from the weight accordingly. I used a 25g skin: 15g filling proportion, which is a little on the 'less filling side'. Ideally it should be a 2:1 skin to filling proportion. 
  4. Measure all the sweet potato doughs and roll them into balls. Do the same with the peanut filling. Take the measured portion of sweet potato dough and using your palm, flatten it into a round shape, making sure that the sides are thinner then the centre. Place a ball of peanut filling in the centre of the dough and pinch all the sides of the dough together. Then, roll it into a ball with both your palms. The seam should smoothen and almost disappear. 
  5. Then, press the ball into the mould firmly, with the seam side facing outwards, so that the smooth side will get the imprint of the mould. Then, tap the mould gently on all sides to remove it from the mould. Place the 'released' kuih on square pieces of oiled banana leaves (or baking paper). 
  6. After all the kuihs have been shaped, arrange them in the steamer and steam them in a wok over high heat for about 10 minutes. Remove from the wok and allow them to cool before consuming, about 15 minutes at least. 

In pictures:

Just prior to steaming - my ang koo kuehs have cracks in them, mainly cos I'm not too good at making them :p

They flatten out quite a bit after steaming, and become a more vibrant yellow. It appears oily but I didn't brush any extra oil on them.  

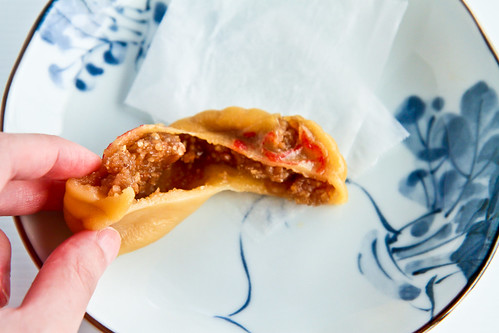
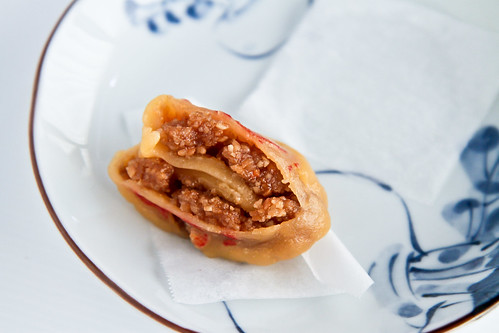
Check out how thin the skin can be! And look at that peanut filling!! :o)
YUM - I used some red coloring on this ang koo kueh to indicate that less peanuts was used heh.

I'll be submitting this post to SSB for this month's Aspiring Bakers #12 - Traditional Kueh as well as Muhibbah Malaysia Monday hosted by Shaz of Test With Skewer and Suresh of 3 Hungry Tummies :] 


Oh, and Happy Halloween, for those of you who 'celebrate' it ;p Guess you could try having this yellow/orange kuih on this day as well, in the spirit of all things orange and Halloween :]

Sunday, September 11, 2011

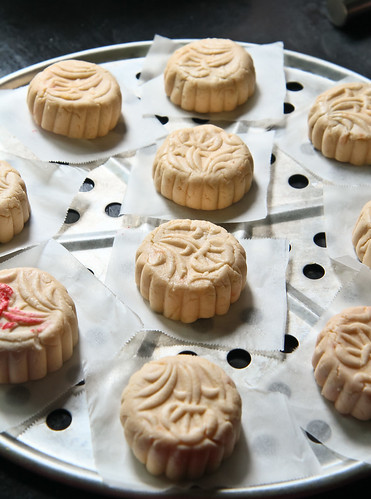
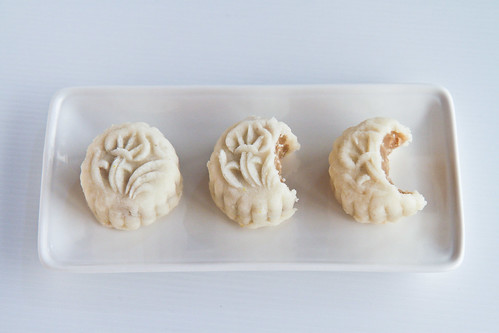
Mini Snow Skin Mooncakes with Melon Seeds and Lotus Paste (冰皮月饼)

I can't believe Mid-Autumn Festival is upon us already. In fact, the actual day will be tomorrow, 12 September 2011! Time really flies, because when Mid-Autumn Festival is here, it'll only be a while before Deepavali, my mom's & brother's birthday, and then Christmas! Okay, I might be getting a little ahead of myself but the point is that the days really seem to fly by when you look back on the weeks but the hours just move so so slowly when you're doing mundane stuff, like studying >.<

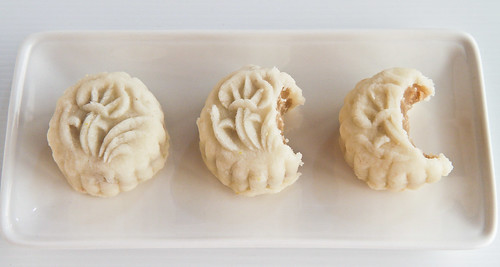
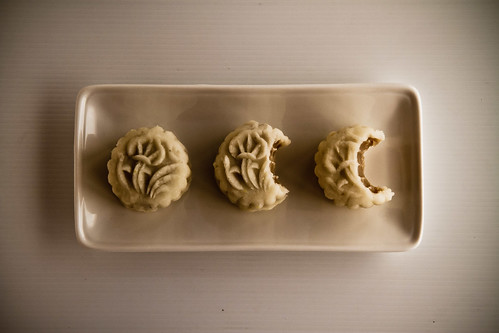
The full moon, gibbous moon and the fat crescent moon :]

Mid-Autumn Festival is also loosely known as Mooncake Festival, and boy do I have wonderful memories of it. I remember carrying lanterns around the neighborhood, and feeling upset when the wind blew and the flame of my candle would burn a hole in my lantern which rapidly grew causing the whole lantern to burst into flames. I also remember competing with my brothers to see who had the most long-lasting lantern. Nowadays, parents get those battery-operated lanterns for their kids, which is rather sad because I think battery operated lanterns are just not as fun. Anyway, because I came from a Chinese secondary school, Mooncake Festival was quite a big thing. Our school would hold a concert, and because we were all under 16 years old, I remember we had to get our parents' permission to stay in school after 6pm. Our school also invited our parents for the celebration, and at 6pm, the celebration would start. After the principal's opening speech, the Chinese Orchestra would play, then the Chinese dancers would dance a traditional dance, with rabbits and all. I remember some Chinese drama group performance as well. And the highlight of the night would definitely be the moon cake  eating. Our chool would ask each class to donate a few boxes of moon cakes, and these would be laid out on a long row of tables at the back of our quadrangle, all sliced and ready to be shared. At the same time, tea would be served, and together with  猜燈謎 games, literally lantern riddles in which prizes were awarded, the students would run off to play with lanterns and sparklers. It was probably the only time when we could roam about our school campus in the dark. Many a teenage secret was shared as friends strolled around in groups, carrying lanterns or sparklers. 


I also remember looking at the unbelievably round moon, which hung so low in the dark, star-studded sky that it looked almost fake. And we would find great joy in looking for the 'rabbit' on the moon. Have you guys seen it before? The holes on the moon really do look like a rabbit! 

Anyway, both family, friends and teachers would all enjoy the moon cakes, and any extras could be brought home to savor. Looking back, I'm very appreciative of what my school did, for teaching us our culture in subtle ways, and making sure we still understood the essence of Mid-Autumn Festival. Mid-Autumn Festival is many ways, is like Thanksgiving, instead of giving thanks, the family, young and old, will gather and admire the moon (賞月), while enjoying each other's presence. 


Back to way way back, when I still found joy in carrying paper lanterns around the neighborhood, I would rather have the pale green snow skin moon cake instead of the brown baked moon cake. As far as I can remember, I've never liked baked moon cakes. I've always like the cool snow skin moon cakes, and every year without fail, my mom would get a pandan flavored green snow skin moon cake for me. I also remember not liking the salted egg yolks when I was younger, but as I get older, my taste preferences lean towards the salty, and I find myself liking moon cakes with 1-2 egg yolks in them. Not 4 though, that's too little lotus filling for me =p So this year, seeing that moon cakes have increased in prices, I decided that it was high time I made some of my own. My mom has her own moon cake mould, so why not use it? In both Malaysia and Singapore, the baking supplies shops bring out their cooked glutinous rice flour packets and out comes the lotus paste, red bean paste, and various other flavored lotus pastes. I simply got myself a packet of koh fun and lotus paste and I was set!

My recipe is more of a suggested recipe as compared to a proper recipe with fixed numbers because I made a combination of small and large moon cakes. All you need to remember is the golden ratio is 1:2, 1 part of skin to 2 parts of filling, and if you stay within this ratio, you shouldn't go wrong. 

What you should first do is to determine how heavy a moon cake your moon cake mould will give you. To do this, simply tear off a huge piece of your snow skin dough, and stuff it into your mould. Make sure to pack it well and remove any excess peeping out of the mould. After that, un-mould the dough and weigh it. This will be the weight of the moon cake that you will get. From there, divide that weight into 3. So for example, after cramming the snow skin dough into my tiny moon cake mould, I found that it weighed 50g. I then divided it into 3, which gave me around 16 odd grams. I decided then to go with 20g of snow skin and 30g of filling. This was because I'm strange that way - I prefer to have a higher skin to filling ratio. If you wish to have more filling, simply use the 1:2 ratio, which should give you around 16g of snow skin and 34g of lotus filling. It's that simple really :]

***

Mini Snow Skin Mooncakes
Adapted from Amanda who adapted it from Aunty Yochana, here
Makes approximately 10 5cm-diameter mooncakes

For the snow skin dough:
100g   koh fun (or gao fen, which is cooked glutinous rice flour)
90g     icing sugar
30g     shortening
120g   cold water
A few drops of coloring (if desired)

For the lotus paste filling: 
300g lotus paste (I used a store bought low-sugar white lotus paste, but you can make your own. Check out Christine's recipe which is close to what my family does)
50-100g melon seeds (vary this amount according to how much melon seeds you like in your moon cake)

Method: 
  1. Sift the koh fun and icing sugar in a mixing bowl. Gently rub the shortening into the flour mixture, combining until the mixture resembles coarse bread crumbs. Mix in the cold water and knead until a soft dough forms. If you wish to add in food coloring, add it in together with the cold water. Let the dough rest for at least 30 minutes before using. 
  2. After rested, divide the dough into balls of equal weight. 
  3. In the meantime, add the melon seeds to the lotus paste and mix evenly. Divide the lotus paste into balls of equal weight. 
  4. To make the moon cake, lightly dust your hands and the mould with the koh fun. Flatten the ball of snow skin until you get a rough circle. Place the ball of filling in the centre of the dough and seal the ball with your snow skin. Make sure that there is no air trapped between the dough and filling and seal the edges tightly. Put the ball seam-side up into the floured mould and pack it in gently. Then, rap it against the counter on all sides so that the moon cake falls out nicely. Chill for at least 6 hours before consuming. 


Janine's jots: 
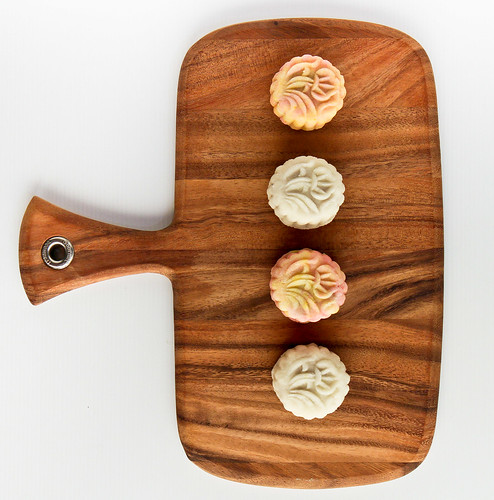
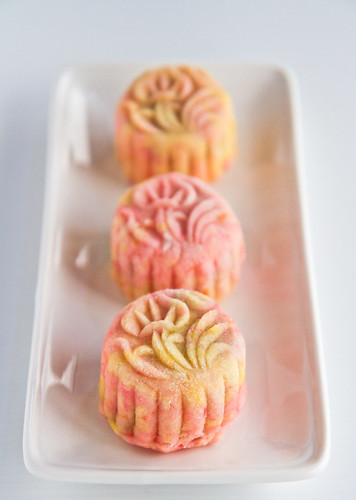
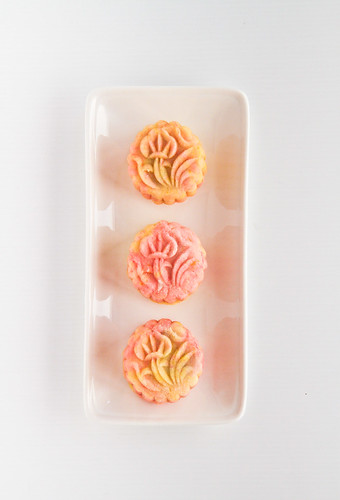
  • Notes: Please note that you CANNOT substitute shortening for butter. It doesn't work. Believe me I've tried. Also, if you wish to get multi colored moon cakes like those above, simply apportion your doughs and color them separately. Then, flatten each colored dough into a rectangular sheet and place the doughs one on top of the other. Proceed to roll up them, swiss roll style. Next, cut off a part of the dough, making sure that it fits your mould Proceed to then flatten the part of the dough into a round circle and proceed as per step 4 above. You will get swirls of color. Like in the 2 multicolored moon cakes above, the one of the left had more yellow than pink and one on the right had more pink than yellow. It's all a matter of preference really. The white ones are the original color. 
  • Taste: I'm not a particular fan of fancy fillings, and I particularly love white lotus paste, so this was perfect. I also don't have a very sweet tooth, so I chose the low-sugar option. The end result was fantastic, in my opinion. 
  • Texture: Although this texture certainly does not beat the smooth texture that you might get for commercial moon cakes, I find it pretty okay and I like the smooth lotus paste which I got from Malaysia. I liked that I could add as much melon seeds as I wanted to the lotus paste to give it that contrast to the smooth paste. 
  • Serving size: Each mini moon cake is about 2-3 bites worth, which is just lovely. And not to mention that buying the ingredients for the moon cakes cost me less than RM25 (S$12), and I got so many moon cakes. Definitely something to consider for the future!
  • Storage: The moon cakes store quite well in the fridge. Be sure to keep them in an airtight container and make sure they don't stick to one another. Mine lasted for about a week before they were gone!
  • Would I make this again?: This is the definitely the cheaper and better way - and what else is better than knowing what goes into what you are eating?  


Another close up of the first photo :]

Same photo, but I decided to use a film effect to emulate the 'shining moon' hanging in the dark sky. Not too successful with that huh? ;p

Anyway, I am submitting this to Aspiring Bakers #11: Mid-Autumn Treats (September 2011), hosted by Happy Home Baking. Have a great Mid-Autumn Festival (中秋節) everyone - may your moon cakes be yummy and your lanterns shine brightly :D

Monday, August 15, 2011

Malaysian Monday #5: Curry Puff, or Epok Epok

I tend to associate food with certain incidents or memories in my life, and this particular food is no different. I still remember the mornings when I would hear this little Malay boy walking across the back alleys on our rows of houses, shouting/singing a tune which till today, I can sing: "kuih kuih, nasi lemak". This phrase was then repeated a million times as he walked from one house to the another. I remember this little Malay boy rather vividly, because I would rush out of the house and hail him to stop. He would then lift the paper towels lining his bright red basket, and uncover the golden crescents of curry puffs, the banana leaf-and-newspaper covered nasi lemak packets, and other assorted kuihs. I still remember he had both kentang and sardin curry puffs, and I would buy an assortment of 5 for RM1. I remember the curry puffs eventually becoming smaller in size, until they became 4 for RM1. Of course, prices today have risen to about 3 for RM1, or worse still, 1 puff for RM0.40.


I remember those times rather fondly, because my mom would chastise us (myself and my brothers) for being lazy, and she would use that little Malay boy as an example. At a really young age (about 10 years or less), he would be wide awake selling his mother's kuih muih as early as 7am in the morning! I used to remember my mom telling us what a hard life that boy leads and how we should be thankful and shouldn't begrudge helping her mop the floor or perform other errands around the house. That lesson is still very much engrained in my memories, and I wonder sometimes, what happened to that little Malay boy? He should be close to 30 years old now. Hmm. 

Curry puffs are also known as epok-epok or karipap pusing or simply karipap among the Malay community, whereas us Chinese typically call it  咖哩角. Another name that I've always heard brandished about it "kari-pok" which is typically said by my less-educated relatives, who cannot pronounce "puff" and hence refer curry as "kari", as a direct Chinese translation, and well, as for pok, it's a bastardized English for puff I guess heh. 


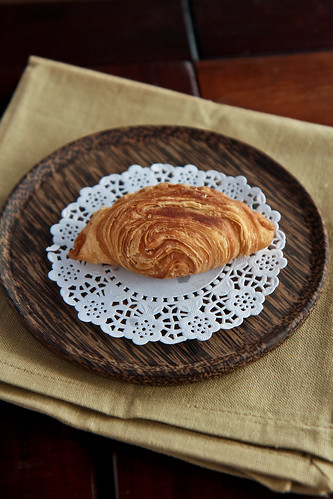
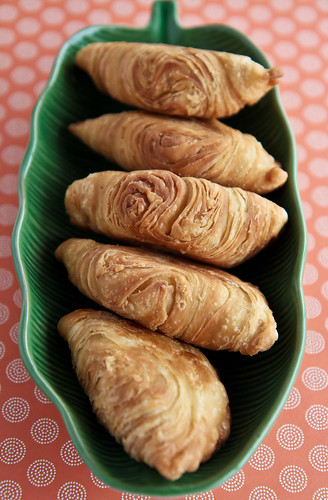
I love curry puffs, but the ones I love more, and also the ones I'll be featuring today, are actually the 千层咖哩角, or many layered curry puff, which typically cost more than the usual normal curry puff. This has been on my bookmarked list of recipes since forever, but I decided that this month was a good time for me to attempt it, because the theme of this month's Aspiring Bakers #10 is pie/tarts, which includes puff pastry. It might not strike some of you that this oil and water dough combination is our very own Asian/Chinese form of puff pastry! So many other Chinese treats make use of this quintessential oil and water dough - Shanghainese moon cakes and char siew sous are some that come to mind. 

Anyway, since this was a spur of the moment decision, I didn't have my camera at home in Malaysia with me (I can only deep fry things in Malaysia, remember?) and I'll have to direct those who are hoping for step-by-step photos to several outstanding bloggers whose posts I referred to in the process of making these puffs. Florence was the master I first turned to, and her instructions and step-by-step tutorial is perfect! For those who can read Chinese, Jane was another person I turned to - in fact, she has made them so many times in so many variations on her blog that she's a master of them already! Finally, another step-by-step I referred to is none other than the host for MMM, Suresh!


Curry Puffs
Loosely adapted from Florence's recipe 
Makes 16 medium sized curry puffs 

For the pastry
Oil Dough
150 g   all-purpose flour
40 g     butter
35 g     shortening

Water Dough
205 g   all-purpose flour
1 tsp     vinegar
50 g     shortening
30 g     sugar
95 g     water

For the vegetarian curried potato filling
3 small potatoes
1 onion, diced
3 cloves of garlic, finely minced
2 tbl garam masala
1 tbl chicken curry powder
Some curry leaves


Method: 
  1. For the filling, par boil the potatoes. Peel and cube them into small pieces. Stir fry the onions until fragrant and add in the garlic followed by the cubed potatoes. Add in the seasoning and cook for about 1-2 minutes, or until the potato softens to your preference. Leave aside to cool until room temperature. 
  2. Meanwhile, prepare the water dough. In a bowl, combine the flour and sugar. Add in the shortening and mix well with the dry ingredients. Add in the vinegar followed by the water and knead until you get a soft and pliable dough. It should take you about 10 minutes or less. Wrap the dough in cling wrap and leave it to rest for 30 minutes while you prepare the oil dough. 
  3. For the oil dough, in the same bowl, add shortening to the flour and mix well. Next, add in the cubed butter and mix everything well until you can compact everything into a ball. 
  4. Divide the water dough into 2 pieces of approximately 170-180g each, and divide the oil dough into 2 pieces of approximately 75-85g each. Working on one piece each of oil dough and water dough and wrap the other 2 pieces of dough separately in cling wrap to prevent them from drying out. 
  5. Using a floured rolling pin, roll out the water dough until it is big enough to enclose the oil dough. Seal the oil dough within the water dough. With the sealed seam facing upwards, roll the dough into a rectangular sheet of approximately 1cm in thickness. Roll the rectangular sheet up from the shorter side, as if rolling up a swiss roll. You should get a horizontal scroll. Now, turn this horizontal scroll 90 degrees until it is vertical. Roll this out until you get another thin rectangular sheet of about 1cm in thickness. Again, roll the sheet up from the shorter end until you get a swiss roll. Let the dough rest for about 15 minutes before cutting the 'swiss roll' up into 10 portions. For each portion, you should be able to see the swirling of the water and oil dough. 
  6. To fill and shape the curry puff, flatten the disc using a rolling pin until you get a rough circle big enough to place your filling. Place about 1-2 tablespoons of filling in the centre and fold the circle into two. You should get a rough semicircle. Press the edges of the dough together and beginning from the bottom, pinch the edge of the puff with your thumb before bringing it upwards to the front. Repeat the process of pleating until the entire semi-circle is sealed.  
  7. Repeat the same process for the remaining pieces of dough. 
  8. Repeat steps 5 and 6 for the other 2 pieces of dough.
  9. Heat up a wok with at least 2 inches of oil. Deep fry the puffs on medium heat until they turn golden brown. Before removing the puffs from the oil, be sure to turn up the heat to medium-high to make sure that the oil does not leach inside the puffs. 
  10. Drain on paper towels and cool for at least 15 minutes before serving. 


Janine's jots: 
  • Taste: For the filling, be sure to add more spices and flavor than you normally will, because the filling needs to be really flavorful. I loved how the curry leaves gave the filling that extra punch - YUM! 
  • Texture: I absolutely love the textural layers on the outside which are so very crisp after frying. You are then greeted with a hot, spicy potato filling which is almost mushy, with some 'bite' from other bits of potato which I purposely left un-mushy. 
  • Serving size: I divided the dough into half and made 10 curry puffs out of a half portion of dough because I wanted smaller puffs and more crispy surface area ;p I think 12 is perhaps the smallest you can go because otherwise there is not enough dough to wrap enough filling for 3 small bites of a small curry puff. 
  • Modifications: You can choose to add chicken, carrots or peas or even hardboiled eggs into the filling - any variation including sardines is fine! Just make sure to make the filling extra tasty so that it will taste normal after frying. Also for the oil dough, I will probably try using more butter and less shortening the next time because I felt that the dough was slightly too crumbly for my preference. 
  • Storage: The curry puffs taste best on the day they are fried, but they keep well at room temperature for up to 3 days if stored in an air-tight container, and briefly reheated before consumption. You can also keep them in the fridge for up to a week, but the curry puff did not crisp up well in the toaster after that period of time. 
  • Would I make this again?: Although it was insanely delicious and rewarding to eat my own curry puffs, I'm definitely staying away from curry puffs for a while - I consumed more than 4 curry puffs within 2 days and looking at the huge amount oil that I used to fry them gives me the heebies jeebies. SO MUCH OIL and fats going to my hips!
  • Notes on frying: Do do make sure that you have enough oil in the wok. I had too little oil in the wok, and my heat was cranked up a little too high, which resulted in my first batch of puffs turning golden brown too quickly, and the inside layer of the puffs was not cooked through. 


Now that I know how much work goes into making a single curry puff, I'll never grouse paying RM1 for the large curry puff (with half an egg) I always buy from the makcik near my house! I'll be sending this onto Muhibbah Malaysia Monday hosted by Shaz of Test With Skewer and Suresh of 3 Hungry Tummies :]


Related Posts Plugin for WordPress, Blogger...