My blog has moved!

You should be automatically redirected in 6 seconds. If not, visit
http://www.unpastiche.com
and update your bookmarks.

Showing posts with label Japanese Recipes. Show all posts

Tuesday, September 11, 2012

Luna Park, North Sydney and Hokkaido Milk Buns with Red Bean Paste (with tangzhong)

Over the weekend I finally had time to upload photos from my CF card (containing photographs I took while I was in Sydney almost 2 months ago) onto my computer. It made me feel a little sad, because those days were so carefree and for the month I was there, it was the first time when I didn't have to study because I had no exams sit for and there was no work to worry about, because work had not started. I basically did what I loved - planning for my meals, shopping for ingredients, and cooking for my loved one :] We also found time to go for holidays and attend church on the weekend. 

It's been a long time since I went to church in Singapore, but I must say that the people at CCC made me feel so welcome. I enjoyed the services because well, the sermons were about church history and me being a history/knowledge buff, I practically soaked up the information on the reformation period. Everyone was so friendly and inclusive that I decided to bake a couple of cakes and cookies each time I attended church. I must admit that I had an ulterior motive, because all those people at church just meant for guinea pigs for my baking, but well, I felt good because everyone only had good comments for the stuff I baked heh :]


To start off, I decided to stay safe and stick with stuff I knew, so I made a hokkaido milk buns with red bean filling. I knew that this would be popular because soft Asian-style breads in Australia don't come cheap and well, most of the people at church were Asians, some of whom have been born in Australia, some of whom are studying in Australia for a couple of years.


CCC is over at Milsons Point, which is in North Sydney. The view of the Sydney Opera House you see above, is from Milsons Point. The only other way of getting the same view is to take a ferry from Circular Quay to places on the other side, to Watsons Bay and the like. The north shores of Sydney are not much of a tourist attraction, which perhaps explains why I have never step foot to places like Chatswood (a very Asian-populated area) and North Ryde. There's lots of good Asian food there, with huge shopping malls that Singaporeans and Malaysians are acquainted with, but I think I very much prefer Sydney on the other side of the river. 


Because it was winter, it was pretty cold most of the time, but on my last visit to church, I decided that I should head out to the area regardless and take some photographs. Looking at the photograph above, you would think that it's spring in Sydney, but the outfits of the two ladies reminds you noooooo it is winter and with the winds blowing in  your face, it's effing cold! I snapped a couple of quick photographs around the area before heading to Luna Park to take a snap of its very iconic entrance. 

Luna Park is an amusement park which has a history stretching back to the 1930s, which explains why the entrance is so...well 1930s. It gives me the impression of old-school amusement parks in America, even though I've never been to America and have never seen an amusement park there. 


I particularly like the two photographs above, the left has been processed to evoke what I think is a 1930s mood, and the right has been changed to black and white just because. I like how the face of the clown is nicely reflected in the puddle (it had rained earlier) on the ground. There was a father with his son of about 6 years of age, and I particularly enjoyed listening in to their conversation. The father was standing a couple of meters beside me when I was taking the photograph, and having spotted me squatting and taking a photograph of the puddle, the reflection and the entrance, he took the opportunity  to teach his child something about science. He first asked his son what he saw when he looked into the puddle of water and then explained how this reflection came about. There is so much to learn everywhere, and I really admire the dad for showing his child that, at such a young age. I would want to be such a parent, if I ever have a child in the future.

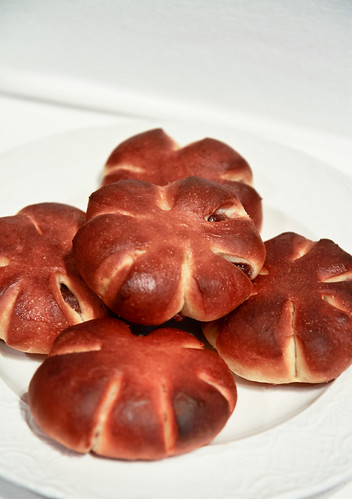
So back to my hokkaido milk buns with red bean filling (北海道牛奶紅豆麵包). I decided to use a japanese style hokkaido milk bread recipe, because I wanted to make full use of the delicious tasting cream I had in Sydney. 


Instead of following the proportions in Christine's recipe above, I decided to modify it a little, to fit the proportions that I am used to.

Hokkaido Milk Toast
Makes 1 500g loaf or 8 medium sized buns

270g bread flour
30 g all-purpose flour
40g sugar
½ tsp (4g) salt
1 tsp (5g) yeast
45-50g egg (without shell)
40g heavy cream (at least 35% fat)
30g full fat milk
100g tangzhong*
25g unsalted butter

*Check this post if you don't know what is tangzhong and how to make it (for 100g, you need to heat about 20g of flour with 100g of water)

To make them into red bean buns, you will need about 500g of red bean paste. I used a storebought one when I was in Australia. I recommend getting the red bean paste from DAISO for those in Singapore/Malaysia. Do get the packet of anko which is produced in Japan and not China.


Method: 

  1. If using a bread machine, follow directions as per your machine, but add the tangzhong together with the flour. If kneading by hand or mixer, place the sugar, salt, bread flour, all-purpose flour and yeast into a large mixing bowl. Then, add milk, cream and egg into the bowl and knead until a rough dough is formed. Add in the softened unsalted butter and knead well, until the dough no longer sticks to your fingers but is slightly tacky.
  2. Shape the dough into a ball and cover it. Allow it to proof for about 60 minutes or until doubled.
  3. Punch down the dough and divide it into pieces weighing 60g each. Allow the balls to rest for about 10 minutes before attempting to shape them. In the meantime, measure out 30-40g of red bean paste (how much depends on how much red bean you like. I used 30g) and roll them into an equal number of balls.
  4. On a lightly floured surface, flatten a dough ball into a round disk. Place the ball of red bean paste in the middle of the disk and wrap the filing with the dough. Pinch the ends together to ensure that each dough ball is completely sealed. Then using your palms, slightly flatten each ball until you get a flat round disk of about 5-8cm thick. Using a sharp knife or scissors, snip the edges of the disk. I made 6 snips to get 6 petals. Be sure to make very deep cuts all around the dough because as the dough proofs, the cuts will become shallower.
  5. Allow the 'flowers' to proof for another 30 minutes or until they have increased about 1.5 times in size. Brush the top of each flower with some egg wash or milk if desired.
  6. Bake in a preheated oven of 180°C for about 22 - 25 minutes, or until golden brown. Remove from oven and allow to cool on a wire rack for at least 30 minutes before consuming. 
Janine's jots: 
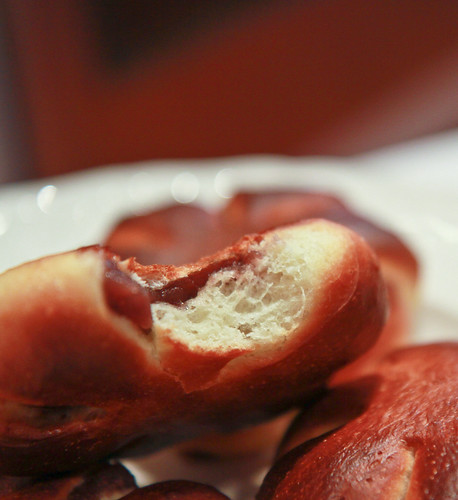
  • Note: I kinda overbaked the breads because they are NOT supposed to be this brown. You should keep an eye on what you're baking, especially if you're using a foreign oven in a foreign environment! I liked it the dark brown crusts though ;p Do also try to make your cuts deeper. I made pretty shallow cuts and this was the result after proofing the second time.
  • Taste: I liked the proportions of my bun - 30g of not-so-sweet red bean paste to 60g of bread dough. I would however recommend using 40g or more red bean paste because as you can see, besides needing more work on my 'putting the red bean ball in the centre' skill, the red bean filling is quite stingy.  
  • Texture: I didn't have the benefit of a mixer or bread machine, so I made the buns completely by hand. Because it was cold in Sydney and because I was lazy, I did not knead the buns until the 'window pane' test could be passed. This meant that the bread is not as elastic as it should be - you can see from the photo above that the bun does not have that many gluten strands. Also, because it was winter, the buns took twice as long to proof - I made the dough the night before and thanks to the chilly night, it took about 6 hours to double in size.
  • Serving size: This recipe makes a really nice rectangular hokkaido loaf but I would think a portion of 8 red bean buns would be ideal for any family too! :]
  • Storage: Because of the high fat content of the buns, they keep quite well. I would think they should keep for at least 3 days at room temperature. I kept one bun in the fridge and reheated it a week later and it still tasted pretty good.
  • Would I make this again?: I would definitely make this recipe whenever I have excess cream! I personally prefer leaner breads but most people I know and those who ate the buns liked the rich and buttery taste of the bun, so I guess if you're looking for a sweet bun recipe, this is it! 

Friday, March 30, 2012

Giveaway Results and some Matcha Madeleines

As promised, here are the winners of my strawberry powder giveaway! I know some of you added me on Twitter, but I'm not sure if it's because of the giveaway or otherwise, but because you didn't leave a comment as per the 'rules', I didn't include you in the draw. I used random.org to select the two lucky winners but the problem is I'm an IT noob and I have no idea how to copy and paste the results onto my post?! So you guys will just have to take my word for it - there were 34 comments and the two selected numbers are 7 and 1. This means that Cathy and Angel, you guys are the lucky winners! :]  I'll be emailing you shortly, so do give me your details as soon as you receive my email.

For those who didn't win, don't fret, because I'm going to have another giveaway really soon (hint, it's a fruit and it's freeze-dried and rare in Singapore too!)


So this post was really to abide by the deadline I set myself in the strawberry milk macarons post and I've been so swamped with work that I haven't had time to bake the things that I've wanted to bake. Times like these make me treasure my 'down time' even more - I promise I won't ever complain about having nothing to do! Anyway, last week I was busy bringing my brother's Japanese buddy around Singapore and Malaysia, so I didn't get to bake much, and this week was a busy week, so even mid-week bread plans have been put on hold. In fact, I'm typing this post in between doing work in the office. I'm considering this my rest and 'slack time'.

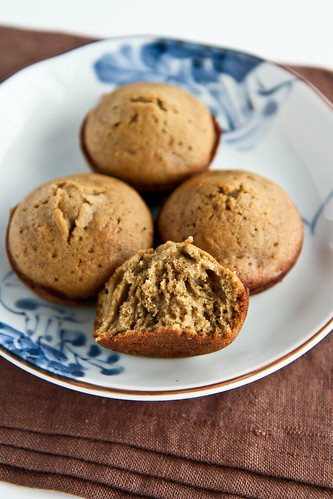
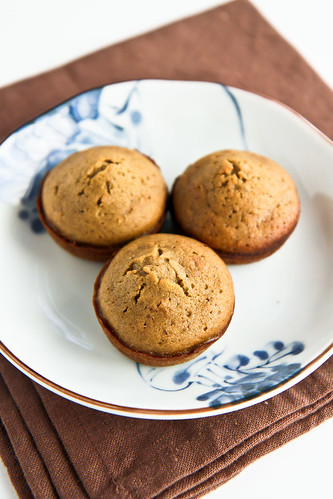
So like I said, I didn't do much baking, but I thought I'd post these matcha (or green tea)  madeleines which I made some time back, as a tribute of sorts to my brother's Japanese buddy who has since gone home. No, I didn't make these financiers for him to eat, because I'm pretty sure that he would be grossed out by the lack of standard of the matcha powder (the ocha satchets which he gave us produce one of the best tasting ochas I've ever had!) and I mean, serving matcha products to a Japanese would be the last thing I would want to do!

Sorry photos are not particularly imaginative because these were taken some time back.


Matcha Madeleines
Adapted from le livre des fours secs et moelleux de pierre herme
Makes 12
120g caster sugar
20g glucose syrup
120g all-purpose flour
10g matcha powder
4g baking powder
¼ tsp salt
130g eggs
20ml milk
1 tsp vanilla extract
130g clarified unsalted butter

Method:
  1. Heat about 150g of unsalted butter over a saucepan and let it melt until you get white solids on the top. Skim away the foam and allow the remaining liquid to cool. It should smell nutty and appear slightly brown.
  2. Sift together the flour, matcha powder, salt and baking powder. Set aside. 
  3. In another bowl, add together the sugar, glucose, vanilla extract and eggs. Mix until just combined.
  4. Fold in the dry ingredients, followed by milk and clarified butter. Refrigerate the mixture for at least 1 hour, or overnight.
  5. Brush your madelein moulds with melted butter and dust lightly with flour, tapping out any excess. Fill the mixture into the mould until about 2/3 full.
  6. Bake in a preheated oven of 180°C for 12 minutes until golden brown. Remove the madelein from the mould and allow it to cool on a wire rack. Best consumed when cool to allow the matcha flavour to show through.
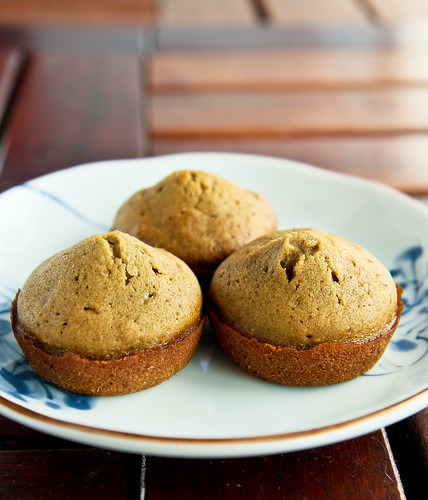
You don't need madeleine moulds to get that distinctive hump ;)

Janine's jots: 
  • Note: I know that these are not the typical madeleine shapes, but I didn't have the moulds where I was, so I simply used a muffin pan. Just grease the muffin pan before use and fill it to about 2/3 full as well.  
  • Taste: I usually find madeleines too sweet for my liking, but I really liked how the matcha cut through the sweetness.
  • Texture: I overbaked my madeleines a little (as seen from the brown bottoms, so the bottoms were a tad tougher than usual, but the tops were delicious!
  • Modifications: I would probably try adding some adzuki beans to vary the textures and tastes, and because adzuki is a perfect complement to matcha :] 
  • Storage: The baked product keeps very well. Keep in an airtight container and it'll last you a week! Also, I baked some after refrigerating it for an hour and baked the rest after keeping some of the batter overnight in the fridge and the resulting baked product tasted the same and had the same texture as those baked immediately.
  • Would I make this again?: Probably not because this produces a lot of madeleines and most of my family members aren't fans of matcha, so I've to eat all of it myself :[ If you're a fan of matcha, this would be right up your alley, because matcha really is cast into the limelight here.

Monday, December 12, 2011

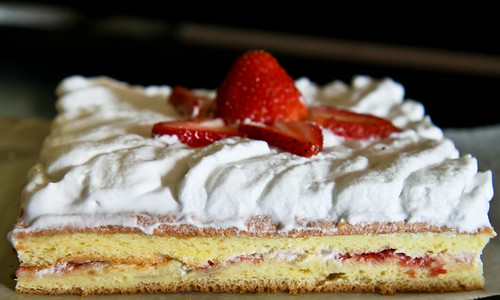
A Simple Japanese Strawberry Shortcake, and My 100th Post Milestone!

I had intended to post this yesterday, but I was utterly wiped out yesterday. This was what I wrote:

Today marks a turning point in my life. In less than 12 hours, I’ll be starting work proper for the first time. No more part-time jobs, holiday attachments, long school holidays or short schooling hours. The real world starts from now on. I’m glad for internships, and I think it’s the main reason why I’m not nervous, because I know what I’m getting in to. 
This post also marks a milestone for this blog too, this is my 100th post! Reaching this 100th post milestone is kind of bittersweet for me too, because 100 posts in a year isn't too many, and this number is just going to get smaller once I start work. Already, my seniors at work are forewarning me of the workload I'll be facing. So. Not. Looking. Forward. :/
Anyway, I had hoped to do a small giveaway to celebrate this 100th post, but I just couldn't find the time to take photos of the things I had in store to give away, because there are a couple of things and as usual, there will be a long prose accompanying the story behind them lol. I thought I would be relatively free this weekend, but ironically, I slept less these past 2 days than while studying for my exams. I guess I was just busy catching up with friends and enjoying life in general. Anyway, I'll try to make time some time soon to bake, and to post a new recipe, but I know life will get in the way. 


Obviously, that being yesterday, I had my first day at work today. I'm so exhausted today, mentally and physically - it's not that I haven't been wearing office wear, but having to wear long sleeved shirts and high heels are a pain, literally. I'm still looking for 'the pair', so if anyone has found theirs, please let me know. I have bought close to (or more than?) 10 pairs of black high heels, trying to find a comfy pair, but all of them have failed me. And to reiterate what I said above, I'm really glad I've worked in the office as an intern before, because like I told Jon, at least I know where the toilets are. Yes, knowing where the toilets are is important to me! The office has an extremely confusing layout, and I got lost today trying to find the library -__-"

Anyway, this has absolutely nothing to do with my strawberry shortcake, except for the fact that I'm craving some right now because the strawberries look so yummy. With the start of work (I managed to get off work early today, so I'm still able to blog), I really wonder if I'll be able to find time to make these again. It's a simple recipe, but has a few components, and I took about 1-2 hours in total, from looking for a recipe, to assembling the ingredients needed, to baking the cake, making the other components and finally assembling and taking photos of the cake. Not a particularly long time, but 2 hours is gonna be real hard to find now that I've to work late and I come home so mentally exhausted. I'm also sorry to admit but I think I still wanna be a student. As much as I loved what I studied, working and applying what I've learnt in real life is so much harder, and taxing :/ Alright, enough of my complaints - here's the recipe :]

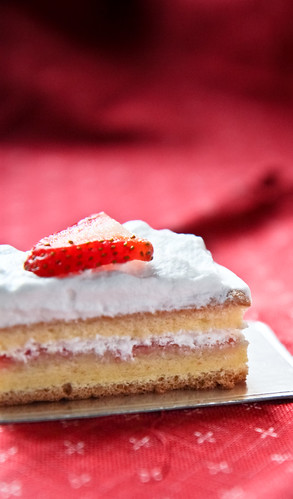
I used flash here so I'm sneakily trying to hide the flash hood mark on the bottom of the photograph. 

Japanese Strawberry Shortcake 
Makes an 8-inch 2-layered cake

Components:


For the stabilized whipped cream, 
Adapted from Rachael of La Fuji Mama

1 tsp gelatin (I used 'gold' power powder)
4 tsp cold water
250ml cold heavy whipping cream
30g icing sugar
1/2 tsp vanilla extract

  1. Put all the cold water in a small saucepan and sprinkle the gelatin over the surface. Let it stand for 5 minutes without stirring. Place the saucepan over low heat and stir constantly with a wooden spoon until the gelatin dissolves. Remove the saucepan from the heat and cool to room temperature. 
  2. Combine the whipping cream, sifted icing sugar and vanilla extract. Beat the mixture for a minute before gradually pouring in the cooled gelatin mixture. Continue whipping the mixture at high speed until you get stiff peaks. 

For the simple sugar syrup, 
30g granulated sugar
60g water
1 tsp of your preferred alcohol, or vanilla extract

Combine the sugar and water in a small saucepan and heat the mixture. Stir until all the sugar has dissolved. Allow the mixture to cool a little before stirring in the vanilla extract (or alcohol - I used rum). 


To assemble the cake:
  1. After allowing the sponge cake to cool, slice it horizontally into half. Place the cut-sides facing up. Pour the simple syrup over both sides of the cake, making sure to adequately soak the entire cake slice. 
  2. Slather jam on one side of the cake and whipped cream on the other side - be as generous or as stingy as you want with the proportions. 
  3. Flip the whipped cream side over onto the jam side. Then, with the remaining whipped cream, pipe or spread over the top layer of the cake. I used Michelle's design on the top (but failed miserably) or you could just smoothen the icing all over the cake like Rachael did. Garnish with some strawberries, and you're done!

The below is the photo of my sunken sponge cake (I should have inverted it when cooling - this prevents it from sinking too much) and the one on the right is what I meant by spreading your jam and whipped cream on each side. Read more in my jots below!


Janine's jots: 
  • Taste: As mentioned before, I don't have a particularly sweet tooth, so I went with using strawberry jam (which is quite tart), and a thin layer of whipped cream. Although I would have liked some fresh strawberries in the middle, I don't like a thick layer of whipped cream, so this was a good compromise. I am very stingy with the cream and jam, but that's really because I don't want it too sweet. Feel free to make it as thick as you want! You should double the whipped cream recipe (that's what the other people who used the recipe did) - mine gives a really stingy amount of cream for the middle and top only. 
  • Texture: I love the texture of this sponge cake, and so does my family. And as I have raved countless of times, it is my to-go to cake, for the sole reason that it's so easy to make. It's also forgiving, because sometimes, I dump all the sugar into the egg whites and forgot to put half into the egg yolks, but the cake still turns out okay. 
  • Serving size: The original sponge cake recipe makes a roll cake of 30cmx30cm proportions, so trying to make it an 8-inch square cake (20x20) was kinda stretching it - this is why the cake is rather flat because there just wasn't enough batter. I reckon it would have been the perfect height for a 6-inch pan. 
  • Modifications: My simple sugar syrup recipe is not exactly a simple sugar because it doesn't have the standard proportions. I opted for a 1:2 proportion for the simple fact that I don't like the syrup to be too sweet. I use this for all my assembled cakes and no problems so far!
  • Storage: Separately, the cake and whipped cream store well in the fridge for about a week. However, once assembled, do consume as soon as possible. Nevertheless, the cake does store well in an airtight container for a few days. And if you soak your cake sufficiently, the cake will still remain moist - in fact, the cake might taste of strawberries as well, because the flavor from the jam has had the time to 'diffuse'. 
  • Would I make this again?: Definitely! I have made both the sponge cake numerous times, as well as the stabilized whipped cream in other cake recipes. 
  • Other comments: I suck at decorating, and my diagonal lines were a major fail here because I tried to be smart and used a plastic bag instead of a ziplock bag or piping bag. Obviously the plastic bag (new and clean of course) was too soft and didn't pipe out nice lines. (Yes I'm blaming the tools and not the carpenter ;p) 

I know it looks like a flat cake with horrible icing but it was delicious!

And the nicest photo of the lot :) 

Saturday, July 30, 2011

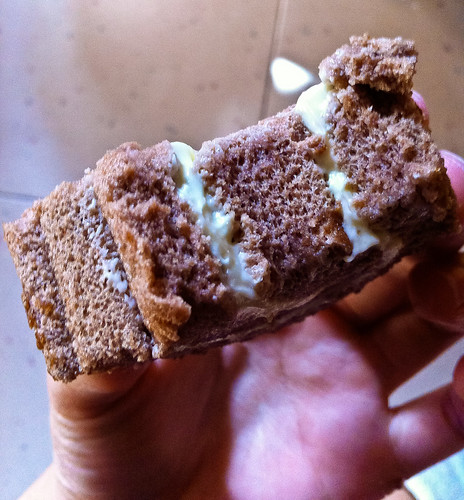
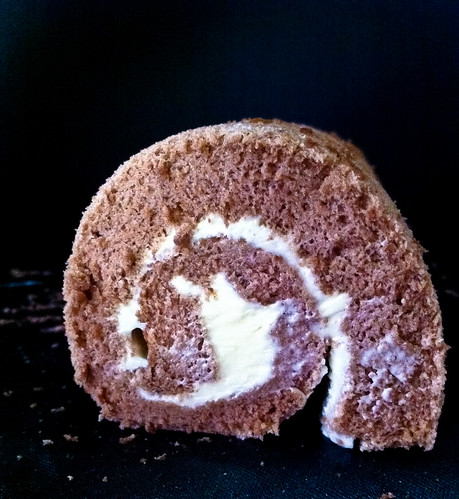
3-ingredient Chocolate Swiss Roll

I have a really bad habit. I tend to go grocery shopping when I'm hungry. And it's bad because this is why - you end up buying a whole lot of groceries and stuff that you don't need and probably won't use until it's reaching its expiry date. Take my desiccated coconut for example. I bought it months ago when I was grocery shopping and had my mind on eating some Anzac cookies, but well, it never happened :/

Another bad habit I have, which is related to the previous one is that I tend to bake when I'm hungry. Which is really really bad. I try to speed the process of baking a lot by upping the temperatures sometimes (which is always a bad thing and explains why I get burnt tops) and when the baked product is done, I take it out of the oven, give it a few blows in a bid to cool it so that I can sink my teeth into it. I have burnt my tongue and throat more than a few times because of this. But what can I do? I'm ravished by the time it's baked!

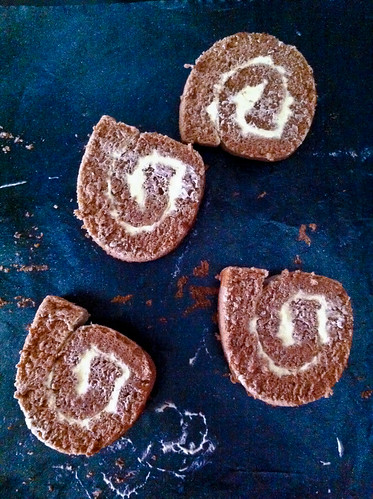
The point of saying this is well, I know the photos from the swiss roll previously weren't that pretty, and I specifically reminded myself to take nicer photos this time, but guess what? I happened to bake right before tea time, and by the time the cake was cool and rolled together with the filling, I was so hungry I could have eaten an elephant! So what happened was that I whipped out my phone from my pocket, hastily took a few shots before gobbling the slices down. And well, my brother had my camera, so that was another excuse ;p I wasn't alone in gobbling the slices down though, my parents were also stuffing themselves crazy with the slices because they were really fluffy and yummy and well, it was tea time!

I'll be submitting this swiss roll for this month's Aspiring Bakers #9 Swiss Rolling Good Times, hosted by Lyn. It's using the same recipe I posted here, but with a slight chocolate variation. 

This is what happens when you become so hungry you don't have time to put the slices on a nice plate to take a photo. 

For the benefit of those lazy to click on the link to my basic sponge cake recipe, I reproduce it here, complete with how to make it a chocolate sponge cake. 

Basic Chocolate Sponge Cake
Adapted from an unknown, very popular Japanese recipe a long time ago
Makes a 30cmx30cm cake

4       large eggs 
60g   castor sugar
30g   all-purpose flour
10g   cocoa powder 


Method: 
  1. Separate the egg whites from the yolks. 
  2. In a bowl, whisk 30g sugar into the yolks. Sift the flour together with the cocoa powder, before sifting them into the yolks. Mix all together until you get a smooth paste. 
  3. In another bowl, whip up the egg whites until foamy, before adding the remaining 30g of sugar. Continue whipping until you get shiny, stiff peaks. Mix some of the whipped egg whites into the yolk mixture to lighten it up before folding the remaining whipped egg whites into the yolk mixture. 
  4. Pour into a lined baking tray and rap the tray against the counter to get rid of any air bubbles. Bake in a preheated oven at 180°C for 10 minutes. 
  5. Leave the cake to cool in the tray for about 10 minutes before removing it to cool on the cooling rack. 


To make it a swiss roll: 


Swiss Meringue buttercream filling
Adapted from Martha Stewart here

80g castor sugar
60g egg whites
160g unsalted butter, diced into 3-cm cubes
A few drops of vanilla extract

Method:

  1. Prepare a bain marie. The pot of water should be simmering and not boiling. 
  2. Dice the butter into 3-cm cubes and allow them to stand at room temperature or until softened. 
  3. In a mixing bowl, whisk together the egg whites and castor sugar. Place the mixing bowl over the bain marie and whisk constantly, until the sugar has completely dissolved and the egg whites are warm. You can use your fingers to rub the mixture in between your fingers to ensure that there are no undissolved particles left. 
  4. Remove the mixing bowl from heat and beginning whipping the mixture at high speed until it becomes thick and glossy. Once soft peaks are achieved, beat at medium speed and begin adding the butter cubes one at a time until it is fully incorporated. The mixture will first appear curdled before reaching a smooth silky texture. At this point, add in the vanilla extract. 
  5. Continue beating until you get soft peaks and there you have it - swiss meringue buttercream! At this point, it will be a little soft because of our humid hot temperature, so do refrigerate it until needed. 


Janine's jots: 
  • Notes: You can choose to use cake flour instead of all-purpose flour if you want a finer crumb. For the filling, you can use a basic whipped cream filling or anything that is your fancy. I used Swiss Meringue buttercream because I was using it later to top some cupcakes and it was convenient. 
  • Taste: The sponge cake by itself may not be sweet enough for some, so I suggest upping the sugar in the recipe to a maximum of 100g. Alternatively, just use a sweeter filling if you're making it into a swiss roll. That's what I did. Note that the buttercream recipe produces buttercream that isn't overly sweet, so do fill free to add more sugar - the original recipe calls for about 120g of sugar. 
  • Serving size: This recipe fits the 30cm by 30cm tray perfectly. As you can see, this cake is definitely 'thicker' than the previous one because I used the right tray for the recipe!
  • Storage: The cake keeps well for weeks in the fridge! I've tried keeping it for a month before using it and it still tastes as good. At room temperature, it stores well for about 3-5 days (without any filling). If you have a whipped cream or buttercream filling, do store the cake in the fridge. 
  • Would I make this again?: Definitely! I can imagine so many other variations I can do with this recipe - substituting the cocoa with nut flours, matcha powder, black sesame, etc. Just make sure that the total 'powder' weight is 40g. 

In pictures: 
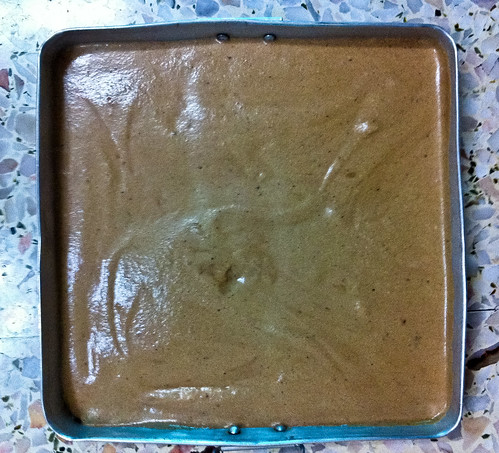
All ready for the oven!
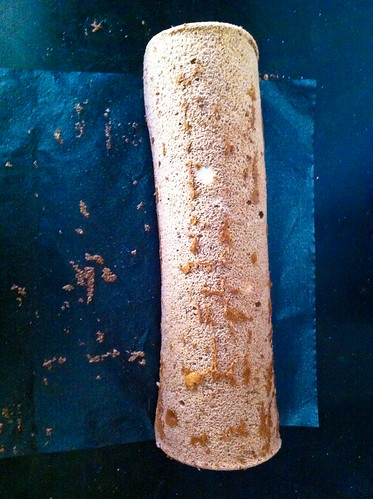
Remember to remove the 'skin' if you want a nice-looking swiss roll!
Check out the innards - it really feels as if it can go boing-boing!
And a final side view of my swiss roll.

Friday, July 29, 2011

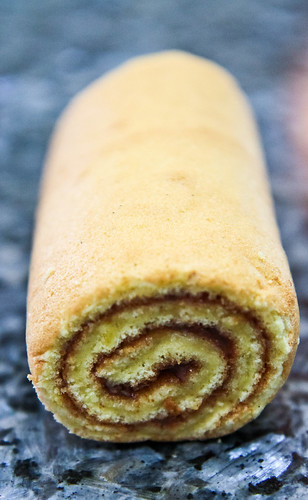
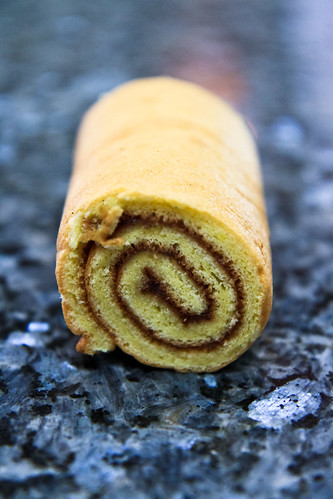
Basic Sponge Cake, rolled.

I've been rather uninspired to bake any type of cake lately, content to make muffins and cupcakes instead; but luckily for me, I took a look at Aspiring Bakers and was inspired again. This month's theme is Swiss Rolling Good Times, and it's the 9th edition, hosted by Lyn. I'm actually quite amazed at how our little group has grown and how active I've been in participating. To date, I have tried to submit at least one post for each theme, and I'm always excited to see what the other Aspiring Bakers come up with, because I tend to get inspired when blog-surfing. 

I have to admit that I'm not a huge fan of swiss rolls, which is kind of strange, because I like sponge cakes, which are essentially swiss rolls but flat. Anyway, I really like this sponge cake recipe a lot - I've been using this for a while now and been alternating this with another basic recipe when I need sponge cakes as a base for my other cakes. This recipe is probably the shortest you'll see anywhere - it only consists of 3 ingredients! I'm not sure why though, when I finally decided to make a swiss roll out of it, the sponge cake didn't turn out too good - it's supposed to be a lot thicker than what you see in the photos but it turned out rather flat. I think it might be because I used a different sized pan and downsized the recipe incorrectly?


Basic Sponge Cake
Adapted from an unknown, very popular Japanese recipe a long time ago
Makes a 30cmx30cm cake

4       large eggs 
60g   castor sugar
40g   all-purpose flour


Method: 
  1. Separate the egg whites from the yolks. 
  2. In a bowl, whisk 30g sugar into the yolks. Sift in the flour, stirring until you get a smooth paste. 
  3. In another bowl, whip up the egg whites until foamy, before adding the remaining 30g of sugar. Continue whipping until you get shiny, stiff peaks. Mix some of the egg whites into the yolk mixture to lighten it up before folding the remaining whipped egg whites into the yolk mixture. 
  4. Pour into a lined baking tray and rap the tray against the counter to get rid of any air bubbles. Bake in a preheated oven at 180°C for 10 minutes. 
  5. Leave the cake to cool in the tray for about 10 minutes before placing it on the cooling rack. 


To make it a swiss roll, 
  • To make your rolling easier, do roll up the cake while its still warm, right after removing it from the tray. Roll it together with your lined baking paper and leave it to cool, rolled up, on the cooling rack it's cool enough to add your filling. 
  • As with any swiss roll, you can use any form of filling you want. If you wish for a whipped cream or buttercream filling, do prepare it while waiting for the cake to bake. I chose to go with my homemade strawberry-apple-rhubarb jam, which was slightly sweet and tart. Be generous with the filling, because otherwise, the cake will taste rather plain. 
  • You can choose to put your swiss roll in the fridge for the flavors to meld together or you can choose to slice it up and consume it right away!


Janine's jots: 
  • Notes: I weigh my egg whites and yolks, and I tend to use about 120-130g of egg whites and 70-80g of egg yolk. Also, if you want a cake with a finer crumb, do swap the all-purpose flour with cake flour or substitute a little cornstarch with the all-purpose flour.
  • Taste: If you're not a huge fan of the 'egg-y' smell, I would advise adding about 1tsp or less of vanilla extract. Otherwise, this makes a really nice sponge cake. 
  • Serving size: This recipe fits the 30cm by 30cm tray perfectly. I've tried using 3 eggs instead, and using a smaller 10-inch rectangular tray (the cake you see below).
  • Storage: The cake keeps well for weeks in the fridge! I've tried keeping it for a month before using it and it still tastes as good. At room temperature, it stores well for about 3-5 days. 
  • Would I make this again?: Definitely! I have been using this sponge cake recipe a lot, because I like the fact that it doesn't use any form of oil or butter but still tastes as good, or it not better than those with!

Oops I can't slice my swiss roll properly :/

I know the photographs aren't too pretty and aren't too convincing, mainly because I made this just before tea, so I was scrambling to get it done so that I could eat it! The other reason is really, I'm not that good at making swiss rolls. The many times I've tried, the cakes turn out to be failures - either they are too thin, or cracked, or just inedible. Although not too aesthetic, I've to say that this was a pretty good attempt on my part, after the many failures. I'll definitely do trying this again (making my recipe into a swiss roll) so that I can convince some of you out there to try this. It's a really simple and short recipe, and produces fantastic results! 

Sunday, June 26, 2011

Japanese Soft Rolls

Although I have been baking quite a bit in Sydney, experimenting with things I've never done before in my life, such as baking with zucchini and rhubarbs, as well as soy cream cheese, sour cream and ricotta, I have not been diligent in writing down the recipes and taking photographs :/ I have been really happy with much of the baking here, and have even (finally) tried making puff pastry, after avoiding it for so long for fear of failure. I have to admit though, it was mainly a success thanks to the low temperatures - the kitchen was probably about 18 degrees without the heater turned on, so the folding of the butter and flour layers was a breeze! 

The only thing bad about winter, in my opinion, is baking bread. I tried making bread once, and I didn't want to give it another go, because the bread here takes about 2-3 hours to rise! This is in comparison to the short 30-40 minutes it takes for my bread to rise in Singapore! Thinking about breads make me miss my bread rolls - for the past few months, I have been baking and modifying a single bread recipe, in a bid to perfect my bread roll recipe. I believe that after more than 10 attempts at the bread, I have come up with my perfect bread roll - which I have found to be really similar to the western recipes for "soft dinner rolls" and the Japanese pan. I have also attempted variations with this basic recipe, and have found them to be equally nice. 

Japanese Soft Rolls 

Ingredients:
300g    bread flour
30g      butter, unsalted
210ml  milk (weighed together with one yolk)
30g      castor sugar
4g        salt
5g        yeast 


Method:
  1. Let the butter soften to room temperature and allow the milk to stand to room temperature as well. 
  2. Using the recommended addition of ingredients of your bread machine, place the ingredients (flour, milk+yolk, sugar, salt and yeast) into your machine and allow it to start kneading. I recommend using the basic kneading program because you will eventually remove the dough to bake in the oven. (If hand kneading, mix flour, sugar, salt and yeast together, before adding in the milk and yolk. Knead for about 5 minutes, before adding the butter as below.)
  3. After a rough dough is formed, add in the butter in small cubes into the dough, allowing the butter to be kneaded into the dough. 
  4. Once the dough is tacky, allow it to rest for approximately one hour, or until it has risen to twice its size. Alternatively, just use the basic white bread program on your bread machine, which includes the rising time.
  5. Punch down the dough and remove it from the bread machine. Shape the dough into your desired shapes. You can also weigh the dough to make sure you get evenly sized rolls. Place the shaped rolls into a baking tray or pan and cover it with a tea towel, allowing it to rise again for another hour or until doubled. If you wish to get rolls to stick together, make sure that you allow about 1-2 finger's space between the rolls because they will expand during the second rise. 
  6. Meanwhile, preheat your oven to 170 degrees. Once the rolls have doubled in size, apply an egg wash or milk wash on the tops of the rolls to get a nice browning when baking. 
  7. Bake the rolls for about 20-30 minutes, depending on the shape of the rolls. Once the tops get your desired brown hue, remove from the oven. Allow it to cool in their pans for about 5-10 minutes, before removing it to cool on a cooling rack. Make sure to cool it on the rack, otherwise moisture will form on the bottom and result in a soggy bottom. Also refrain from eating the rolls too soon, because the insides are still hot and are still 'baking'.  

Janine's jots: 
  • Taste: The rolls are slightly on the less-sweet side, so you can choose to add a little more sugar if you wish - my advice is not to, because sugar will inhibit the yeast from working as well, and you will have to add more yeast to get the same fluffy texture. In 
  • Texture: The bread tastes the nicest when it is fresh out of the oven, and is able to retain the same texture up till 24 hours later (ie, the next day). On the subsequent days, the bread will harden and it will tend to crumble when bit into. To make your buns even softer and fluffier, do try to make small dinner rolls, and make sure they stick to one another after proofing so that you can the 'tear-apart' rolls. 
  • Serving size: This recipe is enough to make approximately 5 100g sausage rolls, or about 6 80g dinner rolls. For the pictures below, I made a combination of them both. 
  • Storage: Best consumed within 24 hours. Freezes well for about a week. 
  • Would I make this again?: Definitely! Do check out the variations I have recommended you can make with this basic recipe. 
  • Other comments: Although I believe in hand kneading bread, I highly recommend using a bread machine or a stand mixer for kneading this bread. This is because the dough is really wet and hard to handle, especially for new bread bakers and you might be tempted to add more flour than you should. 

The above is really the stripped-to-the-bones, basic recipe, but having used this recipe on a regular basis for the past few months (I baked every other day to provide my family with bread for breakfast), I have come up with variants, all of which I find equally delicious. I don't have pictures of these variants, but feel free to experiment! Below, I have also tried to explain the science behind the variations, which I hope will help you because I find that an understanding of the science behind the ingredients help when I'm doing modifications to recipes. 

Variations: 
  • Flour: For the 300g of flour, you can substitute up to 100g of all-purpose flour. I do not recommend using more than that amount, because the bread will not turn out as fluffy. This is because all-purpose or pastry flour has a lower gluten content, which means that the flour is unable to form as much gluten, and gluten is the key to introducing air and fluffiness to the bread. I have also tried substituting some of the bread flour with wholemeal flour (again, up to 100g, but preferably 70g) and it works fine as well. The wholemeal bread will not be as soft as white bread, but that is merely because wholemeal flour contains husks and particles which cut the gluten strands, reducing the amount of gluten and air that can be introduced into the bun. Alternatively, just increase the amount of yeast by 1g to ensure that there is more yeast to form more gluten. 
  • Butter: You can use salted butter, but be sure to reduce the salt to about 2g so that the bread doesn't turn out too salty. If you are far too lazy to wait for the butter to soften, you can also melt the butter in the microwave and use it in the dough. Alternatively, you can also use oil (sunflower or olive oil) - both work as well - the only drawback is that the bread will not have the buttery taste which is oh-so-nice :] Also, if you use olive oil, try to use extra virgin or your bun will have that strong olive smell which some might not like. Also, reduce the oil to 20ml, because oil tends to be 'oilier' than butter, if you get what I mean (no pun intended). 
  • Milk: The original japanese recipe calls for 210ml of milk+yolk, and I have stuck to this in my basic recipe because I find that this gives me a really fluffy and nice tasting bread. Naturally, you can also use just 210ml of milk, which tastes just as nice. You can also reduce the amount of milk to approximately 100ml and top up the rest with water - the end result just doesn't taste as rich and buttery. Other variants I recommend are using cream - you can substitute about 30g of the milk for cream and choose not to use the yolk. The yolk merely acts as a tenderizer for the bread. Yogurt and sour cream substitutes work as well, but do not substitute all the milk for it, because you need that amount of liquid in the recipe to ensure a wet dough and to achieve the fluffiness. 
  • Sugar: I have used both castor and granulated sugar - there is not much difference in the end product. As for brown or raw sugar, I do not recommend it in this recipe, because you might get some of the graininess when kneading the bread. I have also tried to reduce the sugar to 20g - the bread to me tastes fine, but according to my mother, the 30g-sugar bread tastes the closest to those in stores. I have also used honey instead of sugar, and the result is a even softer and fluffier bun, but with a slight honeyish taste to it. Do try it if you're aiming for a sweet roll!
  • Salt: I have used table and sea salt - you might have to reduce the amount for sea salt a little because it is extra salty. 
  • Yeast: You can use up to 7g of yeast, but avoid using more than that because the bread will have a yeasty smell. 4g of yeast is really the least you can use, but you will have to put in extra effort to knead because the gluten takes a longer time to form due to less yeast. You can use less yeast if you want to knead for a longer time, or if you are keeping the dough overnight to rise in the fridge. Otherwise do increase the amount of yeast if you are using lower gluten content flour or wholemeal flour. 
  • Other variations: You can also try the tangzhong method for this recipe, which I have tried countless of times. For times I am lazy, I just use the straight dough method. I know there are detractors from the tangzhong method, saying that it doesn't produce fluffier breads, but I sincerely believe that there is a slight difference, and scientifically there should be a difference. The bread instead of turning crumbly after just 24 hours, take slightly longer to stale and retain to the fluffier texture for a longer time. Of course, since we do not use bread improvers or dough softeners, there is no way for our homemade bread to retain to the soft fluffy texture for long. Trust me, I've tried. 
  • For the tangzhong, use 20g of flour and heat it with 100ml of milk or water. Follow the method illustrated here. You then mix the 280g flour together with the remaining 110ml of milk. Add the tangzhong into the dough after you have mixed the other ingredients together. You can add up to 50ml of extra liquid, but do not be tempted to add anymore because it will be really hard to handle. I find that the tangzhong method enables me to hand-knead with greater ease, because some of the liquid is already 'cooked' into the tangzhong. 
  • You can also try the overnight rise (also known as the 17h method or 中种法) - the end result is delicious too! I have also tried the overnight rise together with the tangzhong method, and the result is a really soft and fluffy method, but the effort isn't really worth it, in my opinion. 


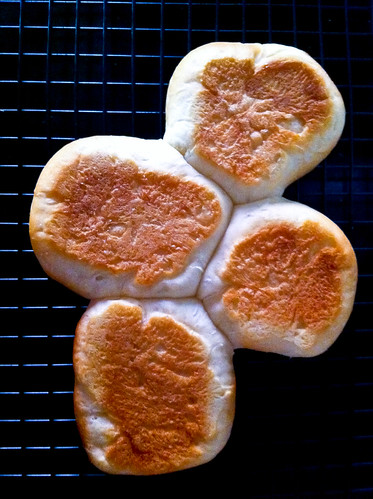
Lovely brown tops!

Oooh look at the bottoms - well baked too :]
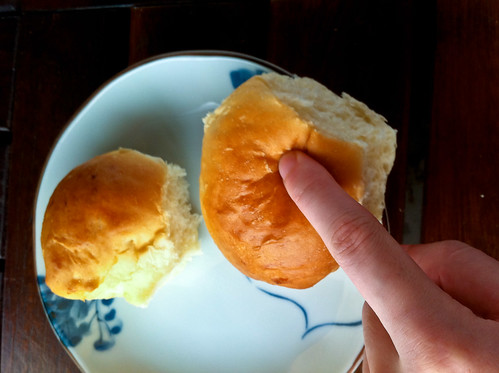
I just love this moment when you pull the rolls apart and see the 'strands' connecting them together :]
Look at how soft the bread is! Boing-boing!

I hope that someone will be encouraged to try this basic recipe out, as well as the variations I have recommended, because this really is the result of many attempts at perfecting this bread recipe. I will be submitting this for Jasmine's Aspiring Bakers #8: Bread Seduction - bread is really my favorite thing to bake, but I haven't been able to bake as much bread as I'd like here in Sydney since winter's a real pain in the ass for baking bread! Anyway, do try this recipe and let me know what you think! :]

Saturday, December 25, 2010

Japanese Soft Rolls (tangzhong method)

Writing the first entry for my virgin food blog is harder than I thought it would be. First, I had to decide which pictures made the final cut, and considering how much I fumble around in the kitchen, there weren’t a great variety of photographs to choose from. Then, I had to edit some of the photos because of the white balance; and finally, the actual crafting of this blog entry which took eons since this is the first time I’m writing something like this. I have been procrastinating over writing (or doing anything productive), but I figured that Christmas would be a good time to mark this virgin entry (although this entry was written a few hours before 25 December itself). Let this be 2010’s Christmas gift to myself, and may it still be in my life when Christmas 2011 comes around, considering the short lives of my many other pursuits.

So, back to (baking) business. This is perhaps the first recipe that had all around approval from my family members. God knows it’s the first recipe where I didn’t have any leftovers to deal with. And this comes at an opportune time, when I’m disappointed in other areas of my life (cue: results from school). I’ve been wanting to try out this tangzhong method that I’ve been reading about in some of the baking blogs I stalk on a daily basis, and I finally got my buns (pun intended) down to doing it yesterday night.

Here's the recipe for Japanese soft rolls using the tangzhong method.

First, what is the tangzhong method?
Tangzhong is hanyu for 湯種法, also known as the water-roux method. This technique was created by Japanese bakers (known as Yukone method) to increase the water content in breads. I’ve been blog-stalking a huge bit lately, and it appears that this method has been circulating ever since 2003 when Yvonne Chen’s “Bread Doctor” book was published.

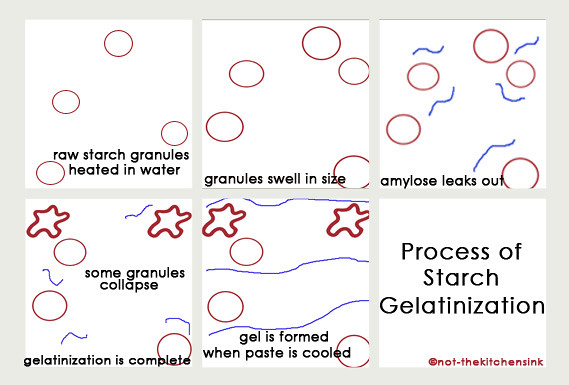
How does the method work? In short, the heating of the 1:5 flour and water mixture encourages more water to be absorbed. To indulge the food chemist in me (and anyone else), the longer explanation is that starch is present as granules in flour. Starch is a mixture of two carbohydrate polymers, amylose and amylopectin. Different starches contain these two polymers in different proportions. Wheat contains about 25% amylose and 75% amylopectin.

I have illustrated the process in the diagram below.

  1. Starch granules are insoluble in cold water.
  2. When heated in water, they gradually absorb water and swell in size, causing the mixture to thicken. 
  3. Amylose migrates out of the granule. 
  4. With continued heating, the granules take in more water and finally, fragment, resulting in the mixture becoming less thick. This process of granule swelling and fragmenting is called gelatinization
Once gelatinized, the granules cannot be recreated. Starches from different plant sources vary in the rate of gelatinization as well as the temperature at which they gelatinize. The film formed on top of the paste or the water that is ‘exuded’ is the result of retrogradation, which happens because these starch gels lack stability. An example of retrogradation is the phenomenon of stale bread. 
(Sources: here and here - this is in chinese)

The tangzhong is made when the paste reaches 65°C. However, for most people without a thermometer handy, it is not necessary to achieve such an accurate temperature. Basically, gelatinization occurs anywhere from 55°C to 85°C, depending on the type of starch, so just place 1:5 flour to water in a small pot on low heat, and stir, either with a whisk or even a spoon. A few things to note: put on low to medium heat because it doesn’t take too long for the paste to reach 65°C! I made a mistake and placed my first attempt on medium to high heat, and the mixture turned lumpy because I did not have a chance to mix the flour and water well before it thickened.

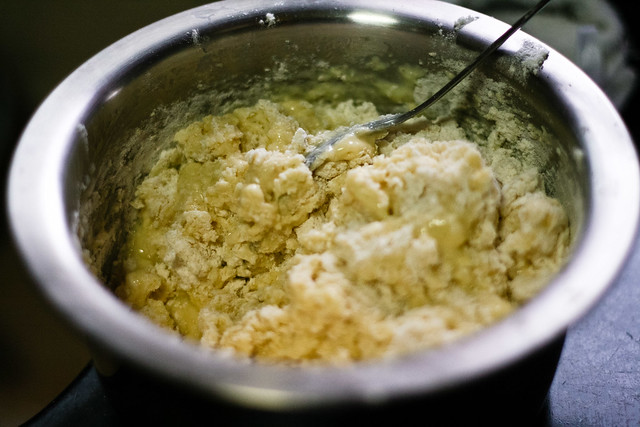
Once your whisk leaves tracks, the paste is done! It takes about a minute or two, and don’t worry if the mixture is slightly runny – it is meant to be that way! The picture below shows my cooled tangzhong which is ready to use in the recipe. If you are a graphic person, this link provides more photos to indicate what the final product should look like. 

Final Product


Lengthy explanation aside, here’s the recipe for Japanese Soft Rolls (adapted from here)

For the tangzhong:
25g        bread flour
125ml    water

Method (for tangzhong):


  1. Mix flour with water thoroughly to remove lumps. Place over low to medium heat and stir consistently with a whisk.
  2. Mixture will thicken and once tracks appear, the tangzhong is done. Remove from heat.
  3. You can either transfer the paste to a clean bowl and cover with a cling wrap to let cool or personally, I just place the lid on top of the pot to let it cool, because the film that might form when the mixture cools does not affect the final product much anyway. Note that this paste is not like a sourdough starter or sponge, so letting it ‘age’ in the fridge will not enhance the flavour.
  4. This produces slightly more than 120g of tangzhong required below.

For the bread:
350g     bread flour (I didn’t have enough, so I replaced 100g with all-purpose flour which worked fine)
55g       castor sugar
1 tsp      salt
56g        egg (or equivalent of 1 large egg)
7g          milk powder (optional)
125ml    milk
120g      tangzhong (from above)
5g          instant yeast
30g        butter, softened and cut into small pieces


Method (for bread):
  1. Combine all dry ingredients (flour, salt, sugar and yeast) together in a clean bowl. In another bowl, combine the wet ingredients (milk, egg and tangzhong).
  2. Make a well in the centre of the dry ingredients and add in the wet ingredients.
  3.  Knead until the gluten has developed – when you can pull apart the dough without it falling apart, and add in the butter. Continue to knead until the dough comes together and is not sticky.
  4.  This takes about 10-15 minutes of hand kneading and it is a very very messy process. I transferred the dough to knead on the counter top, and liberally added flour on the surface to help in my kneading.
  5. Once the dough passes the ‘window pane’ test, knead the dough into a shape of a ball and place it in a greased bowl and cover with a damp tea towel (or cling wrap).
  6. Let it proof until doubled in size (it takes close to an 1 hour in my kitchen)
  7.  Once doubled, transfer the dough to a floured counter top and divide the dough into equal portions (these will dictate how many buns you will have). I divided mine into 6 portions and kneaded them into ball shapes to rest for 15 minutes. This is to allow the gluten to relax a little.
  8.  At this juncture, if you want funny shapes, proceed to roll the portions into whatever shapes you want. I shaped the portions into tighter balls by pulling the ends towards the centre and placed them seam-side on the tray. Let them proof for another 40 minutes to an hour, until doubled in size.
  9. Brush some milk (or whisked egg) on the surface of the balls (this will give it a nice browned shine) and bake in a pre-heated 180°C oven for 20 minutes.
  10. Remove from the oven and transfer to a wire rack to cool before eating :)


In pictures
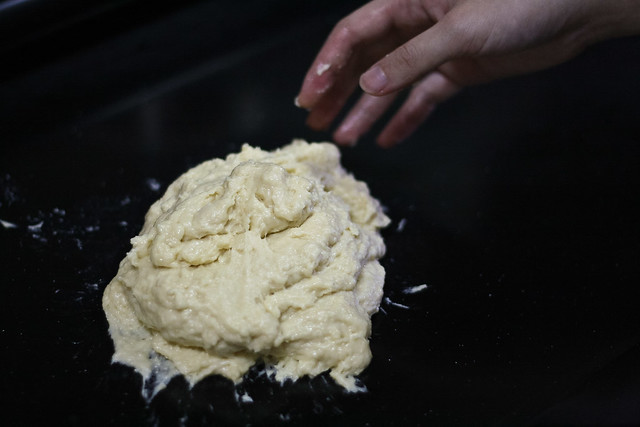
1. Mix wet ingredients into dry ingredients and knead. 

2. After adding butter, knead until dough comes together.

3. Knead dough into a ball shape and proof in a well-greased bowl. I used the same bowl that I used for proofing because I'm lazy to wash too many dirty bowls :/

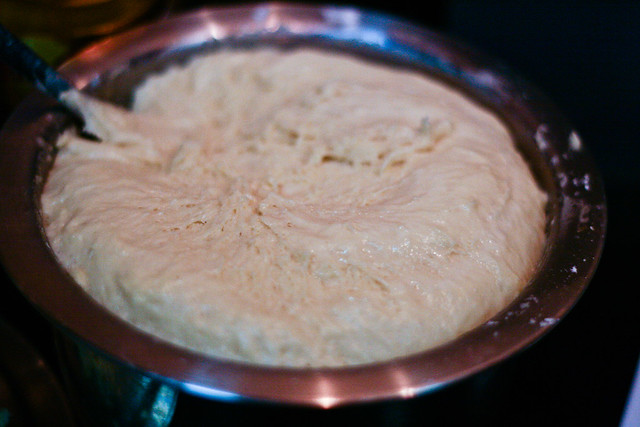
4. After an hour, the dough would have doubled in size. 


5. Remove from bowl and reshape it as desired.

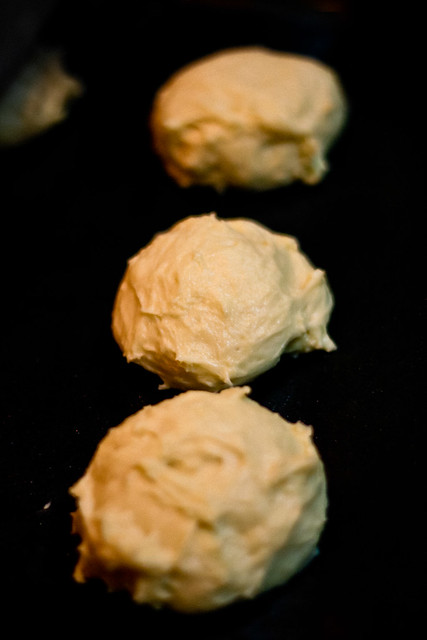
6. Shape into logs (I rolled in a sausage in them) or balls (these are plain) and add a wash of milk or whisked egg (as shown above).

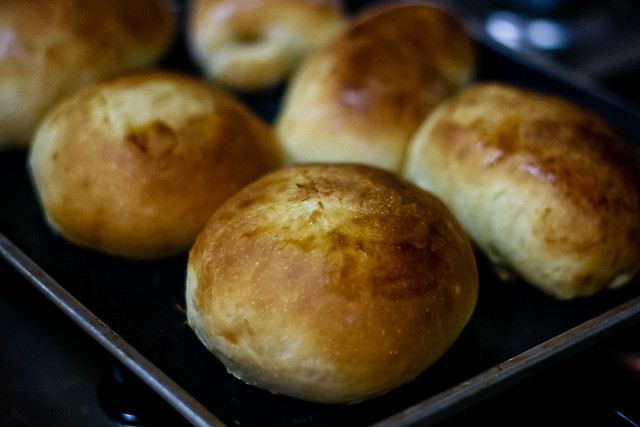
7. And Voilà! The buns are done after 20 minutes or so in the oven :)


PS: The initial kneading process really is very messy, so if you have a bread machine, do feel free to use it to do the initial kneading for you! I'll come up with a slightly modified recipe for those with bread machines sometime later!


Related Posts Plugin for WordPress, Blogger...