My blog has moved!

You should be automatically redirected in 6 seconds. If not, visit
http://www.unpastiche.com
and update your bookmarks.

Showing posts with label Fried Food. Show all posts

Monday, August 15, 2011

Malaysian Monday #5: Curry Puff, or Epok Epok

I tend to associate food with certain incidents or memories in my life, and this particular food is no different. I still remember the mornings when I would hear this little Malay boy walking across the back alleys on our rows of houses, shouting/singing a tune which till today, I can sing: "kuih kuih, nasi lemak". This phrase was then repeated a million times as he walked from one house to the another. I remember this little Malay boy rather vividly, because I would rush out of the house and hail him to stop. He would then lift the paper towels lining his bright red basket, and uncover the golden crescents of curry puffs, the banana leaf-and-newspaper covered nasi lemak packets, and other assorted kuihs. I still remember he had both kentang and sardin curry puffs, and I would buy an assortment of 5 for RM1. I remember the curry puffs eventually becoming smaller in size, until they became 4 for RM1. Of course, prices today have risen to about 3 for RM1, or worse still, 1 puff for RM0.40.


I remember those times rather fondly, because my mom would chastise us (myself and my brothers) for being lazy, and she would use that little Malay boy as an example. At a really young age (about 10 years or less), he would be wide awake selling his mother's kuih muih as early as 7am in the morning! I used to remember my mom telling us what a hard life that boy leads and how we should be thankful and shouldn't begrudge helping her mop the floor or perform other errands around the house. That lesson is still very much engrained in my memories, and I wonder sometimes, what happened to that little Malay boy? He should be close to 30 years old now. Hmm. 

Curry puffs are also known as epok-epok or karipap pusing or simply karipap among the Malay community, whereas us Chinese typically call it  咖哩角. Another name that I've always heard brandished about it "kari-pok" which is typically said by my less-educated relatives, who cannot pronounce "puff" and hence refer curry as "kari", as a direct Chinese translation, and well, as for pok, it's a bastardized English for puff I guess heh. 


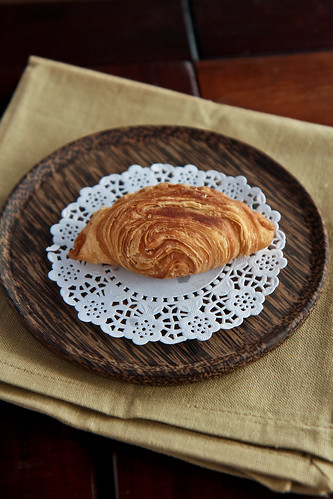
I love curry puffs, but the ones I love more, and also the ones I'll be featuring today, are actually the 千层咖哩角, or many layered curry puff, which typically cost more than the usual normal curry puff. This has been on my bookmarked list of recipes since forever, but I decided that this month was a good time for me to attempt it, because the theme of this month's Aspiring Bakers #10 is pie/tarts, which includes puff pastry. It might not strike some of you that this oil and water dough combination is our very own Asian/Chinese form of puff pastry! So many other Chinese treats make use of this quintessential oil and water dough - Shanghainese moon cakes and char siew sous are some that come to mind. 

Anyway, since this was a spur of the moment decision, I didn't have my camera at home in Malaysia with me (I can only deep fry things in Malaysia, remember?) and I'll have to direct those who are hoping for step-by-step photos to several outstanding bloggers whose posts I referred to in the process of making these puffs. Florence was the master I first turned to, and her instructions and step-by-step tutorial is perfect! For those who can read Chinese, Jane was another person I turned to - in fact, she has made them so many times in so many variations on her blog that she's a master of them already! Finally, another step-by-step I referred to is none other than the host for MMM, Suresh!


Curry Puffs
Loosely adapted from Florence's recipe 
Makes 16 medium sized curry puffs 

For the pastry
Oil Dough
150 g   all-purpose flour
40 g     butter
35 g     shortening

Water Dough
205 g   all-purpose flour
1 tsp     vinegar
50 g     shortening
30 g     sugar
95 g     water

For the vegetarian curried potato filling
3 small potatoes
1 onion, diced
3 cloves of garlic, finely minced
2 tbl garam masala
1 tbl chicken curry powder
Some curry leaves


Method: 
  1. For the filling, par boil the potatoes. Peel and cube them into small pieces. Stir fry the onions until fragrant and add in the garlic followed by the cubed potatoes. Add in the seasoning and cook for about 1-2 minutes, or until the potato softens to your preference. Leave aside to cool until room temperature. 
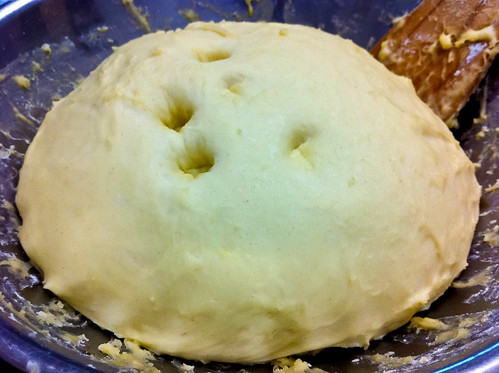
  2. Meanwhile, prepare the water dough. In a bowl, combine the flour and sugar. Add in the shortening and mix well with the dry ingredients. Add in the vinegar followed by the water and knead until you get a soft and pliable dough. It should take you about 10 minutes or less. Wrap the dough in cling wrap and leave it to rest for 30 minutes while you prepare the oil dough. 
  3. For the oil dough, in the same bowl, add shortening to the flour and mix well. Next, add in the cubed butter and mix everything well until you can compact everything into a ball. 
  4. Divide the water dough into 2 pieces of approximately 170-180g each, and divide the oil dough into 2 pieces of approximately 75-85g each. Working on one piece each of oil dough and water dough and wrap the other 2 pieces of dough separately in cling wrap to prevent them from drying out. 
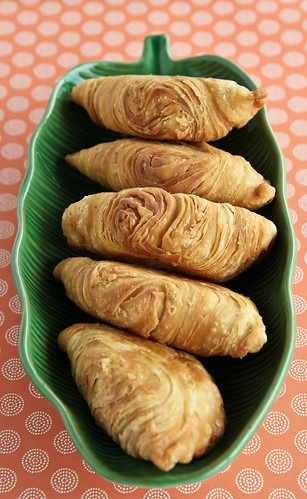
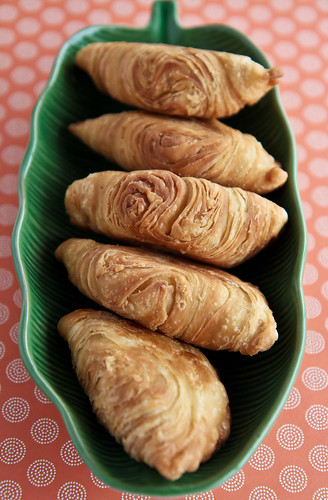
  5. Using a floured rolling pin, roll out the water dough until it is big enough to enclose the oil dough. Seal the oil dough within the water dough. With the sealed seam facing upwards, roll the dough into a rectangular sheet of approximately 1cm in thickness. Roll the rectangular sheet up from the shorter side, as if rolling up a swiss roll. You should get a horizontal scroll. Now, turn this horizontal scroll 90 degrees until it is vertical. Roll this out until you get another thin rectangular sheet of about 1cm in thickness. Again, roll the sheet up from the shorter end until you get a swiss roll. Let the dough rest for about 15 minutes before cutting the 'swiss roll' up into 10 portions. For each portion, you should be able to see the swirling of the water and oil dough. 
  6. To fill and shape the curry puff, flatten the disc using a rolling pin until you get a rough circle big enough to place your filling. Place about 1-2 tablespoons of filling in the centre and fold the circle into two. You should get a rough semicircle. Press the edges of the dough together and beginning from the bottom, pinch the edge of the puff with your thumb before bringing it upwards to the front. Repeat the process of pleating until the entire semi-circle is sealed.  
  7. Repeat the same process for the remaining pieces of dough. 
  8. Repeat steps 5 and 6 for the other 2 pieces of dough.
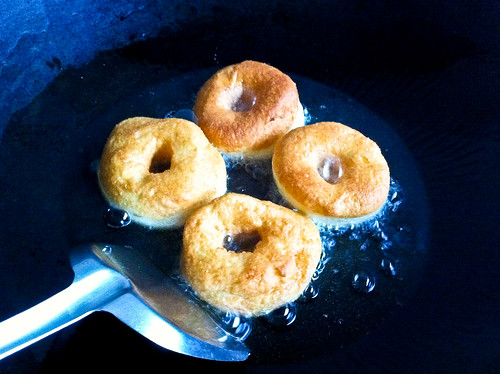
  9. Heat up a wok with at least 2 inches of oil. Deep fry the puffs on medium heat until they turn golden brown. Before removing the puffs from the oil, be sure to turn up the heat to medium-high to make sure that the oil does not leach inside the puffs. 
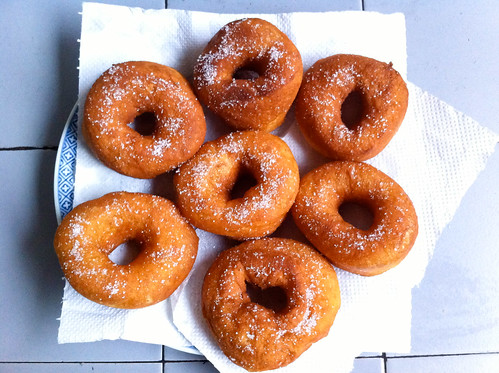
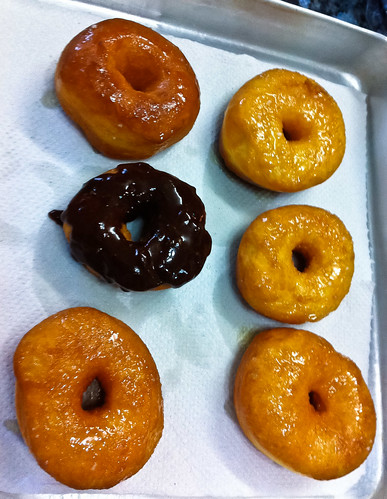
  10. Drain on paper towels and cool for at least 15 minutes before serving. 


Janine's jots: 
  • Taste: For the filling, be sure to add more spices and flavor than you normally will, because the filling needs to be really flavorful. I loved how the curry leaves gave the filling that extra punch - YUM! 
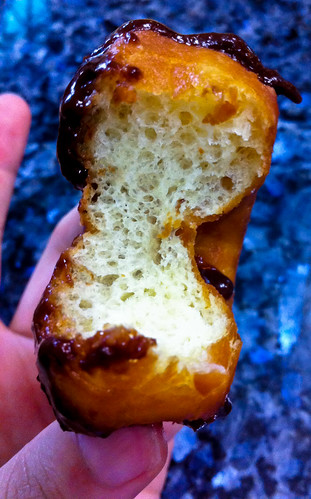
  • Texture: I absolutely love the textural layers on the outside which are so very crisp after frying. You are then greeted with a hot, spicy potato filling which is almost mushy, with some 'bite' from other bits of potato which I purposely left un-mushy. 
  • Serving size: I divided the dough into half and made 10 curry puffs out of a half portion of dough because I wanted smaller puffs and more crispy surface area ;p I think 12 is perhaps the smallest you can go because otherwise there is not enough dough to wrap enough filling for 3 small bites of a small curry puff. 
  • Modifications: You can choose to add chicken, carrots or peas or even hardboiled eggs into the filling - any variation including sardines is fine! Just make sure to make the filling extra tasty so that it will taste normal after frying. Also for the oil dough, I will probably try using more butter and less shortening the next time because I felt that the dough was slightly too crumbly for my preference. 
  • Storage: The curry puffs taste best on the day they are fried, but they keep well at room temperature for up to 3 days if stored in an air-tight container, and briefly reheated before consumption. You can also keep them in the fridge for up to a week, but the curry puff did not crisp up well in the toaster after that period of time. 
  • Would I make this again?: Although it was insanely delicious and rewarding to eat my own curry puffs, I'm definitely staying away from curry puffs for a while - I consumed more than 4 curry puffs within 2 days and looking at the huge amount oil that I used to fry them gives me the heebies jeebies. SO MUCH OIL and fats going to my hips!
  • Notes on frying: Do do make sure that you have enough oil in the wok. I had too little oil in the wok, and my heat was cranked up a little too high, which resulted in my first batch of puffs turning golden brown too quickly, and the inside layer of the puffs was not cooked through. 


Now that I know how much work goes into making a single curry puff, I'll never grouse paying RM1 for the large curry puff (with half an egg) I always buy from the makcik near my house! I'll be sending this onto Muhibbah Malaysia Monday hosted by Shaz of Test With Skewer and Suresh of 3 Hungry Tummies :]


Thursday, May 5, 2011

Light-as-air Donuts

I like donuts. A lot. And I like you tiao and ‘butterfly buns’ too. I used to go for long runs just so that I could treat myself to a butterfly bun and you tiao and ham chim peng afterward. So after salivating over many a post on donuts, I decided to finally take the plunge and try my hand at making them when I knew I was going back to Malaysia for the weekend. This was because of two main reasons – my mom abhors any form of frying while we’re in Singapore (the ventilation in our small kitchen is horrible), so there is absolutely no frying allowed. Back in Malaysia however, we have an outdoor wet kitchen, so I could fry my heart's out (to quote my mother). Second, I knew that I'd be bored out of my senses while in Malaysia because there’s no internet connectivity, so making some donuts for tea would be the perfect excuse to while some time away!

The donut-cutter in action!
Naturally, something had to go wrong. First, I had no donut cutter, and there was no other form of round sharp instrument which I could use as a substitute. Thankfully, I managed to get myself a smallish plastic donut cutter in the nearby Giant for a mere RM2.50! Second, I realized that I was out of bread flour only minutes before making the donuts, so I had to make do with all-purpose flour. I merely kneaded the dough a little longer to try to compensate for the lower gluten content. Lady Luck has been on my side for these last few bakes, because my forgetfulness gave rise to yet another happy mistake. The donuts turned out to tiny fluffy clouds and were a joy to consume. I shall not deny that I finished 8 donuts in a single sitting – I had donuts that were cinnamon-sugar coated, sugar glazed and also chocolate glazed. And ALL of them tasted oh so delicious! And because they were so light, I didn’t feel the greasy after-taste that you’ll sometimes get after consuming too many fried goods. 


Fried Donuts 
Lightly adapted from allrecipes and Lara’s recipe 
(PS Lara has a book all about doughnuts! Lovely recipes accompanied by lovely photographs - do check it out!)

Makes 27 donuts with a 9-cm wide donut cutter

For the donuts
7 g        yeast
30 ml    warm water
180 ml  warm milk
25 g      sugar
½ tsp    salt
1 whole egg + 1 yolk
25 g      shortening or butter
320 g    all-purpose flour

For the sugar glaze 
25 g    butter
80 g    icing sugar
½ tsp  vanilla
30 ml  water

For the chocolate glaze 
Adapted from Alton Brown's recipe, made only 10% of the given quantities


Method: 
  1. In a bowl, dissolve the yeast into the warm water until foamy, for about 5 minutes. 
  2. Add milk, sugar, egg and yolk, salt, shortening and 160g of flour into the bowl, mixing well. Once a smooth paste is achieved, add in the remaining flour. 
  3. Knead the dough, for about 15-20 minutes, or until a smooth dough is achieved. Cover the bowl and let it rest in a warm spot for 45 minutes or until doubled in size. 
  4. Punch down the dough and roll it to about 3-cm thick before using the donut cutter to cut out the donuts. Place the doughnuts on the baking sheet at least 3-cm apart and cover with plastic wrap. 
  5. Allow the donuts to rise until doubled in size, about 30-40 minutes, testing at five-minute intervals. To test whether the dough is ready, touch lightly with a fingertip. If it springs back immediately, it needs more time. If it springs back slowly, it is ready. If it doesn’t spring back at all, it has overproofed and you should punch it down and re-roll it. 
  6. Using at least 10-cm of oil, heat your wok or pot up to 175 degrees and gently drop the donuts into the oil. Fry for about 1 minute per side, until they rise to the top and turn golden brown. 
  7. Remove with a slotted spoon and drain on a wire rack over a paper towel, and let cool slightly before glazing. 

Janine’s jots: 
  • Taste: I’ve reduced the amounts of sugar required in the donut, so by itself the donut is pretty much very plain and not sweet as all – in other words, not too palatable if you eat it on its own. I highly recommend a glaze or sugar coating at the minimum to enhance the flavor profile of the donut. The sugar content in the glaze is also greatly reduced, do feel free to add up to 125g of icing sugar into the glaze. 
  • Texture: The all-purpose flour definitely gave the donut its ‘airy’ texture, much like how Krispy Kreme and J.Co donuts taste like, so for those who prefer more bite in their donut, you’ll have to substitute the all purpose flour for bread flour instead. 
  • Serving size: I'd probably halve the recipe in the future, because 27 donuts are a tad too many for a family to have for tea, but then again, the dough freezes rather well, so it makes sense to make an entire recipe and keep some for a quick fix next time!
  • Modifications: Egg whites provide structure, while egg yolks provide tenderness – so since I went the route of all-purpose flour and ‘cloud-like-ness’, I decided to use an extra yolk instead, to further add to the tenderness of the donut. You can see that in Lara’s recipe, she uses a maximum of 3 yolks to tenderize her donuts, but her recipe calls for bread flour, so do note the subtle differences! 
  • Storage: Although the dough freezes well (you can freeze it before the first proofing, but it's best if you freeze after the punch down so that you save time on proofing the next time), the quality of the fried donut deteriorates rather rapidly after a day. I tried a day-old donut and it just didn't taste as good as when it was eaten hours after it was fried. So, do consume these babies asap!
  • Would I make this again?: I would probably not repeat this any time soon, not because I didn’t like it, but because it’s way too addictive. Like I said previously, the lightness of the donut is rather deceptive and makes you eat more than you should! 
  • Other comments: Do feel free to substitute a bread machine or electric mixer for the first few steps of the recipe. You will realize that it’ll take some time for you to achieve a smooth dough because all-purpose flour has less gluten content and will take longer to form those gluten chains. 


In pictures: (photos again taken with my trusty sidekick, the iPhone)

After the first rise - to check if the dough has sufficiently proofed, press a finger into the dough. If the dough bounces back, it is not sufficiently proofed. If the indentation remains, you can begin punching down the dough and shaping :] As you can see, I was a little over-zealous with the checking :p
Using my donut cutter. I removed the donut holes and actually re-rolled them into sheets for more donuts because I don't really like donut holes :p I don't think the textures of the donuts were affected much by the re-rolling.
All cut and ready for the 2nd proofing. They kinda look outta shape cos they're pretty fragile with the holes in the centre and I don't exactly have a light touch =X
I chose to fry them in a wok instead of a pot because my mom says that woks use less oil than required.  My oil is a little too hot here because some of the donuts wrinkled immediately after I slid them into the oil and are turning wayyyy too brown!
Ooooohhhh look at these lovely donuts - all brown and sugary :] And look at the difference between this shot which is taken outdoors and two photos before this which was taken indoors. Bleh :/
Here's a close-up - my donuts are a tad too brown because I can't control my fire properly - it's my first time frying something! 
Not a pretty picture with icky shadows, but just wanted to show you the sugar and chocolate glazed donuts. Those are not oily donuts but my sugar glazed ones! Really really good - I like the glazed ones better than the normal sugar sprinkled on ones. 
And a picture of the inside before it disappears into my tummy. Look at those holes - LIGHT AS AIR I tell you!

I actually only made 18 donuts with my dough, because I kept a third of the dough in the freezer since I felt that 18 donuts were way too many for a family of 5 to have for tea (I was wrong). Like I mentioned, I combined what I thought was good about both recipes to get the recipe above. I thought that it was a pretty good primer into the world of making donuts, and I definitely have much more to learn - but I'll have to wait until I can get my hands on a wok of hot oil again (in Malaysia), so that I can fry myself some more donuts! If you're wondering about the excess frozen dough - here's a hint, I didn't fry it and no, it wasn’t donuts! ;p
Related Posts Plugin for WordPress, Blogger...