I had wanted to post this yesterday, on Chap Goh Meh, or the 15th day of Chinese New Year to round up the last of my CNY themed posts, but work came up and I couldn’t finish the post in time.
So here it is, one day after the last day of CNY, which is rather apt as well since this is my concluding and round-up post for all the festive baking I’ve been doing. I know many people do their cookie baking in December, because Europeans and Westerners in general tend to associate cookies with Christmas. For myself however, the cookie mania starts the month before Chinese New Year, whenever that is. This year, I’ve actually baked about 20 varieties of cookies, playing around with different recipes. Eventually I think I went back to my kampong bringing 16 types of cookies, most of which had good reviews from my relatives. I still have loads more cookies I want to attempt, but I’m shelving them for next year, and who knows, I might come up with even more ideas the next time.
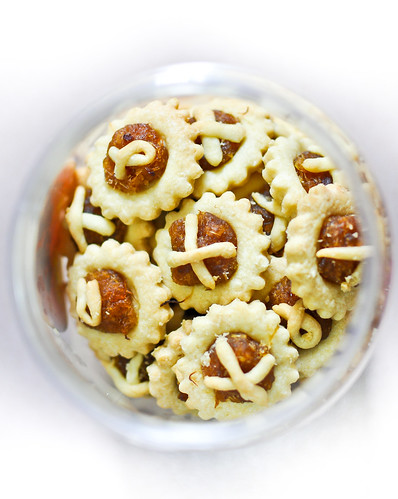
 |
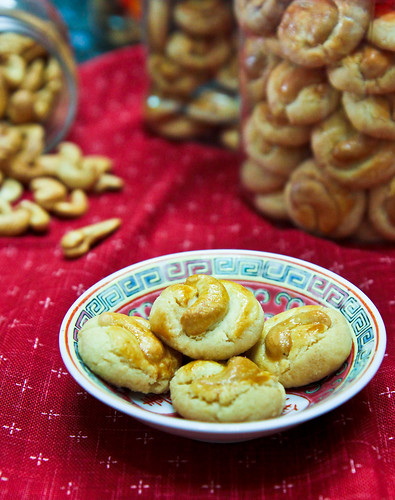
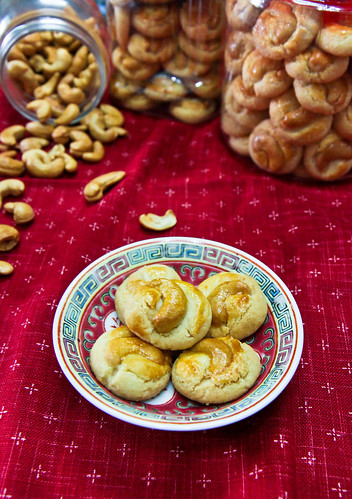
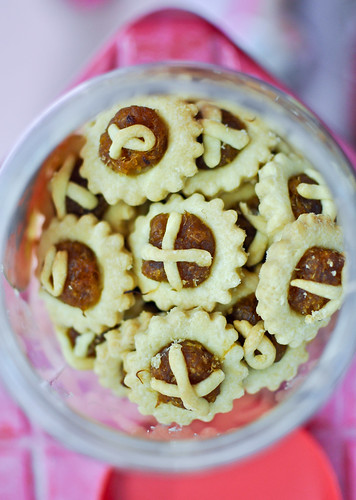
| Some of the cookies packed in jars ready to be brought back to my grandma's |
So anyway, I started making pineapple tarts about one month ago, slightly after Christmas. This year, I had a goal – to find the best pineapple tart cookie by trying as many recipes as I could and deciding upon the best. I’ve to admit that I’ve failed in this endeavour, because there were pros and cons to each recipe, but I’m glad I tried that many recipes, because it helped me distill what I liked and didn’t like for each recipe. This I believe puts me in better stead of pineapple-tart making next year :]
These are the sum total of recipes that I tried, which I've divided into two categories:
Recipes with 'melt in the mouth' texture, suitable for enclosed tarts:
Recipes with a more solid sturdy texture, suitable for open-faced tarts:
My mom's friend Karen's recipe
My grandaunt Rita's recipe
Along with these recipes that I've tried, I had also bookmarked a couple of other recipes, but I wasn't able to try them because well, I didn't have that much pineapple paste for that many tarts. Here's a short list of recipes that I'll probably try next year:
Wendy (uses cream and cream cheese)
Sonia (uses condensed milk)
Tracie (uses rub-in method as well)
I'll just start by saying that although I did make and try 6 different recipes, I don't believe I've found 'the one' yet, because there are things that I both liked and didn't like with each recipe, but I think with some tweaking any of these recipes could easily be it. There are basically two methods of making pineapple tarts, the creaming method and the rub-in method. I'll start by writing in detail how each of these methods work, because besides the difference in ingredients, everything else will be identical.
Sieve dry ingredients (which may include flour, corn flour, salt, baking powder, milk powder, custard powder) together. Set aside.
Beat butter and cream together with sugar until lightened and fluffy. Add in vanilla extract.
Add in the egg yolks and mix until well combined.
Slowly beat in the flour mixture until just combined. Once the flour comes together, stop mixing. Shape the dough into a disc shape and leave it to chill in the fridge for at least 1 hour, or until slightly firm.
In the meantime, divide the pineapple paste into equal sizes, rolling them into balls.When ready to make the tarts, remove the dough from the fridge.
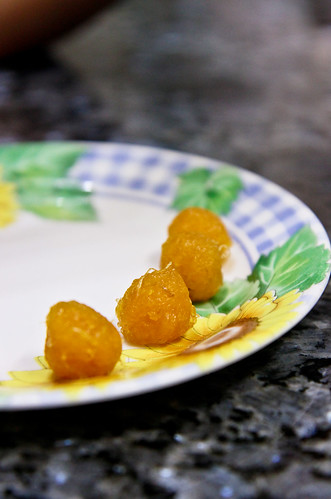
For enclosed tarts, weigh and roll the dough into equal sized balls. Flatten the balls into a round disc and place the ball of pineapple paste in the centre. Pinch the seams of the dough disc together and give the ball a quick roll. You can choose to shape the ball into a spherical ball, or make it slightly elongated and rectangular, or slightly oval to mimic pineapples.
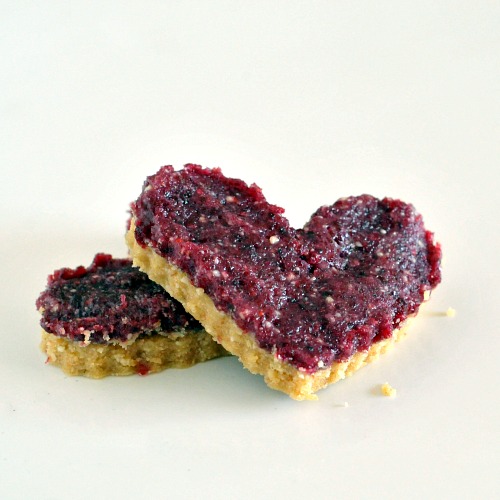
For open-faced tarts, make sure that the dough is quite firm after at least an hour of chilling. Roll out the dough on a clean work surface (you don't need to flour the surface if the dough is buttery and firm enough) until you get the desired thickness. I tend to roll it to about 1 cm thick. Using your desired cutter, cut shapes into the dough. Then, proceed to place your ball of pineapple paste in the centre of the shape. You can also choose to put designs on the tarts as I've done.
Once you're done, give the tarts an egg wash and bake in a preheated oven at 170°C for 18-20 minutes, or until golden brown. Make sure to turn the tray 180° at the 10-12 minute mark, to make sure there is even baking/browning all around.
Rubbing-in method:
Sieve dry ingredients (which may include flour, corn flour, salt, baking powder, milk powder, custard powder) and sugar together. Set aside.
Dice the butter into 3-cm large cubes and place them in the fridge until ready to use. Make sure the butter is really cold. Using a pastry cutter or a fork or your fingertips, rub the butter cubes into the dry ingredients until you get flattened pieces of butter coated with flour and the mixture resembles bread crumbs.
In another bowl, beat together the egg yolks, vanilla and cold water (if any). Add it into the butter mixture and using your fingertips, gently combine the wet and dry ingredients, pressing gently until a dough is formed. Do not knead the dough excessively because you do not want the butter to melt! Wrap the dough in plastic wrap and chill in the fridge for at least 30 minutes to 2 hours.
In the meantime, divide the pineapple paste into equal sizes, rolling them into balls.When ready to make the tarts, remove the dough from the fridge.
For enclosed tarts, weigh and roll the dough into equal sized balls. Flatten the balls into a round disc and place the ball of pineapple paste in the centre. Pinch the seams of the dough disc together and give the ball a quick roll. You can choose to shape the ball into a spherical ball, or make it slightly elongated and rectangular, or slightly oval to mimic pineapples.
For open-faced tarts, make sure that the dough is quite firm after at least an hour of chilling. Roll out the dough on a clean work surface (you don't need to flour the surface if the dough is buttery and firm enough) until you get the desired thickness. I tend to roll it to about 1cm thick. Using your desired cutter, cut shapes into the dough. Then, proceed to place your ball of pineapple paste in the centre of the shape. You can also choose to put designs on the tarts as I've done.
Once you're done, give the tarts an egg wash and bake in a preheated oven at 170 degrees for 18-20 minutes, or until golden brown.
Very importantly, I forgot to add that I use my mom's recipe for the pineapple paste and she does it the old-fashioned way - grating the pineapples by hand (no blender please!) so that you can the fibrous strands that you can see in the enclosed tart photo below. Here's the l
ink to my mom's recipe. I'm really can find no fault with the recipe, so I haven't really bothered with trying other recipes floating about the internet. And don't get put off by the fact that pineapple jam takes long to make - it is in fact exactly like any other fruit jams and it really doesn't take a whole day. If you cut and grate the pineapples quickly enough, then cook the jam right after, it'll only take you say 4 hours at the most? It's best if you have a side-kick like me and my mom, so one person does the cutting and grating and the other does the constant stirring on the stove :]
Preliminary notes: There were things I both liked and disliked about each recipe, and I'll be briefly jotting them down below.
Recipes with 'melt in the mouth' texture, suitable for enclosed tarts:
Youfei's recipe
(rub-in method)
180g butter
¼ tsp salt
250g all-purpose flour
20g corn flour
10g milk powder
50g icing sugar, sifted
1 yolk
¼ tsp vanilla
Comments: I actually made two batches of this recipe, because I liked the melt-in-the-mouth texture that this provided. However, I found it too sweet, so I decreased the icing sugar to just 20g for the second batch and upped the vanilla to half a teaspoon. Definitely a recipe that I'll turn to again next year.
Agnes Chang's recipe
(uses creaming method)
220g unsalted butter
50g castor sugar (or icing)
½ tsp vanilla
2 yolks
360g all-purpose flour
10g corn flour
8g milk powder
¼ tsp salt
Comments: I thought the sugar amounts here was just right, although I would increase the vanilla to 1 teaspoon because I personally don't like the taste of yolks. I would also increase the milk powder slightly more the next time around. This recipe got quite a lot of raves from my relatives for its tenderness and melty texture, although I'm personally not a fan because I thought it stuck to the roof of my mouth too much.
Little Teochew's recipe
(rub-in method)
400g all-purpose flour
50g corn flour
¼ tsp salt
280g cold, unsalted butter
3 egg yolks, beaten
½ tsp vanilla
3 tbsp cold water
6 tbsp icing sugar
Comments: I found the dough too soft because too much water was added. Next time round, I'll decrease this to 1 tablespoon instead. Taste-wise, I didn't think there was much of a difference between this recipe and the previous one above.
Recipes with a more solid sturdy texture, suitable for open-faced tarts:
 Lily's Open-face Pineapple Tart Recipe
(uses rub-in method, or use a food processor)
280g flour
1tsp baking powder
¼ tsp salt
1 tablespoon sugar
110g butter
56g margarine
1 yolk
½ tsp vanilla
2-4 tablespoons chilled water
Comments: This produced one of the sturdiest tarts ever, but the tarts were way too bland. I thought a little bit more sugar and some milk powder would help. Definitely like it because it handles very well for open-faced tarts.
Karen's Pineapple Tart Recipe
(uses creaming method)
140g margarine
120g butter
40g icing sugar
2 eggs
370g all-purpose flour
40g corn flour
¼ tsp salt
Comments: Since this is my mom's friend's recipe, I'm quite biased towards it because I thought it was a pretty good recipe to begin with. I did more tweaking for it the second time around, using 220g butter and just 40g of margarine to give it that crispiness. I also substituted some corn flour with milk powder to enhance the taste. Another recipe that I'll try again next year for open-faced tarts.
Rita's Nyonya Pineapple Tart Recipe
(uses rub-in method)
400g all-purpose flour
250g salted butter
1 egg
40g sugar
(optional: ½ tsp vanilla)
Comments: This is probably a recipe which is more than 50 years old. My grandaunt has been using this recipe since a long long time ago, and you can probably tell that it is an old recipe because it doesn't contain much frills. The original recipe has just 4 ingredients - butter, flour, egg and sugar. And this was the recipe that my mom used for a decade or more, before I stepped in with my experiments ;p This is definitely a versatile recipe for both open-faced and enclosed tarts, and I believe most other nyonya or nastar rolls will use similar recipes. In fact, the original recipe makes use of margarine, which gives it a very crisp texture. In my attempts using this recipe, I used unsalted butter with a half teaspoon of salt, and a teaspoon of vanilla, and substituting 20g of flour with milk powder. Delicious!
Janine's jots:
- Serving size: Most of these recipes make use of a block of butter or thereabouts, and with this amount, you can probably make 80-100 pineapple tarts, depending on whether it is the enclosed or open types, and how large your tarts are.
- Storage: Separately, you can store the pineapple paste in an air-tight container in the fridge or freezer for up to a year. The paste does not freeze in the freezer because of the sugar content and yes, I've tried using a year-old paste which my mom made the previous year. You cannot tell the difference after it's baked. For the dough, you can make it up to a week in advance, although I would advise making it a maximum of three days before lest the 'fridge' smell seeps into the dough. After you've baked the tarts, wait for them to cool completely and store them in air-tight containers. They will laste for about a month before they lose their crispness or tenderness.
- Would I make this again?: Definitely! And I'm going to go about it more scientifically next year so that I can definitively come up with "the best" pineapple tart recipe!
- Other comments:
- You will realize that actually, the proportions are largely similar. In fact, I did a brief calculation of the proportions of butter to flour, which I think is the main factor affecting taste and texture in the tarts, and the recipes range from a 0.58-0.65 ratio of butter/fat to flour. Of course, within these ratios itself, you could probably play around with using shortening, margarine, ghee or butter or even cream cheese, all of which will impact upon the flakiness and 'shortness' and tenderness of the tart. I haven't tried all combinations, but I personally like using all butter for the enclosed version, and using some margarine or shortening when I need the open-faced tarts to be more crispy.
- The other difference of course is choosing to use corn flour to substitute for some of the all-purpose flour. I think there is a difference in how sturdy the tart turns out, but I also believe that using cake flour, or triple-sifted all-purpose flour might also do the trick. Custard powder is actually yellow-colored cornstarch/flour, so please don't be fooled and go all the way to buy custard powder. You can actually use the same amount of cornstarch together with 1-2 drops of yellow coloring to get the same effect.
- Another thing about the dry ingredients or flour proportions is that I like the addition of milk powder because I find that it gives the tart a nice milky flavour. You can substitute about 5g of milk powder to every 100g of flour required in the recipe, or you can experiment and find which quantities you like best. Alternatively, if the recipe requires the addition of cold water, you can substitute that with cold milk. I've tried that in some of the recipes above and it works the same, although the milky flavor is not as intense because so little milk is added.
- If you notice, there are varying amounts of egg being used - some use the whole egg, while most tend to use just the yolks. From what I know from food science, the yolk provides the moistness and tenderness, whereas the white provides the structure; so if you use the whole egg, it is likely that you'll get a sturdier crust whereas if you use just the yolk, you'll get a more tender crust.
- For sugar, you can use icing sugar if you want a meltier texture, but otherwise, castor sugar works fine as well. I don't like my tart crust to be too sweet, because the pineapple paste is already sweet, so I tend to use about 30g of sugar to 250g of butter for the recipes.
I have no idea how the creaming or rub-in method affects the tart, because I didn't actually attempt making a single recipe using varying methods. I can probably generalize it by saying that it is likely that rub-in method gives you a melt-in-your-mouth, tender texture, but then again, the creaming method can also provide the same results (see Agnes Chang's recipe above). So the method probably does affect the end-product to some extent, although I'm not sure what. Anyone has any idea?