My blog has moved!

You should be automatically redirected in 6 seconds. If not, visit
http://www.unpastiche.com
and update your bookmarks.

Showing posts with label Bread. Show all posts

Sunday, September 23, 2012

The best buttery laminated pastry ever - Kouign Amann

If you asked me a couple of years ago if I would ever utter the words kouign amann (pronounced as quiee-ah-mahn) in Singapore, I would have thought you're nuts. But well oh well, with the great number of 'hipster' cafes and patisseries and bakeries popping up in Singapore lately, it appears that pastries like this king of laminated pastry has made its appearance in our sunny little island. 

I might be a bit slow on the take up since I never did patronize Tiong Bahru Bakery when it was hip since it was a tad out of the way for me, but when it opened at Raffles City, my kind colleague/roommate got me a croissant and in her words, "this thing that the staff recommended me to get". She couldn't remember the name of the pastry, but when I saw it, I had a little sneaking suspicion that this might be a kouign amann, but I wasn't very sure because from my experience, kouign amanns generally look more rustic and bread like whereas Gontran Cherrier's version looked a tad puff pastry/danish like. Nevertheless when I bit into the pastry, I was sure. Nothing else in this world can taste so sinfully buttery and sugary!
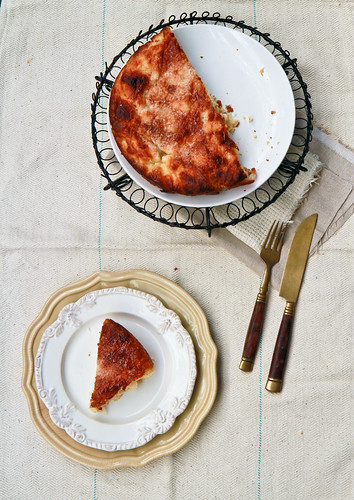


I first got a taste of this heavenly pastry when I was in Paris. I had been stuffing my face silly with macarons, entremets and sweet gâteaux and was growing quite sick of them. Although I like cakes, I'd much prefer pastries and breads. So naturally I did some googling to check what other pastry I should have other than the usual croissants and danishes, and I stumbled upon this mysterious pastry known as the kouign amann. 

Call me crazy but I still remember my first experience of the kouign amann. Jon and I had been walking along Champs-Élysées hunting for a nice leather jacket when we stumbled upon Ladurée. I guess we might have been lucky because the queue was not that long and I even managed to get a couple of photographs of the interior before the staff told me 'no photos'. I got myself the usual - a box of macarons, a croissant, and I pointed to the kouign amann. Back then, I didn't speak French and  naturally didn't want to embarrass myself by massacring the pastry's name. I remember that it smelled delicious, of caramel and butter, and even before I stepped out of the store, I had already slid it out of its paper bag to devour it. My first taste was almost like ambrosia. Until that point in time, I had never ever eaten any pastry that was so deliciously good. I knew I shouldn't have offered any to Jon because he then proceeded to demand that I share this delicious pastry with him. I don't remember where else we went in Paris that day, but I knew that the best memory of the day was walking along the Champs-Élysées, and the Arc de Triomphe whilst devouring the kouign amann. 

Last year, after mastering the art of laminated dough, I decided it was time that I make my own kouign amann and relieve those wonderful memories. You might notice that my kouign amann looks very different from the one that Tiong Bahru Bakery is selling, but I would think mine is a more accurate version - after all, kouign amann is Breton for butter cake and according to wiki, it is a "round crusty cake, made with bread dough containing layers of butter and sugar folded in" ;p
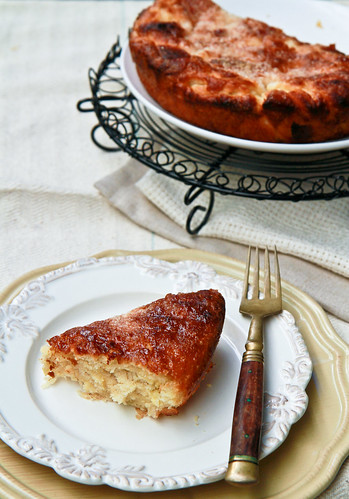


I finally decided on David Lebovitz's Kouign Amann recipe as opposed to Ladurée's because of the crazy amount of sugar and butter that Ladurée's had.  

Kouign Amann
Fills an 8" round cake pan

12g dried yeast (or 5g of instant yeast)
175g (¾ cup) warm water
260g all-purpose flour, plus extra for rolling out the pastry
½ teaspoon sea salt
200g castor sugar, divided, plus extra for rolling out the pastry
110g salted butter, cut into 2-cm pieces

Method:

  1. In a mixing bowl, dissolve the dried yeast in the water with a pinch of sugar. Stir briefly, then let stand for 10 minutes until foamy. If using instant yeast, you can skip this step and add yeast together with the flour. 
  2. Gradually stir the flour and salt into the mixing bowl. The dough should be soft, but not too sticky. Lightly dust your countertop with flour and transfer the dough onto it.
  3. Knead the dough with your hands until the dough is smooth and elastic, for about 3 minutes. If the dough is very sticky, gradually add more flour, about 10g or one tablespoon at a time, until the dough doesn’t stick to your hands. Gather the dough into a bowl and place it into a lightly oiled bowl. Cover and let it rest in a warm place for about 1 hour, or until the dough ball has doubled. 
  4. Then, on a lightly floured countertop, roll the dough into a rectangle about 12″ x 18″ (or 30 cm by 45cm) with the shorter sides to your left and right. If you would like a step-by-step illustration, do pop by David Lebovitz's page!
  5. Mentally divide the rectangle into three equal portions and distribute all the butter cubes in the centre of the dough. Sprinkle 50g of sugar together with the butter cubes. Grab the left side of the dough, lift and fold it over the center, and do the same with the right side (like a letter). 
  6. Then, sprinkle another 50g of sugar along this rectangle and mentally divide this rectangle (it should be about 15cm by 30cm) into three equal portions again. Fold the left over the centre and the right over the left, like in the previous step. You should get a 10cm by 15cm rectangle. Place this on a lightly oiled plate and place it in the fridge for 1 hour. Once chilled, remove the dough from the fridge.  
  7. Dust the countertop with sugar (instead of flour) and roll out the 10cm by 15cm rectangle into a 30cm by 45cm rectangle again. Sprinkle the surface of the rectangle with another 50g of sugar and fold it into thirds, per step 5 again. Place on a lightly oiled plate and let it rest in the fridge for another 30 minutes to 1 hour.
  8. Preheat your oven to 220°C (425°F) and brush the 8 inch cake pan with melted butter. Remove the dough from the fridge and roll it into a circle about the size of your baking pan. The dough might be sticky, so use sugar to lightly dust your countertop. Sprinkle the top of the dough with the remaining 50g of sugar. You may wish to drizzle some melted butter as well. 
  9. Bake for about 40 minutes, or until the top is brown and deeply caramelized. Remove from the oven and let it stand for 15 minutes before running a knife around the edges to release the Kouign Amann. Let it cool for at least an hour before consuming. 
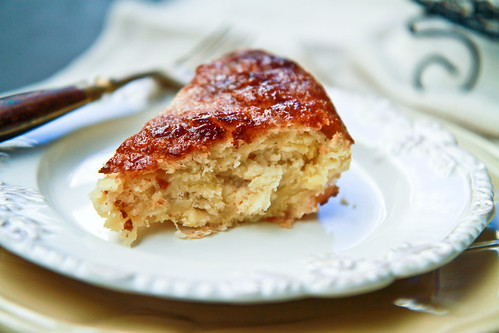

Janine's jots: 
  • Note: Like what David Lebovitz recommended, be sure to use good quality salted butter because it will make a difference. If you don't have access to a good French salted butter (like say Elle & Vire being the most commonly available in Singapore and Malaysia), use normal salted butter and sprinkle some coarse fleur de sel or sea salt on the butter cubes. Also, if you have the luxury of an air-conditioned kitchen, do use it because the dough is very sticky and the sugar melts very quickly, so you have to be quick. As you can see, my layers weren't very prominent because my warm hands caused the sugar to melt soooo rapidly and the butter and sugar just leaked across the layers. 
  • Taste: I found this kouign amann to be slightly less sweet than what I recalled, and definitely not as sweet as Tiong Bahru Bakery's, but it was just nice for me. 
  • Texture: I must admit I deviated from David Lebovitz's method, which was a bad thing. I tried to be ambitious and did the letter-fold four times instead of three as prescribed, and this caused the dough to be slightly more tough and the end product more bread-like. Ideally, this should have less folds than a puff pastry or a croissant. 
  • Serving size: I'm quite used to seeing the kouign amann in this cake-slice version, but Pierre Herme does it individually in large muffin cups whereas Tiong Bahru Bakery does it like a pinwheel. Naturally, the individual portions means more caramelized bits(!) and more yumminess but this round cake version is equally tasty as well, and definitely more rustic. This recipe will feed 8 people comfortably. 
  • Storage: It keeps quite well for about 3 days at room temperature, but I would definitely recommend storing it in the fridge and heating it up with the microwave. 
  • Would I make this again?: YES definitely! If I had to pick between a danish or croissant or this, I would definitely choose this anyway. Plus, so many people who tried this sang praises of it. Jon's friend called it "the awesome thing" :] There are a couple of methods and recipes to making the kouign amann and after I work off all the extra butter and sugar, I'll get down to experimenting with those recipes, especially Ladurée's version!

Tuesday, September 11, 2012

Luna Park, North Sydney and Hokkaido Milk Buns with Red Bean Paste (with tangzhong)

Over the weekend I finally had time to upload photos from my CF card (containing photographs I took while I was in Sydney almost 2 months ago) onto my computer. It made me feel a little sad, because those days were so carefree and for the month I was there, it was the first time when I didn't have to study because I had no exams sit for and there was no work to worry about, because work had not started. I basically did what I loved - planning for my meals, shopping for ingredients, and cooking for my loved one :] We also found time to go for holidays and attend church on the weekend. 

It's been a long time since I went to church in Singapore, but I must say that the people at CCC made me feel so welcome. I enjoyed the services because well, the sermons were about church history and me being a history/knowledge buff, I practically soaked up the information on the reformation period. Everyone was so friendly and inclusive that I decided to bake a couple of cakes and cookies each time I attended church. I must admit that I had an ulterior motive, because all those people at church just meant for guinea pigs for my baking, but well, I felt good because everyone only had good comments for the stuff I baked heh :]


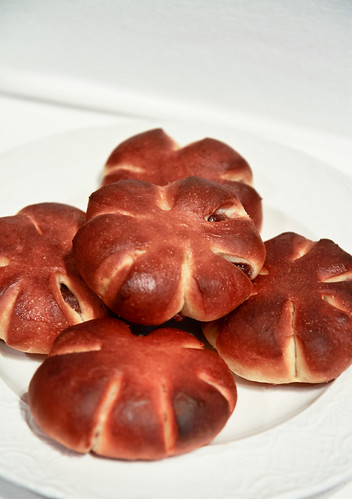
To start off, I decided to stay safe and stick with stuff I knew, so I made a hokkaido milk buns with red bean filling. I knew that this would be popular because soft Asian-style breads in Australia don't come cheap and well, most of the people at church were Asians, some of whom have been born in Australia, some of whom are studying in Australia for a couple of years.


CCC is over at Milsons Point, which is in North Sydney. The view of the Sydney Opera House you see above, is from Milsons Point. The only other way of getting the same view is to take a ferry from Circular Quay to places on the other side, to Watsons Bay and the like. The north shores of Sydney are not much of a tourist attraction, which perhaps explains why I have never step foot to places like Chatswood (a very Asian-populated area) and North Ryde. There's lots of good Asian food there, with huge shopping malls that Singaporeans and Malaysians are acquainted with, but I think I very much prefer Sydney on the other side of the river. 


Because it was winter, it was pretty cold most of the time, but on my last visit to church, I decided that I should head out to the area regardless and take some photographs. Looking at the photograph above, you would think that it's spring in Sydney, but the outfits of the two ladies reminds you noooooo it is winter and with the winds blowing in  your face, it's effing cold! I snapped a couple of quick photographs around the area before heading to Luna Park to take a snap of its very iconic entrance. 

Luna Park is an amusement park which has a history stretching back to the 1930s, which explains why the entrance is so...well 1930s. It gives me the impression of old-school amusement parks in America, even though I've never been to America and have never seen an amusement park there. 


I particularly like the two photographs above, the left has been processed to evoke what I think is a 1930s mood, and the right has been changed to black and white just because. I like how the face of the clown is nicely reflected in the puddle (it had rained earlier) on the ground. There was a father with his son of about 6 years of age, and I particularly enjoyed listening in to their conversation. The father was standing a couple of meters beside me when I was taking the photograph, and having spotted me squatting and taking a photograph of the puddle, the reflection and the entrance, he took the opportunity  to teach his child something about science. He first asked his son what he saw when he looked into the puddle of water and then explained how this reflection came about. There is so much to learn everywhere, and I really admire the dad for showing his child that, at such a young age. I would want to be such a parent, if I ever have a child in the future.

So back to my hokkaido milk buns with red bean filling (北海道牛奶紅豆麵包). I decided to use a japanese style hokkaido milk bread recipe, because I wanted to make full use of the delicious tasting cream I had in Sydney. 


Instead of following the proportions in Christine's recipe above, I decided to modify it a little, to fit the proportions that I am used to.

Hokkaido Milk Toast
Makes 1 500g loaf or 8 medium sized buns

270g bread flour
30 g all-purpose flour
40g sugar
½ tsp (4g) salt
1 tsp (5g) yeast
45-50g egg (without shell)
40g heavy cream (at least 35% fat)
30g full fat milk
100g tangzhong*
25g unsalted butter

*Check this post if you don't know what is tangzhong and how to make it (for 100g, you need to heat about 20g of flour with 100g of water)

To make them into red bean buns, you will need about 500g of red bean paste. I used a storebought one when I was in Australia. I recommend getting the red bean paste from DAISO for those in Singapore/Malaysia. Do get the packet of anko which is produced in Japan and not China.


Method: 

  1. If using a bread machine, follow directions as per your machine, but add the tangzhong together with the flour. If kneading by hand or mixer, place the sugar, salt, bread flour, all-purpose flour and yeast into a large mixing bowl. Then, add milk, cream and egg into the bowl and knead until a rough dough is formed. Add in the softened unsalted butter and knead well, until the dough no longer sticks to your fingers but is slightly tacky.
  2. Shape the dough into a ball and cover it. Allow it to proof for about 60 minutes or until doubled.
  3. Punch down the dough and divide it into pieces weighing 60g each. Allow the balls to rest for about 10 minutes before attempting to shape them. In the meantime, measure out 30-40g of red bean paste (how much depends on how much red bean you like. I used 30g) and roll them into an equal number of balls.
  4. On a lightly floured surface, flatten a dough ball into a round disk. Place the ball of red bean paste in the middle of the disk and wrap the filing with the dough. Pinch the ends together to ensure that each dough ball is completely sealed. Then using your palms, slightly flatten each ball until you get a flat round disk of about 5-8cm thick. Using a sharp knife or scissors, snip the edges of the disk. I made 6 snips to get 6 petals. Be sure to make very deep cuts all around the dough because as the dough proofs, the cuts will become shallower.
  5. Allow the 'flowers' to proof for another 30 minutes or until they have increased about 1.5 times in size. Brush the top of each flower with some egg wash or milk if desired.
  6. Bake in a preheated oven of 180°C for about 22 - 25 minutes, or until golden brown. Remove from oven and allow to cool on a wire rack for at least 30 minutes before consuming. 

Janine's jots: 
  • Note: I kinda overbaked the breads because they are NOT supposed to be this brown. You should keep an eye on what you're baking, especially if you're using a foreign oven in a foreign environment! I liked it the dark brown crusts though ;p Do also try to make your cuts deeper. I made pretty shallow cuts and this was the result after proofing the second time.
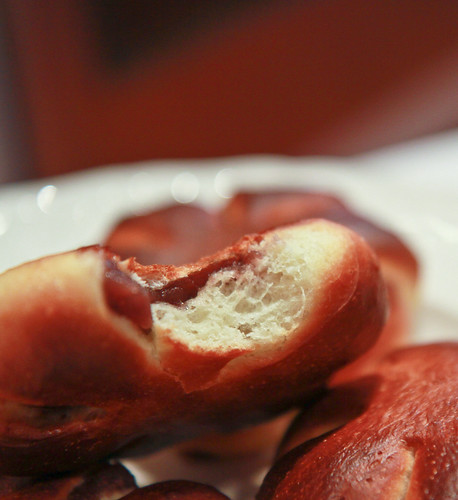
  • Taste: I liked the proportions of my bun - 30g of not-so-sweet red bean paste to 60g of bread dough. I would however recommend using 40g or more red bean paste because as you can see, besides needing more work on my 'putting the red bean ball in the centre' skill, the red bean filling is quite stingy.  
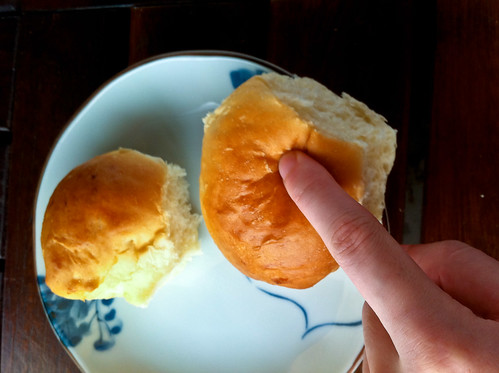
  • Texture: I didn't have the benefit of a mixer or bread machine, so I made the buns completely by hand. Because it was cold in Sydney and because I was lazy, I did not knead the buns until the 'window pane' test could be passed. This meant that the bread is not as elastic as it should be - you can see from the photo above that the bun does not have that many gluten strands. Also, because it was winter, the buns took twice as long to proof - I made the dough the night before and thanks to the chilly night, it took about 6 hours to double in size.
  • Serving size: This recipe makes a really nice rectangular hokkaido loaf but I would think a portion of 8 red bean buns would be ideal for any family too! :]
  • Storage: Because of the high fat content of the buns, they keep quite well. I would think they should keep for at least 3 days at room temperature. I kept one bun in the fridge and reheated it a week later and it still tasted pretty good.
  • Would I make this again?: I would definitely make this recipe whenever I have excess cream! I personally prefer leaner breads but most people I know and those who ate the buns liked the rich and buttery taste of the bun, so I guess if you're looking for a sweet bun recipe, this is it! 

Tuesday, June 5, 2012

Travel Tuesdays: Levain Boulangerie and Patisserie, Kuala Lumpur

I can’t believe this is only my 9th instalment of Travel Tuesdays! I first started this to make sure that I was diligent about uploading and sieving through my travel photographs, but I’m afraid I’ve yet to stick to that goal. I have to admit that sometimes, when I do look through my photos, I too am surprised by what I see - photographs do tend to record things that you never did notice ;p

As I have alluded to here, I went up to KL on a short impromptu trip over the Vesak Day holiday weekend, and the aim of the trip was to stuff myself silly with good food. And that I did. I always have this ‘list’ of places to eat at for almost every destination that I want to visit, so it’s no surprise that I’ve got a very lengthy list for KL, which I regard as my third home, after JB and Singapore.


High up on the list was two places – Levain Boulangerie for the breads, pastries and cakes, and Les Deux Garçons for their French entremets. I was not disappointed at each place. Maybe it’s because I’m looking at the prices with a ‘Singaporean’ eye, but everything was so darn cheap! Cakes per slice in Singapore cost anything from $6 up, so for a cake to cost in the vicinity of RM10 was a pretty good deal for me.
Sadly, I didn’t get too good photos of LDG’s cakes or the place itself, because it was pouring cats and dogs and I didn’t take my camera with me. The cakes didn’t make it back well either, but suffice to say that they are really good! I was very impressed with the care they took in the packaging and the entire look of the place, although I do hope that they come up with some new cakes by the time I return to KL in August because there were probably about 10 types of cakes and tarts in the counter and when I asked, they said that this was all the variety that they had and the flavours don't change. Huh.


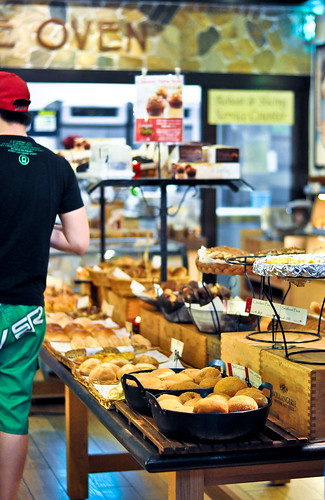
So back to Levain. Levain is my kind of bakery. It's one of those large homey refurbished colonial houses, or 'cottages' as I would like to call them, and the entire place has been renovated (for a cool million I heard). It actually reminds me of MANY such places in Australia, which have these types of bakeries in abundance, and not so much European/continental bakeries. I was half expecting for Levain to let me down in some aspect, because it sold everything – warm food, breads, pastries, cakes, and even macarons! But...I must say that I am pretty impressed on the whole! I went with a huge group of relatives, so I was able to try just about everything. Their beverages, pastries, pizzas, spaghetti, soup, cakes, macarons, breads – ALL CHECKED! Everything was more than passable, and I was very impressed with a few items.

Let’s go down to the nitty gritty shall we?

When you first walk into the bungalow cottage, (you first have to get pass the problem of very-hard-to-find-parking), you will be greeted by the cashier and the bakery proper on the left. On the extreme left, lies the bakery which contains the stone oven which they use for their breads. Mind you, I see normal commercial ovens too, so I suspect only pizzas and the crusty continental breads get their baking in the stone oven.

I liked the self-service aspect of it – if you're just getting the breads to go, you can grab a tray, then head to the cashier to pay up. If you're looking for a seat, I'll recommend you looking for a seat first, noting down the number and going down to order. There's seating downstairs and upstairs, inside and out. The view differs from room to room, so take your pick! You can (or have to) ‘chope’ your seat with a ‘reserved’ tag before making your way to get your food. As for warm food and beverages, they’ll be served to you, so be sure to remember where you are seated. Water and other cutlery are available at counters in each room.


Onto my review proper. For the clueless, levain actually refers to a starter that French bakers used in their baking. And this is perhaps the selling point of this bakery, that all their breads make use of this special levain, or natural yeast as they like to call it. I personally prefer the term sourdough, but well, to each his own. Admittedly, because I was there for the 'levain' items, I was quite disappointed to see a very small variety of actual European-styled breads. I guess that's mainly because Malaysians still like their soft and sweet buns, so European breads, which tend to be crusty, can be pretty hard to sell. Besides, other than the usual baguette, I'm sure more than half of the patrons probably have no idea what European breads I'm referring to.
I tried the 'natural yeast' baguette, which I asked them to slice and toast for me. I didn't quite like it - although it was nicely crisp and all, I expected a slight tinge of sourness or at least some complexity in the taste of the baguette but... nothing. It was a very flat taste, and very reminiscent of normal yeasted baguettes, so I was disappointed that their levain didn't taste good enough. But mind you, I am comparing to the baguettes that I had the privilege of eating in France, so it is perhaps an unfair comparison. The baguette was good, just not great. 

As for the other breads, I read that the bakers actually come up with at least 4 new items each month, which is really impressive! I managed to snitch bites of a couple of other breads, such as the walnut ring thing that you see in the background in the photo above, as well as other 'japanese' style soft sweet breads. The breads were pretty much standard, and the prices were quite hefty (at least RM 3) for each, but I guess we're paying for the experience? A good bet however, would be their sandwiches. They have quite a few varieties available, and the portions are enough for one for lunch.

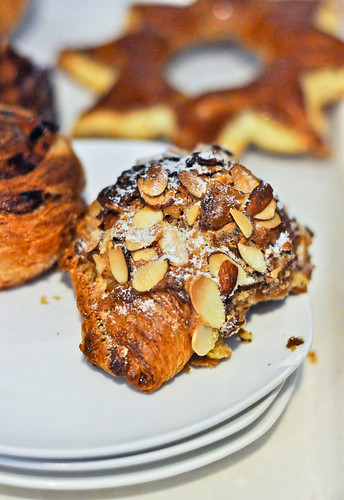
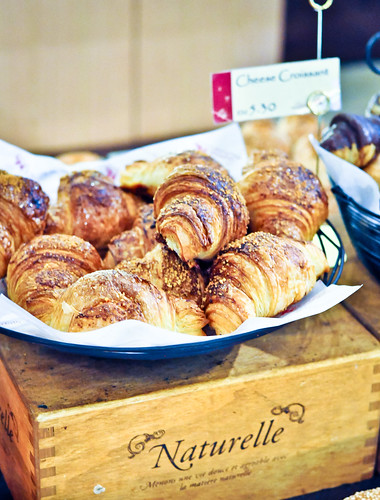
As for the pastries, I liked them :] I had the croissant, the almond croissant as well as the danish pastries (the sultana one). I liked that they used the yeasted versions of these pastries, and that each layer/lamination was very crisp and well done. The almond croissant was really good - I liked the almond paste on the inside - it didn't reek of almond extract, and the sweetness was just right. Same with the other pastries.


As for the macarons - MAJOR GRIPE. WHY WHY WHY do they spell them as macaroons? For a bakery to name themselves after something French, it is unacceptable that they got the spelling of MACARONS wrong! It’s not macaroons for goodness sake! GAH. I certainly felt that it was incongruent to sell French confections and not know how to spell them properly >.<

I can't remember the exact price of each macaron, but I was told by my cousin that the macarons here are quite costly as compared to other places. However, they are also one of the best. So I guess you're paying for good quality stuff! Levain has approximtely 15 flavors on sale each day, and out of those I tried, I was pretty impressed with the strawberry, which had fizzy candy to give it an extra pop. The other flavors were good as well, not overly sweet and overwhelming, and all very well done. I was impressed also with the fact that the feet were nicely frilled for most of the macarons and the sizes and filling quite uniform across the board. Thumbs up!


As for the cakes, I had the Noisette (Hazelnut Dacquoise, Dark 62% Mousse, Chocolate Flourless Cake, Pralinosa Mousse), Mango Passionfruit tart and Raspberry Pistachio Cake. I'm not sure if those are the exact names for the latter two, but I can't seem to find them on the website any longer. They probably are out of season by now. In any case, no loss if you want to try them because out of the three cakes I tried, I was most impressed with the Noisette. You can probably give the other two a pass since the raspberry tasted very sugary and fake, as did the pistachio (there just wasn't enough real pistachio) and the mango-passionfruit quite normal. I tend to prefer a crispier and more well baked pate sucree, so the tart crust was below par for me. Nevertheless, I think each cake cost me RM7-9, so it was pretty cheap and value for money! Do try the noisette - I really enjoyed the praline mousse and the hazelnut dacquoise - I thought the layers were very well balanced between chocolate and hazelnut.


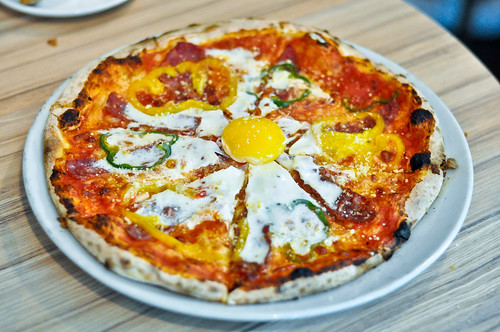
As for the other hot meals, we had two pizzas, which are available from 12pm to 8pm, and we had spaghettis and soups as well. The pizzas start from RM14 for medium sizes and RM20 for large sizes. The large is probably enough for two people for a meal. Very decent prices, and you get to choose whether you want a thin crust or a 'roman' thick crust. The bottom pizza picture shows the thick crust. Really pretty good stuff!

As for the soups, I had the minestrone and mushroom, both to dip the sliced baguette in, nothing too fantastic to rave about, but nothing below average either. Their spaghetti was pretty good - I had the spaghetti in arrabbiata sauce, and the sauce was nicely hot with chilli padi and the spaghetti nicely al dente.

So all in all, Levain gets my two thumbs up! Definitely worth a visit if you're in the vicinity, and if you're a tourist, the place is just off Jalan Imbi, but it's quite a fair walk (especially under the harsh sun) and I'd certaintly recommend taking the taxi there if you can afford it. It's a great getaway in the middle of the city, and definitely a novel experience :]
Details

Levain Boulangerie & Patisserie

Address: 7 Jalan Delima, 55100 Kuala Lumpur, Malaysia
Contact: +603 2142 6611
Opening hours: Mondays to Sundays, 0730h to 2100h
Price: $ (starts from RM3 for a bun)

Tuesday, December 6, 2011

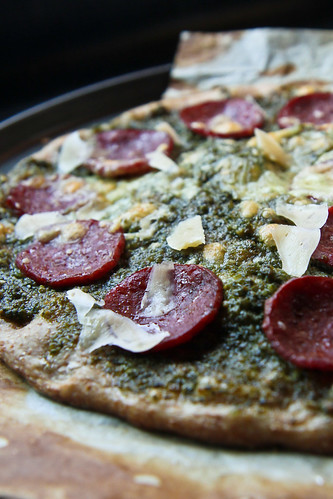
Wholemeal Pizza with Pepperoni and Basil Pesto

Ever since I saw Swee San's Christmas Giveaway post, I've been dying to enter because well, you stand a chance of winning Pantry Magic vouchers! How cool is that? Considering that Pantry Magic in Singapore has closed down and I was a sucker for all their stuff, and knowing the one in Bangsar is huge, I really really really wanted to enter so that I could win hope hehe. 

Anyway, I had many grand ideas as to what green/red thing to make, but suffice to say, time got the better of me. I had wanted to make strawberry macarons, and I did, but I was stubborn and didn't use any red coloring and since the strawberry powder I used just wasn't intense enough, so I got bubblegum-pink macarons instead =X I also wanted something to reflect the theme of Christmas, so I finally decided that pizza would be it. It might be a strange thing to bake to reflect Christmas, but I have fond memories of when my extended family gathered in KL and on the floor under the Christmas tree, were tons and tons of beautifully wrapped presents. I remember us kids would go around the tree and because we were not allowed to touch the gifts before 25th, all we did was to note which present had our names so that once the signal to 'open your presents' was given, we would rush to the tree, grab our presents, and proceed to rip the wrappers off each present in our own spaces. Sadly, as we became older, we didn't like the presents we got and we don't have such a tradition any longer :( Tis a pity really. 

Trying out the 'soft' look here

I have deviated, but anyway, on the dinner table, in addition to the yummy chinese dishes that our mothers and aunties would cook, would be pizza. We would order from the usual delivery company, and as young kids, pizza was the first thing we had (or wanted), well, maybe after the fried chicken or wantons and fries, followed by the meehoon and everything else. I vaguely remember having turkey and ham on some years, but pizza was always there. So using that fond memory of mine, I've decided to glamorize and upgrade the pizza. My favorite used to be plain ol' pepperoni, and as we all know, pizza doughs are typically made of normal white flour. Here, I have 'healthified' the pizza by using a wholemeal crust (which is so much more flavorful) and using the freshest ingredients where possible. I have to admit that if you were to compare the cost of making this pizza (plus the effort and planning required) to picking up the phone and ordering, the latter would be the far easier choice. I spent a bomb getting gourmet Italian spicy pepperoni, a block of parmesan cheese, mozzarella (I stinged here so I didn't get buffalo mozzarella). For the basil pesto, I bought a huge bunch of fresh basil and pine nuts. It is not counting the cost of the good quality Italian olive oil I used in the pizza and pesto. And not forgetting the cost of the organic whole meal flour I used. But hey, it was healthy and yummy, so well worth the splurge :]

For the wholemeal crust, I used a recipe from one of my favorite bread bakers - Peter Reinhart. He's probably the only author whose books I all own. I love the way he writes and how detailed he goes into the science and the whys of bread making. So far, none of the recipes I've tried from his book have failed me. In fact, his pizza napoletana recipe is one of my favorites too, if you want a normal white bread flour pizza base. I also love his cinnamon rolls and bagel recipes! I have to caveat this and say that you really don't need to get all his books because most of the recipes in the books are very very similar, and instructions are very similar as well. If you must, get the "Artisan Bread Every Day", I find instructions in that book the clearest and easiest to understand. 

In order not to violate any copyright restrictions, the recipes below are completely rewritten in my own words (as much as possible anyway). I strongly advise you to get the book if you are interested in wholemeal bread baking, because it really is a very good primer into wholemeal baking. In fact, I've just started my own organic wholemeal sourdough starter, and I hope to post results of it soon. I hope to use the sourdough for the pizza that I'll be making on Christmas this year :]

The cheese was patchy here because I ran out =X

To make the pizza, you will need: 
  • Wholemeal pizza dough (recipe below)
  • Basil pesto sauce (recipe below) or a tomato based sauce 
  • Any other toppings you like - I used the following: 
    • Pepperoni
    • Shredded Mozzarella cheese
    • Shaved Parmesan cheese
    • (not pictured, on another pizza) White onions and portobello mushrooms 

Wholemeal Pizza Dough
Adapted from Peter Reinhart’s Whole Grain Breads
Makes 5 individual sized (about 8-inch) pizzas

One day before you want to make the pizza, prepare the soaker and biga. 

Soaker:
230g whole wheat bread flour 
½ tsp sea salt
200g water

In a container, add water to the whole wheat flour and sea salt. Mix well to combine. Cover it loosely and place in the refrigerator overnight.

Biga:
230g whole wheat flour 
¼ tsp instant yeast
200g water

In a large bowl, combine the flour and yeast with water, mixing until you get a rough ball of dough. Wet your hands slightly with water and knead the dough for about 2 minutes. The dough should feel very tacky but not sticky. Let the dough rest for 5 minutes before kneading it again for another 2 minutes. The dough need not pass the windowpane test but you are aiming for a slightly bouncy, tacky dough. Place the dough in a clean container (large enough for some expansion) and cover tightly. Refrigerate it overnight.

You may refrigerate both the soaker and the biga for a maximum of 3 days. On the day you want to make the pizza, remove the biga and soaker 2 hours before you wish to make the final dough to take off the chill.

Final Dough:

Use all the Biga and Soaker
57g whole wheat flour 
5g salt
1½ tsp rapid-rise yeast
15g sugar
28g olive oil

  1. Remove the biga and soaker 2 hours before. Once they are about room temperature, using a scraper or a knife, roughly chop both doughs together into 12 pieces each. 
  2. Place the dough pieces into a large bowl. Add in the flour, salt, yeast, honey and olive oil to the dough. Wet your hands with water and knead for 5 minutes until all the ingredients are evenly distributed. You may also use a bread machine or a stand mixer with a dough hook to do the mixing. The dough should be slightly sticky and a little soft. 
  3. Flour your work surface generously and roll out the pizza dough on it. Knead the dough for a further 5 minutes, using only as much flour as you need. Let the dough rest for 5 minutes. This allows you to give your arms a rest, although it's mainly to allow the gluten to relax. Knead the dough again for a few minutes until you get a tacky dough. At this point, the dough should pass the windowpane test. Divide the dough into 5 (or more) pieces and form each piece into a tight ball.
  4. Line a baking sheet with parchment paper and oil it with the remaining teaspoon of olive oil. Place the balls on the parchment paper, making sure to roll the balls around to coat them in the olive oil. Cover the baking sheet loosely and allow the dough to rise for about an hour, or until it doubles in size (about 1.5 times is okay as well). 
  5. Preheat the oven to the maximum temperature (I used 220ºC fan forced) and adjust the rack to middle position. 
  6. Place one ball of dough on your floured work surface and using a rolling pin, roll the ball out into a 12-inch diameter disk or your desired size. I rolled the dough to about 8 inches, let it rest for a minute and shrink a little, before using my fingers to further expand the dough to about 10 inches. 
  7. Place the dough onto a lined baking sheet (or pizza stone if you have) and top it with your desired ingredients. I topped it with a generous amount of pesto, followed by pepperoni and mozzarella cheese. On the other pizzas, I added sliced mushrooms and onions as well. Bake for about 10 minutes, or until the cheese is bubbly and golden. Remove from the oven and quickly shave the parmesan cheese onto the pizza. 
  8. Let the pizza cool and rest for about 15 minutes before slicing and serving. 
  9. Repeat steps 6-8 for the remaining balls of dough. 

Basil Pesto 
Adapted from Elise
Makes a cup of pesto, sufficient for all the pizza doughs above. 

2 cups (60g) fresh basil leaves, packed
½ cup (90g) freshly grated Parmesan-Reggiano or Romano cheese
½ cup (100g) extra virgin olive oil
⅓ cup (45g) pine nuts 
3 medium sized garlic cloves
Salt and freshly ground black pepper to taste

Special equipment needed: A food processor or chopper.

Method: 
  1. Peel the garlic and place it in the food processor. Pulse it a few times to mince it. 
  2. Wash the basil and combine it with the pine nuts in the food processor. Pulse them a few times.
  3. Slowly add the olive oil while the food processor is on. You may have to stop to scrape down the sides of the processor with a rubber spatula to ensure all ingredients are evenly blended.
  4. Add the grated cheese and pulse again, until all the ingredients are blended. You can blend longer if you want a smoother paste. I wanted a chunkier paste so I pulsed for less than 15 seconds in total. 
  5. Add a pinch of sea salt and some freshly ground pepper to taste. 

Janine's jots: 
  • Taste: As I mentioned earlier, taste was fantastic. On its own, the pizza dough was so flavorful and so chewy that I literally ate it on its own (as a flatbread) the next day. With the same dough, I also used the traditional tomato version (not pictured because it was all gobbled up), as well as a dessert version (also not pictured because there was none left to photograph - it was a combination of balsamic vinegar, arugula, goat's cheese, figs and honey - a perfect sweet dessert pizza). And yes, I used the exact same ingredients on the dessert pizza as in my salad which I posted earlier. 
  • Texture: I absolutely loved the pizza. It was the right amount of chewy (not too chewy) and you could vary the chewiness through the thickness of the pizza. I made thin crust versions for a crispier base as well as thicker versions with thicker cornicones, which of course were more chewy. 
  • Serving size: The amount of pizzas I got from the recipe was more than enough to feed my family of five. In fact, I had 2 personal sized pizza doughs leftover, which I baked plain for the next day's breakfast. I dipped them in olive oil and balsamic vinegar :]
  • Modifications: I wouldn't change anything about the pizza dough recipe, but I would definitely decrease the amount of olive oil used in the basil pesto because I found it a little too oily for my liking, even though I had decreased the oil in mine to 70g already. You should err on the side of less oil because if you are going to use it on the pizza anyway, you could drizzle some olive oil on top of the pesto if you find it a little too dry. 
  • Storage: You can store the unbaked doughs for up to three days in the fridge, but I would strongly advise you to make all the doughs, and partially bake them, plain, for about 5 minutes in the oven before removing them to cool and storing them in the freezer. You then have readymade wholemeal crusts for whenever you wish to eat pizza!
  • Would I make this again?: Definitely! Although this is the first time I've tried making Peter Reinhart's wholemeal version, this is definitely not my first time making homemade pizza dough. His recipes are my to-go-to for any artisan breads :]


I have to admit that these are not the best photos I've taken, but in my defense, I was very hungry and it was dinner (yes I have dinner at 6plus pm so it's still bright), so there was barely enough time to photograph the pizza before we dug in (although this was the third one after the tomato based pizzas). In fact, I'm surprised the steam was not visible in the pictures because seriously, the pizza was piping hot! Nevertheless, I am submitting this to the Christmas Giveaway in The Sweet Spot. The giveaway closes on 11 December, so you might be a little short of time when you see this post, but do try to join in if you can! Anything green or red will qualify! :]
Friday, October 7, 2011

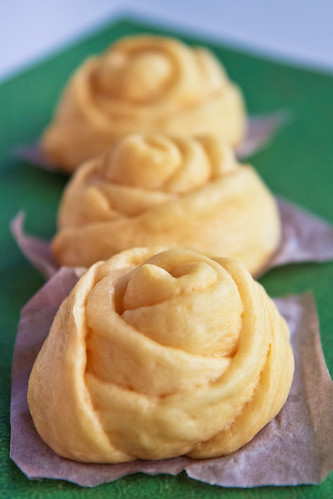
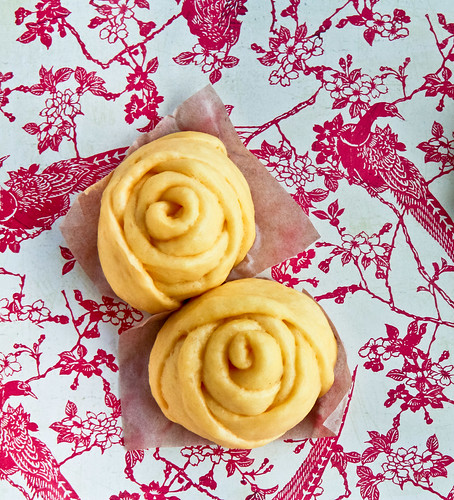
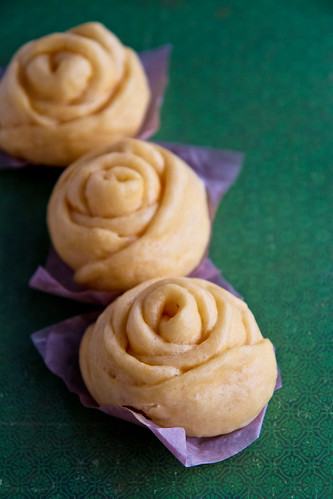
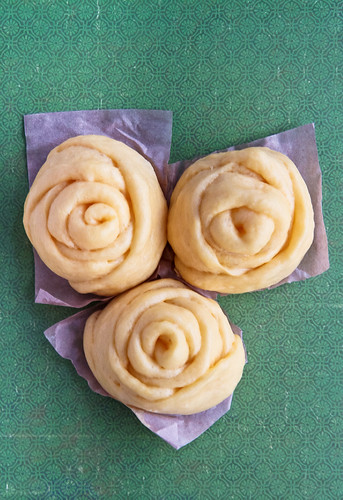
Rose-shaped Steamed Pumpkin Bun/Mantous (南瓜馒头)

It seems like just a while ago that it was October last year, and I was struggling really hard to get back into the pace of life back in Singapore. I had been away for a year, enjoying il dolce far niente and it was hard to study again. Then, I still had not discovered the love of baking that I had within me, so attempting things what these mantous below were probably unheard of.


It might be foreign for some, but I've been brought up on a diet of mantous and paus (a variety of Chinese steamed buns) of the homemade variety - my mom is a really terrific baker (and cook) and every once in a while when she gets sick of cooking the usual 3 dishes, rice and soup for us, she'll turn to making paus - typically of the vegetable variety, with some chicken for our protein needs. Lately, I've encouraged her to extend that repertoire to include a char siew filling as well as a lotus filling, on top of her usual peanut paus. Ever since I saw these beautiful rose-shaped mantous over at Wendy's blog, I've wanted to make them but my mom didn't. Why ever not? Well, my mom says that it's because of old age - as she gets older, she feels 'less daring', preferring to stick to her comfort zone and sticking to her usual recipes and usual combinations. I think even she finds it appalling that her zest and courage in her younger days are slowly diminishing. Nevertheless, I'm happy to accept this baton from my mom, that of the baker in the family, and already, I'm eager to try out new recipes (for anything) as well as hammering new 'family favorites' every weekend. You might think me crazy, but I honestly can't wait for CNY to arrive, because I know that I'll have so many opportunities to experiment with cookies and such then!

So, going back to these rose-shaped mantous, they have been very high on my to-do list. Opportunity came when one day, my mom was thinking of making paus again. I volunteered to make them, using the leftover pumpkin I had from a previous attempt at pumpkin cream cheese muffins (absolutely delicious - recipe to come soon!). The original calls for steamed sweet potato of the purple variety, mainly because the purple gives rise to a really sweet lilac looking 'rose', but like I said, I only had pumpkin, so I made do. This is also perfect since it's fall season in the Northern hemisphere and there will be an abundance of pumpkins. So besides carving them up as jack-o'-lanterns and pumpkin pies and pumpkin muffins, you now have another use for that leftover pumpkin :]


I had this wonderful plan of making it seem as if the birds in the background were 'eating' the buns, but as you can see, the plan sort of failed and it didn't look that great. I then switched to a normal green background, which I feel made the buns 'pop' - looks like a leafy foliage on which my yellow roses grow, don't you think? ;p Do pardon the rather dog-eared paper that the buns are sitting on, I was in quite a hurry to steam those buns so I hastily cut those papers out of tracing paper and they probably weren't the nicest squares (if you could call them those) that you would have seen. 


Steamed Pumpkin Bun/Mantous (南瓜馒头)
Adapted from Wendy

400g all-purpose flour 
100g wheat starch 
250g steamed pumpkin, mashed to a puree 
100g sugar 
15g baking powder 
2g salt 
40g shortening, melted 

11g yeast 
3g sugar 
150g water 


Method: 
  1. Combine the yeast, sugar and water together and let it sit for 5 minutes, or until the yeast becomes frothy. 
  2. Melt the shortening in the microwave and leave it to cool. 
  3. Sift the all-purpose flour and wheat starch together with baking powder and salt. Combine with sugar. Mix in the steamed pumpkin puree until the dry ingredients are moistened. 
  4. Pour the yeast mixture into the flour-pumpkin mixture and begin to knead. Once a rough dough forms, knead in the shortening. If using a stand mixer, continue kneading for about 5 minutes, until the dough becomes elastic and passes the window pane test. If kneading by hand, knead for about 10-15 minutes until the dough feels tacky and not sticky. 
  5. Round the dough into a ball and leave it to proof in a bowl for about 45 minutes, or until it doubles in size. 
  6. After it doubles in size, punch it down (degas it) and divide it into equal portions. I prefer to divide it into portions of 60g each – shape it into a smooth ball and place it on pre-cut pieces of tracing or baking paper. 
  7. To make the rose-shaped buns, divide the dough into equal portions of 10g each and roll each into a small ball. Using both fingers, flatten the ball into a disc of about 1mm in thickness. Do the same for the balls until you get 6 discs. Then, begin layering the discs one on top of the other, making sure to leave about an inch or a two-finger spacing between each layer. Then, begin rolling the layered discs from the bottom disc up, rolling until you get a cylinder. Use a wooden satay stick or chopstick or even a butter knife, and begin sawing the centre of the cylinder until you get 2 equal pieces. Each end of the cylinder will be your rose and the part where you saw off will be the bottom of the rosebud. [Do refer to Wendy's blog for very detailed step-by-step photos - I don't have the patience to take such photos!]
  8. Arrange each rosebud on the pre-cut baking paper and arrange on your steamer. Allow them to rest and proof a second time, for about 30-45 minutes or until doubled in size. 
  9. Fill your wok with water an inch below the steaming plate. Using a medium-high heat, steam your buns for about 15 minutes before removing them to cool. If using a pre-heated steamer, steam for 10 minutes. 


Janine's jots: 
  • Taste: If your pumpkin or sweet potato puree is sweet, feel free to dial down the amount of sugar. I think that if eaten as a sweet snack, a bit of cinnamon for the pumpkin would definitely bring it up a notch. I added lotus paste filling for the round buns and they tasted lovely. Beware of using too much salt – I used 3g for one attempt and it was WAY too salty. 
  • Texture: Same for the shortening. I have used melted butter and although I prefer the taste of melted butter, I find that shortening gives the dough a more elastic feel. You might wish to knead the dough for slightly longer if using the butter substitute, in order to get the same texture. 
  • Serving size: Depending on how large you portion each of your buns, you can get quite a few of them! I got about 30 buns of varying sizes (I made them as mantous as well as filled buns).
  • Modifications: Do use 500g pau flour or low gluten flour if you have them instead of the 400&100 combination I've stated above. You can also substitute equal amounts of sweet potato/taro or any tuber you wish. I have tried using cornstarch instead of wheat starch and it works the same way. 
  • Storage: Buns store wonderfully in the fridge - be sure to steam them first, then cool them before keeping them in an air-tight container in the fridge. Either microwave them on low or steam them again for about 5 minutes before consuming. 
  • Would I make this again?: Yes, only if I'm out to impress somebody ;p The recipe itself is a keeper though!
  • Other comments: Making the rose shaped buns are rather time consuming, because you have to flatten each ball into a disc and then roll them up. The results are fantastic though, and I can imagine a number of things you can do with this. You can also fill the buns up with a filling, although it might be a little difficult because the filling will have to be placed not in the centre but at the 1/3 and 2/3 mark. 

Thursday, June 30, 2011

Steamed Bao (包子)

I returned home to Singapore yesterday, only to be greeted by heavy showers and thunder. I could see countless lightning bolts, although I couldn't hear the thunder, and see the heavy nimbus clouds as the plane flew through them as we were about to land. Just moments before, as the plane began its descent into Singapore, the sun was setting over Malaysia and Indonesia and it really was a sight to see. The clouds never looked so magnificent when they are basked in that golden glow which a setting sun can provide. 

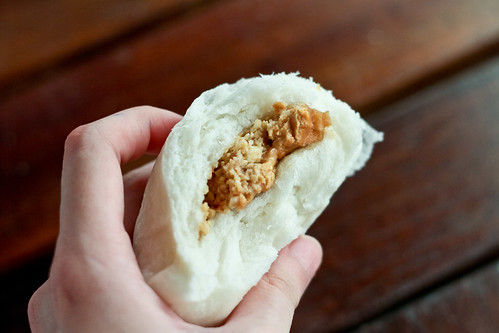
When I arrived home, I was also greeted by a familiar sight (no smell since baos hardly emit any smell when steamed) - steamed baos waiting for my consumption :] I love baos - other than porridge, fried rice and Mee Hoon Kuay (面粉馃), they are my idea of a perfect homecoming present. I used to love to get these peanut baos from a coffeeshop near my place, but after hearing that no one consumes these baos and they are actually being repeatedly steamed on a daily basis for weeks (hence the oily bottoms and weird textures), I have not patronized them anymore. Instead, I bug my mother to make these baos for me. My mom makes a mean peanut steamed bun (花生包) and vegetable steamed bun (菜包). In fact, I now only eat baos that my mom makes, because I really don't like how mushy and weird tasting vegetable baos can get when purchased. I know many people swear by meat steamed buns (肉包) - 小肉包大肉包 but I don't really like meat buns because of the strong porky taste in those buns - I know right, I'm super picky. In any case, the only type of meat bun I like to eat is the honey-roasted pork bun (char siew bao or 叉烧包). This is the bun I will always order when having dimsum. However of late, I have been disappointed by the size, quality and price of these char siew baos. The filling has been decreasing in size, been increasingly replaced with more fats than meat, and the price of these baos have really skyrocketed! It was just a few months ago that I convinced my mom to attempt making char siew baos and to my delight, the results were phenomenal :] Needless to say, I hardly order bao when I'm out because these gems are really easy to make at home - you can make the filling on the first day and make the bao on the second if you don't have enough time - and it's really much quicker than making proper breads which require two periods of proofing and rising.


My mother got this recipe off the Blue Key bao flour box a long time ago, and has been making it for as long as I can remember. However, that tiny recipe booklet no longer accompanies the box (according to my mother), so here's the recipe for keepsakes [word for word from the booklet - see modifications below]: 

Ingredients:
Makes 14 moderately sized baos 

500 g   pau flour
6 g       yeast
100 g   sugar
50 g     oil/shortening
250 g   water

Method:
  1. Mix flour and instant yeast together and dissolve the sugar in water. 
  2. Mix all the ingredients in a mixing bowl, then knead the dough by hand for 10-15 minutes or by mixer until it becomes smooth and extensible. 
  3. Scale the dough at 40g each. Round it and leave it to rest for 10 minutes. 
  4. Flatten the dough and place your filling in the centre of the dough. Wrap the filling by folding the edge of the dough with desired design. Then place each dough on a small piece of square grease-proof paper.  
  5. Cover the dough with a piece of clean plastic sheet and allow it to rise for 35-40 minutes. 
  6. Place all the dough pieces in a steaming rack and steam for 15 minutes over the high heat.

Janine's jots: 
  • Modifications: I also add a pinch of salt to give the baos a little complexity to the taste. Also, be sure to use lukewarm water to dissolve the sugar, before adding the mixture into your flour and yeast. Once you get a rough dough, proceed to add in your oil. You can also use lard or shortening if you prefer. I use sunflower oil since it's available in my pantry all the time. 
  • Taste: This bao can actually be made into a mantou and be eaten on its own, because there is sufficient sugar to give it some taste. However, it tastes especially good when combined with a savory filling. 
  • Texture: The texture of the bao is perhaps not as smooth as those you can get from yum char places, but it's perfectly fine for consumption at home. Perhaps a little bit of wheat gluten and more shortening will result in that smoother bao you can get from shops. 
  • Serving size: This recipe makes enough for 14 similar shaped buns. 
  • Storage: These baos store in the fridge well for about 3 days and freeze perfectly. From the fridge, just steam them again for about 10-15 minutes. From the freezer, remove them to thaw before steaming them or you could just steam them for 30 minutes. 
  • Would I make this again?: Definitely. This is a family staple, and this is perhaps the only way in which I can consume my beloved peanut baos (it's so rare nowadays) and the only way in which I can have a vegetable bao with some chicken inside ;p 
  • Other comments: For the "grease-proof" paper that the recipe mentions, you can use baking paper or tracing paper, cut into little squares. 

In pictures: 

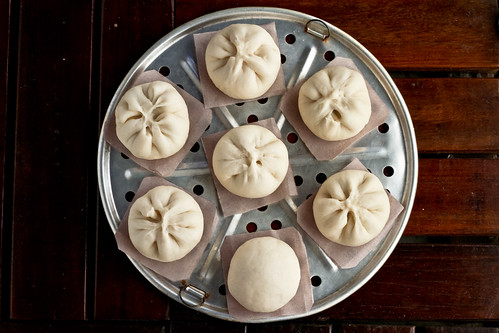
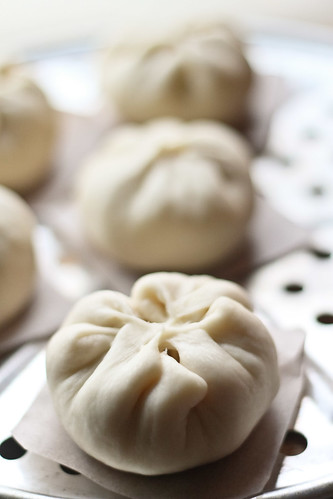
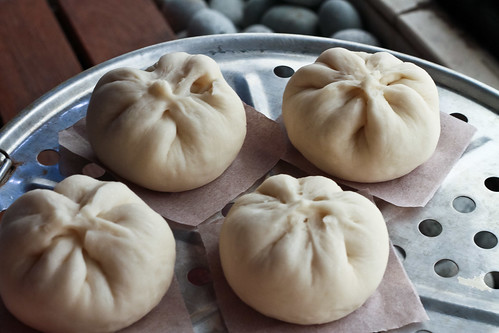
These baos are proofed (see how the pleats are not as prominent as before) and ready to be steamed :]
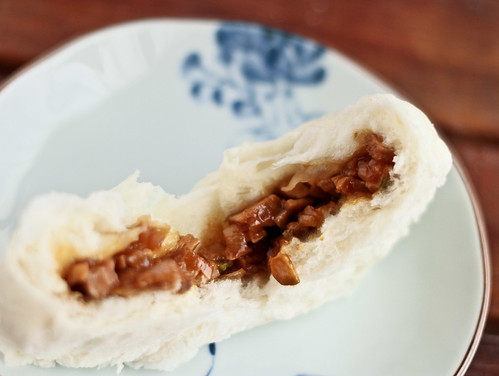
Look at this dreamy char siew filling! Unlike those in stores, this is all meat and little fats - no red coloring is used :]
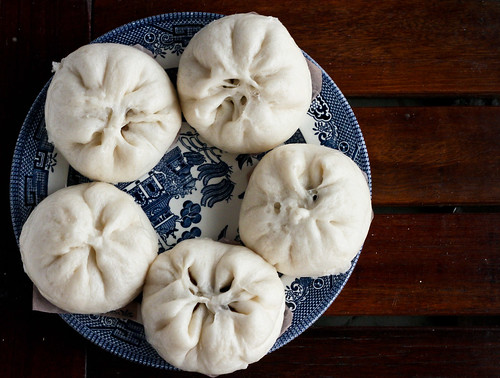
Steamed baos - look at how fat they have become - the pleats are almost giving way :/
Another close-up for good measure :]
My absolute favorite - the peanut bao

And last but not least, my mom's version of vegetable bao - with half a hardboiled egg and pieces of chicken :D

These photos are not taken yesterday, but are from my attempt a few months ago. I've been wanting to post them, but since the recipe is on the booklet, I haven't had a chance to steal them from my mom to type it out. I'll only be writing the recipe for the bao 'skin' today, because I'm still kinda tired from all that travelling that I have done, and I need to figure out the exact measurements to the fillings since my mom usually just 'agars' (estimates) when making the filling (and so do I).


This is my last minute submission to Jasmine's Aspiring Bakers #8: Bread Seduction as well as my 4th Muhibbah Malaysia Monday event hosted by Shaz of Test With Skewer and Suresh of 3 Hungry Tummies (sorry I didn't exactly post this on a Monday cos I wanted to be in time for the roundup!)


Sunday, June 26, 2011

Japanese Soft Rolls

Although I have been baking quite a bit in Sydney, experimenting with things I've never done before in my life, such as baking with zucchini and rhubarbs, as well as soy cream cheese, sour cream and ricotta, I have not been diligent in writing down the recipes and taking photographs :/ I have been really happy with much of the baking here, and have even (finally) tried making puff pastry, after avoiding it for so long for fear of failure. I have to admit though, it was mainly a success thanks to the low temperatures - the kitchen was probably about 18 degrees without the heater turned on, so the folding of the butter and flour layers was a breeze! 

The only thing bad about winter, in my opinion, is baking bread. I tried making bread once, and I didn't want to give it another go, because the bread here takes about 2-3 hours to rise! This is in comparison to the short 30-40 minutes it takes for my bread to rise in Singapore! Thinking about breads make me miss my bread rolls - for the past few months, I have been baking and modifying a single bread recipe, in a bid to perfect my bread roll recipe. I believe that after more than 10 attempts at the bread, I have come up with my perfect bread roll - which I have found to be really similar to the western recipes for "soft dinner rolls" and the Japanese pan. I have also attempted variations with this basic recipe, and have found them to be equally nice. 

Japanese Soft Rolls 

Ingredients:
300g    bread flour
30g      butter, unsalted
210ml  milk (weighed together with one yolk)
30g      castor sugar
4g        salt
5g        yeast 


Method:
  1. Let the butter soften to room temperature and allow the milk to stand to room temperature as well. 
  2. Using the recommended addition of ingredients of your bread machine, place the ingredients (flour, milk+yolk, sugar, salt and yeast) into your machine and allow it to start kneading. I recommend using the basic kneading program because you will eventually remove the dough to bake in the oven. (If hand kneading, mix flour, sugar, salt and yeast together, before adding in the milk and yolk. Knead for about 5 minutes, before adding the butter as below.)
  3. After a rough dough is formed, add in the butter in small cubes into the dough, allowing the butter to be kneaded into the dough. 
  4. Once the dough is tacky, allow it to rest for approximately one hour, or until it has risen to twice its size. Alternatively, just use the basic white bread program on your bread machine, which includes the rising time.
  5. Punch down the dough and remove it from the bread machine. Shape the dough into your desired shapes. You can also weigh the dough to make sure you get evenly sized rolls. Place the shaped rolls into a baking tray or pan and cover it with a tea towel, allowing it to rise again for another hour or until doubled. If you wish to get rolls to stick together, make sure that you allow about 1-2 finger's space between the rolls because they will expand during the second rise. 
  6. Meanwhile, preheat your oven to 170 degrees. Once the rolls have doubled in size, apply an egg wash or milk wash on the tops of the rolls to get a nice browning when baking. 
  7. Bake the rolls for about 20-30 minutes, depending on the shape of the rolls. Once the tops get your desired brown hue, remove from the oven. Allow it to cool in their pans for about 5-10 minutes, before removing it to cool on a cooling rack. Make sure to cool it on the rack, otherwise moisture will form on the bottom and result in a soggy bottom. Also refrain from eating the rolls too soon, because the insides are still hot and are still 'baking'.  

Janine's jots: 
  • Taste: The rolls are slightly on the less-sweet side, so you can choose to add a little more sugar if you wish - my advice is not to, because sugar will inhibit the yeast from working as well, and you will have to add more yeast to get the same fluffy texture. In 
  • Texture: The bread tastes the nicest when it is fresh out of the oven, and is able to retain the same texture up till 24 hours later (ie, the next day). On the subsequent days, the bread will harden and it will tend to crumble when bit into. To make your buns even softer and fluffier, do try to make small dinner rolls, and make sure they stick to one another after proofing so that you can the 'tear-apart' rolls. 
  • Serving size: This recipe is enough to make approximately 5 100g sausage rolls, or about 6 80g dinner rolls. For the pictures below, I made a combination of them both. 
  • Storage: Best consumed within 24 hours. Freezes well for about a week. 
  • Would I make this again?: Definitely! Do check out the variations I have recommended you can make with this basic recipe. 
  • Other comments: Although I believe in hand kneading bread, I highly recommend using a bread machine or a stand mixer for kneading this bread. This is because the dough is really wet and hard to handle, especially for new bread bakers and you might be tempted to add more flour than you should. 

The above is really the stripped-to-the-bones, basic recipe, but having used this recipe on a regular basis for the past few months (I baked every other day to provide my family with bread for breakfast), I have come up with variants, all of which I find equally delicious. I don't have pictures of these variants, but feel free to experiment! Below, I have also tried to explain the science behind the variations, which I hope will help you because I find that an understanding of the science behind the ingredients help when I'm doing modifications to recipes. 

Variations: 
  • Flour: For the 300g of flour, you can substitute up to 100g of all-purpose flour. I do not recommend using more than that amount, because the bread will not turn out as fluffy. This is because all-purpose or pastry flour has a lower gluten content, which means that the flour is unable to form as much gluten, and gluten is the key to introducing air and fluffiness to the bread. I have also tried substituting some of the bread flour with wholemeal flour (again, up to 100g, but preferably 70g) and it works fine as well. The wholemeal bread will not be as soft as white bread, but that is merely because wholemeal flour contains husks and particles which cut the gluten strands, reducing the amount of gluten and air that can be introduced into the bun. Alternatively, just increase the amount of yeast by 1g to ensure that there is more yeast to form more gluten. 
  • Butter: You can use salted butter, but be sure to reduce the salt to about 2g so that the bread doesn't turn out too salty. If you are far too lazy to wait for the butter to soften, you can also melt the butter in the microwave and use it in the dough. Alternatively, you can also use oil (sunflower or olive oil) - both work as well - the only drawback is that the bread will not have the buttery taste which is oh-so-nice :] Also, if you use olive oil, try to use extra virgin or your bun will have that strong olive smell which some might not like. Also, reduce the oil to 20ml, because oil tends to be 'oilier' than butter, if you get what I mean (no pun intended). 
  • Milk: The original japanese recipe calls for 210ml of milk+yolk, and I have stuck to this in my basic recipe because I find that this gives me a really fluffy and nice tasting bread. Naturally, you can also use just 210ml of milk, which tastes just as nice. You can also reduce the amount of milk to approximately 100ml and top up the rest with water - the end result just doesn't taste as rich and buttery. Other variants I recommend are using cream - you can substitute about 30g of the milk for cream and choose not to use the yolk. The yolk merely acts as a tenderizer for the bread. Yogurt and sour cream substitutes work as well, but do not substitute all the milk for it, because you need that amount of liquid in the recipe to ensure a wet dough and to achieve the fluffiness. 
  • Sugar: I have used both castor and granulated sugar - there is not much difference in the end product. As for brown or raw sugar, I do not recommend it in this recipe, because you might get some of the graininess when kneading the bread. I have also tried to reduce the sugar to 20g - the bread to me tastes fine, but according to my mother, the 30g-sugar bread tastes the closest to those in stores. I have also used honey instead of sugar, and the result is a even softer and fluffier bun, but with a slight honeyish taste to it. Do try it if you're aiming for a sweet roll!
  • Salt: I have used table and sea salt - you might have to reduce the amount for sea salt a little because it is extra salty. 
  • Yeast: You can use up to 7g of yeast, but avoid using more than that because the bread will have a yeasty smell. 4g of yeast is really the least you can use, but you will have to put in extra effort to knead because the gluten takes a longer time to form due to less yeast. You can use less yeast if you want to knead for a longer time, or if you are keeping the dough overnight to rise in the fridge. Otherwise do increase the amount of yeast if you are using lower gluten content flour or wholemeal flour. 
  • Other variations: You can also try the tangzhong method for this recipe, which I have tried countless of times. For times I am lazy, I just use the straight dough method. I know there are detractors from the tangzhong method, saying that it doesn't produce fluffier breads, but I sincerely believe that there is a slight difference, and scientifically there should be a difference. The bread instead of turning crumbly after just 24 hours, take slightly longer to stale and retain to the fluffier texture for a longer time. Of course, since we do not use bread improvers or dough softeners, there is no way for our homemade bread to retain to the soft fluffy texture for long. Trust me, I've tried. 
  • For the tangzhong, use 20g of flour and heat it with 100ml of milk or water. Follow the method illustrated here. You then mix the 280g flour together with the remaining 110ml of milk. Add the tangzhong into the dough after you have mixed the other ingredients together. You can add up to 50ml of extra liquid, but do not be tempted to add anymore because it will be really hard to handle. I find that the tangzhong method enables me to hand-knead with greater ease, because some of the liquid is already 'cooked' into the tangzhong. 
  • You can also try the overnight rise (also known as the 17h method or 中种法) - the end result is delicious too! I have also tried the overnight rise together with the tangzhong method, and the result is a really soft and fluffy method, but the effort isn't really worth it, in my opinion. 


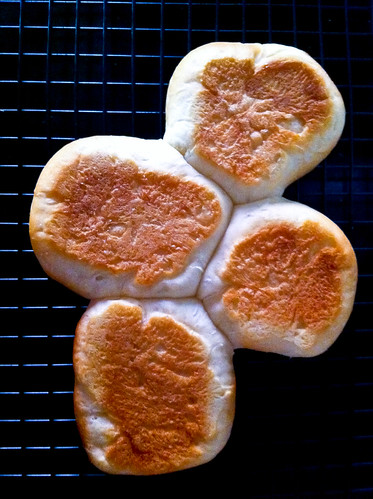
Lovely brown tops!

Oooh look at the bottoms - well baked too :]
I just love this moment when you pull the rolls apart and see the 'strands' connecting them together :]
Look at how soft the bread is! Boing-boing!

I hope that someone will be encouraged to try this basic recipe out, as well as the variations I have recommended, because this really is the result of many attempts at perfecting this bread recipe. I will be submitting this for Jasmine's Aspiring Bakers #8: Bread Seduction - bread is really my favorite thing to bake, but I haven't been able to bake as much bread as I'd like here in Sydney since winter's a real pain in the ass for baking bread! Anyway, do try this recipe and let me know what you think! :]
Related Posts Plugin for WordPress, Blogger...