My blog has moved!

You should be automatically redirected in 6 seconds. If not, visit
http://www.unpastiche.com
and update your bookmarks.

Showing posts with label Healthy Food. Show all posts

Tuesday, January 17, 2012

Healthy CNY cookies #2: Sugar-free (Xylitol) Chocolate Spritz Cookies

I’ve to confess that I took a long time to overcome the hurdle that is sugar. I mean, I've seen the evils of sugar (see this super informative video "Sugar: the Bitter Truth") but after an epic no-sugar disaster (I tried to make no-sugar muffins using only the sweetness of fruits which failed more than majorly), I steered clear of anything labelled as no-sugar. Furthermore, I haven't had good experiences with sugar substitutes, as I find that most have a nasty or weird aftertaste to them. These two coupled together was a huge hurdle and I couldn’t get over the fact that anything without sugar would taste horrible and turn out blah.

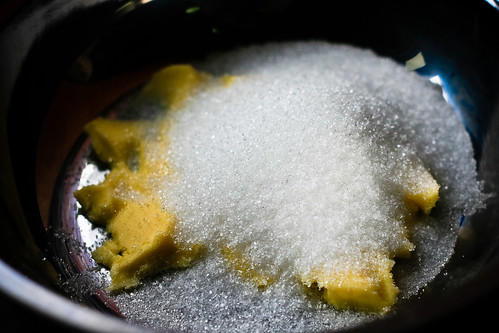
But since my granny came over for a visit over Christmas and I wanted to bake some cookies for her, I had to make them sugar-free so that she could enjoy them without suffering the consequences later. So I began experimenting. I used the most simple of recipes – a butter cookie recipe. I made it sugar-free by substituting equal amounts of sugar substitute, xylitol for the sugar and I also changed it into a chocolate flavoured butter cookie.

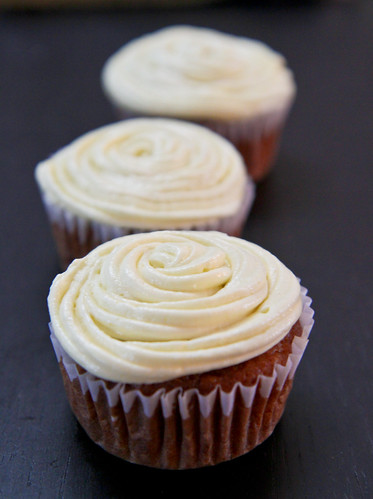
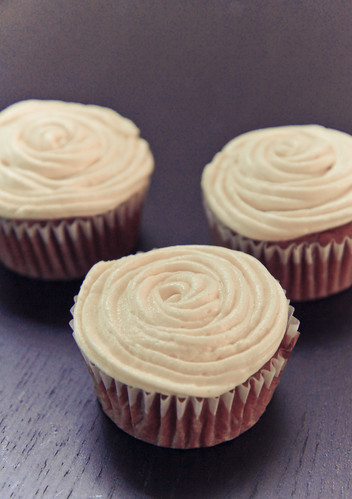
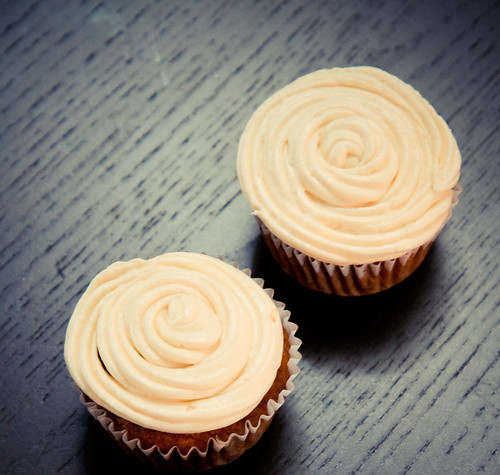
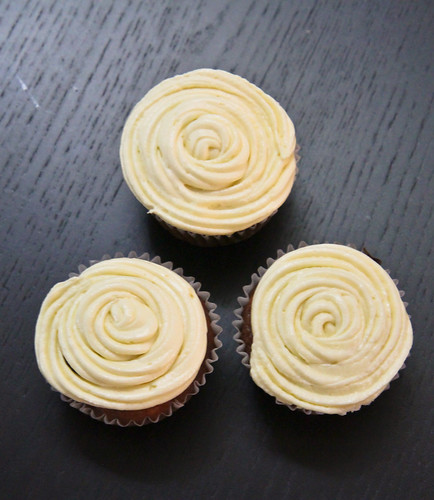
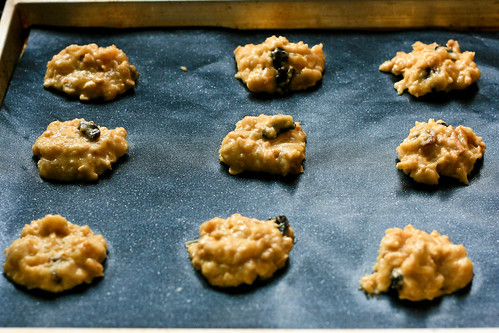
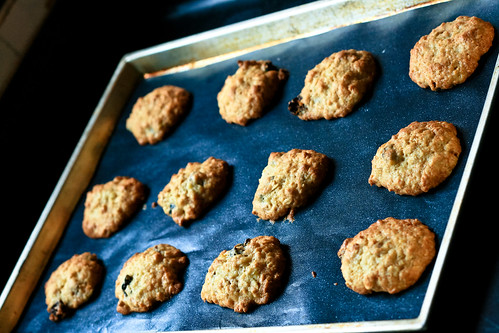
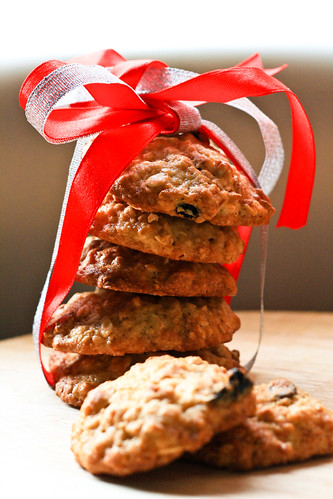
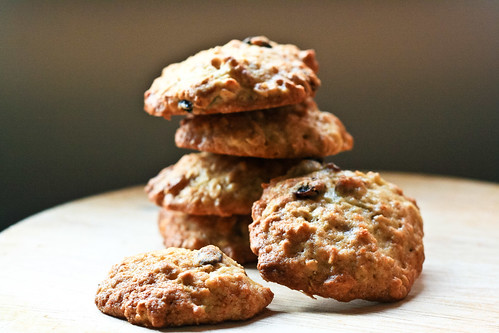
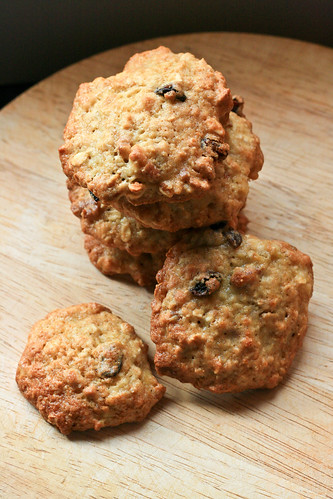
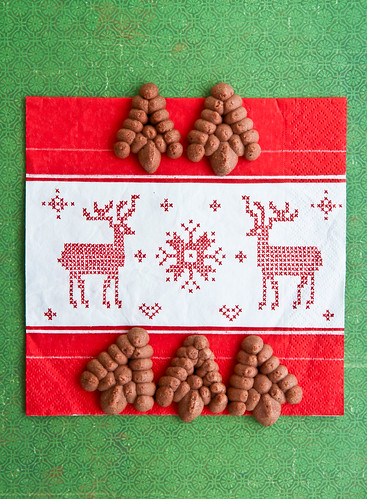
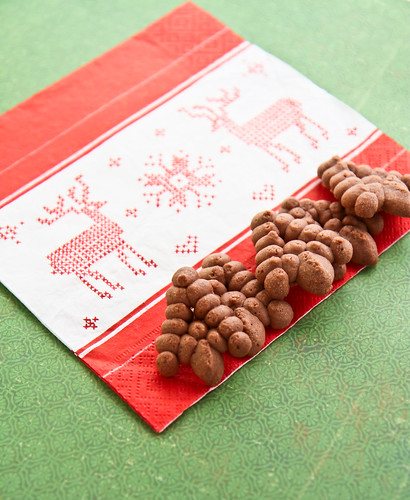
My Christmas Cookie Selection (which are experiments for CNY actually)

Now, my granny has not always been diabetic - in fact, she only tested positive only last year? I suspect old age has something to do with it. My uncle also has diabetes, of the more serious sort, and ever since then, I’ve been ever so conscious that all of us in the family are pretty susceptible too, and we should consciously note what kinds of sugars we are consuming. I’ve been reading up a lot on refined and natural sugars - in fact, as usual, I've come up with a huge long list of these sugars which I will share soon after I make it look more organized. So, I recently got myself some xylitol to experiment with. Why Xylitol? Well, after some reading up, I found that xylitol must suited to my needs. Most sugar alcohols when consumed in excess can cause some gastrointestinal side effects such as diarrhoea and bloating, and these are definitely symptoms I want to avoid. Xylitol on the other hand has a lower incidence of such side effects because it’s more easily tolerated than other types of sugar alcohols.


Xylitol is a naturally occurring sugar alcohol found in various sources such as corn husks, oats, mushrooms, etc. Mine however, is that which was extracted from birch. It has about 9 calories per teaspoon, about half of that of sugar. It also has a glycaemic index of 13. This is in comparison to refined white sugar which has a GI of about 65! The best thing of course, is that there is no nasty aftertaste like what you’ll get from some brands of stevia or other sugar substitutes. For those who might think - wow xylitol? Sounds totally exotic and foreign! I'm sorry to burst your bubble but xylitol is not something new. If you check your chewing gum or toothpaste, you might realize xylitol being used as one of the ingredients. It provides the necessary sweetness and it appears that it is also tooth friendly and helps reduce plaque and tooth decay as well! I haven’t been able to find xylitol in grain form in Singapore, so I got this shipped from UK along with other products (like xanthan gum).

Of course, there are other types of sugars suitable for diabetics, such as “Sugar-free” and Equal, the more common brands in the market. However, these are more of synthetic sugars and I don’t really want to put in any more artificiality into my body, so xylitol it is.


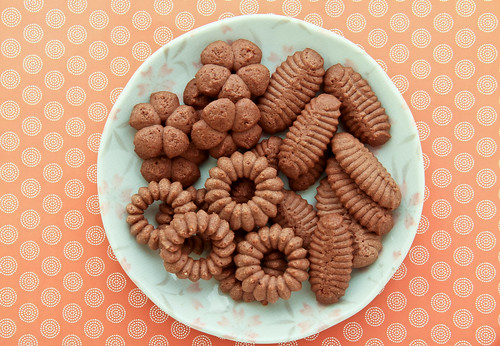
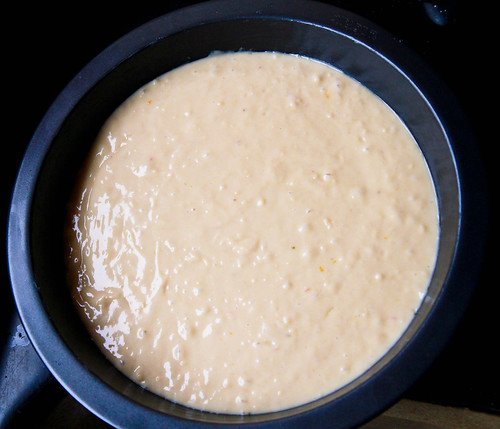
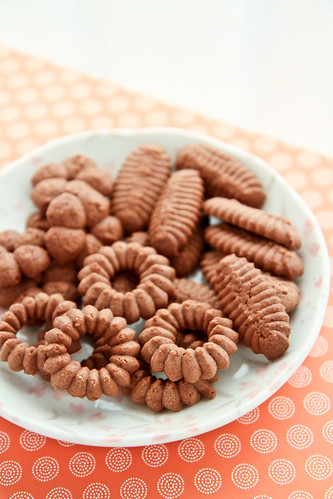
So onto the cookies. I used a cookie press to make them, and boy did I have tons of fun with it! I forgot my mom had such a contraption, and was only reminded when she saw me piping the cookies with a piping bag and commented that she had a cookie press in the drawers somewhere. I used the Christmas tree plate to create Christmas tree cookies for Christmas, which has of course since passed, but as you can see above, you can also create a whole melange of cookie shapes with the cookie press. It was my first time using the press, so if you scrutinize the plate above, you'll see varying shapes and sizes :/ There are so many plates to play around with, and you can get different shapes with the same plate if you just vary the amount of pressure used, so do play around with your cookie press if you have one, because these can be the perfect simple cookies to make for Chinese New Year. In fact, I believe I took less than 30 minutes to make the cookie dough, and press them out before baking. You can churn out jars of CNY cookies in less than a few hours :]


Sugar-free (Xylitol) Chocolate Spritz Cookies
Makes about 50 odd cookies, depending on how large or small
Adapted from Pierre Herme's sable viennois

95g     unsalted butter
¼ tsp  fleur de sel
¼ tsp  vanilla paste
40g     xylitol (or any sugar substitute, or icing sugar for the non-sugar-free aka original version)
15g     egg white
125g   all-purpose flour
Method:
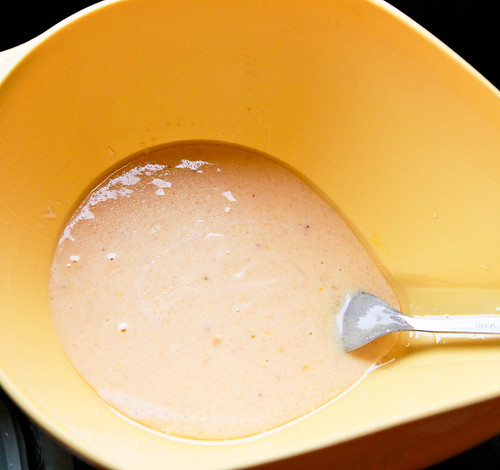
  1. Cream butter and salt until light and fluffy. Next, add in vanilla and sugar, making sure to beat well. 
  2. Add in the egg white and beat until well incorporated. 
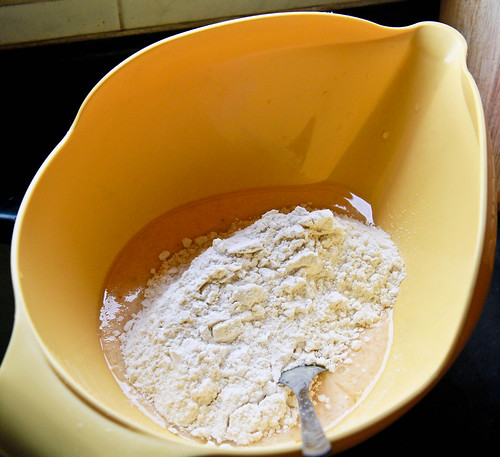
  3. Sift in flour and mix until all the flour is incorporated. Do not over mix. 
  4. Place the batter (it will be quite soft) into a piping bag with your selected tip and proceed to pipe out shapes. If the batter is too soft to handle, place it in the fridge to chill for less than 30 minutes. Do not place it in the fridge for too long as the batter will harden and it will be impossible to pipe out. 
  5. Bake the cookies in a 160°C preheated oven for about 15 minutes. The cookies do not spread much, so you can pipe them quite close to one another, leaving less than 5cm spaces between each cookie. 


Janine's jots: 
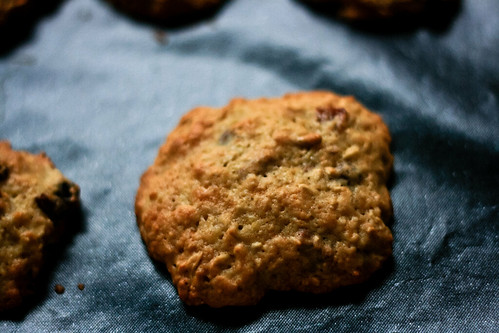
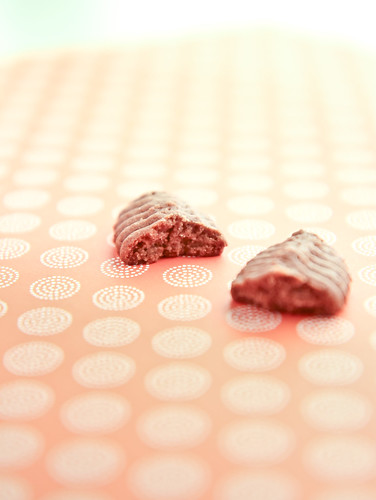
  • Taste: I couldn't taste an obvious difference between the sugar-free and refined sugar versions of the cookie actually, which means that this experiment is a success :] I mean, if you want to be particular, I thought the refined sugar version was probably more crunchy, but this version was definitely fine too! 
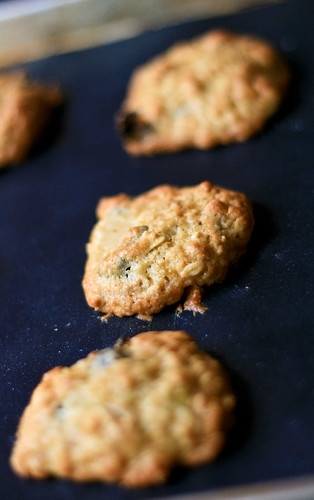
  • Texture: In my first batch, I accidentally added an entire egg white instead of the 15g required by the recipe, so the cookies didn't turn out as crispy as they should have, but the subsequent batch turned out fine. Using xylitol did make the texture of the cookies less crispy, but it was okay for me since this was meant for my grandma and I think she'd prefer a cookie with more 'bite'. 
  • Serving size: You can fill about one tin (those typical plastic jars with the red lids) of cookie using one batch of this recipe, so you might want to double or triple it if you wish to make a couple jars.
  • Modifications: None, because I really like this recipe, although I do much prefer the original non-chocolate ones better. I think chocolate cookies need to be a tad sweeter.
  • Storage: These cookies store very well at room temperature. Just be sure to keep them in an airtight container, and they will last for at least 2-3 weeks. If you store them in those disposable type plastic containers, they will start to lose their crispiness after a few days.
  • Would I make this again?: Definitely, but my granny wants them to be normal butter cookies this time for CNY because she's superstitious and doesn't like 'orh' (black) things for CNY =X

 
Do stay tuned for my final installation of my "Healthy CNY Cookies" series in a few days! :]

Friday, November 18, 2011

Low-fat Carrot Cupcakes using Homemade Applesauce

I'm sorry I haven't been posting this week and last - I'm not sure if I've mentioned it, but I'm supposed to be studying for my final exams (really final final exams since I'll be starting work right after these exams) and at the same time, I'm in Sydney. Strange? Well, I'm supposed to be studying in Sydney, and visiting Jon at the same time, so it works out to be a holiday-and-study-and-visit trip? In any case, I haven't had the urge to blog, although I've been baking like a mad woman these days - I love it when I have guinea pigs to try recipes on, so I've been baking cupcake recipes (complete with frosting since Aussies love sweet things) and asking Jon to bring them for his friends every day. The only bad thing is that his friends are too nice, and don't really give me the criticism that I'm seeking - I want pure unadulterated criticism - i.e., how can the cupcakes be improved, but I usually get comments like "quite nice" or "they finished everything" instead.  -__-" Not too helpful, but hey, I'll take whatever I can get :]


Anyway, I don't usually bake frosted cupcakes, because my family isn't too fond of frosting, and any frosting I do is usually hidden in between the cake layers such that it is a very thin layer - hence my frosting techniques definitely need more work! Just look at the photographs - my attempts at proper swirls and roses kinda failed. BUT I am in part blaming it on the tools - I have been hunting for the Wilton 1M tip for ages, but the staff at the Phoon Huat outlet I visit tells me that this tip has been out of stock even at Wilton itself, so no stock has been coming in. I took the staff's recommendation with a 823 tip, but the tip just isn't big enough to give the classic 'rose' swirl that I'm looking for - sigh. Guess I'll just have to wait for the tip to come back in stock! 

Nicest-frosted cupcake of the lot - it almost looks like the rose I was trying to achieve? 

In any case, I bought a huge bag of Aussie carrots for A$1.10, which was on offer at Coles and decided that I should make carrot cupcakes with them. I usually make a carrot sheet cake, but here in Sydney, I don't exactly have a sheet pan and I only have a 6-hole muffin pan, so cupcakes it was! So I decided to  check out a new carrot cake recipe - particularly Veronica's (Quay Po) carrot cake recipe which has been raved by  Sonia, among others. I actually have my own to-go-to carrot cake recipe, which I derived after many rounds of tasting and testing last year (also when I had a huge craving for cream cheese and carrot cake),  so I was pleasantly surprised after I compared Veronica's recipe and realized that mine and hers were pretty similar! I guess this shows that my testing was really quite successful? ;p The only difference was in the types of sugar used (I like a use a combination of white and brown), and I tend to use less vegetable oil and no nuts or raisins in the recipe since I prefer the nuts on the outside with the frosting. 

As such, I decided to stick to my own recipe, but spicing things up a little by adding a little nutmeg which Veronica called for and substituting some of the fat with applesauce (thus making it low fat!) :] For those of you who might not have heard of this substitution before, applesauce is actually a very common substitute for vegetable oil in a recipe - as such, it is usually used in muffin recipes which tend to use vegetable oil. It sort of adds moisture to the recipe, mimicking to an extent what fat does in a recipe. You can substitute applesauce for vegetable oil on a one-for-one basis, i.e., if the recipe calls for one cup of oil, substitute it with one cup of applesauce. However, I would advise against such a substitution, because the cake or baked good will turn out a little gummy and not as flavorful (plus the apple taste will be quite obvious and strong). Instead, substitute half of the oil with applesauce, and you can accordingly reduce the sugar by about 5-10% since the applesauce is naturally sweet. Do note however that the taste of apples can be quite evident, so keep that in mind when doing substitutions! On top of applesauce, you can actually use other fruit purees, such as banana and pumpkin, both of which I have tried using in other recipes (but note that these have stronger 'tastes' than applesauce). 

You can see the tiny chunk of apple which I didn't mash properly on the right of the cupcake. And yes, I'm stingy with frosting since I don't like overly sweet things. And sorry I had to use flash - the table was black and it was dark when I took this. 

Carrot Cupcakes 
This is my own recipe after much testing, which was originally very loosely adapted from an allrecipes recipe.  
Makes 6 large cupcakes 

80g all-purpose flour 
⅛ tsp salt
½ tsp baking soda
½ tsp baking powder
1 tsp cinnamon
⅛ tsp nutmeg 
1 egg
30g odorless oil (I used sunflower oil)
30g homemade unsweetened applesauce (see recipe below)
40g brown sugar
30g white granulated sugar 
100g shredded (or grated) carrots 

Method:
  1. Preheat the oven to 170°C. 
  2. Sift the dry ingredients (flour, salt, baking soda, baking powder, cinnamon and nutmeg) together. Add in both brown and white sugars and mix well.  
  3. In another bowl, combine the egg, oil and applesauce together, mixing well. 
  4. Gradually pour the wet ingredients into the dry, stirring briefly until just combined. Then, stir in the shredded carrots. It is okay to have slight traces of flour in the batter. 
  5. Pour the batter into the prepared cupcake tins and bake for about 18-20 minutes, until the tops are brown and a cake tester comes out clean with few crumbs sticking to it. 


Cream cheese frosting 
Adapted from Sonia

150g cream cheese, at room temperature
50g unsalted butter, at room temperature
70g icing sugar, sifted 


Method:
  1. Note: I didn't have a mixer so I manually beat the butter and cream cheese. 
  2. Using a wooden spoon, beat the cream cheese and butter until light and creamy. 
  3. Add in the icing sugar in two portions, until all the icing sugar is incorporated. Test the frosting at this point in time to check the sweetness. Add more icing sugar if desired. 
  4. Place the mixture into a piping bag and begin piping. If the mixture is too soft (especially if you beat by hand and have contributed too much body heat to the bowl), refrigerate the frosting (in the piping bag) for half an hour before piping onto the cooled cupcakes. 


Homemade unsweetened applesauce recipe
There is not much of a recipe for the applesauce, but more of directions. 
You will need 

    • A combination of apples (or you can just use a single variety)
    • Some drinking water
    • Spices, if desired.
    • A large pot (with a lid) to cook the apples
    • A wooden spoon 
    • A potato masher/blender
    • Airtight container 

Method: 
  1. Take any combination of apples you desire - I used one each of Fuji, Red Delicious and Sundown apples. Peel, core and chop the apples. 
  2. Place the diced apples in a pot and fill the pot with about an inch of water. Put the lid on the pot and turn the heat to high to boil the apples. After about 5 minutes, remove the lid and turn down the heat to medium, letting the mixture simmer and allowing the water to evaporate. 
  3. Stir the mixture occasionally. Depending on the type of apples, the apples will start to disintegrate. The apples have a high water content, so your mixture will appear more liquid. My mixture took about 15-20 minutes to soften. You can then mash up the apples using a potato masher or with a handheld blender. You can also season the applesauce with cinnamon (or other spices) but I chose to leave it as it is since I wanted to use it in my baking. 
  4. Let the mixture cool before storing in an airtight container in the fridge until ready for use. The applesauce will keep well in the fridge for about a week or two. Do freeze it if you don't plan to use it anytime soon. 
Swirling from the outside-in (bottom) and inside-out (top cupcake) does give you very different results. 

Janine's jots: 
  • Taste: The taste of applesauce is evident, but not overpowering. In fact, some of whom tasted the cupcakes didn't realize that there was applesauce in it. I would definitely up the spices again the next time, seeing that I prefer a very spicy carrot cake but this amount of spices worked fine as well. The cream cheese frosting was also sufficiently sweet, although some commented that they prefer it slightly sweeter (since my cake was already not too sweet). 
  • Texture: I think I shredded my carrots a little too finely this time, because I didn't get the usual 'bite' from the carrots this time. Otherwise, the cupcakes were moist (less moist than usual since I used applesauce) but sufficiently moist, especially after consuming them with frosting. 
  • Serving size: Makes 6 cupcakes nicely, however I filled my cupcake liners to about half-full, and managed to get an extra one cupcake. This is why the cupcakes appear slightly shorter than normal. Do fill the cupcake liners to three-quarters if you want a normal-height cupcake. 
  • Modifications: I used a heaping ½ tsp of baking soda because applesauce is acidic and requires a tad more baking soda. If using just plain oil, use a normal level ½ tsp. I doubled the cinnamon as well to 1tsp, because I like a 'spicier' carrot cake, and also because since there is less oil in the recipe (fat acts as a flavor carrier in cake recipes), I amended that by using more cinnamon to ensure the cake remained equally tasty. I'll also try using a tad more carrots the next time, grated a little coarser for more 'bite'. 
  • Storage: Unfrosted, the cupcakes store well at room temperature for a few days. However, I would advise storing them in an airtight container in the fridge so that they can last longer. In any case, this recipe only produces 6 cupcakes, so it really isn't that hard to finish them all :] 
  • Would I make this again?: Definitely! It is my to-go-to carrot cupcake recipe for a good reason ;p


And as you can see, I've been using the same three cupcakes in all the photos because the other two were even more horribly frosted than this and the rest were in my tummy by the time I remembered to take photographs heh. Anyway, I'll be submitting this to Min for Aspiring Bakers #13: Enjoy Cupcakes! (November 2011). Hopefully I have time to upload the photographs of the other cupcakes I've tried making. I've done a strawberry cupcake comparison (between Martha's strawberry cupcakes, Deb's pink lady cake and Stef's foolproof strawberry cupcake recipes) whose results I'm dying to share, but as usual, forgot to take photos and the only few photos are still on the camera!

Final gratuitous photo of the cupcake :]

Tuesday, November 8, 2011

Arugula, Basil, Cherry Tomatoes, Feta and Fig Salad with Balsamic Vinaigrette

You might realize that savory dishes are few and far between on this blog. The reason being that I live with my parents, so my mom cooks for me when I'm at home, and either I'm far too lazy to whip something up for myself, or I'm way too hungry to even take out a camera.

So on a rainy day when my mom wasn't home and there was nothing in the house - no pasta or day-old rice for me to fry, and absolutely nothing to eat besides vegetables, I decided to throw together this fig salad. These figs made a brief appearance in our supermarkets a few weeks ago, and knowing how short the season for figs were, I grabbed a few of them, intending to use them in anything I could think of. After using these figs in a tart and a pizza, as well as eating them as they are, I was left with a couple of figs left, and they were fast turning soft. On that rainy day, I decided to make myself some fig salad coupled with all the other veggies I had in the fridge. I happened to be lucky and had fresh basil and rocket/arugula as well as cherry tomatoes in the fridge - leftovers from a pizza-making session the day before. 

Together with some crumbled feta, a drizzle of honey and a mixture of balsamic vinegar and extra virgin olive oil, my lunch was settled. Like I said, I seldom have posts on such 'dishes', but I decided that the weather (post-rain) had really good light and I should definitely take a few photos of them figs, because I didn't take any photos of the other things I made with them >.< and figs are really pretty when photographed. I have to say that these hastily taken photos of the salad do look pretty mouthwatering, even though I'm typing now after a full meal of Vietnamese pho. 


There is no fixed recipe for this salad, and neither was this taken from any particular source, but I was inspired by a fig, goat cheese and arugula flatbread by Melissa (I made this during my pizza-making session and it was so yummy that there's no photographic evidence of it left heh).

***

Fig Salad with Arugula, Basil, Cherry Tomatoes and Feta, with Balsamic Vinaigrette
There is no fixed recipe for this, but these are the portions I used for a single serving for lunch. 

1 fig, quartered or sliced
Bunch of arugula
Bunch of basil, roughly chopped
10 cherry tomatoes, halved
2 tablespoons of feta, crumbled

2 parts balsamic vinegar to 1 part extra virgin olive oil
Drizzle of honey, if you want it sweet
Salt and pepper to taste

Method (in photos): 

Wash all your veggies/fruits well before cutting them :]

Combine the extra virgin olive oil together with balsamic vinegar, adding some salt and pepper to taste. Throw in the chiffonaded basil and combine.

After slicing and dicing the tomatoes and arugula, throw them into the vinaigrette and mix well.

Add in the figs (try not to toss the salad too much since figs are quite fragile) and crumble the feta cheese on top before consuming. Bon appetit! 

Janine's jots: 
  • Taste: I tend to prefer my balsamic vinaigrette more balsamic-vinegary, hence the 2:1 ratio. Do stick to equal parts balsamic vinegar and EVOO for a more balanced vinaigrette. I especially loved how the sour feta cheese went together with the sweet balsamic vinegar (make sure to get a good bottle - balsamic vinegar should be more sweet than vinegary), and matched with the sweetness of the figs. I felt that the basil played an important role in adding more 'zest' to the salad too. The peppery arugula was a plus!
  • Texture: Absolutely loved the different textures - the softness of the figs, the crunch from the tomatoes, coupled with the arugula - YUM!
  • Serving size: I wasn't too hungry - so the portions were enough for myself. I would think this salad will go well with a flatbread or as a delicious, tasty side to any meat dish. 
  • Modifications: You can use goat's cheese instead of feta, or any strong-tasting cheese to match the balsamic vinegar and honey. Any other salad vegetables would go well too!
  • Would I make this again?: Definitely! Like Donna Hay would say, fast, fresh and simple! :]

PS: Call me dumb/swakoo but I never knew that figs were known as 无花果 in Mandarin. Even though I knew that 无花果s had a seedy interior, the ones the Chinese ever eat (and the ones I ever saw) were the dried ones - small brown round things, about the size of a walnut. Which was why I was super shocked when my mom told me that figs are the very same as 无花果 (when I was lamenting the fact that figs are so rare and I've never seen them in Singapore ever). Of course, the dried ones and the fresh ones are of different species - one is the common fig, and the other probably black mission but hey, it's always interesting to learn something new everyday :]

Wednesday, September 14, 2011

Homemade Strawberry Apple Jam, and the differences between jams, jellies, compotes, confitures, etc.

My local supermarket had quite a few offers on strawberries in the past few months, where a punnet of 454g USA or Australian strawberries were being sold for slightly less than $5. I grabbed a few punnets, partly because I was kiasu, and partly because I knew I wanted to do a ton of things with them. So far, I've eaten them (duh), used them as decoration on my chocolate cakes, on my tarts, in my cakes... but I still have so many of them and I was afraid they would rot. So I did the next best thing - I decided to can them and make jams out of them! I decided to do a combination of strawberries and apples, but when I was done, I hesitated over whether to call it a jam or preserve or even perhaps a compote?

Check out the ruby red chunk of strawberry in my 'jam' here :]

Naturally, I had to find out what were the differences and I settled on calling this 'thing' I made a jam. I have made a tiny table of what I have found out: 
  • A jam is basically made by boiling fruit and sugar together to a thick consistency whereas a preserve is where the fruits are made into either jams or jellies and are cooked in whole or large pieces to retain their shapes. 
  • A jelly is basically sugar boiled with fruit juice and gelatin, and does not have any fruit bits. It is usually sweeter and more transparent - think of those strawberry or other fruit jellies that we can get locally in those small plastic cones with a white plastic seal on them.  
  • Of course I had to ask what a marmalade was, and it's basically a jam made with citrus fruits and has bits of rind in it. 
  • A compote (or french for mixture) is defined as a dessert made with whole or pieces of fruit in a sugar syrup - sounds like preserves to me! 
  • Similarly, conserves are known as whole fruit jams, which also strike me as the same as preserves. 
  • To makes things more difficult, there are spreads, which wiki defines as a jam or preserve with no added sugar - confusing and contradictory much?! 
  • Then of course, I'm sure some of you have stumbled across terms like confitures and gelées before - these are basically french terms for preserves/jam and jelly respectively. 
  • Finally, there's the syrup. This is pretty simple - it's basically sweetened concentrated fruit juice!
  •  There are also things we know as chutneys and relishes which involve fruit too, but I'll keep that for another day!
And there you have it! I hope the above list was hopeful to at least someone other than me, because I finally got my doubts cleared and I also realized that many bakeries like to use the french word for jelly just to make their desserts sound a little more classy. 

And now onto my jam! A jam is made when fruit, sugar and acid are heated together. First off, all fruits contain natural pectin, but some, like strawberries, do not contain enough natural pectin to gel (to form a jam consistency). When you cut the fruit and heat it, pectin molecules are released. The sugar added helps to bind the liquid from the fruit to the pectin molecules, bringing them closer to one another. When the mixture is brought to a rolling boil, some of that excess liquid is then boiled away, encouraging greater binding between the liquid and pectin, creating a more concentrated mixture. The acid added, in the form of lemon juice does 2 things: it helps with the pectin and it also neutralizes any 'charge' that the pectin molecules might have, encouraging closer binds between pectin and liquid once again. And that's about all there is to making jam really! If you are keen to find out more about jams, there is lots of good information floating about the net, and a good place to start is Food in Jars (she cans all kinds of things) as well as this site where I got a headstart on.

Oops the picture's a little blurry :/


Strawberry Apple Jam

Loosely adapted from Ina Garten's Easy Strawberry Jam Recipe and Allrecipes.com

Ingredients
200g   fresh strawberries, hulled
90g     rose apple, peeled and diced
150g   castor sugar 
25ml   lemon juice

Method:
  1. Wash and drain the strawberries before hulling them. Cut them into halves or smaller pieces if you want a smoother jam. Wash, peel and dice the apple before combing with the strawberries and lemon juice in a heavy-bottomed pot. 
  2. Cover and cook gently until the fruit begin to release their juices, about 5 minutes. 
  3. Once the apples begin to break down, stir in the sugar. Once the sugar is dissolved, bring the mixture to a rolling boil over a medium heat, stirring often to ensure it does not stick to the bottom.
  4. Reduce the mixture to low heat, allowing the mixture to simmer for about 10 minutes or until it thickens. The mixture is ready when it registers 105°C on the thermometer or when it passes the gelling test*.
  5. Spoon the mixture into a sterilized glass jar before allowing it to cool to room temperature. Store covered in the refrigerator.
And the perspective's on this a little wonky :/
Janine's jots: 
  • *How to test the 'jellying point': There are 3 tests you can use - the 105°C temperature point I mentioned earlier, or the spoon test. Simply place a spoon in the freezer before you start jamming and when you think the mixture is thick enough, dip it into the mixture and raise the spoon out. The jelly is done when the syrup forms a sheet that hangs from the spoon. A similar test is the wrinkle test that some call it. Place a small plate in the freezer before you start and spoon a bit of the hot mixture onto the plate when you think it is done. Allow it to cool for a minute (I chill it in the fridge) and push your finger through it. If the mixture 'wrinkles', then setting point has been reached. 
  • Notes: You will realize that many jam recipes ask you to skim and discard any foam that forms but I did not indicate it above because of a few reasons - the foam is usually discarded because it is not the consistency people like in jams and also because it contains air which affects headspace which affects storage of the jam as well as food safety. Since I do not heat process the jars and consume the jams within a short time, this doesn't really affect me. Alternatively, you can prevent the foam by adding some butter or by microwaving the foam to produce normal jam again! 
  • Taste: The original recipe called for 200g of sugar, which I reduced to 150g, out of which 30g was muscovado sugar. However, I still found the jam rather sweet (I don't like overly sweet jams) - this might be because the rose apple used was very sweet. I will reduce the sugar to about 100g the next time. I also found the mixture a little too tart for my liking - I will probably reduce the lemon juice used to 15ml instead.  
  • Serving size: This makes about 250g worth of jam - which is just enough for a fortnight's worth of spread for breads and rolls for an individual like me :] Do feel free to double the recipe without any problems, because my recipe is half of the original. 
  • Modifications: If I were to do this again, I would boil the apples first before adding the strawberries because the apples take longer to lose their shape and because I want a chunkier jam (or preserve). 
  • Storage: Without heat processing, the jam will store well in the refrigerator for at least 2 weeks. If you wish to keep it for longer (up to a year), seal and heat process them. 
  • Would I make this again?: Oh yes, I foresee many lovely combinations, like strawberry rose, pineapple mango and other tropical combinations that will suit our climate perfectly!
  • Other comments: Do note that the quantities of sugar will really depend on your taste. However, beware of reducing the sugar by too much because this will interfere with the jam-forming process. Here, my strawberries were slightly tart and my rose apple was slightly crisp and sweet.  The sugar levels are thus adjusted to suit what I like. Also, if making an all strawberry jam, pectin might have to be added because strawberries are really low in pectin. I overcame that by adding apples and increasing the amount of lemon juice, both which are high in pectin. 
ETA: Since I wrote this post (which was quite a few weeks ago), I have made this same jam recipe with a few variations - less sugar, more fruit, less lemon, different type of fruit, etc. Another variation I have tried is with just 260g of strawberries, 130g of sugar and the zest and juice of a lemon. The jam was a little on the tart side, which was probably because I added too much lemon juice AND zest. 

Anyway, my mom loves my homemade jam and why not make more jam when there's someone appreciative of it right? :] Expect a few more variations coming your way soon!

Wednesday, July 27, 2011

Som Tam ส้มตำ, or Easy Thai Salad

I read CNNGo's list of the worl'd 50 most delicious foods with much joy and pride, mainly because a number of Asian delicacies, especially those of my home country and country of residence made it to that list. And although I might not agree with them on everything, I do agree that Massaman curry (their #1) is absolutely delicious, and so is som tam, which made it to #46 of the list.

And coincidentally, this is the same thing I'm going to attempt from Stephane Reynaud’s 365 Good Reasons to Sit down to Eat – the Easy Thai Salad. It’s rather ubiquitous here in Singapore and Malaysia, and is really easy to whip up considering that we would probably have most, if not all the ingredients in our kitchen. I remember when I was in Thailand, I would order the Thai Mango Salad or Papaya Salad (generally referred to as Som Tam (ส้มตำ)) as a starter each and every time because it really “wakes up your palate”, or what the Chinese call 开胃, literally 'opening your appetite'.

What I love about som tams in general is that they are slightly spicy, slightly sweet and slightly sour, with lots of crunch and and different textures, and this recipe fits the bill perfectly. I have to say that I was slightly doubtful given that this was an Asian recipe written by a non-Asian, but Reynaud got it right :] For this recipe, I omitted the prawns, scallions and vermicelli as I wanted the salad to accompany my meal which contained chicken, and I didn't want it to be overly filling. This recipe really is flexible, in fact, all that is constant is perhaps the "sauce" - you can do a fruit som tam if you wish! 

Components of the salad before mixing them together :]

As with my vacherin post, the recipe below is from the book, but do note my modifications below!

Easy Thai Salad

Ingredients: 
200g chicken breast fillet
2 carrots
2 bulb spring onions 
3 garlic cloves
1 celery stalk
1 bird’s eye chilli
300g rice vermicelli
1 tablespoon sugar
3 tbl fish sauce
3 tbl sunflower oil
1 tbl lemon juice
200g fresh-shelled prawns

Method:
  1. Chop the chicken breast into small cubes, cook it in boiling water for 5 minutes.
  2. Peel the carrots, shred them finely.
  3. Slice the spring onions and celery, peel and finely chop the garlic and chilli.
  4. Cook the vermicelli according to the instructions on the packet.
  5. Combine the sugar, fish sauce, sunflower oil, lemon juice, garlic and chilli.
  6. Mix all ingredients with the prawns. 


Janine's jots: 
  • General comments: As with most of Reynaud's recipes, his instructions are rather brief. Some changes I would have made were to shred the chicken breast instead of cubing them, and boiling them first, followed by the prawns, and finally the vermicelli. 
  • Taste: For a more authentic Thai meal, do use palm sugar instead of normal granulated sugar. Some additions I would suggest, which I added in my salad would be a couple of dried shrimp, as well as chopped peanuts as garnishing. If you have a mortar and pestle, do pound the garlic and chillies (I used more than 1) together to 'release' the flavors, and gradually add the others. Do use lime juice instead lemon juice if possible, and add a couple of tomatoes, green papayas and tamarind juice to the mix for a more "thai" flavor. 
  • Storage: This salad stores well in the fridge for 1-2 days only, because the vegetables tend to lose their crispness. Best to consume right after, once you've combined the paste together with the vegetables. 

A vegetarian Thai Salad (minus the fish sauce of course)

Well, there is a reason why som tam made it to the list, and seriously, besides fish sauce, most of the ingredients are really easily available, especially if you're located in Southeast Asia. If you're not, fret not - I bet the Asian grocer nearest you will definitely have fish sauce, as it's a commonly used condiment not only in Thai but in other cuisines as well. If you are trying to recreate what you've eaten in Thailand, do note the suggestions I have made. I didn't have the opportunity to use my mortar and pestle which is located back home in Malaysia, so I had to make do, but the salad still tasted good.  

If you're a cook and you have problems deciding what to cook everyday, I highly suggest buying Reynaud's book - (I'm not paid to say this) - I find that although this book is pitched to an audience of more experienced chef (for instance the preparation time for this salad stated 10 minutes but I took a lot longer than that just to chop my veggies) and his instructions are sometimes brief, looking at the recipes each day does give you inspiration to cook, and indeed, reasons for you to sit down to eat :] 

Thursday, February 10, 2011

Strawberry yogurt cake, with fresh strawberries and strawberry whipped cream

I found it a pain to write this blog post, as well as a few others that I was drafting – because I was writing out the recipes and back stories to the recipes when my dear old Mac decided to crash on me, after 3 years of loyal service. Suffice to say, I now have it rebooted, but I have also lost all my associated documents and photographs. Thank God that I had done some backing up a few days ago, so not much was lost. Thus, it was a pain to write this post again, especially after I had written a long chunk of stuff :/ 

Anyhow, this month’s Aspiring Baker's theme - Aspiring Bakers #4: Love is in the Air (Feb 2011) fell in nicely with my plans for this month, as I had been planning to be sweet and post a series of Valentine’s Day related bakes for my valentine to visually feast on, since he’s not here in Singapore, and I know that he stalks my blog ;p  So I’ll be killing two birds with one stone with this post =) I like the fact that joining such groups force you to think out of the box, and it impels me to do some baking each month, which was part of my baking plan for 2011. This is also the reason why I’ve joined Daring Kitchen, and hopefully, I’ll get the courage up to attempt more recipes to both cook and bake =) 

This is my second attempt at frosting a cake, and although it doesn't look all that polished, the cake really is yummy and healthy too, because my low-fat, low-sugar yogurt has replaced much of the fat in the recipe.


Now onto the cake. I had some homemade strawberry yogurt lying the fridge, and because I had left it out a tad too long, the yogurt had gotten to a thick consistency, much like Greek yogurt. So I figured it'd be perfect in a cake requiring yogurt, instead of spooning it over my granola in the morning. I adapted a strawberry cupcake recipe from Chie Kato's book as well as a French gâteau au Yaourt I adapted from Clotilde's recipe. I don't have any photograph of the crumb, but rest assured that it is as advertised by Clotilde - fluffy, moist and not overly sweet, almost like a denser version of a strawberry chiffon cake. 

I'll be posting the recipe for my strawberry whipped cream in another post, so stay tuned for that!

Strawberry yogurt cake
For an 8" round cake

Ingredients: 
1            large egg
125 ml   yogurt (I used a strawberry-flavored one)
55 g       granulated sugar 
40 ml     flavorless oil (I use canola oil)
125 g     flour, sifted
¾ tsp     baking powder
¼ tsp     baking soda
¼ tsp     salt
¾ tsp     vanilla extract
1 tbl       strawberry puree (optional)    
Method:
  1. Preheat the oven to 170°C. 
  2. In a large mixing bowl, mix the yogurt with the strawberry puree, before adding in the egg, sugar, vanilla and oil. Mix all of them until combined. 
  3. In another bowl, sift together the flour, baking powder, baking soda and salt. 
  4. Add the flour mixture into the yogurt mixture and quickly mix the two together until few small lumps are left. Be careful not to overmix. 
  5. Pour the batter into a greased cake pan and bake for 20-30 minutes in the oven until the top turns golden brown. 
  6. Remove the cake from the oven and let it stand for at least 10 minutes before transferring it onto a cooling rack. 
Janine’s Jots: 
  • *How to make strawberry puree: what I did was to hull the strawberries, before placing them in a blender to blend. Once blended, you have to strain the mixture through a sieve to remove the seeds of the strawberry (which I forgot to do) so that you get a smooth puree. 
  • I used strawberry yogurt, although an authentic gâteau au yaourt uses natural flavored yogurt. You can actually use any flavor of yogurt you like, in my opinion. 
  • I used a 9" round pan, which gave me a rather thin cake. The batter is better suited for a 8" round pan, which I don't have =/
  • The original recipe calls for 100g of sugar, which I reduced in half because I was going to frost the cake with my strawberry whipping cream. If you are eating the cake plain, do increase the amount of sugar!
  • You can also use the recipe above to make muffins. These should be enough to make 6-8 large muffins. Just reduce the baking time to 15-20 minutes and test for doneness once the tops of the muffin start to turn golden brown. 

In pictures: 

Add sugar, oil, egg and vanilla extract to your strawberry yogurt. 
Mix the ingredients well.
Add the flour mixture into the yogurt mixture and combine. 
Pour the batter into a greased cake pan. Note that there are still some lumps left in the batter, but that's okay!
This is what you DON'T WANT to have. An overbaked cake which is more brown than golden brown =/  And see how small my cake is as compared to the pan? Always use the right pan for your batter!
My cake was over-baked because I forgot to use a shorter baking time since my pan was an inch larger than it should have been. Lesson learnt - always follow my instincts! (and also, use the correct pan!) At 20 minutes, the cake was definitely a nice golden brown, but I decided to let it bake for a while more since I wasn't too sure and at 25 minutes, it came out like this! I had to slice off the top and side portions of the cake before using it because the sides were way too dry! However, I have used this recipe in muffin cases and they bake up real well - they are moist and tasty, with a definite strawberry twang


After cooling the cake, I used a heart-shaped cutter to cut out the two desired heart shapes. I then used my strawberry whipped cream to sandwich them together, before frosting the outside of the cake with it. Technically, the layer you see in the picture is supposed to be the crumb coat, and you're supposed to add another layer of icing so that it'll turn out to be smooth and nice. However, since this was for personal consumption and I don't like overly thick frosting, I didn't go on to do the second layer. To make up for the general plain-ness of the cake, I sliced the strawberry and fanned it for décor on top. And there you have it, a heart-shaped strawberry yogurt cake with strawberry whipped cream, topped with a fresh strawberry, just for Valentine's Day =)

PS: I do think a fresh strawberry is an essential part of the cake, and not just for décor because it gives an extra burst of sweetness and slight tanginess when you eat it together with the cake, not to mention the freshness it adds to the entire experience. 

Here's a final close-up of the cake (or more aptly, a petit four) which I so hastily consumed after snapping a few quick shots (which explains why the exposure and composition's all over the place): 

Happy Valentine's, dear 

Monday, January 17, 2011

Chewy Oatmeal Raisin Cookies

I love snacking. Friends who are close to me will know that I have to have my breakfast once I'm awake, followed by lunch about 3-4h later, followed by a tea-time (or snack-time) and finally dinner by 7pm. In between, I might sneak in a cookie or fruit if I'm at home. Post-holiday, I've been putting myself on a semi-diet, where I try to cut down on eating overly unhealthy stuff. However, I still have cookie cravings - so I figured, why not bake a healthy cookie that I can munch on at will without feeling overly guilty about the calories? Plus the fact that the 1-kg packet of rolled oats which I bought last year was still lying around the cabinet untouched, it was time for me to make some oatmeal cookies!

This recipe has been on my mind for awhile, and it calls for applesauce, which I have blogged about here. Applesauce is a healthy alternative to fats (typically oil or butter) and this substitute is perfect here because I am looking for chewy cookies, and not crisp ones. Applesauce will result in a cookie with a softer and moister texture. 

Chewy Oatmeal Raisin Cookies
Adapted from Nick Malgieri's Perfect Light Desserts and Cook's Illustrated here
Makes 36 cookies

Ingredients:
125 g   all-purpose flour
½ tsp    baking powder
½ tsp    baking soda
½ tsp    salt
30 g     butter, softened
90 g     granulated sugar 
80 g     light brown sugar 
1 large  egg (about 55-60g)
¼ cup   unsweetened applesauce 
1 tsp     vanilla extract
100 g   rolled oats 
75 g     raisins (you can substitute this with pecans, cranberries or even chocolate chunks!)

Method:
  1. Set racks in upper and lower third of oven and preheat oven to 180°C.
  2. Whisk together flour, baking powder, baking soda and salt. Set aside.
  3. Beat softened butter and granulated sugar together. Add the brown sugar until mixture turns fluffy. 
  4. Add in the egg and beat until thoroughly mixed. 
  5. Beat in the applesauce, followed by the vanilla extract. 
  6. Add the flour mixture and mix until the dough starts to come together. Add rolled oats and raisins one at a time and continue mixing the batter. 
  7. Drop the dough using a teaspoon (or an ice cream scoop if you are so inclined), placing them 2 inches (or about 4 fingers) apart on the greased cookie sheets. Use a fork to gently flatten the mounds of dough until about 2 cm thick. 
  8. Bake the cookies for 10-12 minutes. At the halfway mark, change the positions of the pans, from top to bottom and back to front. Once the edges of the cookies start to brown, remove the pans. The centre of the cookie will look underdone, the surface will look dull, but wet and shiny in between the cracks. 
  9. Let the cookies cool on the cookie sheet for 2 minutes before sliding them onto a wire rack to cool.
In pictures
After whisking the dry ingredients, cream butter and sugar together until fluffy. 
This is an example of not-so-good creaming. Cream until fluffy (a sort of yellowish-white) and use the correct sugar in the recipe! I used coarse granulated sugar - whereas fine granulated sugar was called for! =/
Add your egg. You can beat it first before adding to your batter or crack it into your batter and use your spoon to beat it up. I prefer the latter since it means fewer bowls to wash. 
Add your applesauce followed by the vanilla extract and mix thoroughly!
Dump it your rolled oats! (Mine is not pure rolled oats but a mix of wheat sticks, dried fruit and some other stuff). I added in the oats before I added the flour - not sure if it affects the recipe or not =/
Add in the flour all at once and give the batter a quick mix.  Do not overmix!
The completed batter :)


Scoop equal portions of batter and place them at least 1.5 inches apart on a lined baking tray. 
At half-time, I turned the trays around to ensure more even baking. Look at these babies expand!
Aaaannnddd.... we're done :) The cookies should be golden brown on the outside and the color of sand on top. 
See the "moistness" on the top of the cookie? 
Here's another closeup :)

And the above two pictures are my slightly-failed attempts at better food-styling. I think the ribbons detracted too much from the cookies =X


A final one:


Nutritional information: 
Per cookie: 54 calories, 1g total fat, 1g protein, 10g carbohydrates
(These values are from the book but the above recipe will have lower values because I have reduced the sugar (both white and brown) by 20% as compared to the original recipe.)

Janine's Jots: 
  • Cookies will look undone at 10-12 minutes, but this is what makes them chewy! If you want your cookies crisp, just leave them slightly longer for 15 minutes. 
  • I felt that the floury taste was still a little strong - the next time, I'll up the vanilla extract to 2 tsp, together with more rolled oats (probably up to 130g) because there doesn't seem to be enough!
  • If you want a tender, chewy cookie - you can also substitute all-purpose flour for cake flour - the lower protein content will reduce the amount of gluten formation.
  • I made a tiny batch with some chunky peanut butter and it tasted great :)
  • The original recipe calls for 110g of fine granulated sugar and 100g of brown sugar - these proportions would be apt for someone who like their cookies sweet. The reduced amounts in my recipe above makes for a less-than-normal sweet tasting cookie. 
  • Note that the use of fats (butter, in this case) is not totally eliminated because it adds flavor to the cookie. 
This post made it onto Tasteologie here :)

Tuesday, January 11, 2011

Applesauce - a healthier substitute

For a while during my december holidays, I toyed with the idea of going on a low-carb diet. But as with most of my ideas, it went down the drain when I realized that I had to forgo a few of my most favorite foods - bread, pastries and cakes! So I embarked on trying to substitute one of my meals with a high protein, low carb alternative and looked towards healthier alternatives for my baking. One of the things that popped up the most was the substitution of applesauce for any oil in a recipe. I saw this substitution a lot when I was looking at muffin recipes, but it can be used in other types of bakes as well. 

Since then, I bookmarked recipes for making applesauce but did not try it because I was attempting other more interesting recipes. It was only when I was reading Nick Malgieri's book and was entertaining a craving for oatmeal cookies that I decided to finally to try out making my own applesauce. 


For the uninitiated, why can we substitute applesauce for oils in a recipe? 
Fats add richness and texture. The primary function of fats in a recipe is to coat the proteins in the flour, thereby preventing them from mixing with the liquid ingredients and forming gluten, which would result in a tough texture. Applesauce is good substitute, because it is high in pectin, and pectin can also coat the protein, inhibiting the development of gluten and thus keeping the baked good tender and moist. However, applesauce has water, which is a liquid which can contribute to gluten formation. Also, applesauce is more moist than oil, which might result in a more liquid batter. One method to avoid gluten formation is to mix the liquid ingredients and sugar first, and the other dry ingredients separately before combining them together gently and as little as possible. This is because gluten begins to form as soon as flour comes into contact with a liquid and gets more active with stirring.

General rules of thumb
  • Tenderness, moisture and flavor changes when substitutions are made. Because of its moistness, applesauce substitutions work best for cakey recipes - this includes cakes, muffins, brownies, quickbreads, chewy cookies. 
  • 
Oils in a recipe can include butter, or canola oil or shortening. Any butterfat in a recipe can be substituted. Generally, 1 cup of oil can be substituted with 1 cup of unsweetened applesauce. It is generally recommended to first substitute half of the oil in the recipe with applesauce, and slowly increasing the ratio until you are satisfied with the result.


You can completely substitute the oil, but 1 to 2 tablespoons of oil in a recipe is ideal, as it will enhance the recipe's flavour. Note that by substituting half a cup of oil with applesauce, you are already reducing calories in the recipe by 1600 calories!


  • If your applesauce is sweetened, reduce sugar in the recipe accordingly. 
  • You can also use other types of purees: pears, plums, pumpkin, banana or squash as substitutes. 
  • Since applesauce is acidic, add about 1/4 teaspoon of baking soda to smooth its flavour. 
  • Note that applesauce substitutions will result in a moister and softer texture, and is NOT suitable if you want a crisp texture (crispy cookies, for example). 
  • Do not overmix or overbake the cookies because low-fat batters tend to be dry and are prone to becoming tough and dense if overbaked. To prevent this, reduce oven temperatures by about 5°C and check the product for doneness a few minutes before the end of the usual baking time.

Applesauce
Ingredients
Adapted from Nick Malgieri's Perfect Light Desserts 
3          apples (I used a mixture of Delicious, Fuji and Granny Smith)
30 ml   water

For a more flavorful applesauce, add up to 30g of sugar or 1 tsp of lemon juice or a dash of ground cinnamon or all of the three. 

Method:
  1. Peel, halve core and chop apples. 
  2. Place them in a medium saucepan with the water and cook over medium heat until the mixture comes to a boil. 
  3. Lower the heat and allow the apples to simmer in their juices for about 20 minutes, stirring occasionally so that the apples do not scorch. 
  4. If the apples become very dry before they have disintegrated, add 2 to 3 tablespoons of water and continue cooking until the apples turn into a chunky puree. 
  5. Use a whisk or potato masher to break up any large chunks. You can also use the back of your fork or spoon to do the same. 
  6. Remove from heat and let applesauce cool before using it. 

Golden Delicious, Fuji Apple, Granny Smith (From L-R)
Peel, halve and core the apples. Chop them into tiny pieces.
Add 30 ml of water to the apples and bring it to a boil before allowing it to simmer. 
The result after a 30 minute simmer - if you are fine with this texture, then there is no need to mash it up! 

Janine's Jots: 
  • This recipe is for unsweetened applesauce - you can add up to 1/4 cup (~50g) white or brown sugar if you want a sweetened version. Unsweetened applesauce is somewhat of a misnomer because it has the sweetness of the apples - you can smell it while it's cooking! Don't follow any recipes strictly, instead, slowly add sugar to the mixture and taste it until the sweetness suits your preference 
  • You can also cook this in your slow cooker if you like - about 2-3 hours will give you the same result.
  • For a more complex version, check out Elise's recipe here.
  • I mixed the types of apples I used to increase the complexity of taste in the applesauce. Using the same type of apples is fine.
References: here and here

Comments: I'll update with Nick's oatmeal recipe as soon as I try it out! Right now I'm having fun eating the applesauce and using it in my apple pies as extra filling :)
Related Posts Plugin for WordPress, Blogger...