My blog has moved!

You should be automatically redirected in 6 seconds. If not, visit
http://www.unpastiche.com
and update your bookmarks.

Showing posts with label Yogurt. Show all posts

Wednesday, April 18, 2012

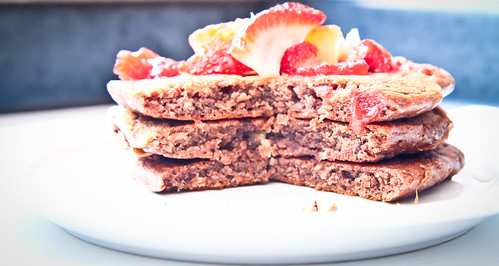
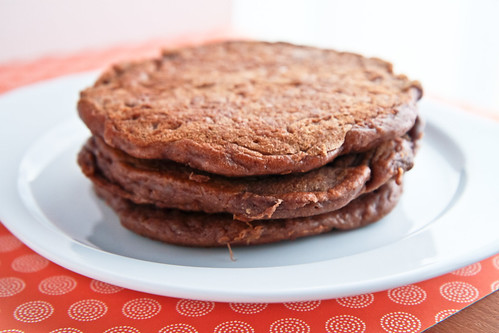
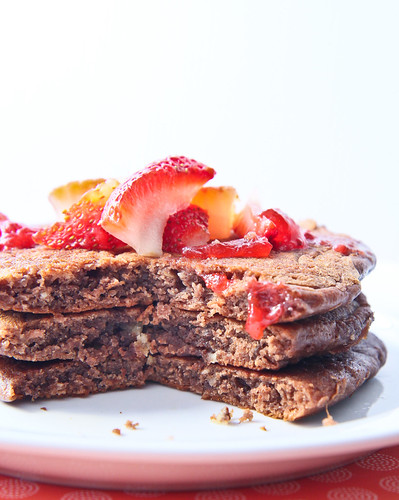
Really Good Chocolate Multigrain Pancakes

Sometimes, I'm obsessive compulsive to the point that even I get sick of myself, literally. I usually try variations on a single recipe and different recipes relating to the same thing for days on end until I satisfy myself that the recipe is the one I want as my "to go to" recipe, or the one recipe I'm willing to replicate to eat for the immediate future.


Just take bread for example. My very first post in the blog was of bread using the tangzhong method. What you didn't know was that I probably tried tens (I am not joking) of recipes before I finally settled on my bread recipe. My family members had to suffer through weeks and weeks of bad, not so good, and not bad breads just so that I could come up with 'the one'. Right now, my brother proclaims that my bread making is my "拿手好菜" (my best dish) and that I should just stick to that. Obviously I don't listen.

Right now, my current fad is granola and yogurt. I've been making my own homemade yogurt (low-fat and unsweetened) and my own granola. As for the yogurt, the experimentation was a few years back, so I've more or less settled on my usual technique. No one in the family is willing to eat my yogurt because they think it is too sour :( But that's the way I like it - natural yogurt tastes like that! So anyway, as for the granola, I've probably tried more than 10 granola recipes and am still experimenting. No one in my family eats that either, so I've to slowly make my way through the granola before making a new batch. I'm currently eating a banana-hazelnut granola and an olive oil-raisin-assorted nuts granola, both of which are so different and taste so good together!
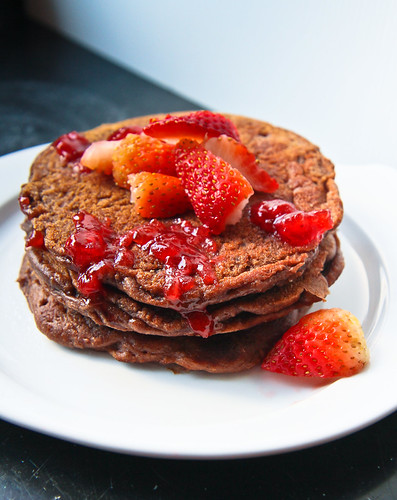
Oops somehow the jam looks horrible on the pancakes :/

So you can probably imagine how it was with my quest for pancakes. I was so obssessed with getting THE pancake recipe that I tried pancake recipes every other day (because I'm the only one willing to eat the pancakes and one recipe of pancakes lasts me 2 breakfasts) for weeks until I finally got sick of having pancakes for breakfast :/ The result of the quest is my basic pancake recipe, which I have blogged about before, and whenever I have yogurt on hand, this is the recipe I turn to.


Chocolate Multigrain Pancakes
Inspired by Smitten Kitchen
Makes 4 thick pancakes

35g egg (about ½ an egg or a small egg)
120g unsweetened low-fat yogurt (or any storebought yogurt)
15g olive oil
½ tsp vanilla extract

¼ tsp baking soda
¼ tsp salt
1 tsp baking powder
2 tsp castor sugar

5g cocoa powder
7g oat flour (or ground oats)
15g whole wheat flour
34g all-purpose flour
15g rye flour
7g sorghum flour
(or replace with 78g of all-purpose flour and 5g cocoa powder)

Method:
  1. In a medium sized bowl, whisk together the egg and yogurt. Add in the olive oil and vanilla extract.
  2. In another bowl, sift together all the dry ingredients - the flours, sugar, baking powder and baking soda, salt and cocoa powder.
  3. Stir the dry ingredients into the wet until the dry ingredients are moistened. A few remaining lumps are okay - do not overstir!
  4. Melt some butter in your pan and ladle a scant ¼ cup batter for one pancake. Cook the pancake until the edges are firm and dry and you see the centre bubbling. This will take about 3 minutes on medium heat. Flip the pancake to the other side and cook for another 3 minutes, or until golden brown (or in this case, until dry to touch on both sides since the pancake is brown anyway)
  5. Repeat for the remaining batter. Drizzle the pancakes with some maple syrup and serve with fresh strawberries and compote. Bon appétit!

Janine's jots: 
  • Note: As with most recipes that I try, I can't help but tweak and modify it to my preference, so in actuality, you see very few similarities with the original (hence making it my very own recipe ;p) For those who want to know what I have tweaked, I have used less egg (lower cholesterol), more yogurt and obviously made it chocolate pancakes instead of normal ones. Because of that, I added a bit of baking soda. Note that this is only for natural cocoa powder. If you are using dutched cocoa powder, you have to use baking soda together with an acidic ingredient, for instance, a touch of lemon juice or vinegar OR you can just replace with an equal amount of baking powder instead.  
  • Taste: Because the yogurt is the bulk of the recipe, the resultant pancake will taste of the pancake (and chocolate of course). Be sure to use good quality cocoa powder and yogurt. I loved how the pancakes tasted - in fact, this is probably the best chocolate pancake I've ever made and eaten!  
  • Texture: I also loved the texture of the pancakes here. I'm a fan of thick, almost cake-like pancakes, so these fit the bill perfectly. They are reminiscent of buttermilk pancakes, so do try these if you like the texture of buttermilk pancakes!
  • Serving size: I have tweaked this recipe such that it makes 4 pancakes - I tend to consume 2 pancakes during a single breakfast. This recipe is easily doubled.
  • Modifications: If you have thick or greek-style yogurt, do use some milk to thin it out (about 1-2 tablespoons will do). You can also refer to Deb's note on this. If the yogurt is already sweetened, you might want to reduce the sugar to 1 tsp as well. As for the combination of flours, feel free to experiment! Deb used a combination of whole wheat, all purpose and barley/rye flour. I went a step further to use a greater variety of flours. I haven't tried a gluten-free version yet, but I'm pretty sure it'll work the same :]
  • Storage: As with most pancake recipes, do not store the uncooked batter because the resultant pancake tends to be tough and does not rise well. For the cooked pancakes, try to consume them when warm, otherwise, these keep well in the fridge for a few days, when stored in an airtight container. Give them a zap in the microwave to heat them up a little.
  • Would I make this again?: Hell yeah!
Thursday, February 17, 2011

Wholemeal Bread Rolls, using tangzhong (汤种全麦面包)

I'm a person of contradiction, on one hand, I really like order and neatness (in terms of how I put my things, have folders for various things, etc) and yet my mom can attest to my lack of order, especially in my bedroom. I'm the same baking wise, for certain recipes, I'm quite the stickler for following instructions to a T, and for others, I just go by feel, which isn't exactly the best way for things like pastries. I'm also quite of a spur-of-the-moment kind of baker, so this bread was the product of my fancies during the weekend. 

I was studying, as usual, when it crossed my mind that I haven't been baking bread for a while now, since I had the necessary ingredients in the pantry (plus I needed to use up my wholemeal flour), I went to the kitchen to pound out some of my frustration on the dough. Btw, I highly recommend manual kneading of bread for anyone feeling highly stressed. I personally find it highly therapeutic and I usually do all my breads by hand, with no aid from the mixer or breadmaker. 

This recipe uses tangzhong, or what some bloggers have coined as the water-roux starter. In any case, it really helps with softer buns. For more information, please refer to my first ever post here! This recipe was adapted from Pei-Lin’s blog where she was making a wholemeal loaf. I’ve halved her recipe and made wholemeal rolls instead of a loaf but it’s still as yummy! They are still pretty soft the following day, as compared to usual bread recipes. This was also my first time using wholemeal flour to bake, and I really do like the taste of wholemeal, and I especially like the fact that I'm eating something with fiber and much healthier than just bread flour, which has all of its essential nutrients stripped away from it.


Wholemeal Bread Rolls, using the Tangzhong method (汤种全麦面包) 

Ingredients
[A]
140g  bread flour 
100g  wholemeal flour (I used organic wholemeal flour, which is the same thing but organically grown)
4g      instant dried yeast 
25g    sugar 
1g      salt 

[B] 
30g egg, beaten (about half an egg) 
50g milk, at room temperature 
20g low fat yogurt 
60g tangzhong, at room temperature* 

[C] 
25g salted butter, softened 

*Refer here on how to make tangzhong - here, I used a proportion of 10g of bread flour to 50ml of water, to give me 60g worth of tangzhong for the recipe. 

Method:
  1. Combine all the dry ingredients in [A] together. I used a sieve with larger holes so that the bran bits in the wholemeal flour could be sifted together with the other ingredients as well. 
  2. Whisk together the egg, milk, yogurt and tangzhong (ingredients in [B]). 
  3. Make a well in the centre of the dry ingredients and add in the wet ingredients. Mix until a dough comes together and pulls away from the sides of the mixing bowl. 
  4. Turn the dough out onto your work surface and knead using the heel of your hands and knuckles. 
  5. Once gluten has developed, knead in the softened butter until it is incorporated. I usually just take out the butter from the fridge, weigh it and put it in the microwave for a quick zap of about 15 seconds. 
  6. This step is where lots of elbow grease is needed. Continue kneading the dough with the heel of your hand and your knuckles. The dough is initially not too cohesive and very oily, because of the addition of the softened butter. You should reach a point where the dough becomes slightly sticky. 
  7. At this point, grab a small thumbsize portion of dough and gently pull the dough in opposite directions and check if a thin membrane can be formed. If such a ‘window’ can be formed without the dough tearing, it means that your dough has passed the windowpane test and is ready for proofing! 
  8. Tuck in the ends of the dough and put in into a greased bowl (I just use the mixing bowl I used previously), cover with a tea towel and let it proof for about an hour, or until doubled in size. To check if it has proofed sufficiently, poke your finger into the dough and if the indentation doesn’t bounce back, it means that your dough has proofed sufficiently! If the ‘hole’ bounces back, let it proof for a couple minutes more and try poking again. 
  9. Deflate the dough and divide it into 8 equal portions. Mine weighed about 55g on average. Shape them into rolls and tuck in the ends, placing the tucked in part on the bottom. You don’t need to flour your surface because the dough isn’t particularly sticky and this can be done without a work surface. 
  10. Arrange the rolls in a round pan (I used my 9-inch cake pan) and leave some space (about 3cm) in between the rolls for them to proof for the second time. Cover the pan with a tea towel and allow them to rest for about 30 minutes, or until the rolls double in size and meet each other. 
  11. Brush some egg wash (some of the egg left from above mixed with water) onto the tops of the rolls and bake them in a preheated oven at 170 degrees for 15-20 minutes. 
  12. When the bread is golden brown (or a skewer comes out clean), remove from the oven and place the rolls on a wire rack to cool.
Janine’s jots: 
  • If you see the original recipe, I have decreased the amount of yeast because I was afraid of the buns having the yeasty taste which I don't really like. 
  • I've also reduced the amount of salt because salted butter was used here instead of unsalted butter. 
  • I also replaced some parts of the milk with yogurt because I feel that yogurt imparts a richer texture to bread. 
  • Now, if you are lazy, you should use your bread machine to do the work from you right from the start, or your mixer with a dough hook. The recipe below is for completely hand-kneaded because I needed to punch my stress out on some inanimate objects. For the bread machine version, simply place the ingredients in as required by your machine (usually yeast is left right on top), and simply click on the program which suits you. For your mixer, just use it to replace all the steps requiring manual labour - until step 7 where you take the dough out to knead for a minute or two before performing the window pane test. 
  • For some pictorial guidance on the entire process, please take a look at Carol's blog here which I found helpful. 
  • If you’re making a loaf, the suggested temperature is 180deg for 30 minutes. I forgot that I was making rolls and baked at 180deg, which resulted in the tops of the buns browning way too quickly. As result, the buns turned out a little drier than I would have liked. I’d suggest baking the rolls at 170 deg for about 15-20 minutes. 
  • If you are following the original recipe with 70ml milk, you might experience the dough being stickier, which will require you to flour your work surface so that you can knead without the dough sticking. If you flour your work surface, oil your hand so that the flour:fat proportion stays roughly the same. 
  • If you don't have wholemeal wheat flour, simply replace the entire amount in the recipe above with normal bread flour. You might find it that it takes a shorter time to knead because for wholemeal flour, the bran bits in the flour cuts the gluten strand, impeding the formation of gluten strands.
In pictures: 
This is step 3, where you add B to A. Notice that the tangzhong has been thoroughly mixed into the wet ingredients before adding it in.
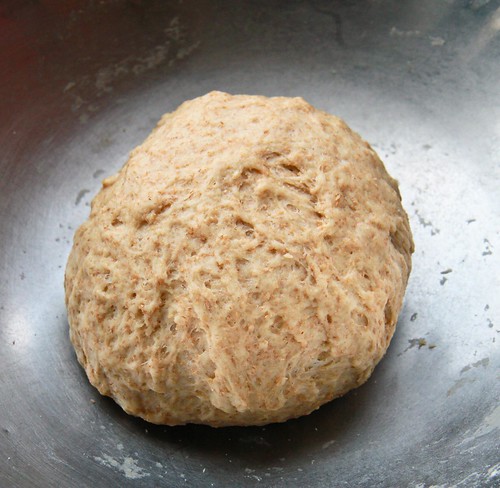
This is after step 8, where I've already finished kneading and tucked the ends of the dough in to form a tight ball. It's ready for its first proofing!

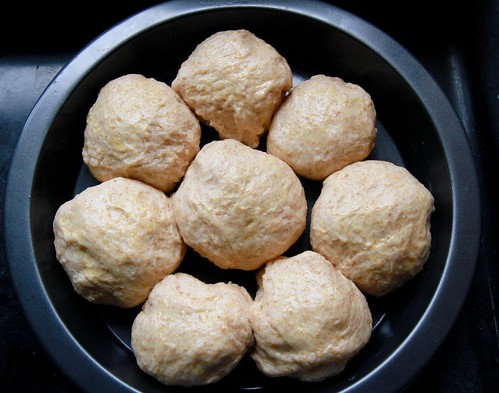
These are the rolls after the second proofing. I've put the egg wash on and it's ready to go into the oven! Notice that the rolls have begun sticking to one another after the proofing, but that's okay because I want yummy pull-apart rolls! :]
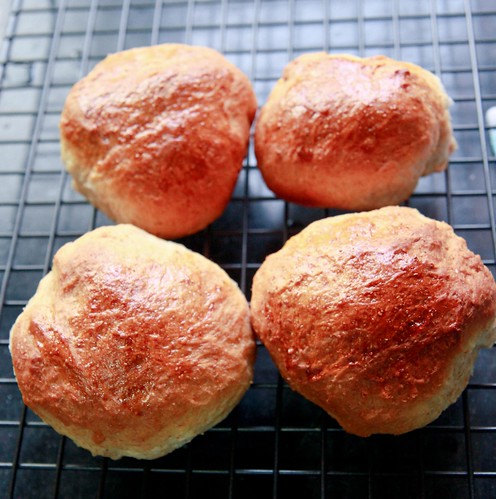
The rolls look rather horrible in this photo, but trust me, it was delicious because the moment it came out of the oven, I took about this long before eating one and so did my family members. Which explains why there's only 4 left in this photo >.< Note that the rolls are a little overbaked (too brown in my opinion), so keep an eye on your rolls once it's 15 minutes! (especially if your oven runs a little hot, like mine)

Sorry once again for the lack of detailed pictures because it's pretty hard to take photographs when you're kneading (especially since I've no tripod and I'm alone at home) and also sometimes my greed to taste my baked creations get the better of me and I forget that I should take some photographs for my blog. But since this blog is set up to indulge my personal food fantasies, I guess it's apt that I should devour them when they're the best tasting, and not after they're cold from excessive photo-taking =p

Thursday, February 10, 2011

Strawberry yogurt cake, with fresh strawberries and strawberry whipped cream

I found it a pain to write this blog post, as well as a few others that I was drafting – because I was writing out the recipes and back stories to the recipes when my dear old Mac decided to crash on me, after 3 years of loyal service. Suffice to say, I now have it rebooted, but I have also lost all my associated documents and photographs. Thank God that I had done some backing up a few days ago, so not much was lost. Thus, it was a pain to write this post again, especially after I had written a long chunk of stuff :/ 

Anyhow, this month’s Aspiring Baker's theme - Aspiring Bakers #4: Love is in the Air (Feb 2011) fell in nicely with my plans for this month, as I had been planning to be sweet and post a series of Valentine’s Day related bakes for my valentine to visually feast on, since he’s not here in Singapore, and I know that he stalks my blog ;p  So I’ll be killing two birds with one stone with this post =) I like the fact that joining such groups force you to think out of the box, and it impels me to do some baking each month, which was part of my baking plan for 2011. This is also the reason why I’ve joined Daring Kitchen, and hopefully, I’ll get the courage up to attempt more recipes to both cook and bake =) 

This is my second attempt at frosting a cake, and although it doesn't look all that polished, the cake really is yummy and healthy too, because my low-fat, low-sugar yogurt has replaced much of the fat in the recipe.


Now onto the cake. I had some homemade strawberry yogurt lying the fridge, and because I had left it out a tad too long, the yogurt had gotten to a thick consistency, much like Greek yogurt. So I figured it'd be perfect in a cake requiring yogurt, instead of spooning it over my granola in the morning. I adapted a strawberry cupcake recipe from Chie Kato's book as well as a French gâteau au Yaourt I adapted from Clotilde's recipe. I don't have any photograph of the crumb, but rest assured that it is as advertised by Clotilde - fluffy, moist and not overly sweet, almost like a denser version of a strawberry chiffon cake. 

I'll be posting the recipe for my strawberry whipped cream in another post, so stay tuned for that!

Strawberry yogurt cake
For an 8" round cake

Ingredients: 
1            large egg
125 ml   yogurt (I used a strawberry-flavored one)
55 g       granulated sugar 
40 ml     flavorless oil (I use canola oil)
125 g     flour, sifted
¾ tsp     baking powder
¼ tsp     baking soda
¼ tsp     salt
¾ tsp     vanilla extract
1 tbl       strawberry puree (optional)    
Method:
  1. Preheat the oven to 170°C. 
  2. In a large mixing bowl, mix the yogurt with the strawberry puree, before adding in the egg, sugar, vanilla and oil. Mix all of them until combined. 
  3. In another bowl, sift together the flour, baking powder, baking soda and salt. 
  4. Add the flour mixture into the yogurt mixture and quickly mix the two together until few small lumps are left. Be careful not to overmix. 
  5. Pour the batter into a greased cake pan and bake for 20-30 minutes in the oven until the top turns golden brown. 
  6. Remove the cake from the oven and let it stand for at least 10 minutes before transferring it onto a cooling rack. 
Janine’s Jots: 
  • *How to make strawberry puree: what I did was to hull the strawberries, before placing them in a blender to blend. Once blended, you have to strain the mixture through a sieve to remove the seeds of the strawberry (which I forgot to do) so that you get a smooth puree. 
  • I used strawberry yogurt, although an authentic gâteau au yaourt uses natural flavored yogurt. You can actually use any flavor of yogurt you like, in my opinion. 
  • I used a 9" round pan, which gave me a rather thin cake. The batter is better suited for a 8" round pan, which I don't have =/
  • The original recipe calls for 100g of sugar, which I reduced in half because I was going to frost the cake with my strawberry whipping cream. If you are eating the cake plain, do increase the amount of sugar!
  • You can also use the recipe above to make muffins. These should be enough to make 6-8 large muffins. Just reduce the baking time to 15-20 minutes and test for doneness once the tops of the muffin start to turn golden brown. 

In pictures: 

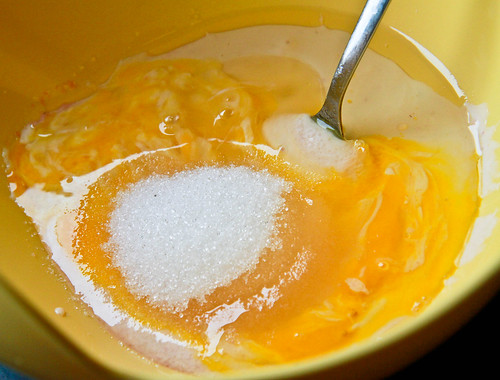
Add sugar, oil, egg and vanilla extract to your strawberry yogurt. 
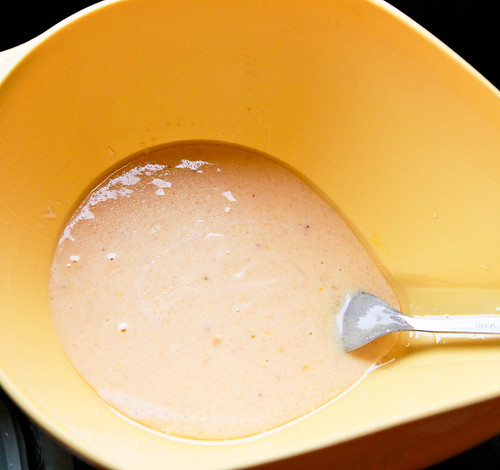
Mix the ingredients well.
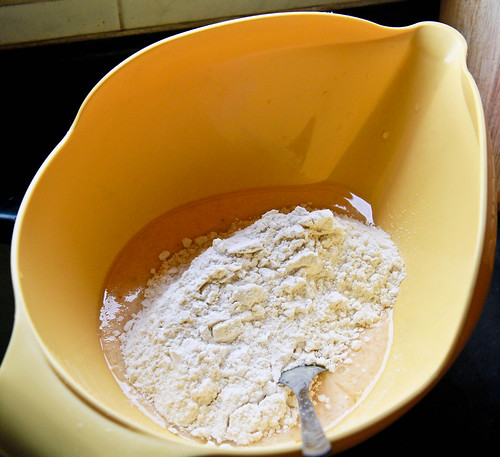
Add the flour mixture into the yogurt mixture and combine. 
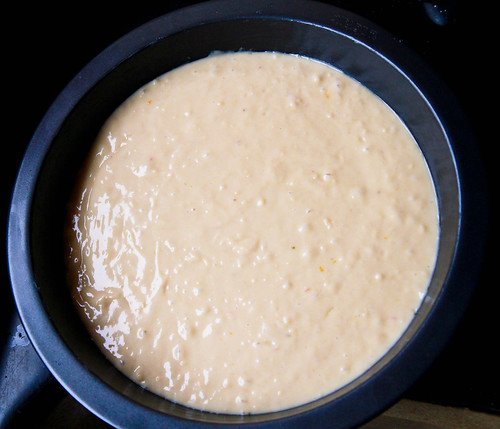
Pour the batter into a greased cake pan. Note that there are still some lumps left in the batter, but that's okay!
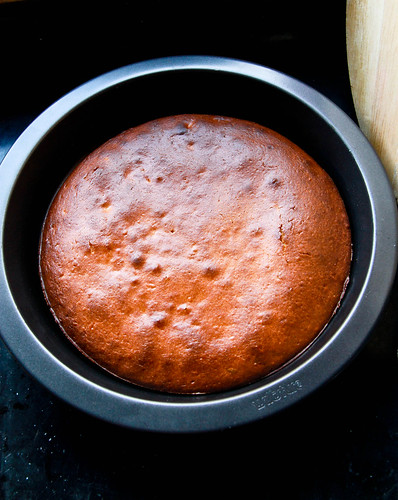
This is what you DON'T WANT to have. An overbaked cake which is more brown than golden brown =/  And see how small my cake is as compared to the pan? Always use the right pan for your batter!
My cake was over-baked because I forgot to use a shorter baking time since my pan was an inch larger than it should have been. Lesson learnt - always follow my instincts! (and also, use the correct pan!) At 20 minutes, the cake was definitely a nice golden brown, but I decided to let it bake for a while more since I wasn't too sure and at 25 minutes, it came out like this! I had to slice off the top and side portions of the cake before using it because the sides were way too dry! However, I have used this recipe in muffin cases and they bake up real well - they are moist and tasty, with a definite strawberry twang


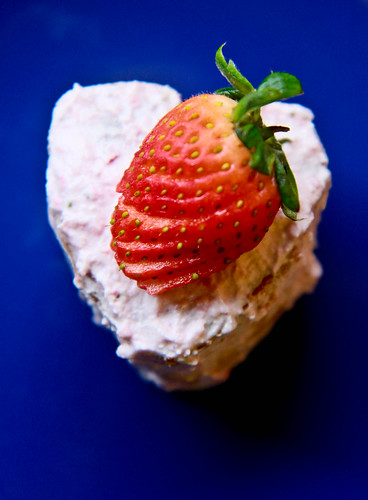
After cooling the cake, I used a heart-shaped cutter to cut out the two desired heart shapes. I then used my strawberry whipped cream to sandwich them together, before frosting the outside of the cake with it. Technically, the layer you see in the picture is supposed to be the crumb coat, and you're supposed to add another layer of icing so that it'll turn out to be smooth and nice. However, since this was for personal consumption and I don't like overly thick frosting, I didn't go on to do the second layer. To make up for the general plain-ness of the cake, I sliced the strawberry and fanned it for décor on top. And there you have it, a heart-shaped strawberry yogurt cake with strawberry whipped cream, topped with a fresh strawberry, just for Valentine's Day =)

PS: I do think a fresh strawberry is an essential part of the cake, and not just for décor because it gives an extra burst of sweetness and slight tanginess when you eat it together with the cake, not to mention the freshness it adds to the entire experience. 

Here's a final close-up of the cake (or more aptly, a petit four) which I so hastily consumed after snapping a few quick shots (which explains why the exposure and composition's all over the place): 

Happy Valentine's, dear 

Related Posts Plugin for WordPress, Blogger...