This post has been long in the making. Like 8 months kinda long. Ever since my first post on macarons more than half a year ago, I've been making macarons on and off, experiencing more failures than successes. I'm experimented with technique, temperature, equipment, ingredients and a whole lot of other variables, and have come to the conclusion that macarons are indeed iffy little creatures and having a humid and cramped kitchen to work in is definitely not the most ideal of places. I say this with a caveat of course, since I know that bakers in similar situations have churned out beautiful macarons but let's face it - you do get better results if you work in an air-conditioned (or low humidity) environment. Also, let's just say that I impose exacting standards on myself and even the 'successful' macarons you see below still don't pass muster in my books - the feet are a tad too short and the tops are not flat and shiny enough.
I'm still experimenting with different recipes (you might say, just stick to a darn recipe girl! But I'm fickle minded that way), and am still determined to get my french meringue technique right - I'm still in the process of tweaking the different variables to see where I'm going wrong.
Like I mentioned previously, I tried making macarons using the french method for a consecutive five times, and each time, the macarons turned out feet less. I was so dejected and disappointed - at that point, I knew that I had to turn to the italian meringue, which had given me results on my first attempt. And to that I turned, and it did give me results as promised. You might query why the hesitation in using a successful method? Well, for one, I find the steps tedious, and you do need a candy thermometer in order to make the italian meringue and second, I really wanted to get my french meringue method right. Suffice to say, after having successful macarons with the italian meringue, I have given up on making macarons for a while and have focussed instead of using up those macaron shells. Once I've cleared my fridge of all those shells, it'll be back to more macaron experiments for me!
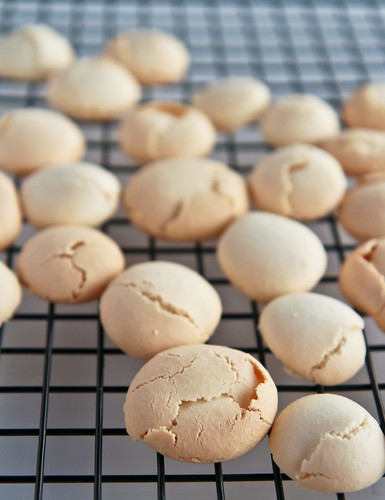
For those interested, these are what my failures looked like:- volcano and cracked tops as well as undercooked bottoms for some.
***
After reading MANY troubleshooting posts (see Not so Humble Pie, Miso Hungry, Duncan, Vivian for some imminent examples) on why my macarons turn out the way that they do, I have concluded that it was a combination of several factors, including:1. Not allowing the 'crust' to develop sufficiently, hence the mega cracks
2. Too humid weather and too high baking temperatures (see this useful post by Silvia and Ivan on dehumidifying)
3. Over folding the batter.
 |
| Check out the difference in the bottoms of the macs - the left ones are using a generic silicone mat and the right ones are made using baking paper. |
***
Nevertheless, I was sick of getting failures, so I escaped by using the italian meringue method (yes I'm escapist) and I ended up with this bunch of macarons you see here:
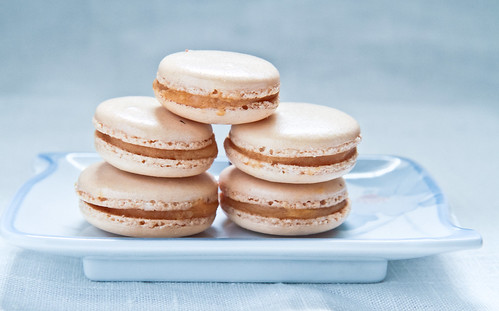
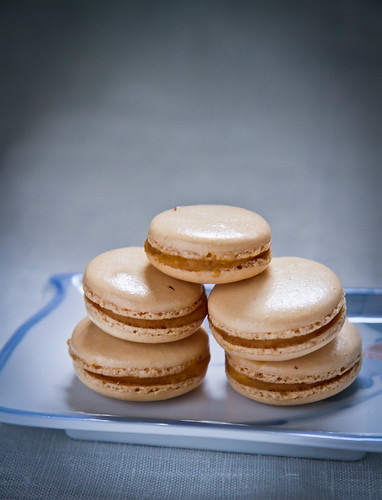
Macarons with relatively smooth shells but super tiny feet. Well, at least they had feet right? And strangely enough, I ended up with salmon pink macarons, even though I used brown coloring. I thought, hey, that might just be serendipity, since I was dying to come up with macarons to qualify for this month's Mactweets Mac Attack Challenge #24, Pink October Macarons. For those not in the know, Mactweets is a monthly macaron challenge started by Jamie and Deeba, both of whom have wonderfully written blogs. This month's Mactweets is special, because it is the second time they are supporting a wonderful cause, since October is also Breast Cancer Awareness Month. I was actually hoping to have some failures which looked like breasts (i.e., those with nipples), but as fate would have it, I didn't get that particular type of maca-fails. So normal pink macarons it is!
I've been wanting to talk about Breast Cancer Awareness this entire month, but time just seems to have passed me by and all my pink-related bakes weren't successful enough to be blogged about. Anyway, I'm at that age where the idea of having breast cancer seems foreign, but I've come to realize that although the risk of getting breast cancer increases with age, being young doesn't mean there is no risk. Women as young as in their early twenties have been diagnosed with breast cancer! I know that many older women have the mentality that this can't happen to me (a friend of my auntie was diagnosed recently and she was in denial, refusing treatment for months before she got some sense knocked into her) - but it does and can happen to ANY of you, male or female! Yes, it does occur in males, though less than 1% of the population. And you can help yourself by doing your own self-examination, and going for a mammogram, especially if you're 40 years or older. Early detection does save lives! I mean, come on - self examinations are free and it costs $50 to go for a mammogram in Singapore. For more information, especially for people in Singapore, please do check out the Breast Cancer Foundation website, where you can get information about breast self examination and other useful information related to breast cancer!
So, if you're female, give yourself some self-love today (terrible pun to tie in the photo below, I'm sorry), and do a self-check to reassure yourself that you're breast cancer free! :]
Alrighty, and back to my macarons. I shall be providing you with Pierre Herme's Italian Meringue recipe, which I translated from his Macarons book which I have in French (yes, the English version was just released). I also used his recipe for caramel fleur de sel (salted caramel buttercream filling), which was awesome (as usual). Because I upped the saltiness a little, the filling matched the sweet shells perfectly.
Macarons with Salted Caramel Buttercream, using the Italian Meringue Method
For the Macarons
150g ground almonds
150g icing sugar
55g egg whites
1 tsp egg yellow food coloring (I used 2 drops brown coloring)
55g egg whites
1 tsp egg yellow food coloring (I used 2 drops brown coloring)
115g castor sugar
40g mineral water
55g egg whites
Method:
For the salted caramel buttercream filling
100g sugar
115g whipping cream
15g butter
- At least a day (24 hours) before attempting the macarons, separate the egg whites from the yolks and let them rest in the fridge (it is too humid and hot here for them to rest on the counter for more than a few hours) to age and 'liquefy' (in the master's words).
- Sift the icing sugar and ground almonds individually to get rid of the large lumps. Then, sift the icing sugar TOGETHER with the ground almonds. This is known as your "tant-pour-tant" (literally, so much for so much or equal parts). Mix in the food coloring into the first 55g of egg whites. Then, combine these colored egg whites into your tant-pour-tant. Mix well and leave this aside.
- For the remaining 55g of egg whites, place it in a clean mixing bowl. Next, heat the castor sugar and water in a saucepan over a medium heat. Do use a candy thermometer - allow the mixture to boil until it reads 118°C. However, once the syrup reaches the 115°C mark, start whisking the egg whites. The sugar syrup should read 118°C just as the egg whites reach a soft peak (the timing is pretty accurate). Pour the sugar syrup down the sides of the bowl and continue whisking the egg whites until you achieve a stiff peak. The egg whites should read about 50°C when stiff peaks are achieved.
- Fold in the egg whites in 3 additions into your tant-pour-tant mixture, gently folding the batter until it is glossy and 'flows like magma'. I generally use the indicator of how long a fold takes to 'dissolve into itself' - about 15 to 20 seconds to check if my batter is ready.
- Pour the batter into a pastry bag filled with a plain tip (about 10-15mm in diameter should be just right) and begin piping the mixture into circles of about 3cm in diameter onto your baking sheets lined with parchment paper. If you have problems piping evenly sized shells, do print out a template or you can trace out 3.5cm rounds on the back of your parchment paper. Since the shells will spread out a little, do pipe the shells a little smaller than the circles you have drawn. Leave a 2cm space in between each shell. After you are done piping, rap the baking sheet against your work surface to ensure that there are no air bubbles trapped in the shells.
- Allow the shells to develop a 'crust' - this crust is simply a skin that ensures that the shell will not stick to your finger. It literally feels like a thin membrane. For a humid environment like Singapore, try to work in an air-conditioned environment or you can place the shells in front of a fan. My shells took about 1 hour to develop a crust.
- Preheat the oven to 160°C (some recommend 180°C but I find that 160°C works best for my oven). Place the tray in the middle rack of the oven and bake for 12-15 minutes. At the 5th minute, the feet should have developed. At the 8th and 11th minute, do open the oven door a little to release the build up of steam. If your macaron shells start to brown, your shells are overcooked. What I do is to remove the tray from the oven at the 12th minute and flip one shell over to check if it adheres to the baking paper. If it does, put the tray back to bake for a few more minutes; if not, the shells are done.
- Once out of the oven, remove the shells from the baking sheet (still on the parchment sheet) and allow them to cool on a cooling rack. This will ensure that the shells don't continue to cook on the hot baking sheet. Once the shells are cool enough to handle, remove them carefully from the parchment sheet (ideally they should not stick at all) and pair them up.
- Fill the shells with your desired filling and store in the refrigerator for at least 24-48 hours before consuming, to allow for an 'osmosis' of the buttercream to the shells.
100g sugar
115g whipping cream
15g butter
1 tsp fleur de sel, or any sea salt.
70g butter, softened.
Method:
- Add half of the sugar to a saucepan and allow it to melt before adding the remaining half of the sugar. Do not stir the mixture and allow all the sugar to melt to a amber color.
- At the same time, bring the cream to a simmer.
- Once the sugar has turned a dark amber color, remove from heat and add the first 15g of butter. Stir quickly and be careful as the mixture might splatter. Then, add in the cream which has been simmering and stir quickly to incorporate.
- Put the saucepan back onto a medium heat and allow it to boil until it reads 108°C on the candy thermometer. Pour the mixture into a heatproof dish to stop the mixture from cooking and allow it to cool.
- Once the caramel mixture has cooled, stir in the sea salt, making sure it dissolves. Begin beating the softened 70g of butter for about 5-10 minutes, or until it becomes soft and fluffy. Add in the cooled caramel mixture in two additions, making sure that the caramel is fully incorporated into the fluffy butter. Place the mixture into a piping bag and your salted caramel buttercream is ready to be piped!
- Note: Veron from Kitchen Musings has this delightful series on Macarons which you should read - more relevantly, her comments on Pierre Herme's italian meringue method here come in handy should you wish to attempt this recipe. For a photo tutorial, do check out Edd's post for this exact same recipe. If you wish to look at local bloggers attempting the italian meringue method, do check out Swee San's step-by-step tutorial for Wendy, both of whom had beautiful macarons with frilly skirts :]
- Taste: I enjoyed the saltiness of the caramel but it might be a tad salty for people unused to the taste of sea salt. I would recommend starting with half a teaspoon and working your way up through tasting (you can do that with the cooled caramel). The sweetness of the macaron shells were thus countered with the salted caramel.
- Texture: For the best experience, DO allow the filled macarons to rest in the fridge for at least a day or two, because the part of the shell in contact with the buttercream yields more easily and this gives you a crisp and chewy mouthfeel, the hallmarks of a good macaron.
- Serving size: I halved both the macaron shells and buttercream recipe, so that I got a smaller number of shells (about 30 pairs).
- Modifications: I didn't get my hands on salted french butter or creme fraiche, so I changed that to normal unsalted butter but used instead an extra teaspoon of sea salt to adjust the saltiness to my liking. Creme fraiche was substituted with whipping cream as well. I did reduce the sugar in the sugar syrup by quite a fair bit - the original calls for 150g of sugar and 37.5g of water but I found that reducing the sugar a little worked as well.
- Storage: The macarons keep extremely well in the refrigerator - you can even freeze them for a month, but note that the shells will soften and lose its crispiness.
- Would I make this again?: Definitely! The italian meringue method requires much more work than the french, but it promises results each time, so I know which recipe to turn to when I have a macaron craving! However, I intend to tweak the recipe a little to see if I can use less sugar for the sugar syrup in order to reduce the sweetness of the shells.
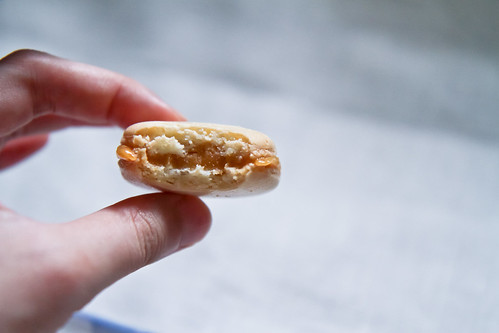 |
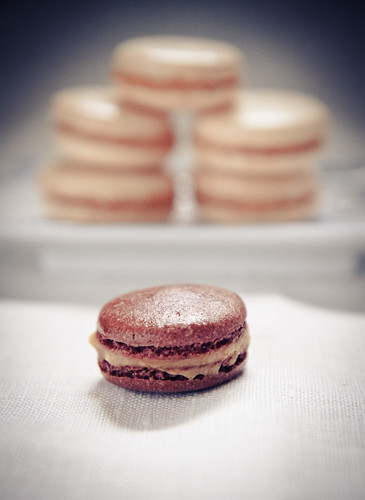
| The texture of the shells were pretty good - slightly crispy with a chewy interior. There are also no visible air pockets whee! :] |
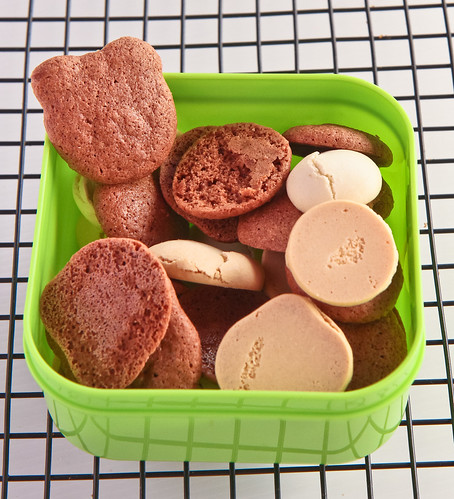
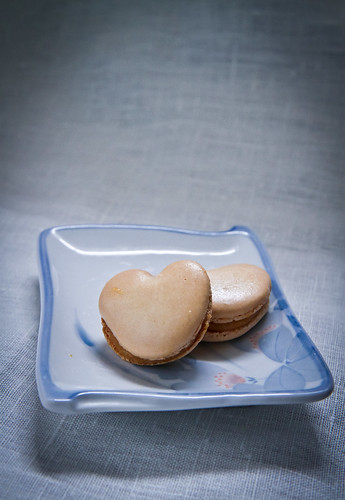
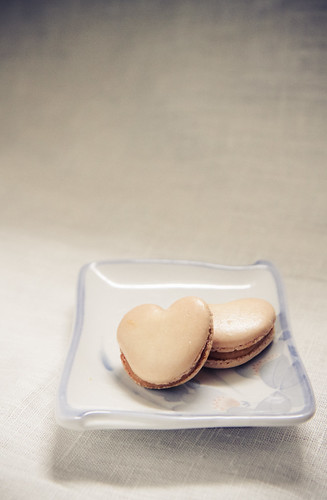
Alright, this post is getting a tad long, so I shall end with a final picture of some heart-shaped macarons I attempted. As you can see, I'm still quite bad at filling the macarons, but I try! ;p
Till my next macaron adventure!


25 comments:
Your macarons look very sweet and pretty. I've never tried to make macarons before but definitely will try to make some for sure :)
thanks Ann - I bet that your macarons will turn out lovely, just like all your other bakes!
Working in a humid kitchen is quite a challenge when making macarons, but you've done amazingly looking little creatures!
I'm glad you've found useful our post on the humidity :)
Hi Silvia (or Ivan),
thanks for leaving a comment here! Yup your post was indeed helpful and I hope that it'll help others (since my readers are mostly from around the equator) like me too :D
what say me.. hmmm..
if only the last pic, the mac was pink, then that will be my favourite too!
I tried the french method 3 times, all crack crack crack. I think I'll just stick to Italian method.
Hi, Janine! Thanks for sharing this Pierre Herme recipe. I like this recipe since the meringue sugar is only at 115g compared to 150g for another PH recipe published on The Telegraph.
So happy to be baking with you in the MacTweets Virtual Kitchen!
your macs are so pretty! i've yet to try the italian method, maybe one day when i've mustered the courage to make macs again. hahaha
i admire your passion and 'never-give-up' spirit :)
about the washed out pic, i like it too. i've tried to produce this sort of pics but never seem to get them right each time. i want a dslr camera!
These photos make me feel at peace with macarons.....give me macarons any time! Beautiful shots as always!
ahhh french method is a real kick up in d a$$ eh..
Your macarons looks perfect, Janine! I have always wanted to try at making them, but the confidence is just not there at the moment! Thanks for all the tips!
Congratulations on some very beautiful looking macarons! Success is often the result of trying and failing and your perseverance has paid off because these look lovely. Anything with salted caramel gets my vote too, yum :-)
Janine, your post on your lovely macs makes me want to make some again. Thanks for all the tips.
Such pretty macaroons ! I have yet to try my hand at them...will sure do soon...yours are an inspiration :)
What a wonderful post. Your macarons are stunning - don't be so hard on yourself! Beautiful colour and can just about taste that gooey salted caramel. Fabulous!
Well done to you for keeping on trying. These do look really good and I think you're being a tad harsh on yourself because they made my mouth water from the first picture! ;)
@Wendy: I still don't want to give up ;p Still die-die trying the french until I get results hehe
@annapet: thanks :D your macs look beautiful, as always!
@sotong: hehe i gave up - that's why i tried the italian meringue method. too sick of failures already. you actually don't need a dslr! I tweaked the controls on adobe lightroom :)
@to food with love: thanks :D
@swee san: haha totally!
@kitchen flavors: I know what you mean - it takes quite a bit to take the first step!
@the little loaf: thanks!
@quay po: your macs look beautiful - do make them again soon!
@zurin: I'm pretty sure you'll excel at them, like all your other bakes!
@jill: thanks for the lovely comment, especially coming from you! your book was one of the first few books I turned to when I needed help with macs :)
@lorraine: thanks so much for the compliment, makes me wanna try making them again heh
i think you did a great job. What works for one might not for another. So macaron making is definitely a long road of experimentation. Looks like you are already making some progress!
Whatever method you used, these came out beautiful. The heart shape and flavor are an added bonus!
Janine, I love reading your tips and how you got to make all the gorgeous looking macarons. I haven't succeeded in them yet so I'm reading them intensely!
Also, GREAT NEWS! You are the winner of my BIRTHDAY BLOG GIVEAWAY!!! Your prize is my Giveaway package 1. I will email you for your details ;)
Wow, give me salted caramel and I'm yours, lol. They look great, and I applaud you for trying so much!
I think that your pink salted caramel macarons are awesome! Little hearts made with lots of love.
Janine! Your macarons turned out so shiny and smooth and neat! LOVE this post...and thx for bringing more awareness to breast cancer too!
ive tried the french method few times and most times turns out really nice in appearance...BUT...i just think the texture is not quite there. so im very curious and trying out the italian method...im thinking it makes it taste better despite the more labour intensive process! guess ill hv to leave that experiment to a day when i feel like sifting almond meals :P
I could write journals on my French failures, but for now I am gob-smacked at how beautiful, whimsical and ethereal your pretty pink macarons look. Just outstanding. Love the filling too. These are the prettiest I've seen in a while. Thank you for the Pinktober shout out and for bringing these to MacTweets!
Hey FYI, boss lurves Macs.
@Paul - yours or mine? Guess I should make some to "pai ma pi"
Post a Comment