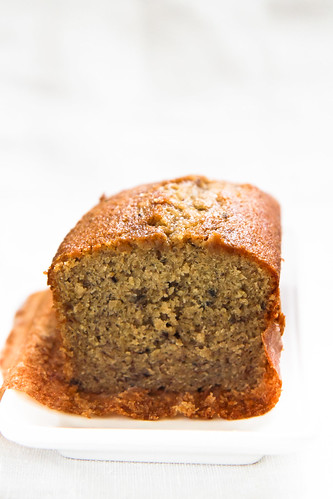
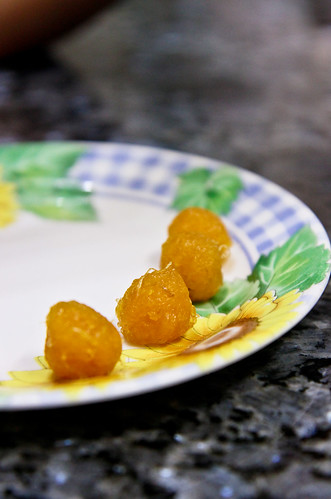
It seems like eons ago when I last posted on my vanilla sugar cookies and I thank you out there for emailing me, showing me support and asking me about ordering the cookies :] Things have been a tad busy lately - the first week of August I was busy baking for a huge wedding order of 200 petit-four sized cakes, and in the second week, I was baking up a storm for a dessert table for a grand-dame's birthday ;p and in the third week, well, I was away in Bangkok for holiday! In between, I haven't had the urge to bake anything new, because well, facing the oven for two whole days (8am to 8pm days) can make you quite sick of baking.
I wouldn't be surprised if no one visits here, because I've been swamped at work, and haven't been able to even find time to check my email or even visit the blogs I frequent. Hopefully, I'll find time to blogsurf next week. This last week, I've been 'working hard for my money', as my dad likes to term it. Having enjoyed two holidays in a row, I've had quite a bit of backlog, and have had to put in 12 to 15 hour days just to catch up. The only light at the end of the tunnel is that I've received my first proper pay check, and today is actually the anniversary of my second month at work! The first month anniversary of forever, if one is pessimistic. I'm finding it harder to keep up blogging and working, because if I don't have to work during the weekends, I tend to sleep and laze through them instead. Baking, if any, is the usual few things - my favorite cookies, sourdough breads, and the usual cupcakes and muffins. Nothing unusual and nothing fantastic. In fact, I haven't touched my camera in a long while. I really hope to get out of this lazy cycle of mine and bake something interesting to post about soon!
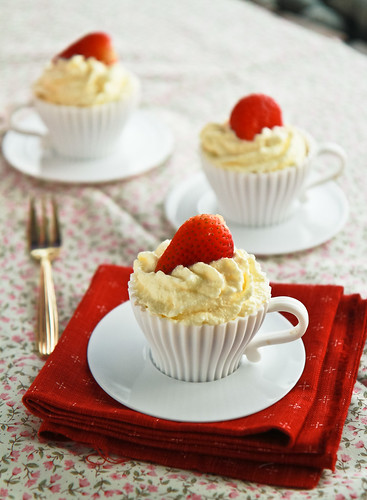
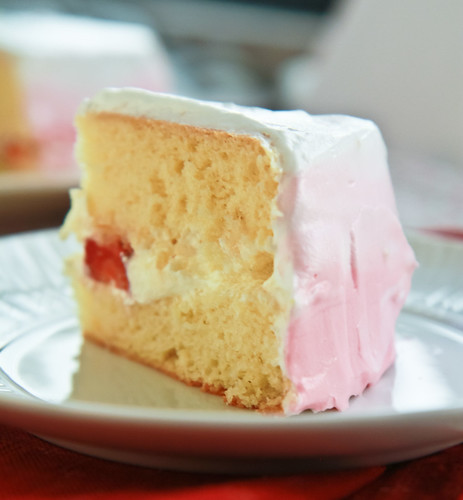
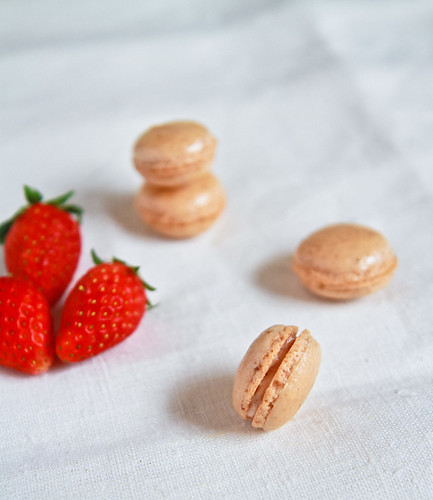
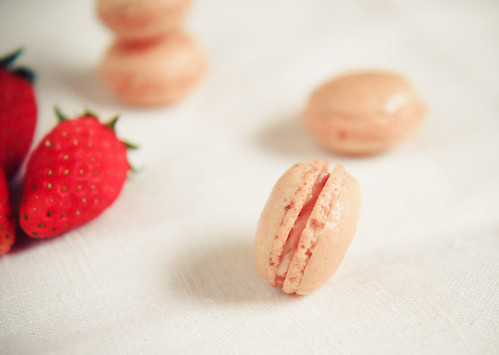
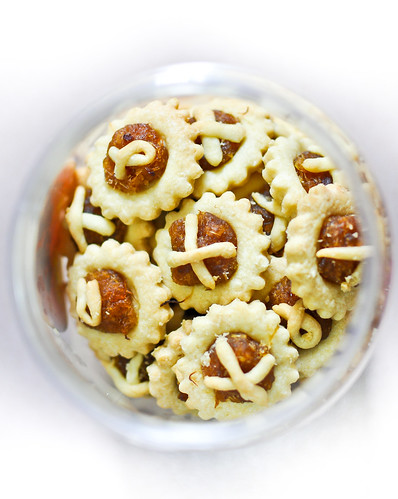
This was something simple I baked nearly two months ago, when strawberries were hitting the supermarkets at about S$5 per half-kilo punnet, and I was busy munching on them sweet morsels as well as making them into jams. Out of all the berries, I think I like strawberries the most, because they are the only berries which I find sweet enough to munch on (as compared to say raspberries) and I love strawberry-themed desserts.
So anyway, because I had an abundance of egg whites and strawberries, I decided to make this particular strawberry cupcake recipe which I've tried countless of times and loved. It uses only egg whites, which means that if you have lots of egg whites and don't feel like making macarons with them, you can try these instead! It's actually a very typical white cake recipe, but instead of milk, strawberry puree is used.
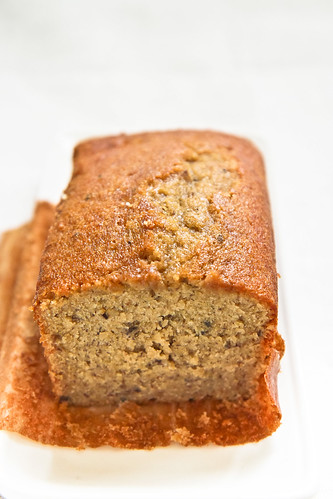
I wouldn't be surprised if no one visits here, because I've been swamped at work, and haven't been able to even find time to check my email or even visit the blogs I frequent. Hopefully, I'll find time to blogsurf next week. This last week, I've been 'working hard for my money', as my dad likes to term it. Having enjoyed two holidays in a row, I've had quite a bit of backlog, and have had to put in 12 to 15 hour days just to catch up. The only light at the end of the tunnel is that I've received my first proper pay check, and today is actually the anniversary of my second month at work! The first month anniversary of forever, if one is pessimistic. I'm finding it harder to keep up blogging and working, because if I don't have to work during the weekends, I tend to sleep and laze through them instead. Baking, if any, is the usual few things - my favorite cookies, sourdough breads, and the usual cupcakes and muffins. Nothing unusual and nothing fantastic. In fact, I haven't touched my camera in a long while. I really hope to get out of this lazy cycle of mine and bake something interesting to post about soon!
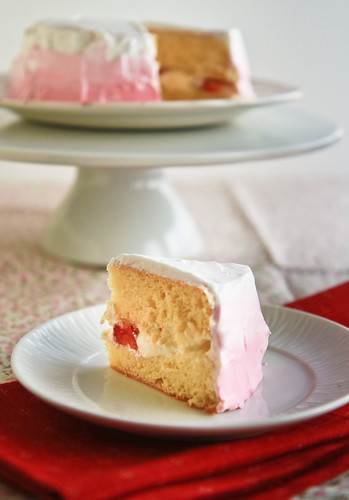
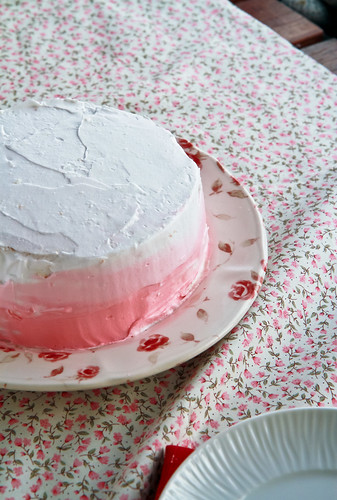
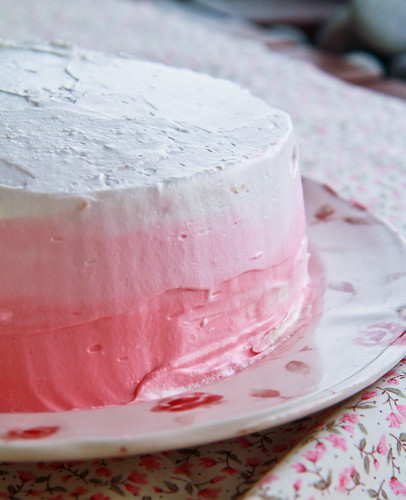
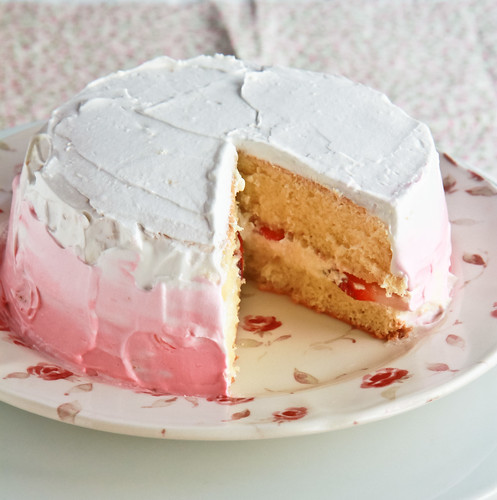
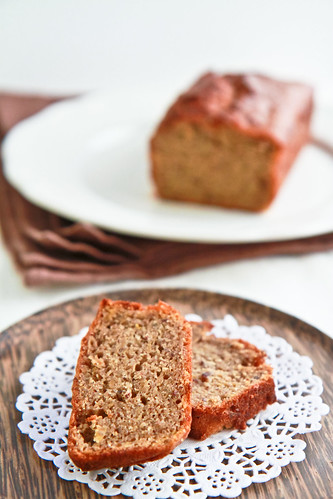
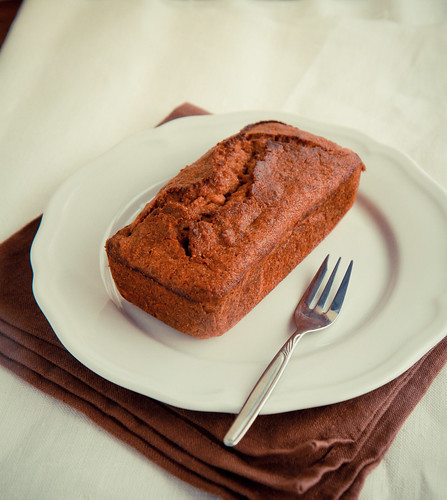
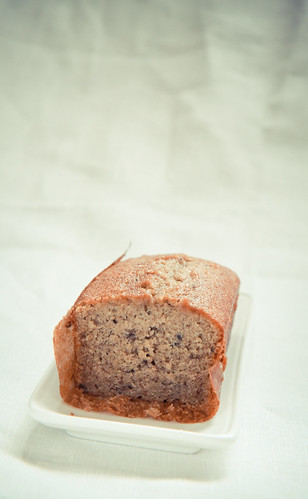
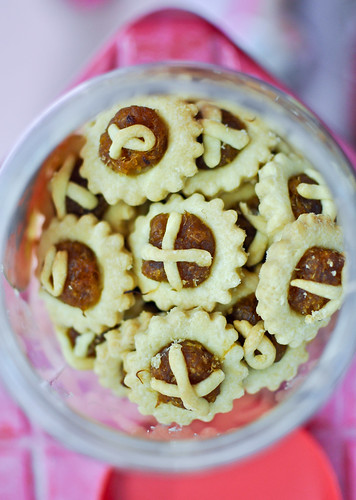
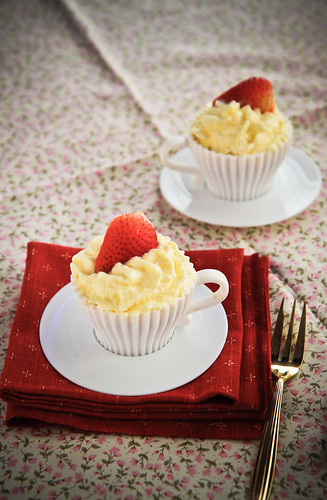
This was something simple I baked nearly two months ago, when strawberries were hitting the supermarkets at about S$5 per half-kilo punnet, and I was busy munching on them sweet morsels as well as making them into jams. Out of all the berries, I think I like strawberries the most, because they are the only berries which I find sweet enough to munch on (as compared to say raspberries) and I love strawberry-themed desserts.
So anyway, because I had an abundance of egg whites and strawberries, I decided to make this particular strawberry cupcake recipe which I've tried countless of times and loved. It uses only egg whites, which means that if you have lots of egg whites and don't feel like making macarons with them, you can try these instead! It's actually a very typical white cake recipe, but instead of milk, strawberry puree is used.
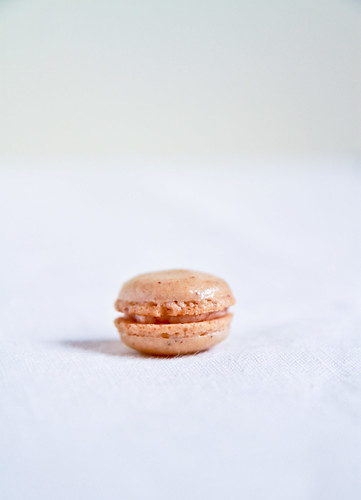
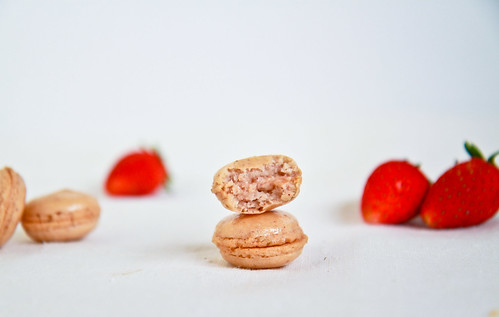
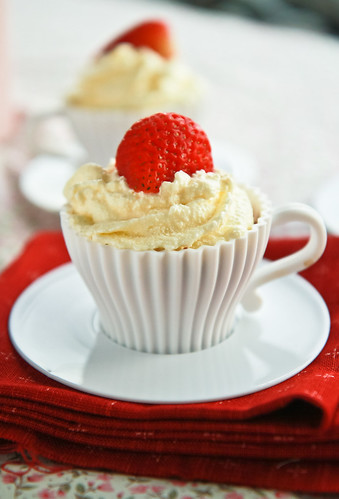
I sometimes use a strawberry milk buttercream to up the 'strawberry-ness' of this cake, but this time, I opted for a cream cheese swiss meringue, just because I had extra cream cheese and I like how nicely it goes with strawberries.

Strawberry White Cake
Adapted from Smitten Kitchen's Pink Lady Cake
Makes 6 cupcakes
65g all-purpose flour
40g castor sugar
1 tsp baking powder
⅛ tsp salt
60g butter
¼ cup strawberry puree (about 60g)
40g egg whites (from about 2 medium sized eggs)
30g milk
Method:
- Place the dry ingredients (flour, sugar, baking power and salt) in a mixing bowl and mix it on low speed for about 30 seconds.
- Add the butter into the dry ingredients and continue mixing on low speed until the butter turns into pea-sized bits. Then, pour in the strawberry puree and mix on medium speed for about 30 seconds until the mixture is well combined and fluffy.
- In a separate bowl, combine the egg whites and milk together. Add the egg white and milk mixture to the mixing bowl in three parts, making sure to beat at least 10 seconds between each addition. Divide the batter equally among the cupcake liners/silicone cupcake moulds, making sure to fill the liners to about slightly less than 2/3 full.
- Bake in a preheated oven at 170°C for about 20 minutes, or until a wooden skewer inserted into the centre of the cupcake comes out clean. Allow the cupcakes to cool for about 30 minutes or until the tops are cool to touch before decorating them with buttercream.
Cream Cheese Swiss Meringue Buttercream
Makes enough to frost 6-8 cupcakes
35g castor sugar
30g egg whites
50g unsalted butter
30g cream cheese
Method:
- Cut the butter and cream cheese into cubes of 3cm and allow to soften. They should yield slightly to touch but not completely give way.
- Add egg whites and castor sugar into a mixing bowl of an electric mixer. Place over a pot of simmering water (not boiling), and whisk constantly until all the sugar granules have dissolved. The mixture should feel slightly warm to your finger (about 50-60°C).
- Remove the mixing bowl from the bain marie, and begin to whip with a whisk attachment until the mixture becomes thick and glossy (almost stiff peaks).
- Switch to the paddle attachment and add the softened butter and cream cheese one cube at a time, until fully incorporated. Mix until you achieve a silky smooth texture. You can also add vanilla, salt or any other flavorings you want at this time.
- Use immediately, or refrigerate for up to 2 weeks. Whip it again until silky smooth before using.
Janine's jots:
- Note: You can actually see that my buttercream was not silky smooth, but quite curdled. That is because I didn't whip the butter until it was fully incorporated - it will take about 10 minutes, so be patient!
- Taste: I have taken the liberty of reducing the sugar in the cake quite a bit, so I think it tastes just nice with the frosting. Make sure to taste the strawberry puree and ensure that it is not too sour, because you will have to increase the sugar amounts to counter that.
- Texture: Do not try to add anymore liquid to the cake batter, because the cake might turn out gummy if you do. I find that this combination of dry vs wet ingredients gives me the best moistest cake possible.
- Storage: Without frosting the cakes, they keep well at room temperature for about 3 days, but store it in the fridge and they can last for 2 weeks.
- Would I make this again?: Definitely! Like I said, this is a cake I always make whenever I have excess strawberries!