My blog has moved!

You should be automatically redirected in 6 seconds. If not, visit
http://www.unpastiche.com
and update your bookmarks.

Showing posts with label Australia. Show all posts

Tuesday, September 11, 2012

Luna Park, North Sydney and Hokkaido Milk Buns with Red Bean Paste (with tangzhong)

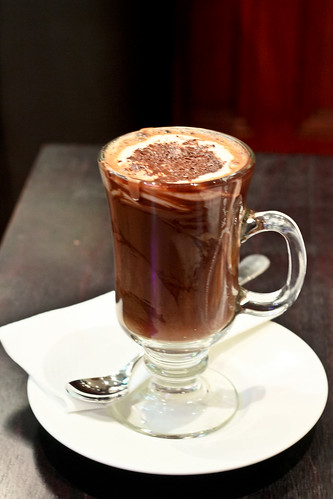
Over the weekend I finally had time to upload photos from my CF card (containing photographs I took while I was in Sydney almost 2 months ago) onto my computer. It made me feel a little sad, because those days were so carefree and for the month I was there, it was the first time when I didn't have to study because I had no exams sit for and there was no work to worry about, because work had not started. I basically did what I loved - planning for my meals, shopping for ingredients, and cooking for my loved one :] We also found time to go for holidays and attend church on the weekend. 

It's been a long time since I went to church in Singapore, but I must say that the people at CCC made me feel so welcome. I enjoyed the services because well, the sermons were about church history and me being a history/knowledge buff, I practically soaked up the information on the reformation period. Everyone was so friendly and inclusive that I decided to bake a couple of cakes and cookies each time I attended church. I must admit that I had an ulterior motive, because all those people at church just meant for guinea pigs for my baking, but well, I felt good because everyone only had good comments for the stuff I baked heh :]


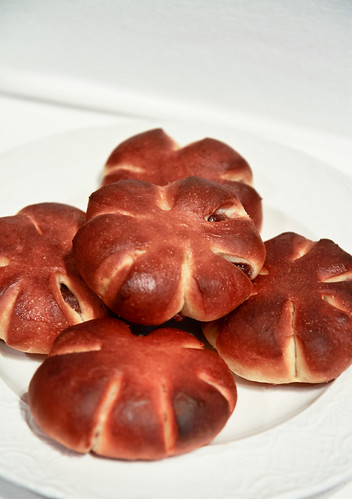
To start off, I decided to stay safe and stick with stuff I knew, so I made a hokkaido milk buns with red bean filling. I knew that this would be popular because soft Asian-style breads in Australia don't come cheap and well, most of the people at church were Asians, some of whom have been born in Australia, some of whom are studying in Australia for a couple of years.


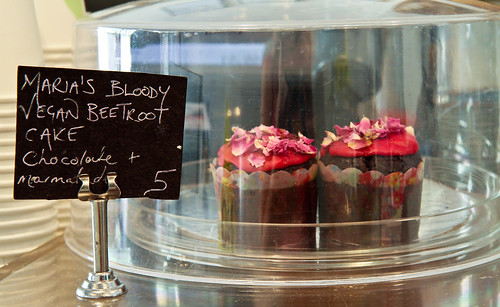
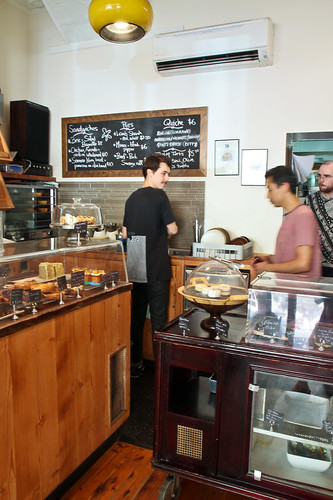
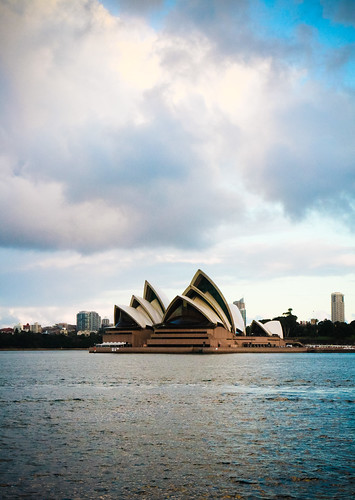
CCC is over at Milsons Point, which is in North Sydney. The view of the Sydney Opera House you see above, is from Milsons Point. The only other way of getting the same view is to take a ferry from Circular Quay to places on the other side, to Watsons Bay and the like. The north shores of Sydney are not much of a tourist attraction, which perhaps explains why I have never step foot to places like Chatswood (a very Asian-populated area) and North Ryde. There's lots of good Asian food there, with huge shopping malls that Singaporeans and Malaysians are acquainted with, but I think I very much prefer Sydney on the other side of the river. 


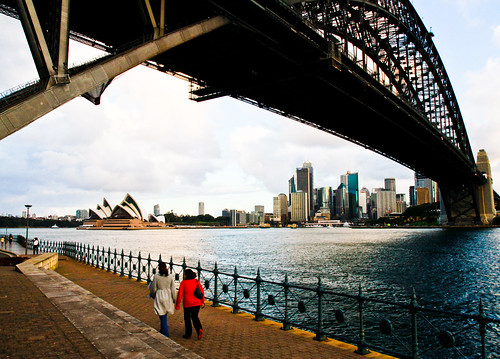
Because it was winter, it was pretty cold most of the time, but on my last visit to church, I decided that I should head out to the area regardless and take some photographs. Looking at the photograph above, you would think that it's spring in Sydney, but the outfits of the two ladies reminds you noooooo it is winter and with the winds blowing in  your face, it's effing cold! I snapped a couple of quick photographs around the area before heading to Luna Park to take a snap of its very iconic entrance. 

Luna Park is an amusement park which has a history stretching back to the 1930s, which explains why the entrance is so...well 1930s. It gives me the impression of old-school amusement parks in America, even though I've never been to America and have never seen an amusement park there. 


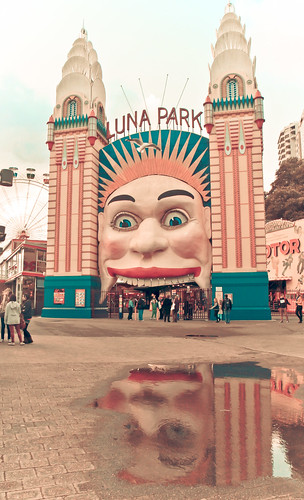
I particularly like the two photographs above, the left has been processed to evoke what I think is a 1930s mood, and the right has been changed to black and white just because. I like how the face of the clown is nicely reflected in the puddle (it had rained earlier) on the ground. There was a father with his son of about 6 years of age, and I particularly enjoyed listening in to their conversation. The father was standing a couple of meters beside me when I was taking the photograph, and having spotted me squatting and taking a photograph of the puddle, the reflection and the entrance, he took the opportunity  to teach his child something about science. He first asked his son what he saw when he looked into the puddle of water and then explained how this reflection came about. There is so much to learn everywhere, and I really admire the dad for showing his child that, at such a young age. I would want to be such a parent, if I ever have a child in the future.

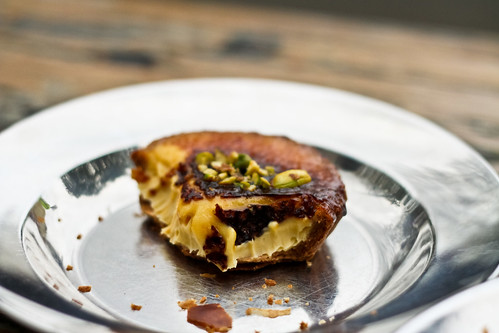
So back to my hokkaido milk buns with red bean filling (北海道牛奶紅豆麵包). I decided to use a japanese style hokkaido milk bread recipe, because I wanted to make full use of the delicious tasting cream I had in Sydney. 


Instead of following the proportions in Christine's recipe above, I decided to modify it a little, to fit the proportions that I am used to.

Hokkaido Milk Toast
Makes 1 500g loaf or 8 medium sized buns

270g bread flour
30 g all-purpose flour
40g sugar
½ tsp (4g) salt
1 tsp (5g) yeast
45-50g egg (without shell)
40g heavy cream (at least 35% fat)
30g full fat milk
100g tangzhong*
25g unsalted butter

*Check this post if you don't know what is tangzhong and how to make it (for 100g, you need to heat about 20g of flour with 100g of water)

To make them into red bean buns, you will need about 500g of red bean paste. I used a storebought one when I was in Australia. I recommend getting the red bean paste from DAISO for those in Singapore/Malaysia. Do get the packet of anko which is produced in Japan and not China.


Method: 

  1. If using a bread machine, follow directions as per your machine, but add the tangzhong together with the flour. If kneading by hand or mixer, place the sugar, salt, bread flour, all-purpose flour and yeast into a large mixing bowl. Then, add milk, cream and egg into the bowl and knead until a rough dough is formed. Add in the softened unsalted butter and knead well, until the dough no longer sticks to your fingers but is slightly tacky.
  2. Shape the dough into a ball and cover it. Allow it to proof for about 60 minutes or until doubled.
  3. Punch down the dough and divide it into pieces weighing 60g each. Allow the balls to rest for about 10 minutes before attempting to shape them. In the meantime, measure out 30-40g of red bean paste (how much depends on how much red bean you like. I used 30g) and roll them into an equal number of balls.
  4. On a lightly floured surface, flatten a dough ball into a round disk. Place the ball of red bean paste in the middle of the disk and wrap the filing with the dough. Pinch the ends together to ensure that each dough ball is completely sealed. Then using your palms, slightly flatten each ball until you get a flat round disk of about 5-8cm thick. Using a sharp knife or scissors, snip the edges of the disk. I made 6 snips to get 6 petals. Be sure to make very deep cuts all around the dough because as the dough proofs, the cuts will become shallower.
  5. Allow the 'flowers' to proof for another 30 minutes or until they have increased about 1.5 times in size. Brush the top of each flower with some egg wash or milk if desired.
  6. Bake in a preheated oven of 180°C for about 22 - 25 minutes, or until golden brown. Remove from oven and allow to cool on a wire rack for at least 30 minutes before consuming. 

Janine's jots: 
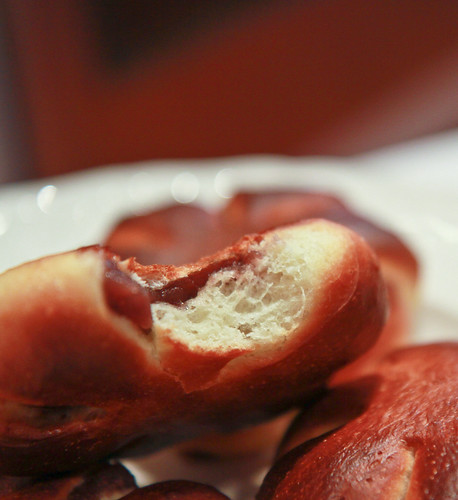
  • Note: I kinda overbaked the breads because they are NOT supposed to be this brown. You should keep an eye on what you're baking, especially if you're using a foreign oven in a foreign environment! I liked it the dark brown crusts though ;p Do also try to make your cuts deeper. I made pretty shallow cuts and this was the result after proofing the second time.
  • Taste: I liked the proportions of my bun - 30g of not-so-sweet red bean paste to 60g of bread dough. I would however recommend using 40g or more red bean paste because as you can see, besides needing more work on my 'putting the red bean ball in the centre' skill, the red bean filling is quite stingy.  
  • Texture: I didn't have the benefit of a mixer or bread machine, so I made the buns completely by hand. Because it was cold in Sydney and because I was lazy, I did not knead the buns until the 'window pane' test could be passed. This meant that the bread is not as elastic as it should be - you can see from the photo above that the bun does not have that many gluten strands. Also, because it was winter, the buns took twice as long to proof - I made the dough the night before and thanks to the chilly night, it took about 6 hours to double in size.
  • Serving size: This recipe makes a really nice rectangular hokkaido loaf but I would think a portion of 8 red bean buns would be ideal for any family too! :]
  • Storage: Because of the high fat content of the buns, they keep quite well. I would think they should keep for at least 3 days at room temperature. I kept one bun in the fridge and reheated it a week later and it still tasted pretty good.
  • Would I make this again?: I would definitely make this recipe whenever I have excess cream! I personally prefer leaner breads but most people I know and those who ate the buns liked the rich and buttery taste of the bun, so I guess if you're looking for a sweet bun recipe, this is it! 

Saturday, July 21, 2012

Vanilla Beans and Vanilla Sugar...and the Great Ocean Road

I can finally tick off the Great Ocean Road from my 'places to visit' list. It's sort of a half-tick, because I didn't exactly manage to visit all the sights that I had wanted to visit, and we only reached Port Campbell before doing a U-turn, because reality had to butt its ugly head in and I had to rush to Melbourne CBD to get some urgent documents couriered back to Singapore. Sigh. The fates were just against me that week. What happened earlier was that the car rental company had upgraded us to this huge MPV (a Toyota Kluger), and this was not a welcome upgrade because the height of the car from the ground coupled with the winding roads made me carsick :/  


That's a photo of the famed Twelve Apostles along GOR - I think two of the Apostles are missing from the above photo because of the vantage point I was at, and in any case, there was never Twelve Apostles to begin with (did you know that?) The photo, on greater inspection, is rather blurry, but I would like to blame the horrendously cold weather for my shaking hands - I was crazy and decided to visit the Twelve Apostles at sunrise, so it was 6am, freakingly cold and windy (it was 10 deg and I was severely underdressed). 

The Great Ocean Road is indeed breathtaking, and I would definitely revisit, although this time in Spring and preferably in a convertible ;) I'll be writing more in a Travel Tuesday entry, because I've lots more to say about the Great Ocean Road. Suffice to say that it's worth spending more than two days leisurely driving along the GOR and I would definitely recommend staying in Apollo Bay - the accommodations I stayed in were not only cheap but one of the best I've stayed in so far!

***

I also wanted to post a short post on some vanilla beans I've received in the mail some time back. I've been waiting for the vanilla extract to 'mature' before I post about the beans :] As you might know, vanilla beans cost a bomb (in Singapore or Malaysia) - I've seen them retailing at about S$5 per bean? Naturally, I was dissatisfied with the prices here and I was pleasantly surprised when I found that there was a cheap source of vanilla beans online! Java Vanilla (you can check them out here or here) is a vanilla plantation in West Java selling its own organic vanilla beans and other vanilla products! (Do note that I'm not too sure about how the organic label works in Indonesia so take that with a pinch of salt). Prices are also pretty reasonable - my pack of 'gourmet java vanilla bean' costs US$30 (S$38/RM95) per 100g pack, inclusive of a trackable postage (to either Singapore or Malaysia). The only drawback is perhaps the fact that you have to have a Paypal account to send the money over. 


What I liked about Java Vanilla is the fact that they ship really quickly - I got my beans about 4 days after I received the tracking number Another plus was the fact that the vanilla beans were properly vacuumed sealed, which meant that the vanilla scent and beans would last longer. I have previously  received vanilla beans simply put in a plastic bag in an envelope to be shipped across the world from some eBay sellers. The vanilla aroma probably disappeared halfway around the world :/ And to think that I paid much more per bean for those :/

If you check their website, they have a few types of vanilla beans available - the 'luxury' bean which is about 19cm or longer, the 'gourmet' which is about 18cm (this is the one I got) and the 'premium' which is about 16cm. Because the beans are packed based on weight, you will get varying amounts of beans depending on the type you buy. I got about 30 beans for my 'gourmet' pack. 

I also did my research prior to buying these beans, because honestly, I was quite doubtful about vanilla beans from Indonesia, but I must say that I was pleasantly surprised. The beans are perhaps one of the oiliest ones I've encountered, but the aroma is fantastic! Ramada, the contact person for Java Vanilla, was really patient with all my queries about the vanilla beans. I was informed that the vanilla beans are the same variety as the ones in Madagascar (Planofilia), and that they use the same curing technique as in Madagascar. However, these retail in the international market as "Bourbon Java Vanilla". I happen to have the Tahitian, Indian and Madagascar vanilla beans in my pantry, and I must say that these Indonesian beans really do resemble the Madagascar ones in aroma (but not in terms of oiliness). There are slight differences though, which I am not able to exactly pinpoint - the Indonesian beans smell a little more pungent(?) but I know for a fact that this pungency will translate very well in custards and other batters. 

So, what did I do with my vanilla beans? I made more homemade vanilla extract with them, and after the vodka turned a deep dark shade of brown, I took out some of the vanilla beans to make vanilla sugar! :] (I was inspired by a post I saw on Java Vanilla's webpage on vanilla powder, which was simply vanilla pods ground into powder.)

Typically, homemade vanilla sugar can be made by simply placing a vanilla pod in a jar of sugar and letting it sit for about a week. The sugar will smell fantastic by then. But I wanted to go a step further and extract more vanilla goodness from the pod (to make it worth its value), so what I did was to re-use the beans I had used for the vanilla extract. I placed about 10 vanilla beans in 500g of granulated sugar, and gave it a few blitzes in my food processor. My food processor is rather blunt, so there's still a lot of 'fibre' from the beans left ungrounded (as you can see from the photos). A commercial blender would definitely be able to make full use of the entire vanilla bean by blitzing the pod into smithereens but I had to use a fine sieve to sieve out the fibre. And after doing that, what you have left is DELICIOUS vanilla sugar! 


The sugar I used was originally white and refined, so you can see how much vanilla-ness I managed to extract from a single bean, judging from the brownness and spottiness of my homemade vanilla sugar :D There are still some fibers left in the vanilla sugar, so the sugar needs another round of sieving when it is slightly drier - the sugar turned a little wet because of the vodka from the vanilla beans and from the blunt processor. 

It took me no longer than 10 minutes to take the vanilla beans out of the vanilla extract, place it into the food processor with the sugar, blitz and sieve it. It's that easy, and now that I have 500g worth of it, I no longer have to waste money buying vanilla sugar from anyone and I am saved the trouble of having to take out a single vanilla pod, slice it into two and remove the 'caviar' whenever the recipe calls for it because I can simply replace some of the sugar with my vanilla sugar! :]

There's no recipe for this, but just a simple ratio of 10 beans to 500g of sugar. You can definitely use more or less vanilla beans if desired. 

Here's a tiny sneak peak of where some of the vanilla sugar went to - vanilla sugar cookies!


If any of you are interested in trying out the vanilla beans, be sure to check out Java Vanilla (or email Ramada directly at his email address - their beans are pretty darn decent and at $1 per bean, it's really value for money! For those of you not willing to shell out S$37/RM95 for a entire pack of beans (it's not that much for an investment but well), I'm more than willing to mail a bean or two to you, just drop me an email :]

Disclaimer: This 'promotion' was not warranted for by Ramada/Java Vanilla, but I was very impressed with their service and their products - hence this post. I did however, receive a small pack of complimentary beans for my order, but all thoughts and content above remain my own. 

Sunday, December 18, 2011

A to Z of Australia: B is also for Black Star Pastry


Now I truly know the meaning of TGIF. It should really be "thank God it's Friday night so that I can sleep till late on Saturday morning" because never have I been so glad for the weekend. And in a blink of an eye, the weekend is over. For want of a better word, I truly have been continually stimulated at work. Stimulated in the sense that I'm discovering new things every day, learning the ropes to one of the noblest professions in society ;) I can't say I'm thrilled to be working, because the hours are really long and I don't get home till late every day but I'm excited for the new things that I'll learn. I know that this will eventually plateau, so I'm absorbing as much information as I can now!

Since I'm drained by the time I reach home, I can't muster strength to do anything else besides eating and bathing, then straight to sleep. Which explains the dearth of blog posts because I haven't had time to bake anything, although I more than made up for it by baking 1kg worth of cookies (butter cookies and experimental pineapple tart cookies :D) as well as my rye hearth bread. I just finished a few hours ago, and I couldn't be bothered to take photographs because the light's so bad and it's been raining cats and dogs. Anyway, since I haven't baked anything this week, I decided that I shall blog about Australia instead.

That's the Newtown courthouse in the reflection. 
Technically I should be onto D already, and although I have an entry for D thought up (but obviously not done up yet), I decided to skip back to B since you really can't afford to give this place a miss if you're in Sydney!

I know it's been a long time since I lasted posted about this, and ironically, the A-Z series was meant to be a travelogue series of my May/June trip to Australia, but instead, photos for this post are taken from my recent trip to Sydney - hence the wonderful light - it is spring after all! Many Sydneysiders will of course know of the fickleness of Sydney's weather in spring - I had my fair share of rain and shine (thunderstorms resplendent with lightning, ever so reminiscent of Singapore's thunderstorms) and lovely spring weather. It was on the latter that Jon and I headed to Black Star Pastry - I'd been dying to head there ever since he got me the watermelon cake as my birthday cake. 


Black Star Pastry is the brainchild of Christopher Thé, who previously worked in Quay, Claude's, as well as Sonoma and Victoire (both of which have nice breads and pastries). It is also highly rated on urban spoon, with 93% of reviewers recommending it. One of their signature desserts has got to be this watermelon cake. I bet most of you have never heard of such a combination, but trust me, it works. The cake consists of two layers of almond dacquoise, fresh whipped cream, watermelon, strawberries, Iranian pistachios and rose petals. It's an absolute delight, because there are so many textures in a single bite, and the flavors of rose, strawberry, watermelon and almonds just go so well together.


They have varying sizes of the cake for order, and if I'm not wrong, this is the 10x12cm cake costing just $24! Since it was just 2 of us, we couldn't finish this in one sitting, and had it the next morning. I've to say that the watermelon leaches water terribly in the fridge, and this caused the dacquoise to be soggy - so I'd advise anyone to finish this all at one go! I apologize if the 2 cake photos above don't' look particularly enticing - it was taken under the light of a study lamp and it had already spent a day in the fridge, hence the misshapenness and sogginess!


The shop is very small, with seating for less than 20? people, but I like the fact that even though it is small, it produces good food with quality, thus garnering the attention it so deserves. During the hour I was there, I saw all sorts of people visit the shop - from regulars getting their cuppa, to the occasional foreign tourist. 

Having had their watermelon cake before, I wanted to try their macarons, amadei cake, ninja, and so many other things, but there was only so much my stomach could handle (having already ate La Banette's millefeuille earlier), so I only could manage the chocolate tart and the orange cake. Check out the full list of their offerings here.


An extensive range of Phoenix's organic sparkling juices are available, on top of the usual caffeine offerings - I can't take caffeine, and after having Phoenix's lemon & lime bitters as well as their cranberry -lime juice, I was drawn to the blood orange. If only Singapore carried them - they were cheap (<A$4) and most importantly, organic and delicious! I felt good drinking something which I knew was organic. 


I think this is perhaps the most photo-heavy entry ever, and very minimal editing was done on the photos because yes, the light was really that awesome. It was such a good day that we sat outside, people-watching while enjoying our desserts. They had these cute goblin stools which are used to place your food on - not a comfortable height to eat with, but the cakes were so good the plate remained in my hand and I didn't need to use the stool at all. 


Best thing about the cakes they offer is that a great number of them are gluten free, such as the strawberry watermelon cake with rose-scented cream and their other famous dessert, the amedei chocolate and hazelnut torte. 


I had the Zokoko choc-caramel tart, which was crazy good. It had a chocolate tart crust which was filled with caramel and chocolate, and topped with Murray River pink sea salt flakes. That was the seriously the icing on the top because the saltiness went really well with the rich chocolate. It got a bit too much for me though, because I found the caramel a bit too sweet, so luckily I could offload it to my human rubbish bin :]


After I shared my tart, (the watermelon cake was his), I decided that I wanted another dessert, but something lighter on the palate this time. The orange cake had caught my eye previously, so I decided to give it ago, even though it looked rather plain for $4.50. Boy was I glad I got it! It's a flourless orange almond cake, made with whole boiled oranges. It is then garnished with persian figs, cream cheese icing, as well as pistachios and rose petals. I absolutely LOVED it! The cream cheese icing was not overly sweet, and complemented all the other garnishings perfectly. It was honestly the best thing I ate the entire trip (and I ate a LOT of things during the 2 weeks I was there). 


Here are a few more photos I took in the shop - they had macarons which were slightly larger than the usual size, but I was really full by then, and the $3.50 price deterred me from buying some back.  And check out the orange cake, with a lemon myrtle chiffon cake in the background. I absolutely love the flavor combinations over here at Black Star Pastry - they utilize very Australian ingredients such as lemon myrtle, while combining Middle Eastern flavors like pistachios and rose petals in French confectionaries. 


And here's a last look at the interior of the shop. This, together with Zumbo, Gelato Messina (my favorite gelato place), Bourke Street Bakery and Baroque Bistro, are my most-gos in Sydney. Even before I land in Sydney, I've already planned my schedule around heading to these places. And with Zumbo and Gelato Messina now open in The Star Casino, it's so near where I stay that I can't justify not going! 


I've to admit though, for the tourist, Newtown might not be high on the list, especially if you're in Sydney for a few days and you want to hit the touristy attractions However, Newtown's probably about less than half an hour by bus to the city, and it does have its own charms. Many quirky and vintage shops line both sides of King Street, and there's tons of good Vietnamese food, as well as interesting bars. It's definitely a suburb you should check out if you're into alternative culture. So do make a trip down to Newtown (and to Black Star Pastry) if you're in Sydney one day!

Details

Black Star Pastry 
Address: 277 Australia Street, Newtown
Contact: (02) 9557 8656
Opening hours: 7am-5pm, daily. 
Website: http://www.blackstarpastry.com.au/

Price: $$ (starts from $6-$15)

Tuesday, July 19, 2011

A to Z of Australia: C is also for Cakes!

I was thinking about cakes the other day. (Who am I kidding? I think about cakes all the time!)

Anyway, as I was saying, I was thinking of chocolate layered cakes, or entremets for my dad's upcoming birthday and a few cakes that I tasted whilst in Melbourne occurred to me. I decided to take a look at them once again, and naturally, I started salivating and mooning over them, again. During my short stay in Melbourne, I think I consumed at least 3 servings of cake and macarons per day, all in the name of 'research'. And this was on top of my daily meals, where I scouted out the best food that Melbourne could provide!

I decided that these exquisite cakes (and bakeries) required a post all of their own, so this is yet another C for my A to Z of Australia, in addition to the one about Chokolait. Do scroll down for more details on the stores!

A common sight outside the bakery.

Remember the cup of hot chocolate I had from Chokolait? Well, after that cup of hot chocolate, I found myself wandering further down Little Collins Street, and lo and behold, I found myself in front of a slate-grey, nondescript storefront which bore the words Le Petit Gateau in cursive grey writing. It really reminds me of the French bakeries, which are similarly located in buildings with straight boring lines (office buildings) and surrounded by other similar buildings.

You can't see from this photo on the right, but there are huge panes of glass for you to peer inside the bakery to see what goodies they have for the day (which are the same everyday actually).

Having seen quite a few bakeries in my trip so far, I wasn't too impressed with the prices of the cakes - each slice retails at $8 and tarts around $5-6 (I can't remember exactly). Because I was so full from the hot chocolate, I decided on having just one cake, and I decided on the brownie and passionfruit chocolate gateau even though I'd just consumed a copious amount of chocolate. This was because I'd seen rave reviews on urbanspoon. And mainly because I also fall prey to any chocolate cakes in display cases. Seriously - at any bakery - the cakes which never fail to draw my attention are the chocolate ones, especially those chocolatey-nutty-praline type of cakes with just the right amount of fruit. I'm predictable that way.

Anyway, back to the cake.

As its name suggests, it has a brownie base, followed by a layer of crunchy praline, passionfruit custard, chocolate mousse and finished off with a chocolate ganache topping with a passionfruit jelly. The flavour combination was phenomenal. I've to admit that till now, I've never had a passionfruit-chocolate combination anything, be it a tart or bread or any other dessert, so I was really very impressed with how well this combination went. The tanginess of the passionfruit went perfectly with the richness of the mousse and the brownie. I also liked the fact that they didn't go with the normal jocondes or dacquoises here but went instead with a walnut-laden brownie, which provided a lovely contrast to the other textures - especially the mousse in the cake.


Le Petit Gateau's Brownie and Passionfruit Chocolate Gateau


Look at how gooey the mousse is. LOVE.


Of course, my dessert journey doesn't end there although it was a darn good start. The next day, I mapped out my route pretty precisely because it was my last full day in Melbourne! After visiting some markets and other touristy attractions, I headed first to the Parisian Patisserie Boulangerie (where I had the best almond croissant outside of Paris) and then to Burch & Purchese followed by LuxBite. I'll write about PPB another day, since I'm not sure where those photos are. Anyway, all these places are slightly North of the city centre, and are not exactly accessible by foot from the city centre. There are however many bus services that ply the area of South Yarra.

So, I'd read quite a number of blog posts on this place - Burch & Purchese, which is essentially the surnames of the 2 patissiers who decided to open a sweets wonderland. Like with many other bakeries in Melbourne, they have a very inconspicuous outside, but walk in, and be impressed. It was the first time I saw a wall of ingredients in a shop. I didn't count, but their blog states that there are more than 250 ingredients there where you can choose to go into your made-to-order cake. B&P is a lot about molecular gastronomy as well, so you also see cool things like edible greeting cards, sprays in addition to the traditional offerings of cookies and meringues.

Yet another normal shopfront. I like their logo colors though!
Check out this wall! It's only 25% of their wall because well I only had my 50mm lens and this was all it could capture without me stumbling into some shelves. 

Some bloggers have described B&P as akin to Willy Wonka's, but since I wasn't privileged enough to go behind the doors, I can't say much for the magic that goes into the sweets, except to say that I was really really impressed with the clean layout of the 'studio' and with the desserts. In fact, I found it really really really hard to make my decision, but I had to make do with just one, because I was so full from consuming so many other goodies before (think Lebanese pizza, etc). I was also very happy that they were very nice about taking photographs in the bakery, very unlike other bakeries which have staff staring down at you like a hawk.


Part of where the magic happens!
These are edible flowers in edible soil!

I was seriously wowed by all the cakes they had on offer because they had really traditional ingredients in unique combinations and unique presentation. In the end, I chose to have the  vanilla-pistachio-lemon-green tea, which is essentially "white chocolate & vanilla mousse | crunchy green tea meringue | lemon cream | pistachio cake | green tea macaroon | brilliant white chocolate spray" (copied verbatim from their webpage). I have to admit that in retrospect, I should have bought a few more cakes, because I kinda regret not having them after I tasted a bite of the cake when I was back at home with my friend. Beware though that a trip to B&P will not be easy on your pocket - each slice costs $9 apiece, but I think it's really worth it for the quality ingredients that go in, and the number of layers in each cake!

Oh look, that's my scarf in the background ;p

After purchasing the cake to-go at B&P, I then drove myself to LuxBite (yes I had the luxury of having a friend's car on top of staying with said friend) and got myself some macarons. I really like the image of the shop - apparently the owners of LuxBite were so enamoured of the Pierre Herme macarons that they decided to open a shop selling macarons themselves. Pretty cool huh? Good thing was that they decided against the sweet, floral French patisserie theme and instead went for French understated elegance, from their black and white finishings to white furniture and backlit macarons in a beautiful glass case. 

Today's macarons selection. 

At any one time, LuxBite has more than 16 types of macarons available, and each and every one of them look delicious! Adjacent to this display case is another storing the typical French desserts and sweets, including some unique ones, but none of them caught my eye, having been to B&P prior. I did like their macarons though - there were some pretty innovative flavors - like kaya toast and watermelon yogurt. Each macaron is uniformly in size, and cost about $2.50 each, I think. They also have tea sets where you can enjoy your macarons with tea, but I was buying them back to share, so no tea set for me!

Some of the macarons I had were the kaya toast and the raspberry&white chocolate, as well as the salted caramel. I've to say that the latter two were not too memorable - of course the shells were the right amount of crispness and chewiness, and the fillings right on the money, but I very much preferred the caramel from Baroque and these combinations were just, well,  run-of-the-mill. The one that left a really really deep impression on me however, was the kaya toast macaron. It's an absolute treasure! The shell had little bits of toasted bread mixed into it, so you not only have the taste of having kaya with bread, you also have the mouthfeel! The house-made kaya is perfect too, tasting as delicious as the kaya that I usually have at home, with the right amount of pandan scent. On top of that, there's  a surprise bit of butter sandwiched between the cookies. Absolute heaven. I really felt like I was having kaya toast back in Singapore - the only thing missing was my teh.

So if you ever hop by Melbourne, do give these places a visit. I assure you that you will not regret any minute trying to get there.


Details


Le Petit Gateau
Address: 458 Little Collins Street, Melbourne
Contact: (03) 9944 8893
Opening hours: 7.30am-5pm, weekdays only.
Website: http://www.lepetitgateau.com.au/
Price: $ (cakes from $8)


Burch & Purchese Sweet Studio
Address: 647 Chapel Street, South Yarra, Victoria 3141
Contact: (03) 9827 7060
Opening hours: 10am to 6.30pm everyday except Monday
Website: http://www.burchandpurchese.com/ and http://www.burchandpurchese.blogspot.com/
Price: $ (cakes from $9)

LuxBite
Address: 38 Toorak Road, South Yarra
Contact: (03) 9867 5888
Opening hours: 8am-8pm, Wednesday to Monday
Website: http://www.luxbite.com.au/
Price: $ (cakes from $7. They also serve hot meals)


Tuesday, July 12, 2011

A to Z of Australia: C is for Chokolait Hub

As some of you might know, Melbourne has the coldest (and weirdest) weather as compared to the other Australian capital cities like Sydney or Perth. When I was in Melbourne, it was windy, and rainy, and really cold. Temperatures were in the low 10s, and the wind was so chilly that as I walked around Melbourne city, I would constantly pop into various shops to warm myself up, and every few hours, I would dream about having a cuppa hot chocolate. And that was what I did. I used the urbanspoon and tripadvisor apps on my phone, searched for a cafe selling good hot chocolate (Why would I want to waste my pounds and pennies on lousy hot chocolate, right?), and found myself at the doorstep of Chocolait.


Chokolait is located within Hub Arcade, which is on Little Collins Street - it's the tiny street between Bourke Street (the main shopping street) and Collins Street. When I entered, there was no one in Chokolait (yet), because it was early in the morning at 9ish and I was looking for a warm respite from the cold, having explored the city since 2 hours ago. After some recommendations from Ross (he's the long grey curly-haired owner of the place), I settled on the classic hot chocolate (right at the top of the list), but made with a mix of dark and milk Belgian chocolate.

Just what I needed - a cuppa hot chocolate to get rid of the cold!

When I commented on the lack of human traffic, Ross told me that the cafe does see quite a lot of tourists, because it is #1 on the list of restaurants in Melbourne. It is true - it was indeed because of those reviews that I headed to Chokolait over other chocolate stores like Haigh's in Melbourne. I've gotta say that this is the best hot chocolate I've ever had in Australia and outside Belgium. It's the perfect combination of dark and milk chocolate - the bitterness of the dark chocolate is perfectly balanced by the saccharine sweetness of the milk chocolate. The chocolate shavings on top of the hot chocolate were also the real deal - freshly shaved milk chocolate which provided a really nice mouthfeel. I could also tell that Ross and Marianne are really proud of their products - their hot chocolate is thick and viscous, not watered down like some 've had elsewhere in Melbourne. While I was sitting in the cafe enjoying my hot chocolate, I also saw a number of people coming in to order their 'hot shots', which is basically hot chocolate, but way thicker and more viscous - so much so that you have to use a spoon to eat them! Those looked fantastic too, but I was too gelat from the hot chocolate to try anymore.

I also wanted to try their pavlova because I'd seen some awesome reviews on it, but I was so full from the hot chocolate (I'd recommend sharing the hot chocolate because it really is a tall glass full of thick chocolate liquid) that I had to skip it. I'm definitely heading back this way if I'm in Melbourne again.

A last look at my heavenly cup of chokolait

Details
Chokolait Hub
Address: Shop 8, Hub Arcade, 318 Little Collins Street, Melbourne 3000
Contact: (03) 96396188
Opening hours: 9am-6pm daily
Website: http://www.chokolait.com.au/

Price: $$ (starts from $6-$15)

Tuesday, July 5, 2011

A to Z of Australia: B is for Bourke Street Bakery

This is the second installment of my Australia series - the A to Z to Australia, and I'll be posting this in lieu of my Travel Tuesdays segment. I have realized that most of my Travel Tuesdays post garner the least number of page views - single digit views even, but I will not be scraping this segment, because Travel Tuesdays act as a travelogue for myself and a challenge for myself to actually look at my photographs and edit them. I have this very bad habit of not looking at any photos taken during my trip because I usually take many many photos on every trip and I utterly dread having to edit any of them. 


Okay, so today I'll be writing about Bourke Street Bakery! Even before I went to Sydney last year, I heard so much about them! So many Australian blogs have written about them, and this is not without good reason! They produce tarts, pastries and breads which have attracted fans from all over the place! And even before I went to Bourke Street Bakery, I knew how good their tarts were, because I got my hands on their book - and I've tried out the shortcrust pastry recipe. This recipe makes a lovely buttery crust which is perfect for fruit filled tarts and egg tarts :]

Anyway, Bourke Street Bakery is a small bakery located on well, Bourke Street, and on a rather quiet corner. In fact, if not for the long snaking queue outside the bakery and the glass window stacked with baked goodies, you would not know that Bourke Street Bakery was there. The bakery itself is really small, but service is really fast because they have at least 3 service staff attending to you. Most locals are there to purchase a rustic loaf of bread to go, but many tourists (like me) tend to want to order the whole bakery worth of goodies. The bakery sells a good mix of sourdough loaves - tons of them in fact, lots of muffin with different flavor combinations, tarts and of course, pastries! They have 4 of those wooden tables and benches that you can see in my photographs, and I managed to snag a seat. It was lovely because temperatures were just hovering around the fifteens and the sun was all warm and nice. Sorry I blanked out the face in the photo on the left because we're camera shy around here. I ordered three pastries which I've been dying to try - the pork & fennel sausage roll, the pan au chocolat and the ginger brûlée tart (they spell it as just brulee though).

I have to say that I wasn't too blown away by the pork & fennel sausage roll and the pan au chocolat, but that is not because they weren't great. It might be because I've been expecting way too much from Bourke Street Bakery, having heard so much about them, or it might be because of the awesomeness of the ginger brulee tart. It's basically a normal crème brûlée tart, but the crème is infused with what Paul & David (the owners) term as an Indian inspired spice - cardamom and ginger. This is something you gotta try - it's just the right amount of ginger and cardamom and spice and creaminess and 'crackling' that you need on a tart. The little nibs of pistachio also go perfectly well with the crème brûlée. For those who don't have the privilege of heading to Sydney to eat these lovely delights, I'll post the recipe for these ginger brulee tarts after I've tried them from the cookbook :]

Alright, I'll just let my photographs do the talking from now on - the light was really lovely so the photographs turned out pretty good :] (in my opinion)

The trio of pastries - just love their quaint metal saucer plates!
An array of tarts - their signature chocolate raspberry is on the left. And look - that's me with the camera in the reflection!
The famous ginger brulee tart - just look at that caramelized top!
GAWDDD creamy deliciousness await on the inside!
The chocolate roll was really lovely and flaky, but paled in comparison to the tart. I didn't like their  chocolate too much  because it tasted like compound chocolate :/
Oops I bit into the pork and fennel roll before I could take a nice photograph. Only gripe with this was that the roll wasn't warm, which didn't make for a nice sausage roll.  

Details
Bourke Street Bakery
Address: 633 Bourke Street, Surry Hills
Also located in Alexandria and Marrickville (rather far away from the city centre)

Opens: 7am-6pm Mon-Fri, 8am-5pm weekends
Price: $ ($4-5 for a tart, $5-6 for a sourdough loaf)
Related Posts Plugin for WordPress, Blogger...