My blog has moved!

You should be automatically redirected in 6 seconds. If not, visit
http://www.unpastiche.com
and update your bookmarks.

Showing posts with label Non-bake. Show all posts

Saturday, April 7, 2012

Steamed Banana Cupcakes

Only now do I understand the joys of public holidays falling on a Monday or a Friday because it means long weekends yo! A few days ago on Monday, I was thinking that three days is a lot of time to bake, but was struck by sudden inspiration to head up north to KL! I asked my brother if he wanted to and lo and behold, a plan was formulated within minutes :] I do so love impromptu-ness! 

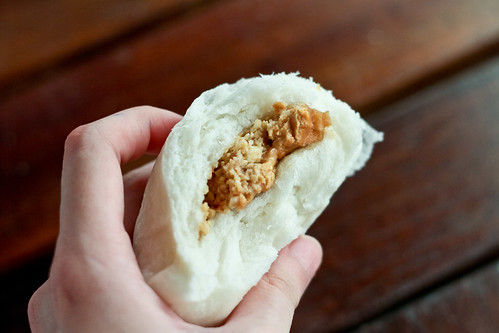
So now my brothers, mom and I are in KL over the long weekend for a food trip! :D We initially wanted to drive up to Penang to gorge ourselves silly, but decided we didn't have enough time to do so, so we've limited ourselves to KL (and Selangor) to stuff ourselves. Thus far, I've had Rakuzen for lunch, damn good fruit rojak with tofu and sotong, dropped by Ben's Independent Grocer at Republika and had really good pork ribs/pizza/risotto for dinner. This morning I had really damn good nasi lemak for breakfast (Najib goes there for his nasi lemak fix as well yo!), then an assortment of bread for lunch, Taiwanese dessert and there's still French patisseries, seafood and pizza left on the to-eat list!


Malaysia Sayangi. Having spent more than half of my life in Singapore, my friends always ask, why not be a Singaporean since you're more than halfway there already? Singapore might be my second home, and I might know the Singaporean national anthem better than the Malaysian one, but well, Malaysia Sayangi sums it up pretty well. It's my country, and it's where I call home.

Coming up to KL always makes me proud of my country. Singaporeans like to say that Singapore is a cosmopolitan country and all, but honestly speaking, I always feel that KL (and Selangor) beats Singapore hands down. Granted, KL might have its dirty and unsightly areas, but in my opinion, it's like an unpolished gem which still hasn't seen its fullest potential. Anyway this mini-rant arose because of discussions with my relatives about corruptness, politics and the plethora of good food one can find in KL.


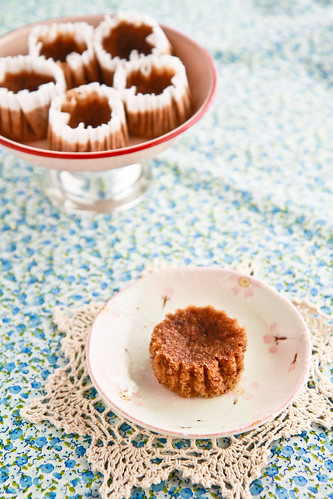
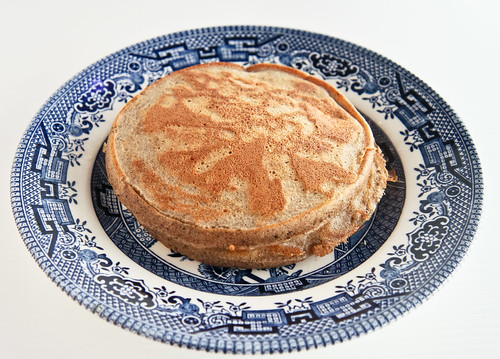
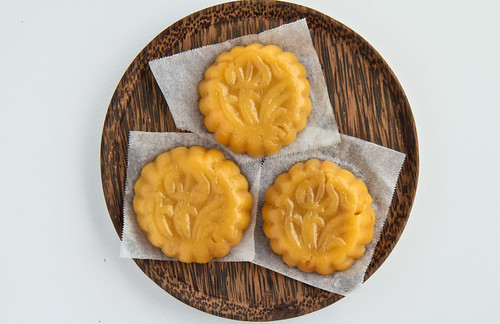
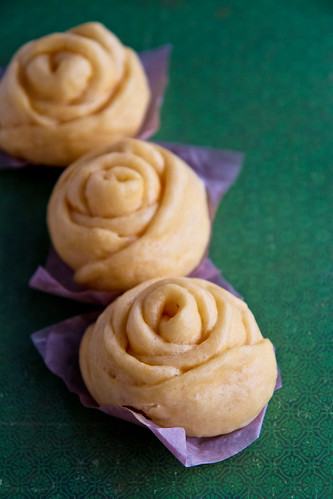
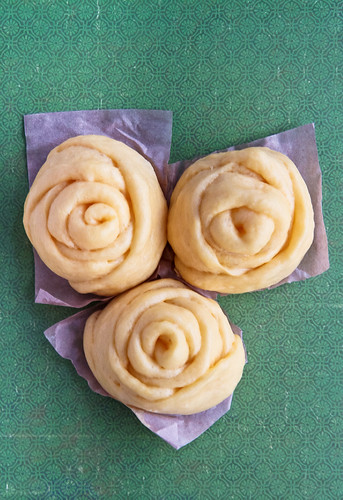
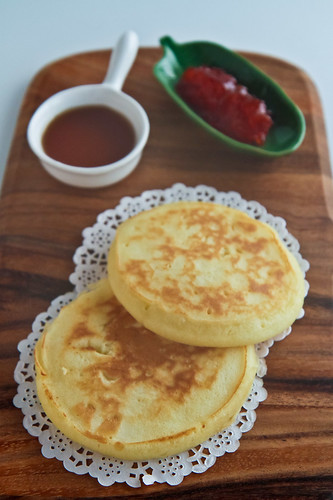
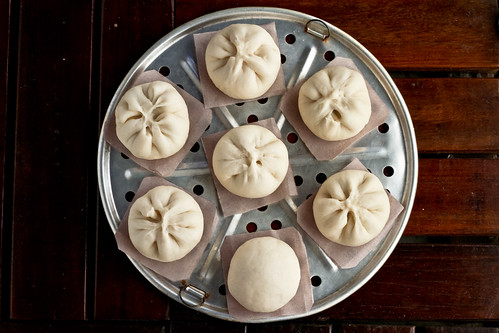
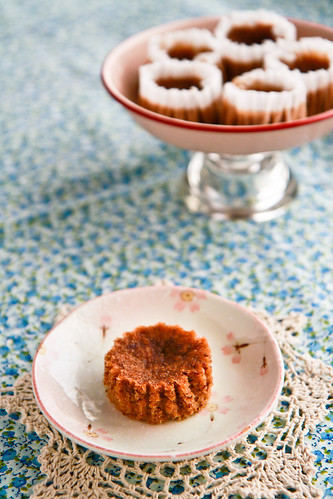
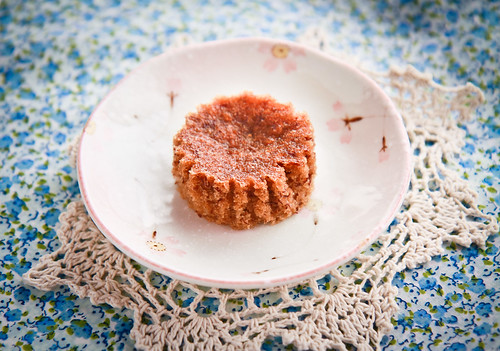
The following cake however, has nothing to do with anything. I was hoping to eat this really good banana leaf curry rice (literally on a banana leaf) and I thought of eating these steamed banana cakes which are really simple to make. I first made this a few weeks ago, when it was too hot to switch on the oven, and I didn't want to fire up the huge oven just to bake a couple of muffins. I also wanted something fast, so steaming is really the fastest way to achieve something 'cakey' in the shortest time.

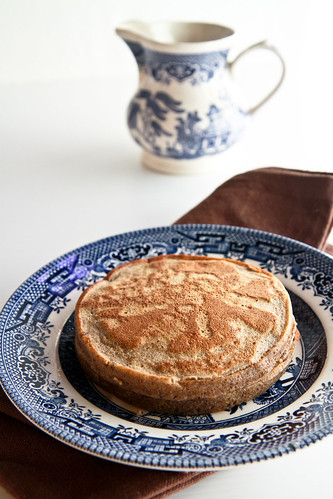
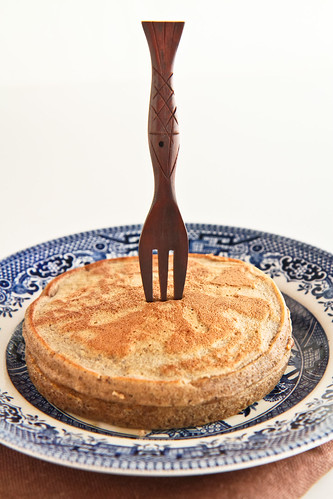
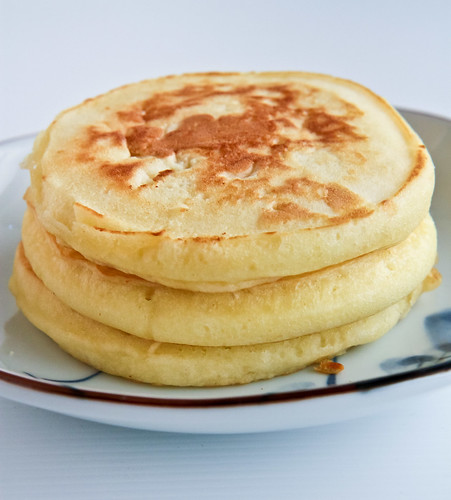
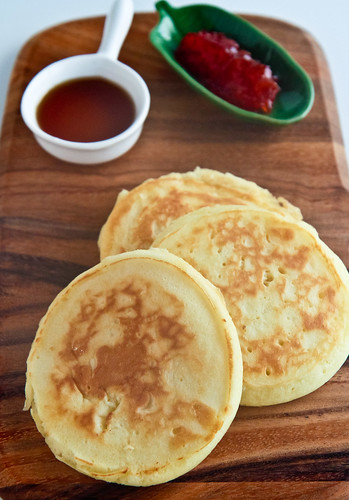
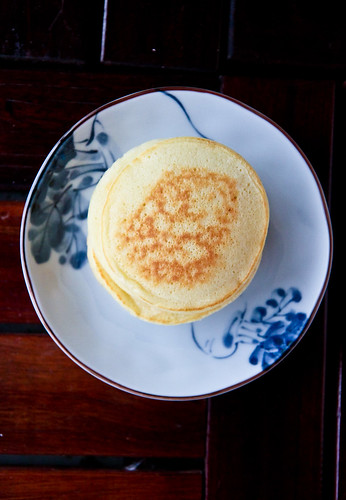
The cupcakes are a little sunken, because I used a tad too little raising agent and I didn't have enough metal tins to go around, so some of the cupcakes turned out as banana pancakes, but they were yummy all the same.  

Steamed Banana Cupcakes
Very slightly adapted from Aunty Yochana

100g banana, mashed
½ tsp vanilla extract
½ tsp baking soda
⅛ tsp salt

65g egg
45g brown sugar
50g all-purpose flour
½ tsp baking powder
30g olive oil


Method: 

  1. Whisk the mashed banana, vanilla extract, baking soda and salt together in a bowl and set aside. 
  2. In another bowl, whisk the egg and brown sugar until pale and fluffy. 
  3. Then, fold in the flour and baking powder (sifted together once) into the egg and sugar mixture. 
  4. Gently fold in the mashed banana mixture and finally, fold in the olive oil. 
  5. Pour into lined cupcake moulds (preferably metal ones) and steam them for about 10-15 minutes on high heat until a tested skewer comes out clean. 

Janine's jots: 
  • Taste: Do use very very ripe bananas because somehow steaming makes the banana taste more prominent than usual. I would also prefer using less vanilla to allow the banana taste to show through even more. 
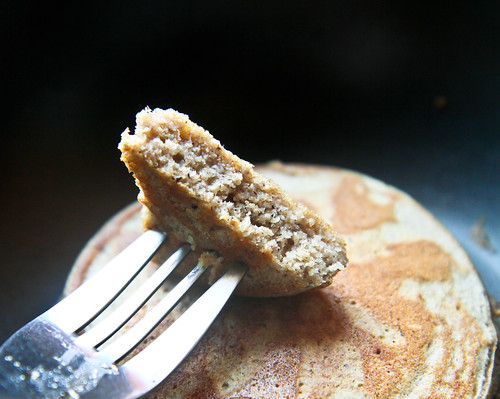
  • Texture: Extremely soft and spongy. 
  • Serving size: Makes about 8 small cupcakes.
  • Modifications: Like I said, I probably would add a tad more baking soda to allow a slightly more raised end-product because sunken cupcakes don't look so attractive :/
  • Storage: These keep well in the fridge (they don't store well at room temperature because the tops will turn moist and sticky after a while). Just give them a short zap in the microwave or steam them at 5 minutes on medium heat. 
  • Would I make this again?: Definitely - it really is a good alternative to baked banana muffins on a hot day :]


Alright, short break between teatime and dinner is over - I'm off for a yummy seafood dinner now :]


Thursday, February 16, 2012

[Thursday's Trio] Buckwheat Pancakes

Today I thought I’d perhaps rewind a bit and talk about how I got started with experimenting with gluten free and other non-wheat flours. (This is partly because I realized I’ve yet to post photos of these buckwheat pancakes and also because I didn’t have my camera this week to take any new photos.) As I was typing out today's post, I also decided that I shall name this new series Thursday's Trio, because for every new ingredient I'm introducing on this blog, I shall also include a trio of facts, uses and recipes for that particular ingredient (three is my lucky number, if you're wondering why trio). I had initially wanted to call it Feature Friday, but that's been used so many times, so Thursday's Trio it is. These facts and tips are usually stuff I scour the internet for when baking with something new, and is of great use to me when experimenting, so I hope it will be of use to you as well, especially if the ingredient is new to you too! :]


So today I'm starting with buckwheat

Now, I’m pretty sure I was like many of you – I frequented many blogs, especially blogs like Tartlette, La Tartine Gourmande and 101 Cookbooks. If you have the time, do click on the links because not only are the photographs exquisite, the persons behind those blogs are genial and truly have wonderful stories to tell. So anyway, visiting those blogs are definitely not good for me because I never fail to salivate each time I visit, and because I get the ‘itch’ – the itch to buy stuff and follow their recipes. All three bloggers share something in common – they believe in healthy and wholesome eating and as a result, their recipes tend not to use the white refined flours that we are used to. Now, I used to get very overwhelmed by all the new names I saw – buckwheat, sorghum, millet, etc. I used to think, what the hell are these?! There were several hurdles I had to overcome before I finally started buying some of those flours and opened a whole new world to myself. Like Sharon commented earlier, looking out of the ‘wheat’ square does tend to introduce you to new grains and flours, all of which are nutritious for you.

from left: almond, buckwheat and sorghum flours

Anyway, the first hurdle was my own self-inflicted fear of trying new things. Once I got over that (after convincing myself that if I failed I’d feed the stuff to my dogs), I faced another problem – where to get those weird sounding flours? At the supermarket, I only tend to see the same few flours. I managed to locate some of those flours, but then I was faced with yet another problem, these flours were sold in at least 500g quantities and were expensive! And I was afraid that I wouldn’t like the taste of them and hence waste the rest of the flour away! Sounds familiar? 

Long story short, I managed to find a pretty cheap source of unique flours (will let you all know where shortly in another post when I compile my list) and my experiments began! Most of my family members are quite ‘anti’ towards my experiments, so sadly, I am usually the only one eating it. I figured what better way to experiment than pancakes? Not only were they simple to make, I could make them in small batches enough for myself, and the taste of the flour will feature prominently, allowing me to decide if I liked the flour or not.


I decided to start with buckwheat. I have to admit that the moment I opened the flour packet, I was a little grossed out. The ‘smell’ reminded me of Indians (no offense or racist connotation intended!), and it was only after I asked my mom that I knew that buckwheat flour is a very commonly used flour in Indian cooking! No wonder I associated the smell of the flour with Indians! :] 

Anyway, most people will say that buckwheat has a nutty flavor, but it reminded me more of a grassy than nutty flavor. For bakers wanting to experiment with buckwheat, I’d strongly recommend starting small, because I found myself needing to get used to the almost smoky flavor of the flour. At first, I was wondering if it was because I got it from an Indian shop that it smelt and tasted so ‘Indian’ (I’m not being discriminatory here but I associate this smell with Indian homes), but I realized that it’s the same taste everywhere. It is an extremely earthy taste. 


Three interesting facts on buckwheat!
  1. Buckwheat is actually a plant, and not a cereal crop and the plant is usually ground with its outer bran, which is high in fiber. This gives us the dark brown color flour that we see, with dark flecks which is the bran. What’s even more interesting is that this fruit seed is actually related to rhubarb! 
  2. Buckwheat does not contain any gluten, which makes it a good flour to use for people with gluten intolerance. 
  3. Buckwheat is also an excellent source of protein. It contains all 8 essential amino acids. Low in fat and high in fibre. Basically, buckwheat is a super healthy food, and you can refer to this if you want to know more. 
Three ways of using buckwheat!
  1. It is also known as sarrasin in French, which is the base ingredient for sarrasin crêpes from Brittany, which I blogged about earlier. The same is known as blinis in Russia, which are essentially tiny egg like pancakes. Or you can just use them for these pancakes like what I’ve done. 
  2. It also makes buckwheat noodles, which are the backbone of much Japanese and Korean cuisine. Soba and naengmyeon anyone?
  3. You can also use buckwheat groats (Available at organic food stores) in porridge or in baking. They taste pretty good! 
Three interesting recipes I've bookmarked from local blogs: 

How to store buckwheat?
Most recommend storing buckwheat in a sealed, airtight container and placing it in a cool dark place. I say just put it in the fridge and it will last long enough for you to experiment with :] 

***
I didn’t want to use a buckwheat pancake recipe that I didn’t trust, because there are quite a few available on the internet. Instead, I modified my pancake recipe. This is my go-to pancake recipe, because I’ve modified it such that one batch below makes exactly 4 large pancakes, which I have over 2 mornings (2 each for breakfast each day).


Transitional Buckwheat Pancakes 

60g flour (30g buckwheat flour) 
2 tsp sugar 
¼ tsp salt 
½ tsp baking powder 
¼ tsp baking soda 
10g oil (I used olive oil) 
50g egg (small egg) 
85g milk 
1 tsp vanilla extract
1 tsp cinnamon powder


Method: 

  1. In a bowl, sift the flours with baking powder and baking soda. Mix in the salt and sugar. 
  2. In another bowl, mix the oil, egg, milk and vanilla extract together. 
  3. Add the liquid ingredients into the dry and give the mixture a quick mix or two. It is okay if the mixture contains a few lumps or two, do not overmix or else you will get tough pancakes! 
  4. Heat a non-stick frying pan on medium low heat. Using a 
    ¼-cup measuring spoon, ladle the 
    ¼-cup of batter on the pan and cook for 3 minutes, or until bubbles appear on the surface. Flip the pancake and cook for another 2 minute or until golden brown.
  5. Repeat with remaining batter and serve warm with maple syrup. Enjoy!


Janine's jots: 
  • Note:  My pancakes may look overly cooked and not evenly brown, but that's because I use very little oil in cooking them, relying on the nonstick pan and mainly heat to cook the pancakes, hence the uneven brownness. I also like to turn up the heat at the start so that the outsides cook faster than the inside, and I get a relatively more 'crispy' texture on the outside of the pancake. 
  • Taste: I like to add an extra pinch of cinnamon to my pancakes, because I feel that it enhances the taste and especially with buckwheat, since it really did help cut down the earthy taste and ease me into taking buckwheat. Also, the pancakes will definitely taste better if you can use melted butter instead of using oil, but in the mornings, I’m usually rushing for time, so olive oil it is!
  • Texture: Because buckwheat does not contain gluten, you can actually mix the dry ingredients into the wet more vigorously and ensure that no lumps remain because they won't turn as dense anyway. This recipe is a no-fail one, and produces fluffy pancakes all the time! 
  • Serving size: This recipe makes 4 large pancakes, as pictured above. 
  • Modifications: For someone new to buckwheat, I would definitely suggest starting with a smaller quantity, say 10g out of the 60g of all-purpose flour and slowly increasing the quantities until you reach 30g. At this proportions, the buckwheat does not taste too overwhelming and are just nice!
  • Storage: I’ve use this same recipe over a month, with varying amounts of different types of flour  every alternate day when I was in my pancake craze, and since the recipe made 4, I would eat two and keep 2 in the fridge. Although freshly made pancakes are definitely nicer, the ones that are stored in the fridge taste equally delicious after a 15 second zap in the microwave. Do make sure you store them in an airtight container. 
  • Would I make this again?: Definitely!

Bon appétit! Pancakes go extremely well with maple syrup :]

Monday, October 31, 2011

Malaysian Monday #8: Ang Koo Kueh (红龟粿)

The bad thing about blog surfing, at any time of the day, is the food porn that greets you each time you visit a blog. I'm an extremely visual person, and am definitely susceptible to good food photos, so I try to blog surf after meals, so that I don't get too tempted. Alas, I still do and I sure do salivate when I see my fellow bloggers' posts - and when I mean I salivate, I literally DO salivate - the salivary glands under my tongue get activated and saliva pools in the lower cavern of my mouth - no joke!

Now, I've been craving for ang koo kueh ever since I saw Lena's post with purple sweet potatoes, but it became progressively worse because I was met with a deluge of ang koo kueh posts, no thanks to this month's Aspiring Bakers #12 - Traditional Kueh. For some mouthwatering versions, check out Edith's yellow sweet potato version and Ah Tze's red ang koo kuehs using beetroot.

I told my mom about making some for ourselves, to which she told me to just go and buy some. And so I did. I bought them because I don't own any ang koo kueh moulds, and because I didn't have glutinous rice flour and was too lazy to steam my own sweet potato. BAD bad decision. In a bid to satisfy my craving, I bought 5 ang koo kuehs from 5 different sellers (with different fillings) at the pasar pagi (morning market) when I accompanied my mom to the wet market, and with the exception of one, all the others disappointed me to no end - they were too oily, not tasty enough, the filling was too grainy, the gripes just go on...


Then I saw Sharon's post on MacGyver ang koo kuehs and I thought, hey, if she can make it with her silicone muffin cups over in Sydney, shouldn't I in Singapore do better, especially since these ingredients are so easily available? So I got myself some sweet potato, glutinous rice flour and decided that I shall save money and use my moon cake mould. It's the same one I used to make my mini snow skin moon cakes. I didn't have enough chopped peanuts at home, and I was far too lazy to go out and get some, so I substituted part of it with peanut butter. Worked like a dream I'd say! 

For those of you readers outside of Southeast Asia, this might look and sound a little foreign. Basically, kuih muih (plural for kuih or kueh) are traditional delicacies of Nyonya origins (Nyonya or Peranakan refers to the Straits Chinese in Singapore and Malaysia - the interracial marriages between the local indigenous people and the mainland Chinese - this marriage also brought about a marriage of chinese and malay and other local pastries, giving us the assortment of kuih muih we have today.) Ang Koo Kuehs (or Ang Koo Kuih) literal means 'red turtle cake' in hokkien, in my case, I guess I should probably name them Ung Ge Niu Kueh (Hokkien for yellow moon cake) since they're not red and not made using the special ang koo kueh mould that is usually used for making them. Anyway, ang koo kuehs traditionally are round or oval, and have soft sticky skin made of glutinous rice flour or rice flour or a combination of both - sometimes, mashed sweet potato (like what I've done here) is used too. Another feature of the ang koo kueh is its filling - traditional fillings include mung bean paste, sesame and peanut. This kueh is then steamed on a square piece of banana leaf. The most important feature must of course be its bright red color and tortoise shape/imprint on the kuih. Why tortoise and why red you might ask? Well, it's no secret that we Chinese are a very taboo bunch - so the color red is meant to welcome the good fortune and luck during an auspicious occasion; and because tortoises are known for the longevity, and we Chinese want to emulate that, so we print a tortoise on the red kuih to make it decoratively more pretty. 

Ang koo kuehs are definitely a popular item during ritual offerings and a baby's first month shower. Again, Chinese have this tradition of celebrating a baby's first month (or full moon, 满月) by giving out a set of goodies including dyed red eggs, ang koo kuehs, glutinous rice, and more recently, cakes. And just an interesting tidbit - ang koo kuehs were used to tell recipients of the baby's gender - if you got domed shaped ang koo kueh, the baby is a boy, and if you get flat ones, the baby is a girl. I'm not sure if this tradition still prevails but it's definitely something interesting to know :]

Cracked mooncake shaped ang koo kuehs! :]

Sweet Potato Ang Koo Kueh Recipe 
Adapted from Florence
Makes 10 moon cake sized kueh

For the skin
100g   sweet potatoes, steamed and mashed.
150g   glutinous rice flour
15g     oil
80g     water

For the peanut filling 
140g   roasted peanuts
50g     peanut butter
60g     granulated sugar
20g     water

10 pieces of baking paper or oiled banana leaves.

Method: 
  1. Steam the sweet potatoes until soft. In a bowl, mash the sweet potatoes with a fork or potato masher. Add in the glutinous rice flour, oil and water and mix well. Knead until you obtain a smooth dough. Cover with a damp cloth and leave aside to rest while you prepare the peanut filling.
  2. After roasting the peanuts, allow them to cool before putting them in the processor. Add the water and granulated sugar before processing it for a few seconds. Then, add in the peanut butter and process until you get your desired consistency. The filling should come together because of the peanut butter. 
  3. Brush the mould with some oil for ease of removal of the kueh from the mould. A good thing to do first is to take a portion of dough, roll it into a ball and press it into the mould. Add or subtract from the ball until the entire ball is smooth and flattened into the mould. Weigh that piece of dough - that should be the total weight of your kueh. Depending on how much filling you prefer, subtract from the weight accordingly. I used a 25g skin: 15g filling proportion, which is a little on the 'less filling side'. Ideally it should be a 2:1 skin to filling proportion. 
  4. Measure all the sweet potato doughs and roll them into balls. Do the same with the peanut filling. Take the measured portion of sweet potato dough and using your palm, flatten it into a round shape, making sure that the sides are thinner then the centre. Place a ball of peanut filling in the centre of the dough and pinch all the sides of the dough together. Then, roll it into a ball with both your palms. The seam should smoothen and almost disappear. 
  5. Then, press the ball into the mould firmly, with the seam side facing outwards, so that the smooth side will get the imprint of the mould. Then, tap the mould gently on all sides to remove it from the mould. Place the 'released' kuih on square pieces of oiled banana leaves (or baking paper). 
  6. After all the kuihs have been shaped, arrange them in the steamer and steam them in a wok over high heat for about 10 minutes. Remove from the wok and allow them to cool before consuming, about 15 minutes at least. 

In pictures:

Just prior to steaming - my ang koo kuehs have cracks in them, mainly cos I'm not too good at making them :p

They flatten out quite a bit after steaming, and become a more vibrant yellow. It appears oily but I didn't brush any extra oil on them.  

Check out how thin the skin can be! And look at that peanut filling!! :o)
YUM - I used some red coloring on this ang koo kueh to indicate that less peanuts was used heh.

I'll be submitting this post to SSB for this month's Aspiring Bakers #12 - Traditional Kueh as well as Muhibbah Malaysia Monday hosted by Shaz of Test With Skewer and Suresh of 3 Hungry Tummies :] 


Oh, and Happy Halloween, for those of you who 'celebrate' it ;p Guess you could try having this yellow/orange kuih on this day as well, in the spirit of all things orange and Halloween :]

Friday, October 7, 2011

Rose-shaped Steamed Pumpkin Bun/Mantous (南瓜馒头)

It seems like just a while ago that it was October last year, and I was struggling really hard to get back into the pace of life back in Singapore. I had been away for a year, enjoying il dolce far niente and it was hard to study again. Then, I still had not discovered the love of baking that I had within me, so attempting things what these mantous below were probably unheard of.


It might be foreign for some, but I've been brought up on a diet of mantous and paus (a variety of Chinese steamed buns) of the homemade variety - my mom is a really terrific baker (and cook) and every once in a while when she gets sick of cooking the usual 3 dishes, rice and soup for us, she'll turn to making paus - typically of the vegetable variety, with some chicken for our protein needs. Lately, I've encouraged her to extend that repertoire to include a char siew filling as well as a lotus filling, on top of her usual peanut paus. Ever since I saw these beautiful rose-shaped mantous over at Wendy's blog, I've wanted to make them but my mom didn't. Why ever not? Well, my mom says that it's because of old age - as she gets older, she feels 'less daring', preferring to stick to her comfort zone and sticking to her usual recipes and usual combinations. I think even she finds it appalling that her zest and courage in her younger days are slowly diminishing. Nevertheless, I'm happy to accept this baton from my mom, that of the baker in the family, and already, I'm eager to try out new recipes (for anything) as well as hammering new 'family favorites' every weekend. You might think me crazy, but I honestly can't wait for CNY to arrive, because I know that I'll have so many opportunities to experiment with cookies and such then!

So, going back to these rose-shaped mantous, they have been very high on my to-do list. Opportunity came when one day, my mom was thinking of making paus again. I volunteered to make them, using the leftover pumpkin I had from a previous attempt at pumpkin cream cheese muffins (absolutely delicious - recipe to come soon!). The original calls for steamed sweet potato of the purple variety, mainly because the purple gives rise to a really sweet lilac looking 'rose', but like I said, I only had pumpkin, so I made do. This is also perfect since it's fall season in the Northern hemisphere and there will be an abundance of pumpkins. So besides carving them up as jack-o'-lanterns and pumpkin pies and pumpkin muffins, you now have another use for that leftover pumpkin :]


I had this wonderful plan of making it seem as if the birds in the background were 'eating' the buns, but as you can see, the plan sort of failed and it didn't look that great. I then switched to a normal green background, which I feel made the buns 'pop' - looks like a leafy foliage on which my yellow roses grow, don't you think? ;p Do pardon the rather dog-eared paper that the buns are sitting on, I was in quite a hurry to steam those buns so I hastily cut those papers out of tracing paper and they probably weren't the nicest squares (if you could call them those) that you would have seen. 


Steamed Pumpkin Bun/Mantous (南瓜馒头)
Adapted from Wendy

400g all-purpose flour 
100g wheat starch 
250g steamed pumpkin, mashed to a puree 
100g sugar 
15g baking powder 
2g salt 
40g shortening, melted 

11g yeast 
3g sugar 
150g water 


Method: 
  1. Combine the yeast, sugar and water together and let it sit for 5 minutes, or until the yeast becomes frothy. 
  2. Melt the shortening in the microwave and leave it to cool. 
  3. Sift the all-purpose flour and wheat starch together with baking powder and salt. Combine with sugar. Mix in the steamed pumpkin puree until the dry ingredients are moistened. 
  4. Pour the yeast mixture into the flour-pumpkin mixture and begin to knead. Once a rough dough forms, knead in the shortening. If using a stand mixer, continue kneading for about 5 minutes, until the dough becomes elastic and passes the window pane test. If kneading by hand, knead for about 10-15 minutes until the dough feels tacky and not sticky. 
  5. Round the dough into a ball and leave it to proof in a bowl for about 45 minutes, or until it doubles in size. 
  6. After it doubles in size, punch it down (degas it) and divide it into equal portions. I prefer to divide it into portions of 60g each – shape it into a smooth ball and place it on pre-cut pieces of tracing or baking paper. 
  7. To make the rose-shaped buns, divide the dough into equal portions of 10g each and roll each into a small ball. Using both fingers, flatten the ball into a disc of about 1mm in thickness. Do the same for the balls until you get 6 discs. Then, begin layering the discs one on top of the other, making sure to leave about an inch or a two-finger spacing between each layer. Then, begin rolling the layered discs from the bottom disc up, rolling until you get a cylinder. Use a wooden satay stick or chopstick or even a butter knife, and begin sawing the centre of the cylinder until you get 2 equal pieces. Each end of the cylinder will be your rose and the part where you saw off will be the bottom of the rosebud. [Do refer to Wendy's blog for very detailed step-by-step photos - I don't have the patience to take such photos!]
  8. Arrange each rosebud on the pre-cut baking paper and arrange on your steamer. Allow them to rest and proof a second time, for about 30-45 minutes or until doubled in size. 
  9. Fill your wok with water an inch below the steaming plate. Using a medium-high heat, steam your buns for about 15 minutes before removing them to cool. If using a pre-heated steamer, steam for 10 minutes. 


Janine's jots: 
  • Taste: If your pumpkin or sweet potato puree is sweet, feel free to dial down the amount of sugar. I think that if eaten as a sweet snack, a bit of cinnamon for the pumpkin would definitely bring it up a notch. I added lotus paste filling for the round buns and they tasted lovely. Beware of using too much salt – I used 3g for one attempt and it was WAY too salty. 
  • Texture: Same for the shortening. I have used melted butter and although I prefer the taste of melted butter, I find that shortening gives the dough a more elastic feel. You might wish to knead the dough for slightly longer if using the butter substitute, in order to get the same texture. 
  • Serving size: Depending on how large you portion each of your buns, you can get quite a few of them! I got about 30 buns of varying sizes (I made them as mantous as well as filled buns).
  • Modifications: Do use 500g pau flour or low gluten flour if you have them instead of the 400&100 combination I've stated above. You can also substitute equal amounts of sweet potato/taro or any tuber you wish. I have tried using cornstarch instead of wheat starch and it works the same way. 
  • Storage: Buns store wonderfully in the fridge - be sure to steam them first, then cool them before keeping them in an air-tight container in the fridge. Either microwave them on low or steam them again for about 5 minutes before consuming. 
  • Would I make this again?: Yes, only if I'm out to impress somebody ;p The recipe itself is a keeper though!
  • Other comments: Making the rose shaped buns are rather time consuming, because you have to flatten each ball into a disc and then roll them up. The results are fantastic though, and I can imagine a number of things you can do with this. You can also fill the buns up with a filling, although it might be a little difficult because the filling will have to be placed not in the centre but at the 1/3 and 2/3 mark. 

Monday, September 26, 2011

Malaysian Monday #7: Non-baked Chinese BBQ Pork, or Char Siew (蜜汁叉烧)

The irony of this dish is that char siew literally means 'fork roast' in chinese, which is an allusion to how it was traditionally made - long strips of pork skewered on long pronged forks and then roasted over a charcoal fire; for this rendition of char siew however, I have opted to go with a non-bake method, which is essentially cooking it down on a stovetop, in a normal pot.

This of course is a perfect opportunity for me to use my Le Creuset crock pot, which I finally decided to buy after years of looking and yearning for it. I bought it at the Isetan sale for slightly under S$200, and I love it! Because it is cast iron, it retains heat really well and I've been using it to cook things like the char siew below, as well as making jams, stews and everything else you can do with a stainless steel pot :D  I foresee that this, together with my trusty Bombino, will be very good friends for many decades to come. Back to the char siew, this method is really very simple, akin to making a stew, AND if you don't particularly like those charred black bits on the baked char siew, this is perfect for you.


Non-Bake Char Siew
Method adapted from Baking Mum
*I have used metric measurements for this recipe. Refer to my previous attempt for the same recipe in cups.

Ingredients: 

500g pork, cut into 2-inch thick strips

For the marinade
40g Hoisin sauce
30g brown sugar
20g white sugar 
15g mui kai lo (玫瑰露)
10g soya sauce
1 tsp sesame oil 

½ tsp salt 
¼ tsp ground white pepper 
½ tsp 5-spice powder
3 cloves of finely minced garlic

200g water

For the glaze
10g olive oil 
10g honey 


Method:

  1. Combine all the ingredients for the marinade in a mixing bowl. 
  2. Add in the pork and marinate for at least 3-6 hours. 
  3. In a large pot, pour in 200g of water as well as the excess marinade from the pork and bring the mixture up to a boil. Once boiling, add in the marinated pork and allow the mixture to reach a boil again. 
  4. Reduce the heat to a medium-low and allow the meat to simmer until it is tender. Simmer with the lid off. This will take about 30 minutes or so. Once the meat is tender, you can increase the heat to boil off the excess water to allow the sauce to thicken. Then, add in the mixture of oil and honey so that the char siew will be glossy. 

Janine's jots: 
  • Note: If you don't have access to 5-spice powder or mui kai lo, please refer to my substitutions in the previous recipe. Also, do try to marinade the meat for slightly longer if possible, so that the meat is more flavorful. I tried marinating for an hour before cooking and the meat was not as tasty. 
  • Taste: Super duper yummy. I haven't tried comparing the char siew together, but from what I remember, the substitutions produce a char siew which is very close in taste to this method which uses the 'original ingredients'. 
  • Texture: I felt that the texture was not as tender as the baked method, but then again it could be because of the amount of fat in the meat because the fat marbling in my cut of pork this time was substantially lesser than before. 
  • Serving size: More than enough to serve a family of 5 for dinner, with extras for char siew baos :]
  • Modifications: None! I might try reducing the sugar a little just to try to make it healthier, but it's really good as it is!
  • Storage: Stores well in the fridge for a few days, but best to freeze it and thaw when you wish to use it again. I have frozen the char siew for a month and used it for a bao filling, and it still tastes as good as new!
  • Would I make this again?: Definitely! This is my 3rd time making char siew using this method - it really is so easy! 
  • And just an extra tip, if you want to use the char siew as filling for your pie, pastry or steamed buns, don't boil down the water too much, leave some sauce behind so that you can combine it together with more seasoning (because you need the mixture to be tastier if it is a filling) and cornstarch to thicken the mixture. Saves you an extra step of adding liquid for the filling!


In pictures: 

I know it doesn't look particularly appetizing, but this is how char siew looks like after you cook it.  I have reduced the water to almost nothing, so I'm left with thick delicious sauce. 
Upclose, after having added the oil+honey glaze. Some of the fatty bits are almost charred, just like the baking method. 


Unlike my mom, my hands are still unable to handle meat right out of the pot (my hands don't have enough tough skin yet), plus I had to take pictures ;p


GAWDDDDDD. I'm drooling as I type this. 

All cut up and ready to serve :]


Sunday, September 11, 2011

Mini Snow Skin Mooncakes with Melon Seeds and Lotus Paste (冰皮月饼)

I can't believe Mid-Autumn Festival is upon us already. In fact, the actual day will be tomorrow, 12 September 2011! Time really flies, because when Mid-Autumn Festival is here, it'll only be a while before Deepavali, my mom's & brother's birthday, and then Christmas! Okay, I might be getting a little ahead of myself but the point is that the days really seem to fly by when you look back on the weeks but the hours just move so so slowly when you're doing mundane stuff, like studying >.<

The full moon, gibbous moon and the fat crescent moon :]

Mid-Autumn Festival is also loosely known as Mooncake Festival, and boy do I have wonderful memories of it. I remember carrying lanterns around the neighborhood, and feeling upset when the wind blew and the flame of my candle would burn a hole in my lantern which rapidly grew causing the whole lantern to burst into flames. I also remember competing with my brothers to see who had the most long-lasting lantern. Nowadays, parents get those battery-operated lanterns for their kids, which is rather sad because I think battery operated lanterns are just not as fun. Anyway, because I came from a Chinese secondary school, Mooncake Festival was quite a big thing. Our school would hold a concert, and because we were all under 16 years old, I remember we had to get our parents' permission to stay in school after 6pm. Our school also invited our parents for the celebration, and at 6pm, the celebration would start. After the principal's opening speech, the Chinese Orchestra would play, then the Chinese dancers would dance a traditional dance, with rabbits and all. I remember some Chinese drama group performance as well. And the highlight of the night would definitely be the moon cake  eating. Our chool would ask each class to donate a few boxes of moon cakes, and these would be laid out on a long row of tables at the back of our quadrangle, all sliced and ready to be shared. At the same time, tea would be served, and together with  猜燈謎 games, literally lantern riddles in which prizes were awarded, the students would run off to play with lanterns and sparklers. It was probably the only time when we could roam about our school campus in the dark. Many a teenage secret was shared as friends strolled around in groups, carrying lanterns or sparklers. 


I also remember looking at the unbelievably round moon, which hung so low in the dark, star-studded sky that it looked almost fake. And we would find great joy in looking for the 'rabbit' on the moon. Have you guys seen it before? The holes on the moon really do look like a rabbit! 

Anyway, both family, friends and teachers would all enjoy the moon cakes, and any extras could be brought home to savor. Looking back, I'm very appreciative of what my school did, for teaching us our culture in subtle ways, and making sure we still understood the essence of Mid-Autumn Festival. Mid-Autumn Festival is many ways, is like Thanksgiving, instead of giving thanks, the family, young and old, will gather and admire the moon (賞月), while enjoying each other's presence. 


Back to way way back, when I still found joy in carrying paper lanterns around the neighborhood, I would rather have the pale green snow skin moon cake instead of the brown baked moon cake. As far as I can remember, I've never liked baked moon cakes. I've always like the cool snow skin moon cakes, and every year without fail, my mom would get a pandan flavored green snow skin moon cake for me. I also remember not liking the salted egg yolks when I was younger, but as I get older, my taste preferences lean towards the salty, and I find myself liking moon cakes with 1-2 egg yolks in them. Not 4 though, that's too little lotus filling for me =p So this year, seeing that moon cakes have increased in prices, I decided that it was high time I made some of my own. My mom has her own moon cake mould, so why not use it? In both Malaysia and Singapore, the baking supplies shops bring out their cooked glutinous rice flour packets and out comes the lotus paste, red bean paste, and various other flavored lotus pastes. I simply got myself a packet of koh fun and lotus paste and I was set!

My recipe is more of a suggested recipe as compared to a proper recipe with fixed numbers because I made a combination of small and large moon cakes. All you need to remember is the golden ratio is 1:2, 1 part of skin to 2 parts of filling, and if you stay within this ratio, you shouldn't go wrong. 

What you should first do is to determine how heavy a moon cake your moon cake mould will give you. To do this, simply tear off a huge piece of your snow skin dough, and stuff it into your mould. Make sure to pack it well and remove any excess peeping out of the mould. After that, un-mould the dough and weigh it. This will be the weight of the moon cake that you will get. From there, divide that weight into 3. So for example, after cramming the snow skin dough into my tiny moon cake mould, I found that it weighed 50g. I then divided it into 3, which gave me around 16 odd grams. I decided then to go with 20g of snow skin and 30g of filling. This was because I'm strange that way - I prefer to have a higher skin to filling ratio. If you wish to have more filling, simply use the 1:2 ratio, which should give you around 16g of snow skin and 34g of lotus filling. It's that simple really :]

***

Mini Snow Skin Mooncakes
Adapted from Amanda who adapted it from Aunty Yochana, here
Makes approximately 10 5cm-diameter mooncakes

For the snow skin dough:
100g   koh fun (or gao fen, which is cooked glutinous rice flour)
90g     icing sugar
30g     shortening
120g   cold water
A few drops of coloring (if desired)

For the lotus paste filling: 
300g lotus paste (I used a store bought low-sugar white lotus paste, but you can make your own. Check out Christine's recipe which is close to what my family does)
50-100g melon seeds (vary this amount according to how much melon seeds you like in your moon cake)

Method: 
  1. Sift the koh fun and icing sugar in a mixing bowl. Gently rub the shortening into the flour mixture, combining until the mixture resembles coarse bread crumbs. Mix in the cold water and knead until a soft dough forms. If you wish to add in food coloring, add it in together with the cold water. Let the dough rest for at least 30 minutes before using. 
  2. After rested, divide the dough into balls of equal weight. 
  3. In the meantime, add the melon seeds to the lotus paste and mix evenly. Divide the lotus paste into balls of equal weight. 
  4. To make the moon cake, lightly dust your hands and the mould with the koh fun. Flatten the ball of snow skin until you get a rough circle. Place the ball of filling in the centre of the dough and seal the ball with your snow skin. Make sure that there is no air trapped between the dough and filling and seal the edges tightly. Put the ball seam-side up into the floured mould and pack it in gently. Then, rap it against the counter on all sides so that the moon cake falls out nicely. Chill for at least 6 hours before consuming. 


Janine's jots: 
  • Notes: Please note that you CANNOT substitute shortening for butter. It doesn't work. Believe me I've tried. Also, if you wish to get multi colored moon cakes like those above, simply apportion your doughs and color them separately. Then, flatten each colored dough into a rectangular sheet and place the doughs one on top of the other. Proceed to roll up them, swiss roll style. Next, cut off a part of the dough, making sure that it fits your mould Proceed to then flatten the part of the dough into a round circle and proceed as per step 4 above. You will get swirls of color. Like in the 2 multicolored moon cakes above, the one of the left had more yellow than pink and one on the right had more pink than yellow. It's all a matter of preference really. The white ones are the original color. 
  • Taste: I'm not a particular fan of fancy fillings, and I particularly love white lotus paste, so this was perfect. I also don't have a very sweet tooth, so I chose the low-sugar option. The end result was fantastic, in my opinion. 
  • Texture: Although this texture certainly does not beat the smooth texture that you might get for commercial moon cakes, I find it pretty okay and I like the smooth lotus paste which I got from Malaysia. I liked that I could add as much melon seeds as I wanted to the lotus paste to give it that contrast to the smooth paste. 
  • Serving size: Each mini moon cake is about 2-3 bites worth, which is just lovely. And not to mention that buying the ingredients for the moon cakes cost me less than RM25 (S$12), and I got so many moon cakes. Definitely something to consider for the future!
  • Storage: The moon cakes store quite well in the fridge. Be sure to keep them in an airtight container and make sure they don't stick to one another. Mine lasted for about a week before they were gone!
  • Would I make this again?: This is the definitely the cheaper and better way - and what else is better than knowing what goes into what you are eating?  


Another close up of the first photo :]

Same photo, but I decided to use a film effect to emulate the 'shining moon' hanging in the dark sky. Not too successful with that huh? ;p

Anyway, I am submitting this to Aspiring Bakers #11: Mid-Autumn Treats (September 2011), hosted by Happy Home Baking. Have a great Mid-Autumn Festival (中秋節) everyone - may your moon cakes be yummy and your lanterns shine brightly :D

Wednesday, September 7, 2011

Fluffy Pancakes III

Classes have been coming hard and fast these few weeks. Tons of tutorials to be done, assignments to be handed in, etc. After I finish tutorial at 8pm and arrive home at about 9pm, I find that I have virtually no energy to do any more work, needless to say any baking. Nevertheless, weekends are left for baking, or rather Saturdays are, and Sundays are for some work and reading my favorite types of books. I've been baking quite a bit, baking at least 2-3 things at one go. On a few occasions in the past months, I woke up on a Saturday morning feeling like I needed pancakes, and pancakes it was! Pancakes are really the easiest things to whip up, in less than 30 minutes, you should be able to mix the batter and make yourself delicious hot pancakes :]


I've been experimenting with a couple of recipes, and will be posting them up one at a time. These are really quite delayed because I really can't find time to blog, and I foresee that things are just gonna get worse :/ Anyway, I got this recipe bookmarked after Sonia left a comment in my previous post telling me that she had found a way for fluffy pancakes without beating the egg whites. Needless to say, I was intrigued and immediately went to her blog to check out her recipe. Her recipe indeed is really simple - most of us probably already have these ingredients in our pantry - flour, sugar, salt, milk, egg and oil. It's really that simple! 

I actually have my own recipe for pancakes which have approximately the same proportions as Sonia's but using all-purpose flour and baking powder instead, as well as having a lower sugar ratio and higher liquid ratio. So on a fine Saturday morning, I decided that I very much would like pancakes to go with  my freshly made strawberry-apple jam, and decided to give her recipe a go. This was yet another perfect chance to try another fluffy pancake recipe!

Fluffy pancakes with maple syrup and homemade strawberry-apple jam :]

Fluffy Pancakes III
Adapted from Sonia
Makes 6 pancakes

Ingredients:
150 g        self-raising flour
50 g          sugar
1/4 tsp      salt
110 ml      fresh milk
55 g          egg (about 1 large egg)
1 tbl          corn oil

Method:
  1. Mix flour, sugar and salt in a mixing bowl.
  2. In a separate bowl, mix together the egg, milk and corn oil. Pour this mixture into the flour mixture and mix until they briefly come together. You may still have tiny lumps of flour but this is okay!
  3. Heat a non-stick frying pan on medium low heat. Using a 
    ¼-cup measuring spoon, ladle 
    ¼-cup of batter on the pan and cook for 2 minutes, or until bubbles appear on the surface. Flip the pancake and cook for another 1 minute or until golden brown.
  4. Repeat with remaining batter and serve warm with maple syrup. 


Janine's jots: 
  • Cooking Notes: Because these pancakes are rather thick, do remember to use low heat to cook them otherwise the outsides will brown far too quickly before the insides are properly cooked!
  • Taste: Pancakes were sufficiently sweet, such that they could be consumed on their own. Of course, nothing beats pancakes with jam and maple syrup :]
  • Texture: You will first realize how thick the batter is, which is quite unlike a pancake batter but this is CORRECT - do not add anymore liquid to it! Just proceed to ladle the batter onto your pan and you should get a thick pancake. I think this helps with the fluffiness of the pancake, because you'll get pancakes with an almost sponge/chiffon-cake-like texture. Seriously good!
  • Serving size: Depending on how large or small you want it to be, you should get around 6 thick yummy pancakes!
  • Modifications: I would probably try decreasing the sugar and increasing the fresh milk in the recipe to see where it'll get it. And the next time, I'd probably use butter instead of corn oil because I much prefer the taste of melted butter. Otherwise, this recipe is pretty close to perfect for me! 
  • Storage: Pancakes should preferably be consumed right after they are made, especially these which had a nice crusty exterior but a soft fluffy interior. They also didn't last beyond breakfast, so I have no idea how long they last stored at room temperature. My guess is that you can store them in the fridge and zap them up when you want to eat them, although it won't taste as nice. 
  • Would I make this again?: Definitely! This is yet another winner after my last fluffy pancakes attempt!

In pictures: 


Fluffy cake-like inside :D

Friday, July 15, 2011

Fluffy Pancakes II

My friend had been craving pancakes for some time, and I wanted to try out a new pancake recipe, which was perfect - she came over to my place early in the morning, so that we could get started on making some pancakes for our breakfast!

This pancake recipe is unique in the sense that it requires whipped egg whites. It also uses milk and not buttermilk or sour cream, which makes life so much easier since milk is so much cheaper and readily available than those ingredients. Now, making pancakes should be a relatively easy task, and you might think - whipped egg whites ain't easy at all! Well, I'm here to prove you wrong - it really is pretty easy. Make sure you separate the egg when it's cold, because it separates most easily then. Let it warm to room temperature before attempting to whip it. The egg white will whip easier when it's not cold. It was all manual labour here - no mixer, just a metal bowl and whisk, and lots of elbow grease. Just use your wrist and whip that egg white  up, it will start to froth and slowly whiten, and before you know it, you have softly whipped egg whites. The whitening of egg whites is one of those processes in baking that I anticipate the most, really. 


Do try out this recipe if you're bored of your usual pancake recipe - whipping your egg whites separately does produce results and some mighty delicious pancakes :]


Fluffy Pancakes
Adapted from Evan here
Makes 7 pancakes

Ingredients: 

1 cup flour
1 tsp baking powder
¼ tsp salt
1 cup milk
1 egg, separated
2 tsp caster sugar
1 tbl oil

Method: 
  1. Sift flour, baking powder and salt into a bowl. 
  2. In another bowl, whisk together the egg yolk, sugar and milk. Add in the oil and mix well. 
  3. Add the yolk mixture into the flour mixture and whisk to combine. Make sure the batter is smooth with no lumps. 
  4. Whisk the egg white until soft peaks are achieved, before folding it into the mixture above. 
  5. Heat a non-stick frying pan on medium low heat. Using a 
    ¼-cup measuring spoon, ladle 
    ¼-cup of batter on the pan and cook for 2 minutes, or until bubbles appear on the surface. Flip the pancake and cook for another 1 minute or until golden brown. 
  6. Repeat for the remaining batter until you get a stack of pancakes. Serve warm with a pat of butter and maple syrup. Enjoy!


Janine's jots: 
  • Taste: Pancakes were sufficiently sweet, such that they could be consumed on their own. Of course, nothing beats pancakes with jam and maple syrup :]
  • Texture: The pancakes were really one of the fluffiest I've consumed, and trust me, I've tried tons of pancake recipes, ranging from those requiring buttermilk to sour cream to yogurt ... the list just goes on! I also like that these pancakes developed a slightly more 'crusty' exterior - perfect for dipping into maple syrup with!
  • Serving size: This was the first time that a recipe yielded exactly what it promised - 7 pancakes were what I got. I know that my photographs only have 5 pancakes but well that's because I ate 2 of them while waiting for the rest to be done since I was SO hungry and the pancakes looked so darn delicious!
  • Modifications: I would probably try decreasing the amount of oil in the recipe because I prefer to use more butter on the pan instead of in the pancake. Otherwise, this recipe is pretty close to perfect for me! 
  • Storage: Pancakes should preferably be consumed right after they are made, but I have found that you can store them (cooked) in the fridge for up to 3 days, and give them a quick zap in the microwave to heat them up. The pancakes are noticeably heavier and less fluffy, but still delicious. You can also choose to store the batter (sans the egg white) in the fridge for a day - this means that you can make the batter the night before, wake up to whip the egg white and make pancakes early in the morning!
  • Would I make this again?: My last pancake using the last 
    ¼-cup of batter turned out rather tough - that's because my pan is only large enough for 1 pancake to be cooked at a time and I think the gluten had already started to form and the egg white deflated. I would definitely try making this on a larger pan, to ensure that all pancakes are equally fluffy :] 

Thursday, June 30, 2011

Steamed Bao (包子)

I returned home to Singapore yesterday, only to be greeted by heavy showers and thunder. I could see countless lightning bolts, although I couldn't hear the thunder, and see the heavy nimbus clouds as the plane flew through them as we were about to land. Just moments before, as the plane began its descent into Singapore, the sun was setting over Malaysia and Indonesia and it really was a sight to see. The clouds never looked so magnificent when they are basked in that golden glow which a setting sun can provide. 

When I arrived home, I was also greeted by a familiar sight (no smell since baos hardly emit any smell when steamed) - steamed baos waiting for my consumption :] I love baos - other than porridge, fried rice and Mee Hoon Kuay (面粉馃), they are my idea of a perfect homecoming present. I used to love to get these peanut baos from a coffeeshop near my place, but after hearing that no one consumes these baos and they are actually being repeatedly steamed on a daily basis for weeks (hence the oily bottoms and weird textures), I have not patronized them anymore. Instead, I bug my mother to make these baos for me. My mom makes a mean peanut steamed bun (花生包) and vegetable steamed bun (菜包). In fact, I now only eat baos that my mom makes, because I really don't like how mushy and weird tasting vegetable baos can get when purchased. I know many people swear by meat steamed buns (肉包) - 小肉包大肉包 but I don't really like meat buns because of the strong porky taste in those buns - I know right, I'm super picky. In any case, the only type of meat bun I like to eat is the honey-roasted pork bun (char siew bao or 叉烧包). This is the bun I will always order when having dimsum. However of late, I have been disappointed by the size, quality and price of these char siew baos. The filling has been decreasing in size, been increasingly replaced with more fats than meat, and the price of these baos have really skyrocketed! It was just a few months ago that I convinced my mom to attempt making char siew baos and to my delight, the results were phenomenal :] Needless to say, I hardly order bao when I'm out because these gems are really easy to make at home - you can make the filling on the first day and make the bao on the second if you don't have enough time - and it's really much quicker than making proper breads which require two periods of proofing and rising.


My mother got this recipe off the Blue Key bao flour box a long time ago, and has been making it for as long as I can remember. However, that tiny recipe booklet no longer accompanies the box (according to my mother), so here's the recipe for keepsakes [word for word from the booklet - see modifications below]: 

Ingredients:
Makes 14 moderately sized baos 

500 g   pau flour
6 g       yeast
100 g   sugar
50 g     oil/shortening
250 g   water

Method:
  1. Mix flour and instant yeast together and dissolve the sugar in water. 
  2. Mix all the ingredients in a mixing bowl, then knead the dough by hand for 10-15 minutes or by mixer until it becomes smooth and extensible. 
  3. Scale the dough at 40g each. Round it and leave it to rest for 10 minutes. 
  4. Flatten the dough and place your filling in the centre of the dough. Wrap the filling by folding the edge of the dough with desired design. Then place each dough on a small piece of square grease-proof paper.  
  5. Cover the dough with a piece of clean plastic sheet and allow it to rise for 35-40 minutes. 
  6. Place all the dough pieces in a steaming rack and steam for 15 minutes over the high heat.

Janine's jots: 
  • Modifications: I also add a pinch of salt to give the baos a little complexity to the taste. Also, be sure to use lukewarm water to dissolve the sugar, before adding the mixture into your flour and yeast. Once you get a rough dough, proceed to add in your oil. You can also use lard or shortening if you prefer. I use sunflower oil since it's available in my pantry all the time. 
  • Taste: This bao can actually be made into a mantou and be eaten on its own, because there is sufficient sugar to give it some taste. However, it tastes especially good when combined with a savory filling. 
  • Texture: The texture of the bao is perhaps not as smooth as those you can get from yum char places, but it's perfectly fine for consumption at home. Perhaps a little bit of wheat gluten and more shortening will result in that smoother bao you can get from shops. 
  • Serving size: This recipe makes enough for 14 similar shaped buns. 
  • Storage: These baos store in the fridge well for about 3 days and freeze perfectly. From the fridge, just steam them again for about 10-15 minutes. From the freezer, remove them to thaw before steaming them or you could just steam them for 30 minutes. 
  • Would I make this again?: Definitely. This is a family staple, and this is perhaps the only way in which I can consume my beloved peanut baos (it's so rare nowadays) and the only way in which I can have a vegetable bao with some chicken inside ;p 
  • Other comments: For the "grease-proof" paper that the recipe mentions, you can use baking paper or tracing paper, cut into little squares. 

In pictures: 

These baos are proofed (see how the pleats are not as prominent as before) and ready to be steamed :]
Look at this dreamy char siew filling! Unlike those in stores, this is all meat and little fats - no red coloring is used :]
Steamed baos - look at how fat they have become - the pleats are almost giving way :/
Another close-up for good measure :]
My absolute favorite - the peanut bao

And last but not least, my mom's version of vegetable bao - with half a hardboiled egg and pieces of chicken :D

These photos are not taken yesterday, but are from my attempt a few months ago. I've been wanting to post them, but since the recipe is on the booklet, I haven't had a chance to steal them from my mom to type it out. I'll only be writing the recipe for the bao 'skin' today, because I'm still kinda tired from all that travelling that I have done, and I need to figure out the exact measurements to the fillings since my mom usually just 'agars' (estimates) when making the filling (and so do I).


This is my last minute submission to Jasmine's Aspiring Bakers #8: Bread Seduction as well as my 4th Muhibbah Malaysia Monday event hosted by Shaz of Test With Skewer and Suresh of 3 Hungry Tummies (sorry I didn't exactly post this on a Monday cos I wanted to be in time for the roundup!)


Related Posts Plugin for WordPress, Blogger...