My blog has moved!

You should be automatically redirected in 6 seconds. If not, visit
http://www.unpastiche.com
and update your bookmarks.

Showing posts with label DIY. Show all posts

Wednesday, September 14, 2011

Homemade Strawberry Apple Jam, and the differences between jams, jellies, compotes, confitures, etc.

My local supermarket had quite a few offers on strawberries in the past few months, where a punnet of 454g USA or Australian strawberries were being sold for slightly less than $5. I grabbed a few punnets, partly because I was kiasu, and partly because I knew I wanted to do a ton of things with them. So far, I've eaten them (duh), used them as decoration on my chocolate cakes, on my tarts, in my cakes... but I still have so many of them and I was afraid they would rot. So I did the next best thing - I decided to can them and make jams out of them! I decided to do a combination of strawberries and apples, but when I was done, I hesitated over whether to call it a jam or preserve or even perhaps a compote?

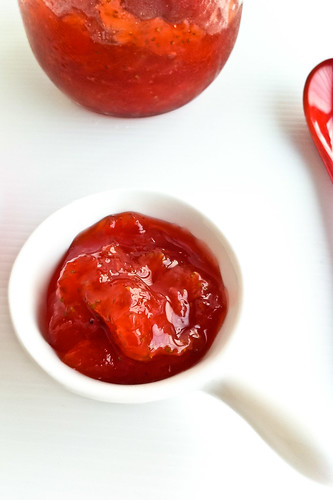
Check out the ruby red chunk of strawberry in my 'jam' here :]

Naturally, I had to find out what were the differences and I settled on calling this 'thing' I made a jam. I have made a tiny table of what I have found out: 
  • A jam is basically made by boiling fruit and sugar together to a thick consistency whereas a preserve is where the fruits are made into either jams or jellies and are cooked in whole or large pieces to retain their shapes. 
  • A jelly is basically sugar boiled with fruit juice and gelatin, and does not have any fruit bits. It is usually sweeter and more transparent - think of those strawberry or other fruit jellies that we can get locally in those small plastic cones with a white plastic seal on them.  
  • Of course I had to ask what a marmalade was, and it's basically a jam made with citrus fruits and has bits of rind in it. 
  • A compote (or french for mixture) is defined as a dessert made with whole or pieces of fruit in a sugar syrup - sounds like preserves to me! 
  • Similarly, conserves are known as whole fruit jams, which also strike me as the same as preserves. 
  • To makes things more difficult, there are spreads, which wiki defines as a jam or preserve with no added sugar - confusing and contradictory much?! 
  • Then of course, I'm sure some of you have stumbled across terms like confitures and gelées before - these are basically french terms for preserves/jam and jelly respectively. 
  • Finally, there's the syrup. This is pretty simple - it's basically sweetened concentrated fruit juice!
  •  There are also things we know as chutneys and relishes which involve fruit too, but I'll keep that for another day!
And there you have it! I hope the above list was hopeful to at least someone other than me, because I finally got my doubts cleared and I also realized that many bakeries like to use the french word for jelly just to make their desserts sound a little more classy. 

And now onto my jam! A jam is made when fruit, sugar and acid are heated together. First off, all fruits contain natural pectin, but some, like strawberries, do not contain enough natural pectin to gel (to form a jam consistency). When you cut the fruit and heat it, pectin molecules are released. The sugar added helps to bind the liquid from the fruit to the pectin molecules, bringing them closer to one another. When the mixture is brought to a rolling boil, some of that excess liquid is then boiled away, encouraging greater binding between the liquid and pectin, creating a more concentrated mixture. The acid added, in the form of lemon juice does 2 things: it helps with the pectin and it also neutralizes any 'charge' that the pectin molecules might have, encouraging closer binds between pectin and liquid once again. And that's about all there is to making jam really! If you are keen to find out more about jams, there is lots of good information floating about the net, and a good place to start is Food in Jars (she cans all kinds of things) as well as this site where I got a headstart on.
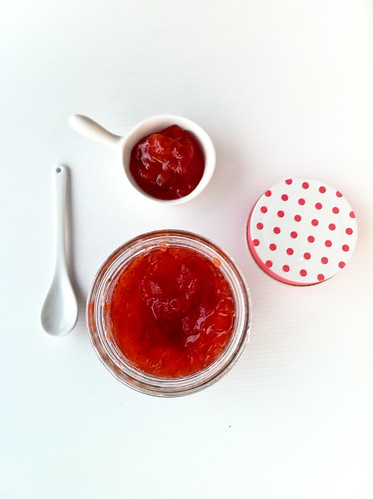
Oops the picture's a little blurry :/


Strawberry Apple Jam

Loosely adapted from Ina Garten's Easy Strawberry Jam Recipe and Allrecipes.com

Ingredients
200g   fresh strawberries, hulled
90g     rose apple, peeled and diced
150g   castor sugar 
25ml   lemon juice

Method:
  1. Wash and drain the strawberries before hulling them. Cut them into halves or smaller pieces if you want a smoother jam. Wash, peel and dice the apple before combing with the strawberries and lemon juice in a heavy-bottomed pot. 
  2. Cover and cook gently until the fruit begin to release their juices, about 5 minutes. 
  3. Once the apples begin to break down, stir in the sugar. Once the sugar is dissolved, bring the mixture to a rolling boil over a medium heat, stirring often to ensure it does not stick to the bottom.
  4. Reduce the mixture to low heat, allowing the mixture to simmer for about 10 minutes or until it thickens. The mixture is ready when it registers 105°C on the thermometer or when it passes the gelling test*.
  5. Spoon the mixture into a sterilized glass jar before allowing it to cool to room temperature. Store covered in the refrigerator.
And the perspective's on this a little wonky :/
Janine's jots: 
  • *How to test the 'jellying point': There are 3 tests you can use - the 105°C temperature point I mentioned earlier, or the spoon test. Simply place a spoon in the freezer before you start jamming and when you think the mixture is thick enough, dip it into the mixture and raise the spoon out. The jelly is done when the syrup forms a sheet that hangs from the spoon. A similar test is the wrinkle test that some call it. Place a small plate in the freezer before you start and spoon a bit of the hot mixture onto the plate when you think it is done. Allow it to cool for a minute (I chill it in the fridge) and push your finger through it. If the mixture 'wrinkles', then setting point has been reached. 
  • Notes: You will realize that many jam recipes ask you to skim and discard any foam that forms but I did not indicate it above because of a few reasons - the foam is usually discarded because it is not the consistency people like in jams and also because it contains air which affects headspace which affects storage of the jam as well as food safety. Since I do not heat process the jars and consume the jams within a short time, this doesn't really affect me. Alternatively, you can prevent the foam by adding some butter or by microwaving the foam to produce normal jam again! 
  • Taste: The original recipe called for 200g of sugar, which I reduced to 150g, out of which 30g was muscovado sugar. However, I still found the jam rather sweet (I don't like overly sweet jams) - this might be because the rose apple used was very sweet. I will reduce the sugar to about 100g the next time. I also found the mixture a little too tart for my liking - I will probably reduce the lemon juice used to 15ml instead.  
  • Serving size: This makes about 250g worth of jam - which is just enough for a fortnight's worth of spread for breads and rolls for an individual like me :] Do feel free to double the recipe without any problems, because my recipe is half of the original. 
  • Modifications: If I were to do this again, I would boil the apples first before adding the strawberries because the apples take longer to lose their shape and because I want a chunkier jam (or preserve). 
  • Storage: Without heat processing, the jam will store well in the refrigerator for at least 2 weeks. If you wish to keep it for longer (up to a year), seal and heat process them. 
  • Would I make this again?: Oh yes, I foresee many lovely combinations, like strawberry rose, pineapple mango and other tropical combinations that will suit our climate perfectly!
  • Other comments: Do note that the quantities of sugar will really depend on your taste. However, beware of reducing the sugar by too much because this will interfere with the jam-forming process. Here, my strawberries were slightly tart and my rose apple was slightly crisp and sweet.  The sugar levels are thus adjusted to suit what I like. Also, if making an all strawberry jam, pectin might have to be added because strawberries are really low in pectin. I overcame that by adding apples and increasing the amount of lemon juice, both which are high in pectin. 
ETA: Since I wrote this post (which was quite a few weeks ago), I have made this same jam recipe with a few variations - less sugar, more fruit, less lemon, different type of fruit, etc. Another variation I have tried is with just 260g of strawberries, 130g of sugar and the zest and juice of a lemon. The jam was a little on the tart side, which was probably because I added too much lemon juice AND zest. 

Anyway, my mom loves my homemade jam and why not make more jam when there's someone appreciative of it right? :] Expect a few more variations coming your way soon!

Monday, February 28, 2011

A little update on my homemade vanilla extract

Time really flies, it really does.

I first started making own homemade vanilla extract when I started the blog, and now, my blog is already 2 months old! I still remember thinking, gosh, it'll take ages for the vanilla extract to start smelling like a real vanilla extract. Fast forward to today, 28 February - my vanilla extract is 2 months (+2 days) old and is ready to be used! And I've to say that minus the vodka hit that I got from first opening the bottle, the extract smells exactly like Tahitian one I have :)

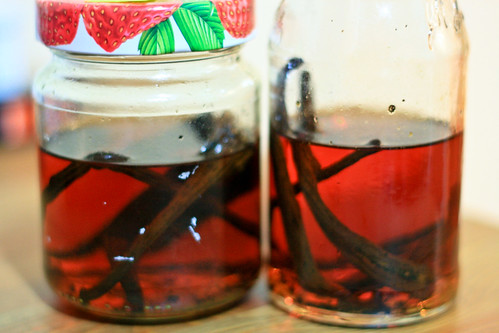
Here's how my baby looked last month (at 4 weeks old):

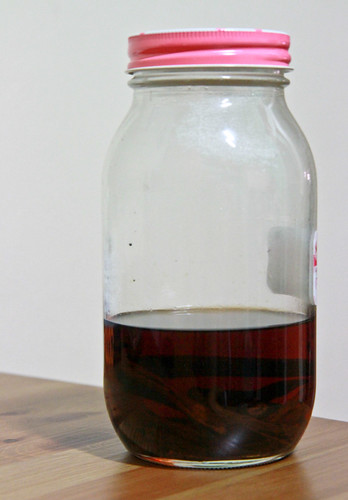
Here's how my baby now: 

And yes, I've upgraded it to a larger jar (which is $2 from Daiso), so that I can submerge the vanilla beans with ease and add more vodka when needed. Although the color difference isn't too great from one to two months, the flavor really does intensify - I occasionally open the jar up to smell the vanilla extract and it really smells better and better! Whoever said that vanilla was like wine was right on the money! It really is better with age - it becomes more mature, and there is more depth to the smell. Taste-wise, I can't tell yet because I haven't tried it in my baking, because I intend to age it for a little while more, AND finish using my existing bottle of vanilla extract before I strain this extract (to get rid of the fibres from the pod) and start using it :]

I might even do a giveaway when this vanilla extract is mature enough (in my opinion), so do stay tuned!  If you want to make your own homemade vanilla extract, all you need is a jar, a knife, some strong alcohol, and some vanilla beans! And lots of patience of course! It really is that simple!

Sunday, January 9, 2011

My Vanilla Project - Homemade vanilla extract

Vanilla has a hand in everything – ice cream, cookies, pies, cakes and even kuehs! For a long while, I was only acquainted with vanilla essence, which my mom used in her baking. My then non-inquisitive mind never did ponder about where this vanilla thing came from, until my jaunt overseas and I found out there were more expensive things called vanilla extracts and vanilla beans! Now that I’ve been exposed to vanilla extract, I doubt I can ever go back to vanilla essences – essences in our part of the world are but the poor and (fake) cousin of extracts – it is usually made of synthetic vanilla. I know that in other parts of the world, essences are a more concentrated form of extracts, but not here in Asia. Good vanilla extract is awesome – just a tiny bit is enough to elevate your baking to the next level – there is a subtle sweetness about vanilla that makes your bakes so much so aromatic.

There are many brands of vanilla extracts, but one of the more famous ones would be the Nielsen-Massey brand of vanilla extracts– which I’ve seen recommended by many sources. The good thing is that it’s available in Singapore, the bad news is that it’s rather costly (about S$20+ if I’m not wrong) as compared to the cheaper alternatives. The vanilla extract that I’m using is from Queen’s, which is somewhat of a house brand in Australia, but I find that it suits my needs for the moment.

As curious as I am with new things, I started on a research of vanilla and other related things which I’ve summarized below. I find Wikipedia useful in this area, and a simple google search will yield most informative results. 

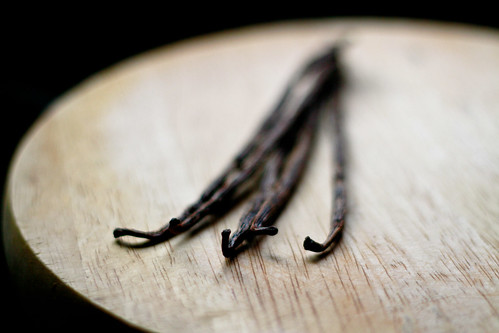
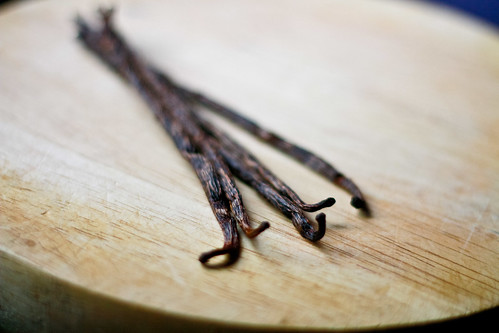
Madagascar Vanilla Beans :)
History of vanilla
The first people to use and cultivate the vanilla bean were the Totonac Indians of Mexico – they used it in rituals, in medicine and as a perfume; but curiously, not as flavoring. When the Indians were conquered by the Aztecs in the 15th century, the secret of the vanilla bean was passed to the Aztecs, who mixed it with their chocolate to make their drink chocolatl. Following that, when the Aztecs were defeated by the Spaniard Hernando Cortez in the 16th century, he returned to Spain with vanilla and cacao, which was enjoyed only by the rich for a long time. Then in 1602, Hugh Morgan, an apothecary to Queen Elizabeth I, suggested that vanilla could be used as a flavoring by itself, and since then, the vanilla bean has been used in baking, perfume manufacture and aromatherapy.

Nowadays, most of the production and cultivation of vanilla is in Madagascar and Indonesia. Mexico, where it originally came from, only produces a small percentage of vanilla now. Another major producer is Tahiti. Vanilla beans are mainly cultivated in tropical areas – places such as Costa Rica, India, Uganda and Jamaica produce them in limited quantities.


What is it?
Vanilla beans are the dried and cured fruit from the Vanilla orchid Vanilla planifolia, a plant native to Mexico. It is the only orchid that is able to bear fruit. It is both a spice and an aromatic, and ranks second only to saffron in terms of price. Why is this so? This is because these flowers usually bloom just for a day and can only be pollinated by the Melipona bee which is native to Mexico. If the flowers are not pollinated, they wither and no beans are produced. Although it is now possible to cultivate and pollinate the flower manually, the flowers still only bloom once and the entire process is manual, including the harvesting and curing – so essentially we are paying for the high labour cost and time expended.

Characteristics of vanilla pods differ based on where and when they are cultivated. For example, Bourbon beans, which are found in Madagascar and the Bourbon Islands, have the thinnest pods of the three varieties, and are described as having a creamy and sweet flavour, with vanillin overtones. Mexican beans are similar to Bourbon beans, but have a more mellow and woody fragrance. Tahitian vanilla beans, on the other hand, come from a completely different plant variety, called vanilla tahitensis. These beans have little vanillin content, but have a fruity aroma which many favour as well.

I’ve used the terms vanilla beans and vanilla pods exchangeably, although strictly speaking, the vanilla bean refers to the pod and seeds. What we are using are the seeds contained within the pod. Each pod has an average of sixty thousand seeds! 


How long do the beans remain fresh?
They should remain moist for at least a year. If they dry out, add half a potato in a jar with them to soften them for use. You can also place them in warm water before use to soften them. If you find white substance appearing on your vanilla bean, do not panic – it might not be mold – it might be the vanillin crystals which provide the vanilla bean with its intrinsic flavor. To determine whether it is mold or the crystals, just touch your finger to the bean – if it is the vanillin crystals, they will disappear after you touch them.

How should I store it?
Vanilla beans should be stored in a closed container in a cool, dry and dark place. They should not be stored in the fridge or freezer because this will dry them out. If stored in an airtight container, open the container once in a week to allow air to circulate. 

How to…
Open the vanilla pod
If you are afraid of a mess, place a parchment paper below the bean such that the seeds fall on the paper instead of on your chopping board. I use a plastic cutting board, so that any stain left by the seeds/pod is easy to wash off. I use a small paring knife which helps me better control the ‘slice’.

Lay your vanilla pod on the paper (or board) and flatten them by pressing on them from top to bottom – I find that this helps in slicing the pod open. If the beans are too dry or hard, you might consider steaming them for a while. Another thing I found useful was to snip off the top end of the vanilla bean before slicing them - there are very few seeds on the extreme ends, so don’t be afraid that you are losing precious seeds! Also, leaving the other end of the bean intact helps keep the sliced open parts remain open-side up.

Scrape out the seeds
Once the pod is sliced open, you can either steep the whole bean in liquid (to impart flavor to the liquid), or scrape out the beans. Most recipes require you to scrape out the seeds so that you can add them to the batter. Using the same paring knife, flip the knife to use the blunt edge and start from the end which you did not snip off. Gently scrape the inside of the pod downwards and with slight pressure. Do not exert too much pressure because you might scrape the ‘bark’ of the pod as well. Each seed is tiny, and black, and is smaller than a needle head. All the seeds will clump together – very much like caviar. I do my scrape in sections – I scrape as much as possible from the top portion, before moving on to the other sections, all the while moving in a downward motion. Once you think you have removed all the seeds possible, do not discard the pod! This pod may still contain tiny black seeds which you can’t see, and better still – the pod itself is able to impart fragrance, aroma and flavor to other things. 


PS: I haven't been able to get photos of me opening the pod and scraping out the seeds because I can't do that one-handedly and take photos :/ So that'll have to wait until I get myself a tripod!

Recipes:
To make a vanilla something, you can either use the whole pod, or just the seeds. Here's a list of Vanilla DIY projects: 

For example, for Vanilla sugar, you do not need to use fresh new pods. Basically, after you have sliced the pod into half and deseeded it, use that very same pod (making sure it is clean and dry), and bury it into your jar or wherever you store your sugar. The pod will impart the vanilla flavor to your sugar. To make full use of your pod, you can run your fingers through the pod (while it is in the jar of sugar), using the sugar crystals to rub against the inside of the pod to tease out all the remaining seeds. Store the pod and sugar in an airtight container and after a short while (you can smell the difference a day later, but putting the bean in the sugar for a longer time will give you a more intense vanilla sugar), you will have your own homemade vanilla sugar!

Vanilla salt: same as for vanilla sugar, just that you place the pod in a jar of salt.

There are a few other vanilla recipes I found here – vanilla vinegar, vanilla coffee; but those aren’t my cup of tea. The main reason why I bought the vanilla beans were because I wanted to make my own vanilla ice cream (more on that next time) and because I wanted to make my own vanilla extract!

**
I saw a few versions of the recipe online, and I decided to do a mini experiment – one jar of vanilla extract would have the pods split, with the seeds intact, and the other would have the pods sliced and seeds scraped. There was another version which recommended cutting the pods into a few pieces, which on hindsight I think will help in releasing the pod’s fragrance more quickly. Legally, vanilla extract has to contain alcohol which is at least 35% proof, and it’s best to use flavorless alcohol – so vodka is a good choice here. Here’s the recipe I adapted and used:

Vanilla extract
Items required:
  • Clean, sterilized jars or bottles
  • Small paring knife
  • Wooden cutting board with parchment paper OR plastic cutting board
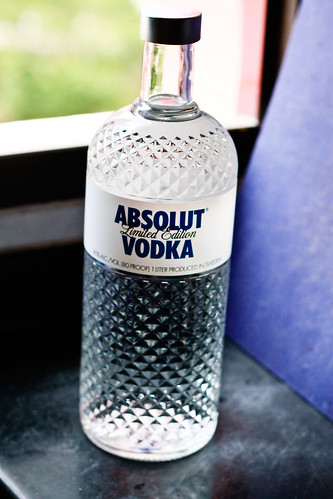
  • Alcohol (I used 40% Absolut Vodka, which is the cheapest Vodka available locally. Some recipes use rum, but I find that using vodka more preferable since it gives the vanilla a chance to shine)
Method:
  1. Pour a cup (or 240ml) of vodka into the sterilized or clean glass jar.
  2. Slice each vanilla bean lengthwise, split them in half while leaving one end connected.
  3. If you want to hasten the process, scrape out the seeds and put them into the jar together with the pods. Alternatively, use more vanilla beans per volume of vodka.
  4. Make sure the vanilla bean is completely covered with vodka and store in a dark cool, place.
  5. Shake the jar once in a while, otherwise you will find the dark brown color concentrated on the bottom of the jar.
  6. After 8 weeks, your homemade vanilla extract will be ready for use!

In pictures
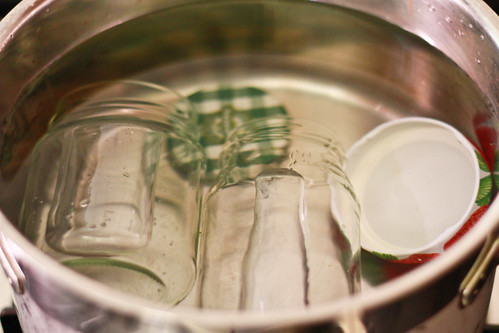
Sterilize your glass jars by submerging them in water and heating it to boiling point. Remove from water and let it dry before using. 
I used Absolut Vodka since it was the cheapest available but you can use any flavorless alcohol with at least 35% alcohol. 
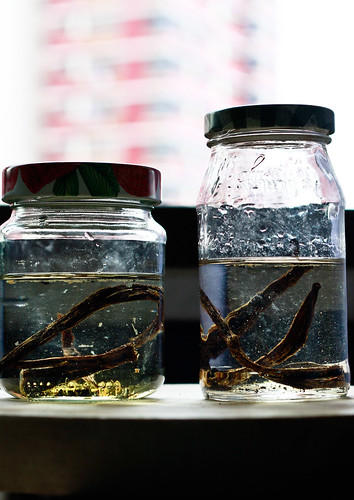
Put the split vanilla beans into the jar and submerge with vodka.

After 2 days - the colorless liquid has already turned brownish.

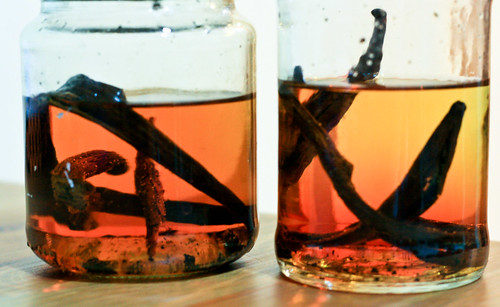
I love the gradient here! Note that the jar on the right, has a lighter color than the one on the left - I suspect it is because the beans were merely split and not scraped out.
12 days have passed since I first started, and the color of the extract is deepening very nicely!

Janine’s Jots:
  • The ratio that most recipes use is 80ml for every vanilla bean, but you can reduce or increase this based on your preference. I put in 150ml of vodka for 2 split vanilla beans.
  • You can replenish your extract by refilling it with more liquor, and leaving it to stand for a while before using. Also, after using a fresh bean in a recipe – for example, after scraping the seeds for a vanilla cookie, just place the empty pod into your jar. If the pod were steeped in milk or cream previously, just rinse off and dry it before placing it into the jar of extract you have going. If you continue replenishing your extract in this manner, your extract will last forever! Another tip is to remove the older beans after a while (say after a year) because they would have ‘run out’ of fragrance by then – this frees up more space for newer beans.
  • If you want clean vanilla extract, be sure to use a fine sieve because otherwise you will get seeds in the extract.
  • If you wish to use your extract before you reach the 8-week mark, check the flavor by putting a few drops into some milk. Drinking the extract itself is not advisable because the alcohol will overwhelm the vanilla taste whereas milk provides a good base of the flavors to develop.
  • Also if you wish to replace vanilla beans in a recipe with extract, the rule of thumb is to replace a 2-inch piece of bean with 1 teaspoon of extract (tip from Rose Levy Beranbaum's book).
So far, only 2 weeks have passed since I first started, and my conclusion from my mini experiment thus far is if you want a vanilla extract quickly, it'll be most effective to split the bean, and to scrape out the seeds as well. On the same basis, cutting the bean into pieces would also hasten the process. However, I'm not sure whether things will be different at the end of 8 weeks, so I'll definitely keep track of the progress of my extracts and let you know if there is any difference to scraping out the seeds or not! :)

Related Posts Plugin for WordPress, Blogger...