My blog has moved!

You should be automatically redirected in 6 seconds. If not, visit
http://www.unpastiche.com
and update your bookmarks.

Showing posts with label Cake. Show all posts

Tuesday, June 26, 2012

Pink Ombré Strawberry Shortcake

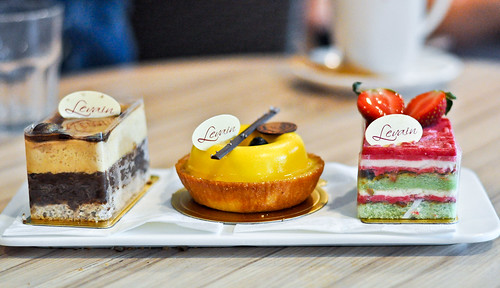
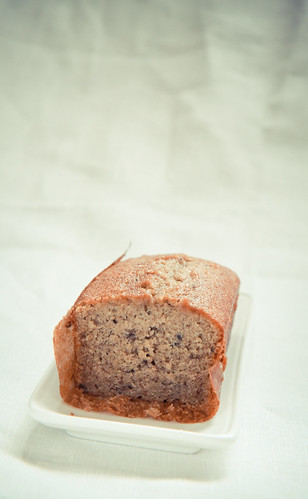
I have been rather remiss in posting this past few weeks. If you noticed, the last post didn't have any pictures and the previous one on Levain Boulangerie consisted of photographs taken way back during Vesak. The ironic thing is that although I've been baking rather diligently the past few weeks (for a colleague who is my first huge (and paying) customer), I've been way too lazy to whip out the camera to take photographs. And usually when I'm done baking, it's evening or night, so that means lousy pictures. 


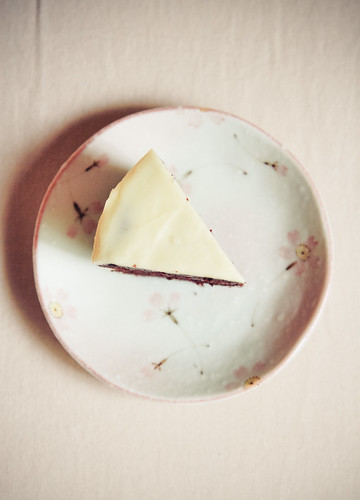
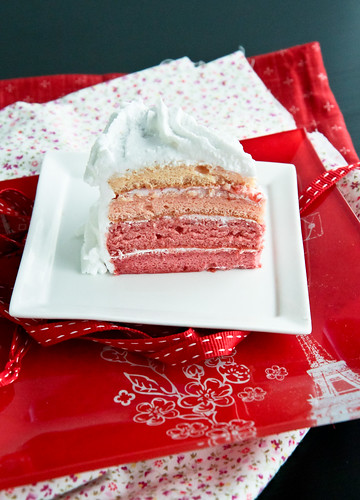
Anyway, I had high hopes for this sponge cake, because it appeared rather highly raved, and one blogger even wrote "不珍藏一辈子后悔". BUT I was disappointed because it turned out to be a rather 'rough' sponge cake, although it baked up pretty high. And to make things worse, this was supposed to be my 'birthday' cake, because I wanted to commemorate my birthday with a nice pink cake. So to say that I was VERY disappointed would be an understatement. One thing's for sure, I'm definitely sticking to my usual sponge cake recipe until I find a better alternative. And to think of it now, I'm definitely going to bake another nice cake as my replacement birthday cake, hopefully soon because it's been way too hot these few days to fire up the oven and I've been resorting to cool treats like froyo for my sweet fix. 


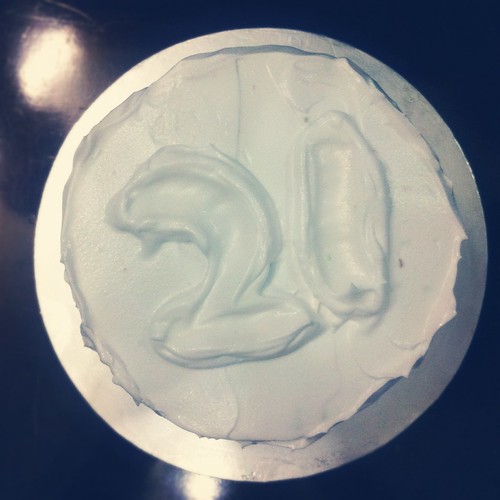
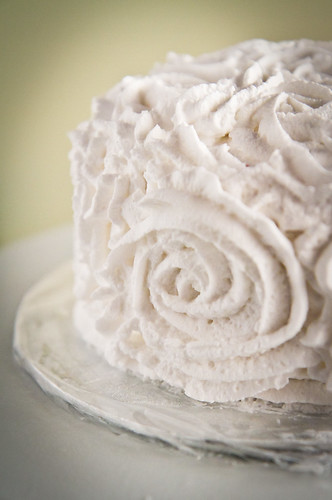
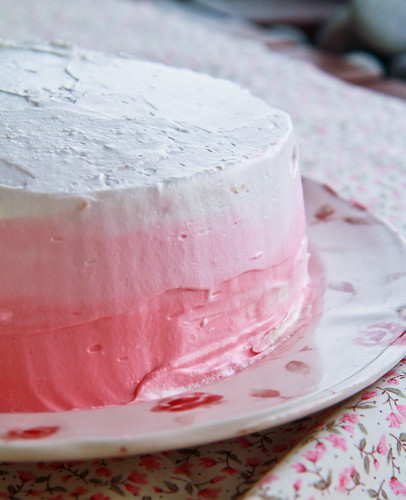
So why post something that I'm not too satisfied with? Well, I had thought I decorated the cake quite nicely on the outside and it would be a waste not to post the photographs up, especially since I had carted out my cake stand and other props to take photos. (Although on hindsight, I realized that the camera did catch a great number of flaws on the frosting which I was not too aware of at first glance).


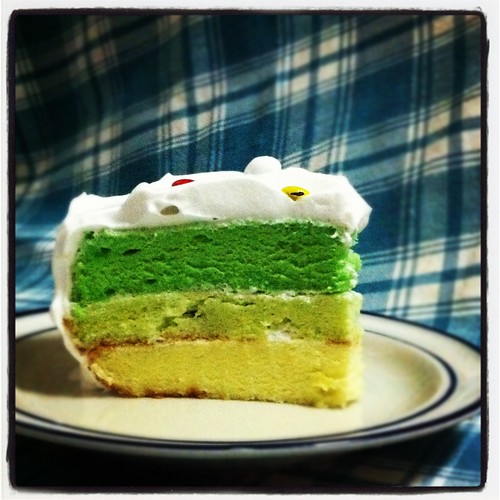
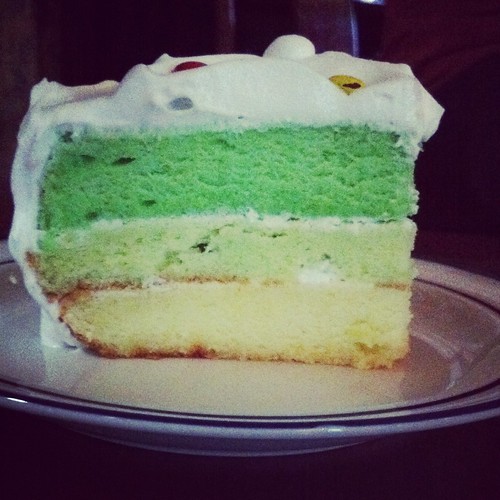
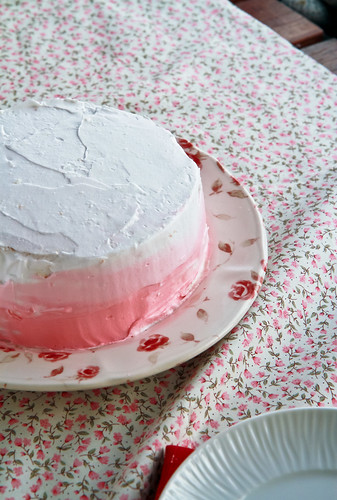
I first got an idea for this cake when I saw Yossy's beautiful pink ombré cake here, way back at the start of the year (on pinterest I think), then I saw it again on Lisa's blog - this time a purple version. Alas, as with many other wonderful pages/ideas that I bookmark, they get pushed back in the queue and I forget about them. It was only in late May that I got reminded by Steph (who has crazy beautiful ideas on her blog) about the ombré cake that I wanted to make. And yes, if you can't tell, I am a fan of ombré. I've always had this fascination for gradients, so it's of no surprise that ombré cakes are on my to-do list. (I'm also a fan of the ombré hair color trend, considering that I just highlighted my hair a few shades of gold and brown ;p) I've made cakes in both pink and green, but this is way easier since it's just a matter of tweaking the frosting - très simple!


Sponge Cake 
Adapted from Huan's Sweets
Makes a 18cm sponge cake

150g eggs (about 3 large eggs)
110g castor sugar
100g all-purpose flour
26g butter
40g milk 

Method: 
  1. In a metal mixing bowl over a bain marie, add in the whole eggs and castor sugar and whisk until the mixture reaches about 40°C. Remove from the bain marie and using a mixer, beat the egg-sugar mixture on medium-high speed until you get almost stiff peaks. The mixture should take about 20-30 seconds to disappear into itself. Following that, reduce the speed to low and beat for 15 seconds. This is to ensure that the air bubbles in the mixture are not overly large. 
  2. Then, heat the butter and milk until the butter is melted, and allow it to cool to about 40°C.
  3. Sift the all-purpose flour into the egg mixture and gently fold the flour such that the egg mixture does not over-deflate. Once all the flour has been folded in, add in the cooled butter-milk mixture and continue to fold gently until it is fully incorporated. Pour the batter into a lined and greased cake tin, and make sure to rap the cake tin against the counter a couple of times to ensure there are no huge air bubbles in the batter. 
  4. Bake the cake in a preheated oven at about 160°C (fan-forced) for about 25-30 minutes. Allow the cake to cool on the counter for at least 15 minutes before releasing from the cake tin. 


As for the other parts of the cake:

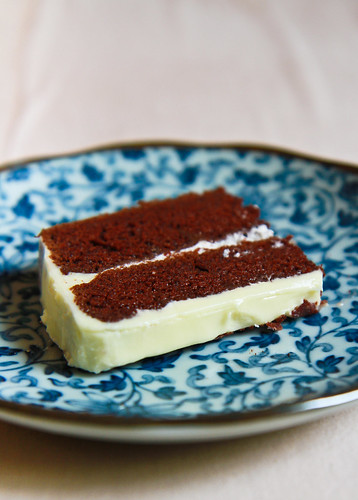
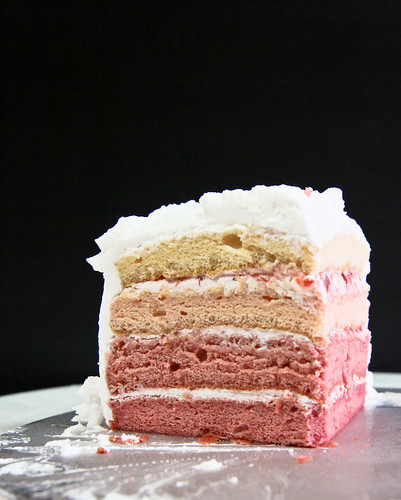
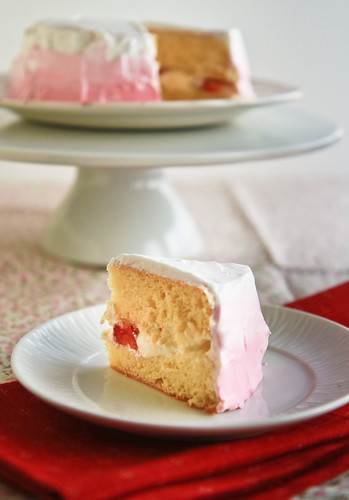
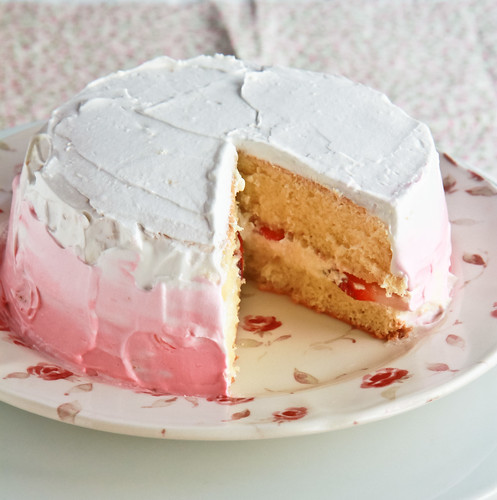
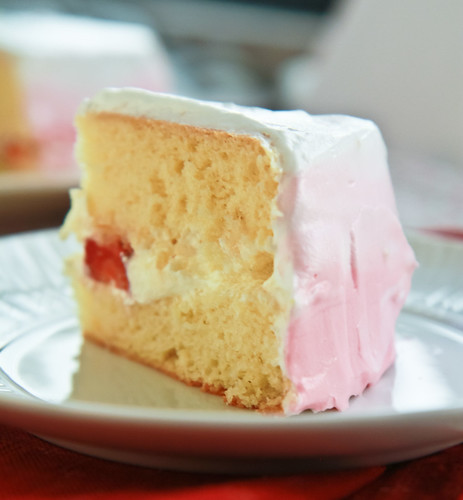
I skipped on the sugar syrup (although I think this would have greatly helped the dry cake) and used the stabilized whipped cream from my strawberry shortcake recipe, but added a couple drops of natural red coloring to get the desired shades of pink. I also added fresh strawberries in the middle cream layer.


Janine's jots: 
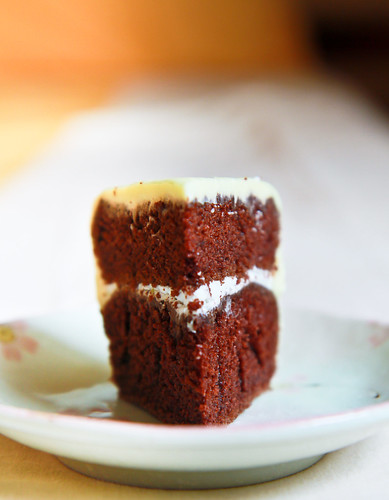
  • Taste: Sponge was sufficiently sweet, although the egg smell was very prominent because no vanilla was added. 
  • Texture: Like I said, I was not a fan of the cake. I found the texture way too rough for a sponge cake, although it was fluffy. 
  • Storage: The cake stores pretty well in the fridge - it lasted about a week, but if you didn't add sugar syrup to the sponge layers, beware that the cake will be VERY dry. 
  • Would I make this again?: Unlikely for the cake, although the ombré is definitely something I'll repeat because it's so simple to achieve but the results look fantastic!

Tuesday, June 5, 2012

Travel Tuesdays: Levain Boulangerie and Patisserie, Kuala Lumpur

I can’t believe this is only my 9th instalment of Travel Tuesdays! I first started this to make sure that I was diligent about uploading and sieving through my travel photographs, but I’m afraid I’ve yet to stick to that goal. I have to admit that sometimes, when I do look through my photos, I too am surprised by what I see - photographs do tend to record things that you never did notice ;p

As I have alluded to here, I went up to KL on a short impromptu trip over the Vesak Day holiday weekend, and the aim of the trip was to stuff myself silly with good food. And that I did. I always have this ‘list’ of places to eat at for almost every destination that I want to visit, so it’s no surprise that I’ve got a very lengthy list for KL, which I regard as my third home, after JB and Singapore.


High up on the list was two places – Levain Boulangerie for the breads, pastries and cakes, and Les Deux Garçons for their French entremets. I was not disappointed at each place. Maybe it’s because I’m looking at the prices with a ‘Singaporean’ eye, but everything was so darn cheap! Cakes per slice in Singapore cost anything from $6 up, so for a cake to cost in the vicinity of RM10 was a pretty good deal for me.
Sadly, I didn’t get too good photos of LDG’s cakes or the place itself, because it was pouring cats and dogs and I didn’t take my camera with me. The cakes didn’t make it back well either, but suffice to say that they are really good! I was very impressed with the care they took in the packaging and the entire look of the place, although I do hope that they come up with some new cakes by the time I return to KL in August because there were probably about 10 types of cakes and tarts in the counter and when I asked, they said that this was all the variety that they had and the flavours don't change. Huh.


So back to Levain. Levain is my kind of bakery. It's one of those large homey refurbished colonial houses, or 'cottages' as I would like to call them, and the entire place has been renovated (for a cool million I heard). It actually reminds me of MANY such places in Australia, which have these types of bakeries in abundance, and not so much European/continental bakeries. I was half expecting for Levain to let me down in some aspect, because it sold everything – warm food, breads, pastries, cakes, and even macarons! But...I must say that I am pretty impressed on the whole! I went with a huge group of relatives, so I was able to try just about everything. Their beverages, pastries, pizzas, spaghetti, soup, cakes, macarons, breads – ALL CHECKED! Everything was more than passable, and I was very impressed with a few items.

Let’s go down to the nitty gritty shall we?

When you first walk into the bungalow cottage, (you first have to get pass the problem of very-hard-to-find-parking), you will be greeted by the cashier and the bakery proper on the left. On the extreme left, lies the bakery which contains the stone oven which they use for their breads. Mind you, I see normal commercial ovens too, so I suspect only pizzas and the crusty continental breads get their baking in the stone oven.

I liked the self-service aspect of it – if you're just getting the breads to go, you can grab a tray, then head to the cashier to pay up. If you're looking for a seat, I'll recommend you looking for a seat first, noting down the number and going down to order. There's seating downstairs and upstairs, inside and out. The view differs from room to room, so take your pick! You can (or have to) ‘chope’ your seat with a ‘reserved’ tag before making your way to get your food. As for warm food and beverages, they’ll be served to you, so be sure to remember where you are seated. Water and other cutlery are available at counters in each room.


Onto my review proper. For the clueless, levain actually refers to a starter that French bakers used in their baking. And this is perhaps the selling point of this bakery, that all their breads make use of this special levain, or natural yeast as they like to call it. I personally prefer the term sourdough, but well, to each his own. Admittedly, because I was there for the 'levain' items, I was quite disappointed to see a very small variety of actual European-styled breads. I guess that's mainly because Malaysians still like their soft and sweet buns, so European breads, which tend to be crusty, can be pretty hard to sell. Besides, other than the usual baguette, I'm sure more than half of the patrons probably have no idea what European breads I'm referring to.
I tried the 'natural yeast' baguette, which I asked them to slice and toast for me. I didn't quite like it - although it was nicely crisp and all, I expected a slight tinge of sourness or at least some complexity in the taste of the baguette but... nothing. It was a very flat taste, and very reminiscent of normal yeasted baguettes, so I was disappointed that their levain didn't taste good enough. But mind you, I am comparing to the baguettes that I had the privilege of eating in France, so it is perhaps an unfair comparison. The baguette was good, just not great. 

As for the other breads, I read that the bakers actually come up with at least 4 new items each month, which is really impressive! I managed to snitch bites of a couple of other breads, such as the walnut ring thing that you see in the background in the photo above, as well as other 'japanese' style soft sweet breads. The breads were pretty much standard, and the prices were quite hefty (at least RM 3) for each, but I guess we're paying for the experience? A good bet however, would be their sandwiches. They have quite a few varieties available, and the portions are enough for one for lunch.

As for the pastries, I liked them :] I had the croissant, the almond croissant as well as the danish pastries (the sultana one). I liked that they used the yeasted versions of these pastries, and that each layer/lamination was very crisp and well done. The almond croissant was really good - I liked the almond paste on the inside - it didn't reek of almond extract, and the sweetness was just right. Same with the other pastries.


As for the macarons - MAJOR GRIPE. WHY WHY WHY do they spell them as macaroons? For a bakery to name themselves after something French, it is unacceptable that they got the spelling of MACARONS wrong! It’s not macaroons for goodness sake! GAH. I certainly felt that it was incongruent to sell French confections and not know how to spell them properly >.<

I can't remember the exact price of each macaron, but I was told by my cousin that the macarons here are quite costly as compared to other places. However, they are also one of the best. So I guess you're paying for good quality stuff! Levain has approximtely 15 flavors on sale each day, and out of those I tried, I was pretty impressed with the strawberry, which had fizzy candy to give it an extra pop. The other flavors were good as well, not overly sweet and overwhelming, and all very well done. I was impressed also with the fact that the feet were nicely frilled for most of the macarons and the sizes and filling quite uniform across the board. Thumbs up!


As for the cakes, I had the Noisette (Hazelnut Dacquoise, Dark 62% Mousse, Chocolate Flourless Cake, Pralinosa Mousse), Mango Passionfruit tart and Raspberry Pistachio Cake. I'm not sure if those are the exact names for the latter two, but I can't seem to find them on the website any longer. They probably are out of season by now. In any case, no loss if you want to try them because out of the three cakes I tried, I was most impressed with the Noisette. You can probably give the other two a pass since the raspberry tasted very sugary and fake, as did the pistachio (there just wasn't enough real pistachio) and the mango-passionfruit quite normal. I tend to prefer a crispier and more well baked pate sucree, so the tart crust was below par for me. Nevertheless, I think each cake cost me RM7-9, so it was pretty cheap and value for money! Do try the noisette - I really enjoyed the praline mousse and the hazelnut dacquoise - I thought the layers were very well balanced between chocolate and hazelnut.


As for the other hot meals, we had two pizzas, which are available from 12pm to 8pm, and we had spaghettis and soups as well. The pizzas start from RM14 for medium sizes and RM20 for large sizes. The large is probably enough for two people for a meal. Very decent prices, and you get to choose whether you want a thin crust or a 'roman' thick crust. The bottom pizza picture shows the thick crust. Really pretty good stuff!

As for the soups, I had the minestrone and mushroom, both to dip the sliced baguette in, nothing too fantastic to rave about, but nothing below average either. Their spaghetti was pretty good - I had the spaghetti in arrabbiata sauce, and the sauce was nicely hot with chilli padi and the spaghetti nicely al dente.

So all in all, Levain gets my two thumbs up! Definitely worth a visit if you're in the vicinity, and if you're a tourist, the place is just off Jalan Imbi, but it's quite a fair walk (especially under the harsh sun) and I'd certaintly recommend taking the taxi there if you can afford it. It's a great getaway in the middle of the city, and definitely a novel experience :]
Details

Levain Boulangerie & Patisserie

Address: 7 Jalan Delima, 55100 Kuala Lumpur, Malaysia
Contact: +603 2142 6611
Opening hours: Mondays to Sundays, 0730h to 2100h
Price: $ (starts from RM3 for a bun)

Thursday, May 31, 2012

Chocolate Layer Cake with Cream Cheese Frosting

I'm quite a horrible procrastinator. I remember almost a year ago, seeing similar entries on Lena, Zoe and Joyce's blogs, and then realizing that they were doing a small bake-along where all three of them would try the same recipe and post them on the same day. This Bake-Along was very useful for people like me, because I am usually hesitant to try new recipes, but with three different opinions from three bakers saying that X recipe is good, I definitely felt more confident in attempting those recipes.

And I'm pretty sure that this was the experience of many other home bakers as well, who have gradually joined in the bake-along. As for me, well, I'm sure that all three hosts are quite sick of seeing my comments saying that 'I hope to join for the next bake-along', but when the next one comes along, I never do join. So....what better time to join than on their first year anniversary? :]
Only one slice was left for the 'photoshoot'

So here's my virgin entry to Bake-Along on their first anniversary and I really hope that I'll be punctual with the upcoming few, because I do love the upcoming ones - crumble and scones, a few of my favorite things to eat! And of course, layered cakes, which is the reason why I'm joining this time. iI love to eat layered cakes, because I love how creative you can get with just mixing and matching the layers and filling, and also because layered cakes are usually celebration cakes, my favorite type of cake to eat :]

So for this chocolate cake, I remember digging it from this treasure trove of chocolate cake recipes I found on the Bon Appétit website, 10 years of chocolate cakes, BUT the problem is that I can't exactly recall which chocolate cake recipe from Bon Appétit actually inspired this recipe, but I'm thinking it should be somewhat similar to this one. In any case, the ingredients and method has been so modified that it doesn't matter. And if you do happen to click on the first link, notice that you will only see ten pictures of chocolate cakes with the year 2000 to 2010 underneath each, but do click on the pictures because that will lead you onto even MORE chocolate cake recipes for that year.

I've been slowly baking my way through the recipes, and the reason why I chose this one below is because it was simple (only one-bowl required) and it didn't require the use of melted chocolate, buttermilk or sour cream, all of which I didn't have. It only requires pantry staples like cocoa powder and milk, which is fantastic for times when you have a chocolate cake craving.

Look at those tight crumbs! YUMMY :]

 
One-bowl Chocolate Cake
Adapted from Bon Appétit
Makes a 6"/15cm cake

For the cake:
120g castor sugar
125g all-purpose flour
35g cocoa powder
1 tsp baking soda
¾ tsp baking powder
½ tsp salt
120ml milk
55g butter, melted
1 tsp vanilla
1 egg

120g boiling water
2 tsp espresso or coffee powder

For the cream cheese frosting:
120g cream cheese
55g butter
85g powdered/icing sugar

Method:
  1. In a cup or bowl, add the coffee powder into the boiling water. Allow it to steep while preparing the other ingredients.
  2. In a large mixing bowl, sift together the flour, cocoa powder, baking powder and baking soda. To that, add in the salt and sugar. 
  3. Then, add in your 'wet ingredients', the melted butter, vanilla, milk, egg and the cup of coffee from step 1. Mix together all the ingredients until no visible lumps remain. Pour the batter into a lined or greased 6-inch pan, or a cupcake pan with 8 cupcake liners.
  4. Bake at 160°C for about 30 minutes for the cake, or 20 minutes for the cupcakes. An inserted skewer should come out with almost clean with a few crumbs. Allow the cake to cool in the pan for at least 15 minutes before removing to cool on a cooling rack. You have to wait until the cake is completely cooled before attempting to slice it into two layers.
  5. In the meantime, prepare the cream cheese frosting. The cream cheese and butter should be at room temperature, but should not be too soft. I find that a good estimate is to remove them from the fridge for about 15 minutes before making the frosting. In a mixing bowl, cream the cream cheese and butter with a handheld or stand mixer, or with a wooden spoon. The mixture should appear homogenous in color (butter is slightly yellow and cream cheese is off-white, so these colors should be well-combined together) and once it appears light and fluffy, sift in the icing sugar, making sure to cream well, until all the sugar has been incorporated. If the cream cheese frosting is too 'soft', store it in the fridge while preparing the cake layers.
  6. Once the cake is completely cooled, slice it into half with a serrated knife. Add a thin layer of cream cheese frosting on one side of the layer, before sandwicing the two layers together. Add another layer of frosting on the top and sides of the cake, and refrigerate until firm. The recipe above gives you enough frosting for the 6" inch, but only for a very thin layer of frosting, so if you're a frosting monster and have a sweet tooth, I'd recommend doubling the frosting recipe for a thicker layer all around. Bon Appétit! 

Janine's jots: 
  • Taste: The cocoa powder features very prominently here, so be sure to use good quality cocoa powder, and please don't skimp on the coffee because it does bring the chocolatey-ness up a notch. Trust me.
  • Texture: The cake is moist, and doesn't have overly tender crumbs, which is good in a cake which you want to cut into layers.
  • Serving size: Enough Since it's only a 6" cake, it can only feed about 8 persons, assuming you have a tiny slice each.
  • Modifications: None! Enough have been made!
  • Storage: If unfrosted, the cake freezes very well, for almost a month. If frosted, keep in the refrigerator for not more than one to two weeks because the cake will lose its moistness after that.
  • Would I make this again?: Maybe...not because it's not a good cake, but there's so many other chocolate cake recipes to try! This will definitely be one to-go-to cake, because it's very simple to make, and you will always have the ingredients handy!
So join in for the bake-along! :]
 

Tuesday, May 1, 2012

Green Ombre Pandan Chiffon Layered Cake

I have been in a blogging rut of sorts this past week. No oomph to post anything even though I have got a couple of recipes that I've tried later that I should blog about. The other reason is work I guess. I’ve been going home at about 10pm everyday, which means I’ve only got energy left to bathe and sleep when I get home. Even exercise plans have been put on hold because I can’t bring myself to wake up at 6am for my run. And plans to run near the office have not materialize because I much rather complete my work and get home than run and work later. Like today, I slept in late till 8am (because of my darn body clock) and finally am going out for lunch with the girls later. But after that, it's back to work - yes, even though it is Labour Day :/ 

Anyway, I really wanted to support Aspiring Bakers this month in April (cos it's 1 May today!) because layered cakes are really a favorite of mine to make, and I had a couple of birthdays this month to bake cakes for, but sometimes the best laid plans of mice and men go awry. Plans to make a chocolate entremet were also put on hold, even though I've already got the joconde and feuilletine layer done. As Benjamin Franklin once said, diligence overcomes difficulties, sloth makes them.


SO even though I've missed the deadline for Aspiring Bakers, I have decided to exercise some diligence by posting up some instagram photos (with various effects) of this layered chiffon cake that I made for my brother for his 21st birthday earlier this year. This was when I was in my ombre craze - cue the pink ombre layered cake I made for my mom and perhaps a ton other color gradients (brown, blue, yellow, etc) which I experimented with :]

Since my brother doesn’t usually like to eat my cakes, I actually had no plans to make any for him, but I was back at home idling and itching to make a cake, so I decided to make him one anyway even if he didn't want it. I don't have much baking equipment back in my home in Malaysia, so I had to make do with what I had. So that meant that chocolate cakes were out since I didn't have any cocoa powder back home. What I had however, was lots of pandan because my mom has a pandan plant in the garden. So I decided on a green ombre cake, made using pandan leaves and a tad of green coloring for the darkest green layer. This was perfect, because I know my brother loves traditional flavors and since he's in the army, what better color to represent him that green? :]


I try to stick with as natural coloring as possible, so the bottom two layers are made completely with natural pandan extract pounded with a mortar and pestle whereas the final layer had a little help from a few drops of green coloring. I know the cream sandwiching the layers are very meagre, but that's really because my brother is not a fan of cream of any sorts, and would scrap off any cream he sees on a cake, so I decided to save him the trouble by putting minimal cream in between and very 'scrapable' whipped cream on the outside. 

My Mother's Pandan Chiffon Cake 
Makes 3 x 6 inch round cakes or a 23cm chiffon cake 

5 egg yolks
60g olive oil or melted butter
70g castor sugar
 ¼ tsp salt
110g pandan juice*
125g all-purpose flour
Green coloring, where required

6 egg whites
140g sugar
⅛ tsp cream of tartar

*Make pandan juice by pounding at least 20 pandan leaves with 100g of water or milk. I make mine with milk. You can blitz the leaves if you don't have a mortar and pestle. 

Note: I have not compared my mom's recipe with other recipes, but I'm pretty sure that this recipe is similar to many other pandan chiffon recipes out there. Nevertheless, I still stand by this being my mom's original recipe because the amounts are derived from my mom's twenty years of experimentation in the kitchen. Also, the method below outlines the traditional method of making the pandan chiffon cake. How I actually made the layered cake will be outlined in my jots below. 

Method:  
  1. Preheat the oven to 170°C. 
  2. Place the egg whites, sugar and cream of tartar into a mixing bowl and beat with an electric mixer until stiff peaks form. This should take about 5 minutes or more depending on the power of your mixer. You should be able to overturn your bowl without anything falling out of it. 
  3. In another large mixing bowl, mix the egg yolks with oil, salt and sugar. Do not add the sugar directly onto the yolks because it will turn lumpy. Mix the yolks with oil first before adding the salt and sugar. Then, add in the pandan juice and all-purpose flour. Mix well until you have a smooth paste.
  4. Spoon a tiny portion of the egg white mixture (about ⅛ or 2 spatulas worth of egg white) and mix it into the egg yolk mixture to loosen the mixture. Then, lightly fold in ⅓ of the egg white into the yolk mixture. Continue folding in the remaining egg whites, making sure that it is well combined and you get a homogeneous pale green batter.
  5. Pour the batter into 3 6-inch round tins (ungreased and unlined) or a 23cm chiffon tin. Give the tin a few raps against the kitchen counter to ensure that there is no trapped air. 
  6. For the 6-inch rounds, bake for about 25 minutes. For the 23cm chiffon, bake for about 35-40 minutes. The top of the cake should be a light brown and an inserted skewer should come out clean. 
  7. After removing the tins from the oven, invert the tins immediately over a cooling rack. Allow the cake to cool for at least 20 minutes before unmoulding and serving. 


Janine's jots:  
  • How to make a layered ombre cake: If you are lazy like me and don't wish to repeat the same processes above three times just to get three different colors, you can opt for the lazy method by making the above recipe and dividing it into three batters. First, you have to make a 'concentrated pandan juice'. I did this by pounding the pandan leaves with 50g of water, which gave me a very dark green liquid. I then diluted this with varying amounts of milk to get three different color gradients. What I did then was to combine the egg yolk mixture with all the ingredients except the pandan juice, then dividing the portions equally into three bowls before mixing in the pandan juice. For the darkest mixture, I added in a few drops of green coloring to get the dark green color. You cannot get such a color with just natural pandan extract, trust me. As for the egg whites, I was lazy too, so I measured the weight of the bowl before and after mixing the whites and then apportioned the stiff egg whites between three bowls and folded them in gently. Bake as per above. As for the whipped cream in between the layers on the outside, you can use a stabilized whipped cream recipe or you can opt for the lazy method (like I did here) and whip 200g of cream together with 30g of icing sugar. Whip until you get almost stiff peaks and you're done. 
  • Taste: I'm not quite a fan of pandan chiffon - I tend to prefer orange chiffons, but I could tell that my brother and my family enjoyed the cake a lot and I thought the pandan flavor was not too overwhelming. Just perfect :]
  • Texture: Because I used round tins instead of the standard chiffon tin, the chiffon cake was slightly more compact than usual, mainly because the cake requires metal in the centre to assist it in rising. Nevertheless, the chiffon cake was still delicious. 
  • Serving size: This makes a 3 layered 6-inch cake, which is just enough for a family of five to have about 1-2 servings each.
  • Modifications: None. If you want a more traditional taste, you can opt for coconut milk instead of normal fresh milk. Or you could use kaya to sandwich the layers.  
  • Storage: The cake was consumed right after I constructed it, but usually chiffon cakes without any cream can last a couple of days at room temperature.  
  • Would I make this again?: Definitely! This pandan chiffon cake is one of my mom's hand-me-down recipes to me, and is definitely something I treasure because no further tweaking to it is needed :]

I know the picture quality is rather crappy but in my defence, these are iPhone pictures captured in low light and were extremely hastily taken. I'll come back with nicer pictures of other cakes next time! If I can find the time to...

Saturday, April 7, 2012

Steamed Banana Cupcakes

Only now do I understand the joys of public holidays falling on a Monday or a Friday because it means long weekends yo! A few days ago on Monday, I was thinking that three days is a lot of time to bake, but was struck by sudden inspiration to head up north to KL! I asked my brother if he wanted to and lo and behold, a plan was formulated within minutes :] I do so love impromptu-ness! 

So now my brothers, mom and I are in KL over the long weekend for a food trip! :D We initially wanted to drive up to Penang to gorge ourselves silly, but decided we didn't have enough time to do so, so we've limited ourselves to KL (and Selangor) to stuff ourselves. Thus far, I've had Rakuzen for lunch, damn good fruit rojak with tofu and sotong, dropped by Ben's Independent Grocer at Republika and had really good pork ribs/pizza/risotto for dinner. This morning I had really damn good nasi lemak for breakfast (Najib goes there for his nasi lemak fix as well yo!), then an assortment of bread for lunch, Taiwanese dessert and there's still French patisseries, seafood and pizza left on the to-eat list!


Malaysia Sayangi. Having spent more than half of my life in Singapore, my friends always ask, why not be a Singaporean since you're more than halfway there already? Singapore might be my second home, and I might know the Singaporean national anthem better than the Malaysian one, but well, Malaysia Sayangi sums it up pretty well. It's my country, and it's where I call home.

Coming up to KL always makes me proud of my country. Singaporeans like to say that Singapore is a cosmopolitan country and all, but honestly speaking, I always feel that KL (and Selangor) beats Singapore hands down. Granted, KL might have its dirty and unsightly areas, but in my opinion, it's like an unpolished gem which still hasn't seen its fullest potential. Anyway this mini-rant arose because of discussions with my relatives about corruptness, politics and the plethora of good food one can find in KL.


The following cake however, has nothing to do with anything. I was hoping to eat this really good banana leaf curry rice (literally on a banana leaf) and I thought of eating these steamed banana cakes which are really simple to make. I first made this a few weeks ago, when it was too hot to switch on the oven, and I didn't want to fire up the huge oven just to bake a couple of muffins. I also wanted something fast, so steaming is really the fastest way to achieve something 'cakey' in the shortest time.

The cupcakes are a little sunken, because I used a tad too little raising agent and I didn't have enough metal tins to go around, so some of the cupcakes turned out as banana pancakes, but they were yummy all the same.  

Steamed Banana Cupcakes
Very slightly adapted from Aunty Yochana

100g banana, mashed
½ tsp vanilla extract
½ tsp baking soda
⅛ tsp salt

65g egg
45g brown sugar
50g all-purpose flour
½ tsp baking powder
30g olive oil


Method: 

  1. Whisk the mashed banana, vanilla extract, baking soda and salt together in a bowl and set aside. 
  2. In another bowl, whisk the egg and brown sugar until pale and fluffy. 
  3. Then, fold in the flour and baking powder (sifted together once) into the egg and sugar mixture. 
  4. Gently fold in the mashed banana mixture and finally, fold in the olive oil. 
  5. Pour into lined cupcake moulds (preferably metal ones) and steam them for about 10-15 minutes on high heat until a tested skewer comes out clean. 

Janine's jots: 
  • Taste: Do use very very ripe bananas because somehow steaming makes the banana taste more prominent than usual. I would also prefer using less vanilla to allow the banana taste to show through even more. 
  • Texture: Extremely soft and spongy. 
  • Serving size: Makes about 8 small cupcakes.
  • Modifications: Like I said, I probably would add a tad more baking soda to allow a slightly more raised end-product because sunken cupcakes don't look so attractive :/
  • Storage: These keep well in the fridge (they don't store well at room temperature because the tops will turn moist and sticky after a while). Just give them a short zap in the microwave or steam them at 5 minutes on medium heat. 
  • Would I make this again?: Definitely - it really is a good alternative to baked banana muffins on a hot day :]


Alright, short break between teatime and dinner is over - I'm off for a yummy seafood dinner now :]


Thursday, March 1, 2012

[Thursday's Trio] Multigrain Banana Loaf (with Sorghum)

There was a time, not too long ago, when my life merely revolved around white flour and wholemeal flour. Like I mentioned in my previous Thursday’s Trio post on buckwheat, it was blog surfing that introduced me to looking outside the “wheat box” and boy am I glad I did!

Today’s flour of the day or Thursday's Trio is sorghum flour, or jowar flour as it is known to many Indians. In my last post, some asked me what is sorghum and hopefully this post today will answer all your queries and perhaps whet your appetite to try out sorghum for yourself!


As with many cereals and crops, sorghum was originally cultivated in Egypt, and it continues to be a staple food source in Africa. I guess one main reason why it has lived through the ages is because of its sturdiness and resistance to drought. Over in India, it is commonly used, and appears in foods like jowar roti and other flatbreads (chapattis) all over India. You can check out some jowar roti recipes here here and here. They use pretty much the same proportions. And yes, I bought my pack of sorghum flour from the Indian shop as well :]

Sorghum has gained popularity recently because it is gluten-free and people suffering from celiac disease can safely enjoy foods made with sorghum. Sorghum is seldom used alone, because it is bland (flavourless). That being said, its neutral flavour and light colour is also precisely the reason why it is used as a substitute for wheat flour since it does not alter the taste and smell of the finished product. It does alter texture however – it results in a crumbly end product because of its lack of gluten, so it is usually used in tandem with rice or corn starches or more fat.


Three interesting facts on sorghum
  1. Sorghum is the 5th most important cereal crop grown in the world! It is typically used as a replacement for wheat in India and Africa. And what’s even more interesting is that it is also known as “Milo” in Spanish!
  2. There was once when the nutritional benefits of sorghum were not known – in fact, the UNFAO found them to have “poor nutritional quality”. Nowadays, sorghum is known as the next “superfruit” for its high antioxidant power – studies have shown that it has 4-12 times MORE antioxidants than fruits like pomegranates, acai berries, and blueberries!
  3. Sorghum is also high in insoluble fibre, which is helpful for improving digestion and bowel movement. Also, the starch in sorghum is more slowly digested than other cereals, which makes it friendly for diabetics because it controls blood glucose.
Three ways of using sorghum
  1. Sorghum is also used to produce sorghum sorghum syrup or molasses, which is used as a sugar substitute. The stalks of the sorghum plant are harvested, crushed like sugar cane to produce the syrup. Just check out this recipe for instance.
  2. Sorghum grains can be ‘popped’ just like popcorn, and they taste even better!
  3. You might not know this, but sorghum grains are usually found in the ten-grain mixes (十谷米) that you can find in organic food stores.
Three interesting recipes I’ve bookmarked from blogs
I couldn’t find local blogs using these recipes, so I’ve picked some from my favourite blogs, and I’ve cheated a little by including three of each category below to show you how versatile sorghum can be!
  1. Tart crust containing sweet white rice (glutinous rice), millet, cornstarch and sorghum by Tartlette
  2. Chocolate chip cookie using sorghum flour, millet flour and tapioca and corn starches

How to store sorghum flour?
Most recommend storing sorghum (and all other flours) in a sealed, airtight container and placing it in a cool dark place. If you're afraid that it'll deteriorate under the tropical heat, just store it in an airtight container and place it in the fridge :]


Gluten-Free Banana Loaf
Makes a 6" round cake or 15cm loaf and a couple cupcakes 
50g butter
45g brown sugar
25g castor sugar
55g egg (without shell)
150g banana, mashed
90g gluten-free flour mix* 
¼ tsp xanthan gum
¼ tsp baking soda
½ tsp baking powder
½ tsp cinnamon
½ tsp vanilla extract
50g milk

*I used a mixture of the following: 15g almond flour, 15g millet flour, 15g sorghum flour, 15g rice flour, 15g tapioca flour, 10g corn starch and 5g ground flaxseed.

Method:
  1. Preheat oven to 160°C.
  2. Sieve the various flours, xanthan gum, baking powder, baking soda and cinnamon together. Set aside.
  3. Cream butter until softened. Add in the sugars and cream until fluffy. Add in the egg and beat well, for about 1 minute or until mixture does not appear too curdled. 
  4. Next, add in the mashed banana and mix well. 
  5. Sieve in half of the dry ingredients, beating until all traces of flour disappear. Add in half of the milk and mix well. Repeat with a quarter of the dry ingredients and the remaining half of the milk, and end with the last quarter of the dry ingredients. You should get a smooth cake batter at this stage.
  6. If baking as a round cake or loaf, bake for about 30-35 minutes until a skewer comes out clean. If baking as cupcakes/muffins, bake for about 20 minutes, or until the tops turn golden brown. Let cool for about 15 minutes on wire racks before serving. The cake tastes best the next day, after it is fully cooled and the cake has had time to develop its rich banana flavor. 


Janine's jots: 
  • Taste: I upped the cinnamon this time around and I much prefer this cake because of the added spiciness.
  • Texture: Because of the lack of gluten, the loaf is slightly more compact and moist in the centre. But this could also be because of the greater amount of liquid (I used 50g milk instead of 20g per my previous recipe), greater amount of mashed bananas (150g instead of 120g) and smaller amount of sugar (70g instead of 90g). The batter is slightly more liquid than usual as well.
  • Serving size: I used a small loaf tin and made tiny cupcakes with the rest of the batter. If you want a nice and tall loaf, I suggest using a 15cm or (4 x 7) loaf tin!
  • Modifications: I would probably stick to the original liquid and banana amounts (about 20g milk and 120g banana) because I found this gluten-free version a little dense in the centre for my liking. I much prefer a breadier texture for my banana loaves. But this purely be because of the lack of gluten here. I haven't had enough attempts to determine my optimum proportions yet ;p But my mom did enjoy its moistness and said the extra banana made it super yummy.
  • Storage: Because the cake contains banana, it only stores well for a day at room temperature in our tropical climate. After that, the cake will feel a little sticky. I would advise keeping the cake in the fridge, and it will taste good for at least a week. If you prefer, give the cake a quick 5s zap in the microwave and it will be slightly warm, perfect with a cup of tea in the morning :]
  • Would I make this again?: Yes definitely! Check out my previous recipe here!


Check out the dense (and moist) crumb!


Friday, February 24, 2012

Healthy Banana Sponge Cake-Loaf

Just a quick post this week, mainly because I haven't been feeling well. I'm still feeling a little under the weather now, but hopefully next week I can start afresh without feeling all queasy and ill. Anyhow, work's been pretty slow this week, so I've had time to think of what to bake this coming weekend. If only I had more bananas, I'd make another round of this banana cake/loaf. I've been enjoying slices of it over the past week, because it's been keeping well in the fridge, and I particularly enjoy it with my hot cuppa' milo in the morning.

I've also been contemplating what to call this - a banana cake or a banana bread or a banana loaf? I have no idea what's the real difference between all of them actually - I would think the main difference lies in the crumb and the method of making, followed by what kind of pan you actually place the batter in. So if that's the case, then my creation should most probably be called a banana cake-loaf since a banana bread merely uses the muffin method.

The original recipe was a normal banana sponge cake recipe, with a sponge cake method of whisking whole eggs to ribbon stage. I changed the recipe from an 8-inch cake into a loaf pan and mini cupcakes, and swapped out most of the white flour to various flours I had on hand. I also switched the method from whisking eggs (which I still suck at) to a basic butter and sugar creaming method. Main reason being I don't like using oil and I suck at whipping eggs to ribbon stage and I desperately wanted my banana cake craving to be satisfied.


And because I wanted it to be no-fail, I went along with a pretty popular recipe on the local blogosphere. You would think that no-fail means following the recipe to a T, but oh no that's not how I work. I merely used the recipe for its proportions because honestly, I didn't want to start from basic ratios and play around with the quantities until I got a right one, which is why I'm giving credit to the original source below, even though you will later see how much I massacred it. Being in the profession that I am, I think very highly of copyrights and intellectual property, which is perhaps why I find it very repugnant that some people have the gall to post recipes which are exact copies or very similar to famous recipes without giving proper accreditation. Even if you were merely inspired by a particular recipe, I do think it's important to give credit when it's due, because after all, you were inspired by that recipe to come up with something of your own! And imagine how much hard work that particular person had to put in, trying failures after failures, just to come up with those golden proportions. Just my two cents really - there are far better posts on the internet on recipe accreditation and copyrighting your recipes (which is a misnomer really, but that's a story for another day).

Original recipe
Adapted from Wen who adapted it from Richard Goh's baking class
Makes an 8" round cake

150g eggs, room temperature
130g sugar 
200g banana, mashed
150g cake flour (or top flour)
½ tsp baking powder
¼ tsp baking soda 
100g vegetable oil 

Method:
  1. Preheat oven to 160°C.
  2. Grease & line a 8" round tin with paper.
  3. Sieve flour, baking powder & soda together. Sieve twice & set aside.
  4. Whisk eggs, sugar & banana at maximum speed until you reach the thick ribbon stage, approximately 10-15 minutes. 
  5. Fold in the dry ingredients until all traces disappear. 
  6. Add in oil and fold well until the batter is shiny and flawy. 
  7. Bake for about 40-45 minutes, until golden brown. 


Janine's Banana Cake-Loaf
Makes a 6" round cake or 15cm loaf and a couple cupcakes 

50g unsalted butter 
¼ tsp sea salt
90g egg 
80g sugar (40g white and 40g brown) 
120g banana, mashed
100g all purpose flour* 
¼ tsp baking soda
½ tsp baking powder
¼ tsp cinnamon
½ tsp vanilla extract
20g milk 

* I used 45g AP flour, 10g oatmeal flour, 15g almond meal, 15g millet flour and 15g sorghum flour. 

Method:
  1. Preheat oven to 160°C.
  2. Sieve the various flours, baking powder, baking soda and cinnamon together. Set aside.
  3. Cream butter until softened. Add in the sugars and cream until fluffy. Add in the eggs and beat well, for about 1 minute or until mixture does not appear too curdled. 
  4. Next, add in the mashed banana and mix well. 
  5. Sieve in half of the dry ingredients, beating until all traces of flour disappear. Add in half of the milk and mix well. Repeat with a quarter of the dry ingredients and the remaining half of the milk, and end with the last quarter of the dry ingredients. You should get a smooth cake batter at this stage.
  6. If baking as a round cake, bake for about 30-35 minutes until a skewer comes out clean. If baking as cupcakes/muffins, bake for about 20 minutes, or until the tops turn golden brown. Let cool for about 15 minutes on wire racks before serving. The cake tastes best the next day, after it is fully cooled and the cake has had time to develop its rich banana flavor. 

Janine's jots: 
  • Taste: I usually use bananas which are very ripe and have many many black spots. I find that those types of bananas (not sure of the name) make the nicest tasting cakes. Do not use the Del Monte type of bananas because the taste just isn't as rich. Also, bananas and cinnamon go extremely well together. If you like a spicier cake (like I do), feel free to up the cinnamon to ½ tsp and add a tiny pinch of nutmeg. The result is exquisite!
  • Texture: Because half of the flour has been replaced with flour which does not produce any gluten, you can actually mix the batter rather vigorously without fear of a dense cake forming because there just isn't enough gluten to be formed with the 45g of all-purpose flour. 
  • Modifications: I think I've made enough modifications to the original recipe already! ;p 
  • Storage: Because the cake contains banana, it only stores well for a day at room temperature in our tropical climate. After that, the cake will feel a little sticky. I would advise keeping the cake in the fridge, and it will taste good for at least a week. If you prefer, give the cake a quick 5s zap in the microwave and it will be slightly warm, perfect with a cup of tea in the morning :]
  • Would I make this again?: I have since made this cake for than a couple of times - in fact, this is my go-to recipe whenever I have overripe bananas! Do check out my follow-up post on yet another modification I made to the recipe!

I think this is perhaps one of my shortest posts to date, knowing how long-winded I am. Have a great weekend y'all! :] I'm looking forward to a bread-making weekend (hopefully work doesn't intrude)!

Monday, January 2, 2012

Mom's Birthday 4-layered Strawberry Cake with Whipped Cream and Strawberry Jam

Before I begin my long spiel, HAPPY 2012 everyone! And hurray for the long weekend ;p


This post is actually a timed post, because as I speak, I probably am having the time of my life shopping and eating, whilst taking a well-deserved break overseas. Anyway, Christmas weekend came and went rather quickly, and with work and all, I haven’t been taking nice photographs of what I’ve been baking recently. I actually wanted to post about the Christmas log I made this year, but I didn't have my camera with me when we had it for tea, so :(

I know I was contemplative the last post, but thinking back on that last Christmas log and eating my current one really makes me very very proud at how much I’ve progressed as a baker. In fact, I think I've come full circle nicely, because this Christmas log cake was probably the first proper cake I made myself, with a new recipe, with the untested oven and with my new mixer. Thinking back, it certainly was horrible and the people must have been lying through their teeth when they told me it was nice. I remember the dense layer at the bottom of the cake, and at that time, I didn’t know what it was caused by. Now, I know so much better, that the dense layer is caused by overmixing of the batter and deflation of the egg whites. I cringe when I think about those guests eating the cake with that dense layer.


So anyway, since this year's log cake was made with my favorite sponge cake recipe and with equally delicious whipped cream and chocolate ganache, it was tons better than last year. My family, my harshest critics, enjoyed it immensely :] Since I don’t have a nice photograph of the Christmas log cake, I’ve decided to blog about my mother’s birthday cake instead. It’s made from the same cake base as the Christmas log cake and perhaps half of the cake recipes on this blog. I know I’ve blogged about this sponge cake time and time again, but it really is my favourite cake. This is not something I write about lightly, because if you could see the countless swiss rolls and sponge cakes that my dogs ate during the time I was experimenting with various recipes, you’d be alarmed.


Here, I've slathered on whipped cream and jam in between the cake slices, as well as brushed each slice with sugar syrup. After that, I crumb coated the cake with a thin layer of whipped cream, then proceeded to decorate it. Be sure to refrigerate the cake for at least an hour after you're done because it allows the jam and alcohol laced syrup to meld into the layers. If you notice, I fiddled with 2 different designs for the cake. I initially wanted it to be covered with roses, but the roses didn't turn out too good because I doubt whipped cream is suitable. Buttercream would be far smoother and give better results. So I 'erased' the roses off and decided to go with simple ruffles at the side and a huge "50" on the top, because my mom turned half a century old!


Alright, so here’s the recipe again for those too lazy to refer to my older posts!


Strawberry Sponge Cake
Not sure why the cake looks greenish here :/

Components: 
  • 4 sponge cake layers 
  • Simple sugar syrup
  • Stabilized whipped cream 
  • Strawberry jam (I used my strawberry-apple jam)

To make 1 layer of sponge cake:
2       large eggs 
30g   castor sugar
20g   all-purpose flour

Strawberry powder (dried strawberries processed into powder form)
1 tsp red coloring (optional)


Method: 
  1. Separate the egg whites from the yolks. 
  2. In a bowl, whisk half of the sugar into the yolks. Sift in the flour and strawberry powder, stirring until you get a smooth paste. Add in the red coloring if using. 
  3. In another bowl, whip up the egg whites until foamy, before adding the remaining half of sugar. Continue whipping until you get shiny, stiff peaks. Mix some of the egg whites into the yolk mixture to lighten it up before folding the remaining whipped egg whites into the yolk mixture. 
  4. Pour into a lined baking tray and rap the tray against the counter to get rid of any air bubbles. Bake in a preheated oven at 180°C for 10 minutes. 
  5. Leave the cake to cool in the tray for about 10 minutes before placing it on the cooling rack. 

For the stabilized whipped cream, 

1 tsp gelatin 
4 tsp cold water
250ml cold heavy whipping cream
30g icing sugar
1/2 tsp vanilla extract

  1. Put all the cold water in a small saucepan and sprinkle the gelatin over the surface. Let it stand for 5 minutes without stirring. Place the saucepan over low heat and stir constantly with a wooden spoon until the gelatin dissolves. Remove the saucepan from the heat and cool to room temperature. 
  2. Combine the whipping cream, sifted icing sugar and vanilla extract. Beat the mixture for a minute before gradually pouring in the cooled gelatin mixture. Continue whipping the mixture at high speed until you get stiff peaks. 

For the simple sugar syrup, 
30g granulated sugar
60g water
1 tsp of your preferred alcohol, or vanilla extract

Combine the sugar and water in a small saucepan and heat the mixture. Stir until all the sugar has dissolved. Allow the mixture to cool a little before stirring in the vanilla extract (or alcohol - I used rum). 


To assemble: 
  1. If baking as sheets, cut out 6-inch circles from the cake sheets. You will be able to cut 2 6-inch circles from the 2 sheets and get quite a bit of excess cake. 
  2. Brush the cooled sugar syrup on each layer. Be sure to brush on both sides of the cake. 
  3. Spread a thin layer of jam on each layer of the cake, followed by a thin layer of whipped cream. 
  4. Stack all the layers together and begin spreading whipped cream in a thin layer on the outside of the cake. This will be your crumb coat. Place the cake in the freezer for about 15 minutes before removing to decorate the cake. Alternatively, you can chill the cake for an hour until the crumb coat has set (i.e. the whipped cream is slightly stiffer) and proceed to decorate as desired. 


Janine's jots: 
  • Note: To get the color gradient, substitute the all-purpose flour for strawberry powder, using a maximum of 15g all-purpose flour and 10g strawberry flour. Also use some red coloring for a more intense red color. For the first two layers, I didn't use any red coloring, merely using strawberry powder to get the red-ness. I made 4x of the batter above, then used my estimation to divide the batter into 4. This perhaps explains why the layers are not too even and the bottom 2 layers are actually almost the same color :/ 
  • Taste & Texture:  I absolutely adore this cake because it's so easy to make. My family loves it too. Just a tiny caveat - this cake is quite ‘spongy’ when it comes out of the oven and tastes pretty eggy without any addition of flavouring, but this is easily amended with the addition of vanilla extract or any other flavouring you desire. 
  • Serving size: This makes a 4 layered 6-inch cake, which serves a family of 5 perfectly for a heavy tea (about 1.5-2 slices per person depending on how large each slice is cut). My family is not a fan of icing or cream, hence the very thin layers of cream between the cakes and on the outside. If you love whipped cream, be sure to double the recipe and be generous!
  • Modifications: You can choose to bake them as sheets, which will take about 10 minutes to bake up - if you touch the top, it’ll be slightly moist and may stick to your finger. So just test with a cake tester and if it comes out dry then the cake is done. You can also choose to bake them in round or rectangular pans and later slice them in half. That works as well. Just increase the baking time to about 20-30 minutes for an 8” round pan.
  • Storage: The cake stores well in the fridge, covered. If you are serving the cake right away, you can choose to forgo the sugar syrup, but I highly recommend using it because it gives you a far moister cake. The syrup also ensures that your cake stays moist in the fridge! 
  • Would I make this again?: Definitely! You might actually realize that this recipe is almost identical to my strawberry shortcake posted a while back - with virtually the same components!


With that, I end 2011 with what I term “a blast” in my own books. As I usher in the New Year, I fervently hope that I will still be able to find time to blog and post recipes to share with you readers. And I’m hoping to come back with a few goodies from my trip to share with you, to celebrate my first year blogiversary with :] 2012 is the start of many new things for me, so here's to many wonderful things ahead!
Related Posts Plugin for WordPress, Blogger...