
It's 14 March today, and to all the geeks (and math-tormented souls out there), Happy π Day :]
For those who have no idea what this sign π means, either you didn't get an education which revolved around learning about areas of circles or you forgot! It's the Greek letter for "pi" or typically pronounced as "pie", which is the ratio of the circumference of a circle to its diameter. Why is today π day? Well, because π is 3.14159 (and it goes on and on and on since it's an irrational number - anyone remember the tune that goes: sine sine cosine sine 3.14159?) and today's 3.14 :]
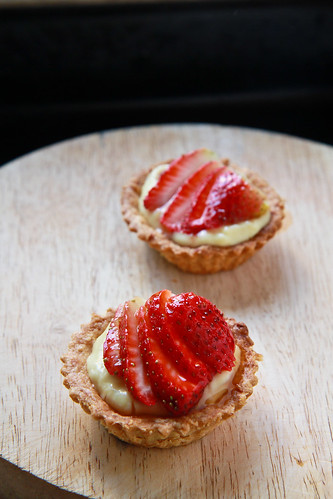
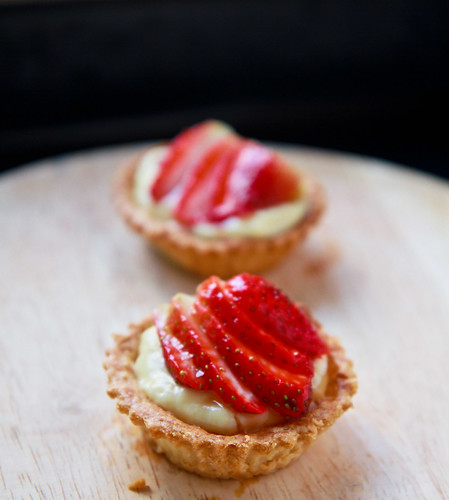
Anyway, I wanted to bake a pie in commemoration of pie day - but I decided on a tart instead because it's easier and I think strawberries taste nicer in a tart than in a pie. What's the difference you might ask? Well, I always thought the only difference was that pies had a top crust and tarts did not, but boy was I wrong. The differences are quite aplenty, and subtle, so much so that I became more confused than enlightened after reading a few websites. Some talk about sloping sides and amount of filling and flavor of crust and so on. According to thekitchn, both the pie and tart can be sweet or savory. However, the tart usually only has a bottom crust, whereas a pie can have a bottom, or top or both crusts. This apparently is the consensus among most people. I tend to agree that this is the key difference - this is affirmed by Oxford Companion to Food, which states that "the difference between a tart and a pie is the former does not contain a top crust." In fact, the Oxford Companion provides an interesting primer to the word pie - "The derivation of the word may be from magpie, shortened to pie. The explanation offered in favour or this is that the magpie collects a variety of things, and that it was an essential feature of early pies that they contained a variety of ingredients.... Early pies had pastry tops, but modern pies may have a topping of something else...or even be topless."
I tend to think that sometimes, names and terminology just gets confusing because people don't really use appropriate names to name their foods - think of galettes and tortes and linzertortes and tarte tatins and cobblers - there are so many variants of pastries using basically the same two things - filling and crust! Think of misnomers like boston cream pie which is technically a cake and not a pie at all! I proffer another reason as to why pies and tarts appear so different - I think it's basically a matter of where they originated from - pies originated in Medieval England, popularized in American culture today (considering early American settlers were English), whereas tarts probably originated in Medieval Europe. Of course, I have to put in a disclaimer here that this is mere speculation on my part since I really have not checked if tarts really did originate from Medieval Europe or elsewhere.
PS: anyone remember the nursery rhyme Sing a song of sixpence which has the line "Four and twenty blackbirds baked in a pie"?
I've to admit that the recipes do get troublesome sometimes - for instance, the chocolate chip cookie recipe requires uneven numbers of egg whites and yolks, and some require a mix of flours, which some people might find a chore. But think of it this way - if it yields the best (insert whatever item you are baking here), then it should be worth the try! At least it'll be better than trying another mediocre recipe and failing, no? The Cook’s Illustrated pie dough recipe is no different, it requires the use of vodka, which not many people have at home, and requires the use of shortening as well, which again, not many people have ready at home. The recipe also uses a food processor, which I believe most locals do not have. In any case, I too don't have a food processor (although I'd love to have one) and I didn't use shortening in the recipe, but I believe the use of vodka did help in making a flaky crust :] If the technique I use for the pie crust looks familiar, it's because it's largely adapted from Rose Levy Beranbaum's technique of cutting the butter into flour for pies.
Foolproof Pie Dough
Adapted from Cook's Illustrated
Makes enough for one 9-inch double-crust pie
Ingredients:
300 g all-purpose flour
1 tsp sea salt
2 tbl sugar
280 g cold unsalted butter, cut into 3-cm cubes
70 ml cold vodka
80 ml cold water
1 tsp sea salt
2 tbl sugar
280 g cold unsalted butter, cut into 3-cm cubes
70 ml cold vodka
80 ml cold water
Method:
- Divide the butter roughly into thirds, keeping one-third in the freezer (about 100g).
- Weigh and sieve flour, salt and sugar together, placing them in a clean mixing bowl. Add the remaining unfrozen butter into the flour mixture. Either use a fork, pastry cutter or your clean fingertips, begin cutting the butter into the flour, until it resembles coarse breadcrumbs.
- Spoon the mixture into a large ziplock bag and add the frozen butter into the bag. Expel any air from the bag and close it. Use a rolling pin to flatten the butter into flakes. You should get flattened "breadcrumb" bits and butter flakes. Place the ziplock bag into the freezer for about 10 minutes to make sure that all the butter is firm.
- Transfer the mixture to a chilled bowl. Slowly add 50ml of the cold vodka and 50ml of the cold water and incorporate them into the dough. At this point, I like to use a spatula to gather the dough together instead of using my fingertips. Add the remaining vodka and water, until you get a shaggy dough.
- Put the mixture back into the ziplock bag and use the heel of your hand to knead the mixture until it comes together and feels stretchy.
- At this point, divide the dough into 2 or more discs (depending on whether you are making tarts or tartlets), and refrigerate for at least 45 minutes, preferably overnight before using.

What I did was to divide the dough into 4 discs, because I was making tartlets and didn't did that much dough at one time. I froze 3 discs, and after refrigerating one disc for 45 minutes, I proceeded to use them for my tartlets. I use my lazy-person method of making tart cases - which is, to grab a small portion of the dough, press it out with my fingers such that it is thin enough (about 4mm thick), and press it into the tart case. If the dough is too small for the case, I take additional bits of the dough to fill up the spaces. After making a few, I kept all of the tart cases (with dough in them) in a ziplock bag, and froze them. The reason why I'm doing this is because I had to bake the tarts without any filling since I was making strawberry tarts, and since I was lazy to blind bake, this was the only other method. If you bake the tarts once you remove them from the freezer, there is no need for you to blind bake them - that's a tip from Rose! ;] Before removing them from the freezer, be sure to preheat your oven to 190 degrees, and bake the tarts for about 15 minutes or until golden brown.
**
For the creme pâtissière (pastry cream), I used Donna Hay's recipe which I obtained from Evan's post here. It's really simple and good :]
For the creme pâtissière (pastry cream), I used Donna Hay's recipe which I obtained from Evan's post here. It's really simple and good :]
Creme Pâtissière
Ingredients:
240 ml milk
1 tsp vanilla extract
2 egg yolks
30 g castor sugar
25 g cornstarch (or cornflour)
Method:
- Place the milk and vanilla extract in a saucepan over medium high heat and bring to a boil before setting aside.
- Whisk together egg yolks and caster sugar in a bowl until the sugar dissolves and it becomes a pale yellow color. Add in the cornstarch and whisk until combined.
- Slowly pour in the milk, making sure to whisk continuously. Pour the mixture back into the saucepan and heat over medium high heat. Continue whisking constantly until the mixture thickens. Once thickened, remove from heat and set aside to cool.
- Once cooled, spoon into cooled tart shells and serve with fresh fruits of your choice.
Janine's jots:
- Taste: The crust itself is very flakey and buttery because it is an all-butter crust. Therefore, be sure to use good quality butter.
- Serving size: I managed to make about 25 mini tartlets (1.5 inch diameter) with one disc of dough.
- Modifications: If you don't have vodka, you can use vinegar to the same effect as well. Rice vinegar is fine too as the smell disappears after baking. Basically vodka or vinegar evaporate when baking, and they do not add to gluten formation since it does not react with the flour, thus giving you a flaky crust! Also, you might not have to use all the water and vodka, so sprinkle them in slowly after the first addition.
- Storage: I've kept the pie discs in the freezer, in a ziplock bag and each separately packaged for over a month and I take one disc out whenever I feel like using it. It takes less than half an hour to be malleable enough to roll and the tart crust tastes as good as before. The dough keeps really well! I've still got a disc left, and I'll be doing a comparison by baking it after having storing it for 3 months vs another newly made pie dough (same recipe) to see if there's any difference.
- Would I make this again? Most definitely!
- Other comments: Make sure that all your equipment used is cold, so that the butter does not melt excessively. I have warm palms, so having cold water and vodka helps to neutralize the effect my fingers have on melting the butter.
This post is getting rather long and convoluted, because this is perhaps the first time I'm doing a recipe with multiple components and my verbosity is getting the better of me :/ Anyhow, here are some more pictures of the completed product. I'm glad I finally did try out the pie dough recipe, because I do think that it's a keeper (although I changed a lot of the steps - thus making it mine hehe) and it's really versatile! I even made egg tarts with them which my mother proclaimed the best thing I've ever made!
This will be my first submission for Aspiring Bakers #5 : Fruity March (March 2011) hosted by Jess of Bakericious! This post has also been tastespotted here :]
7 comments:
beautiful tarts!
WOw! So pretty and yummy looking! THe pastry looks crispy too! I like!
it look so lovely! (:
@jess, jeannie and jasmine: thanks - the tarts really were yummy!
The tarts are very beautiful. I'm sure they taste great right? :D
Hi Jamine. i need your big help. if possible i send you email regards to the dough.
thank you.
@Evelyn: Hey I just checked my mail and I didn't get an email from you? If you don't mind, can you send it again to ask.thekitchensink@gmail.com? Thanks :)
Post a Comment