My blog has moved!

You should be automatically redirected in 6 seconds. If not, visit
http://www.unpastiche.com
and update your bookmarks.

Showing posts with label Pancakes. Show all posts

Wednesday, April 18, 2012

Really Good Chocolate Multigrain Pancakes

Sometimes, I'm obsessive compulsive to the point that even I get sick of myself, literally. I usually try variations on a single recipe and different recipes relating to the same thing for days on end until I satisfy myself that the recipe is the one I want as my "to go to" recipe, or the one recipe I'm willing to replicate to eat for the immediate future.


Just take bread for example. My very first post in the blog was of bread using the tangzhong method. What you didn't know was that I probably tried tens (I am not joking) of recipes before I finally settled on my bread recipe. My family members had to suffer through weeks and weeks of bad, not so good, and not bad breads just so that I could come up with 'the one'. Right now, my brother proclaims that my bread making is my "拿手好菜" (my best dish) and that I should just stick to that. Obviously I don't listen.

Right now, my current fad is granola and yogurt. I've been making my own homemade yogurt (low-fat and unsweetened) and my own granola. As for the yogurt, the experimentation was a few years back, so I've more or less settled on my usual technique. No one in the family is willing to eat my yogurt because they think it is too sour :( But that's the way I like it - natural yogurt tastes like that! So anyway, as for the granola, I've probably tried more than 10 granola recipes and am still experimenting. No one in my family eats that either, so I've to slowly make my way through the granola before making a new batch. I'm currently eating a banana-hazelnut granola and an olive oil-raisin-assorted nuts granola, both of which are so different and taste so good together!

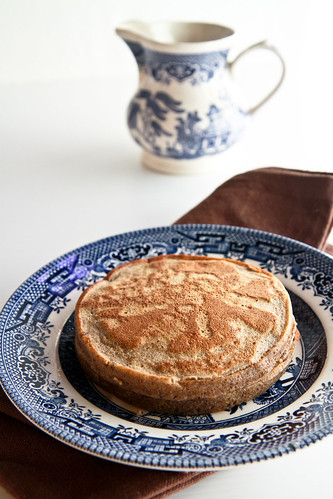
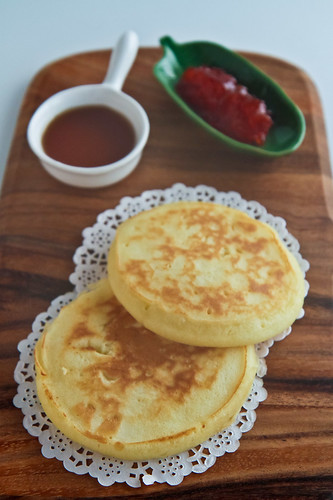
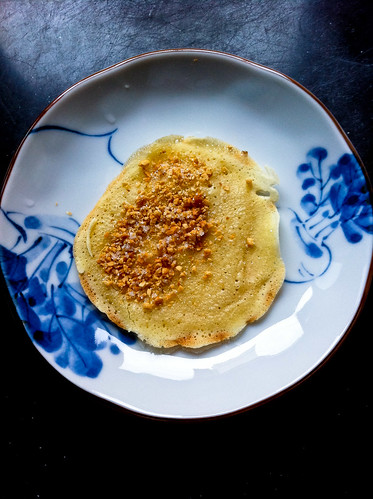
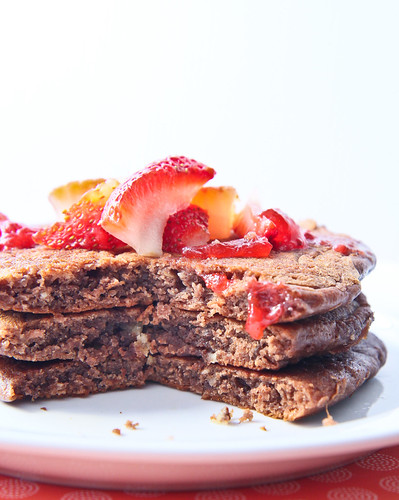
Oops somehow the jam looks horrible on the pancakes :/

So you can probably imagine how it was with my quest for pancakes. I was so obssessed with getting THE pancake recipe that I tried pancake recipes every other day (because I'm the only one willing to eat the pancakes and one recipe of pancakes lasts me 2 breakfasts) for weeks until I finally got sick of having pancakes for breakfast :/ The result of the quest is my basic pancake recipe, which I have blogged about before, and whenever I have yogurt on hand, this is the recipe I turn to.


Chocolate Multigrain Pancakes
Inspired by Smitten Kitchen
Makes 4 thick pancakes

35g egg (about ½ an egg or a small egg)
120g unsweetened low-fat yogurt (or any storebought yogurt)
15g olive oil
½ tsp vanilla extract

¼ tsp baking soda
¼ tsp salt
1 tsp baking powder
2 tsp castor sugar

5g cocoa powder
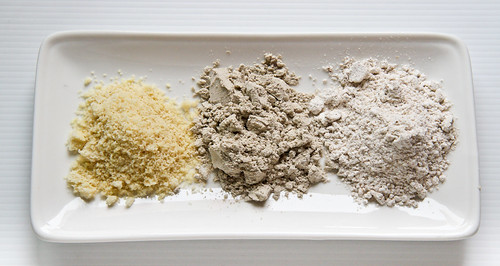
7g oat flour (or ground oats)
15g whole wheat flour
34g all-purpose flour
15g rye flour
7g sorghum flour
(or replace with 78g of all-purpose flour and 5g cocoa powder)

Method:
  1. In a medium sized bowl, whisk together the egg and yogurt. Add in the olive oil and vanilla extract.
  2. In another bowl, sift together all the dry ingredients - the flours, sugar, baking powder and baking soda, salt and cocoa powder.
  3. Stir the dry ingredients into the wet until the dry ingredients are moistened. A few remaining lumps are okay - do not overstir!
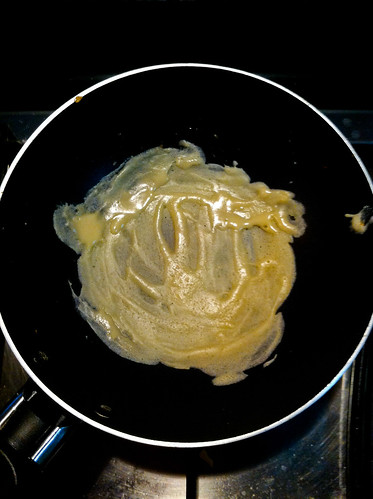
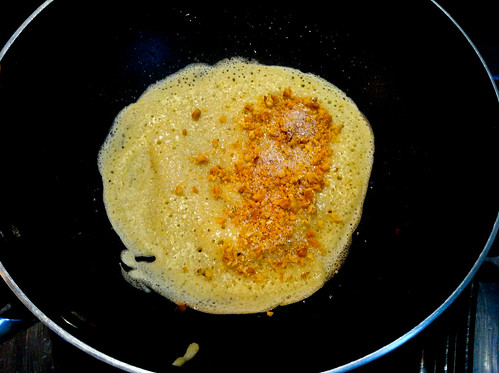
  4. Melt some butter in your pan and ladle a scant ¼ cup batter for one pancake. Cook the pancake until the edges are firm and dry and you see the centre bubbling. This will take about 3 minutes on medium heat. Flip the pancake to the other side and cook for another 3 minutes, or until golden brown (or in this case, until dry to touch on both sides since the pancake is brown anyway)
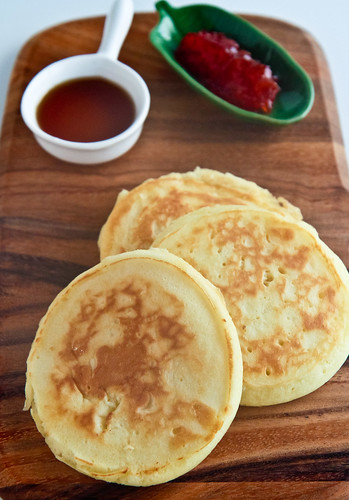
  5. Repeat for the remaining batter. Drizzle the pancakes with some maple syrup and serve with fresh strawberries and compote. Bon appétit!

Janine's jots: 
  • Note: As with most recipes that I try, I can't help but tweak and modify it to my preference, so in actuality, you see very few similarities with the original (hence making it my very own recipe ;p) For those who want to know what I have tweaked, I have used less egg (lower cholesterol), more yogurt and obviously made it chocolate pancakes instead of normal ones. Because of that, I added a bit of baking soda. Note that this is only for natural cocoa powder. If you are using dutched cocoa powder, you have to use baking soda together with an acidic ingredient, for instance, a touch of lemon juice or vinegar OR you can just replace with an equal amount of baking powder instead.  
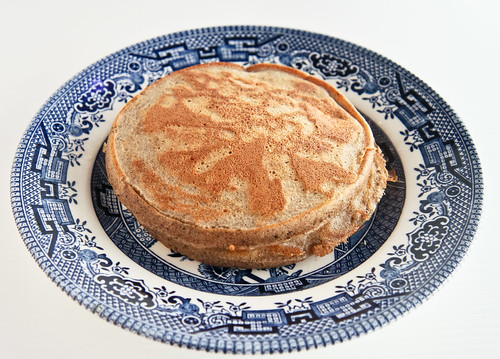
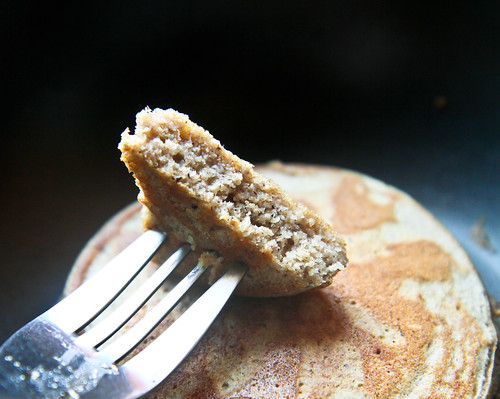
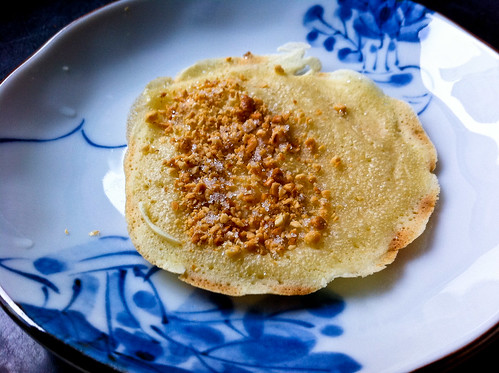
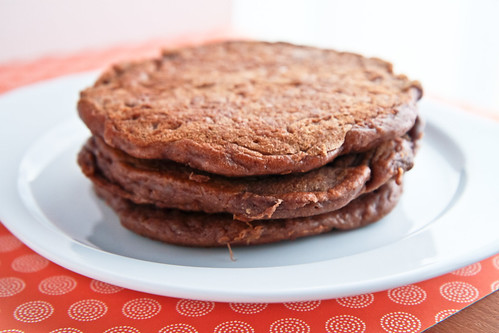
  • Taste: Because the yogurt is the bulk of the recipe, the resultant pancake will taste of the pancake (and chocolate of course). Be sure to use good quality cocoa powder and yogurt. I loved how the pancakes tasted - in fact, this is probably the best chocolate pancake I've ever made and eaten!  
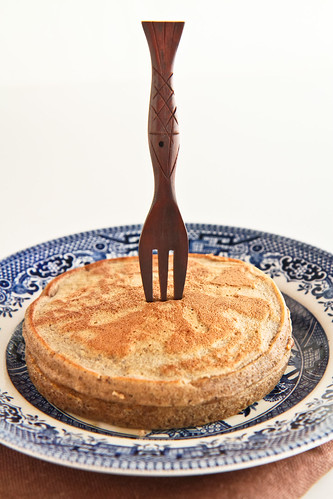
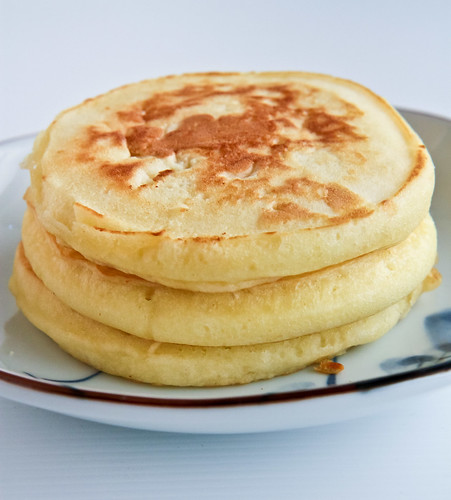
  • Texture: I also loved the texture of the pancakes here. I'm a fan of thick, almost cake-like pancakes, so these fit the bill perfectly. They are reminiscent of buttermilk pancakes, so do try these if you like the texture of buttermilk pancakes!
  • Serving size: I have tweaked this recipe such that it makes 4 pancakes - I tend to consume 2 pancakes during a single breakfast. This recipe is easily doubled.
  • Modifications: If you have thick or greek-style yogurt, do use some milk to thin it out (about 1-2 tablespoons will do). You can also refer to Deb's note on this. If the yogurt is already sweetened, you might want to reduce the sugar to 1 tsp as well. As for the combination of flours, feel free to experiment! Deb used a combination of whole wheat, all purpose and barley/rye flour. I went a step further to use a greater variety of flours. I haven't tried a gluten-free version yet, but I'm pretty sure it'll work the same :]
  • Storage: As with most pancake recipes, do not store the uncooked batter because the resultant pancake tends to be tough and does not rise well. For the cooked pancakes, try to consume them when warm, otherwise, these keep well in the fridge for a few days, when stored in an airtight container. Give them a zap in the microwave to heat them up a little.
  • Would I make this again?: Hell yeah!

Thursday, February 16, 2012

[Thursday's Trio] Buckwheat Pancakes

Today I thought I’d perhaps rewind a bit and talk about how I got started with experimenting with gluten free and other non-wheat flours. (This is partly because I realized I’ve yet to post photos of these buckwheat pancakes and also because I didn’t have my camera this week to take any new photos.) As I was typing out today's post, I also decided that I shall name this new series Thursday's Trio, because for every new ingredient I'm introducing on this blog, I shall also include a trio of facts, uses and recipes for that particular ingredient (three is my lucky number, if you're wondering why trio). I had initially wanted to call it Feature Friday, but that's been used so many times, so Thursday's Trio it is. These facts and tips are usually stuff I scour the internet for when baking with something new, and is of great use to me when experimenting, so I hope it will be of use to you as well, especially if the ingredient is new to you too! :]


So today I'm starting with buckwheat

Now, I’m pretty sure I was like many of you – I frequented many blogs, especially blogs like Tartlette, La Tartine Gourmande and 101 Cookbooks. If you have the time, do click on the links because not only are the photographs exquisite, the persons behind those blogs are genial and truly have wonderful stories to tell. So anyway, visiting those blogs are definitely not good for me because I never fail to salivate each time I visit, and because I get the ‘itch’ – the itch to buy stuff and follow their recipes. All three bloggers share something in common – they believe in healthy and wholesome eating and as a result, their recipes tend not to use the white refined flours that we are used to. Now, I used to get very overwhelmed by all the new names I saw – buckwheat, sorghum, millet, etc. I used to think, what the hell are these?! There were several hurdles I had to overcome before I finally started buying some of those flours and opened a whole new world to myself. Like Sharon commented earlier, looking out of the ‘wheat’ square does tend to introduce you to new grains and flours, all of which are nutritious for you.

from left: almond, buckwheat and sorghum flours

Anyway, the first hurdle was my own self-inflicted fear of trying new things. Once I got over that (after convincing myself that if I failed I’d feed the stuff to my dogs), I faced another problem – where to get those weird sounding flours? At the supermarket, I only tend to see the same few flours. I managed to locate some of those flours, but then I was faced with yet another problem, these flours were sold in at least 500g quantities and were expensive! And I was afraid that I wouldn’t like the taste of them and hence waste the rest of the flour away! Sounds familiar? 

Long story short, I managed to find a pretty cheap source of unique flours (will let you all know where shortly in another post when I compile my list) and my experiments began! Most of my family members are quite ‘anti’ towards my experiments, so sadly, I am usually the only one eating it. I figured what better way to experiment than pancakes? Not only were they simple to make, I could make them in small batches enough for myself, and the taste of the flour will feature prominently, allowing me to decide if I liked the flour or not.


I decided to start with buckwheat. I have to admit that the moment I opened the flour packet, I was a little grossed out. The ‘smell’ reminded me of Indians (no offense or racist connotation intended!), and it was only after I asked my mom that I knew that buckwheat flour is a very commonly used flour in Indian cooking! No wonder I associated the smell of the flour with Indians! :] 

Anyway, most people will say that buckwheat has a nutty flavor, but it reminded me more of a grassy than nutty flavor. For bakers wanting to experiment with buckwheat, I’d strongly recommend starting small, because I found myself needing to get used to the almost smoky flavor of the flour. At first, I was wondering if it was because I got it from an Indian shop that it smelt and tasted so ‘Indian’ (I’m not being discriminatory here but I associate this smell with Indian homes), but I realized that it’s the same taste everywhere. It is an extremely earthy taste. 


Three interesting facts on buckwheat!
  1. Buckwheat is actually a plant, and not a cereal crop and the plant is usually ground with its outer bran, which is high in fiber. This gives us the dark brown color flour that we see, with dark flecks which is the bran. What’s even more interesting is that this fruit seed is actually related to rhubarb! 
  2. Buckwheat does not contain any gluten, which makes it a good flour to use for people with gluten intolerance. 
  3. Buckwheat is also an excellent source of protein. It contains all 8 essential amino acids. Low in fat and high in fibre. Basically, buckwheat is a super healthy food, and you can refer to this if you want to know more. 
Three ways of using buckwheat!
  1. It is also known as sarrasin in French, which is the base ingredient for sarrasin crêpes from Brittany, which I blogged about earlier. The same is known as blinis in Russia, which are essentially tiny egg like pancakes. Or you can just use them for these pancakes like what I’ve done. 
  2. It also makes buckwheat noodles, which are the backbone of much Japanese and Korean cuisine. Soba and naengmyeon anyone?
  3. You can also use buckwheat groats (Available at organic food stores) in porridge or in baking. They taste pretty good! 
Three interesting recipes I've bookmarked from local blogs: 

How to store buckwheat?
Most recommend storing buckwheat in a sealed, airtight container and placing it in a cool dark place. I say just put it in the fridge and it will last long enough for you to experiment with :] 

***
I didn’t want to use a buckwheat pancake recipe that I didn’t trust, because there are quite a few available on the internet. Instead, I modified my pancake recipe. This is my go-to pancake recipe, because I’ve modified it such that one batch below makes exactly 4 large pancakes, which I have over 2 mornings (2 each for breakfast each day).


Transitional Buckwheat Pancakes 

60g flour (30g buckwheat flour) 
2 tsp sugar 
¼ tsp salt 
½ tsp baking powder 
¼ tsp baking soda 
10g oil (I used olive oil) 
50g egg (small egg) 
85g milk 
1 tsp vanilla extract
1 tsp cinnamon powder


Method: 

  1. In a bowl, sift the flours with baking powder and baking soda. Mix in the salt and sugar. 
  2. In another bowl, mix the oil, egg, milk and vanilla extract together. 
  3. Add the liquid ingredients into the dry and give the mixture a quick mix or two. It is okay if the mixture contains a few lumps or two, do not overmix or else you will get tough pancakes! 
  4. Heat a non-stick frying pan on medium low heat. Using a 
    ¼-cup measuring spoon, ladle the 
    ¼-cup of batter on the pan and cook for 3 minutes, or until bubbles appear on the surface. Flip the pancake and cook for another 2 minute or until golden brown.
  5. Repeat with remaining batter and serve warm with maple syrup. Enjoy!


Janine's jots: 
  • Note:  My pancakes may look overly cooked and not evenly brown, but that's because I use very little oil in cooking them, relying on the nonstick pan and mainly heat to cook the pancakes, hence the uneven brownness. I also like to turn up the heat at the start so that the outsides cook faster than the inside, and I get a relatively more 'crispy' texture on the outside of the pancake. 
  • Taste: I like to add an extra pinch of cinnamon to my pancakes, because I feel that it enhances the taste and especially with buckwheat, since it really did help cut down the earthy taste and ease me into taking buckwheat. Also, the pancakes will definitely taste better if you can use melted butter instead of using oil, but in the mornings, I’m usually rushing for time, so olive oil it is!
  • Texture: Because buckwheat does not contain gluten, you can actually mix the dry ingredients into the wet more vigorously and ensure that no lumps remain because they won't turn as dense anyway. This recipe is a no-fail one, and produces fluffy pancakes all the time! 
  • Serving size: This recipe makes 4 large pancakes, as pictured above. 
  • Modifications: For someone new to buckwheat, I would definitely suggest starting with a smaller quantity, say 10g out of the 60g of all-purpose flour and slowly increasing the quantities until you reach 30g. At this proportions, the buckwheat does not taste too overwhelming and are just nice!
  • Storage: I’ve use this same recipe over a month, with varying amounts of different types of flour  every alternate day when I was in my pancake craze, and since the recipe made 4, I would eat two and keep 2 in the fridge. Although freshly made pancakes are definitely nicer, the ones that are stored in the fridge taste equally delicious after a 15 second zap in the microwave. Do make sure you store them in an airtight container. 
  • Would I make this again?: Definitely!

Bon appétit! Pancakes go extremely well with maple syrup :]

Wednesday, September 7, 2011

Fluffy Pancakes III

Classes have been coming hard and fast these few weeks. Tons of tutorials to be done, assignments to be handed in, etc. After I finish tutorial at 8pm and arrive home at about 9pm, I find that I have virtually no energy to do any more work, needless to say any baking. Nevertheless, weekends are left for baking, or rather Saturdays are, and Sundays are for some work and reading my favorite types of books. I've been baking quite a bit, baking at least 2-3 things at one go. On a few occasions in the past months, I woke up on a Saturday morning feeling like I needed pancakes, and pancakes it was! Pancakes are really the easiest things to whip up, in less than 30 minutes, you should be able to mix the batter and make yourself delicious hot pancakes :]


I've been experimenting with a couple of recipes, and will be posting them up one at a time. These are really quite delayed because I really can't find time to blog, and I foresee that things are just gonna get worse :/ Anyway, I got this recipe bookmarked after Sonia left a comment in my previous post telling me that she had found a way for fluffy pancakes without beating the egg whites. Needless to say, I was intrigued and immediately went to her blog to check out her recipe. Her recipe indeed is really simple - most of us probably already have these ingredients in our pantry - flour, sugar, salt, milk, egg and oil. It's really that simple! 

I actually have my own recipe for pancakes which have approximately the same proportions as Sonia's but using all-purpose flour and baking powder instead, as well as having a lower sugar ratio and higher liquid ratio. So on a fine Saturday morning, I decided that I very much would like pancakes to go with  my freshly made strawberry-apple jam, and decided to give her recipe a go. This was yet another perfect chance to try another fluffy pancake recipe!

Fluffy pancakes with maple syrup and homemade strawberry-apple jam :]

Fluffy Pancakes III
Adapted from Sonia
Makes 6 pancakes

Ingredients:
150 g        self-raising flour
50 g          sugar
1/4 tsp      salt
110 ml      fresh milk
55 g          egg (about 1 large egg)
1 tbl          corn oil

Method:
  1. Mix flour, sugar and salt in a mixing bowl.
  2. In a separate bowl, mix together the egg, milk and corn oil. Pour this mixture into the flour mixture and mix until they briefly come together. You may still have tiny lumps of flour but this is okay!
  3. Heat a non-stick frying pan on medium low heat. Using a 
    ¼-cup measuring spoon, ladle 
    ¼-cup of batter on the pan and cook for 2 minutes, or until bubbles appear on the surface. Flip the pancake and cook for another 1 minute or until golden brown.
  4. Repeat with remaining batter and serve warm with maple syrup. 


Janine's jots: 
  • Cooking Notes: Because these pancakes are rather thick, do remember to use low heat to cook them otherwise the outsides will brown far too quickly before the insides are properly cooked!
  • Taste: Pancakes were sufficiently sweet, such that they could be consumed on their own. Of course, nothing beats pancakes with jam and maple syrup :]
  • Texture: You will first realize how thick the batter is, which is quite unlike a pancake batter but this is CORRECT - do not add anymore liquid to it! Just proceed to ladle the batter onto your pan and you should get a thick pancake. I think this helps with the fluffiness of the pancake, because you'll get pancakes with an almost sponge/chiffon-cake-like texture. Seriously good!
  • Serving size: Depending on how large or small you want it to be, you should get around 6 thick yummy pancakes!
  • Modifications: I would probably try decreasing the sugar and increasing the fresh milk in the recipe to see where it'll get it. And the next time, I'd probably use butter instead of corn oil because I much prefer the taste of melted butter. Otherwise, this recipe is pretty close to perfect for me! 
  • Storage: Pancakes should preferably be consumed right after they are made, especially these which had a nice crusty exterior but a soft fluffy interior. They also didn't last beyond breakfast, so I have no idea how long they last stored at room temperature. My guess is that you can store them in the fridge and zap them up when you want to eat them, although it won't taste as nice. 
  • Would I make this again?: Definitely! This is yet another winner after my last fluffy pancakes attempt!

In pictures: 


Fluffy cake-like inside :D

Friday, July 15, 2011

Fluffy Pancakes II

My friend had been craving pancakes for some time, and I wanted to try out a new pancake recipe, which was perfect - she came over to my place early in the morning, so that we could get started on making some pancakes for our breakfast!

This pancake recipe is unique in the sense that it requires whipped egg whites. It also uses milk and not buttermilk or sour cream, which makes life so much easier since milk is so much cheaper and readily available than those ingredients. Now, making pancakes should be a relatively easy task, and you might think - whipped egg whites ain't easy at all! Well, I'm here to prove you wrong - it really is pretty easy. Make sure you separate the egg when it's cold, because it separates most easily then. Let it warm to room temperature before attempting to whip it. The egg white will whip easier when it's not cold. It was all manual labour here - no mixer, just a metal bowl and whisk, and lots of elbow grease. Just use your wrist and whip that egg white  up, it will start to froth and slowly whiten, and before you know it, you have softly whipped egg whites. The whitening of egg whites is one of those processes in baking that I anticipate the most, really. 


Do try out this recipe if you're bored of your usual pancake recipe - whipping your egg whites separately does produce results and some mighty delicious pancakes :]


Fluffy Pancakes
Adapted from Evan here
Makes 7 pancakes

Ingredients: 

1 cup flour
1 tsp baking powder
¼ tsp salt
1 cup milk
1 egg, separated
2 tsp caster sugar
1 tbl oil

Method: 
  1. Sift flour, baking powder and salt into a bowl. 
  2. In another bowl, whisk together the egg yolk, sugar and milk. Add in the oil and mix well. 
  3. Add the yolk mixture into the flour mixture and whisk to combine. Make sure the batter is smooth with no lumps. 
  4. Whisk the egg white until soft peaks are achieved, before folding it into the mixture above. 
  5. Heat a non-stick frying pan on medium low heat. Using a 
    ¼-cup measuring spoon, ladle 
    ¼-cup of batter on the pan and cook for 2 minutes, or until bubbles appear on the surface. Flip the pancake and cook for another 1 minute or until golden brown. 
  6. Repeat for the remaining batter until you get a stack of pancakes. Serve warm with a pat of butter and maple syrup. Enjoy!


Janine's jots: 
  • Taste: Pancakes were sufficiently sweet, such that they could be consumed on their own. Of course, nothing beats pancakes with jam and maple syrup :]
  • Texture: The pancakes were really one of the fluffiest I've consumed, and trust me, I've tried tons of pancake recipes, ranging from those requiring buttermilk to sour cream to yogurt ... the list just goes on! I also like that these pancakes developed a slightly more 'crusty' exterior - perfect for dipping into maple syrup with!
  • Serving size: This was the first time that a recipe yielded exactly what it promised - 7 pancakes were what I got. I know that my photographs only have 5 pancakes but well that's because I ate 2 of them while waiting for the rest to be done since I was SO hungry and the pancakes looked so darn delicious!
  • Modifications: I would probably try decreasing the amount of oil in the recipe because I prefer to use more butter on the pan instead of in the pancake. Otherwise, this recipe is pretty close to perfect for me! 
  • Storage: Pancakes should preferably be consumed right after they are made, but I have found that you can store them (cooked) in the fridge for up to 3 days, and give them a quick zap in the microwave to heat them up. The pancakes are noticeably heavier and less fluffy, but still delicious. You can also choose to store the batter (sans the egg white) in the fridge for a day - this means that you can make the batter the night before, wake up to whip the egg white and make pancakes early in the morning!
  • Would I make this again?: My last pancake using the last 
    ¼-cup of batter turned out rather tough - that's because my pan is only large enough for 1 pancake to be cooked at a time and I think the gluten had already started to form and the egg white deflated. I would definitely try making this on a larger pan, to ensure that all pancakes are equally fluffy :] 

Monday, March 21, 2011

Malaysian Monday #1: Apam Balik/ Min Jiang Kuih

I suddenly was craving apam balik a few days back, so I googled and found myself on Lily's blog. Her blog is a veritable trove of Malaysian/Singaporean dishes, and she even had three variations of apam balik! Min Jiang Kuih is typically thicker and you can tell from the name that it's the Chinese version - this is the version that is selling in Jollibean and Mr. Bean - the "peanut pancake" version. Of course, there's all sorts of variants to the name - Ban Jian Kuih and whatnot, but my parents called it Min Jiang Kuih, so it's Min Jiang Kuih for me too! Apam balik means the same thing - apam = pancake and balik = turnover or folded, so it's just Malay for folded pancake! I tend to think that there's the thick version of apam balik with peanuts, sugar and creamy corn (YUMMEH) and the thin crispy version, which is oh so delicious as well. This tends to be sold by Malay uncles on those motorbikes in Malaysia, but can also be found in pasar malams. I lovex100000 apam balik, especially those hybrid types which are not too thick, and yet crispy on the outside, and they've this "sweet spot", typically in the centre, with the highest concentration of peanuts and butter. Anyone know what I'm talking about? :)

PS: I have this really amusing story about apam balik. I've been eating it for ages, since I was a little kid, and I always thought it was called "Abang balik" which means big brother come back in Malay. And NO ONE corrected me when I ordered apam balik, until a few years ago, when this toothy old (seriously very very old) uncle told me, abang balik - salah lah dik, abang tak mahu balik! Basically, he was joking with me, saying that it was the wrong name, and big brother doesn't want to go back. LOL. 


Apam Balik
Ingredients:
Adapted from Lily's recipe here

For the pancake: 
85 g   all-purpose flour
50 g   rice flour
15 g   cornstarch
1 tsp   double action baking powder
¼ tsp  baking soda
¼ tsp  salt
1        egg, about 55g
60 g   castor sugar
1 tsp  vanilla essence
90 ml water
10 ml milk

For the filling:
50 g melted butter
30 g granulated sugar (castor sugar is fine too)
60 g roasted peanuts, chopped

Method:
  1. Prepare the filling by melting the butter, mixing it together with sugar and peanuts. 
  2. Add the sugar into the egg and mix until sugar dissolves. Add in the vanilla essence and mix well.
  3. Sieve all the dry ingredients together (all-purpose flour, rice flour, cornstarch, baking powder, baking soda and salt). 
  4. Mix together the water and milk and add it into the egg mixture. 
  5. Gradually add the dry ingredients into the wet ingredients, making sure to stir well to avoid clumping. Strain the mixture if you cannot get rid of the lumps. 
  6. Set the ingredients aside in the fridge for at least 3 hours for it to thicken. I left it overnight in the fridge. 
  7. Heat a crepe pan or small nonstick pan - and add a little bit of oil/butter to coat the pan. Using a ladle or tablespoon (for small pancakes), quickly spread the batter onto the pan, making sure the batter is uniformly thick. 
  8. Cook until you see the edges of the pancake starting to brown. At this point, add in the filling on one half of the batter. This makes sure that the filling will adhere to the pancake better when it's ready to be folded. 
  9. Once the bottom is golden brown, using a heatproof spatula to lift up the half of the pancake without the filling and fold it into half. 
  10. Repeat the process for the next pancake. 
  11. Allow the pancake to cool for a minute or two before consuming!
Janine's jots: 
  • Taste: The pancake is slightly too eggy for me, but that might be due to the fact that I'm using organic virgin eggs. 
  • Texture: This yields a pancake with a crispy texture, so if you're looking for a thick chewy version of apam balik - this is not it!
  • Serving size: The original recipe is twice that noted above, but this halved portion is more than enough to make 10 pancakes (at least!) I managed to churn out close to 20 mini 4-inch pancakes. 
  • Modifications: The batter is slightly thick, even after sitting at room temperature for a while. I'd probably put more milk in the future and reduce the amount of water to give the pancake for flavour. 
  • Other comments: Be sure to let the batter sit for at least 20 minutes to let it reach room temperature so that it will be easier to spread. If you're greedy (like me) and can't wait for 20 minutes, simply add a teaspoon or two of milk to the batter and incorporate thoroughly such that the batter is more fluid and spreadable. 
  • Storage: The batter is able to last pretty long in the fridge. I managed to eat pancakes every day for breakfast for 4 days. However, note that there's an egg in the batter, so if you're icky about leaving a raw egg in a batter for 5 days, I'd advise you to consume the batter at one sitting. 
  • Would I make this again? Definitely! It's almost too easy to whip up if you're having an apam balik craving! You just need to have rice flour in your kitchen :]
In pictures: 
Spread the batter on your pan as thinly as possible. As you can see, I'm not really good at spreading it thinly and my pan is a little small >.<
Once the edges start to brown, you can add your peanut filling. I cheat by adding the butter directly to the batter without melting, and then sprinkling the sugar and peanuts.
Mmmmmm =D Be sure to fold it into half the moment you get it off the pan because it hardens very quickly when cooled and will crack if you try to fold it then!
Oooh thin crispy goodness! You can make a thicker version (a min jiang kuih version) with the same batter!
Or you could be more 'French' and add nutella to the apam balik instead! It tastes as good as the ones with peanuts, seriously!

PS: All these photos are taken with my iPhone, with minor adjustments done on the computer. Looks not bad eh? I've been using my phone to take a number of my photos, mainly because I don't have the camera with me sometimes, or am too lazy to take it out.


Also, this marks my first entry into Muhibbah Malaysia Monday event hosted by Shaz of Test With Skewer and Suresh of 3 Hungry Tummies. My mom is a really good cook, and I do hope to gradually write all her recipes down so that I can cook equally delicious meals for myself in the future and possibly pass it on! So may this be the first of many entries into MMM :]


Saturday, February 12, 2011

Valentine's Day Roundup

As Valentine's Day rounds the corner, the blogosphere is inundated, really, with posts about Valentine food and gift ideas. I like looking at "food porn", plus I do like the inspiration which comes to my mind when looking at these imaginative and creative food creations, so I decided to do my very first Valentine's Day Food Roundup for this blog =)

These are a few ideas, food ones of course, for you to make for the coming Valentine's Day. Of course, you don't really have to make it on 14 February itself, because love between two people should be celebrated every day, all year round. But if there's a special day that the world set aside just for celebrating love, jump in and celebrate! I'm not one for a restaurant meal on Valentine's, because all the hype results in superly inflated prices everywhere. A few days again, the telly was just telling me that a romantic dinner for 2 on the Singapore Flyer is in the region $300-$400. Like what?!! Well, maybe because I'm still a student and also because I'm particularly stingy, but $400 for a meal just seems over the top, especially if it's not a hatted meal. 

Onto the pictures - I claim no ownership for any of the pictures or ideas - all pictures have been linked to their respective blogs and recipe pages, so click on! 

I'll be doing a roundup of what I have been doing at home (all heart-related) at a later date, because I'm just too lazy to take out my CF card to upload the photographs for the time being. Also, I know that all the pictures below are "heart" related, which is cliched, but I really do like hearts (and butterflies) and what better time than Valentine's to have heart-shaped food? =)

Surprise your loved one with a hearty breakfast (pun-intended):
French toast perhaps? 


Or some crepes if you are so inclined?
Mmmm chocolate pancakes!
Sweet Potato pancakes


Or some red velvet pancakes?

And perhaps for lunch, what about some heart-shaped pasta? =)
Heart ravioli?

A simple pasta, shaped in a heart

A heart-shaped pizza
Heart-shaped pizza AND heart-shaped pepperoni?


And for tea, here's a smorgasbord of ideas!


Hot cocoa with a pink hearted marshmallow?

Churros
Some jelly pops for you?
YUMMO donuts!

Sweet heart pies
An apple hand pie perhaps?
Fruit pizza decorated with fresh fruit? 
Simple puff pastry hearts!


And onto my favorite parts - dessert!!!
Red velvet cupcakes - the recipe is similar to the one I use
Or a simple chocolate cupcake with heart-shaped sprinkles?
I love this two-in-one red velvet cake idea
Gosh - it's a cake within a cake!

I like the two-tone frosting here :)
Perhaps give a hint with your Valentine ring cupcakes?
I'm pretty sure this cupcake flower bouquet will pretty much trump any bouquet if your guy bought it for you!

If you're really short of time, why not just dip some strawberries into chocolate - just be different :)
Give strawberry roses instead of roses


Some ladybug-berries maybe?
And who can forget cookies?

A vanilla version here
A chocolate version here
Conversation heart cookies by Annie's Eats - she has really good tutorials on icing and I follow her sugar cookies recipe for any cookie I want to ice!

NOT forgetting my craze at the moment - macarons!
Conversation heart macarons are so dear :)
Be more literal with heart-shaped macarons perhaps? Btw, do check out Steph's blog - she has really creative ideas and wonderful photographs to match :)

For those who love flowers and cupcakes, why not this? 
Give flowers AND cupcakes at the same time!
Or cakes disguised as chocolate truffles

Finally, a little crafting to end the post
Use felt to make an envelope to keep a note for your loved one

There's tons of ideas on the internet to give you inspiration, so have a wonderful Valentine's! If you are without a valentine of the opposite sex, it's no time for consternation - use the opportunity to spend more time with your family, or your besties! They too deserve (and enjoy) love from you!

PS: I've not done any round up from local blogs because I believe most of them will be entered into Aspiring Bakers #4 and that round up will be done by Ellena at the end of the month!
Related Posts Plugin for WordPress, Blogger...