I can't believe Mid-Autumn Festival is upon us already. In fact, the actual day will be tomorrow, 12 September 2011! Time really flies, because when Mid-Autumn Festival is here, it'll only be a while before Deepavali, my mom's & brother's birthday, and then Christmas! Okay, I might be getting a little ahead of myself but the point is that the days really seem to fly by when you look back on the weeks but the hours just move so so slowly when you're doing mundane stuff, like studying >.<
I also remember looking at the unbelievably round moon, which hung so low in the dark, star-studded sky that it looked almost fake. And we would find great joy in looking for the 'rabbit' on the moon. Have you guys seen it before? The holes on the moon really do look like a rabbit!
Anyway, both family, friends and teachers would all enjoy the moon cakes, and any extras could be brought home to savor. Looking back, I'm very appreciative of what my school did, for teaching us our culture in subtle ways, and making sure we still understood the essence of Mid-Autumn Festival. Mid-Autumn Festival is many ways, is like Thanksgiving, instead of giving thanks, the family, young and old, will gather and admire the moon (賞月), while enjoying each other's presence.
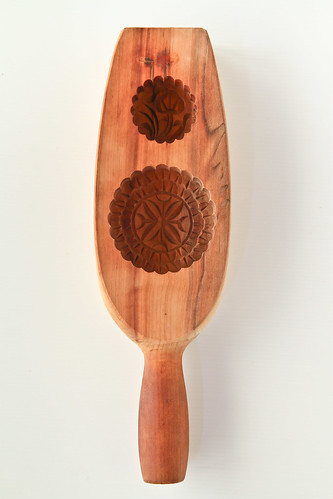
Back to way way back, when I still found joy in carrying paper lanterns around the neighborhood, I would rather have the pale green snow skin moon cake instead of the brown baked moon cake. As far as I can remember, I've never liked baked moon cakes. I've always like the cool snow skin moon cakes, and every year without fail, my mom would get a pandan flavored green snow skin moon cake for me. I also remember not liking the salted egg yolks when I was younger, but as I get older, my taste preferences lean towards the salty, and I find myself liking moon cakes with 1-2 egg yolks in them. Not 4 though, that's too little lotus filling for me =p So this year, seeing that moon cakes have increased in prices, I decided that it was high time I made some of my own. My mom has her own moon cake mould, so why not use it? In both Malaysia and Singapore, the baking supplies shops bring out their cooked glutinous rice flour packets and out comes the lotus paste, red bean paste, and various other flavored lotus pastes. I simply got myself a packet of koh fun and lotus paste and I was set!
My recipe is more of a suggested recipe as compared to a proper recipe with fixed numbers because I made a combination of small and large moon cakes. All you need to remember is the golden ratio is 1:2, 1 part of skin to 2 parts of filling, and if you stay within this ratio, you shouldn't go wrong.
What you should first do is to determine how heavy a moon cake your moon cake mould will give you. To do this, simply tear off a huge piece of your snow skin dough, and stuff it into your mould. Make sure to pack it well and remove any excess peeping out of the mould. After that, un-mould the dough and weigh it. This will be the weight of the moon cake that you will get. From there, divide that weight into 3. So for example, after cramming the snow skin dough into my tiny moon cake mould, I found that it weighed 50g. I then divided it into 3, which gave me around 16 odd grams. I decided then to go with 20g of snow skin and 30g of filling. This was because I'm strange that way - I prefer to have a higher skin to filling ratio. If you wish to have more filling, simply use the 1:2 ratio, which should give you around 16g of snow skin and 34g of lotus filling. It's that simple really :]
***
Mini Snow Skin Mooncakes
Adapted from Amanda who adapted it from Aunty Yochana, here
Makes approximately 10 5cm-diameter mooncakes
For the snow skin dough:
100g koh fun (or gao fen, which is cooked glutinous rice flour)
90g icing sugar
30g shortening
120g cold water
A few drops of coloring (if desired)
For the lotus paste filling:
300g lotus paste (I used a store bought low-sugar white lotus paste, but you can make your own. Check out Christine's recipe which is close to what my family does)
50-100g melon seeds (vary this amount according to how much melon seeds you like in your moon cake)
Method:
- Sift the koh fun and icing sugar in a mixing bowl. Gently rub the shortening into the flour mixture, combining until the mixture resembles coarse bread crumbs. Mix in the cold water and knead until a soft dough forms. If you wish to add in food coloring, add it in together with the cold water. Let the dough rest for at least 30 minutes before using.
- After rested, divide the dough into balls of equal weight.
- In the meantime, add the melon seeds to the lotus paste and mix evenly. Divide the lotus paste into balls of equal weight.
- To make the moon cake, lightly dust your hands and the mould with the koh fun. Flatten the ball of snow skin until you get a rough circle. Place the ball of filling in the centre of the dough and seal the ball with your snow skin. Make sure that there is no air trapped between the dough and filling and seal the edges tightly. Put the ball seam-side up into the floured mould and pack it in gently. Then, rap it against the counter on all sides so that the moon cake falls out nicely. Chill for at least 6 hours before consuming.
Janine's jots:
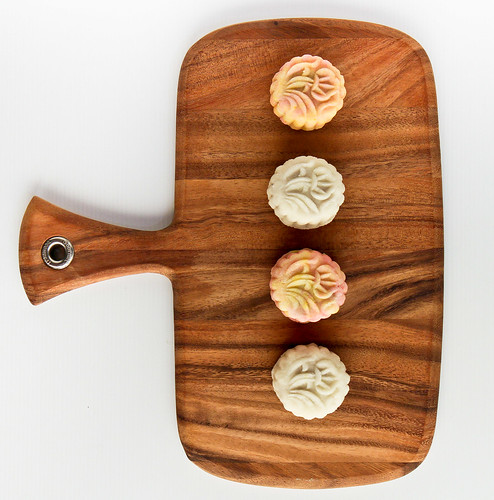
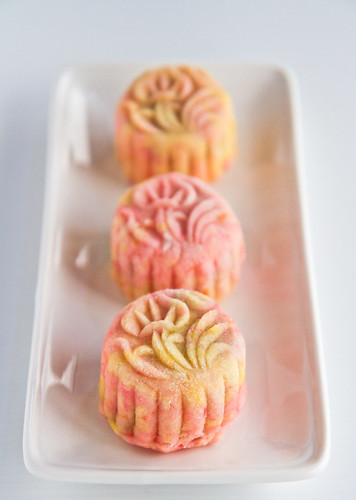
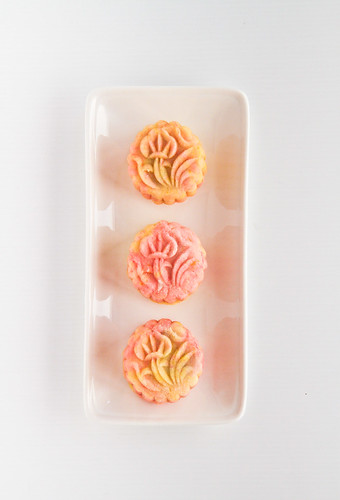
- Notes: Please note that you CANNOT substitute shortening for butter. It doesn't work. Believe me I've tried. Also, if you wish to get multi colored moon cakes like those above, simply apportion your doughs and color them separately. Then, flatten each colored dough into a rectangular sheet and place the doughs one on top of the other. Proceed to roll up them, swiss roll style. Next, cut off a part of the dough, making sure that it fits your mould Proceed to then flatten the part of the dough into a round circle and proceed as per step 4 above. You will get swirls of color. Like in the 2 multicolored moon cakes above, the one of the left had more yellow than pink and one on the right had more pink than yellow. It's all a matter of preference really. The white ones are the original color.
- Taste: I'm not a particular fan of fancy fillings, and I particularly love white lotus paste, so this was perfect. I also don't have a very sweet tooth, so I chose the low-sugar option. The end result was fantastic, in my opinion.
- Texture: Although this texture certainly does not beat the smooth texture that you might get for commercial moon cakes, I find it pretty okay and I like the smooth lotus paste which I got from Malaysia. I liked that I could add as much melon seeds as I wanted to the lotus paste to give it that contrast to the smooth paste.
- Serving size: Each mini moon cake is about 2-3 bites worth, which is just lovely. And not to mention that buying the ingredients for the moon cakes cost me less than RM25 (S$12), and I got so many moon cakes. Definitely something to consider for the future!
- Storage: The moon cakes store quite well in the fridge. Be sure to keep them in an airtight container and make sure they don't stick to one another. Mine lasted for about a week before they were gone!
- Would I make this again?: This is the definitely the cheaper and better way - and what else is better than knowing what goes into what you are eating?
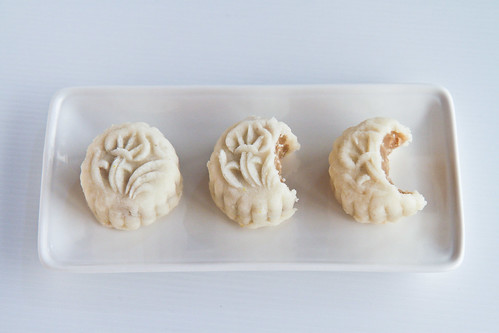
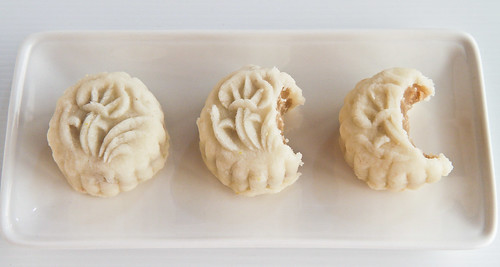 |
| Another close up of the first photo :] |
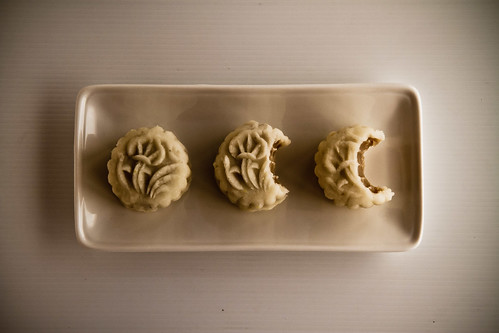 |
| Same photo, but I decided to use a film effect to emulate the 'shining moon' hanging in the dark sky. Not too successful with that huh? ;p |
Anyway, I am submitting this to Aspiring Bakers #11: Mid-Autumn Treats (September 2011), hosted by Happy Home Baking. Have a great Mid-Autumn Festival (中秋節) everyone - may your moon cakes be yummy and your lanterns shine brightly :D


16 comments:
Happy Mid Autumn Festival =)
wow yours turned out amazing! ive always enjoyed ones with yolks in them...but can't stand ones which are too sweet! i know, before we know it its gonna be xmas (the dept stores here already brought out the xmas trees!)
@Wilson: Thanks, enjoy your mid autumn festival as well, if you celebrate it :)
@Viv: oh wow christmas trees in september? that's kinda early no?!
Wow, gorgeous looking mooncakes, love the colored ones...happy mid-autumn festival to you:)
lovely mooncakes, I like the one with double colour! Happy Mid-autumn festival!
^^ 祝你中秋节快乐!
Happy Mid Autumn! The marbling pink n yellow snowskin is pretty..
Absolutely gorgeous! I do so lover the colours.
Happy Mid Autumn Festival! Lovely mooncakes, so pretty!
THese look beautiful--the snowskin mooncakes are my favorite kind :D Thanks for sharing your stories of celebrating it at school! Happy Mid-Autumn Festival!
the coloured ones look very pretty! Yeah, nowadays i think most kids will carry the battery operated lanterns, that will prevent them from burning, i think some parents also feel safer than carrying the plastic paper ones. there are still a lot of these plastic ones selling at my place here..all sorts of designs..mostly animal designs..:)
happy mid autumn! wonderful work on the mooncakes!
Lovely Snowskin Mooncake! I like the colourful one, so sweet.
to all, thanks for the nice comments :) Hope you guys had a wonderful mid-autumn festival!
These are very beautiful. I'd like to give snow skin mooncakes a try next year...and I'll hopefully have a mold by then!
Well done! I love the multicoloured ones. I so wish I had a mooncake mould.
Post a Comment