My blog has moved!

You should be automatically redirected in 6 seconds. If not, visit
http://www.unpastiche.com
and update your bookmarks.

Wednesday, March 9, 2011

Wordless Wednesday #01 - Capri

Yes, the sky and sea is really that blue.

This marks my first entry in Wordless Wednesday. Ironically, this post won't be wordless because I thought to explain that I hope to make this a start of a series showcasing the travel aspect of my life - mainly the amazing places I've been to and things I've seen over the recent years. So I shall let the photo speak a thousand words on my behalf.

PS: Compressing my photo into a smaller size has made the shrubbery on the bottom right of the picture and the cliffs look a tad weird? 

Monday, March 7, 2011

Focaccia #2: Herbed tomato focaccia di patate

As promised, this is the second installment of my focaccia series. This time, I decided to use a recipe from Nancy Harmon Jenkin’s book, Flavors of Puglia. This is a rather old book, dating to 1997, but it is a tome of recipes for anyone wanting to attempt Pugliese recipes (Puglia is at the heel of the boot of Italy, if you get what I mean). Pugliese recipes are very much Mediterranean, considering that it’s so far south of Italy, and it is of no surprise that focaccia is a staple in their cuisine because it is said that focaccia came from the Etruscans, who were greatly influenced by the Greeks. A little bit more about the focaccia – it takes its name from the Roman phrase panis focacius which means a flat loaf of bread cooked under the ashes of a fire or upon a hearth. Of course, most of us bakers don’t have a hearth, so we’ll just have to make do with an oven. Also, if you compare recipes for pizza dough and focaccia, you’ll realize that they are largely similar, if not the same. The focaccia can be regarded as the predecessor of the modern pizza, in more ways than one. It was definitely invented before the pizza (which is essentially flatbread with toppings) and I remember being told that the focaccia will be the first thing into the hearth (in pizzerias or bakeries), to test if the heat of the oven was right for the pizzas. If the focaccia came out right, it was time to load in the pizzas!

I know most Singaporeans think of focaccia as rectangular, but it is made in other shapes – like a circle. I decided to attempt the focaccia pugliese, and since it is traditionally made in a round tray, I decided to follow suit as well. The focaccia pugliese is actually a focaccia di patate, or potato focaccia. It can be topped with slices of potato, but the defining characteristic, in my opinion, is the addition of a mashed potato into the dough. I tried looking up for more information about this focaccia on the Internet but couldn’t find much information about it.

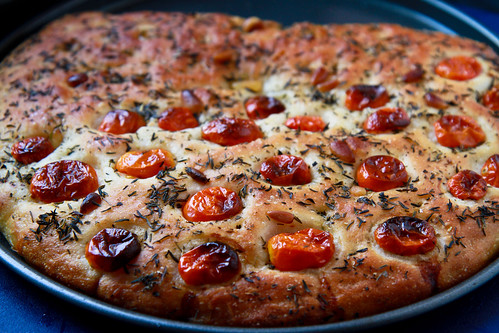
Yummy round focaccia :]

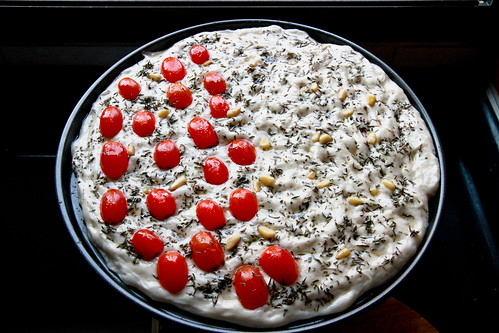
Anyway, I didn’t exactly follow Jenkin’s recipe for toppings, because I wanted to use Peter Reinhart’s herb oil as well as incorporate some tomatoes into the focaccia, having ate onion-and-herb versions the past few days. Of course, I couldn’t settle on just one flavor, so it was herbed tomatoes on one side, and pine nuts with herb oil on the other side.

Potato focaccia

Ingredients
For the dough: 
1 large potato, about 150g
½ tsp   dried yeast
1 tsp    salt
60 ml   warm water
1 tbl     extra virgin olive oil
180 g   bread flour

For the herb oil:
½ cup olive oil
1 tbl garlic powder (or fresh chopped garlic is fine)
½ tbl sea salt
1 tsp paprika powder
½ tsp ground black pepper
5 tbls of your desired herb mix. I used:
1 tbl dried basil
1 tbl dried parsley
1 tbl dried oregano
1 tbl dried thyme
1 tbl dried rosemary

Method:
  1. Preparing the mashed potato. Peel the potato and place it in a large bowl with boiling water to cover it. Place the bowl in a microwave and put it on high for 3 minutes. This will soften the potato enough for it to be mashed. Do note that there will be splashing, so use a microwave cover if you have it. Drain the water from the potato and mash it with a fork/potato masher. Allow it to cool and set aside.
  2. Preparing the starter. Add the yeast into the warm water. Add 80g of the bread flour into the mixture and let it sit for 30 minutes.
  3. Making the dough. The mixture should have increased in size and be bubbling a little. Add in the remaining flour. Once incorporated, add in the mashed potato and salt. Add in the olive oil and mix everything well. Once everything comes together in a shaggy dough, you can either use your mixer to knead the dough for about 5-7 minutes or turn it out onto your counter and knead it manually for about 10 minutes, or until the windowpane test is achieved. This dough will be slightly wet because it is a high-hydration dough, so do be sure to flour the counter and oil your hands to ensure that the proportions remain roughly the same. Form the dough into a tight ball and let it rest in a well-oiled bowl for an hour, or until doubled.
  4. Preparing the herb oil. Warm the olive oil a little, to about 50 degrees, before adding in all the herbs and dried ingredients. Take it off heat and let it stand for 30 minutes before using.
  5. Getting ready for the second proof. Use your palm to gently press on the dough to deflate it. Press until the whole pan is covered. It does not matter if the pan is not completely covered because the dough will expand for a second time. Using your fingers, make slight indentations all over the dough. This will result in ‘dimples’ in the dough. Add the tomatoes cut-side down onto the dough, pressing it into the dough so that it adheres. Add the raw pine nuts as well. Next, add the herb oil onto the dough, making sure the surface is well covered. Let the dough rest for another 40 minutes, or until it increases to about 1.5 times its size.
  6. Baking the focaccia. Preheat the oven to 220 degree Celsius and bake for 15-20 minutes. The surface should turn golden brown. Let it cool before removing. 
Janine's jots: 
  • Taste: I didn't like the taste of the focaccia as much as I liked the others, mainly because I found the potato taste a little disconcerting in a bread. The potato taste is not overwhelming, but it is present if you're a discerning eater.
  • Texture: The crumb of the focaccia was tight, with the requisite holes and airiness. I found it less chewy than the normal focaccia. 
  • Storage: Because of the use of tomatoes in the focaccia, you have to store it in the fridge after the first day, otherwise the moisture in the tomatoes will attract mould. It tastes just as good after three days. 
  • Would I make this again? Having tried other focaccia recipes, this will not be my to-go-to focaccia recipe. However, if you're in search of a focaccia which has a more tender crumb, this will be it. 
  • Other comments: The herb oil was highly raved about on several websites and forums, but I didn't find it overly impressive. The sharpness of the paprika and black pepper overwhelmed the herbs a little. 

In pictures: 
Mash up your boiled potato. You can use any time of potato, but a Russet would be most mashable. 
This is step 3 where starter is added into the flour, together with the other ingredients before kneading.  
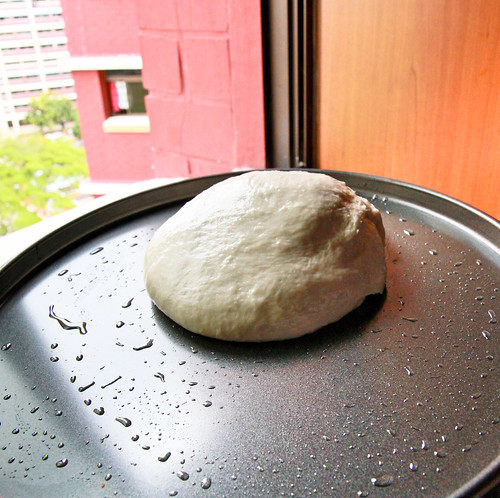
This is the size of my kneaded ball - note how small it is in comparison to the tray but don't worry! It'll expand to cover the entire tray! The "spots" are actually olive oil spots that I've spread onto the tray. Do oil the surface of the dough as well so that it doesn't dry out when proofing!
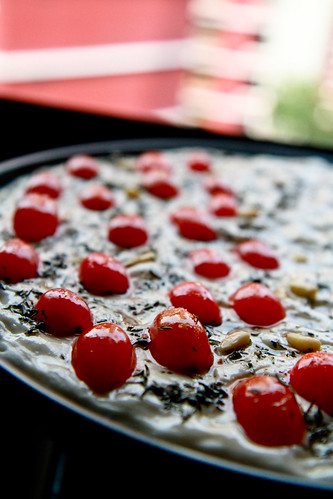
After the first proofing - I've flattened it and added my toppings. I like variety, so I've made two different flavours - one with herb and tomato, the other with more herbs and pine nuts :] Don't worry if the entire pan still isn't fully covered - you still have one last proofing before baking!
Oops sorry I was hungry so I ate a bit of the focaccia before I could muster the energy to take photos ;) The baked focaccia will shrink from the pan a little - that's normal!
Here's the only photo of the crumb that I remembered to take. The crumb of this focaccia is good - full of holes and it isn't 'heavy' or overly chewy. My siblings couldn't tell there was potato in it, but I could taste the mashed potato in it though!
Final cut-up shot of the focaccia. My surface is a little dry because I like my focaccia with more crusty bits than soft dimply bits, so I tend to use a little less oil than required. Do use the entire half cup of oil if you like it moist and soft. 

Am submitting this to Yeastspotting here :]

Friday, March 4, 2011

Focaccia #1: Focaccia Genovese

My best friend came over to my place to bake some time ago, during our mutual free day. She isn't one to bake bread, but she was very inspired by 제빵왕 김탁구 (King of Baking, Kim Tak Goo)! I'm sure from the name you can tell that it's related to baking - bread specifically. It's a typical Korean drama, with complicated sub-plots and vengeance and revenge and what not, but that's besides the point. The point is that, there is alot of baking done in the show! Here's a tiny clip of the father baking :)


Well, this is not exactly inaccurate, as the clip owner suggests, because breads do contain eggs. The only gripe I had was how fast the bread proofed and rose but well, it's a show after all right! 

Anyway, my friend wanted to bake a bread, so I was racking my brains as to which bread would be easy to do AND yummy to eat. I finally decided on focaccia, because both of us had an enjoyable time in Italy and focaccia is something that is pretty hard to go wrong on. Previously, I'd only used the no-knead recipe for focaccia breads (which yield damn tasty breads btw), but in this case, since my friend wanted to experience the feeling of making breads herself, the no-knead recipe was a no-go, because I'd have to put together the ingredients the night before and only do some brief kneading before putting the bread in the oven. My search brought me to Amiscell's blog, a native Italian living in Singapore. His blog isn't frequently updated nowadays, but do take a look at his archives if you're interested in Italian cooking! Like most Italians, he probably goes by the motto of fresh produce, cooked simply. That's what I totally love about Italian cuisine. How pasta and pizza and breads in Italy (oh not forgetting gelato!) can taste so good - just because the freshest and best quality ingredients are used. I once ate a tortellini dish in Modena, and it was "just" tortellini in broth, but I tell you, it was the one of the best, and by far the most memorable meal I had in Italy. The trattoria had no menu, and it was definitely family-run. The daughter came up to us, speaking to us in Italian. Luckily, I could understand little bits of Italian (I'm pretty good with Italian food names hehe - and French ones as well heh) and we managed to order ourselves a primo, a secondo with some contorno and dolce :] That's basically a first course of pasta (I had tortellini and I also tried their tagliatelle which was AWESOME), a second course of meat (I forgot what meat I had actually because the pasta was so excellent), contorno is basically side dishes of vegetables/salad to go with the secondo and dessert! Of course, there is the caffè served after the meal, to cleanse your palate. I'm sorry I don't have any pictures to go along with the description but you've to trust me on this - it was dee-li-cious!

OH and I totally forgot the most important part - while waiting for the meal, I had the most wonderful basket of bread, together with balsamic vinegar and olive oil. And lambrusco of course. The bread, consisted of what I think is a variation of focaccia - because there's probably a million variations of focaccia in Italy and it basically just refers to any flatbread. Modena is in the province where balsamic vinegar originated - Emilia-Romagna (since the Middle Ages!), and I tell you, it is seriously THE BEST balsamic vinegar you'll ever have, period. I've eaten at quite a number of Italian establishments in Singapore, and so far, no balsamic vinegar served here even comes close to beating the ones served in Modena. The aceto balsamico is served in tiny round-bottomed flasks, with cork-stoppers which have red wax seals on them. I've had the pleasure of trying those aged 12 years and 25 years (the premium types), and it is just phenomenal. It's totally unlike any type of vinegar with balsamic vinegar is actually sweet, but it has this sour bite that is not over the top, making the sweetness totally acceptable. It's quite a lousy description because you'll really only understand what I mean when you taste it!

Anyway, enough of my rambling - I do get quite passionate about my food adventures in Europe, and I had a number of them considering that I spent a year there - I decided to make focaccia genovese, which basically translates to Genoa focaccia, or focaccia of Genoa. Genoa is a province in Liguria, which is in Northwest Italy (I especially remember Genoa because it's Genova in Italian, and the Princess in Princess Diaries (played by Anne Hathaway) came from the Kingdom of Genovia - which is rather similar in spelling lol. Anyhow, focaccia genovese is really a staple of Ligurian cuisine - and wikipedia defines it as a flat bread of up to 2 cm, seasoned with olive oil and salt. So what we've attempted below is really an onion-and-thyme-topped homage to focaccia genovese :]

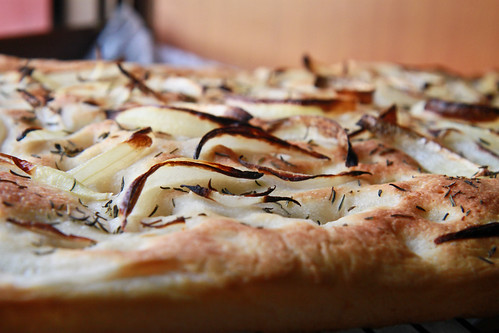
Love the burnt bits of onion :] I used dried thyme here btw.

I actually followed Amiscell's recipe to a T, and he has some lovely step-by-step pictures for those interested. You'll need to set aside about 4 hours of your time for baking this, out of which 1 hour will be active time - ie, time that you'll be kneading and shaping, the rest of the time is basically waiting for the yeast and flour to do its magic, and you can do anything else you want to do while waiting. Don't be put off by the many steps and the 4 times of proofing - it isn't too bad and my instructions below should be quite clear!


Focaccia Genovese
Makes enough for a 35cm by 28cm baking tray

Ingredients: 
For the bread: 
200 ml   water, at room temperature
20 g       extra virgin olive oil
7 g         salt
3 g         sugar
340 g     bread flour
7g          dry yeast


For the topping: 
Some olive oil mixed with some warm water (in 3:1 proportions)
Some sea salt
And anything else you desire - I used 1 tbl of dried thyme and half an onion. 

Method:
  1. Dissolve the yeast in water (about 20-30ml of the 200ml should suffice). 
  2. Mix the rest of the water, sugar, olive oil, salt and half the flour (170g) into a large mixing bowl. 
  3. Pour the yeast-water mixture into the dough and knead until it is fully incorporated.
  4. Add in the remaining flour, and continue kneading until the dough becomes tacky, and not excessively sticky. This should take about 10-20 minutes of hand kneading. 
  5. Place the dough in the bowl and cover it with a damp tea towel. Let the dough rest for about 15 minutes at room temperature. 
  6. Take the dough out of the bowl and stretch the dough slightly, so that you can do a letter fold. This is basically mentally dividing the dough in three and folding the two ends into the centre. This is your first horizontal fold. Turn your dough 90 degrees and do the same letter fold - this will be your vertical fold. Your dough should be about 30% the size of the tray you are baking it in. 
  7. Pour some olive oil onto a baking tray, making sure that it evenly coats the entire tray. Place your folded dough onto the tray, and make sure it is evenly coated with olive oil on both sides as well. Let the dough rest for a 2nd time, for about 45 minutes, or until it has doubled in size. 
  8. Using the heel of your hands, press the dough into the tray, flattening it until the whole tray is covered with the dough. Sprinkle some salt (preferably sea salt) onto the top to give the focaccia flavor. Let the dough rest for the 3rd time, for about 30 minutes. 
  9. Pour some more olive oil into a bowl, and add some water to it to mix. Using clean palms, dip your hands with the oil-water mixture, and massage the liquid onto the top of your focaccia to spread it uniformly. After this, using your fingers (8 fingers minus the thumbs) - make depressions in the focaccia from the top to the bottom. You can add more of the olive-water mixture so that it sinks into the depressions. The oil-coated depressions will form softer areas when baked, which juxtaposed nicely against the crispy crust. 
  10. At this point, add your favorite toppings to the focaccia. Here, I added sliced onions and dried thyme. 
  11. Let the focaccia rest for a 4th and final time - for about 60 minutes. The dough would have risen to about 1.5 times its height. It does not matter if it doesn't rise as much since this is a flatbread! 
  12. At about 30 minutes into the 4th proofing, preheat your oven at 220 degrees. 
  13. Place the dough into the oven and bake for 15 minutes, or until the focaccia is golden brown. 
  14. Remove from oven, and immediately remove the focaccia from the tray and onto a cooling rack to cool for 10 minutes before slicing. This is to make sure that the bottom of the focaccia does not turn soggy from the steam. Brush generously with the olive-oil mixture before serving. 

Janine's jots: 
  • The original recipe uses 3g of malt instead of sugar, but I don't think most Singaporean bakers will have malt lying around their kitchen, and sugar really is quite a fine substitute in my opinion. 
  • If you are not kneading by hand, you can still use this recipe using a mixer - the time used in step 4 for kneading will most likely be reduced by half. 
  • You can use light olive oil or extra virgin olive oil or plain normal olive oil - it's all fine but just remember that olive oil will have a stronger taste. Italians are quite liberal in their use of olive oil, so don't be stingy when pouring the olive oil onto the focaccia!
  • If you have a pizza stone, do use it instead to bake your focaccia because this will give a more evenly baked crust and bottom. 

In pictures:

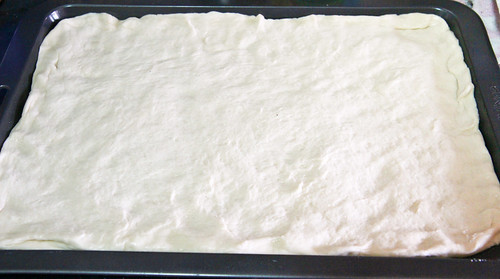
This is the dough after the 2nd proofing. We've pressed it to cover the entire baking tray. Do try to use your hand to flatten it and don't stretch it because you want uniform thickness!
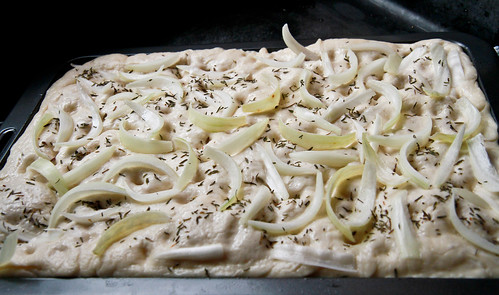
Do try to slice your onions thickly - 5mm would be great and remember to press them into the dough, otherwise they will fall off when baked! Also, the onions might look a lot, but it's only half an onion and once baked, it's actually not that much after all! A whole onion would have been perfect!

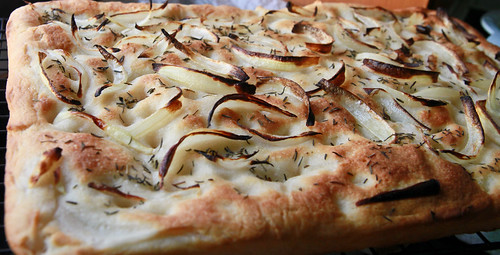
This is the completed focaccia! I've quite a bit of burnt onion because they weren't sliced thick enough. Also, I'm not a fan of too much olive oil, which explains why you see more golden brown bits as compared to the whitish bits, which are the depressions containing the olive-oil mixture.

Yet another gratuitous shot of the focaccia. Do note that the depressions you made in step 9 will result in the white parts you see above because there is more oil in the depressions. These parts, eaten together with the crusty parts - are just perfect!

This will be the first of my focaccia posts (I'll have at least 3 more focaccia posts with different recipes in each) and I've to admit after trying out a number of recipes, this is the second recipe I will go to if I want to eat focaccia genovese the traditional way. The first (and my favorite) recipe I will go to is Peter Reinhart's focaccia recipe, which I'll post soon. There is a longer waiting time for his recipe (overnight proofing in the fridge) - but it's worth it. 

Wednesday, March 2, 2011

List of Baking Supplies Stores in Singapore

When I first started out with baking, I've to admit that besides Phoon Huat, I knew of very few baking places or baking shops. So I actually went on this spree where I compiled a long long list of baking supplies stores from the internet, and went to each and every one of these stores below, just to take a look and perhaps, buy things. I actually managed to take pictures of the interior and exterior of most of them using my iPhone, but since it crashed on me not long ago without me backing up those photos, sadly those pictures are gone. I know many people would think I'm crazy, but I'm really very cheapo in more ways that one, and I'd really go out of my way to get a certain thing if it's cheaper in a certain place - including transport and time costs of course, I'm not that dumb :o Anyway, I know most people might have a usual place that they go to for ingredients, but I figured a list would be helpful for anyone new (like I was) who might be wondering if there's any store nearby selling X ingredient. I was sort of a pest, asking some bloggers where they got X or Y ingredient because I had no idea where to get them when I was new to baking.  

I'll start with the more popular/common stores before highlighting the others. The stores are in no particular order really. They are mainly baking supplies or bakeware stores, but they do sell cookware and other accessories needed for adventures in the kitchen. Some also hold cooking and baking classes for the enthusiast - just check out the webpages to take a look!

ETA: If you want to have an idea of how prices of different brands of chocolate, cocoa powder and butter differ among these stores - do check out my post on price comparisons of baking ingredients in Singapore. 

Just a little disclaimer that I have not been remunerated by anyone to list these stores down, and comments of each place are solely my own. 

List of Baking Supplies Stores in Singapore 
  1.  Cold Storage supermarkets
    • List of branches here
    • Comments: Everyone knows that these places contain the most basic of ingredients - flour, sugar, salt and whatnot. The bigger branches will have more unique baking ingredients.  Most Cold Storage branches (I esp like the Great World City one because it is HUGE and has lots of stuff) have an assortment of Bob's Red Mill's flours - which I find helpful for bread making and they have a huge range of butters as well. PLUS these supermarkets do home delivery if you spend above a certain amount!
    • Also, Cold Storage runs this premium market place called Jason's or Marketplace - and they have a HUGE range of imported goods (mainly to cater to expats) but you can find canned blueberries, frozen raspberries, puff pastry sheets, etc here! If you are baking for a vegan - find the flours you need here, seriously!
  2. NTUC supermarkets
    • List of branches here
    • Fairprice Finest branches have quite a huge variety of creams with various butterfat content for baking, as well as a huge variety of organic ingredients for baking. The baking ingredients aisle is pretty long :] They also sell baking equipment like Wilton trays, etc.
    • In my opinion, it's generally cheaper than Cold Storage. 
  3. Giant supermarkets
    • List of branches here
    • Mostly selling more plebian baking items. 
  4. Other supermarkets
    • Obviously, there's Carrefour and Isetan (good for Japanese baking stuff) but I wanted to highlight ThreeSixty Supermarket in Ion. Most people probably don't know about it since it's located all the way up in Ion's 4th floor and they obviously cater to people living there. The prices are rather jacked up, and the space is what I call atas (Malay for up or high, but colloquialism for 'catering to the higher echelons of society' - this is the nicest way I can put it). They have lots of imported goods - Waitrose products and SUPER DELICIOUS chips which I can't remember the brand now for the life of me. They also have stuff like Fage greek yogurt, choices of buttermilk and half-and-halves, like 20 types of flour, and they have a huge selection of pasta (fresh!). I particularly love the food section but that's irrelevant here, hehe. Note that this supermarket doesn't go easy on your pocket!
  5. Phoon Huat
    • List of store locations here
    • Note that the stores have different opening hours, remember to check before going! Also, sometimes things go out of stock, so I usually give the branch I'm going to a call to check. 
    • Well, who doesn't know about Phoon Huat? They were initially called Red Man, with a few branches scattered around Singapore, but have expanded (so has their product variety!) If you need a single place to go to satisfy your baking needs, Phoon Huat should be able to do it, unless you're looking for expensive French butter or Valrhona chocolate. I especially like Phoon Huat because I'm their member and have a 5% discount hehe. They have baking accessories, cupcake liners... basically almost everything! 
  6. ToTT
    • Address: 896 Dunearn Road, #01-01A, Singapore 589472
    • Contact: 62197077
    • Opening Hours: 11am to 10pm daily 
    • Webpage: here
    • This megastore just opened last year, and it's a venture of Sia Huat, which is this huge kitchen equipment and everything-food supplier. I like the fact that it's huge and has lots of space, but it doesn't have much of baking ingredients here I'm afraid. If I remember correctly, they have nut powders in a tiny fridge, but that's about all. If however you are looking for baking equipment, you've come to the right place! All sorts of sizes and shapes of pans, trays, and what-have-you here! I bought a cute flour sieve here because I couldn't leave empty-handed! The only thing I didn't like was that parking was quite troublesome and I had to pay :(
    • Oh, and you should check out the website to note the classes they are conducting if you're interested in any. 
  7. Sun Lik Trading
    • Address: 33 Seah Street, Singapore 188389
    • Contact: 63380980
    • Opening Hours: 8.30am to 6.30pm from Mondays to Fridays, 8.30am-6pm on Saturdays, closed on Sundays. 
    • Webpage: http://sunliktrading.com/
    • Now, this is the place to go if you've been looking for a place to get Valrhona or Callebaut chocolate. They have all sorts of good quality ingredients here, but it's rather small. They also have small selections of trays and other equipment. 
  8. Bake-it-yourself
    • Address: 182 Bukit Timah Road, Singapore 229853
    • Contact: 68871258
    • Opening Hours: 11am to 7pm, Mondays to Saturdays, closed on Sundays. 
    • Webpage: http://www.b-i-y.com/
    • You might have problems looking for a place to park but this is a decorator's dream I think. It's pink on the inside, and there's two floors worth of candy moulds, cute tins, sprinkles, etc. The upside is that it has huge variety (you can check out the website for an indication) but downside is that it is a little costly. 
  9. Pantry Magic Lemon Zest
    • Address: 43 Jalan Merah Saga, Chip Bee Gardens, #01-80, Holland Village, Singapore 278115
    • Contact: 64710566
    • Webpage: http://www.lemonzestlife.com/
    • This same store used to be known as Pantry Magic, but after some renovation works earlier in the year, they've changed their name to Lemon Zest. They no longer sell baking ingredients, with the exception of Nielsen-Massey vanilla and other extracts. They mostly sell bakeware, cookware, beautiful cake stands and other pots and pans. They also sell books and magazines! 
  10. Shermay's Cooking School
    • Address: 43 Jalan Merah Saga, Chip Bee Gardens, #01-76, Holland Village, Singapore 278115
    • Contact: 64798442 / 74798414
    • Opening Hours: 10am - 8.30pm daily 
    • Webpage: http://www.shermay.com
    • As the name suggests, they are actually more well-known for their cooking and baking classes, which are conducted by famous chefs and are widely received in Singapore. Their store also doubles up as a retail store, which sells accessories for Kitchenaid, Nordicware items, as well as Valrhona Chocolate. Also a source for French butter, Elle & Vire. 
  11. Kitchen Capers
    • Address: Block 71, Kallang Bahru #01-531F, Singapore 330071
    • Contact: 63920159
    • Opening Hours: 10am to 8.30pm daily 
    • Webpage: http://www.kitchencapers.net
    • This originally started as an online store, but it now has a retail location. This is yet another option for those staying in the East - it also sells interesting ingredients that you can't get in say, Phoon Huat. If you're looking for egg white powder for macarons heh (not meringue powder, mind you) or Valrhona etc type of chocolates, you can get them here. The online store provides you with an indication of price, which I like. 
  12. Gim Hin Lee
    • Address: Block 10, Haig Road, #01-363/5, Singapore 430010
    • Contact: 67428388
    • Opening Hours: 9am to 9pm Monday - Saturday, 9am to 6pm on Sunday. 
    • This store is really convenient staying in the East, but because it's located in a neighbourhood, transport options aren't really that great. It sells a similar variety of items to Phoon Huat - so no expensive baking ingredients here. They are also the official retail location for Bake King products. They have an official online store page here for you to purchase items and have them delivered to you!
  13. Ailin Bakery House
    • Address: 845 Geylang Road #01-48, Tanjong Katong Complex, Singapore 400845
    • Contact: 67432693
    • This is yet another option for Eastsiders - it is a really small shop, but they sell a huge variety of things. From what I've read online, their house brand ingredients are really popular - pineapple paste for pineapple tarts during the new year, essences, as well as cake and muffin mixes. 

People who know me know that I'm addicted to lists. I like listing down things, so I do hope this list helps someone - if there are any errors to anything above, do let me know and I'll amend it!

For those interested in seeing the interior of some of the places (BIY, Sun Lik, Gim Hin Lee), do check out the video links on the right sidebar of Oi Lin's blog. 

Ps, for those in Malaysia - I found a list which might be helpful too!

Monday, February 28, 2011

A little update on my homemade vanilla extract

Time really flies, it really does.

I first started making own homemade vanilla extract when I started the blog, and now, my blog is already 2 months old! I still remember thinking, gosh, it'll take ages for the vanilla extract to start smelling like a real vanilla extract. Fast forward to today, 28 February - my vanilla extract is 2 months (+2 days) old and is ready to be used! And I've to say that minus the vodka hit that I got from first opening the bottle, the extract smells exactly like Tahitian one I have :)

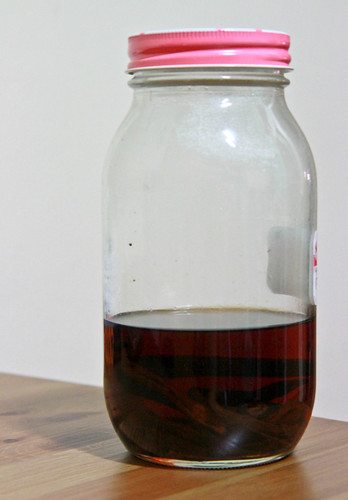
Here's how my baby looked last month (at 4 weeks old):

Here's how my baby now: 

And yes, I've upgraded it to a larger jar (which is $2 from Daiso), so that I can submerge the vanilla beans with ease and add more vodka when needed. Although the color difference isn't too great from one to two months, the flavor really does intensify - I occasionally open the jar up to smell the vanilla extract and it really smells better and better! Whoever said that vanilla was like wine was right on the money! It really is better with age - it becomes more mature, and there is more depth to the smell. Taste-wise, I can't tell yet because I haven't tried it in my baking, because I intend to age it for a little while more, AND finish using my existing bottle of vanilla extract before I strain this extract (to get rid of the fibres from the pod) and start using it :]

I might even do a giveaway when this vanilla extract is mature enough (in my opinion), so do stay tuned!  If you want to make your own homemade vanilla extract, all you need is a jar, a knife, some strong alcohol, and some vanilla beans! And lots of patience of course! It really is that simple!

Thursday, February 24, 2011

Wholemeal Yogurt Buns

I used to think that I wasn’t a really lovey-dovey kind of person, but this entire month, I’ve been baking/making things related to love or hearts. Maybe it’s partly because Aspiring Bakers’ theme for February has been at the back of my head, so I was racking my brains as to what I could make that was heart-shaped. But I do think it’s more of the former than the latter, mainly because my valentine is more than 7000km away, and he can't try my food like how he did when he was around, so these posts are a virtual feast (I hope) for him. 

Anyway, after my wholemeal tangzhong rolls, I embarked on yet another bread recipe because I was in search of the world’s softest bun! One blog linked to the other, and I landed on Zurin’s blog. She says that it is the world’s softest buns and boy, her pictures do look like it! But I have to admit that I was a teeny weeny disappointed because my buns weren’t as soft and fluffy as I anticipated them to be. Yes, they were soft (and remained soft even 3 days after!) but they were not as soft as those you can get from bakeries. My mom tells me that there is no way I can get bakery-quality buns, because those breads have bread improvers and softeners in them, but so many other blogs have claimed that they managed to get bakery-quality breads with their recipes. So I’m wondering if we are comparing the breads with different bakery standards? Or is it because of the way I knead the bun, or my oven or the lack of egg wash on the buns? There are so many variables involved, but I think I can cancel out the oven bit because I have bought an oven thermometer and have been ensuring that the temperature is super duper accurate – unless those other bakers have inaccurate temperature ovens lol. But as for the kneading bit, I’m definitely going to try kneading with my Bombino (long story, but it’s the name of my KA mixer) and see if there is any visible difference. Rest assured, I will definitely attempt this recipe again because I do see its potential for bakery-quality soft rolls and will come back with a post-mortem, to dissect where I think I went wrong/right. I'm probably gonna combine this yogurt recipe together with the water-roux/ tangzhong method to see where it takes me =]

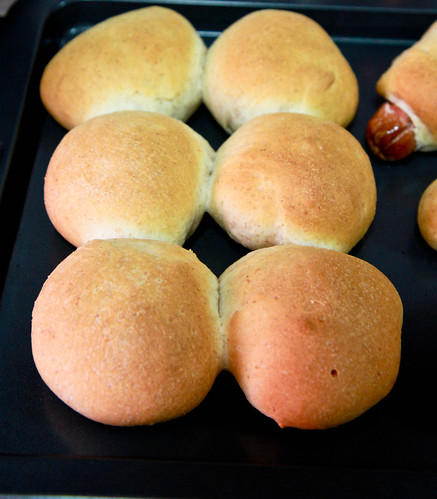
Instead of making normal round shaped rolls this time, I experimented with all sorts of mini rolls – I made braided nutella buns, bite-sized buns with sausages, buns with nutella inside, and normal plain heart-shaped buns. The other buns are not aesthetically pleasing at all, so you only get a glimpse of the normal and filled round buns as well as the sausage bun (see it sticking out on the right below). The heart-shaped buns weren’t that successful however, because they kind of lost their shape after the second proofing and I didn’t really dare to shape them after that, for fear that the bread would be dense from my shaping. I have newfound admiration for those bloggers who managed to get such lovely heart shaped buns! 

Buns just don't look as nice without an egg wash, don't they?

Yogurt Rolls (hand kneaded)

Ingredients 
220 g    bread flour 
30 g      wholemeal flour (you can use all 250g of bread flour if you like) 
15 g      castor sugar 
3 g        salt 
3 g        yeast 
120 g    yogurt 
40 g      milk 
25 g      egg 
30 g      butter 

Method: 
  1. Sieve the flours, salt, yeast and sugar in a mixing bowl.
  2. In a saucepan, add your milk, yogurt and butter and allow it to warm over a medium heat. Once the mixture turns lukewarm (about 45deg), take it off the fire and allow it to cool slightly to about 40deg. You don't need a thermometer for this - as long as your bare finger is able to stand the warmth, it should be about right.
  3. Crack the egg into a separate bowl and pour some of the liquid mixture to temper the egg. This is to ensure that the egg will not curdle when you add it into the warm liquid mixture.
  4. Mix the egg mixture into the rest of the liquid mixture until fully incorporated. 
  5. Make a well in the dry ingredients and pour the wet ingredients in, stirring with the wooden spoon until the flour is incorporated and you start getting a shaggy mass of dough. 
  6. Lightly flour your work surface and turn the dough out onto it. Knead for about 10 minutes, until the dough becomes smooth and elastic. 
  7. Once it passes the window pane test, round up the dough and rest it inside a lightly oiled bowl. Cover with a tea towel and allow the dough to rest until it doubles in size (approximately 45 minutes in our hot weather). 
  8. Punch down the dough and knead it for a few minutes before dividing your dough into your desired number. This recipe ideally makes 6 rolls, but I divided mine into small bite size buns and rolls weighing about 40g each. 
  9. Once shaped, place the buns into a greased pan, leaving about an inch gap in between each roll and allow them to rest and proof for another 45 minutes, or until they have doubled in size. 
  10. Preheat the oven to 170degrees, and if you wish, apply an egg wash onto your rolls once they have doubled in size. 
  11. Bake for 20 minutes, or until golden brown and leave to cool for at least 10 minutes before consuming your buns =)
In pictures: 
This is the size of the dough after it has proofed for about 45 minutes. To test if the proofing is sufficient, simply poke a hole in the dough (see the hole on the right?) and see if the hole remains there. If it does, proofing is done and you can proceed to the next step! If not, cover the bowl and wait for another 10 minutes before trying the 'poke' test again.
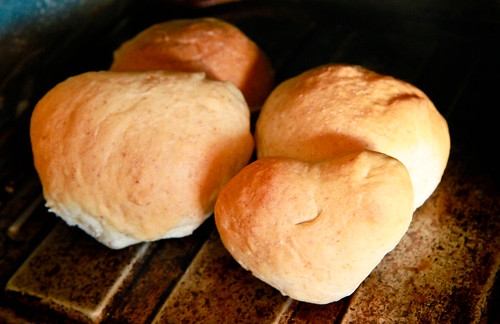
My attempt at making heart-shaped buns. They still resemble heart shapes here, but wait till you see the next photo :/
No longer so lovey-dovey huh? :(
My only consolation - one bun which resembled a heart - ps it has a nutella surprise inside! :)
This will be my last show of support to Ellena for Aspiring Bakers #4: Love is in the Air (Feb 2011), because I'll be doing tarts next and there ain't gonna be no hearts there, just lotsa 'buttah' =)

Monday, February 21, 2011

Strawberry & Pistachio Financiers

I am working my way up the French pastry food chain, slowly and steadily. Over the span of the last year, I’ve attempted choux puffs, éclairs (which are essentially choux puffs with cream and chocolate), tuiles and macarons, and I’ve diligently noted down the recipes that work for me and other comments in my handy little spiral bound notebook.

I am a girl on a mission, really. I am on a mission to master baking techniques, and I think French pastry is a good way to start. Nowhere else have I encountered such need for precision and skill as I have in the making of French pastry. The fact that I love French pastry is a huge plus, of course. I still remember the day when Jon and I stepped into Ladurée, and I bought a huge box of macarons, as well as this tiny delightful pastry, which I forgot the name of, because I was so bedazzled by all that variety of pastries. But nevertheless, the first bite into the pastry brought me to pastry heaven. I realized then why I paid 3 euros for a tiny little thing which was half the size of my palm, and why Ladurée is as famous as it is today. The outside was crispy, but the moment you bit into it, the crisp exterior gave way to a soft flakey, buttery interior which contained just the right amount of sugar and flavor within those layers. (Not that its macarons were not good, but that tiny pastry left a deeper impression on me than the macarons because I’m not too much for overly sweet pastries.) I want to accomplish that one day – that something of mine will evoke such great enjoyment on another that it will leave an indelible impression in that person’s memories. That, to me, is the epitome of good baking.

Anyway, rambles aside, I’m working my way down my imaginary pastry list and today, I can tick financiers off it. I’m actually moving onto viennoiserie items such as pains (which is French for bread and not pain as in ouch) and croissants pretty soon because I’ve been buoyed up by the fact that the flakey piecrust I made was a huge success with my parents and puff pastry has been calling my name for the longest time! After that, I’m gonna hop on back to harder types of French pastry (in my opinion), like the croquembouche (which figuratively killed many contenders in Masterchef Australia), mille-feuille and most importantly, those complicated gateaus that I’ve been dying to try!

Now, time for a little history. You can skip this entire part if you’re not history-inclined but I am a history buff and information junkie, and I really like to research extensively about any new ‘thing’ I’m trying out. Well according to Dorie Greenspan in Paris Sweets and here as well, “The financier is a pure-bred Parisian, having been created in the late nineteenth century by a pastry chef named Lasne, who had a shop on the rue Saint-Denis near the Bourse, the city's stock exchange.  Lasne had a bead on his clients:  he knew that they were rich, discriminating and always in a hurry, so he designed his little unglazed cookie-cake so that it could be eaten without a knife, fork or spoon and without risk to suit, shirt or tie.  It was an early and classy form of fast food.”

Now, I do believe it was intentional on Lasne’s part, that he did a number of intelligent things with the financier. First, he named it financier, which we all know in plain English means someone (usually rich and a big shot) in the finance industry – this must have really piqued those financiers’ (the person) attention! Second, he baked these cakes in shallow rectangular pans, such that they resembled ingots or gold bars, lending itself to its namesake. And most importantly, he used really rich and expensive ingredients like butter and almond (back in those days they were luxurious and rich), and I can bet my money that those financiers got a kick out of being able to afford these ingot-like tea cakes which plebian people could not afford!

Onto the cake itself – the main reason I attempted this recipe was because I had pistachios lying around which I had originally intended for pistachio macarons, but I decided on financiers instead because I wanted to try something different, something cakey instead. Usual financier recipes use almond meal - like you see in Dorie's recipe which I've linked above. The other attractive thing about the financiers was the fact that they used browned butter, and that they would be tiny cookies with a crispy exterior giving way to a nutty, not-so-crumbly interior. This was what drew me in the most. I love food with hard or crispy or crunchy exteriors!

Now for my blasphemous admissions - I’ve to admit that though I did try chouquettes and madeleines in France, I never did come across a financier. It might be because my eyes weren’t exactly on a lookout for them or maybe because I was too eager hoping into boulangeries to get baguettes and croissants that I didn’t have much time for financiers. So I’m actually making these financiers with no basis of comparison. Second, I didn’t have those shallow rectangular pans which are characteristic of a financier, so I settled for my muffin pan instead. And, I used a recipe which asked for whipped egg whites despite reading that a quick mix with normal egg whites will do =/ Nevertheless, I thought this recipe turned out pretty well!

Strawberry & Pistachio Financiers 
Makes 6 6-cm (Ø) financiers, adapted from Leemei (do check out her photos of these financiers - they look awesome!)

Ingredients:
25 g ground almonds
50 g ground pistachios
45 g unsalted butter
40 g icing sugar
15 g all-purpose flour
45 g egg whites (about 1.5 eggs)
⅛ tsp salt
¼ tsp vanilla extract 

Method:
  1. Grind the pistachios and almonds into powder. You can roast them for about 10 minutes at 160°C if you want a nuttier taste to emerge in your financiers.
  2. In the meantime, place the butter into a saucepan and put it on medium heat to start ‘browning the butter’. This basically is melting down the butter until it turns slightly brown and emits this nutty aroma. Take off heat once it’s done and allow it to cool.
  3. In a bowl, sieve the ground nut powders, together with flour and icing sugar.
  4. Beat the egg whites until you get soft peaks.
  5. Make a well in the centre of the dry ingredients and add your vanilla extract. Mix in the whipped egg whites. Once incorporated, mix in the cooled browned butter. Be sure to only use the liquid from the browned butter and not the solids. *In my ingredient proportions above, I’ve taken into account the loss of weight from browning the butter (the original recipe only needs 37g worth of melted butter).
  6. After mixing everything, you should get a batter which is almost similar to a madeleine batter. Cover this up and put it into the refrigerator to chill for at least 2 hours. (I left mine overnight.)
  7. Preheat your oven to 180°C. In the meantime, take your batter out of the fridge and spoon your mixture into the mould. 
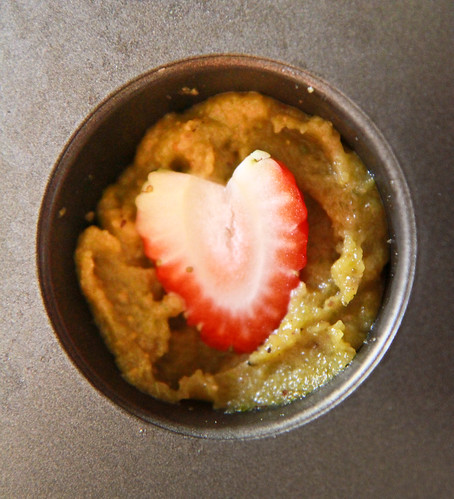
  8. Wash, hull and slice your strawberries before placing them on top each of your financier. If you wish, you can chop up some more pistachios to sprinkle on top. 
  9. Bake for 20 minutes or until the tops of the financiers turn golden brown and are dry to touch. Remove from the moulds and allow to cool for at least 15 minutes before consuming them. You can add some icing sugar atop each for decorative purposes (or added sweetness) if you like =)
Janine’s tips: 
  • Be sure to mix the batter as little as possible, because you don’t want the gluten in the flour to form extensively and give you a tough financier. Some recipes require a resting period for the financier (like this recipe), but others do not. I’m not too sure why, but I suspect it’s to enhance the contrast between the crusty outside and a soft, moist inside. 
  • After chilling your mixture in the fridge, you might have to wait for a couple of minutes before the batter is amenable to scooping because the batter hardens a fair bit after it's chilled! Also, you don’t need to grease your moulds because the batter is quite rich and should come off easily when the financiers are baked.
  • Some people don't recommend the use of strawberries, because its high moisture content might result in it sinking to the bottom of the batter. I didn't face such a problem but if you are afraid of sinking strawberries, one tip is to bake the batter for about 2-3 minutes, before opening the oven door to add your strawberry slices. You don't need to be afraid of sinking tops because there isn't any rising involved for financiers!
  • Most importantly, pay attention to your butter when you’re browning it! Because of the small quantity of butter, it melts really quickly and the entire process is but a few minutes! Keep your nose close to the saucepan to smell for that ‘nutty’ aroma and once you do, take the pan off the heat! If you get a dark brown liquid, my advice is for you to throw it away and to start again, because it’ll taste bitter.
  • I also discovered something amazing you can do with your food processor (or in my case, my chopper!) I used my mini food chopper to grind up my nuts, and because I saw that some recipes required whipped egg whites and some did not, I wasn't too concerned about clean bowls and equipment for the egg whites, so I dumped the whites into the same chopper I'd used before and pulsed it for about 5 minutes. The egg whites emerged softly whipped, similar to what you get from a mixer! The only downside is that my chopper did get pretty heated up and it is small, so perhaps whites from 3 eggs would be the maximum it can take.  
In pictures: 
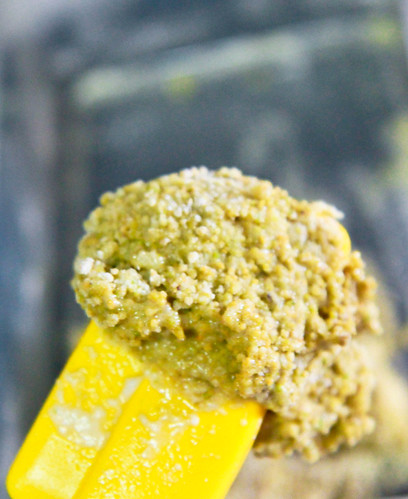
The batter before I started folding in the egg whites. My dry ingredients look a little gravelly because I didn't grind the nuts finely since I wanted a more 'chewy' texture
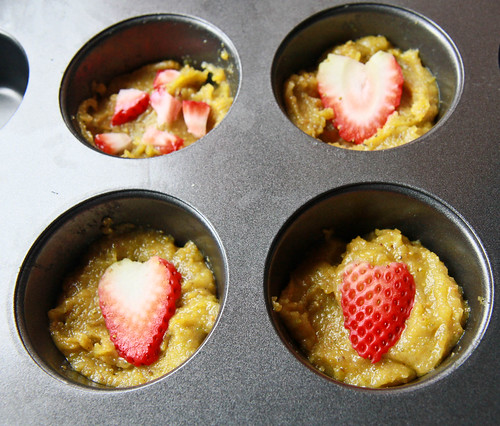
Spoon the batter into the moulds and place your sliced strawberries on top! You can slice them or chop them, as you wish =)
And here's another photo, just because the light was soooo good today :)
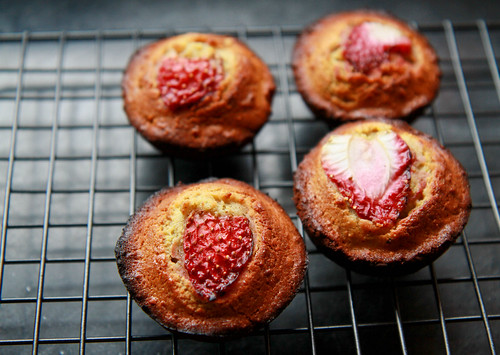
Some of my financiers were a little overbaked - spot the black parts? =/


Also, from what I’ve read, friands are like an Australian relative – I’ve compared several recipes and friands basically contain almost the same proportion of nut meal to butter as do financiers. The only difference it seems is that friands are typically baked in small oval pans.

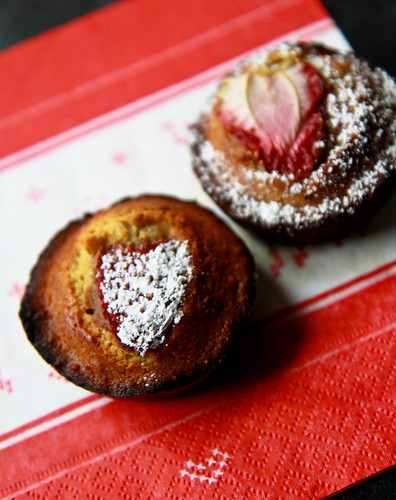
See the heart shape from the strawberry?
Strawberries lend themselves really well to Valentine's and I think it's partly because of its shape! If you slice the strawberry properly, you’ll get an instant heart shape! 

But most importantly, I think strawberries depict love and what it entails very well - they are actually really ugly looking on the outside - I mean, come on, look at those pits with seeds and tiny hairs sticking out of them! but if you bite into them, you'll be rewarded with this sweet, and sometimes tart, flesh. And so, because I believe that love should not be celebrated merely on Valentine's, this is another post dedicated to my valentine, assuming he still has the time to read my blog. I hope you are eating your mandatory 4 pancakes every morning! I'm also submitting it to Aspiring Bakers #4: Love is in the Air (Feb 2011), which is hosted by Ellena this month. 

Sunday, February 20, 2011

=)

Here's a smiley face for the upcoming week (because I don't have classes)
Yes, I did take the photo on top of the lid of the lock&lock container I was storing the macarons in.

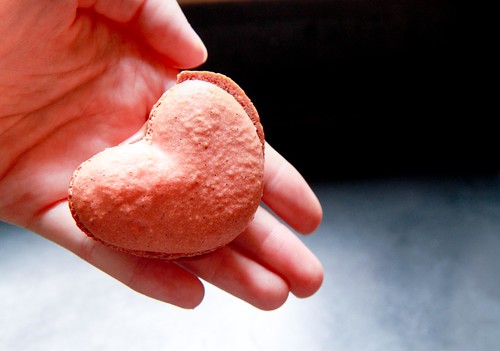
I'm still quite bad at apportioning filling for the macarons because as you can see, one of the macarons above has ganache flowing out of it and the heart-shaped one doesn't seem to have enough! And I did have a problem with matching heart-shaped shells because although I tried to pipe them uniformly, they turned out uniform BUT unsymmetrical, which meant that none of the shells actually matched one another =S And it's pretty obvious from this close-up picture that my macarons were the teeniest bit undermixed. Btw, here's the link to my vanilla bean macaron recipe if anyone's looking for it!

Here's to a 'light heart' this week!
I finally gave these macarons to my girlfriends when we met over Korean BBQ (2D1N Soju Bang - which was really value for money at $22 per head for a meat buffet) for our belated Valentine's day meal and the verdict was that it was not bad =) I bet they were confused by the filling of the macaron, because it not only contained mint chocolate, it also contained little bits of my salted caramel, which made it minty and salty at the same time! (I quite like the weird combination, btw)

I always look forward to meeting my girlfriends, because like the macarons, they are the nearest and dearest friends that I'll ever have; and my heart immediately lightens whenever I'm out with them because of the great company. On a side note, I'm definitely going to try macarons out a few more times at the very least, because I have yet to come up with a satisfactory filling/buttercream and there are a couple more variations on flavor and technique that I wanna experiment with!

Have a great week everyone!

Thursday, February 17, 2011

Wholemeal Bread Rolls, using tangzhong (汤种全麦面包)

I'm a person of contradiction, on one hand, I really like order and neatness (in terms of how I put my things, have folders for various things, etc) and yet my mom can attest to my lack of order, especially in my bedroom. I'm the same baking wise, for certain recipes, I'm quite the stickler for following instructions to a T, and for others, I just go by feel, which isn't exactly the best way for things like pastries. I'm also quite of a spur-of-the-moment kind of baker, so this bread was the product of my fancies during the weekend. 

I was studying, as usual, when it crossed my mind that I haven't been baking bread for a while now, since I had the necessary ingredients in the pantry (plus I needed to use up my wholemeal flour), I went to the kitchen to pound out some of my frustration on the dough. Btw, I highly recommend manual kneading of bread for anyone feeling highly stressed. I personally find it highly therapeutic and I usually do all my breads by hand, with no aid from the mixer or breadmaker. 
This recipe uses tangzhong, or what some bloggers have coined as the water-roux starter. In any case, it really helps with softer buns. For more information, please refer to my first ever post here! This recipe was adapted from Pei-Lin’s blog where she was making a wholemeal loaf. I’ve halved her recipe and made wholemeal rolls instead of a loaf but it’s still as yummy! They are still pretty soft the following day, as compared to usual bread recipes. This was also my first time using wholemeal flour to bake, and I really do like the taste of wholemeal, and I especially like the fact that I'm eating something with fiber and much healthier than just bread flour, which has all of its essential nutrients stripped away from it.


Wholemeal Bread Rolls, using the Tangzhong method (汤种全麦面包) 

Ingredients
[A]
140g  bread flour 
100g  wholemeal flour (I used organic wholemeal flour, which is the same thing but organically grown)
4g      instant dried yeast 
25g    sugar 
1g      salt 

[B] 
30g egg, beaten (about half an egg) 
50g milk, at room temperature 
20g low fat yogurt 
60g tangzhong, at room temperature* 

[C] 
25g salted butter, softened 

*Refer here on how to make tangzhong - here, I used a proportion of 10g of bread flour to 50ml of water, to give me 60g worth of tangzhong for the recipe. 

Method:
  1. Combine all the dry ingredients in [A] together. I used a sieve with larger holes so that the bran bits in the wholemeal flour could be sifted together with the other ingredients as well. 
  2. Whisk together the egg, milk, yogurt and tangzhong (ingredients in [B]). 
  3. Make a well in the centre of the dry ingredients and add in the wet ingredients. Mix until a dough comes together and pulls away from the sides of the mixing bowl. 
  4. Turn the dough out onto your work surface and knead using the heel of your hands and knuckles. 
  5. Once gluten has developed, knead in the softened butter until it is incorporated. I usually just take out the butter from the fridge, weigh it and put it in the microwave for a quick zap of about 15 seconds. 
  6. This step is where lots of elbow grease is needed. Continue kneading the dough with the heel of your hand and your knuckles. The dough is initially not too cohesive and very oily, because of the addition of the softened butter. You should reach a point where the dough becomes slightly sticky. 
  7. At this point, grab a small thumbsize portion of dough and gently pull the dough in opposite directions and check if a thin membrane can be formed. If such a ‘window’ can be formed without the dough tearing, it means that your dough has passed the windowpane test and is ready for proofing! 
  8. Tuck in the ends of the dough and put in into a greased bowl (I just use the mixing bowl I used previously), cover with a tea towel and let it proof for about an hour, or until doubled in size. To check if it has proofed sufficiently, poke your finger into the dough and if the indentation doesn’t bounce back, it means that your dough has proofed sufficiently! If the ‘hole’ bounces back, let it proof for a couple minutes more and try poking again. 
  9. Deflate the dough and divide it into 8 equal portions. Mine weighed about 55g on average. Shape them into rolls and tuck in the ends, placing the tucked in part on the bottom. You don’t need to flour your surface because the dough isn’t particularly sticky and this can be done without a work surface. 
  10. Arrange the rolls in a round pan (I used my 9-inch cake pan) and leave some space (about 3cm) in between the rolls for them to proof for the second time. Cover the pan with a tea towel and allow them to rest for about 30 minutes, or until the rolls double in size and meet each other. 
  11. Brush some egg wash (some of the egg left from above mixed with water) onto the tops of the rolls and bake them in a preheated oven at 170 degrees for 15-20 minutes. 
  12. When the bread is golden brown (or a skewer comes out clean), remove from the oven and place the rolls on a wire rack to cool.
Janine’s jots: 
  • If you see the original recipe, I have decreased the amount of yeast because I was afraid of the buns having the yeasty taste which I don't really like. 
  • I've also reduced the amount of salt because salted butter was used here instead of unsalted butter. 
  • I also replaced some parts of the milk with yogurt because I feel that yogurt imparts a richer texture to bread. 
  • Now, if you are lazy, you should use your bread machine to do the work from you right from the start, or your mixer with a dough hook. The recipe below is for completely hand-kneaded because I needed to punch my stress out on some inanimate objects. For the bread machine version, simply place the ingredients in as required by your machine (usually yeast is left right on top), and simply click on the program which suits you. For your mixer, just use it to replace all the steps requiring manual labour - until step 7 where you take the dough out to knead for a minute or two before performing the window pane test. 
  • For some pictorial guidance on the entire process, please take a look at Carol's blog here which I found helpful. 
  • If you’re making a loaf, the suggested temperature is 180deg for 30 minutes. I forgot that I was making rolls and baked at 180deg, which resulted in the tops of the buns browning way too quickly. As result, the buns turned out a little drier than I would have liked. I’d suggest baking the rolls at 170 deg for about 15-20 minutes. 
  • If you are following the original recipe with 70ml milk, you might experience the dough being stickier, which will require you to flour your work surface so that you can knead without the dough sticking. If you flour your work surface, oil your hand so that the flour:fat proportion stays roughly the same. 
  • If you don't have wholemeal wheat flour, simply replace the entire amount in the recipe above with normal bread flour. You might find it that it takes a shorter time to knead because for wholemeal flour, the bran bits in the flour cuts the gluten strand, impeding the formation of gluten strands.
In pictures: 
This is step 3, where you add B to A. Notice that the tangzhong has been thoroughly mixed into the wet ingredients before adding it in.
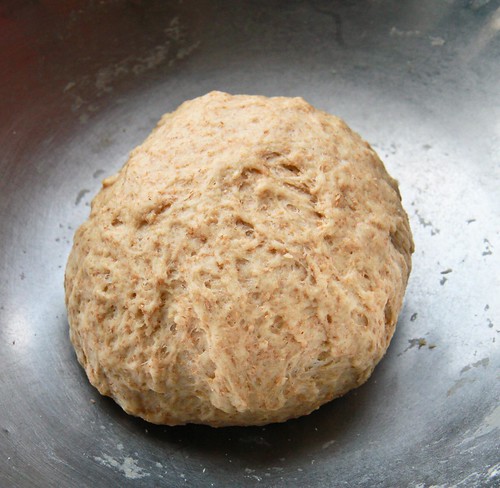
This is after step 8, where I've already finished kneading and tucked the ends of the dough in to form a tight ball. It's ready for its first proofing!

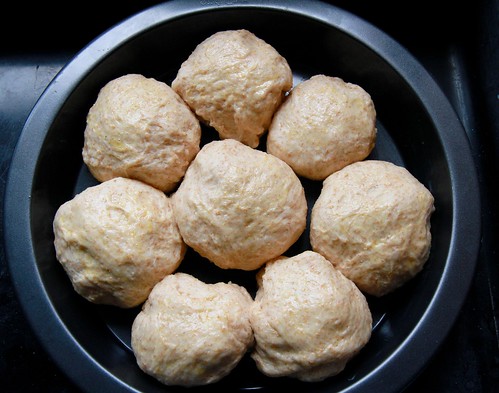
These are the rolls after the second proofing. I've put the egg wash on and it's ready to go into the oven! Notice that the rolls have begun sticking to one another after the proofing, but that's okay because I want yummy pull-apart rolls! :]
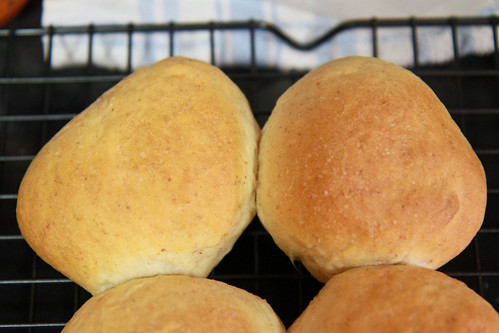
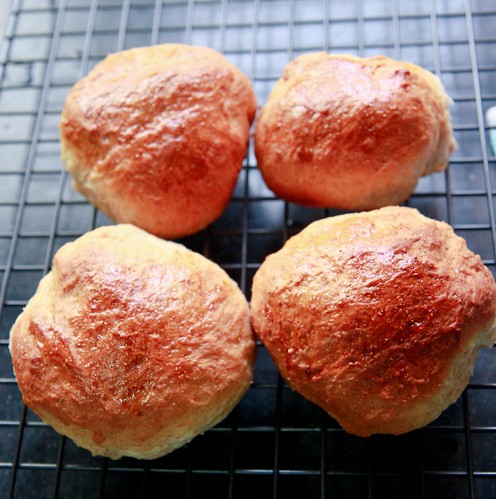
The rolls look rather horrible in this photo, but trust me, it was delicious because the moment it came out of the oven, I took about this long before eating one and so did my family members. Which explains why there's only 4 left in this photo >.< Note that the rolls are a little overbaked (too brown in my opinion), so keep an eye on your rolls once it's 15 minutes! (especially if your oven runs a little hot, like mine)

Sorry once again for the lack of detailed pictures because it's pretty hard to take photographs when you're kneading (especially since I've no tripod and I'm alone at home) and also sometimes my greed to taste my baked creations get the better of me and I forget that I should take some photographs for my blog. But since this blog is set up to indulge my personal food fantasies, I guess it's apt that I should devour them when they're the best tasting, and not after they're cold from excessive photo-taking =p

Related Posts Plugin for WordPress, Blogger...