My blog has moved!

You should be automatically redirected in 6 seconds. If not, visit
http://www.unpastiche.com
and update your bookmarks.

Showing posts with label Steamed. Show all posts

Saturday, April 7, 2012

Steamed Banana Cupcakes

Only now do I understand the joys of public holidays falling on a Monday or a Friday because it means long weekends yo! A few days ago on Monday, I was thinking that three days is a lot of time to bake, but was struck by sudden inspiration to head up north to KL! I asked my brother if he wanted to and lo and behold, a plan was formulated within minutes :] I do so love impromptu-ness! 

So now my brothers, mom and I are in KL over the long weekend for a food trip! :D We initially wanted to drive up to Penang to gorge ourselves silly, but decided we didn't have enough time to do so, so we've limited ourselves to KL (and Selangor) to stuff ourselves. Thus far, I've had Rakuzen for lunch, damn good fruit rojak with tofu and sotong, dropped by Ben's Independent Grocer at Republika and had really good pork ribs/pizza/risotto for dinner. This morning I had really damn good nasi lemak for breakfast (Najib goes there for his nasi lemak fix as well yo!), then an assortment of bread for lunch, Taiwanese dessert and there's still French patisseries, seafood and pizza left on the to-eat list!


Malaysia Sayangi. Having spent more than half of my life in Singapore, my friends always ask, why not be a Singaporean since you're more than halfway there already? Singapore might be my second home, and I might know the Singaporean national anthem better than the Malaysian one, but well, Malaysia Sayangi sums it up pretty well. It's my country, and it's where I call home.

Coming up to KL always makes me proud of my country. Singaporeans like to say that Singapore is a cosmopolitan country and all, but honestly speaking, I always feel that KL (and Selangor) beats Singapore hands down. Granted, KL might have its dirty and unsightly areas, but in my opinion, it's like an unpolished gem which still hasn't seen its fullest potential. Anyway this mini-rant arose because of discussions with my relatives about corruptness, politics and the plethora of good food one can find in KL.


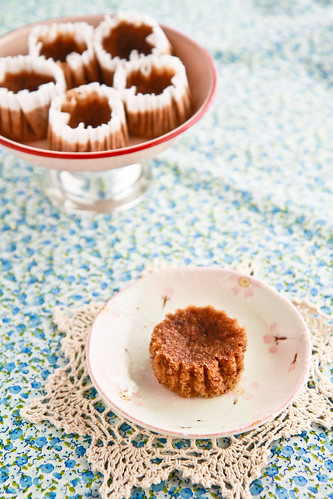
The following cake however, has nothing to do with anything. I was hoping to eat this really good banana leaf curry rice (literally on a banana leaf) and I thought of eating these steamed banana cakes which are really simple to make. I first made this a few weeks ago, when it was too hot to switch on the oven, and I didn't want to fire up the huge oven just to bake a couple of muffins. I also wanted something fast, so steaming is really the fastest way to achieve something 'cakey' in the shortest time.

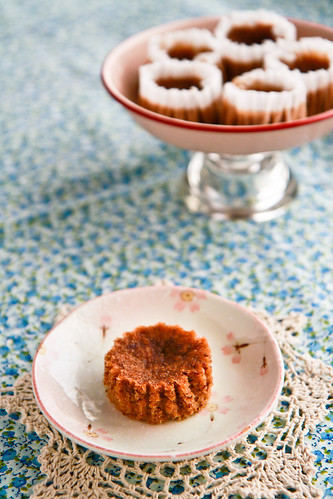
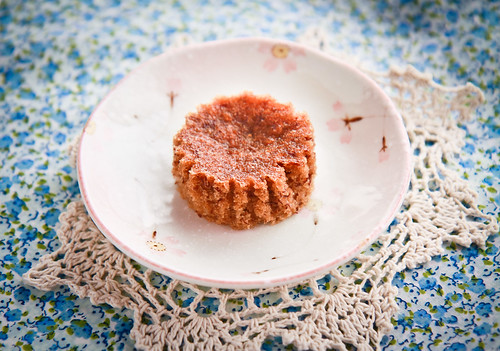
The cupcakes are a little sunken, because I used a tad too little raising agent and I didn't have enough metal tins to go around, so some of the cupcakes turned out as banana pancakes, but they were yummy all the same.  
Steamed Banana Cupcakes
Very slightly adapted from Aunty Yochana

100g banana, mashed
½ tsp vanilla extract
½ tsp baking soda
⅛ tsp salt

65g egg
45g brown sugar
50g all-purpose flour
½ tsp baking powder
30g olive oil


Method: 

  1. Whisk the mashed banana, vanilla extract, baking soda and salt together in a bowl and set aside. 
  2. In another bowl, whisk the egg and brown sugar until pale and fluffy. 
  3. Then, fold in the flour and baking powder (sifted together once) into the egg and sugar mixture. 
  4. Gently fold in the mashed banana mixture and finally, fold in the olive oil. 
  5. Pour into lined cupcake moulds (preferably metal ones) and steam them for about 10-15 minutes on high heat until a tested skewer comes out clean. 
Janine's jots: 
  • Taste: Do use very very ripe bananas because somehow steaming makes the banana taste more prominent than usual. I would also prefer using less vanilla to allow the banana taste to show through even more. 
  • Texture: Extremely soft and spongy. 
  • Serving size: Makes about 8 small cupcakes.
  • Modifications: Like I said, I probably would add a tad more baking soda to allow a slightly more raised end-product because sunken cupcakes don't look so attractive :/
  • Storage: These keep well in the fridge (they don't store well at room temperature because the tops will turn moist and sticky after a while). Just give them a short zap in the microwave or steam them at 5 minutes on medium heat. 
  • Would I make this again?: Definitely - it really is a good alternative to baked banana muffins on a hot day :]


Alright, short break between teatime and dinner is over - I'm off for a yummy seafood dinner now :]

Friday, October 7, 2011

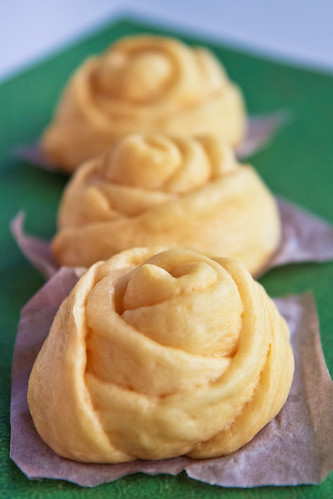
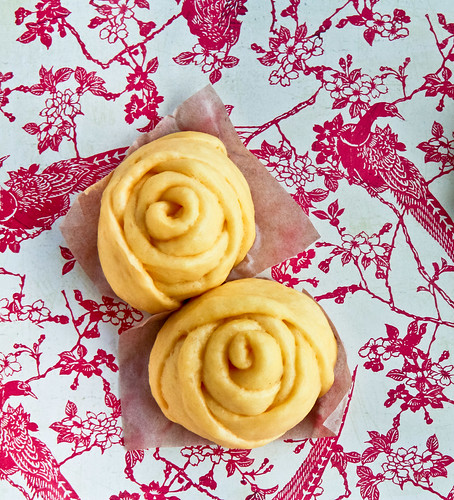
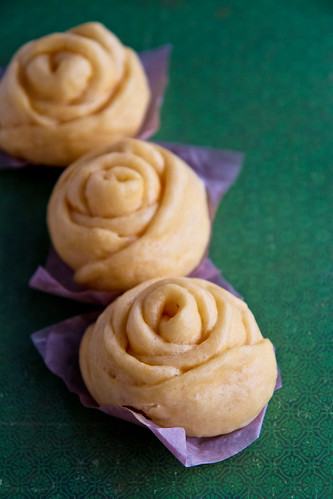
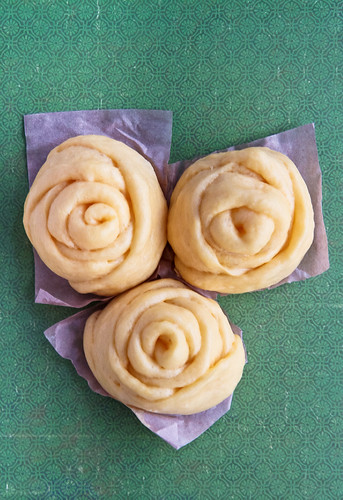
Rose-shaped Steamed Pumpkin Bun/Mantous (南瓜馒头)

It seems like just a while ago that it was October last year, and I was struggling really hard to get back into the pace of life back in Singapore. I had been away for a year, enjoying il dolce far niente and it was hard to study again. Then, I still had not discovered the love of baking that I had within me, so attempting things what these mantous below were probably unheard of.


It might be foreign for some, but I've been brought up on a diet of mantous and paus (a variety of Chinese steamed buns) of the homemade variety - my mom is a really terrific baker (and cook) and every once in a while when she gets sick of cooking the usual 3 dishes, rice and soup for us, she'll turn to making paus - typically of the vegetable variety, with some chicken for our protein needs. Lately, I've encouraged her to extend that repertoire to include a char siew filling as well as a lotus filling, on top of her usual peanut paus. Ever since I saw these beautiful rose-shaped mantous over at Wendy's blog, I've wanted to make them but my mom didn't. Why ever not? Well, my mom says that it's because of old age - as she gets older, she feels 'less daring', preferring to stick to her comfort zone and sticking to her usual recipes and usual combinations. I think even she finds it appalling that her zest and courage in her younger days are slowly diminishing. Nevertheless, I'm happy to accept this baton from my mom, that of the baker in the family, and already, I'm eager to try out new recipes (for anything) as well as hammering new 'family favorites' every weekend. You might think me crazy, but I honestly can't wait for CNY to arrive, because I know that I'll have so many opportunities to experiment with cookies and such then!

So, going back to these rose-shaped mantous, they have been very high on my to-do list. Opportunity came when one day, my mom was thinking of making paus again. I volunteered to make them, using the leftover pumpkin I had from a previous attempt at pumpkin cream cheese muffins (absolutely delicious - recipe to come soon!). The original calls for steamed sweet potato of the purple variety, mainly because the purple gives rise to a really sweet lilac looking 'rose', but like I said, I only had pumpkin, so I made do. This is also perfect since it's fall season in the Northern hemisphere and there will be an abundance of pumpkins. So besides carving them up as jack-o'-lanterns and pumpkin pies and pumpkin muffins, you now have another use for that leftover pumpkin :]


I had this wonderful plan of making it seem as if the birds in the background were 'eating' the buns, but as you can see, the plan sort of failed and it didn't look that great. I then switched to a normal green background, which I feel made the buns 'pop' - looks like a leafy foliage on which my yellow roses grow, don't you think? ;p Do pardon the rather dog-eared paper that the buns are sitting on, I was in quite a hurry to steam those buns so I hastily cut those papers out of tracing paper and they probably weren't the nicest squares (if you could call them those) that you would have seen. 


Steamed Pumpkin Bun/Mantous (南瓜馒头)
Adapted from Wendy

400g all-purpose flour 
100g wheat starch 
250g steamed pumpkin, mashed to a puree 
100g sugar 
15g baking powder 
2g salt 
40g shortening, melted 

11g yeast 
3g sugar 
150g water 


Method: 
  1. Combine the yeast, sugar and water together and let it sit for 5 minutes, or until the yeast becomes frothy. 
  2. Melt the shortening in the microwave and leave it to cool. 
  3. Sift the all-purpose flour and wheat starch together with baking powder and salt. Combine with sugar. Mix in the steamed pumpkin puree until the dry ingredients are moistened. 
  4. Pour the yeast mixture into the flour-pumpkin mixture and begin to knead. Once a rough dough forms, knead in the shortening. If using a stand mixer, continue kneading for about 5 minutes, until the dough becomes elastic and passes the window pane test. If kneading by hand, knead for about 10-15 minutes until the dough feels tacky and not sticky. 
  5. Round the dough into a ball and leave it to proof in a bowl for about 45 minutes, or until it doubles in size. 
  6. After it doubles in size, punch it down (degas it) and divide it into equal portions. I prefer to divide it into portions of 60g each – shape it into a smooth ball and place it on pre-cut pieces of tracing or baking paper. 
  7. To make the rose-shaped buns, divide the dough into equal portions of 10g each and roll each into a small ball. Using both fingers, flatten the ball into a disc of about 1mm in thickness. Do the same for the balls until you get 6 discs. Then, begin layering the discs one on top of the other, making sure to leave about an inch or a two-finger spacing between each layer. Then, begin rolling the layered discs from the bottom disc up, rolling until you get a cylinder. Use a wooden satay stick or chopstick or even a butter knife, and begin sawing the centre of the cylinder until you get 2 equal pieces. Each end of the cylinder will be your rose and the part where you saw off will be the bottom of the rosebud. [Do refer to Wendy's blog for very detailed step-by-step photos - I don't have the patience to take such photos!]
  8. Arrange each rosebud on the pre-cut baking paper and arrange on your steamer. Allow them to rest and proof a second time, for about 30-45 minutes or until doubled in size. 
  9. Fill your wok with water an inch below the steaming plate. Using a medium-high heat, steam your buns for about 15 minutes before removing them to cool. If using a pre-heated steamer, steam for 10 minutes. 


Janine's jots: 
  • Taste: If your pumpkin or sweet potato puree is sweet, feel free to dial down the amount of sugar. I think that if eaten as a sweet snack, a bit of cinnamon for the pumpkin would definitely bring it up a notch. I added lotus paste filling for the round buns and they tasted lovely. Beware of using too much salt – I used 3g for one attempt and it was WAY too salty. 
  • Texture: Same for the shortening. I have used melted butter and although I prefer the taste of melted butter, I find that shortening gives the dough a more elastic feel. You might wish to knead the dough for slightly longer if using the butter substitute, in order to get the same texture. 
  • Serving size: Depending on how large you portion each of your buns, you can get quite a few of them! I got about 30 buns of varying sizes (I made them as mantous as well as filled buns).
  • Modifications: Do use 500g pau flour or low gluten flour if you have them instead of the 400&100 combination I've stated above. You can also substitute equal amounts of sweet potato/taro or any tuber you wish. I have tried using cornstarch instead of wheat starch and it works the same way. 
  • Storage: Buns store wonderfully in the fridge - be sure to steam them first, then cool them before keeping them in an air-tight container in the fridge. Either microwave them on low or steam them again for about 5 minutes before consuming. 
  • Would I make this again?: Yes, only if I'm out to impress somebody ;p The recipe itself is a keeper though!
  • Other comments: Making the rose shaped buns are rather time consuming, because you have to flatten each ball into a disc and then roll them up. The results are fantastic though, and I can imagine a number of things you can do with this. You can also fill the buns up with a filling, although it might be a little difficult because the filling will have to be placed not in the centre but at the 1/3 and 2/3 mark. 

Thursday, June 30, 2011

Steamed Bao (包子)

I returned home to Singapore yesterday, only to be greeted by heavy showers and thunder. I could see countless lightning bolts, although I couldn't hear the thunder, and see the heavy nimbus clouds as the plane flew through them as we were about to land. Just moments before, as the plane began its descent into Singapore, the sun was setting over Malaysia and Indonesia and it really was a sight to see. The clouds never looked so magnificent when they are basked in that golden glow which a setting sun can provide. 

When I arrived home, I was also greeted by a familiar sight (no smell since baos hardly emit any smell when steamed) - steamed baos waiting for my consumption :] I love baos - other than porridge, fried rice and Mee Hoon Kuay (面粉馃), they are my idea of a perfect homecoming present. I used to love to get these peanut baos from a coffeeshop near my place, but after hearing that no one consumes these baos and they are actually being repeatedly steamed on a daily basis for weeks (hence the oily bottoms and weird textures), I have not patronized them anymore. Instead, I bug my mother to make these baos for me. My mom makes a mean peanut steamed bun (花生包) and vegetable steamed bun (菜包). In fact, I now only eat baos that my mom makes, because I really don't like how mushy and weird tasting vegetable baos can get when purchased. I know many people swear by meat steamed buns (肉包) - 小肉包大肉包 but I don't really like meat buns because of the strong porky taste in those buns - I know right, I'm super picky. In any case, the only type of meat bun I like to eat is the honey-roasted pork bun (char siew bao or 叉烧包). This is the bun I will always order when having dimsum. However of late, I have been disappointed by the size, quality and price of these char siew baos. The filling has been decreasing in size, been increasingly replaced with more fats than meat, and the price of these baos have really skyrocketed! It was just a few months ago that I convinced my mom to attempt making char siew baos and to my delight, the results were phenomenal :] Needless to say, I hardly order bao when I'm out because these gems are really easy to make at home - you can make the filling on the first day and make the bao on the second if you don't have enough time - and it's really much quicker than making proper breads which require two periods of proofing and rising.


My mother got this recipe off the Blue Key bao flour box a long time ago, and has been making it for as long as I can remember. However, that tiny recipe booklet no longer accompanies the box (according to my mother), so here's the recipe for keepsakes [word for word from the booklet - see modifications below]: 

Ingredients:
Makes 14 moderately sized baos 

500 g   pau flour
6 g       yeast
100 g   sugar
50 g     oil/shortening
250 g   water

Method:
  1. Mix flour and instant yeast together and dissolve the sugar in water. 
  2. Mix all the ingredients in a mixing bowl, then knead the dough by hand for 10-15 minutes or by mixer until it becomes smooth and extensible. 
  3. Scale the dough at 40g each. Round it and leave it to rest for 10 minutes. 
  4. Flatten the dough and place your filling in the centre of the dough. Wrap the filling by folding the edge of the dough with desired design. Then place each dough on a small piece of square grease-proof paper.  
  5. Cover the dough with a piece of clean plastic sheet and allow it to rise for 35-40 minutes. 
  6. Place all the dough pieces in a steaming rack and steam for 15 minutes over the high heat.

Janine's jots: 
  • Modifications: I also add a pinch of salt to give the baos a little complexity to the taste. Also, be sure to use lukewarm water to dissolve the sugar, before adding the mixture into your flour and yeast. Once you get a rough dough, proceed to add in your oil. You can also use lard or shortening if you prefer. I use sunflower oil since it's available in my pantry all the time. 
  • Taste: This bao can actually be made into a mantou and be eaten on its own, because there is sufficient sugar to give it some taste. However, it tastes especially good when combined with a savory filling. 
  • Texture: The texture of the bao is perhaps not as smooth as those you can get from yum char places, but it's perfectly fine for consumption at home. Perhaps a little bit of wheat gluten and more shortening will result in that smoother bao you can get from shops. 
  • Serving size: This recipe makes enough for 14 similar shaped buns. 
  • Storage: These baos store in the fridge well for about 3 days and freeze perfectly. From the fridge, just steam them again for about 10-15 minutes. From the freezer, remove them to thaw before steaming them or you could just steam them for 30 minutes. 
  • Would I make this again?: Definitely. This is a family staple, and this is perhaps the only way in which I can consume my beloved peanut baos (it's so rare nowadays) and the only way in which I can have a vegetable bao with some chicken inside ;p 
  • Other comments: For the "grease-proof" paper that the recipe mentions, you can use baking paper or tracing paper, cut into little squares. 

In pictures: 

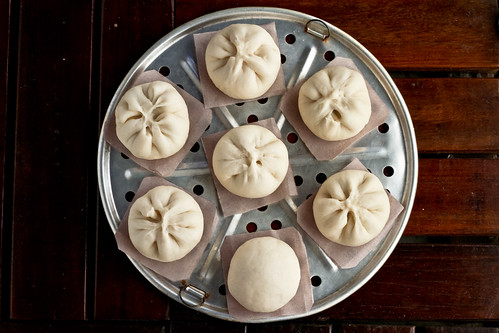
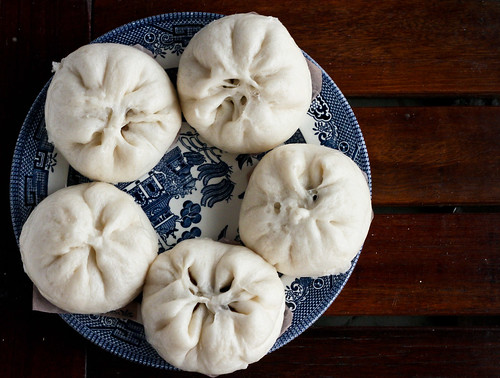
These baos are proofed (see how the pleats are not as prominent as before) and ready to be steamed :]
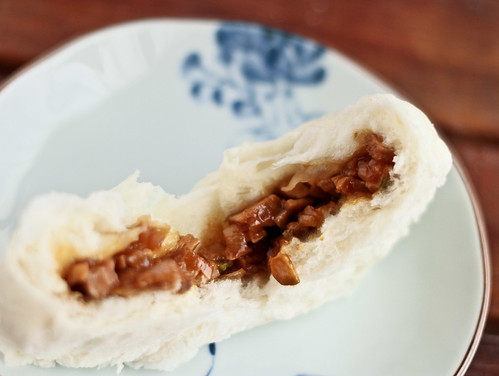
Look at this dreamy char siew filling! Unlike those in stores, this is all meat and little fats - no red coloring is used :]
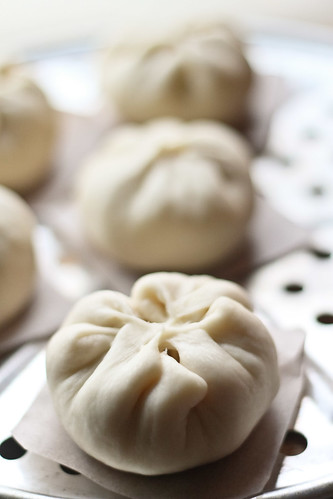
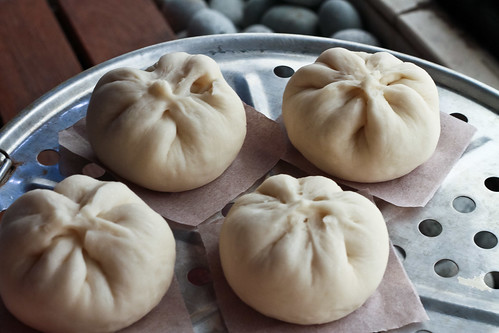
Steamed baos - look at how fat they have become - the pleats are almost giving way :/
Another close-up for good measure :]
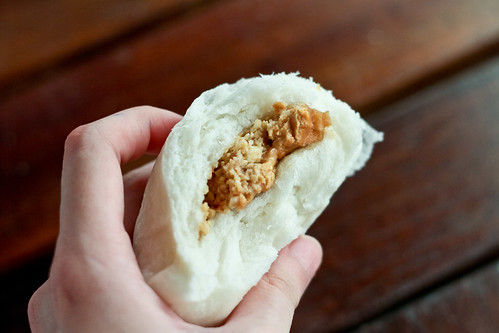
My absolute favorite - the peanut bao

And last but not least, my mom's version of vegetable bao - with half a hardboiled egg and pieces of chicken :D

These photos are not taken yesterday, but are from my attempt a few months ago. I've been wanting to post them, but since the recipe is on the booklet, I haven't had a chance to steal them from my mom to type it out. I'll only be writing the recipe for the bao 'skin' today, because I'm still kinda tired from all that travelling that I have done, and I need to figure out the exact measurements to the fillings since my mom usually just 'agars' (estimates) when making the filling (and so do I).


This is my last minute submission to Jasmine's Aspiring Bakers #8: Bread Seduction as well as my 4th Muhibbah Malaysia Monday event hosted by Shaz of Test With Skewer and Suresh of 3 Hungry Tummies (sorry I didn't exactly post this on a Monday cos I wanted to be in time for the roundup!)


Saturday, May 28, 2011

Moist Chocolate Cake, steamed.

So I'm finally back in Singapore after a 17-day volunteer trip to Cambodia, specifically, Phnom Penh. The trip was extremely fruitful, to say the least. I managed to do a spot of shopping, and visited the Angkor Wat as well (which was spectacular). Not only did I immerse myself in Khmer food for 17 days, I even had the privilege of cooking AND baking for 150+ people! I'll definitely post more about that once I've sieved through the tons of photos I took! I've been really busy ever since I've got back - going for my brother's convocation and editing those photos, doing admin stuff for my own convocation, shopping for some travel essentials for my next trip, and filling myself up with missed foods - leaving me little time to bake. I only managed to bake an orange chiffon cake which my family had for breakfast and tea yesterday. In fact, I'm actually flying off again tomorrow, for a really really long holiday this time, to Australia. I'll be spending 5 whole weeks in Australia, mainly in Sydney where I'll be staying with Jon <3 

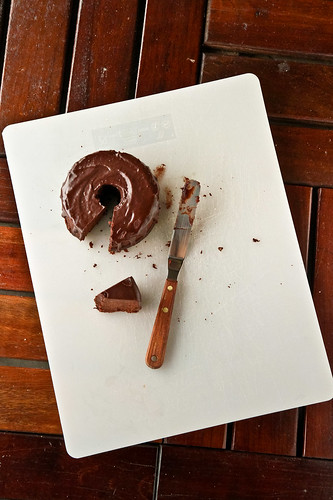
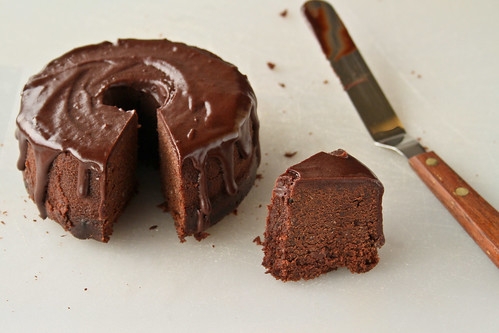
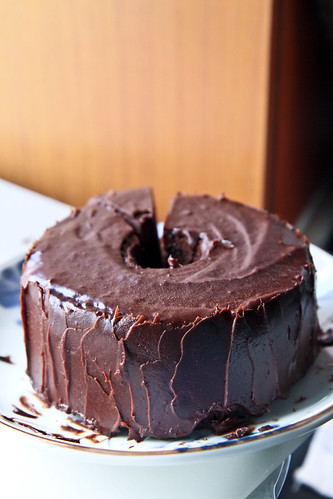
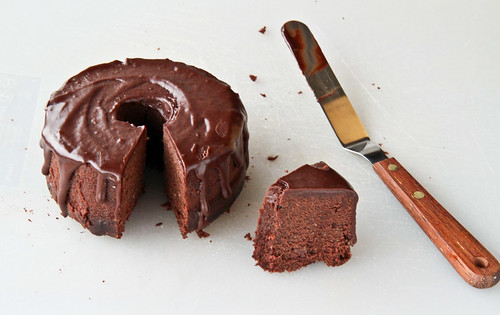
This post is long overdue, because I'd actually steamed this chocolate cake before I left for Cambodia, in the early bits of May. I promise I'll stop lazing around in June and get more food posts up because I now have a hefty backlog of recipes! This is a fantastic recipe by the way, for the times when you don't feel like firing up your oven and just want to do something simple. This chocolate cake is deliciously moist (even more so than normal oven-baked chocolate cakes), and is superb even without any ganache or topping. Of course, having a ganache is the icing on the cake, literally and figuratively speaking. I also tried my hand at doing some food styling in the picture below, which is quite a feat considering I usually snap a few obligatory photographs before gobbling up the food. Food styling does take quite a bit of thought and pre-planning, and I've to say that despite the lack of props, I was quite satisfied with the shot below, deficiencies aside. As usual, I'm open to any forms of critique :]


Steamed Moist Chocolate Cake
Loosely adapted from Ju

For the cake batter
70 g    butter
10 g    heavy cream
80 g    castor sugar
90 g    fresh milk
¼ tsp  vanilla extract
1         egg
65 g    all-purpose flour
20 g    cocoa powder
10 g    dark chocolate, melted
¼ tsp  baking powder
¼ tsp  baking soda

For a simple chocolate ganache
100 g chocolate (I used a mixture of dark and milk chocolate)
90 g   cream 

Method: 
  1. Combine and heat the sugar, milk, vanilla extract, butter and cream in a saucepan until the sugar has dissolved and butter has melted. Ingredients need not come to a boil. Remove from heat and leave it to cool once ingredients have melted. 
  2. Once cooled, whisk in the egg, beating until the egg is well combined. 
  3. Sift the cocoa powder, flour, baking powder and baking soda in a large mixing bowl. 
  4. Pour the liquid mixture into the dry ingredients and mix well, making sure the batter is free of lumps. 
  5. Pour the batter into a prepared pan and place it in the steamer. You need not preheat the steamer. Steam over medium heat for about 30 minutes and make sure that the top of the pan is covered loosely with a sheet of aluminum foil. Insert a skewer to test for doneness. If it comes out clean, remove from the steamer, otherwise continue steaming for a further 5 minutes before testing again.
  6. Let the cake cool for at least 20 minutes before adding the chocolate ganache. 
  7. In the meantime, prepare the ganache by heating the cream until it boils. Remove from heat once it has boiled and pour it over the chopped chocolate, whisking rapidly to ensure that the chocolate melts. Allow the ganache to cool slightly before pouring over the cooled chocolate cake. Decorate as desired. 


Janine's Jots: 
  • Note: I've modified the recipe a fair bit - I substituted some of the butter for cream, reduced the sugar, changed the evaporated milk for fresh milk and some of the cocoa powder for melted dark chocolate.
  • Taste: The cake is just sweet enough for me. I had to make the chocolate ganache a tad sweeter so that the cake would be more palatable to others who tried the cake. Because I'd used fresh milk instead of evaporated milk, I shouldn't have reduced the amount of sugar too much. Chocolate taste-wise, I felt that the cocoa taste in the cake was not strong enough. This was saved by the chocolate ganache, which gave the cake a much-needed chocolate boost (in my opinion). My family thought the cake tasted chocolatey enough by itself. I would probably increase the amount of cocoa powder the next time, as well as add some coffee/espresso powder to punch up the chocolate taste. I would probably add in a dash of salt as well.
  • Texture: It was pretty fine, because I substituted 5 g of the all-purpose flour for cornstarch. For a finer texture, I'll definitely try using cake flour the next time. Also, I still felt that the cake was a little oily for my liking - I'll try reducing the amounts of butter used. However, I noted that this oiliness receded after storage in the fridge and it actually helped to keep the cake moist. 
  • Serving size: This halved recipe makes enough for a 12-cm chiffon pan and 2 7-cm wide cupcakes. Do use the original full recipe if you wish to make a full 8-inch cake. 
  • Modifications: For people with a sweeter tooth, you might wish to increase the proportion of milk to dark chocolate, and to add in icing sugar to the ganache. You can also whip the cooled ganache to have a fluffier frosting. 
  • Storage: The cake keeps really well in the fridge - one week later, the cake still retains its moisture. Do make sure that you remove it from the fridge at least 15 minutes before serving to ensure that the cake softens a little and tastes its best :]
  • Would I make this again?: Having tried a number of moist chocolate cakes, I think this one takes the cake (pun unintended) in terms of moisture. The preparation method is also simple, and can be done within an hour. Definitely gonna make this again, but with more variations the next time ;p
  • Other comments: Make sure to thoroughly beat the batter before steaming. I didn't, and you can see the disastrous results below. You can steam the cake in a cold steamer - all you need to do is to factor in an extra 10 minutes. This halved recipe only requires about 30 minutes or so - the cupcakes were done in slightly under 25 minutes and the chiffon cake took a few minutes more. The aluminum foil helped keep the tops of the cake dry from the water droplets condensing on the wok.

In pictures: 

This is the result of not mixing your batter properly - the lumpy bits rise to the surface!


Chocolate is one of my favorite ingredients and foods, and I'd planned to participate more actively in Aspiring Bakers but because of my schedule, this will probably be my one and only submission to Aspiring Bakers #7 – Chocolate Delight (May 2011), hosted by Doris. I really hope that once I'm settled in Sydney, I'll be able to continue my baking and cooking because I'm really missing them dearly!


Related Posts Plugin for WordPress, Blogger...