My blog has moved!

You should be automatically redirected in 6 seconds. If not, visit
http://www.unpastiche.com
and update your bookmarks.

Showing posts with label Cookies. Show all posts

Sunday, December 2, 2012

What I've been up to lately

This is probably my longest absence from the blog - the last post was in September and it's already December! Time really flies, and I can't wait for Christmas to arrive! I was swamped at work for the past two months, and in November, I was swamped with orders for cupcakes and cookies, thanks to the company's charity food fair which I chose to participate in. 

So here's what I've been up to lately, in pictures. 

I've been up to my eyeballs in cupcakes - I made cupcakes for a 1st birthday - chocolate cupcakes with a vanilla cooked flour frosting (really delish btw!). Although the focussing and lighting, as well as the posture of my mother's hands below are a bit off, I really like it because of the lines and veins that are visible. Reminds me that my mom's hands are aging and so is she! Ps: belated happy birthday mommy!


Also for the 1st birthday party, some safari-themed cookies! Some of them turned out pretty good, but I wasn't too satisfied for the monkey and lion cookies because the icing separated and there were visible bubbles! =X Those became food for my dogs instead. 


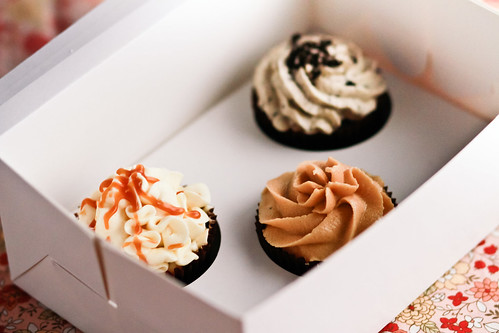
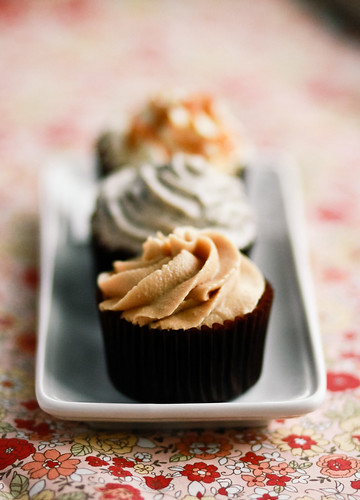
Next up, the food fair I was talking about. I was mighty pleased with myself, because I managed to sell approximately 300+ cupcakes (consisting of pre-orders) and more than 20 jars of cookies! That raked in $2000 of funds for the Children's Cancer Foundation! =D If only my mom were around to help me bake - if she were and if my grandma weren't sick, I could have definitely taken in more orders, but well...family first! I sold 13 flavours of cupcakes (on hindsight, I might have been a bit too ambitious) and the flavours you see below are salted caramel, peanut butter and cookies & cream. Initially, I taste tested almost every tray of cookie and cake because I wanted to be sure of the quality but I eventually got a really bad sore throat and I decided that I was confident enough about my goods not to need to try every single tray. The cupcakes were quite well received and I must say that I have become quite adept at making cupcakes and frosting - so much so that I can confidently say that I can manage 100 cupcakes of a single flavour in a couple of hours! 


Another gratuitous photograph. This photo, as well as the one before and after this was taken with my new lens, a 85mm 1.8. I must say that I like the depth of field, but the shutter speed is a little slow :/


How christmassy eh? ;p


And finally, here's some of the cookies I sold at the fair. Most of them were very welcomed - especially my earl grey sable, vanilla sable and chocolate sable! Recipes to follow (soon I hope). 


Because it's been some time, I've been finding it hard to write a proper recipe post - but I do have a great number of backlog recipes to clear! Stay tuned for the recipes to the pictures above soon! :]

Saturday, July 21, 2012

Vanilla Beans and Vanilla Sugar...and the Great Ocean Road

I can finally tick off the Great Ocean Road from my 'places to visit' list. It's sort of a half-tick, because I didn't exactly manage to visit all the sights that I had wanted to visit, and we only reached Port Campbell before doing a U-turn, because reality had to butt its ugly head in and I had to rush to Melbourne CBD to get some urgent documents couriered back to Singapore. Sigh. The fates were just against me that week. What happened earlier was that the car rental company had upgraded us to this huge MPV (a Toyota Kluger), and this was not a welcome upgrade because the height of the car from the ground coupled with the winding roads made me carsick :/  


That's a photo of the famed Twelve Apostles along GOR - I think two of the Apostles are missing from the above photo because of the vantage point I was at, and in any case, there was never Twelve Apostles to begin with (did you know that?) The photo, on greater inspection, is rather blurry, but I would like to blame the horrendously cold weather for my shaking hands - I was crazy and decided to visit the Twelve Apostles at sunrise, so it was 6am, freakingly cold and windy (it was 10 deg and I was severely underdressed). 

The Great Ocean Road is indeed breathtaking, and I would definitely revisit, although this time in Spring and preferably in a convertible ;) I'll be writing more in a Travel Tuesday entry, because I've lots more to say about the Great Ocean Road. Suffice to say that it's worth spending more than two days leisurely driving along the GOR and I would definitely recommend staying in Apollo Bay - the accommodations I stayed in were not only cheap but one of the best I've stayed in so far!

***

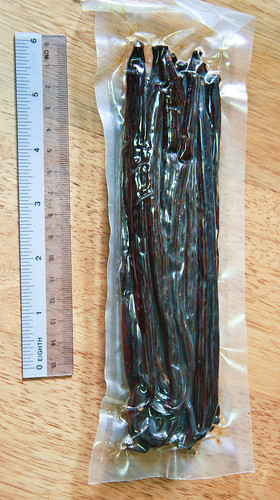
I also wanted to post a short post on some vanilla beans I've received in the mail some time back. I've been waiting for the vanilla extract to 'mature' before I post about the beans :] As you might know, vanilla beans cost a bomb (in Singapore or Malaysia) - I've seen them retailing at about S$5 per bean? Naturally, I was dissatisfied with the prices here and I was pleasantly surprised when I found that there was a cheap source of vanilla beans online! Java Vanilla (you can check them out here or here) is a vanilla plantation in West Java selling its own organic vanilla beans and other vanilla products! (Do note that I'm not too sure about how the organic label works in Indonesia so take that with a pinch of salt). Prices are also pretty reasonable - my pack of 'gourmet java vanilla bean' costs US$30 (S$38/RM95) per 100g pack, inclusive of a trackable postage (to either Singapore or Malaysia). The only drawback is perhaps the fact that you have to have a Paypal account to send the money over. 


What I liked about Java Vanilla is the fact that they ship really quickly - I got my beans about 4 days after I received the tracking number Another plus was the fact that the vanilla beans were properly vacuumed sealed, which meant that the vanilla scent and beans would last longer. I have previously  received vanilla beans simply put in a plastic bag in an envelope to be shipped across the world from some eBay sellers. The vanilla aroma probably disappeared halfway around the world :/ And to think that I paid much more per bean for those :/

If you check their website, they have a few types of vanilla beans available - the 'luxury' bean which is about 19cm or longer, the 'gourmet' which is about 18cm (this is the one I got) and the 'premium' which is about 16cm. Because the beans are packed based on weight, you will get varying amounts of beans depending on the type you buy. I got about 30 beans for my 'gourmet' pack. 

I also did my research prior to buying these beans, because honestly, I was quite doubtful about vanilla beans from Indonesia, but I must say that I was pleasantly surprised. The beans are perhaps one of the oiliest ones I've encountered, but the aroma is fantastic! Ramada, the contact person for Java Vanilla, was really patient with all my queries about the vanilla beans. I was informed that the vanilla beans are the same variety as the ones in Madagascar (Planofilia), and that they use the same curing technique as in Madagascar. However, these retail in the international market as "Bourbon Java Vanilla". I happen to have the Tahitian, Indian and Madagascar vanilla beans in my pantry, and I must say that these Indonesian beans really do resemble the Madagascar ones in aroma (but not in terms of oiliness). There are slight differences though, which I am not able to exactly pinpoint - the Indonesian beans smell a little more pungent(?) but I know for a fact that this pungency will translate very well in custards and other batters. 

So, what did I do with my vanilla beans? I made more homemade vanilla extract with them, and after the vodka turned a deep dark shade of brown, I took out some of the vanilla beans to make vanilla sugar! :] (I was inspired by a post I saw on Java Vanilla's webpage on vanilla powder, which was simply vanilla pods ground into powder.)

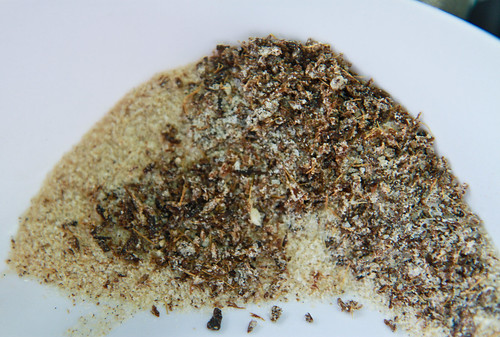
Typically, homemade vanilla sugar can be made by simply placing a vanilla pod in a jar of sugar and letting it sit for about a week. The sugar will smell fantastic by then. But I wanted to go a step further and extract more vanilla goodness from the pod (to make it worth its value), so what I did was to re-use the beans I had used for the vanilla extract. I placed about 10 vanilla beans in 500g of granulated sugar, and gave it a few blitzes in my food processor. My food processor is rather blunt, so there's still a lot of 'fibre' from the beans left ungrounded (as you can see from the photos). A commercial blender would definitely be able to make full use of the entire vanilla bean by blitzing the pod into smithereens but I had to use a fine sieve to sieve out the fibre. And after doing that, what you have left is DELICIOUS vanilla sugar! 


The sugar I used was originally white and refined, so you can see how much vanilla-ness I managed to extract from a single bean, judging from the brownness and spottiness of my homemade vanilla sugar :D There are still some fibers left in the vanilla sugar, so the sugar needs another round of sieving when it is slightly drier - the sugar turned a little wet because of the vodka from the vanilla beans and from the blunt processor. 

It took me no longer than 10 minutes to take the vanilla beans out of the vanilla extract, place it into the food processor with the sugar, blitz and sieve it. It's that easy, and now that I have 500g worth of it, I no longer have to waste money buying vanilla sugar from anyone and I am saved the trouble of having to take out a single vanilla pod, slice it into two and remove the 'caviar' whenever the recipe calls for it because I can simply replace some of the sugar with my vanilla sugar! :]

There's no recipe for this, but just a simple ratio of 10 beans to 500g of sugar. You can definitely use more or less vanilla beans if desired. 

Here's a tiny sneak peak of where some of the vanilla sugar went to - vanilla sugar cookies!


If any of you are interested in trying out the vanilla beans, be sure to check out Java Vanilla (or email Ramada directly at his email address - their beans are pretty darn decent and at $1 per bean, it's really value for money! For those of you not willing to shell out S$37/RM95 for a entire pack of beans (it's not that much for an investment but well), I'm more than willing to mail a bean or two to you, just drop me an email :]

Disclaimer: This 'promotion' was not warranted for by Ramada/Java Vanilla, but I was very impressed with their service and their products - hence this post. I did however, receive a small pack of complimentary beans for my order, but all thoughts and content above remain my own. 

Thursday, April 12, 2012

[Thursday's Trio] Absolutely Delicious Gluten-free Chocolate Chip Cookies

Finally the third instalment of Thursday's Trio! As you might have discovered, I find it rather hard to stick to a schedule - as you might or might not have realized, I have not done my Travel Tuesdays for a long long time (the last one was about Phnom Penh in June 2011) and neither have I completed my A to Z of Australia series either. In fact, I'm only at the letter E (for Eveleigh Markets), and since starting the series, I've been to Australia at least three other times. Oops.

In any case, I'm trying hard to make Thursday's Trio a monthly thing because I've gotten feedback that it's really helpful for some of you and I love reading up and researching on such things anyway. I previously talked about buckwheat and sorghum and today, I touch on millet.


Millet is often associated with bird seed, because well, it is part of bird food. It is tiny in size, and can vary in color, from white to gray to yellow to red. Technically, millet is a  a seed and not a grain.There are many varieties of millet, the most popular being finger millet and pearl millet. In fact, teff is actually a type of millet as well – Ehtiopian millet. If I'm not wrong, the yellow colored millet grains that we see in supermarkets and organic food stores in Singapore and Malaysia are pearl millets.

Similar to sorghum, millet is a staple in some parts of Asia (it apparently originates from China) and Africa, and it is very drought-resistant. Added to that is its short growing season – it can develop from a seed into a ready-to-harvest plant in less than 70 days! I guess this is yet another reason why it is grown in lands with low fertility and dense population.


Three interesting facts about millet
  1. Did you know that millet is even mentioned in the Bible as an ingredient for unleavened bread! (See Ezekiel 4:9)
  2. Remember the 5th most important crop sorghum? Well, millet is the 6th most important grain crop and it is actually related to sorghum!
  3. Millet is a good source of magnesium and phytochemicals, which helps lower high blood pressure and reduce heart attack and cancer risk. Studies have also shown that the insoluble fibre in millet also helps women avoid gallstones and protects against breast cancer! I personally enjoy millet because it is non-glutinous and is not acid forming, which helps with my digestion and gastritis.
Three ways of using millet
  1. Think of millet as similar to rice, and you can imagine just how many ways you can use it. It can be used as a flour, a grain, puffs or even flakes!
  2. You can also eat millet ‘fried rice’ – it tastes exactly like rice, just that it’s ‘shorter grained’. Cook millet as you would rice and you're set! Or cook it with more water and you can eat it as a porridge - sweet or savoury it's all up to you!
  3. Use whole millet to add an extra crunch to your muffins (think of it as large poppy seeds), bread, pancakes and even cookie recipes. I like it in my granola :]
Three interesting recipes I’ve bookmarked from blogs
  1. Tartlette's Strawberry Jelly Roll Cake (with rice and millet flour only)

How to store millet?
As with other grains/seeds, millet can last for quite a long time (two years) if properly stored. The whole seeds can be kept together with your rice or in a closed container in a cool dry place. The flour becomes rancid very rapidly after it is ground, therefore, do place the flour in the refrigerator, especially in our warm, humid environment.    

  
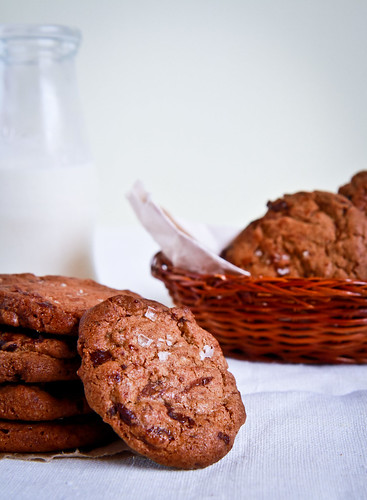
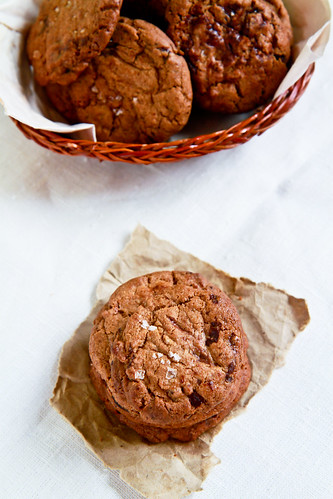
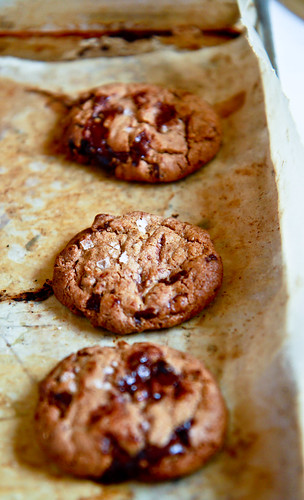
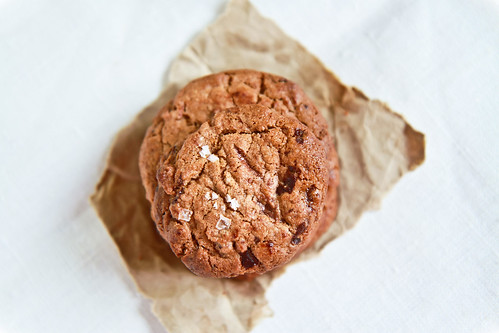
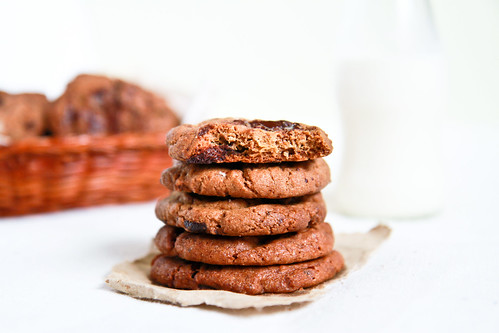
So as you can tell from the photographs, I'm featuring millet in my chocolate chip cookies today! I actually made a millet-only pancake, but I didn't exactly enjoy it, so I thought these chocolate chip cookies would be more convincing for those just starting to explore millet. If you notice, millet is seldom used alone (unless you're cooking the whole seed) and really tastes best when combined with a mixture of starches and flours.

I'm calling these the 36-hour chocolate chip cookies because making these cookies take at least 36 hours! After making the cookie dough, you have to allow the dough to rest in the fridge for at least 36 hours (find out why here) before taking it out to bake into morsels of heaven :]

I actually baked both the normal wheat version and gluten-free version at the same time, and conducted a tiny experiment. Those cookies which were baked a day after making the dough (ie, less than 24 hours) did not taste as chocolatey as those which were baked at least 36 hours later. As for the gluten-free and wheat versions, most tasters could NOT even tell the difference! And mind you, I gave the cookies to friends, relatives and colleagues! Some actually said that the gluten-free version was crispier and far more tasty than the wheat! I personally think so as well! So there you have it - baking gluten-free does not necessarily mean compromising on taste and texture - as long as you get your proportions right, it'll taste as good or even better than normal!

The recipe below is actually a halved version of the usual, do feel free to double the amounts - I tried out this recipe 3 times, making variations each time and I find myself liking this combination of flour and sugar the best. Do check out more detailed notes below.

36-hour Gluten-free Chocolate Chip Cookies
Adapted from David Leite's Ultimate Chocolate Chip Cookies (also known as the NY Times cookies) and sighted at Tartlette who adapted it from Shauna

50g sorghum flour
40g tapioca starch
30g white rice flour
50g millet flour
30g glutinous rice flour
15g buckwheat flour
15g hazelnut flour
10g cornstarch
(240g of flour in total)

2 teaspoons flaxseed, ground
2 teaspoons water
1 teaspoon cocoa powder
(OR 1 teaspoon xanthan gum)

¾ tsp baking soda
1 tsp baking powder (make sure it does not contain wheat)
¾ tsp sea salt

140g butter
110g brown sugar
90g white sugar
30g egg (about ½ an egg )
1 tsp vanilla extract
130g chopped chocolate (semisweet, or about 60-70%)

Sea salt, to taste

Method:
  1. In a small bowl, combine the ground flaxseed and cocoa powder together with the water and set aside.
  2. In a separate large bowl, whisk all the flours and starches together with the baking soda, baking powder and sea salt. Whisk in xanthan gum if not using the ground flaxeed combination.
  3. In the bowl of an electric mixer fitted with the paddle attachment, beat together the butter, brown sugar and white sugar on medium speed for 2 minutes until light and fluffy. Add in the egg and vanilla extract and beat until well incorporated. Beat for at least 1 minute. By now, the flaxseed-water mixture should be quite gelatinous - add it into the mixture and beat until incorporated.
  4. Add in the flour mixture into the batter in 2 batches, making sure that all the flour is incorporated before adding the next batch.
  5. Add in the chopped chocolate (and nuts if you desire) and mix briefly to incorporate.
  6. Then, scoop your preferred size of dough balls before placing into an airtight container to refrigerate for at least 36 hours. Alternatively, you can weigh your dough balls (my large ones were about 35g and small ones about 12g) OR you can refrigerate the dough and scoop them right before baking.
  7. When ready to bake, preheat the oven to 170°C and position a rack in the middle of the oven and line the baking sheets with parchment paper or a non-stick liner. Arrange the large dough balls about 3 finger spaces apart and sprinkle the tops with sea salt.
  8. Bake the cookies for about 15 minutes, or until they are golden brown and the sides are set. Allow the cookies to cool for at least 15 minutes before transferring to cooling racks.
Janine's jots: 
  • Note: If you want crispy cookies, do make the cookies small (about 10-15g) and remove them from the fridge at least 15 minutes before baking to allow them to soften slightly. Flatten them before baking and you will get nice crispy cookies, reminiscent of Famous Amos (I didn't say this - my brother did). Bake those cookies for 15-20 minutes - not only the sides but the centre of the cookie should be almost set before removing them from the oven. Conversely, if you prefer the thick chewy cookies a la Subway, portion large cookies (at least 35g in weight or an ice-cream scoop size) and bake them the moment you remove them from the fridge. The dough ball will gradually soften in the oven and remain thick. Once the sides have set (but the centre is still soft), remove them from the oven. They should take about 15 minutes or so.
  • Taste: Absolutely delicious. As stated above, I found the gluten-free cookies far more complex in taste than the normal ones - I could vaguely make out the taste of millet and hazelnut, which complemented the chocolate really well, without any addition of chopped nuts. This is definitely THE COOKIE to make when you want to introduce different flours into your diet and if you want to fool unsuspecting victims because they won't know that they're not eating gluten-free products!
  • Texture: I made a batch using xanthan gum and another without, and I found myself preferring the texture of the one without because the after-taste is less 'slimey'. Then again, that batch had more tapioca starch in it, so that could be one of the factors as well! In any case, this cookie dough is extremely versatile and can be used to make crispy OR chewy cookies - just vary the baking times and baking method :]
  • Serving size: Depending on size, the recipe above can make at least 3-4 trays of cookies. I made at least 100 small cookies with a single batch.
  • Modifications: For those who might be allergic to nuts as well, simply substitute the hazelnut powder for arrowroot starch or any other type of flour. Also, as indicated in the recipe, flaxseed can be replaced by xanthan gum and it is actually a substitute for egg as well. Feel free to increase the flaxseed amounts to 1 tablespoon to replace the egg in the recipe. The cocoa powder is added to mask the taste of flaxseed because sometimes ground flaxseed can taste nasty.
  • Storage: Store the unbaked cookie dough in the fridge for a maximum of 3 days before baking. Store in the freezer for up to 2 weeks although I wouldn't recommend this if you have egg in the dough. For baked cookies, store in airtight containers and they'll last really long! Don't store the chewy and crispy ones together though, because the crispy cookies will turn soft.
  • Would I make this again?: DEFINITELY YES!!


And finally, please note that I don't profess to be a gluten-free expert, although I have read up quite a bit on it. Most of my recipes do have gluten because I don't need to eat gluten-free, although I find it interesting as an alternative diet. Should you be a coeliac sufferer or are gluten-sensitive, please do be aware of some common pitfalls below:

Important notes for gluten-free baking in your kitchen
  • Do make sure that all the flours you use are certified gluten-free, or it is stated on the label that the flour product is processed in a mill which does not process other types of gluten flour. To be safe, you can opt for Bob Red Mills' which is gluten free or some types of flours sold in organic food stores.
  • Do make sure that the baking powder you use is gluten-free as well because some, if not most, baking powders contain wheat as one of the ingredients. You can buy a gluten-free baking powder OR you can simply make it yourself by using mixing baking soda, cream of tartar and arrowroot starch. 
  • Another source of gluten is in the chocolates. Make sure again that the chocolate you use is of good quality, and the label on it states that it does not have any wheat products or it is not processed in a factory which processes wheat or gluten products.
There are definitely far more notes on gluten-free baking but this is merely a primer. For more information, simply google "gluten-free baking" and you'll get millions of hits to blogs all over the world introducing you to the strange new world of gluten-free baking. Enjoy! :]

Tuesday, January 31, 2012

On the 9th day of Chinese New Year, I had ... Cashewnut Cookies

If you check in every Singaporean or Malaysian mother’s recipe book for Chinese New Year cookies, I bet you'll find a recipe for cashew nut cookies. These cookies are ubiquitous during Chinese New Year and I’ve never had one go past without seeing and eating these cookies. It is also mainly during this period that my mom fries up kilograms of cashew nut cookies and packs them into glass jars for relatives to snack on. Why so? Well, knowing how superstitious Chinese people are, we have associated symbolisms and meanings even to food we eat. I mean, the entire process of lo hei (捞起) yu sheng or yu sang (鱼生) is filled with symbolism - check out this website for the 'prosperous words' to say when you're in the process of making the prosperity salad and tossing it.


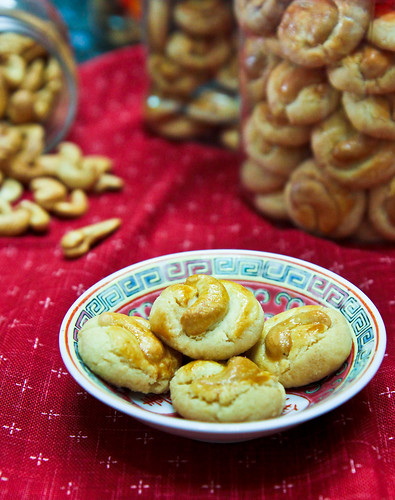
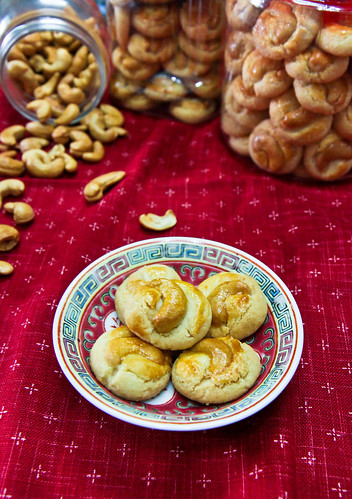
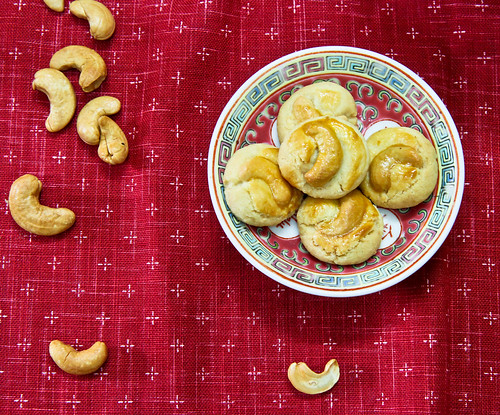
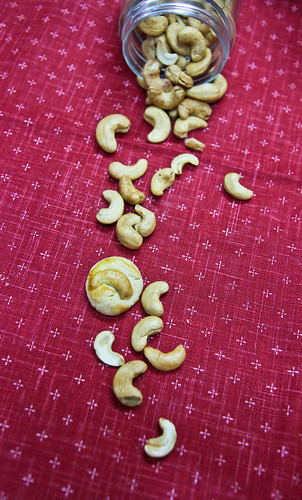
As for cashew nuts (腰果), we Chinese believe that the nuts resemble gold ingots from days long gone, and so we eat them in a bid to get wealthy. Ironic much? In any case, you can choose to roast the cashews by placing them on a tray in a preheated oven, but from experience, these are not as nice as compared to fried ones. All you need to do is to use some oil (olive oil is good) and continually toss and 'fry' the cashews. They turn a lovely golden brown (as you can see above), and taste better. And because you're making this snack yourself, you can choose NOT to salt them. And they are cheaper if you buy them raw and fry/roast them yourself rather than buy them packaged and salted, ew. The healthier option of course is to roast them in the oven, but I justify it by eating less of these nuts. Another good thing about these cashews is that they have a lower fat content than most other nuts and more than three-quarters of their fat is unsaturated fatty acids. They contain high quantities of oleic acid, which is the same fat which promotes good heart health. But as with any foods, eat in moderation! About 20 cashews (35g) count as one serving, and as with most nuts, do not eat more than one serving a day. It's best to eat less than 3 servings per week. Most importantly, cashew nuts are rich in minerals, such as zinc (important for growth and development) and copper (important for your joints and antioxidant defenses) among others. I learnt this recently, and I've been encouraging my mom to eat more cashews because she suffers from low blood pressure and has a weak constitution, so iron and minerals in any natural form is most welcome!


So as I was saying previously, oldies are goodies, and these are my mom's super good cashew nut cookies recipe. I'm not sure where the original was from, but I'm pretty sure both the ingredients and instructions have been modified enough over the decades for my mom to call it her own. I find it rather astonishing (and amusing) at how similar my mom and I are in terms of recipe jotting – my mom crams a few recipes on a page, which I do now without knowing she did the same, and she writes comments such as “very good” on the side of recipes she tries, which I do as well. 

If you recall, I also baked this last year, but I used the original recipe and didn't post the recipe up. So here it is: 

120g butter
120g shortening
125g sugar
1 tsp vanilla
1 tsp salt
1 cup ground cashew nuts
155g self-raising flour
125g plain flour
Some cashewnuts for decoration


This year however, I had to do some modifications. As usual, I only decided to bake this very last minute (ie, on the eve of New Year’s eve), so I didn’t have all the ingredients I needed. I didn't have the shortening and self-raising flour that was required, so I replaced it with margarine and normal flour with baking powder instead. So here is 2012's modified recipe:

Cashewnut Cookies
At least 100 cookies

120g unsalted butter
120g margarine
125g castor sugar
1 tsp vanilla extract
1 tsp salt
120g ground cashew nuts
280g plain flour
1½ tsp baking powder

Some cashewnuts for decoration
1 egg yolk for egg wash 

Method: 
  1. Preheat the oven to 160°C. 
  2. Choosing the smaller sized cashew nuts, split them into half along their seams and place them face up on a baking tray. Place the tray in the preheated oven for about 10-15 minutes, making sure that the cashews DO NOT turn too golden brown. You just want them less raw so that they can bake in time with the cookies later. 
  3. Weigh the discarded or weird shaped cashew nuts (until you get 120g) and place them in a food processor. Grind them up and set it aside. 
  4. Sift the plain flour together with baking powder and set it aside. 
  5. Let the butter and margarine both sit at room temperature until softened. Cream butter and margarine together, then add sugar, salt and vanilla extract. Cream until pale yellow and fluffy. 
  6. Add in the ground cashew nuts and give the mixture a quick stir. Next, add in the sifted flour and stir the mixture until all traces of flour has disappeared. 
  7. Next, proceed to measure out small balls (depending on how large you want your cookies to be - mine were about 7-9g each). Place them on a greased baking tray and leaving about a thumb's space between each ball, because you will have to slightly flatten them and the cookies do spread a bit. After flattening your cookie balls, press in your pre-roasted cashews. Use an egg wash over each cookie if you want them to have a golden brown hue (much like gold ingots). 
  8. Bake at 160°C (fan-forced) or 175°C (conventional) for about 18-20 minutes, or until golden brown. Remove the cookies when they're done, and allow to them to cool before storing them in airtight containers. Do resist the temptation of eating them immediately, because the cookies taste better the next day. 


Janine's jots: 
  • Note: This recipe can be easily modified by substituting any other ground nuts, and I'm sure it'll taste equally good. In fact, I think it will be a really good base for a gluten-free cookie (though not nut-free).
  • Taste: I love cashew nuts, so these cookies taste perfect for me (and all my relatives). They are also not as sweet as those you get from shops, and hence are the perfect sweetness. I didn't have to experiment with the sugar amounts because this sugar amount has been tried and tested, and derived after many years of baking them (by my mom). 
  • Texture: These cookies are an absolute delight - crispy with an extra crunch from the cashew nuts. Everyone who ate these cookies loved them. I believe the crispiness is derived from a mixture of margarine and butter, because I can't seem to get this same texture with an all-butter recipe. But I might be wrong. More experiments next year ;p
  • Serving size: I can't recall how many cookies I made, but I could fill 3 large containers with cookies, so perhaps 100 cookies at least? 
  • Modifications: NONE. They're perfected well enough already, in my book. 
  • Storage: These cookies store really well in an airtight container. It has been almost two weeks since I last made them and they still are as crispy and yummy. 
  • Would I make this again?: Definitely. My aunt made me promise. And among all the cookies I made for CNY, this was one of the more well-received ones, because it was traditional, and because it was yummy. Also, I loved making it because it was so simple - I got the dough made and the cookies baked in less than three hours. And this is taking into consideration that my oven can only bake one small tray at a time!


Anyway, today's the ninth day of Chinese New Year, and it's the day that Hokkiens pray to the Jade Emperor (or 天公). There are varying stories of why this is so grandly celebrated by the Hokkiens, but the common thread is that the Hokkien people were forced to hide in sugarcane plantations by their enemies during the Chinese New Year, and when it was finally safe, it was the 9th day of Chinese New Year already. So these Hokkiens went back to their homes and celebrated this 9th day as if it were the 1st day, hence the grand celebrations and the act of giving thanks. Not sure how true this story is, but at least it explains the grand feasts that some have on this day (roast pig, et al).

I don't exactly celebrate Chinese New Year besides the first and second day, because that's all the holiday I get from the Singapore government, so these cashew nut cookies reminiscent of gold ingots are all that I'll be offering to 天公 for now :]

And yes, I took these photos the same time as I did the gluten-free orange poppy seed cookies the previous post, and was still experimenting with indoor flash. I'm still not too pleased with the photos but I was in a rush as usual, so I can only grumble and learn from my mistakes now, after post-processing. 

Wednesday, January 25, 2012

Healthy CNY cookies #3: Gluten-free Orange-Poppy Seed Squares

Oldies are the goodies. Although I've been trying all sorts of newfangled recipes, be it cakes or cookies, sometimes, mom's recipes still are the best. It may be because of the memories that we associate with the tastes, that makes it taste good, or perhaps the sheer number of generations that a single recipe has fed that makes an 'old' recipe good, so let's not question it ;p For Chinese New Year, in addition to the new recipes (white chocolate oatmeal cookies for example) I looked through my mom's recipe book, torn and tattered that it is, for some of the more traditional and loved CNY cookie recipes. I found this recipe entitled Oriental Cookies, and despite the exotic sounding name, it looked like a traditional butter cookie to me. So I decided that it was the perfect recipe to use for a batch of gluten-free cookies I was planning to make for my cousin.


I've been baking up a storm this CNY season, but even as I make the usual pineapple tarts and cashew nut cookies, I wanted the diabetics in my family (the 2 eldest folks in my family) to be able to partake in the cookies during breakfast and tea (CNY is all about the cookies in my family), so I came up with the sugar-free butter cookies. Looking back (now that I'm back in Singapore), I should definitely increase my repertoire of sugar-free or healthy cookies to a greater number, because the single jar that I brought back was readily consumed by my grandma and uncle, and it was the fastest cookie to disappear. I'm sure if I can make the cookies taste almost the same as the original, people won't be able to tell the difference! The only thing holding me back for now is that exorbitant prices of the sugar substitutes :/

Anyway, these gluten-free cookies were very very well-received by the family, even with the rest of the family who didn't need to eat gluten free. I didn't know exactly what foods my cousin couldn't eat, because a year ago, I was ignorant about these things, so I just made it gluten free. I actually found out later that he was on a GFCF and nut-free diet, which means that I shouldn't have added the almonds into the mix. Luckily, he's not allergic to them, so it's okay in small quantities. With my increased awareness of foods and baking, I'm definitely making something more interesting for him next year - I'm thinking of not only making it gluten-free and casein-free, but going all the way and making it vegan by doing an egg-free and butter-free version. That should be pretty interesting :]


For those of you who might be thinking, what the heck is this gluten-free thing and how does it affect me? I can eat anything! Well, I can too, but this didn't stop me from exploring. A gluten-free diet is basically a diet on which no gluten can be consumed - it may be for health reasons (eliminating wheat and enriched carbohydrates) or it may be simply because your body cannot process gluten (coeliacs). This was perhaps a lesser known phenomenon in Singapore and in Asia, but there has been increasing awareness of this disease because of the greater number of people being inflicted (or diagnosed) with coeliac disease. So what is gluten? Gluten is basically a protein found in wheat - it's the thing that makes bread rises and makes it so elastic and yummy. Thankfully for those in Asia, our staple food, rice is gluten-free. There are many other grains and seeds which are gluten free, such as millet and buckwheat, and other root starches like tapioca and arrowroot - these are the typical flours used in gluten-free baking. Sometimes, a binder or glue is required to mimic the action of gluten, and this is where xanthan or guar gum gums comes in. It's a gum derived from trees, and it acts as a 'glue' for the flours to 'stick' together. This gum might sound exotic, but trust me, it's not - it's a stabilizer commonly used in many processed food products - if you check your food label, it goes by the name E415.

So even though I'm perfectly healthy, I have been reading a lot about a gluten-free diet, because I think that by eliminating wheat flours in our diet, we are actually introducing a great variety of flours and new ingredients that we normally will not encounter. I still make cookies and cakes with white enriched flour, but this also goes hand-in-hand with my bread made of rye and spelt, my rice which has millet mixed into in, my granola which has flaxseed and quinoa and all sorts of other seeds and grains. All these serve to introduce interesting and healthful ingredients into my family's diets. This post is getting rather long, so I'll stop my long spiel for now. Be warned that this is but the first of many posts on such a topic - I do believe that more Singaporeans are looking into a healthier lifestyle (with all those organic food stores and 十谷米 products on the rise), and this is but one way of incorporating healthy living into our daily lives. 

Gluten-free Orange-Poppy Seed Stars
Adapted from one of my mother's recipes entitled Oriental Cookies (source unknown)
Makes about 60 star-shaped cookies 

60g      unsalted butter
⅛ tsp   salt
¼ tsp   baking powder (gluten free)
⅛ tsp   baking soda
½ tsp   orange zest (half an orange)
1 tsp    poppy seeds (or sesame seeds)
50g     icing sugar, sifted
12g     egg
100g   gluten-free flour mix*
½ tsp   xanthan gum

*I used a homemade mixture of the following flours:
10g cornstarch
20g tapioca flour (or tapioca starch)
20g almond flour (or ground almonds)
10g millet flour
15g sorghum flour
10g glutinous rice flour
10g rice flour
5g buckwheat flour

Method: 
  1. Sift the various flours together. Then, sift the flours together with the xanthan gum, baking powder and baking soda. Set aside. 
  2. Cream butter with icing sugar and salt, until pale and fluffy. Then, beat in the orange zest and poppy seeds. 
  3. Beat in the egg white until it is well-incorporated. Beat for about a minute at medium speed.  
  4. Add in the sifted flour mix and beat until all traces of flour is gone. You can beat the mixture for slightly longer because the lack of gluten in the flour means there is no fear of tough cookies! :]
  5. Roll out the dough to a thickness of 1cm, and you can either use cookie cutters or cut rectangular shapes. You may also roll the cookies into balls and flatten them. The cookies will be crispier if they are flatter. 
  6. Bake at 180°C for about 15-20 minutes, or until the cookies turn a light golden brown. Cool on a rack until totally cool to touch before storing in air-tight containers.  


Janine's jots: 
  • Note: Poppy seeds are banned in Singapore, but there is a variety of blue poppy seeds available in Malaysian supermarkets that you may use. Alternatively, you can use black sesame seeds or totally omit poppy seeds if you want. The poppy seeds merely add an extra crunch to the cookies, and for course are aesthetically interesting for kids to eat. In addition, if making for someone who needs to eat gluten-free, make sure that your baking powder is certified gluten free, or make your own. This is because baking powder is usually combined with wheat or some other products which contain gluten, so please please be aware of this! It could be deadly if you use normal baking powder for someone who is seriously allergic to gluten!
  • Taste: I love how the various flours used add to the complexity of the taste of each cookie. For instance, the buckwheat flour gives it a grassy nutty flavor, which is why I used a small portion of it. The almond flour, which I deliberately ground rather coarsely, gave it the nuttiness and crunch. Millet and sorghum both provide sweetness to the cookie dough, and you can also add gluten-free oat flour for more sweetness! 
  • Texture: In my mom's recipe book, she also adds that you can add a maximum of 30g chopped nuts (almonds or walnuts) for extra nuttiness and crunch. 
  • Serving size: This recipe is a halved version of the original, and depending on how large your cookie shapes are, you should get about 50 cookies or more. I had enough cookies to fill 2 8x11inch trays. 
  • Modifications: The original cookie recipe does not include the orange zest and poppy seeds, but I decided to add them in, because I thought the fragrance of oranges would be apt for a CNY cookie, with all those mandarins and tangerines around. 
  • Storage: These cookies store extremely well in an air-tight container, for 2 weeks or more. 
  • Would I make this again?: Definitely! Not only were they well-received by the family, it got a thumbs up by my friends who tried it as well. I personally think it's a nice cookie to eat, and most people didn't even know it was a gluten free cookie until I told them :] 


The first two parts of my "Healthy CNY Cookies" series were Pseudo-pineapple tarts (which were apple tarts in disguise) and sugar-free butter cookiesThis post rounds up this short series, but it's definitely not the last healthy cookie recipe I'm going to attempt. I've been reading up a lot on 'alternative' baking (for want of a better word) and it's high time I changed that into real experiments, so stay tuned!

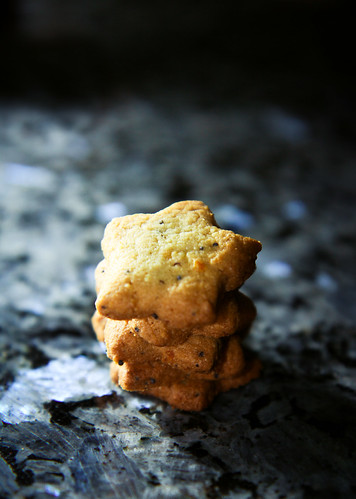
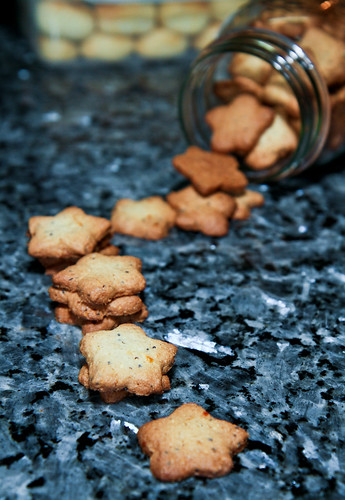
PS: These photos are taken on my granite dining table back home, and I was playing around with my indoor flash. I definitely have much to learn about indoor flash!

Tuesday, January 17, 2012

Healthy CNY cookies #2: Sugar-free (Xylitol) Chocolate Spritz Cookies

I’ve to confess that I took a long time to overcome the hurdle that is sugar. I mean, I've seen the evils of sugar (see this super informative video "Sugar: the Bitter Truth") but after an epic no-sugar disaster (I tried to make no-sugar muffins using only the sweetness of fruits which failed more than majorly), I steered clear of anything labelled as no-sugar. Furthermore, I haven't had good experiences with sugar substitutes, as I find that most have a nasty or weird aftertaste to them. These two coupled together was a huge hurdle and I couldn’t get over the fact that anything without sugar would taste horrible and turn out blah.

But since my granny came over for a visit over Christmas and I wanted to bake some cookies for her, I had to make them sugar-free so that she could enjoy them without suffering the consequences later. So I began experimenting. I used the most simple of recipes – a butter cookie recipe. I made it sugar-free by substituting equal amounts of sugar substitute, xylitol for the sugar and I also changed it into a chocolate flavoured butter cookie.

My Christmas Cookie Selection (which are experiments for CNY actually)

Now, my granny has not always been diabetic - in fact, she only tested positive only last year? I suspect old age has something to do with it. My uncle also has diabetes, of the more serious sort, and ever since then, I’ve been ever so conscious that all of us in the family are pretty susceptible too, and we should consciously note what kinds of sugars we are consuming. I’ve been reading up a lot on refined and natural sugars - in fact, as usual, I've come up with a huge long list of these sugars which I will share soon after I make it look more organized. So, I recently got myself some xylitol to experiment with. Why Xylitol? Well, after some reading up, I found that xylitol must suited to my needs. Most sugar alcohols when consumed in excess can cause some gastrointestinal side effects such as diarrhoea and bloating, and these are definitely symptoms I want to avoid. Xylitol on the other hand has a lower incidence of such side effects because it’s more easily tolerated than other types of sugar alcohols.


Xylitol is a naturally occurring sugar alcohol found in various sources such as corn husks, oats, mushrooms, etc. Mine however, is that which was extracted from birch. It has about 9 calories per teaspoon, about half of that of sugar. It also has a glycaemic index of 13. This is in comparison to refined white sugar which has a GI of about 65! The best thing of course, is that there is no nasty aftertaste like what you’ll get from some brands of stevia or other sugar substitutes. For those who might think - wow xylitol? Sounds totally exotic and foreign! I'm sorry to burst your bubble but xylitol is not something new. If you check your chewing gum or toothpaste, you might realize xylitol being used as one of the ingredients. It provides the necessary sweetness and it appears that it is also tooth friendly and helps reduce plaque and tooth decay as well! I haven’t been able to find xylitol in grain form in Singapore, so I got this shipped from UK along with other products (like xanthan gum).

Of course, there are other types of sugars suitable for diabetics, such as “Sugar-free” and Equal, the more common brands in the market. However, these are more of synthetic sugars and I don’t really want to put in any more artificiality into my body, so xylitol it is.


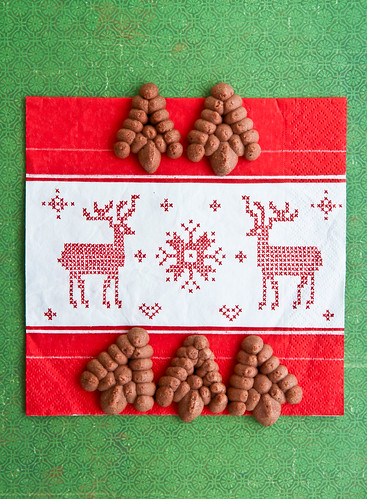
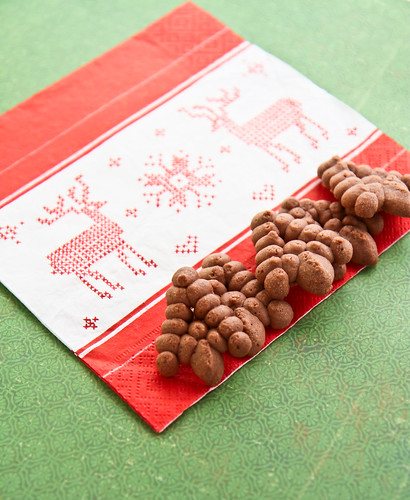
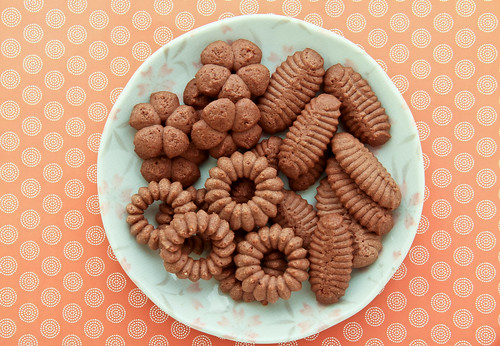
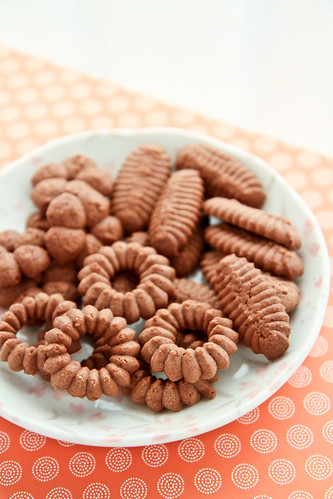
So onto the cookies. I used a cookie press to make them, and boy did I have tons of fun with it! I forgot my mom had such a contraption, and was only reminded when she saw me piping the cookies with a piping bag and commented that she had a cookie press in the drawers somewhere. I used the Christmas tree plate to create Christmas tree cookies for Christmas, which has of course since passed, but as you can see above, you can also create a whole melange of cookie shapes with the cookie press. It was my first time using the press, so if you scrutinize the plate above, you'll see varying shapes and sizes :/ There are so many plates to play around with, and you can get different shapes with the same plate if you just vary the amount of pressure used, so do play around with your cookie press if you have one, because these can be the perfect simple cookies to make for Chinese New Year. In fact, I believe I took less than 30 minutes to make the cookie dough, and press them out before baking. You can churn out jars of CNY cookies in less than a few hours :]


Sugar-free (Xylitol) Chocolate Spritz Cookies
Makes about 50 odd cookies, depending on how large or small
Adapted from Pierre Herme's sable viennois

95g     unsalted butter
¼ tsp  fleur de sel
¼ tsp  vanilla paste
40g     xylitol (or any sugar substitute, or icing sugar for the non-sugar-free aka original version)
15g     egg white
125g   all-purpose flour
Method:
  1. Cream butter and salt until light and fluffy. Next, add in vanilla and sugar, making sure to beat well. 
  2. Add in the egg white and beat until well incorporated. 
  3. Sift in flour and mix until all the flour is incorporated. Do not over mix. 
  4. Place the batter (it will be quite soft) into a piping bag with your selected tip and proceed to pipe out shapes. If the batter is too soft to handle, place it in the fridge to chill for less than 30 minutes. Do not place it in the fridge for too long as the batter will harden and it will be impossible to pipe out. 
  5. Bake the cookies in a 160°C preheated oven for about 15 minutes. The cookies do not spread much, so you can pipe them quite close to one another, leaving less than 5cm spaces between each cookie. 


Janine's jots: 
  • Taste: I couldn't taste an obvious difference between the sugar-free and refined sugar versions of the cookie actually, which means that this experiment is a success :] I mean, if you want to be particular, I thought the refined sugar version was probably more crunchy, but this version was definitely fine too! 
  • Texture: In my first batch, I accidentally added an entire egg white instead of the 15g required by the recipe, so the cookies didn't turn out as crispy as they should have, but the subsequent batch turned out fine. Using xylitol did make the texture of the cookies less crispy, but it was okay for me since this was meant for my grandma and I think she'd prefer a cookie with more 'bite'. 
  • Serving size: You can fill about one tin (those typical plastic jars with the red lids) of cookie using one batch of this recipe, so you might want to double or triple it if you wish to make a couple jars.
  • Modifications: None, because I really like this recipe, although I do much prefer the original non-chocolate ones better. I think chocolate cookies need to be a tad sweeter.
  • Storage: These cookies store very well at room temperature. Just be sure to keep them in an airtight container, and they will last for at least 2-3 weeks. If you store them in those disposable type plastic containers, they will start to lose their crispiness after a few days.
  • Would I make this again?: Definitely, but my granny wants them to be normal butter cookies this time for CNY because she's superstitious and doesn't like 'orh' (black) things for CNY =X

 
Do stay tuned for my final installation of my "Healthy CNY Cookies" series in a few days! :]

Wednesday, January 11, 2012

Healthy CNY cookies #1: Pseudo-Pineapple Tarts for Diabetics - Apple Tarts

As the Chinese New Year (CNY) draws near (it's 23 and 24 January this year for those still in the dark - which means yet another long weekend :D) and my CNY cookie making frenzy heats up, I’ve been thinking about not only the different types of cookies I'm able to experiment with, but also cookies fit for everyone in my extended family to eat. This means that cookies fit for diabetics, celiacs, as well as persons with high or low blood pressure. This also means that I have to experiment with cookie recipes by making some sugar free, some gluten free, and some full of the good stuff (fibre, nutrients, etc), especially for my elders who are getting on in their years ;p

I've decided to start simply - by adapting tried and tested recipes to fit these new requirements. This will be the first of a few 'healthy' CNY cookies that you too can choose to make if your family suffers from the same afflictions as mine.

I've started things off with the most important ‘cookie’ for CNY (in my opinion) – the pineapple tart. We all know that pineapple tarts contain an inordinate amount of sugar – just the pineapple paste itself will contain enough sugar to kill a diabetic (figuratively, not literally I hope). I’m not sure how true this is, but my mom always warned me against eating too many pineapple tarts because according to her, 3 tarts has enough calories for a meal! So I’ve always restricted myself to not more than 3 at a sitting ;p


Now, the use of refined sugar in making the pineapple paste is definitely bad for a diabetic, but I wasn't too daring to make the paste with sugar substitutes (and also because it would be expensive to do so). So instead, I I decided to substitute pineapple paste with a fruit already rich in fruit sugars – apples. Apple paste, or apple jam or more properly called applesauce is definitely way easier to make than pineapple paste. My applesauce contains no additives and no extra sugar. Any sweetness is derived from the natural sweetness of the apple you use. As such, I highly recommend the use of Royal Gala or Fuji Apples which are ripe and sweet, as well as one Granny Smith, to mimic the tartness of the pineapple.

For the crust, to make it diabetic friendly, you can opt for a sugar-substitute such as Equal or Stevia or xylitol, and mix it with some whole grain flours instead of the refined white flours that we usually use. Why whole grain flours? Well, highly refined products like enriched white flours are not good for diabetics because first, it lacks natural nutrients and it gets translated into the blood sugar very rapidly, causing a spike in blood sugar levels. This is not good because diabetics do not have enough insulin to regulate their blood sugar. So whole grains, are definitely a good choice to go with that sugar-free option when you wish to indulge but don’t want to run the risk of elevating your blood sugar level overly.


Apple Tarts
Makes about 60 pieces, depending on how large or small they are and what decorations you put on top

For the crust:
Adapted from Pierre Herme's Pâte Sucrée recipe

125g   all-purpose flour
15g     almond flour/meal
45g     icing sugar (or equal amounts of powdered sugar substitute)
75g     unsalted butter, room temperature
¼ tsp   salt
½ egg  (about 25-30g)
Seeds from an inch of vanilla pod

Method:
  1. Sift the flour and icing sugar separately.
  2. In a mixing bowl, cream the butter until it softens.
  3. Then, add the following: icing sugar, ground almonds, salt, vanilla seeds and beaten egg. Lastly, add in the flour. Use your mixer on the lowest speed until the pastry comes together in a ball. As soon as it does, stop and flatten it into a disc. You can also choose to use a food processor. Clingwrap it and chill for at least 3 hours before use.

For the Apple Jam:
See my applesauce recipe here

To assemble:

  1. Make the crust first, and place it in the refrigerator to chill for at least 1-3 hours before using. In the meantime, prepare the apple jam. Basically, use any applesauce recipe and be sure to cook down the applesauce until it is relatively drier than usual.
  2. After it cools, remove the crust from the refrigerator and proceed to roll it out, to about 3-5mm thick, depending on how thick you like your tart.
  3. Portion the jam onto the tarts before decorating with more dough (optional). You can place the tarts relatively close to one another on the cookie tray because they do not spread/expand that much. Before baking, you can choose to use a egg yolk glaze on the tarts. I did not do this as I was lazy.
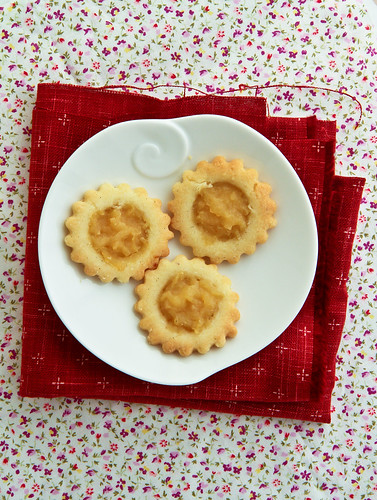
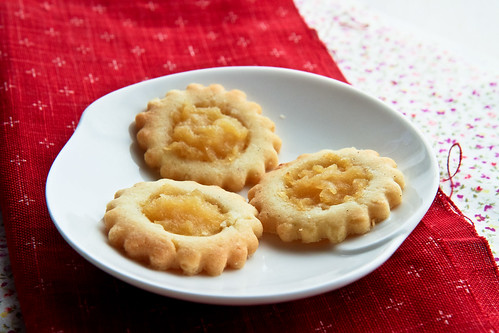
  4. Bake in a preheated oven at 170°C for about 20-25 minutes or until the tart is slightly golden brown. Note that if you don't use an egg yolk glaze, your tarts will look like mine below - slightly on the pale side.


Janine's jots: 
  • Taste: If you like, you can also add some cinnamon to the applesauce, to bring out the apple flavour more.
  • Texture: I would definitely cook down the applesauce a little more since I used my normal method and it was still quite liquid. I thought the applesauce would dry out in the oven when baked with the crust, but it did not and was rather wet still. This meant that the tarts had to be consumed on the day itself, otherwise the tarts turned a tad too soggy.
  • Serving size: The recipe is a quartered version of the original, and will definitely make about 1-2 trays worth of tarts, but the exact number is hard to determine because your tarts may be of different sizes.
  • Modifications: If you want a more healthy option, you can definitely up the almond flour, and substitute the all-purpose flour with a bit of rice or millet flour. This also means you can mix/process the dough longer since there's no gluten in these flours. Millet also adds a wonderful sweet taste (and browness) to the tarts as well.
  • Storage: My tarts only kept well for 3 days, because it started getting soft on the third day and that's not the texture you want for a pseudo-pineapple tart.
  • Would I make this again?: I would definitely want to try this again, but making the enclosed version this time because I think the moist apple jam is more suited for a crumbly, melt in your mouth enclosed tart :]


Disclaimer: Please do note that I am not a nutritinoist or medical professional. All recommendations made above are based on what I've read on the internet and in books, so please do consult your doctor if you have any doubts.

I am merely stating that this might be a suitable alternative for diabetics craving for that ubiquitous pineapple tart during CNY. The tart might not be safe for diabetics to consume in large quantities, because it still does contain fruit sugars as well as refined flours and sugars. Please do consume at your own discretion, and always remember, everything in moderation!

PS: I know my tarts aren't very well-made (the filling is so horrible looking) and I have been quite stingy with the filling but this was merely an experiment which went well ;p

Thursday, March 10, 2011

Homemade Cinnamon Sugar Wheat Thins

As I'm typing this entry, I'm munching on my homemade wheat thins and boy are they addictive! I've to admit I've never eaten Wheat Thins, because I don't think they're available locally, but I have eaten other types of wheat crackers. Like Arnotts shapes!! Anyone remember them? They have flavors like Pizza and Cheddar - I remember loving the Pizza flavored ones to bits! But horrors! Each cracker contains 12% of saturated fat and 10% of sodium - a definite no-no! These homemade ones are by far the better choice. I'm no calorie counter, but I'm pretty sure that the saturated fat and sodium content is much lower and better yet, there's no preservatives!

I saw this recipe while I was blog surfing on Xiaolu's blog, and I've bookmarked it until a suitable time to attempt them. The time came sooner than I expected when my daily oatmeal chocolate chip cookie snack ran out! I do have a bad habit when it comes to snacking - I tend to get sick of one type of biscuit/cookie really easily. In fact, I usually just open a packet of biscuits to eat one or two before I leave them languishing in the cookie jar until the air has gone out of them :/ Bad habit I claim to have inherited from my mom who shares the same bad habit! :p


Homemade Wheat Thins
Adapted from Xiaolu, from King Arthur Flour Whole Grain Baking Book
Makes 6 dozen crackers

Ingredients:
For the crackers:
150 g    wholemeal flour (or whole wheat flour)
20 g      castor sugar
½ tsp     salt
½ tsp     vanilla extract 
60 g      unsalted butter, cold
60 g      water

For the topping: 
1 tsp cinnamon powder
2 tsp icing sugar
(sift both together)
Granulated sugar for additional sprinkling

Method: 
  1. Combine the flour, sugar and salt together. 
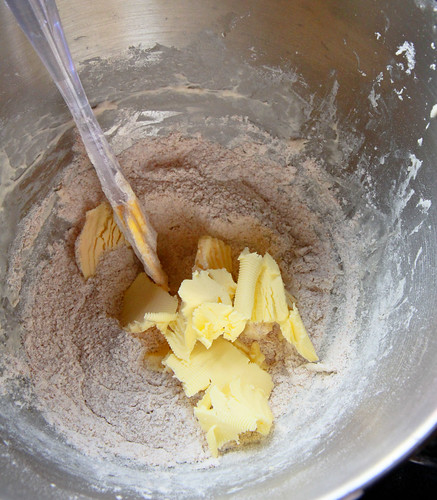
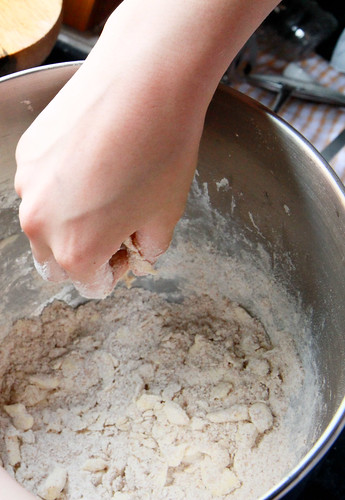
  2. Cut the butter into 3-cm large cubes and use your fingers (or a fork) to cut it into the dry ingredients. 
  3. Once a bread-crumb texture is achieved, add in 40g of water, making sure to fully incorporate it into the dough. If the dough remains dry, slowly add in the water a tablespoon at a time, until all the bread crumbs have been incorporated into the dough. You might not need to use the entire 60g of water! Cover and chill the dough for 10 minutes. 
  4. Preheat the oven to 190 degrees. Line your baking sheets with parchment paper.
  5. Lightly flour your counter and your rolling pin. Grab a fist-sized portion of the dough, making sure to keep the dough covered under a damp tea towel to prevent it from drying out. Roll the piece of dough, as thin as you can (about 2mm thick). Using a pizza cutter or sharp knife (I used the edge of my bench scraper), cut the pieces into squares approximately, 3-5cm wide (or whatever shapes you want your crackers to be). 
  6. Sprinkle the squares with your cinnamon-sugar topping, or any desired sweet or savoury topping. Repeat the process with the remaining dough. 
  7. Bake the crackers for about 5-10 minutes, or  until they are crisp and brown. Check on the crackers after 5 minutes, making sure to rotate the tray if your crackers don't brown evenly. If some of your thinner crackers have already browned, use a spatula to remove them and continue baking. 
  8. Once ready, remove the crackers form he oven and cool on the pan for about 10 minutes before they're ready for consumption! Store the crackers in airtight containers.

Janine's Jots: 
  • I didn't exactly bother to make sure that my crackers were uniform in size, but if you are the OCD type, you can trim the edges of your rolled out dough and proceed to cut into uniform rectangles. 
  • Tips: You can actually roll the dough out on your pre-cut parchment paper, cut it into pieces and transfer the paper onto your baking tray without having to bother with excessively flouring your countertop. Just be sure not to cut into your parchment paper. You don't have to even separate the pieces after you've cut them because they don't expand and are easily snapped off at the lines you've cut. 
  • Texture: If you manage to roll out your dough thin enough, the crackers will be nicely thin and crisp. They don't expand AT ALL. Try not to re-roll your scraps too many times because it'll give rise to layers and the crackers won't be as crisp!
  • Storage: I've stored the crackers in an airtight container, and so far, it's been more than a week and the crackers are still as crisp as before :]
  • Serving size: Like Xiaolu, I highly recommend doubling the recipe, because 6 dozen crackers is really a small amount! They're really addictive and you can finish a number of them at one go!
  • Modifications: This recipe is easily adaptible and really easy to make! It only took me about 10 minutes of active preparation and about an hour in total before I got to eat the cooled crackers! You can easily make savory versions. In fact, the original poster made a savory one with paprika, turmeric, garlic and onion powder added into the dough. Salt was also sprinkled on top. I did a herb version along the same lines. 
  • Taste: If you are not much of a fan of wheaty textures and tastes, I'd recommend subbing at least 30g of the wholemeal flour with all-purpose flour, which is what the original recipe called for.  
  • Would I make this again? DEFINITELY. There aren't many cinnamon flavored crackers available in our local supermarkets because I don't think it's favored by locals, but I love cinnamon to bits! I can imagine myself making different versions of this cracker - BBQ, cheddar cheese - the variations are endless. And it goes really well with salsa, dips and cheeses and ham too! And I can't stress enough how easy it is to make the dough and bake them! Be sure to keep an eye on the crackers though, some of mine turned a tad too brown and had the chao-tah (burnt) taste, which was awful. 


In pictures: 
Combine the dry ingredients. Excuse the dirty bowl - I used it for other purposes earlier  :/
Incorporate the butter into the dry ingredients, using your fingers., until you get coarse breadcrumbs. 
Lightly flour your counter so that you can roll your dough on it. Shaky hands for this picture, sorry!
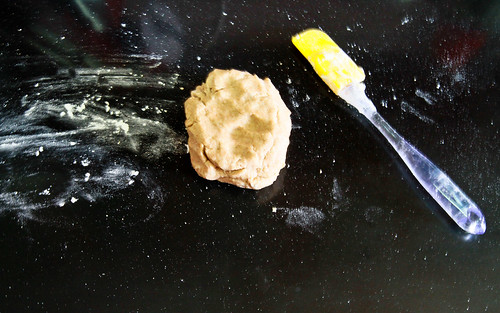
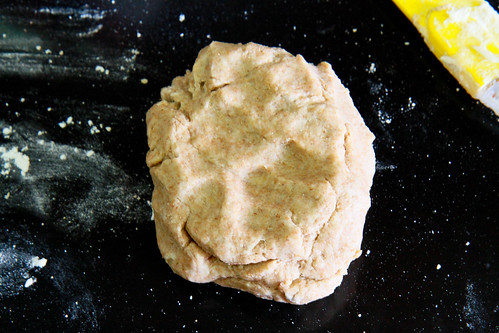
A close-up of how the dough looks like - it's not wet like bread dough, and not difficult to handle like most pie doughs. 
See the rolled out dough? This is still not thin enough! It has to be as thin as how you imagine you want your crackers to be - really really thin!
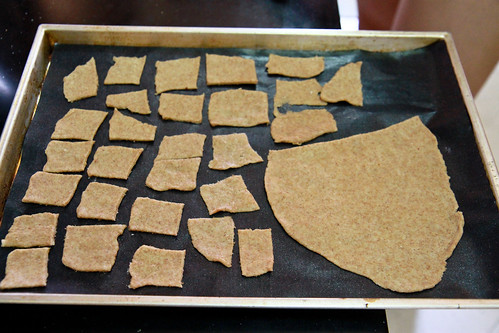
What I've done here is to separate the pieces on the baking paper - there is no need to do so because the pieces totally do not expand and do not stick to one another! See the big piece on the right? I used my bench scrapper to cut it into pieces on the tray rather than moving the pieces from the countertop to the tray :]
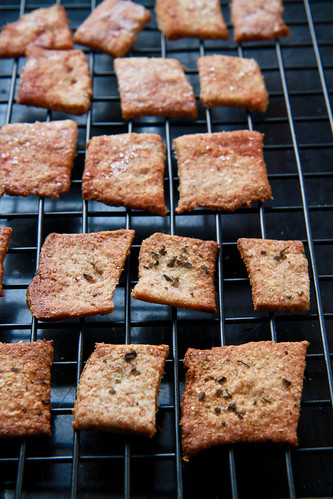
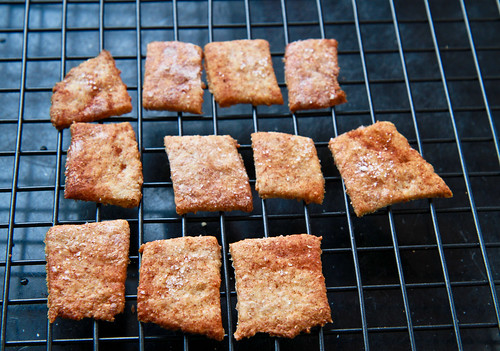
These are my cinnamon-sugar topped ones. They look a tad browner than the herb ones. As you can see, I don't really care much for regular sizes. 
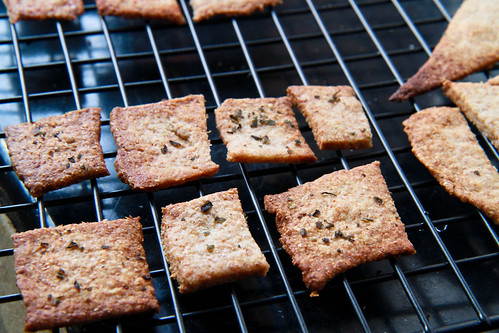
These are the herb-topped ones. Be sure to press the herbs into the crackers before baking, otherwise they'll all fall out when baked!
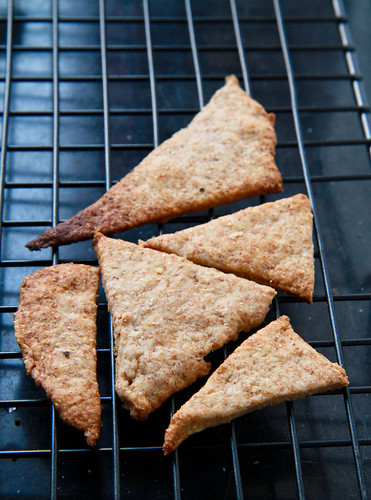
My attempt at making plain triangular ones for dipping sauces heh :] Note the top triangle tip? That's way too brown - it'll have the burnt taste which is a no-no unless you like that type of smells.

I haven't exactly raved much about recipes I've attempted, but I've to admit that this will be one of the recipes that I'm sure I'll be repeating many many times this year. They're really easy to make, and I also like the fact that I can control the amount of sugar and fat going into this cracker - so that I know exactly what I'm snacking on. And the best part is the ability to change the flavours of this cracker according to your preference! I thinking along the lines of perhaps making a rice cracker version - subbing the wheat flour for rice flour instead, and perhaps making a thick cracker, with some cheese or other sweet filling inside, just like those weetbix cereal I eat in the morning! Will see how that goes :] Do try out this recipe everyone! It's definitely one for keeps!
Related Posts Plugin for WordPress, Blogger...