My blog has moved!

You should be automatically redirected in 6 seconds. If not, visit
http://www.unpastiche.com
and update your bookmarks.

Showing posts with label Chinese Recipes. Show all posts

Tuesday, September 11, 2012

Luna Park, North Sydney and Hokkaido Milk Buns with Red Bean Paste (with tangzhong)

Over the weekend I finally had time to upload photos from my CF card (containing photographs I took while I was in Sydney almost 2 months ago) onto my computer. It made me feel a little sad, because those days were so carefree and for the month I was there, it was the first time when I didn't have to study because I had no exams sit for and there was no work to worry about, because work had not started. I basically did what I loved - planning for my meals, shopping for ingredients, and cooking for my loved one :] We also found time to go for holidays and attend church on the weekend. 

It's been a long time since I went to church in Singapore, but I must say that the people at CCC made me feel so welcome. I enjoyed the services because well, the sermons were about church history and me being a history/knowledge buff, I practically soaked up the information on the reformation period. Everyone was so friendly and inclusive that I decided to bake a couple of cakes and cookies each time I attended church. I must admit that I had an ulterior motive, because all those people at church just meant for guinea pigs for my baking, but well, I felt good because everyone only had good comments for the stuff I baked heh :]


To start off, I decided to stay safe and stick with stuff I knew, so I made a hokkaido milk buns with red bean filling. I knew that this would be popular because soft Asian-style breads in Australia don't come cheap and well, most of the people at church were Asians, some of whom have been born in Australia, some of whom are studying in Australia for a couple of years.


CCC is over at Milsons Point, which is in North Sydney. The view of the Sydney Opera House you see above, is from Milsons Point. The only other way of getting the same view is to take a ferry from Circular Quay to places on the other side, to Watsons Bay and the like. The north shores of Sydney are not much of a tourist attraction, which perhaps explains why I have never step foot to places like Chatswood (a very Asian-populated area) and North Ryde. There's lots of good Asian food there, with huge shopping malls that Singaporeans and Malaysians are acquainted with, but I think I very much prefer Sydney on the other side of the river. 


Because it was winter, it was pretty cold most of the time, but on my last visit to church, I decided that I should head out to the area regardless and take some photographs. Looking at the photograph above, you would think that it's spring in Sydney, but the outfits of the two ladies reminds you noooooo it is winter and with the winds blowing in  your face, it's effing cold! I snapped a couple of quick photographs around the area before heading to Luna Park to take a snap of its very iconic entrance. 

Luna Park is an amusement park which has a history stretching back to the 1930s, which explains why the entrance is so...well 1930s. It gives me the impression of old-school amusement parks in America, even though I've never been to America and have never seen an amusement park there. 


I particularly like the two photographs above, the left has been processed to evoke what I think is a 1930s mood, and the right has been changed to black and white just because. I like how the face of the clown is nicely reflected in the puddle (it had rained earlier) on the ground. There was a father with his son of about 6 years of age, and I particularly enjoyed listening in to their conversation. The father was standing a couple of meters beside me when I was taking the photograph, and having spotted me squatting and taking a photograph of the puddle, the reflection and the entrance, he took the opportunity  to teach his child something about science. He first asked his son what he saw when he looked into the puddle of water and then explained how this reflection came about. There is so much to learn everywhere, and I really admire the dad for showing his child that, at such a young age. I would want to be such a parent, if I ever have a child in the future.

So back to my hokkaido milk buns with red bean filling (北海道牛奶紅豆麵包). I decided to use a japanese style hokkaido milk bread recipe, because I wanted to make full use of the delicious tasting cream I had in Sydney. 
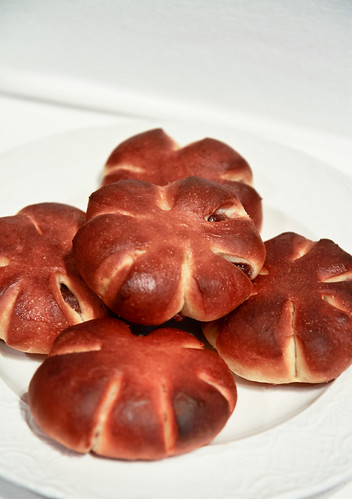


Instead of following the proportions in Christine's recipe above, I decided to modify it a little, to fit the proportions that I am used to.

Hokkaido Milk Toast
Makes 1 500g loaf or 8 medium sized buns

270g bread flour
30 g all-purpose flour
40g sugar
½ tsp (4g) salt
1 tsp (5g) yeast
45-50g egg (without shell)
40g heavy cream (at least 35% fat)
30g full fat milk
100g tangzhong*
25g unsalted butter

*Check this post if you don't know what is tangzhong and how to make it (for 100g, you need to heat about 20g of flour with 100g of water)

To make them into red bean buns, you will need about 500g of red bean paste. I used a storebought one when I was in Australia. I recommend getting the red bean paste from DAISO for those in Singapore/Malaysia. Do get the packet of anko which is produced in Japan and not China.


Method: 

  1. If using a bread machine, follow directions as per your machine, but add the tangzhong together with the flour. If kneading by hand or mixer, place the sugar, salt, bread flour, all-purpose flour and yeast into a large mixing bowl. Then, add milk, cream and egg into the bowl and knead until a rough dough is formed. Add in the softened unsalted butter and knead well, until the dough no longer sticks to your fingers but is slightly tacky.
  2. Shape the dough into a ball and cover it. Allow it to proof for about 60 minutes or until doubled.
  3. Punch down the dough and divide it into pieces weighing 60g each. Allow the balls to rest for about 10 minutes before attempting to shape them. In the meantime, measure out 30-40g of red bean paste (how much depends on how much red bean you like. I used 30g) and roll them into an equal number of balls.
  4. On a lightly floured surface, flatten a dough ball into a round disk. Place the ball of red bean paste in the middle of the disk and wrap the filing with the dough. Pinch the ends together to ensure that each dough ball is completely sealed. Then using your palms, slightly flatten each ball until you get a flat round disk of about 5-8cm thick. Using a sharp knife or scissors, snip the edges of the disk. I made 6 snips to get 6 petals. Be sure to make very deep cuts all around the dough because as the dough proofs, the cuts will become shallower.
  5. Allow the 'flowers' to proof for another 30 minutes or until they have increased about 1.5 times in size. Brush the top of each flower with some egg wash or milk if desired.
  6. Bake in a preheated oven of 180°C for about 22 - 25 minutes, or until golden brown. Remove from oven and allow to cool on a wire rack for at least 30 minutes before consuming. 
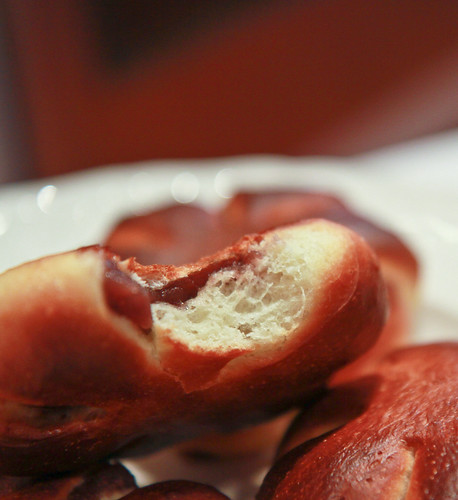
Janine's jots: 
  • Note: I kinda overbaked the breads because they are NOT supposed to be this brown. You should keep an eye on what you're baking, especially if you're using a foreign oven in a foreign environment! I liked it the dark brown crusts though ;p Do also try to make your cuts deeper. I made pretty shallow cuts and this was the result after proofing the second time.
  • Taste: I liked the proportions of my bun - 30g of not-so-sweet red bean paste to 60g of bread dough. I would however recommend using 40g or more red bean paste because as you can see, besides needing more work on my 'putting the red bean ball in the centre' skill, the red bean filling is quite stingy.  
  • Texture: I didn't have the benefit of a mixer or bread machine, so I made the buns completely by hand. Because it was cold in Sydney and because I was lazy, I did not knead the buns until the 'window pane' test could be passed. This meant that the bread is not as elastic as it should be - you can see from the photo above that the bun does not have that many gluten strands. Also, because it was winter, the buns took twice as long to proof - I made the dough the night before and thanks to the chilly night, it took about 6 hours to double in size.
  • Serving size: This recipe makes a really nice rectangular hokkaido loaf but I would think a portion of 8 red bean buns would be ideal for any family too! :]
  • Storage: Because of the high fat content of the buns, they keep quite well. I would think they should keep for at least 3 days at room temperature. I kept one bun in the fridge and reheated it a week later and it still tasted pretty good.
  • Would I make this again?: I would definitely make this recipe whenever I have excess cream! I personally prefer leaner breads but most people I know and those who ate the buns liked the rich and buttery taste of the bun, so I guess if you're looking for a sweet bun recipe, this is it! 

Tuesday, June 26, 2012

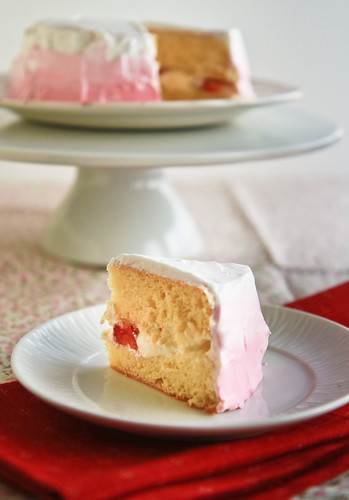
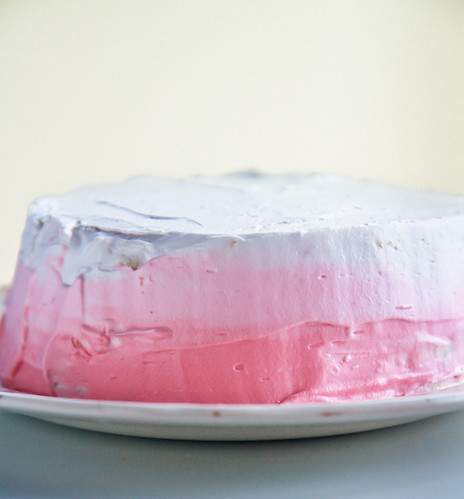
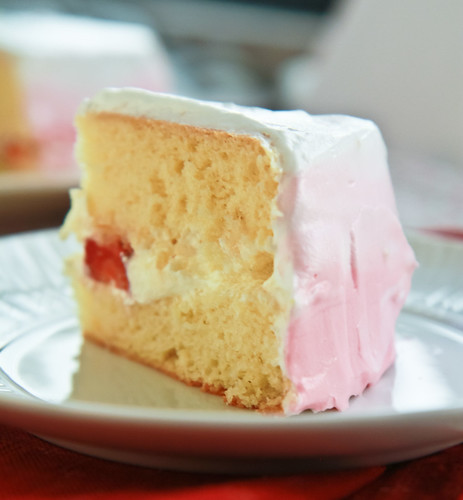
Pink Ombré Strawberry Shortcake

I have been rather remiss in posting this past few weeks. If you noticed, the last post didn't have any pictures and the previous one on Levain Boulangerie consisted of photographs taken way back during Vesak. The ironic thing is that although I've been baking rather diligently the past few weeks (for a colleague who is my first huge (and paying) customer), I've been way too lazy to whip out the camera to take photographs. And usually when I'm done baking, it's evening or night, so that means lousy pictures. 


Anyway, I had high hopes for this sponge cake, because it appeared rather highly raved, and one blogger even wrote "不珍藏一辈子后悔". BUT I was disappointed because it turned out to be a rather 'rough' sponge cake, although it baked up pretty high. And to make things worse, this was supposed to be my 'birthday' cake, because I wanted to commemorate my birthday with a nice pink cake. So to say that I was VERY disappointed would be an understatement. One thing's for sure, I'm definitely sticking to my usual sponge cake recipe until I find a better alternative. And to think of it now, I'm definitely going to bake another nice cake as my replacement birthday cake, hopefully soon because it's been way too hot these few days to fire up the oven and I've been resorting to cool treats like froyo for my sweet fix. 


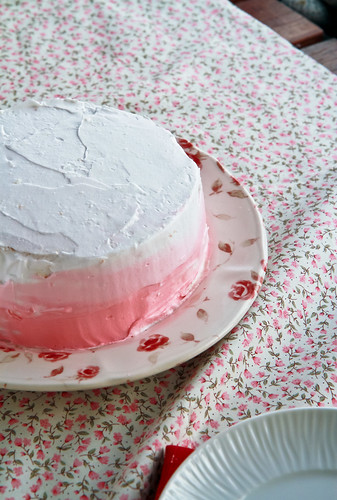
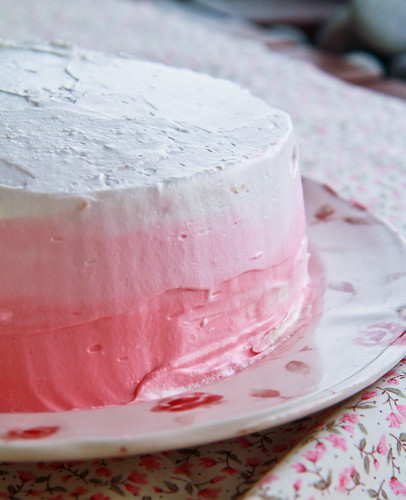
So why post something that I'm not too satisfied with? Well, I had thought I decorated the cake quite nicely on the outside and it would be a waste not to post the photographs up, especially since I had carted out my cake stand and other props to take photos. (Although on hindsight, I realized that the camera did catch a great number of flaws on the frosting which I was not too aware of at first glance).


I first got an idea for this cake when I saw Yossy's beautiful pink ombré cake here, way back at the start of the year (on pinterest I think), then I saw it again on Lisa's blog - this time a purple version. Alas, as with many other wonderful pages/ideas that I bookmark, they get pushed back in the queue and I forget about them. It was only in late May that I got reminded by Steph (who has crazy beautiful ideas on her blog) about the ombré cake that I wanted to make. And yes, if you can't tell, I am a fan of ombré. I've always had this fascination for gradients, so it's of no surprise that ombré cakes are on my to-do list. (I'm also a fan of the ombré hair color trend, considering that I just highlighted my hair a few shades of gold and brown ;p) I've made cakes in both pink and green, but this is way easier since it's just a matter of tweaking the frosting - très simple!


Sponge Cake 
Adapted from Huan's Sweets
Makes a 18cm sponge cake

150g eggs (about 3 large eggs)
110g castor sugar
100g all-purpose flour
26g butter
40g milk 

Method: 
  1. In a metal mixing bowl over a bain marie, add in the whole eggs and castor sugar and whisk until the mixture reaches about 40°C. Remove from the bain marie and using a mixer, beat the egg-sugar mixture on medium-high speed until you get almost stiff peaks. The mixture should take about 20-30 seconds to disappear into itself. Following that, reduce the speed to low and beat for 15 seconds. This is to ensure that the air bubbles in the mixture are not overly large. 
  2. Then, heat the butter and milk until the butter is melted, and allow it to cool to about 40°C.
  3. Sift the all-purpose flour into the egg mixture and gently fold the flour such that the egg mixture does not over-deflate. Once all the flour has been folded in, add in the cooled butter-milk mixture and continue to fold gently until it is fully incorporated. Pour the batter into a lined and greased cake tin, and make sure to rap the cake tin against the counter a couple of times to ensure there are no huge air bubbles in the batter. 
  4. Bake the cake in a preheated oven at about 160°C (fan-forced) for about 25-30 minutes. Allow the cake to cool on the counter for at least 15 minutes before releasing from the cake tin. 


As for the other parts of the cake:

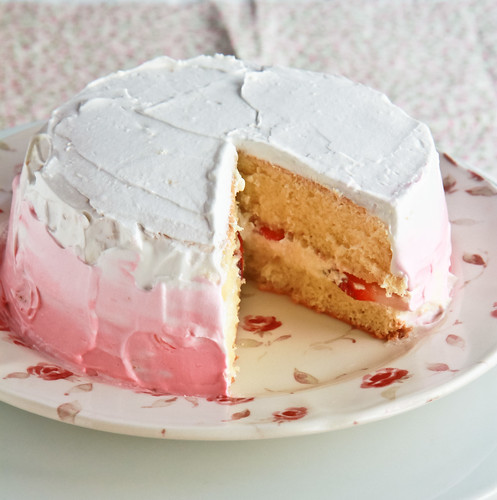
I skipped on the sugar syrup (although I think this would have greatly helped the dry cake) and used the stabilized whipped cream from my strawberry shortcake recipe, but added a couple drops of natural red coloring to get the desired shades of pink. I also added fresh strawberries in the middle cream layer.


Janine's jots: 
  • Taste: Sponge was sufficiently sweet, although the egg smell was very prominent because no vanilla was added. 
  • Texture: Like I said, I was not a fan of the cake. I found the texture way too rough for a sponge cake, although it was fluffy. 
  • Storage: The cake stores pretty well in the fridge - it lasted about a week, but if you didn't add sugar syrup to the sponge layers, beware that the cake will be VERY dry. 
  • Would I make this again?: Unlikely for the cake, although the ombré is definitely something I'll repeat because it's so simple to achieve but the results look fantastic!

Tuesday, February 7, 2012

A Review on Pineapple Tarts - attempting 6 different recipes and many batches

I had wanted to post this yesterday, on Chap Goh Meh, or the 15th day of Chinese New Year to round up the last of my CNY themed posts, but work came up and I couldn’t finish the post in time.

So here it is, one day after the last day of CNY, which is rather apt as well since this is my concluding and round-up post for all the festive baking I’ve been doing. I know many people do their cookie baking in December, because Europeans and Westerners in general tend to associate cookies with Christmas. For myself however, the cookie mania starts the month before Chinese New Year, whenever that is. This year, I’ve actually baked about 20 varieties of cookies, playing around with different recipes. Eventually I think I went back to my kampong bringing 16 types of cookies, most of which had good reviews from my relatives. I still have loads more cookies I want to attempt, but I’m shelving them for next year, and who knows, I might come up with even more ideas the next time.

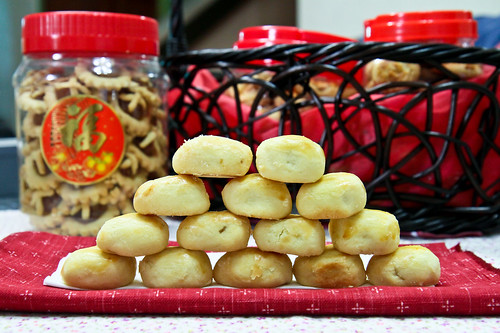
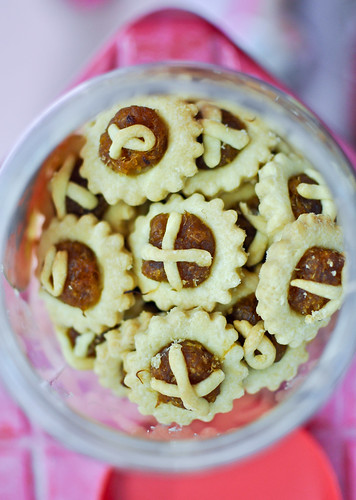
Some of the cookies packed in jars ready to be brought back to my grandma's

So anyway, I started making pineapple tarts about one month ago, slightly after Christmas. This year, I had a goal – to find the best pineapple tart cookie by trying as many recipes as I could and deciding upon the best. I’ve to admit that I’ve failed in this endeavour, because there were pros and cons to each recipe, but I’m glad I tried that many recipes, because it helped me distill what I liked and didn’t like for each recipe. This I believe puts me in better stead of pineapple-tart making next year :]

These are the sum total of recipes that I tried, which I've divided into two categories:

Recipes with 'melt in the mouth' texture, suitable for enclosed tarts:
  1. Youfei's recipe
  2. Agnes Chang's recipe (similar to Lai Kuan's and SSB's
  3. Little Teochew's recipe
Recipes with a more solid sturdy texture, suitable for open-faced tarts:
  1. My mom's friend Karen's recipe
  2. My grandaunt Rita's recipe
Along with these recipes that I've tried, I had also bookmarked a couple of other recipes, but I wasn't able to try them because well, I didn't have that much pineapple paste for that many tarts. Here's a short list of recipes that I'll probably try next year:
  • Anncoo (uses rub-in method)
  • Wendy (uses cream and cream cheese)
  • Sonia (uses condensed milk)
  • Tracie (uses rub-in method as well)
  • Ah Tze (uses only ghee)
  • Peng/HHB (uses creaming method)
  • ZY (uses rub in method)


I'll just start by saying that although I did make and try 6 different recipes, I don't believe I've found 'the one' yet, because there are things that I both liked and didn't like with each recipe, but I think with some tweaking any of these recipes could easily be it. There are basically two methods of making pineapple tarts, the creaming method and the rub-in method. I'll start by writing in detail how each of these methods work, because besides the difference in ingredients, everything else will be identical.

Creaming method:
  1. Sieve dry ingredients (which may include flour, corn flour, salt, baking powder, milk powder, custard powder) together. Set aside.
  2. Beat butter and cream together with sugar until lightened and fluffy. Add in vanilla extract.
  3. Add in the egg yolks and mix until well combined.
  4. Slowly beat in the flour mixture until just combined. Once the flour comes together, stop mixing. Shape the dough into a disc shape and leave it to chill in the fridge for at least 1 hour, or until slightly firm.
  5. In the meantime, divide the pineapple paste into equal sizes, rolling them into balls.When ready to make the tarts, remove the dough from the fridge.
  6. For enclosed tarts, weigh and roll the dough into equal sized balls. Flatten the balls into a round disc and place the ball of pineapple paste in the centre. Pinch the seams of the dough disc together and give the ball a quick roll. You can choose to shape the ball into a spherical ball, or make it slightly elongated and rectangular, or slightly oval to mimic pineapples.
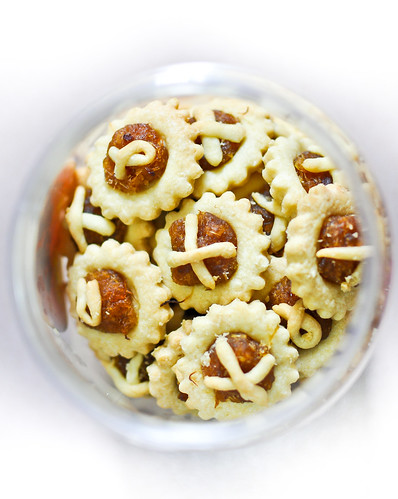
  7. For open-faced tarts, make sure that the dough is quite firm after at least an hour of chilling. Roll out the dough on a clean work surface (you don't need to flour the surface if the dough is buttery and firm enough) until you get the desired thickness. I tend to roll it to about 1 cm thick. Using your desired cutter, cut shapes into the dough. Then, proceed to place your ball of pineapple paste in the centre of the shape. You can also choose to put designs on the tarts as I've done.
  8. Once you're done, give the tarts an egg wash and bake in a preheated oven at 170°C for 18-20 minutes, or until golden brown. Make sure to turn the tray 180° at the 10-12 minute mark, to make sure there is even baking/browning all around.
Rubbing-in method:
  1. Sieve dry ingredients (which may include flour, corn flour, salt, baking powder, milk powder, custard powder) and sugar together. Set aside.
  2. Dice the butter into 3-cm large cubes and place them in the fridge until ready to use. Make sure the butter is really cold. Using a pastry cutter or a fork or your fingertips, rub the butter cubes into the dry ingredients until you get flattened pieces of butter coated with flour and the mixture resembles bread crumbs.
  3. In another bowl, beat together the egg yolks, vanilla and cold water (if any). Add it into the butter mixture and using your fingertips, gently combine the wet and dry ingredients, pressing gently until a dough is formed. Do not knead the dough excessively because you do not want the butter to melt! Wrap the dough in plastic wrap and chill in the fridge for at least 30 minutes to 2 hours.
  4. In the meantime, divide the pineapple paste into equal sizes, rolling them into balls.When ready to make the tarts, remove the dough from the fridge.
  5. For enclosed tarts, weigh and roll the dough into equal sized balls. Flatten the balls into a round disc and place the ball of pineapple paste in the centre. Pinch the seams of the dough disc together and give the ball a quick roll. You can choose to shape the ball into a spherical ball, or make it slightly elongated and rectangular, or slightly oval to mimic pineapples.
  6. For open-faced tarts, make sure that the dough is quite firm after at least an hour of chilling. Roll out the dough on a clean work surface (you don't need to flour the surface if the dough is buttery and firm enough) until you get the desired thickness. I tend to roll it to about 1cm thick. Using your desired cutter, cut shapes into the dough. Then, proceed to place your ball of pineapple paste in the centre of the shape. You can also choose to put designs on the tarts as I've done.
  7. Once you're done, give the tarts an egg wash and bake in a preheated oven at 170 degrees for 18-20 minutes, or until golden brown.

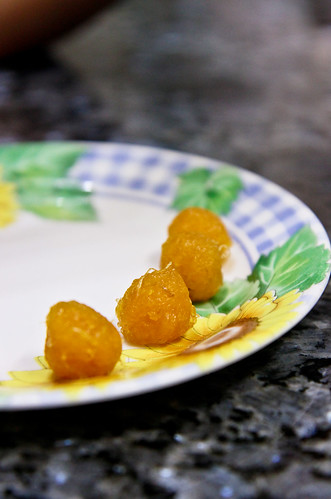
Very importantly, I forgot to add that I use my mom's recipe for the pineapple paste and she does it the old-fashioned way - grating the pineapples by hand (no blender please!) so that you can the fibrous strands that you can see in the enclosed tart photo below. Here's the link to my mom's recipe. I'm really can find no fault with the recipe, so I haven't really bothered with trying other recipes floating about the internet. And don't get put off by the fact that pineapple jam takes long to make - it is in fact exactly like any other fruit jams and it really doesn't take a whole day. If you cut and grate the pineapples quickly enough, then cook the jam right after, it'll only take you say 4 hours at the most? It's best if you have a side-kick like me and my mom, so one person does the cutting and grating and the other does the constant stirring on the stove :]


Preliminary notes: There were things I both liked and disliked about each recipe, and I'll be briefly jotting them down below.

Recipes with 'melt in the mouth' texture, suitable for enclosed tarts:

Youfei's recipe
(rub-in method)

180g butter
¼ tsp salt
250g all-purpose flour
20g corn flour
10g milk powder
50g icing sugar, sifted

1 yolk
¼ tsp vanilla

Comments: I actually made two batches of this recipe, because I liked the melt-in-the-mouth texture that this provided. However, I found it too sweet, so I decreased the icing sugar to just 20g for the second batch and upped the vanilla to half a teaspoon. Definitely a recipe that I'll turn to again next year.

Agnes Chang's recipe
(uses creaming method)

220g unsalted butter
50g castor sugar (or icing)

½ tsp vanilla
2 yolks

360g all-purpose flour
10g corn flour
8g milk powder
¼ tsp salt

Comments: I thought the sugar amounts here was just right, although I would increase the vanilla to 1 teaspoon because I personally don't like the taste of yolks. I would also increase the milk powder slightly more the next time around. This recipe got quite a lot of raves from my relatives for its tenderness and melty texture, although I'm personally not a fan because I thought it stuck to the roof of my mouth too much. 

 Little Teochew's recipe
(rub-in method)
400g all-purpose flour
50g corn flour
¼ tsp salt
280g cold, unsalted butter
3 egg yolks, beaten
½ tsp vanilla
3 tbsp cold water
6 tbsp icing sugar

Comments: I found the dough too soft because too much water was added. Next time round, I'll decrease this to 1 tablespoon instead. Taste-wise, I didn't think there was much of a difference between this recipe and the previous one above.  

Recipes with a more solid sturdy texture, suitable for open-faced tarts:

Lily's Open-face Pineapple Tart Recipe
(uses rub-in method, or use a food processor)

280g flour
1tsp baking powder
¼ tsp salt
1 tablespoon sugar

110g butter
56g margarine

1 yolk
½ tsp vanilla

2-4 tablespoons chilled water

Comments: This produced one of the sturdiest tarts ever, but the tarts were way too bland. I thought a little bit more sugar and some milk powder would help. Definitely like it because it handles very well for open-faced tarts.

Karen's Pineapple Tart Recipe
(uses creaming method)

140g margarine
120g butter
40g icing sugar

2 eggs

370g all-purpose flour
40g corn flour
¼ tsp salt

Comments: Since this is my mom's friend's recipe, I'm quite biased towards it because I thought it was a pretty good recipe to begin with. I did more tweaking for it the second time around, using 220g butter and just 40g of margarine to give it that crispiness. I also substituted some corn flour with milk powder to enhance the taste. Another recipe that I'll try again next year for open-faced tarts.


Rita's Nyonya Pineapple Tart Recipe
(uses rub-in method)

400g all-purpose flour
250g salted butter
1 egg
40g sugar
(optional: ½ tsp vanilla)

Comments: This is probably a recipe which is more than 50 years old. My grandaunt has been using this recipe since a long long time ago, and you can probably tell that it is an old recipe because it doesn't contain much frills. The original recipe has just 4 ingredients - butter, flour, egg and sugar. And this was the recipe that my mom used for a decade or more, before I stepped in with my experiments ;p This is definitely a versatile recipe for both open-faced and enclosed tarts, and I believe most other nyonya or nastar rolls will use similar recipes. In fact, the original recipe makes use of margarine, which gives it a very crisp texture. In my attempts using this recipe, I used unsalted butter with a half teaspoon of salt, and a teaspoon of vanilla, and substituting 20g of flour with milk powder. Delicious!


Janine's jots: 
  • Serving size: Most of these recipes make use of a block of butter or thereabouts, and with this amount, you can probably make 80-100 pineapple tarts, depending on whether it is the enclosed or open types, and how large your tarts are.
  • Storage: Separately, you can store the pineapple paste in an air-tight container in the fridge or freezer for up to a year. The paste does not freeze in the freezer because of the sugar content and yes, I've tried using a year-old paste which my mom made the previous year. You cannot tell the difference after it's baked. For the dough, you can make it up to a week in advance, although I would advise making it a maximum of three days before lest the 'fridge' smell seeps into the dough. After you've baked the tarts, wait for them to cool completely and store them in air-tight containers. They will laste for about a month before they lose their crispness or tenderness.
  • Would I make this again?: Definitely! And I'm going to go about it more scientifically next year so that I can definitively come up with "the best" pineapple tart recipe!
  • Other comments:
  • You will realize that actually, the proportions are largely similar. In fact, I did a brief calculation of the proportions of butter to flour, which I think is the main factor affecting taste and texture in the tarts, and the recipes range from a 0.58-0.65 ratio of butter/fat to flour. Of course, within these ratios itself, you could probably play around with using shortening, margarine, ghee or butter or even cream cheese, all of which will impact upon the flakiness and 'shortness' and tenderness of the tart. I haven't tried all combinations, but I personally like using all butter for the enclosed version, and using some margarine or shortening when I need the open-faced tarts to be more crispy.
  • The other difference of course is choosing to use corn flour to substitute for some of the all-purpose flour. I think there is a difference in how sturdy the tart turns out, but I also believe that using cake flour, or triple-sifted all-purpose flour might also do the trick. Custard powder is actually yellow-colored cornstarch/flour, so please don't be fooled and go all the way to buy custard powder. You can actually use the same amount of cornstarch together with 1-2 drops of yellow coloring to get the same effect.
  • Another thing about the dry ingredients or flour proportions is that I like the addition of milk powder because I find that it gives the tart a nice milky flavour. You can substitute about 5g of milk powder to every 100g of flour required in the recipe, or you can experiment and find which quantities you like best. Alternatively, if the recipe requires the addition of cold water, you can substitute that with cold milk. I've tried that in some of the recipes above and it works the same, although the milky flavor is not as intense because so little milk is added.
  • If you notice, there are varying amounts of egg being used - some use the whole egg, while most tend to use just the yolks. From what I know from food science, the yolk provides the moistness and tenderness, whereas the white provides the structure; so if you use the whole egg, it is likely that you'll get a sturdier crust whereas if you use just the yolk, you'll get a more tender crust.
  • For sugar, you can use icing sugar if you want a meltier texture, but otherwise, castor sugar works fine as well. I don't like my tart crust to be too sweet, because the pineapple paste is already sweet, so I tend to use about 30g of sugar to 250g of butter for the recipes.
  • I have no idea how the creaming or rub-in method affects the tart, because I didn't actually attempt making a single recipe using varying methods. I can probably generalize it by saying that it is likely that rub-in method gives you a melt-in-your-mouth, tender texture, but then again, the creaming method can also provide the same results (see Agnes Chang's recipe above). So the method probably does affect the end-product to some extent, although I'm not sure what. Anyone has any idea?

Tuesday, November 22, 2011

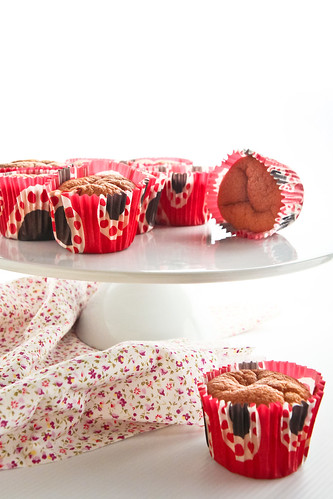
Hokkaido Chiffon Cupcakes (北海道戚風蛋糕), and how to get to JB

I've had a number of emails asking me about how to go to JB, or specifically, how to get to certain baking shops in JB. As much as I love Malaysia, I must admit that public transport options in JB are pretty sucky, and taking buses to these baking shops I've listed can be quite a feat/hassle - since the bus stops are not exactly near those places (you have to walk across roads, etc) and there are no proper bus stops (you might know what I mean if you've seen Malaysian buses stop at the weirdest points on the road). I had initially wanted to list down a number of transport options to get to JB, seeing how qualified I am to do so - before my family decided to stay in Singapore, I travelled to and fro JB and Singapore every single day (yes, every day no joke) for over a decade. Whenever I tell people of how much time I took to commute every day (4 hours to and fro), people go, "Wow - how did you manage to do well in school while spending so much time traveling?" Well, I've to admit that I've no idea - even I feel amazed that I managed to find time to study and have a number of CCAs (after-school activities for those who are unfamiliar with the Singaporean love for acronyms). So yes, I am more than qualified to tell you how to get to JB. Back then, there were only a few buses plying the Singapore-JB route - meaning you had to wait really really long if there was a traffic jam. Today, so many buses - CW1, CW2, 160, 170, 950, TS2, etc ply the route and stop at so many more stops in Singapore and JB, making things much more convenient.

If you want more information on travel options to Johor Bahru (JB), do look at this Wikitravel entry on JB - it is really very informative and saves me from having to explain.

I also wanted to clarify certain misconceptions that readers might have got from the list of shops:

  1. Although some of the shops have addresses listed as 'Larkin' - these are not at the Larkin Bus Terminal that some JB-SG buses stop at. They are quite a distance away and I wouldn't advise walking there!
  2. For Ng Ming Huat, you can try taking a bus there - it is next to Crowne Hotel and relatively near to Pelangi Mall and Holiday Plaza and KSL City, but for the life of me, I have no idea which buses stop near it because I have never taken a bus there myself. 
  3. For the shop Perling Indah - it is NOT near Taman Bukit Indah at all. Taman Bukit Indah is another terminal for the buses CW3 and CW6. Perling Indah is actually in the row of shops next to Perling Mall, which is the mall that you might see when exiting the Second Link at the Taman Perling exit. Perling Indah is the second last shop and is next to a 24-hours Indian Muslim eatery Sayed. For the intrepid, you can choose to take CW3 and tell the bus driver "Perling Mall" - this will deposit you on the road across Perling Mall, after which you have to jaywalk across two two-lane road with a rather huge drain separating them. (The pedestrian crossing at one end of the road doesn't really work and I wouldn't advise you trying to cross there because most cars ignore the red light anyway, making it really dangerous to attempt crossing at the pedestrian crossing. Ironic yes?) Then, you still have to cross another small two-lane road (with little traffic) before getting to Perling Mall, then walking the width of the mall before reaching that row of shops that Perling Indah is on. Note that the Perling Mall stop does not have a bus stop, but there is a makeshift 'terminal' for the CW3 buses which head to Bukit Indah first before heading to Second Link via Bukit Indah and then terminates at Jurong East. Pretty confusing so yup - only for the courageous!  


Causeway link
Like I've mentioned previously, I seriously do not advise traveling around JB by bus - it is difficult and a waste of time. Either go by car or taxi if you wish to head to these places. I hope this helps those who have been wondering! For your information, the CW3 and CW6 I'm talking about is this bright yellow bus on the right. I have linked up the buses which head to Singapore in the hyperlink underneath.

***

Alright, now that I've said my piece, it's onto the post proper. I'm making Hokkaido Chiffon Cupcakes (北海道戚風蛋糕) today :]


I know quite a few people have raved about it, and I don't want to be a wet blanket, but this recipe really is in fact a chiffon cake recipe, albeit made into cupcakes. I actually don't get the Hokkaido in the title, but like SD - I reckon that it's probably because of the Hokkaido cream or milk used in the filling of the cupcake (which I've omitted here). And to be a bigger wet blanket, this recipe actually resembles most of the chiffon cake recipes I've seen and yes, I've also used this recipe in a chiffon cake tin and the cake turns out fine - without the falling and wrinkly top. In fact, I've actually tweaked this recipe to make it pandan flavored as well as reduced the amount of egg whites used (which is my mom's chiffon cake recipe) and it works fine. So erm, sorry but there's nothing much to rave about BUT I caveat this to say that it is still quite a good recipe, albeit a little on the not-so-sweet side (which is suitable for me but not people with sweeter preferences). It also kinda cheats on the usual chiffon recipe because baking powder is used (the real authentic/old school chiffon cake recipes (or at least my mom's) don't use baking powder), which explains the extra lift. 


Hokkaido Chiffon Cupcakes (北海道戚風蛋糕)
Adapted from Jessie who got it from the book 不用模型做点心
Makes 12-14 tall cupcakes 

Ingredients:
4 egg yolks (about 80g)
70g castor sugar
1 tsp vanilla extract
80ml fresh milk 
60ml odorless oil

135g all-purpose flour (or cake flour if you prefer)
4g (1 tsp) baking powder

6 egg whites (about 180g)
50g castor sugar


Method:
  1. Preheat your oven to 180°C.
  2. Place the egg yolks in a bowl and whisk them together with the 70g of sugar until yolks turn a pale yellow. Add the vanilla extract, followed by the milk and oil. Whisk well to combine. 
  3. Next, sieve in the flour and baking powder, making sure to incorporate all the flour into the mixture. 
  4. In another bowl, beat the egg whites on high for about 30 seconds until foamy, before adding the remaining 50g of castor sugar. Beat the egg whites until firm peaks are achieved (but not overly stiff). 
  5. Take a third of the egg whites and fold it into the egg yolk mixture to lighten it. You don't need to be overly gently with this one-third portion of egg whites. Continue folding in the remaining egg whites, making sure to fold all the whites gently until you get a very pale yellow batter. Fill the cupcake liners until about 70%, making sure not to over-fill the liners as the batter will rise quite a bit before falling when cooling. 
  6. Bake the cupcakes for about 20 minutes, or until the tops turn a golden brown and a cake skewer comes out clean. Cool for 10 minutes in the tin before removing it onto a cooling rack to cool. The cupcakes will fall and wrinkle, but that's normal - you can top it with a dollop of cream or sieve icing sugar on it to cover the 'wrinkles' up. 


Janine's jots: 
  • Taste: As mentioned by Rima in her post, this cupcake is a little on the not-so-sweet side (perfect for me) but not so for someone look for that sugar hit. I'd definitely advise increasing the sugar amounts by at least 10% if you want something sweeter, or just top the cupcake off with a dollop of whipped cream or fill it with curd for that little something extra. 
  • Texture: It's almost as if you are 'eating clouds' actually - it is very light, (even though I used all-purpose flour and not cake flour), and each cupcake is easily consumed in three bites or less, without that 'heavy' gelat filling you get after eating a slice of pound cake. You can probably finish two or three of these at a go! Also, I prefer to bake these a little browner so that I get the 'crust' but if you want an overall soft chiffon, do bake it for a shorter time (start checking at 15 minutes), and once you get a golden color, you can remove the cupcakes! 
  • Serving size: I made about 14 cupcakes with the full recipe and 8 cupcakes with the halved recipe - probably because I filled the cups slightly less the second time around. 
  • Modifications: I have also made a halved portion of this recipe and it works fine. You can also bake this recipe in a normal 23-cm chiffon cake tin. 
  • Storage: The cupcakes stored well for a day or two (beyond that I've no idea because they were gone) but I'd presume that they should keep well in the fridge for at least a week. 
  • Would I make this again?: Definitely - it is a rather standard chiffon cake recipe which I turn to once in a while anyway :]
  • Note: I would advise using slightly higher cupcake liners to enable the cake to rise (it looks visually more appealing too). However, normal liners are fine too!

In pictures: 


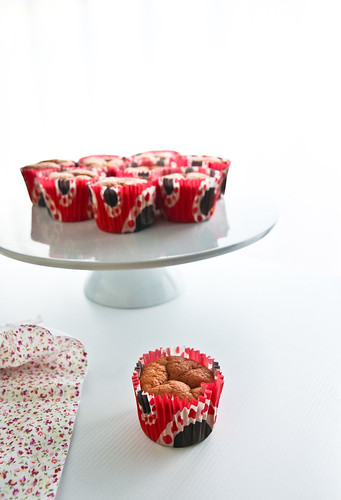
PS: That crusty golden brown part is actually my favorite part of the cake. I ate a few of those tops and left the bottoms for my family...which led my mom to exclaim, "Which rat bit the cupcakes?" --> Of course she knew I ate them - I've this weird habit where I like to eat crusts - I like the last slice of the bread because it's the crust, same for the ends of the spring roll, etc... you get my drift. 


Oops the white balance is a little off here :/ 
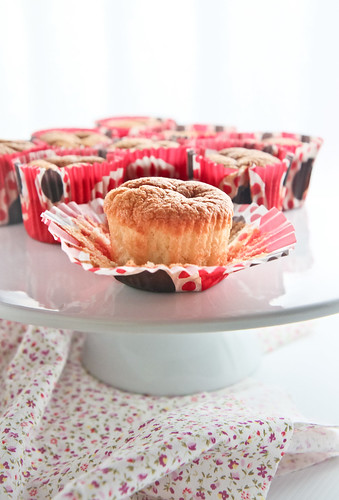
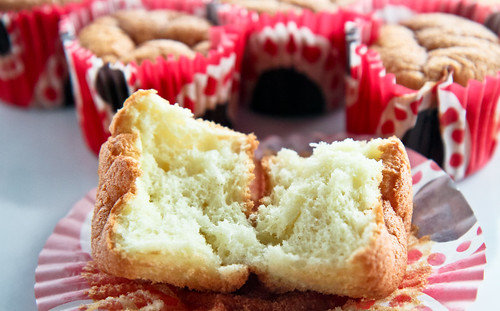
As you can see, the inside of the cupcake still remains soft and fluffy, with a nice golden brown crusty exterior :] Since this is a chiffon cake in a cup, I'll be submitting this to Min for Aspiring Bakers #13: Enjoy Cupcakes! (November 2011)

Friday, October 7, 2011

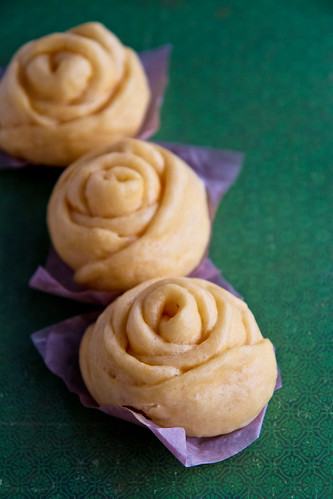
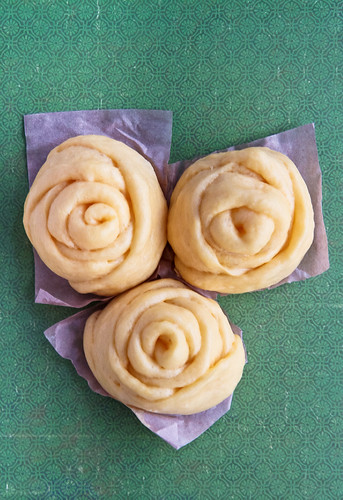
Rose-shaped Steamed Pumpkin Bun/Mantous (南瓜馒头)

It seems like just a while ago that it was October last year, and I was struggling really hard to get back into the pace of life back in Singapore. I had been away for a year, enjoying il dolce far niente and it was hard to study again. Then, I still had not discovered the love of baking that I had within me, so attempting things what these mantous below were probably unheard of.


It might be foreign for some, but I've been brought up on a diet of mantous and paus (a variety of Chinese steamed buns) of the homemade variety - my mom is a really terrific baker (and cook) and every once in a while when she gets sick of cooking the usual 3 dishes, rice and soup for us, she'll turn to making paus - typically of the vegetable variety, with some chicken for our protein needs. Lately, I've encouraged her to extend that repertoire to include a char siew filling as well as a lotus filling, on top of her usual peanut paus. Ever since I saw these beautiful rose-shaped mantous over at Wendy's blog, I've wanted to make them but my mom didn't. Why ever not? Well, my mom says that it's because of old age - as she gets older, she feels 'less daring', preferring to stick to her comfort zone and sticking to her usual recipes and usual combinations. I think even she finds it appalling that her zest and courage in her younger days are slowly diminishing. Nevertheless, I'm happy to accept this baton from my mom, that of the baker in the family, and already, I'm eager to try out new recipes (for anything) as well as hammering new 'family favorites' every weekend. You might think me crazy, but I honestly can't wait for CNY to arrive, because I know that I'll have so many opportunities to experiment with cookies and such then!

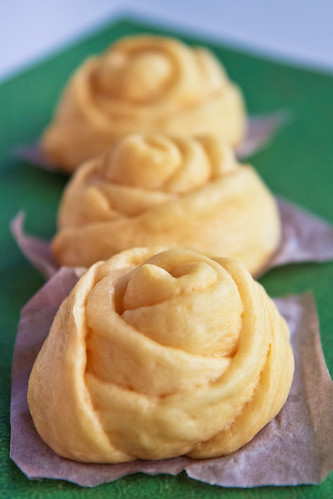
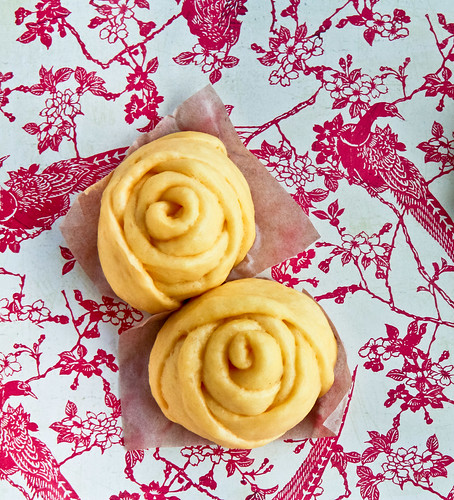
So, going back to these rose-shaped mantous, they have been very high on my to-do list. Opportunity came when one day, my mom was thinking of making paus again. I volunteered to make them, using the leftover pumpkin I had from a previous attempt at pumpkin cream cheese muffins (absolutely delicious - recipe to come soon!). The original calls for steamed sweet potato of the purple variety, mainly because the purple gives rise to a really sweet lilac looking 'rose', but like I said, I only had pumpkin, so I made do. This is also perfect since it's fall season in the Northern hemisphere and there will be an abundance of pumpkins. So besides carving them up as jack-o'-lanterns and pumpkin pies and pumpkin muffins, you now have another use for that leftover pumpkin :]


I had this wonderful plan of making it seem as if the birds in the background were 'eating' the buns, but as you can see, the plan sort of failed and it didn't look that great. I then switched to a normal green background, which I feel made the buns 'pop' - looks like a leafy foliage on which my yellow roses grow, don't you think? ;p Do pardon the rather dog-eared paper that the buns are sitting on, I was in quite a hurry to steam those buns so I hastily cut those papers out of tracing paper and they probably weren't the nicest squares (if you could call them those) that you would have seen. 


Steamed Pumpkin Bun/Mantous (南瓜馒头)
Adapted from Wendy

400g all-purpose flour 
100g wheat starch 
250g steamed pumpkin, mashed to a puree 
100g sugar 
15g baking powder 
2g salt 
40g shortening, melted 

11g yeast 
3g sugar 
150g water 


Method: 
  1. Combine the yeast, sugar and water together and let it sit for 5 minutes, or until the yeast becomes frothy. 
  2. Melt the shortening in the microwave and leave it to cool. 
  3. Sift the all-purpose flour and wheat starch together with baking powder and salt. Combine with sugar. Mix in the steamed pumpkin puree until the dry ingredients are moistened. 
  4. Pour the yeast mixture into the flour-pumpkin mixture and begin to knead. Once a rough dough forms, knead in the shortening. If using a stand mixer, continue kneading for about 5 minutes, until the dough becomes elastic and passes the window pane test. If kneading by hand, knead for about 10-15 minutes until the dough feels tacky and not sticky. 
  5. Round the dough into a ball and leave it to proof in a bowl for about 45 minutes, or until it doubles in size. 
  6. After it doubles in size, punch it down (degas it) and divide it into equal portions. I prefer to divide it into portions of 60g each – shape it into a smooth ball and place it on pre-cut pieces of tracing or baking paper. 
  7. To make the rose-shaped buns, divide the dough into equal portions of 10g each and roll each into a small ball. Using both fingers, flatten the ball into a disc of about 1mm in thickness. Do the same for the balls until you get 6 discs. Then, begin layering the discs one on top of the other, making sure to leave about an inch or a two-finger spacing between each layer. Then, begin rolling the layered discs from the bottom disc up, rolling until you get a cylinder. Use a wooden satay stick or chopstick or even a butter knife, and begin sawing the centre of the cylinder until you get 2 equal pieces. Each end of the cylinder will be your rose and the part where you saw off will be the bottom of the rosebud. [Do refer to Wendy's blog for very detailed step-by-step photos - I don't have the patience to take such photos!]
  8. Arrange each rosebud on the pre-cut baking paper and arrange on your steamer. Allow them to rest and proof a second time, for about 30-45 minutes or until doubled in size. 
  9. Fill your wok with water an inch below the steaming plate. Using a medium-high heat, steam your buns for about 15 minutes before removing them to cool. If using a pre-heated steamer, steam for 10 minutes. 


Janine's jots: 
  • Taste: If your pumpkin or sweet potato puree is sweet, feel free to dial down the amount of sugar. I think that if eaten as a sweet snack, a bit of cinnamon for the pumpkin would definitely bring it up a notch. I added lotus paste filling for the round buns and they tasted lovely. Beware of using too much salt – I used 3g for one attempt and it was WAY too salty. 
  • Texture: Same for the shortening. I have used melted butter and although I prefer the taste of melted butter, I find that shortening gives the dough a more elastic feel. You might wish to knead the dough for slightly longer if using the butter substitute, in order to get the same texture. 
  • Serving size: Depending on how large you portion each of your buns, you can get quite a few of them! I got about 30 buns of varying sizes (I made them as mantous as well as filled buns).
  • Modifications: Do use 500g pau flour or low gluten flour if you have them instead of the 400&100 combination I've stated above. You can also substitute equal amounts of sweet potato/taro or any tuber you wish. I have tried using cornstarch instead of wheat starch and it works the same way. 
  • Storage: Buns store wonderfully in the fridge - be sure to steam them first, then cool them before keeping them in an air-tight container in the fridge. Either microwave them on low or steam them again for about 5 minutes before consuming. 
  • Would I make this again?: Yes, only if I'm out to impress somebody ;p The recipe itself is a keeper though!
  • Other comments: Making the rose shaped buns are rather time consuming, because you have to flatten each ball into a disc and then roll them up. The results are fantastic though, and I can imagine a number of things you can do with this. You can also fill the buns up with a filling, although it might be a little difficult because the filling will have to be placed not in the centre but at the 1/3 and 2/3 mark. 

Monday, September 26, 2011

Malaysian Monday #7: Non-baked Chinese BBQ Pork, or Char Siew (蜜汁叉烧)

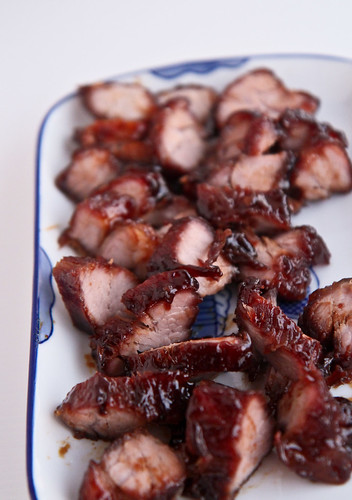
The irony of this dish is that char siew literally means 'fork roast' in chinese, which is an allusion to how it was traditionally made - long strips of pork skewered on long pronged forks and then roasted over a charcoal fire; for this rendition of char siew however, I have opted to go with a non-bake method, which is essentially cooking it down on a stovetop, in a normal pot.

This of course is a perfect opportunity for me to use my Le Creuset crock pot, which I finally decided to buy after years of looking and yearning for it. I bought it at the Isetan sale for slightly under S$200, and I love it! Because it is cast iron, it retains heat really well and I've been using it to cook things like the char siew below, as well as making jams, stews and everything else you can do with a stainless steel pot :D  I foresee that this, together with my trusty Bombino, will be very good friends for many decades to come. Back to the char siew, this method is really very simple, akin to making a stew, AND if you don't particularly like those charred black bits on the baked char siew, this is perfect for you.


Non-Bake Char Siew
Method adapted from Baking Mum
*I have used metric measurements for this recipe. Refer to my previous attempt for the same recipe in cups.

Ingredients: 

500g pork, cut into 2-inch thick strips

For the marinade
40g Hoisin sauce
30g brown sugar
20g white sugar 
15g mui kai lo (玫瑰露)
10g soya sauce
1 tsp sesame oil 

½ tsp salt 
¼ tsp ground white pepper 
½ tsp 5-spice powder
3 cloves of finely minced garlic

200g water

For the glaze
10g olive oil 
10g honey 


Method:

  1. Combine all the ingredients for the marinade in a mixing bowl. 
  2. Add in the pork and marinate for at least 3-6 hours. 
  3. In a large pot, pour in 200g of water as well as the excess marinade from the pork and bring the mixture up to a boil. Once boiling, add in the marinated pork and allow the mixture to reach a boil again. 
  4. Reduce the heat to a medium-low and allow the meat to simmer until it is tender. Simmer with the lid off. This will take about 30 minutes or so. Once the meat is tender, you can increase the heat to boil off the excess water to allow the sauce to thicken. Then, add in the mixture of oil and honey so that the char siew will be glossy. 

Janine's jots: 
  • Note: If you don't have access to 5-spice powder or mui kai lo, please refer to my substitutions in the previous recipe. Also, do try to marinade the meat for slightly longer if possible, so that the meat is more flavorful. I tried marinating for an hour before cooking and the meat was not as tasty. 
  • Taste: Super duper yummy. I haven't tried comparing the char siew together, but from what I remember, the substitutions produce a char siew which is very close in taste to this method which uses the 'original ingredients'. 
  • Texture: I felt that the texture was not as tender as the baked method, but then again it could be because of the amount of fat in the meat because the fat marbling in my cut of pork this time was substantially lesser than before. 
  • Serving size: More than enough to serve a family of 5 for dinner, with extras for char siew baos :]
  • Modifications: None! I might try reducing the sugar a little just to try to make it healthier, but it's really good as it is!
  • Storage: Stores well in the fridge for a few days, but best to freeze it and thaw when you wish to use it again. I have frozen the char siew for a month and used it for a bao filling, and it still tastes as good as new!
  • Would I make this again?: Definitely! This is my 3rd time making char siew using this method - it really is so easy! 
  • And just an extra tip, if you want to use the char siew as filling for your pie, pastry or steamed buns, don't boil down the water too much, leave some sauce behind so that you can combine it together with more seasoning (because you need the mixture to be tastier if it is a filling) and cornstarch to thicken the mixture. Saves you an extra step of adding liquid for the filling!


In pictures: 

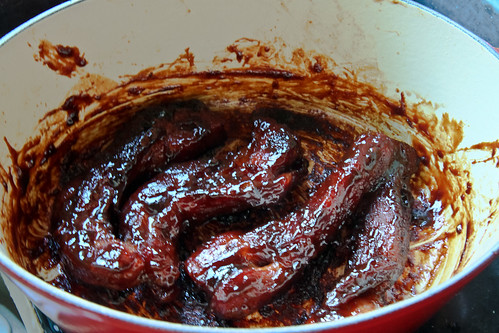
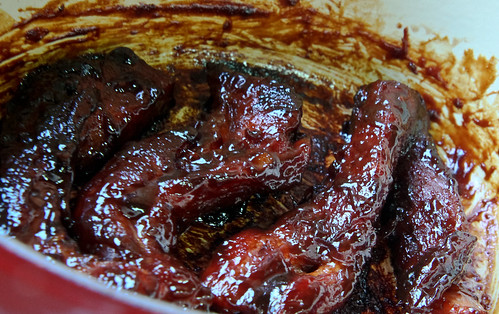
I know it doesn't look particularly appetizing, but this is how char siew looks like after you cook it.  I have reduced the water to almost nothing, so I'm left with thick delicious sauce. 
Upclose, after having added the oil+honey glaze. Some of the fatty bits are almost charred, just like the baking method. 


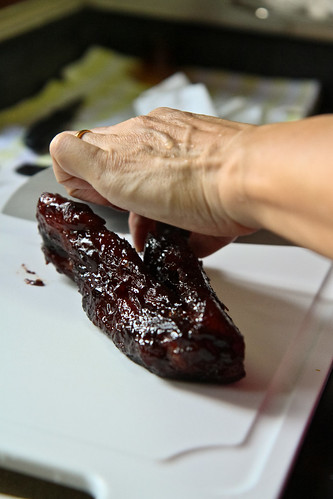
Unlike my mom, my hands are still unable to handle meat right out of the pot (my hands don't have enough tough skin yet), plus I had to take pictures ;p


GAWDDDDDD. I'm drooling as I type this. 

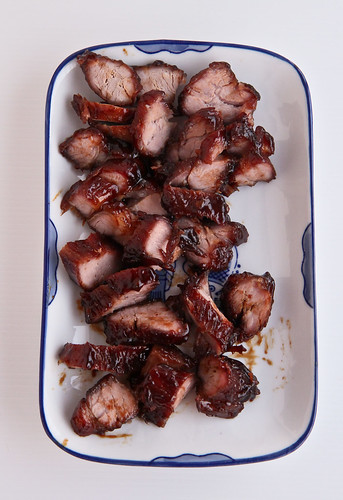
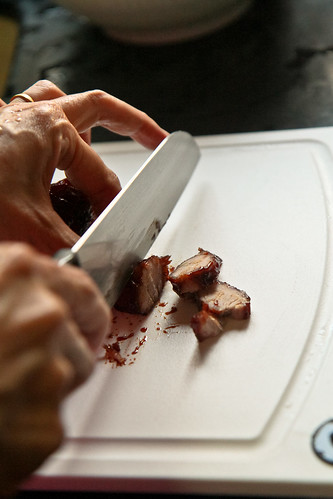
All cut up and ready to serve :]


Tuesday, September 20, 2011

Malaysian Monday #6: Chinese BBQ Pork, or Char Siew (蜜汁叉烧)

If I had to choose a meat that I had to live with for the rest of my life, it will be pork. And maybe perhaps chicken being a very close second. I love pork, in all its variations, and one of my favorite ways of preparing pork is marinating it in a BBQ-ish sauce, to give me char siew. Living in Singapore (and Malaysia), I never had to make my own char siew, because frankly speaking, it's available everywhere! Compound that with the fact that there's a super good roast pork and char siew stall opposite my estate; well, making my own char siew never occurred to me. 

At least, it never did until I was in Sydney and suddenly decided that I had to make my own char siew because I was dying to eat some proper Chinese-flavored pork. Char Siew as I know it to be, is also known as char siu, chashao (the direct translation from Chinese 叉烧) and perhaps chasu as well, which is what the Japanese call their version of roasted pork meat. Here at home, we usually consume it with rice or noodles, in pastries (叉烧酥 anyone?) or steamed buns. Anyway, I was in Sydney for a while, and I decided I had to make char siew. So off I went to first buy a dish that I could use in the oven (oh the extent I go to just for making something myself no?), then to get myself a proper cut of meat - I prefer to get the shoulder or butt which is less fatty but you can get the belly if you are in the market for something more fatty.

This is actually a picture of my second charsiew attempt, which I will blog about later. 

Of course before all these, I did my research on the recipes available on the internet, and boy did I come across many! However, I had to adapt a recipe of my own, mainly because I was working with a bare pantry, and I didn't want to buy too many ingredients only to not use it again. So ingredients like fermented tofu (taucheo), maltose (麦芽糖), Chinese Rose wine (绍兴酒 or shaoxing wine) and five-spice powder were out. Those requiring red food coloring were also out because I'm not a fan of food coloring. However, you do require the basic Chinese seasonings such as soy sauce (both light and dark) as well as Hoisin sauce. 

I am thus happy to announce that this version below is really something that anyone, especially someone overseas who doesn't have access to a very well-stocked Asian kitchen, can accomplish in a jiffy. All you have to do is to make sure you have an oven-safe dish, the requisite ingredients below, and get yourself down to your butcher (preferably the Asian butcher since the cuts of meat required will be best understood by the Asian butcher, especially if you tell him you want it for roast BBQ pork), marinate the pork and let it rest for a few hours before putting it in the oven a few hours before dinner. Trust me, I made it twice when I was in Sydney and it was DELICIOUS. I know someone else can attest to that ;p


Sorry the photos are pretty bad, because I was really very famished by the time I finished cooking and all I could think of was to polish off the charsiew, hence the blurry iPhone photographs and un-cut meat lol. 


Char Siew Recipe
Adapted from Lily 

500g pork, cut into 2-inch thick strips 

For the marinade
3 tbl Hoisin sauce
2 tbl brown sugar
1 tbl white sugar 
1 tbl rice wine 
2 tsp soya sauce
1 tsp sesame oil 

¼ tsp salt 
¼ tsp ground black pepper
¼ tsp ground white pepper 
½ tsp ground cinnamon 
¼ tsp allspice 

3 cloves of finely minced garlic

For the glaze
1 tbl dark soya sauce
1 tbl honey
1 tbl oil (I used olive oil)

Method: 
  1. Combine all the ingredients for the marinade together in a large ziplock bag. 
  2. If your cut of pork is too thick, cut it to about 2-3 inches and put it in the ziplock bag. Seal the bag and begin massaging the pork, ensuring that the marinade coats every part of the pork. 
  3. Leave it to rest for at least half at hour, preferably for 1-2 hours. In the meantime, preheat your oven to 180ºC.
  4. Place the pork into an oven safe dish and place it in the middle rack of the oven. Bake for about 10 minutes on one side before flipping the pork over to the other side to bake for another 10 minutes. Then, bast the pork using the glaze mixture and turn the heat up to about 210ºC (or up to 250ºC). Bake the pork for a further 5-10 minutes on each side until caramelized. You should be able to see almost-black charred bits on the pork. If so, remove from the oven and wait for it to cool before cutting and serving. Otherwise, turn down the heat to 150ºC and leave it in the oven until you are ready to serve. 
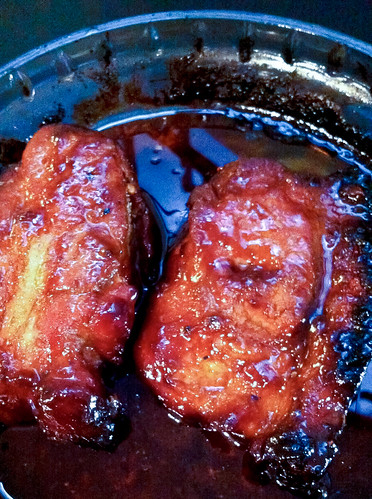
Look at those charred bits! And the translucent liquid is actually the rendered fat from the pork!

Janine's jots: 
  • Note: The recipe is also in cup measurements because I didn't have the benefit of a weighing machine, and spoons and cups were all I had. You can use 1 tsp of garlic powder as in the original recipe if you have it. I didn't, hence the minced garlic. 
  • Tips: Another tip is to make sure you have 2 racks in the oven, one on top and another in the centre. I found that to better aid caramelization, placing the dish of pork on the top rack with the top heating element turned on helped in caramelizing the pork faster and within a shorter time. 
  • Taste: Cooking is always an inexact science for myself, so do adjust the amount of spices and marinade according to your preferences. I have used quite a bit of sugar and soy sauce in the recipe to suit my preferences, but on subsequent attempts, have used less sugar and soy sauce and the result is still really good. 
  • Texture: The texture really depends on which cut of meat you get. As you can see, the cut I got above (probably the shoulder) was rather meaty and had quite little fat, so I should have sliced the pork into 2-inch slices as advised instead of leaving them whole because I had to bake them for a longer time to make sure they were tender. 
  • Serving size: A 500g serving will be more than enough to serve a family of 4 as the main dish. For 2, we demolished this in 2 meals. 
  • Storage: The char siew stores really well in the fridge, keeping for at least a week. You can also choose to keep it in the freezer, which is what I did when I made a lot of the charsiew. It goes well in fried rice, charsiew paos, and anything else!
  • Would I make this again?: Definitely! This is by far the cheaper method to get good quality charsiew, even in Singapore! Just do your math, a cut of pork will set you back a few dollars, and you'll be able to gorge yourself silly on the resulting charsiew, whereas buying the charsiew from a store will easily cost $5 up for quarter the weight. 

Recommended substitutions for ingredients 
  • To substitute the Chinese Rose wine (玫瑰露), many on the internet suggest that the best substitute is a dry sherry. If you happen to have sake lying around, do use that, but note that it's sweeter than shaoxing wine. In a pinch, just use a dry white wine that you might have lying around, or some Chinese rice wine (绍兴酒) will do as well. I tried both of the latter and they didn't make too much of a difference (in my opinion). 
  • For the maltose, I simply substituted it with honey. 
  • For the 5-spice powder (五香粉), you can make your own using Marc's recipe or you can just do what I did and just use whatever you have in your pantry. Basically, 5-spice powder is made up of (duh) 5 spices, although what these 5 spices are can differ somewhat. The usual suspects include star anise (bajiao), cloves, cinnamon (or Chinese cinnamon, rougui), Sichuan pepper (huajiao) and ground fennel seeds. The spices are not in equal quantities, so it's really a matter of taste. For my substitute below, I have attempted to use ground cinnamon, allspice (which contains ), some black pepper and some white pepper. 
  • If you don't have Hoisin sauce, my recommendation is for you to get it, because it's pretty inexpensive - a few dollars for about 300+g in any Asian grocery store. I can vouch that it will be available in the smallest of Asian grocers. Otherwise, a good substitution (I have tried this at home) is a combination of 4 parts soy sauce to 2 parts peanut butter to 1 part honey/sugar to 1 part white vinegar. You can also choose to add garlic powder, sesame oil, habenero and other seasonings. There are many recipes on the internet for Hoisin sauce, but honestly, it's pretty troublesome when it's so cheap and you'll have many other uses for it, like Hoisin Chicken Wings :]


        Related Posts Plugin for WordPress, Blogger...