My blog has moved!

You should be automatically redirected in 6 seconds. If not, visit
http://www.unpastiche.com
and update your bookmarks.

Showing posts with label One-pot. Show all posts

Thursday, May 31, 2012

Chocolate Layer Cake with Cream Cheese Frosting

I'm quite a horrible procrastinator. I remember almost a year ago, seeing similar entries on Lena, Zoe and Joyce's blogs, and then realizing that they were doing a small bake-along where all three of them would try the same recipe and post them on the same day. This Bake-Along was very useful for people like me, because I am usually hesitant to try new recipes, but with three different opinions from three bakers saying that X recipe is good, I definitely felt more confident in attempting those recipes.

And I'm pretty sure that this was the experience of many other home bakers as well, who have gradually joined in the bake-along. As for me, well, I'm sure that all three hosts are quite sick of seeing my comments saying that 'I hope to join for the next bake-along', but when the next one comes along, I never do join. So....what better time to join than on their first year anniversary? :]
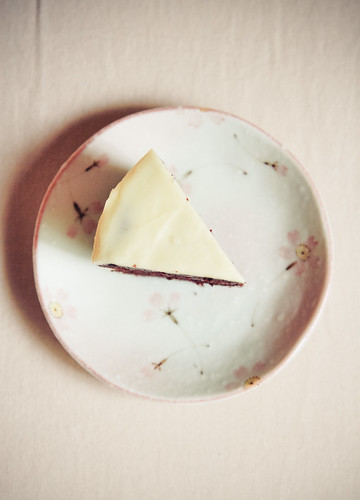
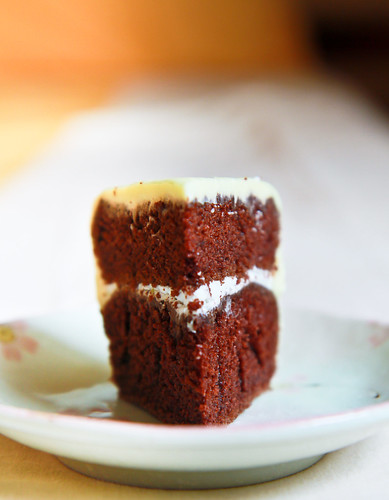
Only one slice was left for the 'photoshoot'

So here's my virgin entry to Bake-Along on their first anniversary and I really hope that I'll be punctual with the upcoming few, because I do love the upcoming ones - crumble and scones, a few of my favorite things to eat! And of course, layered cakes, which is the reason why I'm joining this time. iI love to eat layered cakes, because I love how creative you can get with just mixing and matching the layers and filling, and also because layered cakes are usually celebration cakes, my favorite type of cake to eat :]
So for this chocolate cake, I remember digging it from this treasure trove of chocolate cake recipes I found on the Bon Appétit website, 10 years of chocolate cakes, BUT the problem is that I can't exactly recall which chocolate cake recipe from Bon Appétit actually inspired this recipe, but I'm thinking it should be somewhat similar to this one. In any case, the ingredients and method has been so modified that it doesn't matter. And if you do happen to click on the first link, notice that you will only see ten pictures of chocolate cakes with the year 2000 to 2010 underneath each, but do click on the pictures because that will lead you onto even MORE chocolate cake recipes for that year.

I've been slowly baking my way through the recipes, and the reason why I chose this one below is because it was simple (only one-bowl required) and it didn't require the use of melted chocolate, buttermilk or sour cream, all of which I didn't have. It only requires pantry staples like cocoa powder and milk, which is fantastic for times when you have a chocolate cake craving.

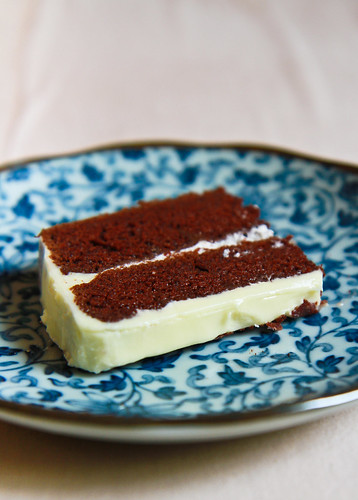
Look at those tight crumbs! YUMMY :]

 
One-bowl Chocolate Cake
Adapted from Bon Appétit
Makes a 6"/15cm cake

For the cake:
120g castor sugar
125g all-purpose flour
35g cocoa powder
1 tsp baking soda
¾ tsp baking powder
½ tsp salt
120ml milk
55g butter, melted
1 tsp vanilla
1 egg

120g boiling water
2 tsp espresso or coffee powder

For the cream cheese frosting:
120g cream cheese
55g butter
85g powdered/icing sugar

Method:
  1. In a cup or bowl, add the coffee powder into the boiling water. Allow it to steep while preparing the other ingredients.
  2. In a large mixing bowl, sift together the flour, cocoa powder, baking powder and baking soda. To that, add in the salt and sugar. 
  3. Then, add in your 'wet ingredients', the melted butter, vanilla, milk, egg and the cup of coffee from step 1. Mix together all the ingredients until no visible lumps remain. Pour the batter into a lined or greased 6-inch pan, or a cupcake pan with 8 cupcake liners.
  4. Bake at 160°C for about 30 minutes for the cake, or 20 minutes for the cupcakes. An inserted skewer should come out with almost clean with a few crumbs. Allow the cake to cool in the pan for at least 15 minutes before removing to cool on a cooling rack. You have to wait until the cake is completely cooled before attempting to slice it into two layers.
  5. In the meantime, prepare the cream cheese frosting. The cream cheese and butter should be at room temperature, but should not be too soft. I find that a good estimate is to remove them from the fridge for about 15 minutes before making the frosting. In a mixing bowl, cream the cream cheese and butter with a handheld or stand mixer, or with a wooden spoon. The mixture should appear homogenous in color (butter is slightly yellow and cream cheese is off-white, so these colors should be well-combined together) and once it appears light and fluffy, sift in the icing sugar, making sure to cream well, until all the sugar has been incorporated. If the cream cheese frosting is too 'soft', store it in the fridge while preparing the cake layers.
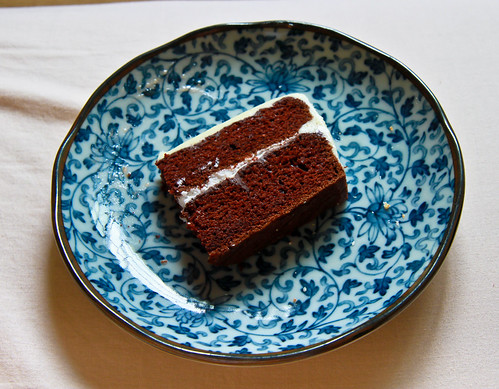
  6. Once the cake is completely cooled, slice it into half with a serrated knife. Add a thin layer of cream cheese frosting on one side of the layer, before sandwicing the two layers together. Add another layer of frosting on the top and sides of the cake, and refrigerate until firm. The recipe above gives you enough frosting for the 6" inch, but only for a very thin layer of frosting, so if you're a frosting monster and have a sweet tooth, I'd recommend doubling the frosting recipe for a thicker layer all around. Bon Appétit! 
Janine's jots: 
  • Taste: The cocoa powder features very prominently here, so be sure to use good quality cocoa powder, and please don't skimp on the coffee because it does bring the chocolatey-ness up a notch. Trust me.
  • Texture: The cake is moist, and doesn't have overly tender crumbs, which is good in a cake which you want to cut into layers.
  • Serving size: Enough Since it's only a 6" cake, it can only feed about 8 persons, assuming you have a tiny slice each.
  • Modifications: None! Enough have been made!
  • Storage: If unfrosted, the cake freezes very well, for almost a month. If frosted, keep in the refrigerator for not more than one to two weeks because the cake will lose its moistness after that.
  • Would I make this again?: Maybe...not because it's not a good cake, but there's so many other chocolate cake recipes to try! This will definitely be one to-go-to cake, because it's very simple to make, and you will always have the ingredients handy!
So join in for the bake-along! :]
 

Tuesday, November 8, 2011

Arugula, Basil, Cherry Tomatoes, Feta and Fig Salad with Balsamic Vinaigrette

You might realize that savory dishes are few and far between on this blog. The reason being that I live with my parents, so my mom cooks for me when I'm at home, and either I'm far too lazy to whip something up for myself, or I'm way too hungry to even take out a camera.

So on a rainy day when my mom wasn't home and there was nothing in the house - no pasta or day-old rice for me to fry, and absolutely nothing to eat besides vegetables, I decided to throw together this fig salad. These figs made a brief appearance in our supermarkets a few weeks ago, and knowing how short the season for figs were, I grabbed a few of them, intending to use them in anything I could think of. After using these figs in a tart and a pizza, as well as eating them as they are, I was left with a couple of figs left, and they were fast turning soft. On that rainy day, I decided to make myself some fig salad coupled with all the other veggies I had in the fridge. I happened to be lucky and had fresh basil and rocket/arugula as well as cherry tomatoes in the fridge - leftovers from a pizza-making session the day before. 

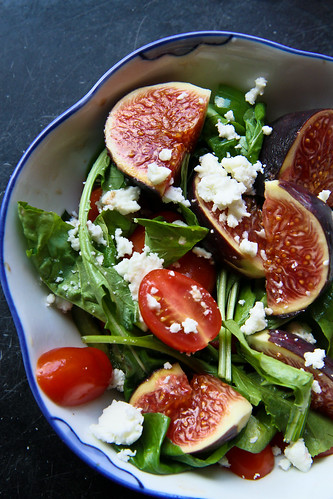
Together with some crumbled feta, a drizzle of honey and a mixture of balsamic vinegar and extra virgin olive oil, my lunch was settled. Like I said, I seldom have posts on such 'dishes', but I decided that the weather (post-rain) had really good light and I should definitely take a few photos of them figs, because I didn't take any photos of the other things I made with them >.< and figs are really pretty when photographed. I have to say that these hastily taken photos of the salad do look pretty mouthwatering, even though I'm typing now after a full meal of Vietnamese pho. 


There is no fixed recipe for this salad, and neither was this taken from any particular source, but I was inspired by a fig, goat cheese and arugula flatbread by Melissa (I made this during my pizza-making session and it was so yummy that there's no photographic evidence of it left heh).

***

Fig Salad with Arugula, Basil, Cherry Tomatoes and Feta, with Balsamic Vinaigrette
There is no fixed recipe for this, but these are the portions I used for a single serving for lunch. 

1 fig, quartered or sliced
Bunch of arugula
Bunch of basil, roughly chopped
10 cherry tomatoes, halved
2 tablespoons of feta, crumbled

2 parts balsamic vinegar to 1 part extra virgin olive oil
Drizzle of honey, if you want it sweet
Salt and pepper to taste

Method (in photos): 

Wash all your veggies/fruits well before cutting them :]

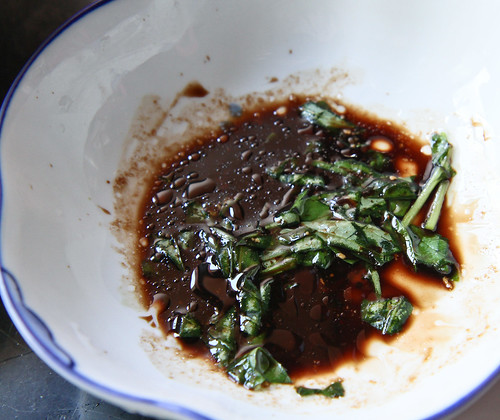
Combine the extra virgin olive oil together with balsamic vinegar, adding some salt and pepper to taste. Throw in the chiffonaded basil and combine.

After slicing and dicing the tomatoes and arugula, throw them into the vinaigrette and mix well.

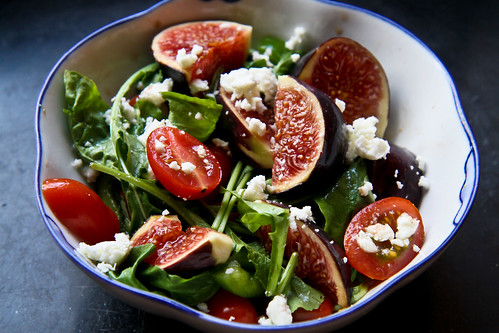
Add in the figs (try not to toss the salad too much since figs are quite fragile) and crumble the feta cheese on top before consuming. Bon appetit! 

Janine's jots: 
  • Taste: I tend to prefer my balsamic vinaigrette more balsamic-vinegary, hence the 2:1 ratio. Do stick to equal parts balsamic vinegar and EVOO for a more balanced vinaigrette. I especially loved how the sour feta cheese went together with the sweet balsamic vinegar (make sure to get a good bottle - balsamic vinegar should be more sweet than vinegary), and matched with the sweetness of the figs. I felt that the basil played an important role in adding more 'zest' to the salad too. The peppery arugula was a plus!
  • Texture: Absolutely loved the different textures - the softness of the figs, the crunch from the tomatoes, coupled with the arugula - YUM!
  • Serving size: I wasn't too hungry - so the portions were enough for myself. I would think this salad will go well with a flatbread or as a delicious, tasty side to any meat dish. 
  • Modifications: You can use goat's cheese instead of feta, or any strong-tasting cheese to match the balsamic vinegar and honey. Any other salad vegetables would go well too!
  • Would I make this again?: Definitely! Like Donna Hay would say, fast, fresh and simple! :]

PS: Call me dumb/swakoo but I never knew that figs were known as 无花果 in Mandarin. Even though I knew that 无花果s had a seedy interior, the ones the Chinese ever eat (and the ones I ever saw) were the dried ones - small brown round things, about the size of a walnut. Which was why I was super shocked when my mom told me that figs are the very same as 无花果 (when I was lamenting the fact that figs are so rare and I've never seen them in Singapore ever). Of course, the dried ones and the fresh ones are of different species - one is the common fig, and the other probably black mission but hey, it's always interesting to learn something new everyday :]

Saturday, June 11, 2011

[$20 Budget Meal] Mee Hoon Kuay (面粉馃)

Also known as Ban Mian (板面),  Mee Hoon Kuay (or Kueh) (面粉馃) can also be called handmade or hand-pulled noodles. Actually, there is a difference between ban mian and mee hoon kuay - ban mian is the Chinese version of fettucini (in my opinion) - ie, it is made with long and evenly cut strips of dough whereas mee hoon kuay has dough which is torn by hand, and is characterized by uneven shapes. Sadly though, in food courts and many stalls in Singapore, mee hoon kuay is actually machine-cut into squares. I prefer my mee hoon kuay hand torn, because I love the different textures (thick and thin) as well as the different sizes that comes with the manual 'pulling'. I also think that such dough tends to be more "QQ" (this means more elastic in Chinese lingo). 

As I have alluded to previously, I'm currently overseas in Australia for a long holiday, and it being winter here, makes me crave warm and soupy things. Mee hoon kuay was one of the first dishes that popped into my head - the other two being bak kut teh (肉骨茶) and tom yum goong. Having tried mee hoon kuay out from scratch, I'm definitely KIVing the other two :] 

Anyway, not to blow my mother's horn, but my mom is a really good cook, and one of the things that she makes which I absolutely love and will have over anything else outside, is her mee hoon kuay. I usually help here in the tearing of the dough and the general cooking of it, but I have never actually helped her in preparing the dough. So when I called her to ask for the recipe, she told me that there wasn't any recipe and basically just add enough water and some oil to make the flour elastic. And add an egg also. Like huh?! I've heard this often enough, when I was overseas and called my mom almost every other day to ask how to cook X or Y and she gave the most vague instructions! But I'd like to think that because of this, I've actually learnt how to cook by taste and smell, which is perhaps one of the most valuable lessons that any cook can learn :] So anyhow, since I really had no idea of how much water and flour, I decided to go hunting online for some measurements because for a novice, measurements are important! I found myself on Lydia's and Tintin's blogs, where they had prepared their own version of mee hoon kuay. My recipe below is an amalgamation of their recipes and what I'm used to - minced meat and mushroom precooked together, to be added into the soup later, fried anchovies on the side, lots of chili and fried shallots. 

Believe it or not, this was taken with the iPhone. Hate that the sides are a little cut off and the perspective's a little off :/ I was in a hurry to eat it ;p


Mee Hoon Kueh (面粉馃) 
Serves 2 for a meal

For the noodles: 
1 cup all purpose flour
1 egg
Pinch of salt
½ tbl oil (I used sunflower oil)
2 tbl water

For the soup base: 
1.5 litre water
150g anchovies 
Some shallot oil
Salt and pepper, to taste

For the dipping sauce: 
2 bird eye chilies, chopped
1 clove garlic, minced
1 tbl soy sauce

Additional ingredients: 
6 stalks of Choy Sum (or any Asian greens, washed and chopped)
4 fishballs 
2 eggs 
Minced meat and mushroom (about 150g of minced meat and 50-100g of shitake mushrooms)


Additional garnishing: 

Ikan bilis (or anchovies, about 50g) 
Some stalks of spring onion (also known as shallots)
Some fried shallots (small onions)

Method: 
  1. Measure out a cup of flour into a large mixing bowl. Add in a pinch of salt. Make a hole in the centre of the flour, and crack the egg into it. Pour in also the oil and water. Combine the mixture until a rough dough comes together. Start kneading the dough for about 20 minutes (if doing by hand), until you achieve a smooth elastic dough. Cover the dough and let it rest for at least an hour before pulling into pieces. 
  2. After washing the ikan bilis, boil 150g in 1.5 litres of water. Bring to a boil before letting it to simmer for at least half an hour. Season the stock to taste with salt and pepper. 
  3. For the remaining ikan bilis, pat dry after washing and place into a microwave-safe bowl. Place it into the microwave for about 3 minutes on high. The ikan bilis should turn crispy, just like deep fried ones. (Note: there is no need to add oil!)
  4. For the dipping sauce, combine the chilies and garlic in the soy sauce and place in a sauce plate. 
  5. For the minced meat and mushrooms, soak the dried mushrooms in warm water for at least an hour to soften. Slice mushrooms lengthwise into 1-cm wide strips. In a pan (or wok), saute some minced garlic until slightly brown before adding the minced meat. Fry until meat turns light brown and add in the mushroom slices. Cook until softened, before adding light and dark soy sauce. To thicken the sauce, add in some cornstarch dissolved in some water. 
  6. For the noodle dough, using a rolling pin, roll the dough into approximately 3mm thick. To make it more manageable, divide the dough into smaller sizes (about A4 size). Make sure that the stock is boiling before beginning to tear the dough into smaller bite-size pieces. Immediately throw these pieces into the boiling stock. 
  7. Once you have torn all the dough, add in the fishballs and vegetables of choice. Depending on how you like your egg (runny yolk or fully cooked), crack in the egg after the vegetables have been cooked. 
  8. To serve, ladle the cooked dough, fishballs, egg and vegetables and stock into a soup bowl. To garnish, add a few spoonfuls of the minced meat and mushroom, microwaved ikan bilis, some fried shallots and spring onions. Dip into dipping sauce and enjoy :]

Janine's jots: 
  • Notes: If you're doing the tearing of the dough yourself, make sure you work quickly, so that the first few pieces of dough don't cook too long and turn out mushy. What works for me is to make sure that the initial batch of dough is slightly thicker than the later batches to ensure that they take longer to cook. Alternatively, you can tear the dough first and place them on a plate (make sure they are placed apart, otherwise they will stick). 
  • Taste: Fantastic. There really isn't much I'd change in this recipe, except perhaps use more ikan bilis in the stock. 
  • Texture: The mee hoon kuay is sufficiently Q and elastic, and is heavenly, when eaten with the crisp ikan bilis, soft springy fishball accompanied with the sharpness of the chili. 
  • Serving size: I found it pretty manageable to cook the 2-person portion in a large pan. The amounts above are more than sufficient to cook a meal for 2 for dinner. 
  • Modifications: None. I love it! Btw, for ban mian, all you have to do is use a knife to cut the dough into long strips instead of tearing the dough. It's that simple. There's no need to flour the dough if you are going to cook it immediately in the stock. 
  • Storage: The cooked mee hoon kuay does not keep well in the fridge at all. You must consume it within an hour of cooking otherwise it'll become soft and mushy. 
  • Would I make this again?: Definitely!!! 


A little close up of the mee hoon kuay :D
These are the only photos I have now, because unluckily, I dropped my camera on the floor yesterday and the lens broke into two. Yes, it broke. One end got shattered so badly and the other end got stuck to the body. Thankfully, I managed to get it unstuck, and the camera body was unharmed. The sad thing is that I've now lost a lens and only have my wide angle lens left :( I was really upset for the whole day because I really liked those lens and I was planning for all these fine-dining places in Sydney and the UWA is really slow and has a large minimum aperture, which makes it a bad choice especially in all those restaurants. Boo :'( I foresee many photos being taken with my trusty iPhone for the next few posts as well. 

On a happier note, this post will also be killing two birds with one stone because it's my third entry for the Muhibbah Malaysia Monday event hosted by Shaz of Test With Skewer and Suresh of 3 Hungry Tummies. AND, after much much procrastination, I am finally participating in the $20 Budget Meal event that has been hosted by Ellena for the past few months. This month's theme is Noodle, and it has to be a one-pot dish cooked for at least 2 people. Since I'm in Australia now, I'll be using Australian dollar for the calculations below. 

Total cost for this dish is about A$7.06, breakdown as follows: 
- Flour: $0.20
- Ikan Bilis: $1.50
- Minced Meat: $2 (I used minced pork)
- Dried Mushrooms: $1
- Choy Sum: $1
- 3 eggs: $0.36
- Spring onion: $0.30
- Fishballs: $0.70

This makes for a truly cheap and budget meal because eating out in Sydney (where I'm at now), is not cheap at all. The cheapest available meals tend to be Asian food, and even that will cost you at least $8 for lunch and $10 for dinner, per person. If you want to dine in proper restaurants, expect to set yourself back by at least $20 for just the main course. With less than A$8, I have managed to cook an extremely satisfying meal for 2, with homemade and healthy ingredients (ie, homemade stock and no MSG!). Therefore, for those currently living overseas now (and if you happen to be craving mee hoon kuay), please don't hesitate to head down to your Asian supermarket to buy the ingredients. The only ingredient that might be slightly harder to find is ikan bilis. Make sure to call it anchovies or jiang yu zai (江鱼仔) to make sure that the shopkeeper understands what you want. And one final note, making the dough is also not as hard as it seems ;] Do try this out!

Monday, June 6, 2011

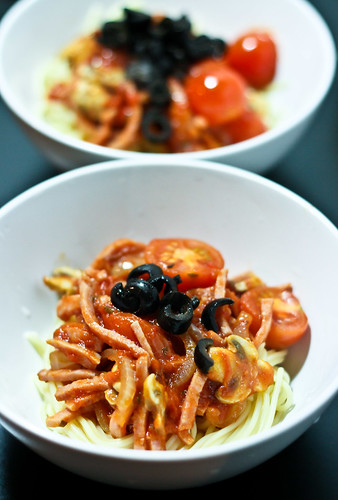
Comfort food - Spaghetti Bolognese

I first heard of Murdoch's 365 challenge on Ellie’s blog, and I am super excited to be part of this challenge, where cooks from all over the world are cooking through Stéphane Reynaud’s 365 Good Reasons to Sit down to Eat. This is the first of a few recipes I’m trying - it was meant for 3 June, which incidentally was my birthday (I didn't realize it when I was picking recipes), and I also didn’t realize how busy I’d be with all the traveling and settling down I’d to do, so I'm really sorry that this is out of sync with the date it is supposed to be made on. Some comments about the book which I now have -  I’ll have to say that since this book is written by a 'western' author, some of the recipes on certain days do call for some ingredients which are slightly more exotic or harder to find in Singapore, or perhaps just a lot more expensive. Just another little gripe though - I'm someone who's really into details - and Reynaud's instructions tend to be a little of the vague side. He also tends to list ingredients like "onions" and "tomatoes" without specifying white or red onions, etc - this could be problematic for new cooks who are using the book. Nevertheless, the book is still great for dinner ideas, especially when you're running low on inspiration, because the dishes are really easy to whip up and require very minimal preparation and cooking time!

I chose this spaghetti recipe as my first attempt, because spaghetti bolognese is perhaps one of the first few one-pot dishes I made, and have continued to make many times. I don't usually follow a specific recipe when cooking spaghetti bolognese, but I was pleasantly surprised as to how similar my 'recipe' (or the lack of it) is to Reynaud's. 


Spaghetti Bolognese 
Serves 6 

Note: I have amended the ingredients instructions in the book slightly to suit my own recipe. For the original recipe, please refer to page 240 of Stéphane Reynaud’s 365 Good Reasons to Sit down to Eat

4 x 185 g beef steaks or chicken (or lean bacon strips)
6 tomatoes 
20 cherry tomatoes (optional)
4 onions 
100 g mushrooms 
1 tablespoon concentrated tomato paste 
2 tablespoons tomato sauce (or ketchup) 
1 bunch of basil, leaves picked (or dried basil)
500 g spaghetti 
Olive oil 
Salt and pepper, to taste

Method: 
  1. Dice the tomatoes. Halve the cherry tomatoes. Peel and slice the onions. Slice the mushrooms. 
  2. Sauté the meat in olive oil with the onions, allowing them to brown before adding the mushrooms. Once the mushrooms grey, add in the diced tomatoes, tomato paste and sauce. Cook for 10 minutes on medium-low heat. Add in the halved cherry tomatoes. 
  3. Cook the spaghetti in boiling water with some olive oil and salt added, for about 10 minutes. Drain the spaghetti and pour the Bolognese sauce over it. 
  4. Roughly slice the basil and scatter over the plate. Add in some olives if preferred. 

Janine's jots: 
  • General Comments: As usual, I added my own ingredients to the recipe - I substituted the fresh basil for dried ones because I didn't have fresh basil available, and I had to use up my mushrooms and lean bacon strips which were probably going to spoil. These substitutions might have altered the taste of the original recipe somewhat, but I believe what's important is the tomato base for the sauce! 
  • Taste: Make sure to use nice fresh tomatoes so that you get a nice sauce. I tend to add some sugar to sweeten if the tomato sauce is too tart. If you don’t have concentrated tomato paste or sauce, just use tomato puree that you can get from the supermarkets. I prefer using fresh tomatoes since there's no preservatives involved. Also, be sure to look for good concentrated tomato paste - I use passata di pomodoro (which is basically Italian for tomato paste) which I bought in Italy, which is awesome tasting. 
  • Modifications: Reynaud advises against using minced meat, because using steaks or chicken fillets and slicing them is a much tastier choice. I roughly quartered the recipe to make 2 servings - it was enough for 2 small eaters for dinner. 
  • Storage: The sauce stores well in the fridge for about 3 days, and freezes well as well. 
  • Would I make this again?: Definitely - I make this all the time when I run out of things to cook. This is also my ultimate easy to cook dish and is something I always turn to while traveling and when I have my own kitchen, because it calls for the simplest of seasonings and ingredients. 

If you haven't yet attempted a spaghetti bolognese dish or if you have been using those spaghetti sauce in a jar, do try this recipe out - I assure you it won't take up more than 30 minutes of your time to prepare and cook! If you already have tried spaghetti bolognese before, still do try this recipe out because it won't disappoint! If you're interested in what other dishes the other cooks are whipping up in their kitchen, do head down to Murdoch Books’ 365 Challenge Blog to have a look!

PS: I bought the cherry tomatoes from an organic market here in Sydney (which I will be writing about soon), and they tasted soooooo awesome. The sweetness and slight tartness that bursts into your mouth when you bite into it is unbelievable! If these already taste so good, I can't imagine how the heirloom tomatoes will taste like!
Related Posts Plugin for WordPress, Blogger...