My blog has moved!

You should be automatically redirected in 6 seconds. If not, visit
http://www.unpastiche.com
and update your bookmarks.

Tuesday, January 17, 2012

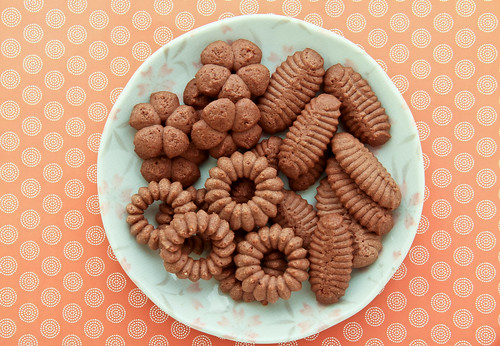
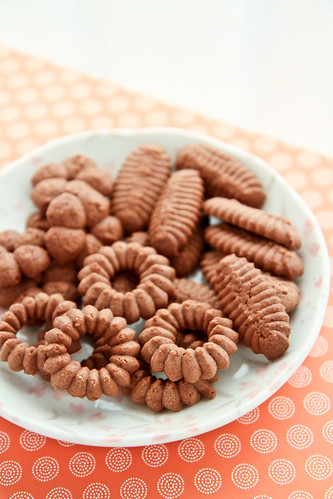
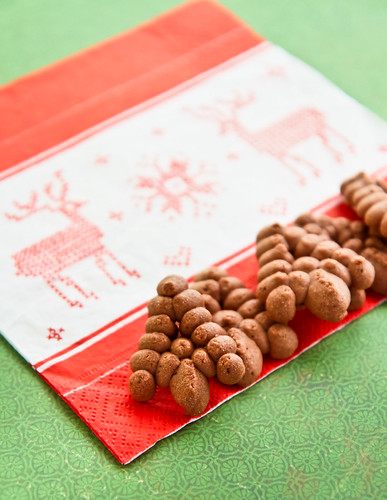
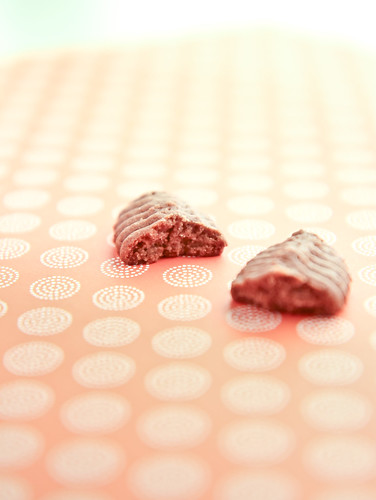
Healthy CNY cookies #2: Sugar-free (Xylitol) Chocolate Spritz Cookies

I’ve to confess that I took a long time to overcome the hurdle that is sugar. I mean, I've seen the evils of sugar (see this super informative video "Sugar: the Bitter Truth") but after an epic no-sugar disaster (I tried to make no-sugar muffins using only the sweetness of fruits which failed more than majorly), I steered clear of anything labelled as no-sugar. Furthermore, I haven't had good experiences with sugar substitutes, as I find that most have a nasty or weird aftertaste to them. These two coupled together was a huge hurdle and I couldn’t get over the fact that anything without sugar would taste horrible and turn out blah.

But since my granny came over for a visit over Christmas and I wanted to bake some cookies for her, I had to make them sugar-free so that she could enjoy them without suffering the consequences later. So I began experimenting. I used the most simple of recipes – a butter cookie recipe. I made it sugar-free by substituting equal amounts of sugar substitute, xylitol for the sugar and I also changed it into a chocolate flavoured butter cookie.

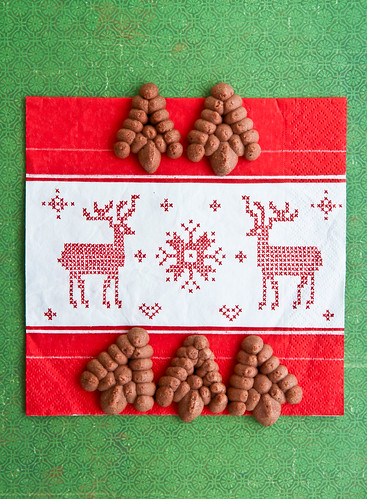
My Christmas Cookie Selection (which are experiments for CNY actually)

Now, my granny has not always been diabetic - in fact, she only tested positive only last year? I suspect old age has something to do with it. My uncle also has diabetes, of the more serious sort, and ever since then, I’ve been ever so conscious that all of us in the family are pretty susceptible too, and we should consciously note what kinds of sugars we are consuming. I’ve been reading up a lot on refined and natural sugars - in fact, as usual, I've come up with a huge long list of these sugars which I will share soon after I make it look more organized. So, I recently got myself some xylitol to experiment with. Why Xylitol? Well, after some reading up, I found that xylitol must suited to my needs. Most sugar alcohols when consumed in excess can cause some gastrointestinal side effects such as diarrhoea and bloating, and these are definitely symptoms I want to avoid. Xylitol on the other hand has a lower incidence of such side effects because it’s more easily tolerated than other types of sugar alcohols.

Xylitol is a naturally occurring sugar alcohol found in various sources such as corn husks, oats, mushrooms, etc. Mine however, is that which was extracted from birch. It has about 9 calories per teaspoon, about half of that of sugar. It also has a glycaemic index of 13. This is in comparison to refined white sugar which has a GI of about 65! The best thing of course, is that there is no nasty aftertaste like what you’ll get from some brands of stevia or other sugar substitutes. For those who might think - wow xylitol? Sounds totally exotic and foreign! I'm sorry to burst your bubble but xylitol is not something new. If you check your chewing gum or toothpaste, you might realize xylitol being used as one of the ingredients. It provides the necessary sweetness and it appears that it is also tooth friendly and helps reduce plaque and tooth decay as well! I haven’t been able to find xylitol in grain form in Singapore, so I got this shipped from UK along with other products (like xanthan gum).

Of course, there are other types of sugars suitable for diabetics, such as “Sugar-free” and Equal, the more common brands in the market. However, these are more of synthetic sugars and I don’t really want to put in any more artificiality into my body, so xylitol it is.


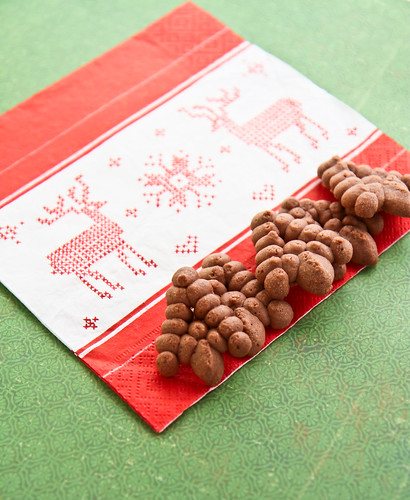
So onto the cookies. I used a cookie press to make them, and boy did I have tons of fun with it! I forgot my mom had such a contraption, and was only reminded when she saw me piping the cookies with a piping bag and commented that she had a cookie press in the drawers somewhere. I used the Christmas tree plate to create Christmas tree cookies for Christmas, which has of course since passed, but as you can see above, you can also create a whole melange of cookie shapes with the cookie press. It was my first time using the press, so if you scrutinize the plate above, you'll see varying shapes and sizes :/ There are so many plates to play around with, and you can get different shapes with the same plate if you just vary the amount of pressure used, so do play around with your cookie press if you have one, because these can be the perfect simple cookies to make for Chinese New Year. In fact, I believe I took less than 30 minutes to make the cookie dough, and press them out before baking. You can churn out jars of CNY cookies in less than a few hours :]


Sugar-free (Xylitol) Chocolate Spritz Cookies
Makes about 50 odd cookies, depending on how large or small
Adapted from Pierre Herme's sable viennois

95g     unsalted butter
¼ tsp  fleur de sel
¼ tsp  vanilla paste
40g     xylitol (or any sugar substitute, or icing sugar for the non-sugar-free aka original version)
15g     egg white
125g   all-purpose flour
Method:
  1. Cream butter and salt until light and fluffy. Next, add in vanilla and sugar, making sure to beat well. 
  2. Add in the egg white and beat until well incorporated. 
  3. Sift in flour and mix until all the flour is incorporated. Do not over mix. 
  4. Place the batter (it will be quite soft) into a piping bag with your selected tip and proceed to pipe out shapes. If the batter is too soft to handle, place it in the fridge to chill for less than 30 minutes. Do not place it in the fridge for too long as the batter will harden and it will be impossible to pipe out. 
  5. Bake the cookies in a 160°C preheated oven for about 15 minutes. The cookies do not spread much, so you can pipe them quite close to one another, leaving less than 5cm spaces between each cookie. 


Janine's jots: 
  • Taste: I couldn't taste an obvious difference between the sugar-free and refined sugar versions of the cookie actually, which means that this experiment is a success :] I mean, if you want to be particular, I thought the refined sugar version was probably more crunchy, but this version was definitely fine too! 
  • Texture: In my first batch, I accidentally added an entire egg white instead of the 15g required by the recipe, so the cookies didn't turn out as crispy as they should have, but the subsequent batch turned out fine. Using xylitol did make the texture of the cookies less crispy, but it was okay for me since this was meant for my grandma and I think she'd prefer a cookie with more 'bite'. 
  • Serving size: You can fill about one tin (those typical plastic jars with the red lids) of cookie using one batch of this recipe, so you might want to double or triple it if you wish to make a couple jars.
  • Modifications: None, because I really like this recipe, although I do much prefer the original non-chocolate ones better. I think chocolate cookies need to be a tad sweeter.
  • Storage: These cookies store very well at room temperature. Just be sure to keep them in an airtight container, and they will last for at least 2-3 weeks. If you store them in those disposable type plastic containers, they will start to lose their crispiness after a few days.
  • Would I make this again?: Definitely, but my granny wants them to be normal butter cookies this time for CNY because she's superstitious and doesn't like 'orh' (black) things for CNY =X
 
Do stay tuned for my final installation of my "Healthy CNY Cookies" series in a few days! :]

Wednesday, January 11, 2012

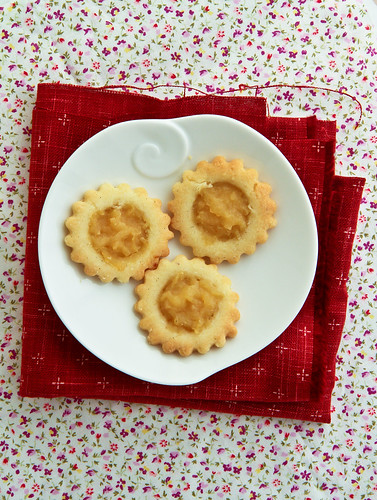
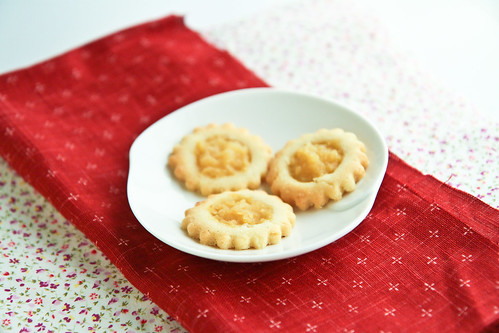
Healthy CNY cookies #1: Pseudo-Pineapple Tarts for Diabetics - Apple Tarts

As the Chinese New Year (CNY) draws near (it's 23 and 24 January this year for those still in the dark - which means yet another long weekend :D) and my CNY cookie making frenzy heats up, I’ve been thinking about not only the different types of cookies I'm able to experiment with, but also cookies fit for everyone in my extended family to eat. This means that cookies fit for diabetics, celiacs, as well as persons with high or low blood pressure. This also means that I have to experiment with cookie recipes by making some sugar free, some gluten free, and some full of the good stuff (fibre, nutrients, etc), especially for my elders who are getting on in their years ;p

I've decided to start simply - by adapting tried and tested recipes to fit these new requirements. This will be the first of a few 'healthy' CNY cookies that you too can choose to make if your family suffers from the same afflictions as mine.

I've started things off with the most important ‘cookie’ for CNY (in my opinion) – the pineapple tart. We all know that pineapple tarts contain an inordinate amount of sugar – just the pineapple paste itself will contain enough sugar to kill a diabetic (figuratively, not literally I hope). I’m not sure how true this is, but my mom always warned me against eating too many pineapple tarts because according to her, 3 tarts has enough calories for a meal! So I’ve always restricted myself to not more than 3 at a sitting ;p


Now, the use of refined sugar in making the pineapple paste is definitely bad for a diabetic, but I wasn't too daring to make the paste with sugar substitutes (and also because it would be expensive to do so). So instead, I I decided to substitute pineapple paste with a fruit already rich in fruit sugars – apples. Apple paste, or apple jam or more properly called applesauce is definitely way easier to make than pineapple paste. My applesauce contains no additives and no extra sugar. Any sweetness is derived from the natural sweetness of the apple you use. As such, I highly recommend the use of Royal Gala or Fuji Apples which are ripe and sweet, as well as one Granny Smith, to mimic the tartness of the pineapple.

For the crust, to make it diabetic friendly, you can opt for a sugar-substitute such as Equal or Stevia or xylitol, and mix it with some whole grain flours instead of the refined white flours that we usually use. Why whole grain flours? Well, highly refined products like enriched white flours are not good for diabetics because first, it lacks natural nutrients and it gets translated into the blood sugar very rapidly, causing a spike in blood sugar levels. This is not good because diabetics do not have enough insulin to regulate their blood sugar. So whole grains, are definitely a good choice to go with that sugar-free option when you wish to indulge but don’t want to run the risk of elevating your blood sugar level overly.


Apple Tarts
Makes about 60 pieces, depending on how large or small they are and what decorations you put on top

For the crust:
Adapted from Pierre Herme's Pâte Sucrée recipe

125g   all-purpose flour
15g     almond flour/meal
45g     icing sugar (or equal amounts of powdered sugar substitute)
75g     unsalted butter, room temperature
¼ tsp   salt
½ egg  (about 25-30g)
Seeds from an inch of vanilla pod

Method:
  1. Sift the flour and icing sugar separately.
  2. In a mixing bowl, cream the butter until it softens.
  3. Then, add the following: icing sugar, ground almonds, salt, vanilla seeds and beaten egg. Lastly, add in the flour. Use your mixer on the lowest speed until the pastry comes together in a ball. As soon as it does, stop and flatten it into a disc. You can also choose to use a food processor. Clingwrap it and chill for at least 3 hours before use.

For the Apple Jam:
See my applesauce recipe here

To assemble:

  1. Make the crust first, and place it in the refrigerator to chill for at least 1-3 hours before using. In the meantime, prepare the apple jam. Basically, use any applesauce recipe and be sure to cook down the applesauce until it is relatively drier than usual.
  2. After it cools, remove the crust from the refrigerator and proceed to roll it out, to about 3-5mm thick, depending on how thick you like your tart.
  3. Portion the jam onto the tarts before decorating with more dough (optional). You can place the tarts relatively close to one another on the cookie tray because they do not spread/expand that much. Before baking, you can choose to use a egg yolk glaze on the tarts. I did not do this as I was lazy.
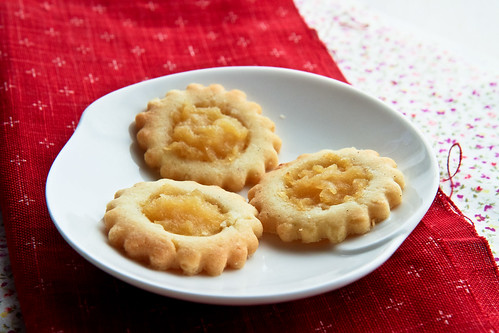
  4. Bake in a preheated oven at 170°C for about 20-25 minutes or until the tart is slightly golden brown. Note that if you don't use an egg yolk glaze, your tarts will look like mine below - slightly on the pale side.


Janine's jots: 
  • Taste: If you like, you can also add some cinnamon to the applesauce, to bring out the apple flavour more.
  • Texture: I would definitely cook down the applesauce a little more since I used my normal method and it was still quite liquid. I thought the applesauce would dry out in the oven when baked with the crust, but it did not and was rather wet still. This meant that the tarts had to be consumed on the day itself, otherwise the tarts turned a tad too soggy.
  • Serving size: The recipe is a quartered version of the original, and will definitely make about 1-2 trays worth of tarts, but the exact number is hard to determine because your tarts may be of different sizes.
  • Modifications: If you want a more healthy option, you can definitely up the almond flour, and substitute the all-purpose flour with a bit of rice or millet flour. This also means you can mix/process the dough longer since there's no gluten in these flours. Millet also adds a wonderful sweet taste (and browness) to the tarts as well.
  • Storage: My tarts only kept well for 3 days, because it started getting soft on the third day and that's not the texture you want for a pseudo-pineapple tart.
  • Would I make this again?: I would definitely want to try this again, but making the enclosed version this time because I think the moist apple jam is more suited for a crumbly, melt in your mouth enclosed tart :]


Disclaimer: Please do note that I am not a nutritinoist or medical professional. All recommendations made above are based on what I've read on the internet and in books, so please do consult your doctor if you have any doubts.

I am merely stating that this might be a suitable alternative for diabetics craving for that ubiquitous pineapple tart during CNY. The tart might not be safe for diabetics to consume in large quantities, because it still does contain fruit sugars as well as refined flours and sugars. Please do consume at your own discretion, and always remember, everything in moderation!

PS: I know my tarts aren't very well-made (the filling is so horrible looking) and I have been quite stingy with the filling but this was merely an experiment which went well ;p

Monday, January 2, 2012

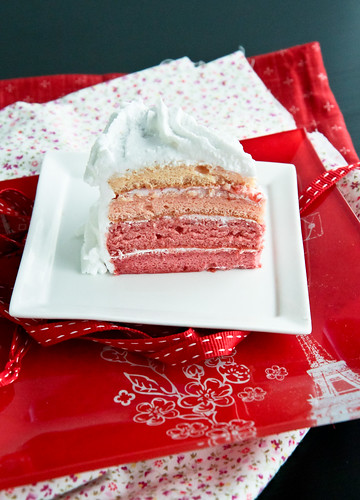
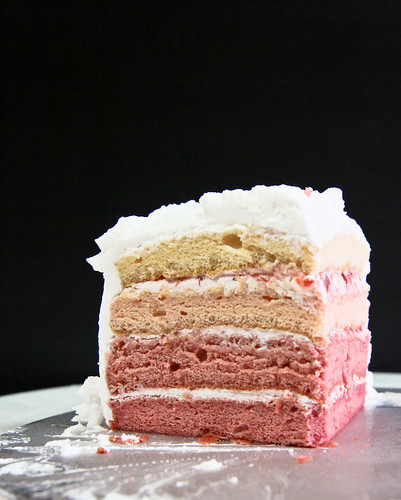
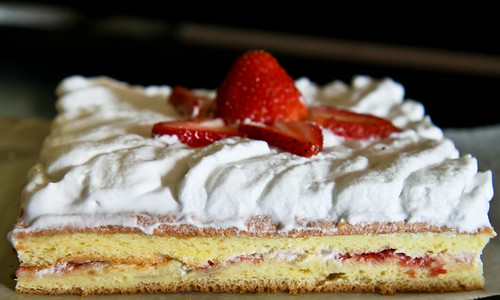
Mom's Birthday 4-layered Strawberry Cake with Whipped Cream and Strawberry Jam

Before I begin my long spiel, HAPPY 2012 everyone! And hurray for the long weekend ;p


This post is actually a timed post, because as I speak, I probably am having the time of my life shopping and eating, whilst taking a well-deserved break overseas. Anyway, Christmas weekend came and went rather quickly, and with work and all, I haven’t been taking nice photographs of what I’ve been baking recently. I actually wanted to post about the Christmas log I made this year, but I didn't have my camera with me when we had it for tea, so :(

I know I was contemplative the last post, but thinking back on that last Christmas log and eating my current one really makes me very very proud at how much I’ve progressed as a baker. In fact, I think I've come full circle nicely, because this Christmas log cake was probably the first proper cake I made myself, with a new recipe, with the untested oven and with my new mixer. Thinking back, it certainly was horrible and the people must have been lying through their teeth when they told me it was nice. I remember the dense layer at the bottom of the cake, and at that time, I didn’t know what it was caused by. Now, I know so much better, that the dense layer is caused by overmixing of the batter and deflation of the egg whites. I cringe when I think about those guests eating the cake with that dense layer.


So anyway, since this year's log cake was made with my favorite sponge cake recipe and with equally delicious whipped cream and chocolate ganache, it was tons better than last year. My family, my harshest critics, enjoyed it immensely :] Since I don’t have a nice photograph of the Christmas log cake, I’ve decided to blog about my mother’s birthday cake instead. It’s made from the same cake base as the Christmas log cake and perhaps half of the cake recipes on this blog. I know I’ve blogged about this sponge cake time and time again, but it really is my favourite cake. This is not something I write about lightly, because if you could see the countless swiss rolls and sponge cakes that my dogs ate during the time I was experimenting with various recipes, you’d be alarmed.


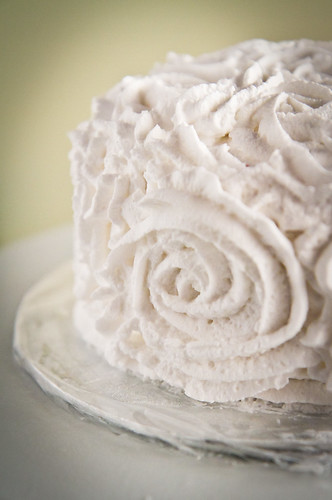
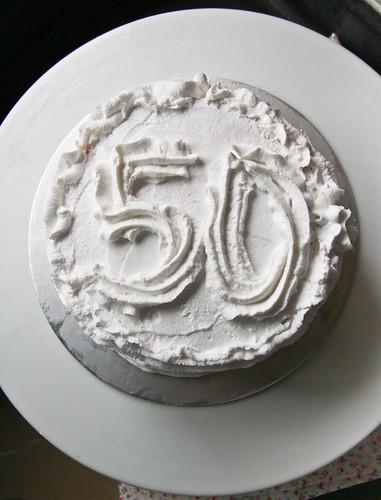
Here, I've slathered on whipped cream and jam in between the cake slices, as well as brushed each slice with sugar syrup. After that, I crumb coated the cake with a thin layer of whipped cream, then proceeded to decorate it. Be sure to refrigerate the cake for at least an hour after you're done because it allows the jam and alcohol laced syrup to meld into the layers. If you notice, I fiddled with 2 different designs for the cake. I initially wanted it to be covered with roses, but the roses didn't turn out too good because I doubt whipped cream is suitable. Buttercream would be far smoother and give better results. So I 'erased' the roses off and decided to go with simple ruffles at the side and a huge "50" on the top, because my mom turned half a century old!


Alright, so here’s the recipe again for those too lazy to refer to my older posts!


Strawberry Sponge Cake
Not sure why the cake looks greenish here :/

Components: 
  • 4 sponge cake layers 
  • Simple sugar syrup
  • Stabilized whipped cream 
  • Strawberry jam (I used my strawberry-apple jam)

To make 1 layer of sponge cake:
2       large eggs 
30g   castor sugar
20g   all-purpose flour

Strawberry powder (dried strawberries processed into powder form)
1 tsp red coloring (optional)


Method: 
  1. Separate the egg whites from the yolks. 
  2. In a bowl, whisk half of the sugar into the yolks. Sift in the flour and strawberry powder, stirring until you get a smooth paste. Add in the red coloring if using. 
  3. In another bowl, whip up the egg whites until foamy, before adding the remaining half of sugar. Continue whipping until you get shiny, stiff peaks. Mix some of the egg whites into the yolk mixture to lighten it up before folding the remaining whipped egg whites into the yolk mixture. 
  4. Pour into a lined baking tray and rap the tray against the counter to get rid of any air bubbles. Bake in a preheated oven at 180°C for 10 minutes. 
  5. Leave the cake to cool in the tray for about 10 minutes before placing it on the cooling rack. 

For the stabilized whipped cream, 

1 tsp gelatin 
4 tsp cold water
250ml cold heavy whipping cream
30g icing sugar
1/2 tsp vanilla extract

  1. Put all the cold water in a small saucepan and sprinkle the gelatin over the surface. Let it stand for 5 minutes without stirring. Place the saucepan over low heat and stir constantly with a wooden spoon until the gelatin dissolves. Remove the saucepan from the heat and cool to room temperature. 
  2. Combine the whipping cream, sifted icing sugar and vanilla extract. Beat the mixture for a minute before gradually pouring in the cooled gelatin mixture. Continue whipping the mixture at high speed until you get stiff peaks. 

For the simple sugar syrup, 
30g granulated sugar
60g water
1 tsp of your preferred alcohol, or vanilla extract

Combine the sugar and water in a small saucepan and heat the mixture. Stir until all the sugar has dissolved. Allow the mixture to cool a little before stirring in the vanilla extract (or alcohol - I used rum). 


To assemble: 
  1. If baking as sheets, cut out 6-inch circles from the cake sheets. You will be able to cut 2 6-inch circles from the 2 sheets and get quite a bit of excess cake. 
  2. Brush the cooled sugar syrup on each layer. Be sure to brush on both sides of the cake. 
  3. Spread a thin layer of jam on each layer of the cake, followed by a thin layer of whipped cream. 
  4. Stack all the layers together and begin spreading whipped cream in a thin layer on the outside of the cake. This will be your crumb coat. Place the cake in the freezer for about 15 minutes before removing to decorate the cake. Alternatively, you can chill the cake for an hour until the crumb coat has set (i.e. the whipped cream is slightly stiffer) and proceed to decorate as desired. 


Janine's jots: 
  • Note: To get the color gradient, substitute the all-purpose flour for strawberry powder, using a maximum of 15g all-purpose flour and 10g strawberry flour. Also use some red coloring for a more intense red color. For the first two layers, I didn't use any red coloring, merely using strawberry powder to get the red-ness. I made 4x of the batter above, then used my estimation to divide the batter into 4. This perhaps explains why the layers are not too even and the bottom 2 layers are actually almost the same color :/ 
  • Taste & Texture:  I absolutely adore this cake because it's so easy to make. My family loves it too. Just a tiny caveat - this cake is quite ‘spongy’ when it comes out of the oven and tastes pretty eggy without any addition of flavouring, but this is easily amended with the addition of vanilla extract or any other flavouring you desire. 
  • Serving size: This makes a 4 layered 6-inch cake, which serves a family of 5 perfectly for a heavy tea (about 1.5-2 slices per person depending on how large each slice is cut). My family is not a fan of icing or cream, hence the very thin layers of cream between the cakes and on the outside. If you love whipped cream, be sure to double the recipe and be generous!
  • Modifications: You can choose to bake them as sheets, which will take about 10 minutes to bake up - if you touch the top, it’ll be slightly moist and may stick to your finger. So just test with a cake tester and if it comes out dry then the cake is done. You can also choose to bake them in round or rectangular pans and later slice them in half. That works as well. Just increase the baking time to about 20-30 minutes for an 8” round pan.
  • Storage: The cake stores well in the fridge, covered. If you are serving the cake right away, you can choose to forgo the sugar syrup, but I highly recommend using it because it gives you a far moister cake. The syrup also ensures that your cake stays moist in the fridge! 
  • Would I make this again?: Definitely! You might actually realize that this recipe is almost identical to my strawberry shortcake posted a while back - with virtually the same components!


With that, I end 2011 with what I term “a blast” in my own books. As I usher in the New Year, I fervently hope that I will still be able to find time to blog and post recipes to share with you readers. And I’m hoping to come back with a few goodies from my trip to share with you, to celebrate my first year blogiversary with :] 2012 is the start of many new things for me, so here's to many wonderful things ahead!

Sunday, December 25, 2011

One Year On

Merry Christmas everyone! Although Christmas this year was a subdued affair, we celebrated by having roast chicken instead of roast turkey, coupled with delicious roast vegetables and a homely mushroom soup. All very simple, but delicious all the same. I also made a chocolate log cake, again with my 3-ingredient sponge rolled up with whipped cream and topped with chocolate ganache. 

My family no longer exchange gifts, because it's usually a waste of money if you get something just for the sake of gift giving. Christmas is not just about gift giving, but about giving, so if you've received many useless/unwanted gifts this year, why not ask your friends and family to use that money next year to donate it to a cause close to your heart or to help a charity? 

Because of the commercialization of Christmas, it's also easy to forget why there is Christmas in the first place - for Christians, it's the day when Christ was born; for others, it's perhaps a time for family and for giving thanks, and to reflect on the year gone by. That particularly applies to me - I find myself particularly reflective during Christmas, as I dwell on what has happened in the year past and what I hope for the year ahead. This Christmas is also particularly meaningful, because it's when my blog turns one! Yes, I first started the blog exactly a year ago on Christmas Day. I didn't exactly draft that very first post on Christmas Day itself because it being my first post, I remember spending many days on it, editing and thinking of what to write. I finally posted it on Christmas Day, because I wanted Christmas to mark the birth of my blog, and the birth of something new in my life. It was also because I got my Bombino, my workhorse the Kitchenaid for Xmas last year. 

Some experimental sugar-free Christmas tree cookies for diabetics in my family

Looking back, I'm very thankful for the gift, because I can honestly say that it perhaps helped me move forward with my baking, because I could no longer hide behind the excuse of not having any mixer to bake the 'harder' things. To say that I’m very proud of the past year and how this little blog of mine has progressed is an understatement. I opened a document entitled “aims for my blog”, which I wrote one year ago, and one of my aims was to be more consistent in taking photographs and to settle on a structure for my blog posts. I believe I’ve settled into my own structure over the past year, and although I’m still not too consistent in taking photographs of everything I bake, I’m making an effort and I'm definitely proud of the progress I've made in food styling-wise and photography-wise. 

The other aim was to have 2000 page views after 6 months. I’m not sure why I settled on this number, but I’m glad to say that I’ve surpassed this greatly. Today, exactly 12 months after I started my first post, this blog has garnered more than 118,000 page views! This has definitely surpassed the original aim of 2000 page views. There are still a couple more personal aims which I have yet to fulfill, but I’m taking steps towards that. With the advent of work (I officially started work 12 December), posting has been much slower, so I've decided to take things slower, and let this blog grow organically, and let fate surprise me instead. 

Anyway, I decided that this was an apt time as any to do a little walk down memory lane now that my blog is a year old. I decided to bastardize the 7-links meme that has been going around the internet, with just 5 links of my own. You might realize that most of the links are pretty recent entries, because I think that my photography has picked up considerably recently, hence the self-confidence ;p


My Most Beautiful Post and The Post That I Am Most Proud Of 
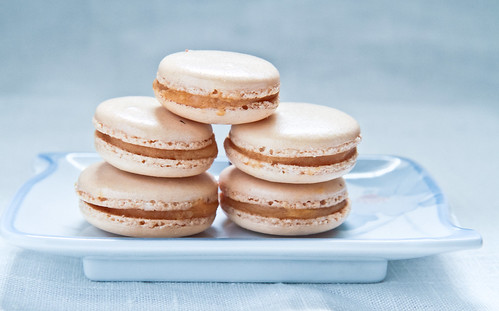
This was hard. I equate most beautiful post with the photos that I’ve taken that I’m most pleased with. This would be a tie with my pink salted caramel macarons and my chocolate cupcakes. I believe my photograph-taking has been improving, thanks to the reading up and experimenting I’m doing. 

For the salted caramel macarons, I'm proud of them because it represents how far I have gone since the first time I started baking. I always used to help my mom with baking cupcakes and muffins, and never would I imagine myself baking macarons, little things which I gobbled down when I was in Europe. I'm really proud of how much I've grown as a baker, but to an extent, I have been very hesitant about doing entremets and more complex stuff, hence the dearth of such things on the blog. I really hope that with the advent of the new year, I'll gather more courage to try and post about them here! :]
For the chocolate cupcakes, it's a really simple recipe, but it shows how much I've improved food styling wise. A year ago, I would never have used so many textures and props in a photograph, and taking the effort to look for the best light and to find props to match the cupcakes. But hey, look at how far I've come :]


My Most Popular Post 
Hands down it is my list of baking places in Singapore. When I posted the list, I never knew it would be as popular as it is now. I think it ranks as one of the top 10 google result searches when you search for “baking supplies in Singapore” or something like that. Do also check out my list of price comparisons between baking ingredients in Singapore, which I myself refer to on more than one occasion. I actually have many more of such lists, like a complete list of food places/ restaurants in town - this helps me when ive no idea what to eat in Orchard, as well as to help my guests from overseas. And a complete list of pizzerias, organic food stores, etc. I hope to be able to post them soon, once I type them out and neatly arrange things. 


A Post Whose Success Surprised Me 
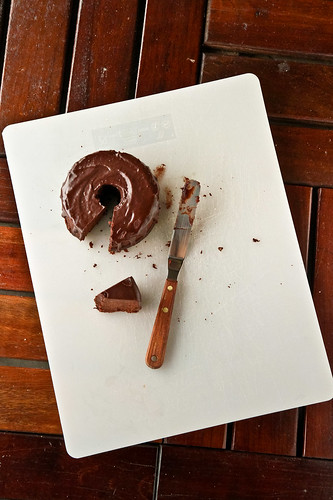
Again, this is a tie between my fluffy pancakes and moist steamed chocolate cake. The pancakes post was literally done in half an hour. I had made the pancakes earlier in the morning, hurriedly snapped a few photos with my iphone and my camera, then uploaded it and wrote a short blog post to accompany it. I never imagined so many would think the pancakes were pretty and had it repined both on tumblr and interest!

Same for the chocolate cake. I was actually too lazy to look for a proper plate for the cake, so I used the white cutting board as a base and couldn't be bothered with the chocolate and crumbs all over. I must say it looks pretty artistic on hindsight ;p


A Post I Feel Didn’t Get the Attention It Deserved 
This would have to be Pierre Herme’s ispahan cupcake. With the popularity of the ispahan flavor combination, I was expecting this recipe to make the rounds, but sadly, it didn’t. Perhaps it’s too plebian as compared to the ispahan macaron or buche de noel? Anyhow, I’m posting it again here so that those of you who are too scared to try the tough stuff (like me), can start off with this relatively simple cupcake recipe :] 


Alright. I actually wanted to post a couple of my Christmas recipes (such as my new and improved Christmas log cake and various other cookies), but I actually had to work on the eve of Christmas eve, which was officially a company holiday, and work's been a bitch the whole of last week. In fact, I've to go back to the office later tonight (yes, on Christmas Day) and I'll probably have to work through to Boxing Day tomorrow as well. Sad no? Well, as my senior said, welcome to the sad life

Anyhow, have a blessed Christmas everyone, and hopefully I'll find time to post something new between now and the new year, before I leave for a short holiday to Taiwan :]
Sunday, December 18, 2011

A to Z of Australia: B is also for Black Star Pastry


Now I truly know the meaning of TGIF. It should really be "thank God it's Friday night so that I can sleep till late on Saturday morning" because never have I been so glad for the weekend. And in a blink of an eye, the weekend is over. For want of a better word, I truly have been continually stimulated at work. Stimulated in the sense that I'm discovering new things every day, learning the ropes to one of the noblest professions in society ;) I can't say I'm thrilled to be working, because the hours are really long and I don't get home till late every day but I'm excited for the new things that I'll learn. I know that this will eventually plateau, so I'm absorbing as much information as I can now!

Since I'm drained by the time I reach home, I can't muster strength to do anything else besides eating and bathing, then straight to sleep. Which explains the dearth of blog posts because I haven't had time to bake anything, although I more than made up for it by baking 1kg worth of cookies (butter cookies and experimental pineapple tart cookies :D) as well as my rye hearth bread. I just finished a few hours ago, and I couldn't be bothered to take photographs because the light's so bad and it's been raining cats and dogs. Anyway, since I haven't baked anything this week, I decided that I shall blog about Australia instead.

That's the Newtown courthouse in the reflection. 
Technically I should be onto D already, and although I have an entry for D thought up (but obviously not done up yet), I decided to skip back to B since you really can't afford to give this place a miss if you're in Sydney!

I know it's been a long time since I lasted posted about this, and ironically, the A-Z series was meant to be a travelogue series of my May/June trip to Australia, but instead, photos for this post are taken from my recent trip to Sydney - hence the wonderful light - it is spring after all! Many Sydneysiders will of course know of the fickleness of Sydney's weather in spring - I had my fair share of rain and shine (thunderstorms resplendent with lightning, ever so reminiscent of Singapore's thunderstorms) and lovely spring weather. It was on the latter that Jon and I headed to Black Star Pastry - I'd been dying to head there ever since he got me the watermelon cake as my birthday cake. 


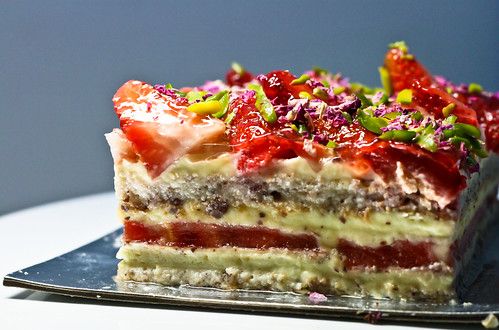
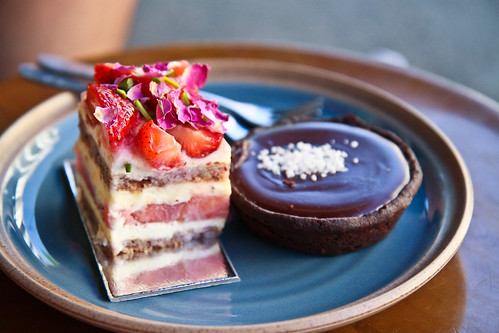
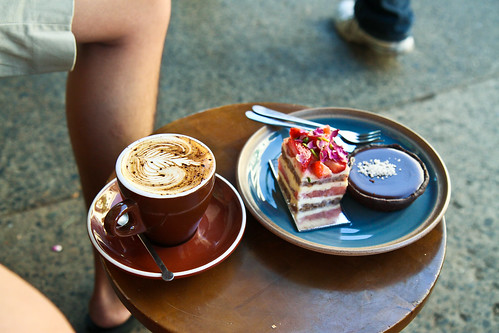
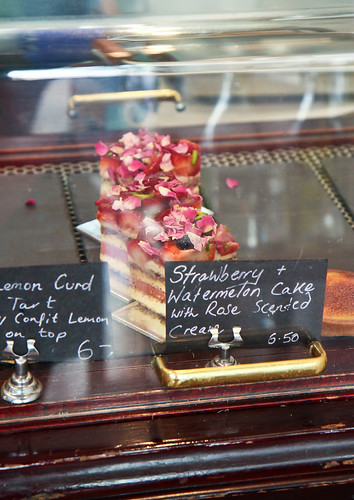
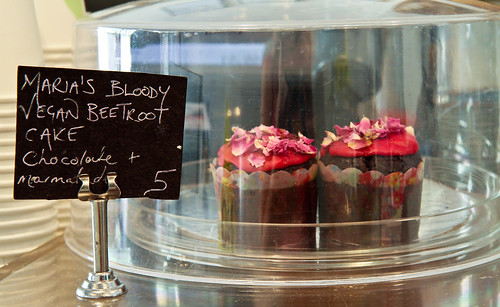
Black Star Pastry is the brainchild of Christopher Thé, who previously worked in Quay, Claude's, as well as Sonoma and Victoire (both of which have nice breads and pastries). It is also highly rated on urban spoon, with 93% of reviewers recommending it. One of their signature desserts has got to be this watermelon cake. I bet most of you have never heard of such a combination, but trust me, it works. The cake consists of two layers of almond dacquoise, fresh whipped cream, watermelon, strawberries, Iranian pistachios and rose petals. It's an absolute delight, because there are so many textures in a single bite, and the flavors of rose, strawberry, watermelon and almonds just go so well together.


They have varying sizes of the cake for order, and if I'm not wrong, this is the 10x12cm cake costing just $24! Since it was just 2 of us, we couldn't finish this in one sitting, and had it the next morning. I've to say that the watermelon leaches water terribly in the fridge, and this caused the dacquoise to be soggy - so I'd advise anyone to finish this all at one go! I apologize if the 2 cake photos above don't' look particularly enticing - it was taken under the light of a study lamp and it had already spent a day in the fridge, hence the misshapenness and sogginess!


The shop is very small, with seating for less than 20? people, but I like the fact that even though it is small, it produces good food with quality, thus garnering the attention it so deserves. During the hour I was there, I saw all sorts of people visit the shop - from regulars getting their cuppa, to the occasional foreign tourist. 

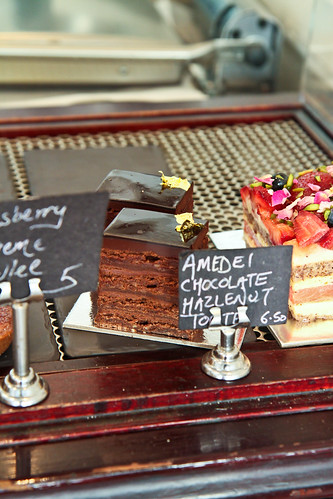
Having had their watermelon cake before, I wanted to try their macarons, amadei cake, ninja, and so many other things, but there was only so much my stomach could handle (having already ate La Banette's millefeuille earlier), so I only could manage the chocolate tart and the orange cake. Check out the full list of their offerings here.


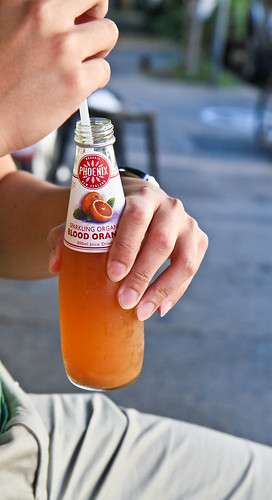
An extensive range of Phoenix's organic sparkling juices are available, on top of the usual caffeine offerings - I can't take caffeine, and after having Phoenix's lemon & lime bitters as well as their cranberry -lime juice, I was drawn to the blood orange. If only Singapore carried them - they were cheap (<A$4) and most importantly, organic and delicious! I felt good drinking something which I knew was organic. 


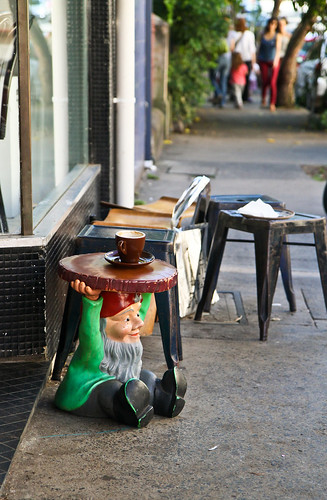
I think this is perhaps the most photo-heavy entry ever, and very minimal editing was done on the photos because yes, the light was really that awesome. It was such a good day that we sat outside, people-watching while enjoying our desserts. They had these cute goblin stools which are used to place your food on - not a comfortable height to eat with, but the cakes were so good the plate remained in my hand and I didn't need to use the stool at all. 


Best thing about the cakes they offer is that a great number of them are gluten free, such as the strawberry watermelon cake with rose-scented cream and their other famous dessert, the amedei chocolate and hazelnut torte. 


I had the Zokoko choc-caramel tart, which was crazy good. It had a chocolate tart crust which was filled with caramel and chocolate, and topped with Murray River pink sea salt flakes. That was the seriously the icing on the top because the saltiness went really well with the rich chocolate. It got a bit too much for me though, because I found the caramel a bit too sweet, so luckily I could offload it to my human rubbish bin :]


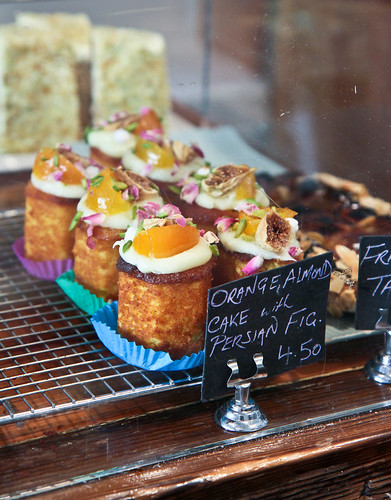
After I shared my tart, (the watermelon cake was his), I decided that I wanted another dessert, but something lighter on the palate this time. The orange cake had caught my eye previously, so I decided to give it ago, even though it looked rather plain for $4.50. Boy was I glad I got it! It's a flourless orange almond cake, made with whole boiled oranges. It is then garnished with persian figs, cream cheese icing, as well as pistachios and rose petals. I absolutely LOVED it! The cream cheese icing was not overly sweet, and complemented all the other garnishings perfectly. It was honestly the best thing I ate the entire trip (and I ate a LOT of things during the 2 weeks I was there). 


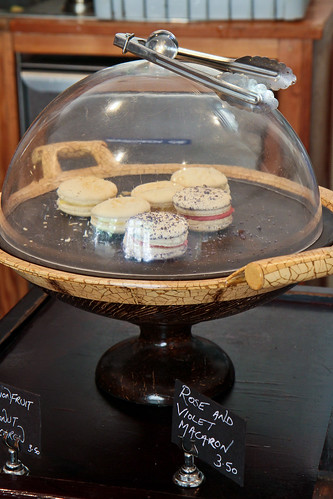
Here are a few more photos I took in the shop - they had macarons which were slightly larger than the usual size, but I was really full by then, and the $3.50 price deterred me from buying some back.  And check out the orange cake, with a lemon myrtle chiffon cake in the background. I absolutely love the flavor combinations over here at Black Star Pastry - they utilize very Australian ingredients such as lemon myrtle, while combining Middle Eastern flavors like pistachios and rose petals in French confectionaries. 


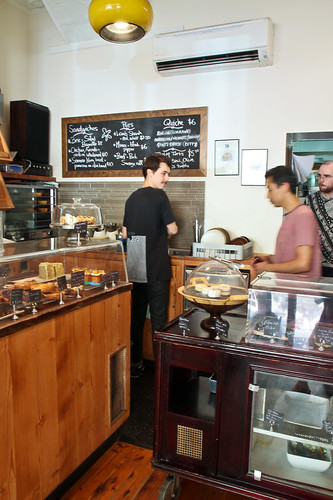
And here's a last look at the interior of the shop. This, together with Zumbo, Gelato Messina (my favorite gelato place), Bourke Street Bakery and Baroque Bistro, are my most-gos in Sydney. Even before I land in Sydney, I've already planned my schedule around heading to these places. And with Zumbo and Gelato Messina now open in The Star Casino, it's so near where I stay that I can't justify not going! 


I've to admit though, for the tourist, Newtown might not be high on the list, especially if you're in Sydney for a few days and you want to hit the touristy attractions However, Newtown's probably about less than half an hour by bus to the city, and it does have its own charms. Many quirky and vintage shops line both sides of King Street, and there's tons of good Vietnamese food, as well as interesting bars. It's definitely a suburb you should check out if you're into alternative culture. So do make a trip down to Newtown (and to Black Star Pastry) if you're in Sydney one day!

Details

Black Star Pastry 
Address: 277 Australia Street, Newtown
Contact: (02) 9557 8656
Opening hours: 7am-5pm, daily. 
Website: http://www.blackstarpastry.com.au/

Price: $$ (starts from $6-$15)

Monday, December 12, 2011

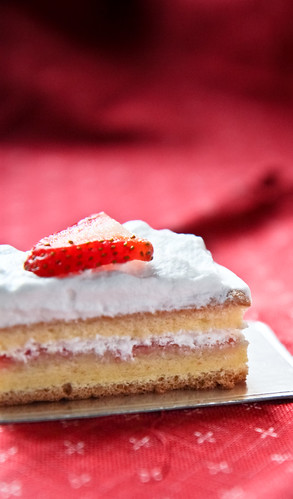
A Simple Japanese Strawberry Shortcake, and My 100th Post Milestone!

I had intended to post this yesterday, but I was utterly wiped out yesterday. This was what I wrote:

Today marks a turning point in my life. In less than 12 hours, I’ll be starting work proper for the first time. No more part-time jobs, holiday attachments, long school holidays or short schooling hours. The real world starts from now on. I’m glad for internships, and I think it’s the main reason why I’m not nervous, because I know what I’m getting in to. 
This post also marks a milestone for this blog too, this is my 100th post! Reaching this 100th post milestone is kind of bittersweet for me too, because 100 posts in a year isn't too many, and this number is just going to get smaller once I start work. Already, my seniors at work are forewarning me of the workload I'll be facing. So. Not. Looking. Forward. :/
Anyway, I had hoped to do a small giveaway to celebrate this 100th post, but I just couldn't find the time to take photos of the things I had in store to give away, because there are a couple of things and as usual, there will be a long prose accompanying the story behind them lol. I thought I would be relatively free this weekend, but ironically, I slept less these past 2 days than while studying for my exams. I guess I was just busy catching up with friends and enjoying life in general. Anyway, I'll try to make time some time soon to bake, and to post a new recipe, but I know life will get in the way. 


Obviously, that being yesterday, I had my first day at work today. I'm so exhausted today, mentally and physically - it's not that I haven't been wearing office wear, but having to wear long sleeved shirts and high heels are a pain, literally. I'm still looking for 'the pair', so if anyone has found theirs, please let me know. I have bought close to (or more than?) 10 pairs of black high heels, trying to find a comfy pair, but all of them have failed me. And to reiterate what I said above, I'm really glad I've worked in the office as an intern before, because like I told Jon, at least I know where the toilets are. Yes, knowing where the toilets are is important to me! The office has an extremely confusing layout, and I got lost today trying to find the library -__-"

Anyway, this has absolutely nothing to do with my strawberry shortcake, except for the fact that I'm craving some right now because the strawberries look so yummy. With the start of work (I managed to get off work early today, so I'm still able to blog), I really wonder if I'll be able to find time to make these again. It's a simple recipe, but has a few components, and I took about 1-2 hours in total, from looking for a recipe, to assembling the ingredients needed, to baking the cake, making the other components and finally assembling and taking photos of the cake. Not a particularly long time, but 2 hours is gonna be real hard to find now that I've to work late and I come home so mentally exhausted. I'm also sorry to admit but I think I still wanna be a student. As much as I loved what I studied, working and applying what I've learnt in real life is so much harder, and taxing :/ Alright, enough of my complaints - here's the recipe :]

I used flash here so I'm sneakily trying to hide the flash hood mark on the bottom of the photograph. 

Japanese Strawberry Shortcake 
Makes an 8-inch 2-layered cake

Components:


For the stabilized whipped cream, 
Adapted from Rachael of La Fuji Mama

1 tsp gelatin (I used 'gold' power powder)
4 tsp cold water
250ml cold heavy whipping cream
30g icing sugar
1/2 tsp vanilla extract

  1. Put all the cold water in a small saucepan and sprinkle the gelatin over the surface. Let it stand for 5 minutes without stirring. Place the saucepan over low heat and stir constantly with a wooden spoon until the gelatin dissolves. Remove the saucepan from the heat and cool to room temperature. 
  2. Combine the whipping cream, sifted icing sugar and vanilla extract. Beat the mixture for a minute before gradually pouring in the cooled gelatin mixture. Continue whipping the mixture at high speed until you get stiff peaks. 

For the simple sugar syrup, 
30g granulated sugar
60g water
1 tsp of your preferred alcohol, or vanilla extract

Combine the sugar and water in a small saucepan and heat the mixture. Stir until all the sugar has dissolved. Allow the mixture to cool a little before stirring in the vanilla extract (or alcohol - I used rum). 


To assemble the cake:
  1. After allowing the sponge cake to cool, slice it horizontally into half. Place the cut-sides facing up. Pour the simple syrup over both sides of the cake, making sure to adequately soak the entire cake slice. 
  2. Slather jam on one side of the cake and whipped cream on the other side - be as generous or as stingy as you want with the proportions. 
  3. Flip the whipped cream side over onto the jam side. Then, with the remaining whipped cream, pipe or spread over the top layer of the cake. I used Michelle's design on the top (but failed miserably) or you could just smoothen the icing all over the cake like Rachael did. Garnish with some strawberries, and you're done!

The below is the photo of my sunken sponge cake (I should have inverted it when cooling - this prevents it from sinking too much) and the one on the right is what I meant by spreading your jam and whipped cream on each side. Read more in my jots below!


Janine's jots: 
  • Taste: As mentioned before, I don't have a particularly sweet tooth, so I went with using strawberry jam (which is quite tart), and a thin layer of whipped cream. Although I would have liked some fresh strawberries in the middle, I don't like a thick layer of whipped cream, so this was a good compromise. I am very stingy with the cream and jam, but that's really because I don't want it too sweet. Feel free to make it as thick as you want! You should double the whipped cream recipe (that's what the other people who used the recipe did) - mine gives a really stingy amount of cream for the middle and top only. 
  • Texture: I love the texture of this sponge cake, and so does my family. And as I have raved countless of times, it is my to-go to cake, for the sole reason that it's so easy to make. It's also forgiving, because sometimes, I dump all the sugar into the egg whites and forgot to put half into the egg yolks, but the cake still turns out okay. 
  • Serving size: The original sponge cake recipe makes a roll cake of 30cmx30cm proportions, so trying to make it an 8-inch square cake (20x20) was kinda stretching it - this is why the cake is rather flat because there just wasn't enough batter. I reckon it would have been the perfect height for a 6-inch pan. 
  • Modifications: My simple sugar syrup recipe is not exactly a simple sugar because it doesn't have the standard proportions. I opted for a 1:2 proportion for the simple fact that I don't like the syrup to be too sweet. I use this for all my assembled cakes and no problems so far!
  • Storage: Separately, the cake and whipped cream store well in the fridge for about a week. However, once assembled, do consume as soon as possible. Nevertheless, the cake does store well in an airtight container for a few days. And if you soak your cake sufficiently, the cake will still remain moist - in fact, the cake might taste of strawberries as well, because the flavor from the jam has had the time to 'diffuse'. 
  • Would I make this again?: Definitely! I have made both the sponge cake numerous times, as well as the stabilized whipped cream in other cake recipes. 
  • Other comments: I suck at decorating, and my diagonal lines were a major fail here because I tried to be smart and used a plastic bag instead of a ziplock bag or piping bag. Obviously the plastic bag (new and clean of course) was too soft and didn't pipe out nice lines. (Yes I'm blaming the tools and not the carpenter ;p) 

I know it looks like a flat cake with horrible icing but it was delicious!

And the nicest photo of the lot :) 

Tuesday, December 6, 2011

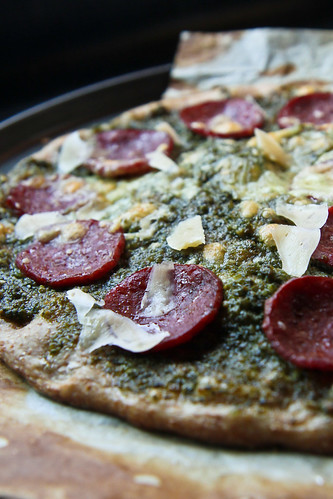
Wholemeal Pizza with Pepperoni and Basil Pesto

Ever since I saw Swee San's Christmas Giveaway post, I've been dying to enter because well, you stand a chance of winning Pantry Magic vouchers! How cool is that? Considering that Pantry Magic in Singapore has closed down and I was a sucker for all their stuff, and knowing the one in Bangsar is huge, I really really really wanted to enter so that I could win hope hehe. 

Anyway, I had many grand ideas as to what green/red thing to make, but suffice to say, time got the better of me. I had wanted to make strawberry macarons, and I did, but I was stubborn and didn't use any red coloring and since the strawberry powder I used just wasn't intense enough, so I got bubblegum-pink macarons instead =X I also wanted something to reflect the theme of Christmas, so I finally decided that pizza would be it. It might be a strange thing to bake to reflect Christmas, but I have fond memories of when my extended family gathered in KL and on the floor under the Christmas tree, were tons and tons of beautifully wrapped presents. I remember us kids would go around the tree and because we were not allowed to touch the gifts before 25th, all we did was to note which present had our names so that once the signal to 'open your presents' was given, we would rush to the tree, grab our presents, and proceed to rip the wrappers off each present in our own spaces. Sadly, as we became older, we didn't like the presents we got and we don't have such a tradition any longer :( Tis a pity really. 

Trying out the 'soft' look here

I have deviated, but anyway, on the dinner table, in addition to the yummy chinese dishes that our mothers and aunties would cook, would be pizza. We would order from the usual delivery company, and as young kids, pizza was the first thing we had (or wanted), well, maybe after the fried chicken or wantons and fries, followed by the meehoon and everything else. I vaguely remember having turkey and ham on some years, but pizza was always there. So using that fond memory of mine, I've decided to glamorize and upgrade the pizza. My favorite used to be plain ol' pepperoni, and as we all know, pizza doughs are typically made of normal white flour. Here, I have 'healthified' the pizza by using a wholemeal crust (which is so much more flavorful) and using the freshest ingredients where possible. I have to admit that if you were to compare the cost of making this pizza (plus the effort and planning required) to picking up the phone and ordering, the latter would be the far easier choice. I spent a bomb getting gourmet Italian spicy pepperoni, a block of parmesan cheese, mozzarella (I stinged here so I didn't get buffalo mozzarella). For the basil pesto, I bought a huge bunch of fresh basil and pine nuts. It is not counting the cost of the good quality Italian olive oil I used in the pizza and pesto. And not forgetting the cost of the organic whole meal flour I used. But hey, it was healthy and yummy, so well worth the splurge :]

For the wholemeal crust, I used a recipe from one of my favorite bread bakers - Peter Reinhart. He's probably the only author whose books I all own. I love the way he writes and how detailed he goes into the science and the whys of bread making. So far, none of the recipes I've tried from his book have failed me. In fact, his pizza napoletana recipe is one of my favorites too, if you want a normal white bread flour pizza base. I also love his cinnamon rolls and bagel recipes! I have to caveat this and say that you really don't need to get all his books because most of the recipes in the books are very very similar, and instructions are very similar as well. If you must, get the "Artisan Bread Every Day", I find instructions in that book the clearest and easiest to understand. 

In order not to violate any copyright restrictions, the recipes below are completely rewritten in my own words (as much as possible anyway). I strongly advise you to get the book if you are interested in wholemeal bread baking, because it really is a very good primer into wholemeal baking. In fact, I've just started my own organic wholemeal sourdough starter, and I hope to post results of it soon. I hope to use the sourdough for the pizza that I'll be making on Christmas this year :]

The cheese was patchy here because I ran out =X

To make the pizza, you will need: 
  • Wholemeal pizza dough (recipe below)
  • Basil pesto sauce (recipe below) or a tomato based sauce 
  • Any other toppings you like - I used the following: 
    • Pepperoni
    • Shredded Mozzarella cheese
    • Shaved Parmesan cheese
    • (not pictured, on another pizza) White onions and portobello mushrooms 

Wholemeal Pizza Dough
Adapted from Peter Reinhart’s Whole Grain Breads
Makes 5 individual sized (about 8-inch) pizzas

One day before you want to make the pizza, prepare the soaker and biga. 

Soaker:
230g whole wheat bread flour 
½ tsp sea salt
200g water

In a container, add water to the whole wheat flour and sea salt. Mix well to combine. Cover it loosely and place in the refrigerator overnight.

Biga:
230g whole wheat flour 
¼ tsp instant yeast
200g water

In a large bowl, combine the flour and yeast with water, mixing until you get a rough ball of dough. Wet your hands slightly with water and knead the dough for about 2 minutes. The dough should feel very tacky but not sticky. Let the dough rest for 5 minutes before kneading it again for another 2 minutes. The dough need not pass the windowpane test but you are aiming for a slightly bouncy, tacky dough. Place the dough in a clean container (large enough for some expansion) and cover tightly. Refrigerate it overnight.

You may refrigerate both the soaker and the biga for a maximum of 3 days. On the day you want to make the pizza, remove the biga and soaker 2 hours before you wish to make the final dough to take off the chill.

Final Dough:

Use all the Biga and Soaker
57g whole wheat flour 
5g salt
1½ tsp rapid-rise yeast
15g sugar
28g olive oil

  1. Remove the biga and soaker 2 hours before. Once they are about room temperature, using a scraper or a knife, roughly chop both doughs together into 12 pieces each. 
  2. Place the dough pieces into a large bowl. Add in the flour, salt, yeast, honey and olive oil to the dough. Wet your hands with water and knead for 5 minutes until all the ingredients are evenly distributed. You may also use a bread machine or a stand mixer with a dough hook to do the mixing. The dough should be slightly sticky and a little soft. 
  3. Flour your work surface generously and roll out the pizza dough on it. Knead the dough for a further 5 minutes, using only as much flour as you need. Let the dough rest for 5 minutes. This allows you to give your arms a rest, although it's mainly to allow the gluten to relax. Knead the dough again for a few minutes until you get a tacky dough. At this point, the dough should pass the windowpane test. Divide the dough into 5 (or more) pieces and form each piece into a tight ball.
  4. Line a baking sheet with parchment paper and oil it with the remaining teaspoon of olive oil. Place the balls on the parchment paper, making sure to roll the balls around to coat them in the olive oil. Cover the baking sheet loosely and allow the dough to rise for about an hour, or until it doubles in size (about 1.5 times is okay as well). 
  5. Preheat the oven to the maximum temperature (I used 220ºC fan forced) and adjust the rack to middle position. 
  6. Place one ball of dough on your floured work surface and using a rolling pin, roll the ball out into a 12-inch diameter disk or your desired size. I rolled the dough to about 8 inches, let it rest for a minute and shrink a little, before using my fingers to further expand the dough to about 10 inches. 
  7. Place the dough onto a lined baking sheet (or pizza stone if you have) and top it with your desired ingredients. I topped it with a generous amount of pesto, followed by pepperoni and mozzarella cheese. On the other pizzas, I added sliced mushrooms and onions as well. Bake for about 10 minutes, or until the cheese is bubbly and golden. Remove from the oven and quickly shave the parmesan cheese onto the pizza. 
  8. Let the pizza cool and rest for about 15 minutes before slicing and serving. 
  9. Repeat steps 6-8 for the remaining balls of dough. 

Basil Pesto 
Adapted from Elise
Makes a cup of pesto, sufficient for all the pizza doughs above. 

2 cups (60g) fresh basil leaves, packed
½ cup (90g) freshly grated Parmesan-Reggiano or Romano cheese
½ cup (100g) extra virgin olive oil
⅓ cup (45g) pine nuts 
3 medium sized garlic cloves
Salt and freshly ground black pepper to taste

Special equipment needed: A food processor or chopper.

Method: 
  1. Peel the garlic and place it in the food processor. Pulse it a few times to mince it. 
  2. Wash the basil and combine it with the pine nuts in the food processor. Pulse them a few times.
  3. Slowly add the olive oil while the food processor is on. You may have to stop to scrape down the sides of the processor with a rubber spatula to ensure all ingredients are evenly blended.
  4. Add the grated cheese and pulse again, until all the ingredients are blended. You can blend longer if you want a smoother paste. I wanted a chunkier paste so I pulsed for less than 15 seconds in total. 
  5. Add a pinch of sea salt and some freshly ground pepper to taste. 

Janine's jots: 
  • Taste: As I mentioned earlier, taste was fantastic. On its own, the pizza dough was so flavorful and so chewy that I literally ate it on its own (as a flatbread) the next day. With the same dough, I also used the traditional tomato version (not pictured because it was all gobbled up), as well as a dessert version (also not pictured because there was none left to photograph - it was a combination of balsamic vinegar, arugula, goat's cheese, figs and honey - a perfect sweet dessert pizza). And yes, I used the exact same ingredients on the dessert pizza as in my salad which I posted earlier. 
  • Texture: I absolutely loved the pizza. It was the right amount of chewy (not too chewy) and you could vary the chewiness through the thickness of the pizza. I made thin crust versions for a crispier base as well as thicker versions with thicker cornicones, which of course were more chewy. 
  • Serving size: The amount of pizzas I got from the recipe was more than enough to feed my family of five. In fact, I had 2 personal sized pizza doughs leftover, which I baked plain for the next day's breakfast. I dipped them in olive oil and balsamic vinegar :]
  • Modifications: I wouldn't change anything about the pizza dough recipe, but I would definitely decrease the amount of olive oil used in the basil pesto because I found it a little too oily for my liking, even though I had decreased the oil in mine to 70g already. You should err on the side of less oil because if you are going to use it on the pizza anyway, you could drizzle some olive oil on top of the pesto if you find it a little too dry. 
  • Storage: You can store the unbaked doughs for up to three days in the fridge, but I would strongly advise you to make all the doughs, and partially bake them, plain, for about 5 minutes in the oven before removing them to cool and storing them in the freezer. You then have readymade wholemeal crusts for whenever you wish to eat pizza!
  • Would I make this again?: Definitely! Although this is the first time I've tried making Peter Reinhart's wholemeal version, this is definitely not my first time making homemade pizza dough. His recipes are my to-go-to for any artisan breads :]


I have to admit that these are not the best photos I've taken, but in my defense, I was very hungry and it was dinner (yes I have dinner at 6plus pm so it's still bright), so there was barely enough time to photograph the pizza before we dug in (although this was the third one after the tomato based pizzas). In fact, I'm surprised the steam was not visible in the pictures because seriously, the pizza was piping hot! Nevertheless, I am submitting this to the Christmas Giveaway in The Sweet Spot. The giveaway closes on 11 December, so you might be a little short of time when you see this post, but do try to join in if you can! Anything green or red will qualify! :]
Related Posts Plugin for WordPress, Blogger...