My blog has moved!

You should be automatically redirected in 6 seconds. If not, visit
http://www.unpastiche.com
and update your bookmarks.

Showing posts with label Cream. Show all posts

Thursday, May 31, 2012

Chocolate Layer Cake with Cream Cheese Frosting

I'm quite a horrible procrastinator. I remember almost a year ago, seeing similar entries on Lena, Zoe and Joyce's blogs, and then realizing that they were doing a small bake-along where all three of them would try the same recipe and post them on the same day. This Bake-Along was very useful for people like me, because I am usually hesitant to try new recipes, but with three different opinions from three bakers saying that X recipe is good, I definitely felt more confident in attempting those recipes.

And I'm pretty sure that this was the experience of many other home bakers as well, who have gradually joined in the bake-along. As for me, well, I'm sure that all three hosts are quite sick of seeing my comments saying that 'I hope to join for the next bake-along', but when the next one comes along, I never do join. So....what better time to join than on their first year anniversary? :]
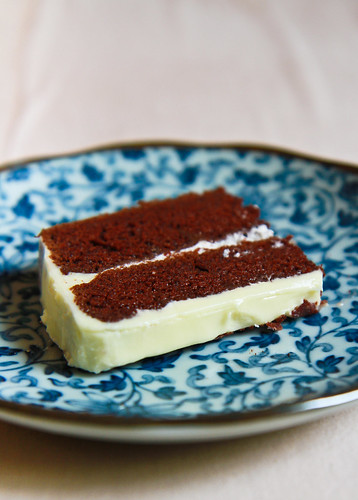
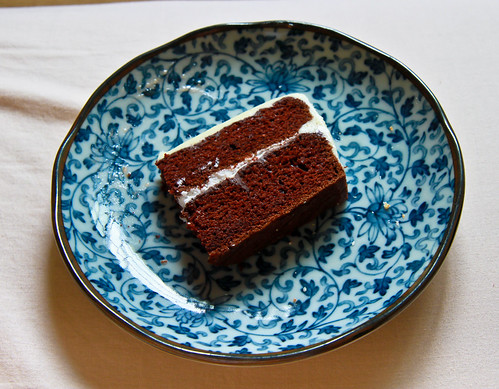
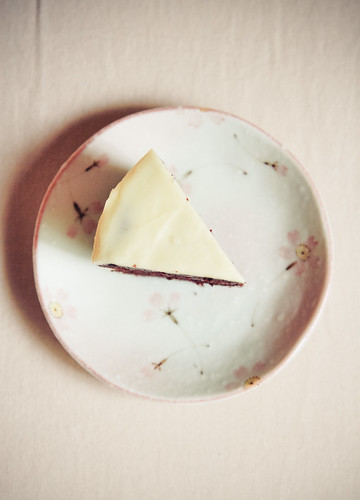
Only one slice was left for the 'photoshoot'

So here's my virgin entry to Bake-Along on their first anniversary and I really hope that I'll be punctual with the upcoming few, because I do love the upcoming ones - crumble and scones, a few of my favorite things to eat! And of course, layered cakes, which is the reason why I'm joining this time. iI love to eat layered cakes, because I love how creative you can get with just mixing and matching the layers and filling, and also because layered cakes are usually celebration cakes, my favorite type of cake to eat :]

So for this chocolate cake, I remember digging it from this treasure trove of chocolate cake recipes I found on the Bon Appétit website, 10 years of chocolate cakes, BUT the problem is that I can't exactly recall which chocolate cake recipe from Bon Appétit actually inspired this recipe, but I'm thinking it should be somewhat similar to this one. In any case, the ingredients and method has been so modified that it doesn't matter. And if you do happen to click on the first link, notice that you will only see ten pictures of chocolate cakes with the year 2000 to 2010 underneath each, but do click on the pictures because that will lead you onto even MORE chocolate cake recipes for that year.

I've been slowly baking my way through the recipes, and the reason why I chose this one below is because it was simple (only one-bowl required) and it didn't require the use of melted chocolate, buttermilk or sour cream, all of which I didn't have. It only requires pantry staples like cocoa powder and milk, which is fantastic for times when you have a chocolate cake craving.

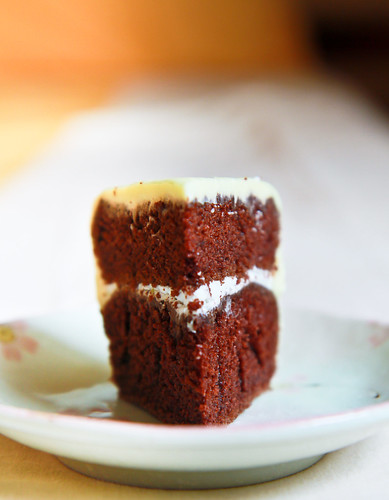
Look at those tight crumbs! YUMMY :]

 
One-bowl Chocolate Cake
Adapted from Bon Appétit
Makes a 6"/15cm cake

For the cake:
120g castor sugar
125g all-purpose flour
35g cocoa powder
1 tsp baking soda
¾ tsp baking powder
½ tsp salt
120ml milk
55g butter, melted
1 tsp vanilla
1 egg

120g boiling water
2 tsp espresso or coffee powder

For the cream cheese frosting:
120g cream cheese
55g butter
85g powdered/icing sugar

Method:
  1. In a cup or bowl, add the coffee powder into the boiling water. Allow it to steep while preparing the other ingredients.
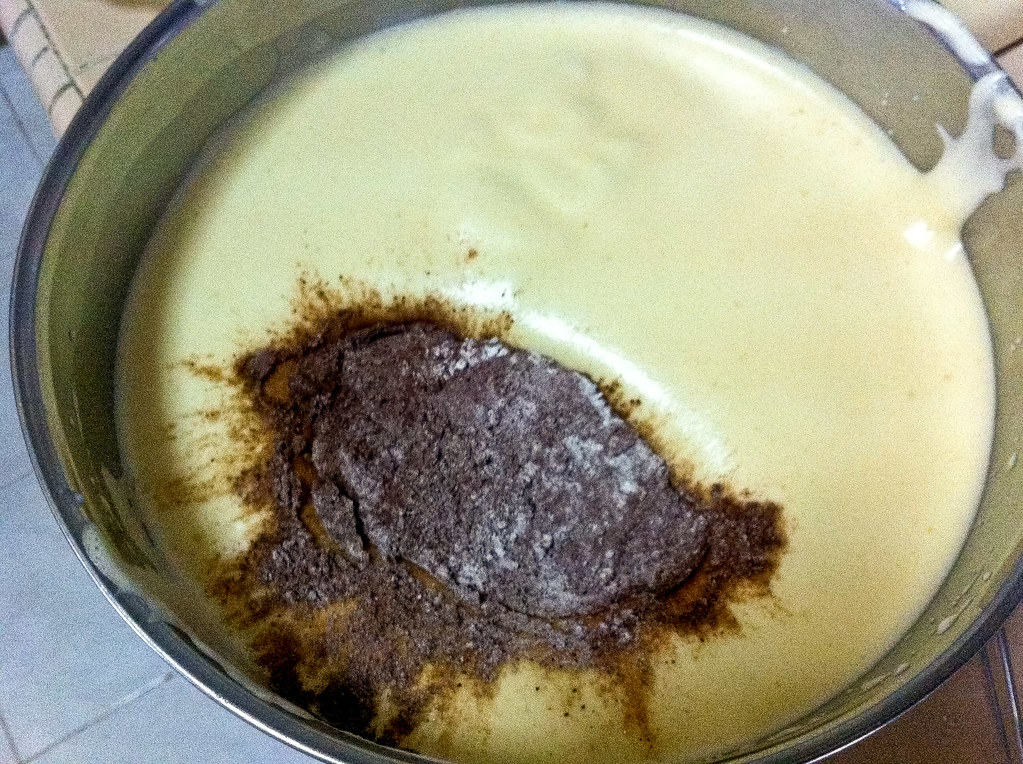
  2. In a large mixing bowl, sift together the flour, cocoa powder, baking powder and baking soda. To that, add in the salt and sugar. 
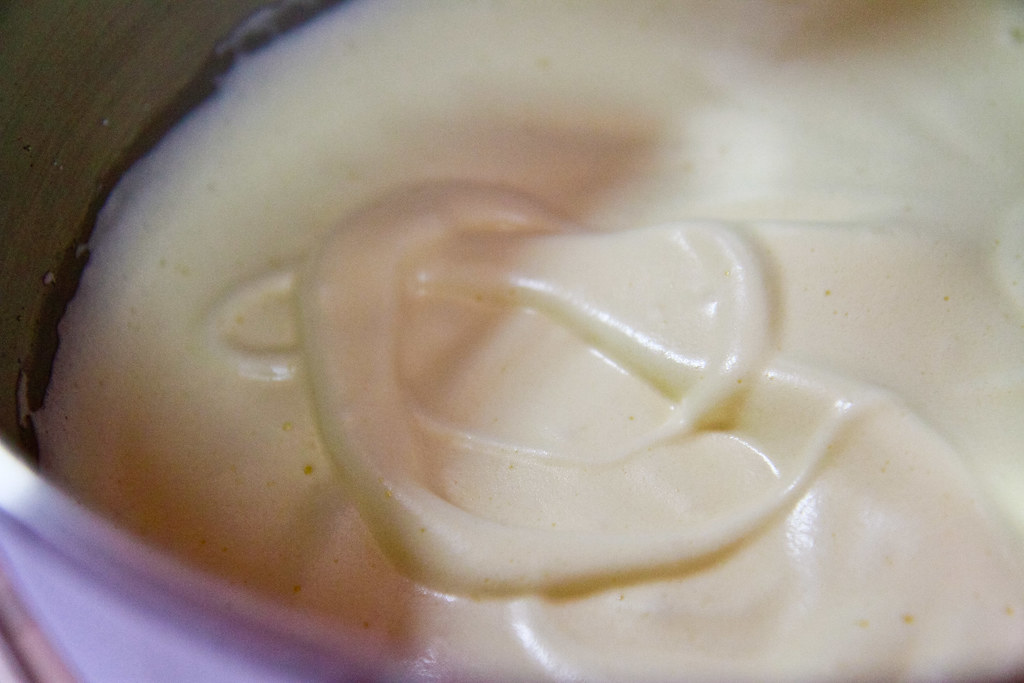
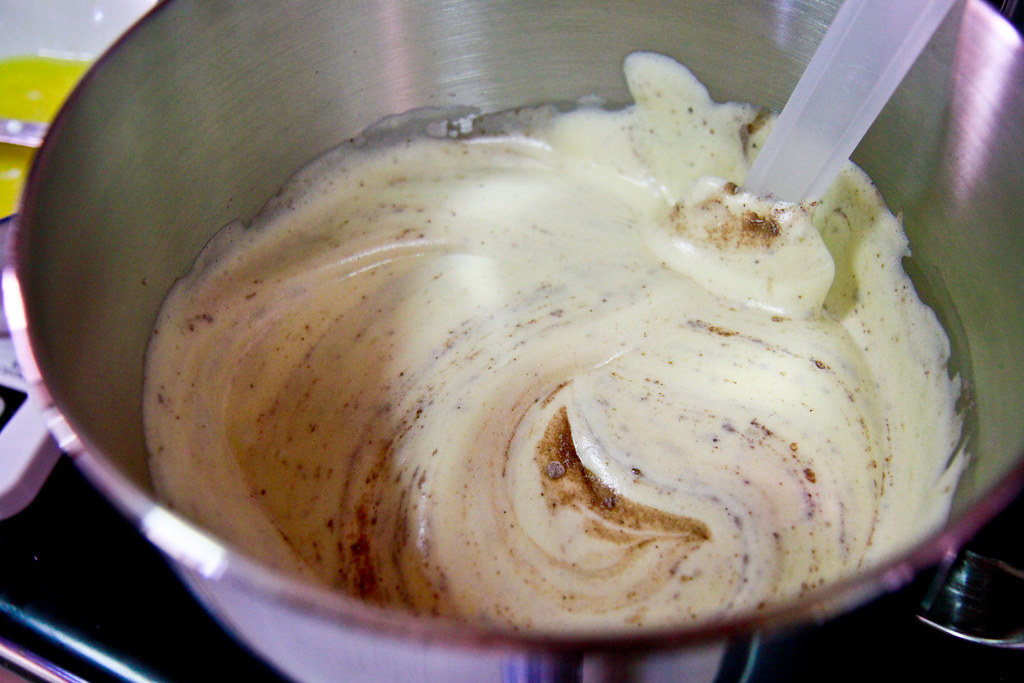
  3. Then, add in your 'wet ingredients', the melted butter, vanilla, milk, egg and the cup of coffee from step 1. Mix together all the ingredients until no visible lumps remain. Pour the batter into a lined or greased 6-inch pan, or a cupcake pan with 8 cupcake liners.
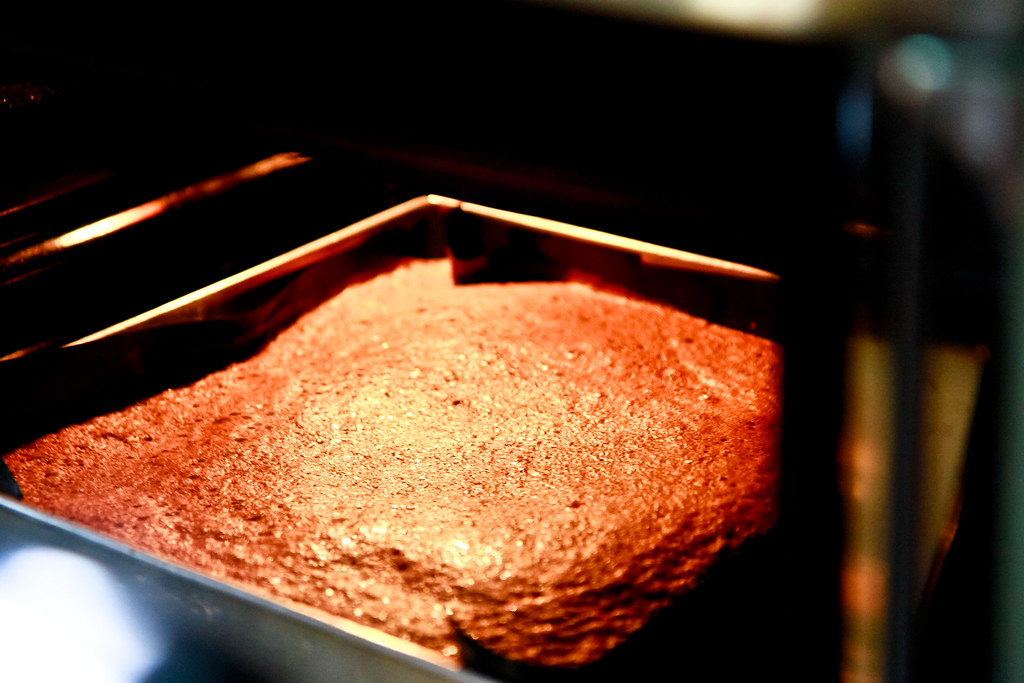
  4. Bake at 160°C for about 30 minutes for the cake, or 20 minutes for the cupcakes. An inserted skewer should come out with almost clean with a few crumbs. Allow the cake to cool in the pan for at least 15 minutes before removing to cool on a cooling rack. You have to wait until the cake is completely cooled before attempting to slice it into two layers.
  5. In the meantime, prepare the cream cheese frosting. The cream cheese and butter should be at room temperature, but should not be too soft. I find that a good estimate is to remove them from the fridge for about 15 minutes before making the frosting. In a mixing bowl, cream the cream cheese and butter with a handheld or stand mixer, or with a wooden spoon. The mixture should appear homogenous in color (butter is slightly yellow and cream cheese is off-white, so these colors should be well-combined together) and once it appears light and fluffy, sift in the icing sugar, making sure to cream well, until all the sugar has been incorporated. If the cream cheese frosting is too 'soft', store it in the fridge while preparing the cake layers.
  6. Once the cake is completely cooled, slice it into half with a serrated knife. Add a thin layer of cream cheese frosting on one side of the layer, before sandwicing the two layers together. Add another layer of frosting on the top and sides of the cake, and refrigerate until firm. The recipe above gives you enough frosting for the 6" inch, but only for a very thin layer of frosting, so if you're a frosting monster and have a sweet tooth, I'd recommend doubling the frosting recipe for a thicker layer all around. Bon Appétit! 

Janine's jots: 
  • Taste: The cocoa powder features very prominently here, so be sure to use good quality cocoa powder, and please don't skimp on the coffee because it does bring the chocolatey-ness up a notch. Trust me.
  • Texture: The cake is moist, and doesn't have overly tender crumbs, which is good in a cake which you want to cut into layers.
  • Serving size: Enough Since it's only a 6" cake, it can only feed about 8 persons, assuming you have a tiny slice each.
  • Modifications: None! Enough have been made!
  • Storage: If unfrosted, the cake freezes very well, for almost a month. If frosted, keep in the refrigerator for not more than one to two weeks because the cake will lose its moistness after that.
  • Would I make this again?: Maybe...not because it's not a good cake, but there's so many other chocolate cake recipes to try! This will definitely be one to-go-to cake, because it's very simple to make, and you will always have the ingredients handy!
So join in for the bake-along! :]
 

Monday, January 2, 2012

Mom's Birthday 4-layered Strawberry Cake with Whipped Cream and Strawberry Jam

Before I begin my long spiel, HAPPY 2012 everyone! And hurray for the long weekend ;p


This post is actually a timed post, because as I speak, I probably am having the time of my life shopping and eating, whilst taking a well-deserved break overseas. Anyway, Christmas weekend came and went rather quickly, and with work and all, I haven’t been taking nice photographs of what I’ve been baking recently. I actually wanted to post about the Christmas log I made this year, but I didn't have my camera with me when we had it for tea, so :(

I know I was contemplative the last post, but thinking back on that last Christmas log and eating my current one really makes me very very proud at how much I’ve progressed as a baker. In fact, I think I've come full circle nicely, because this Christmas log cake was probably the first proper cake I made myself, with a new recipe, with the untested oven and with my new mixer. Thinking back, it certainly was horrible and the people must have been lying through their teeth when they told me it was nice. I remember the dense layer at the bottom of the cake, and at that time, I didn’t know what it was caused by. Now, I know so much better, that the dense layer is caused by overmixing of the batter and deflation of the egg whites. I cringe when I think about those guests eating the cake with that dense layer.


So anyway, since this year's log cake was made with my favorite sponge cake recipe and with equally delicious whipped cream and chocolate ganache, it was tons better than last year. My family, my harshest critics, enjoyed it immensely :] Since I don’t have a nice photograph of the Christmas log cake, I’ve decided to blog about my mother’s birthday cake instead. It’s made from the same cake base as the Christmas log cake and perhaps half of the cake recipes on this blog. I know I’ve blogged about this sponge cake time and time again, but it really is my favourite cake. This is not something I write about lightly, because if you could see the countless swiss rolls and sponge cakes that my dogs ate during the time I was experimenting with various recipes, you’d be alarmed.


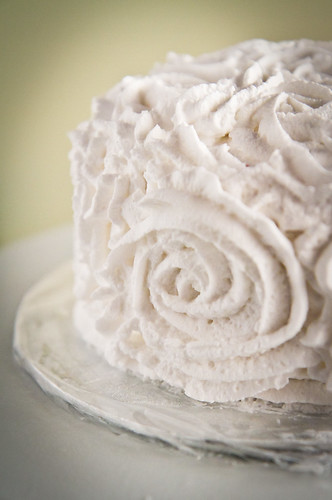
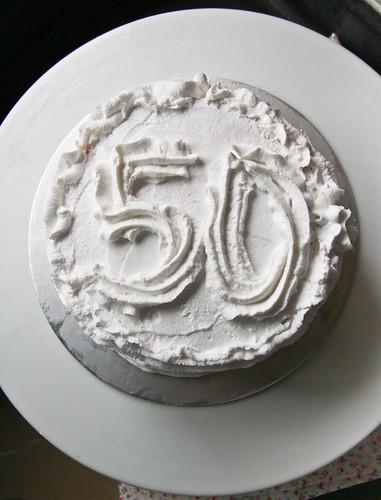
Here, I've slathered on whipped cream and jam in between the cake slices, as well as brushed each slice with sugar syrup. After that, I crumb coated the cake with a thin layer of whipped cream, then proceeded to decorate it. Be sure to refrigerate the cake for at least an hour after you're done because it allows the jam and alcohol laced syrup to meld into the layers. If you notice, I fiddled with 2 different designs for the cake. I initially wanted it to be covered with roses, but the roses didn't turn out too good because I doubt whipped cream is suitable. Buttercream would be far smoother and give better results. So I 'erased' the roses off and decided to go with simple ruffles at the side and a huge "50" on the top, because my mom turned half a century old!


Alright, so here’s the recipe again for those too lazy to refer to my older posts!


Strawberry Sponge Cake
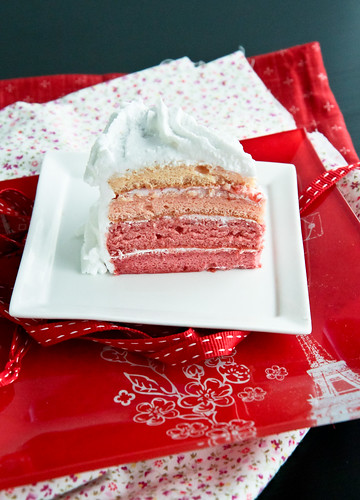
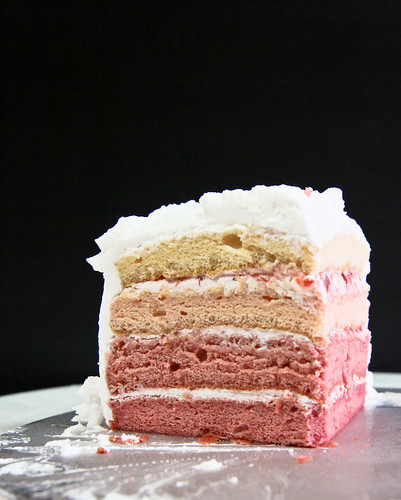
Not sure why the cake looks greenish here :/

Components: 
  • 4 sponge cake layers 
  • Simple sugar syrup
  • Stabilized whipped cream 
  • Strawberry jam (I used my strawberry-apple jam)

To make 1 layer of sponge cake:
2       large eggs 
30g   castor sugar
20g   all-purpose flour

Strawberry powder (dried strawberries processed into powder form)
1 tsp red coloring (optional)


Method: 
  1. Separate the egg whites from the yolks. 
  2. In a bowl, whisk half of the sugar into the yolks. Sift in the flour and strawberry powder, stirring until you get a smooth paste. Add in the red coloring if using. 
  3. In another bowl, whip up the egg whites until foamy, before adding the remaining half of sugar. Continue whipping until you get shiny, stiff peaks. Mix some of the egg whites into the yolk mixture to lighten it up before folding the remaining whipped egg whites into the yolk mixture. 
  4. Pour into a lined baking tray and rap the tray against the counter to get rid of any air bubbles. Bake in a preheated oven at 180°C for 10 minutes. 
  5. Leave the cake to cool in the tray for about 10 minutes before placing it on the cooling rack. 

For the stabilized whipped cream, 

1 tsp gelatin 
4 tsp cold water
250ml cold heavy whipping cream
30g icing sugar
1/2 tsp vanilla extract

  1. Put all the cold water in a small saucepan and sprinkle the gelatin over the surface. Let it stand for 5 minutes without stirring. Place the saucepan over low heat and stir constantly with a wooden spoon until the gelatin dissolves. Remove the saucepan from the heat and cool to room temperature. 
  2. Combine the whipping cream, sifted icing sugar and vanilla extract. Beat the mixture for a minute before gradually pouring in the cooled gelatin mixture. Continue whipping the mixture at high speed until you get stiff peaks. 

For the simple sugar syrup, 
30g granulated sugar
60g water
1 tsp of your preferred alcohol, or vanilla extract

Combine the sugar and water in a small saucepan and heat the mixture. Stir until all the sugar has dissolved. Allow the mixture to cool a little before stirring in the vanilla extract (or alcohol - I used rum). 


To assemble: 
  1. If baking as sheets, cut out 6-inch circles from the cake sheets. You will be able to cut 2 6-inch circles from the 2 sheets and get quite a bit of excess cake. 
  2. Brush the cooled sugar syrup on each layer. Be sure to brush on both sides of the cake. 
  3. Spread a thin layer of jam on each layer of the cake, followed by a thin layer of whipped cream. 
  4. Stack all the layers together and begin spreading whipped cream in a thin layer on the outside of the cake. This will be your crumb coat. Place the cake in the freezer for about 15 minutes before removing to decorate the cake. Alternatively, you can chill the cake for an hour until the crumb coat has set (i.e. the whipped cream is slightly stiffer) and proceed to decorate as desired. 


Janine's jots: 
  • Note: To get the color gradient, substitute the all-purpose flour for strawberry powder, using a maximum of 15g all-purpose flour and 10g strawberry flour. Also use some red coloring for a more intense red color. For the first two layers, I didn't use any red coloring, merely using strawberry powder to get the red-ness. I made 4x of the batter above, then used my estimation to divide the batter into 4. This perhaps explains why the layers are not too even and the bottom 2 layers are actually almost the same color :/ 
  • Taste & Texture:  I absolutely adore this cake because it's so easy to make. My family loves it too. Just a tiny caveat - this cake is quite ‘spongy’ when it comes out of the oven and tastes pretty eggy without any addition of flavouring, but this is easily amended with the addition of vanilla extract or any other flavouring you desire. 
  • Serving size: This makes a 4 layered 6-inch cake, which serves a family of 5 perfectly for a heavy tea (about 1.5-2 slices per person depending on how large each slice is cut). My family is not a fan of icing or cream, hence the very thin layers of cream between the cakes and on the outside. If you love whipped cream, be sure to double the recipe and be generous!
  • Modifications: You can choose to bake them as sheets, which will take about 10 minutes to bake up - if you touch the top, it’ll be slightly moist and may stick to your finger. So just test with a cake tester and if it comes out dry then the cake is done. You can also choose to bake them in round or rectangular pans and later slice them in half. That works as well. Just increase the baking time to about 20-30 minutes for an 8” round pan.
  • Storage: The cake stores well in the fridge, covered. If you are serving the cake right away, you can choose to forgo the sugar syrup, but I highly recommend using it because it gives you a far moister cake. The syrup also ensures that your cake stays moist in the fridge! 
  • Would I make this again?: Definitely! You might actually realize that this recipe is almost identical to my strawberry shortcake posted a while back - with virtually the same components!


With that, I end 2011 with what I term “a blast” in my own books. As I usher in the New Year, I fervently hope that I will still be able to find time to blog and post recipes to share with you readers. And I’m hoping to come back with a few goodies from my trip to share with you, to celebrate my first year blogiversary with :] 2012 is the start of many new things for me, so here's to many wonderful things ahead!

Wednesday, October 26, 2011

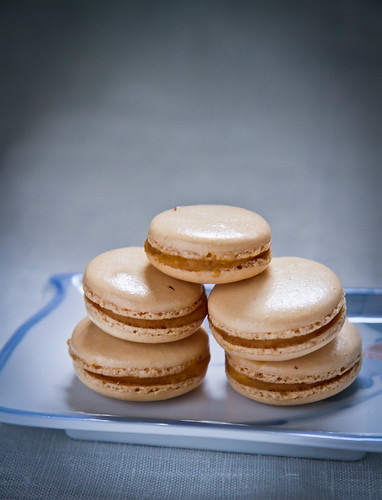
Pink Salted Caramel Macarons for Breast Cancer Awareness Month

This post has been long in the making. Like 8 months kinda long. Ever since my first post on macarons more than half a year ago, I've been making macarons on and off, experiencing more failures than successes. I'm experimented with technique, temperature, equipment, ingredients and a whole lot of other variables, and have come to the conclusion that macarons are indeed iffy little creatures and having a humid and cramped kitchen to work in is definitely not the most ideal of places. I say this with a caveat of course, since I know that bakers in similar situations have churned out beautiful macarons but let's face it - you do get better results if you work in an air-conditioned (or low humidity) environment. Also, let's just say that I impose exacting standards on myself and even the 'successful' macarons you see below still don't pass muster in my books - the feet are a tad too short and the tops are not flat and shiny enough.


I'm still experimenting with different recipes (you might say, just stick to a darn recipe girl! But I'm fickle minded that way), and am still determined to get my french meringue technique right - I'm still in the process of tweaking the different variables to see where I'm going wrong.

Like I mentioned previously, I tried making macarons using the french method for a consecutive five times, and each time, the macarons turned out feet less. I was so dejected and disappointed - at that point, I knew that I had to turn to the italian meringue, which had given me results on my first attempt. And to that I turned, and it did give me results as promised. You might query why the hesitation in using a successful method? Well, for one, I find the steps tedious, and you do need a candy thermometer in order to make the italian meringue and second, I really wanted to get my french meringue method right. Suffice to say, after having successful macarons with the italian meringue, I have given up on making macarons for a while and have focussed instead of using up those macaron shells. Once I've cleared my fridge of all those shells, it'll be back to more macaron experiments for me!

For those interested, these are what my failures looked like:- volcano and cracked tops as well as undercooked bottoms for some.


***
After reading MANY troubleshooting posts (see Not so Humble PieMiso Hungry, Duncan, Vivian for some imminent examples) on why my macarons turn out the way that they do, I have concluded that it was a combination of several factors, including:

1. Not allowing the 'crust' to develop sufficiently, hence the mega cracks
2. Too humid weather and too high baking temperatures (see this useful post by Silvia and Ivan on dehumidifying)
3. Over folding the batter.


Check out the difference in the bottoms of the macs - the left ones are using a generic silicone mat and the right ones are made using baking paper. 

***

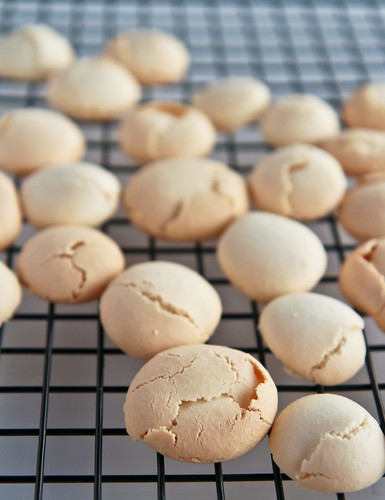
Nevertheless, I was sick of getting failures, so I escaped by using the italian meringue method (yes I'm escapist) and I ended up with this bunch of macarons you see here:

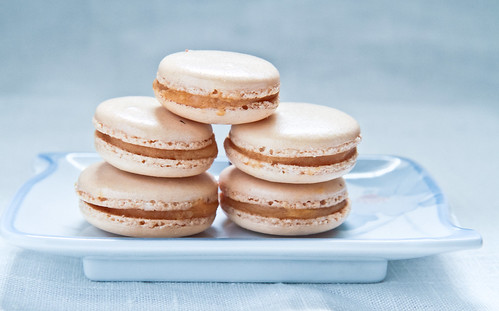
Finally, some successful macarons.

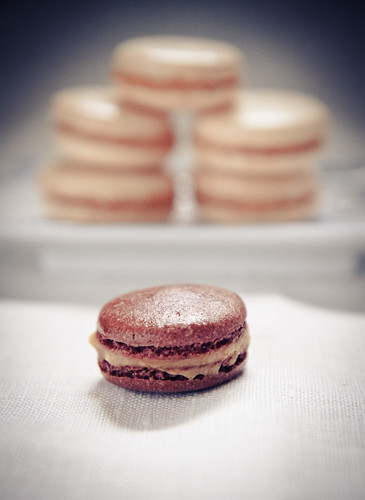
Macarons with relatively smooth shells but super tiny feet. Well, at least they had feet right? And strangely enough, I ended up with salmon pink macarons, even though I used brown coloring. I thought, hey, that might just be serendipity, since I was dying to come up with macarons to qualify for this month's Mactweets Mac Attack Challenge #24, Pink October Macarons. For those not in the know, Mactweets is a monthly macaron challenge started by Jamie and Deeba, both of whom have wonderfully written blogs. This month's Mactweets is special, because it is the second time they are supporting a wonderful cause, since October is also Breast Cancer Awareness Month. I was actually hoping to have some failures which looked like breasts (i.e., those with nipples), but as fate would have it, I didn't get that particular type of maca-fails. So normal pink macarons it is!

I've been wanting to talk about Breast Cancer Awareness this entire month, but time just seems to have passed me by and all my pink-related bakes weren't successful enough to be blogged about. Anyway, I'm at that age where the idea of having breast cancer seems foreign, but I've come to realize that although the risk of getting breast cancer increases with age, being young doesn't mean there is no risk. Women as young as in their early twenties have been diagnosed with breast cancer! I know that many older women have the mentality that this can't happen to me (a friend of my auntie was diagnosed recently and she was in denial, refusing treatment for months before she got some sense knocked into her) - but it does and can happen to ANY of you, male or female! Yes, it does occur in males, though less than 1% of the population. And you can help yourself by doing your own self-examination, and going for a mammogram, especially if you're 40 years or older. Early detection does save lives! I mean, come on - self examinations are free and it costs $50 to go for a mammogram in Singapore. For more information, especially for people in Singapore, please do check out the Breast Cancer Foundation website, where you can get information about breast self examination and other useful information related to breast cancer!

So, if you're female, give yourself some self-love today (terrible pun to tie in the photo below, I'm sorry), and do a self-check to reassure yourself that you're breast cancer free! :]


Alrighty, and back to my macarons. I shall be providing you with Pierre Herme's Italian Meringue recipe, which I translated from his Macarons book which I have in French (yes, the English version was just released). I also used his recipe for caramel fleur de sel (salted caramel buttercream filling), which was awesome (as usual). Because I upped the saltiness a little, the filling matched the sweet shells perfectly. 

Macarons with Salted Caramel Buttercream, using the Italian Meringue Method

For the Macarons
150g   ground almonds
150g   icing sugar
55g     egg whites
1 tsp   egg yellow food coloring (I used 2 drops brown coloring)

115g   castor sugar
40g     mineral water
55g     egg whites

Method: 
  1. At least a day (24 hours) before attempting the macarons, separate the egg whites from the yolks and let them rest in the fridge (it is too humid and hot here for them to rest on the counter for more than a few hours) to age and 'liquefy' (in the master's words). 
  2. Sift the icing sugar and ground almonds individually to get rid of the large lumps. Then, sift the icing sugar TOGETHER with the ground almonds. This is known as your "tant-pour-tant" (literally, so much for so much or equal parts). Mix in the food coloring into the first 55g of egg whites. Then, combine these colored egg whites into your tant-pour-tant. Mix well and leave this aside. 
  3. For the remaining 55g of egg whites, place it in a clean mixing bowl. Next, heat the castor sugar and water in a saucepan over a medium heat. Do use a candy thermometer - allow the mixture to boil until it reads 118°C. However, once the syrup reaches the 115°C mark, start whisking the egg whites. The sugar syrup should read 118°C just as the egg whites reach a soft peak (the timing is pretty accurate). Pour the sugar syrup down the sides of the bowl and continue whisking the egg whites until you achieve a stiff peak. The egg whites should read about 50°C when stiff peaks are achieved. 
  4. Fold in the egg whites in 3 additions into your tant-pour-tant mixture, gently folding the batter until it is glossy and 'flows like magma'. I generally use the indicator of how long a fold takes to 'dissolve into itself' - about 15 to 20 seconds to check if my batter is ready. 
  5. Pour the batter into a pastry bag filled with a plain tip (about 10-15mm in diameter should be just right) and begin piping the mixture into circles of about 3cm in diameter onto your baking sheets lined with parchment paper. If you have problems piping evenly sized shells, do print out a template or you can trace out 3.5cm rounds on the back of your parchment paper. Since the shells will spread out a little, do pipe the shells a little smaller than the circles you have drawn. Leave a 2cm space in between each shell. After you are done piping, rap the baking sheet against your work surface to ensure that there are no air bubbles trapped in the shells. 
  6. Allow the shells to develop a 'crust' - this crust is simply a skin that ensures that the shell will not stick to your finger. It literally feels like a thin membrane. For a humid environment like Singapore, try to work in an air-conditioned environment or you can place the shells in front of a fan. My shells took about 1 hour to develop a crust.
  7. Preheat the oven to 160°C (some recommend 180°C but I find that 160°C works best for my oven). Place the tray in the middle rack of the oven and bake for 12-15 minutes. At the 5th minute, the feet should have developed. At the 8th and 11th minute, do open the oven door a little to release the build up of steam. If your macaron shells start to brown, your shells are overcooked. What I do is to remove the tray from the oven at the 12th minute and flip one shell over to check if it adheres to the baking paper. If it does, put the tray back to bake for a few more minutes; if not, the shells are done. 
  8. Once out of the oven, remove the shells from the baking sheet (still on the parchment sheet) and allow them to cool on a cooling rack. This will ensure that the shells don't continue to cook on the hot baking sheet. Once the shells are cool enough to handle, remove them carefully from the parchment sheet (ideally they should not stick at all) and pair them up. 
  9. Fill the shells with your desired filling and store in the refrigerator for at least 24-48 hours before consuming, to allow for an 'osmosis' of the buttercream to the shells. 

For the salted caramel buttercream filling
100g sugar
115g whipping cream
15g butter 

1 tsp fleur de sel, or any sea salt. 
70g butter, softened. 

Method: 
  1. Add half of the sugar to a saucepan and allow it to melt before adding the remaining half of the sugar. Do not stir the mixture and allow all the sugar to melt to a amber color. 
  2. At the same time, bring the cream to a simmer. 
  3. Once the sugar has turned a dark amber color, remove from heat and add the first 15g of butter. Stir quickly and be careful as the mixture might splatter. Then, add in the cream which has been simmering and stir quickly to incorporate. 
  4. Put the saucepan back onto a medium heat and allow it to boil until it reads 108°C on the candy thermometer. Pour the mixture into a heatproof dish to stop the mixture from cooking and allow it to cool. 
  5. Once the caramel mixture has cooled, stir in the sea salt, making sure it dissolves. Begin beating the softened 70g of butter for about 5-10 minutes, or until it becomes soft and fluffy. Add in the cooled caramel mixture in two additions, making sure that the caramel is fully incorporated into the fluffy butter. Place the mixture into a piping bag and your salted caramel buttercream is ready to be piped!


Janine's jots: 
  • Note: Veron from Kitchen Musings has this delightful series on Macarons which you should read - more relevantly, her comments on Pierre Herme's italian meringue method here come in handy should you wish to attempt this recipe. For a photo tutorial, do check out Edd's post for this exact same recipe. If you wish to look at local bloggers attempting the italian meringue method, do check out Swee San's step-by-step tutorial for Wendy, both of whom had beautiful macarons with frilly skirts :]
  • Taste: I enjoyed the saltiness of the caramel but it might be a tad salty for people unused to the taste of sea salt. I would recommend starting with half a teaspoon and working your way up through tasting (you can do that with the cooled caramel). The sweetness of the macaron shells were thus countered with the salted caramel. 
  • Texture: For the best experience, DO allow the filled macarons to rest in the fridge for at least a day or two, because the part of the shell in contact with the buttercream yields more easily and this gives you a crisp and chewy mouthfeel, the hallmarks of a good macaron. 
  • Serving size: I halved both the macaron shells and buttercream recipe, so that I got a smaller number of shells (about 30 pairs). 
  • Modifications: I didn't get my hands on salted french butter or creme fraiche, so I changed that to normal unsalted butter but used instead an extra teaspoon of sea salt to adjust the saltiness to my liking. Creme fraiche was substituted with whipping cream as well. I did reduce the sugar in the sugar syrup by quite a fair bit - the original calls for 150g of sugar and 37.5g of water but I found that reducing the sugar a little worked as well. 
  • Storage: The macarons keep extremely well in the refrigerator - you can even freeze them for a month, but note that the shells will soften and lose its crispiness. 
  • Would I make this again?: Definitely! The italian meringue method requires much more work than the french, but it promises results each time, so I know which recipe to turn to when I have a macaron craving! However, I intend to tweak the recipe a little to see if I can use less sugar for the sugar syrup in order to reduce the sweetness of the shells. 

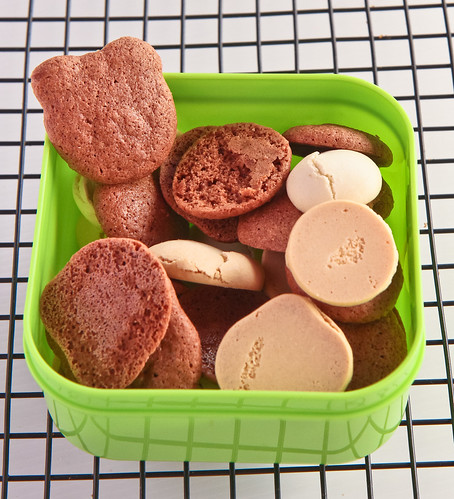
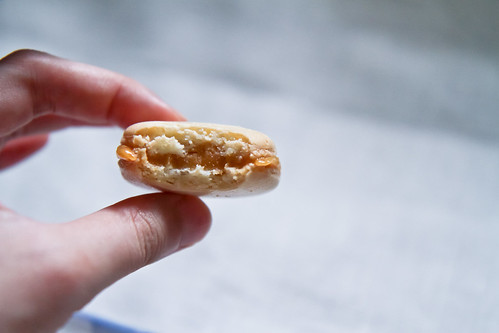
Well, I had ONE successful chocolate macaron from the batch of chocolate failures.
The texture of the shells were pretty good - slightly crispy with a chewy interior. There are also no visible air pockets whee! :]

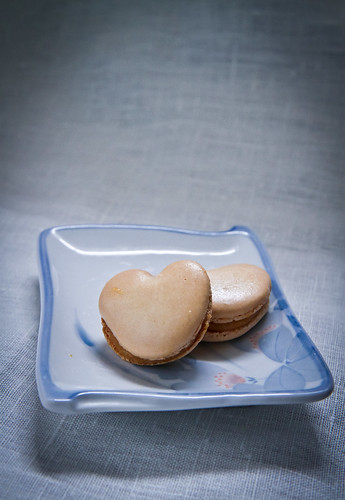
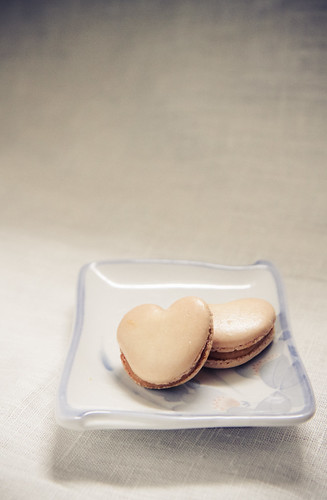
Alright, this post is getting a tad long, so I shall end with a final picture of some heart-shaped macarons I attempted. As you can see, I'm still quite bad at filling the macarons, but I try! ;p

Till my next macaron adventure!

Playing around with colors. I quite like the washed out look here. What say you?

Sunday, October 16, 2011

Price Comparison of [some] Baking Ingredients in Baking Supplies Shops across Singapore

When I first posted THIS list of baking supplies stores in Singapore, I never imagined that it would be one of the most popular posts on this blog. I'm happy that it is, because it means that my list is of use to other people who may be on the search of certain baking products/goods/ingredients in certain places. Do check out the updated list - I've updated it with some additional places, as well as included the opening hours of all the places. 

Just a tiny grouse - I've seen some similar lists on other blogs (who I shall not name) who have posted similar lists - while I understand that there are only that many places in Singapore selling baking ingredients, and that such information is easily available on the www, time and effort was spent to collate the list, so it would be highly appreciated if credit is given where it is due. 

Okay, gripes aside, I thought that the list should be supplemented with additional information which I personally find helpful - mainly price comparisons for a few common ingredients. As I've said before - I'm a very 'cheapo' person - I like to think of myself as thrifty though. I like to survey prices and I like to think about buying something for some time before actually buying (though I give in to impulse buys more often than not). I have this tiny note in my phone which records the prices of certain ingredients in certain places, so that I know how much it is and if it really is on promotion (some stores have this gimmick of putting an item on offer when really it is the same price :/ ).

So for this list, I decided to use ingredients that I usually purchase, which actually are ingredients that most recipes will require - butter, other dairy products, cocoa powder and chocolate. Flour, sugar and eggs are the other typical contenders, but since these are largely the same everywhere, I've left them out. I've also included almonds and baking mats in the comparison below, just for fun and because I thought it might be useful to others as well. I still remember back when I first started baking (late last year), I spent so much time visiting each and every shop, surveying prices and jotting them down in my phone. These prices are updated as of October 2011, and should be the prices you'll see when you visit the stores yourself. 

These are the lucky seven ingredients I've decided to start with, but I'll probably list more as time goes on. I already have a number of other information in mind to post and share with you guys.

Again, please note that I am not paid by any of the shops below to do any (secret/stealth) promotion or advertisement, and these prices are the result of an extensive market survey conducted over months after my numerous visits to these places to hunt for the best prices and ingredients. 

***

Valrhona chocolate 
Some might wonder, what on earth is this Valrhona which bloggers rave about now and then? Well, it actually used to be a small chocolate producing company in the Lyon area of France, but since then, they have grown to become one of the leading producers of chocolate in the world. Renowned pastry chefs and chocolatiers from around the world use Valrhona (which is the result of pretty good marketing in my opinion) and they also sponsor many chocolate competitions around the world.

I especially remember an episode of Adriano Zumbo's short documentary where he says that he went to the factory in France to specially make his own chocolate [ETA: it appears that I must have remembered wrongly, because I read that he is loyal to Cacao Barry.] (by that he means choosing where the chocolate comes from as well as the % of chocolate and type of bean). For those still in the dark, chocolate, like vanilla pods, is highly affected by where it is being grown - so a Criollo cocoa bean grown in Tanzania compared with another grown in Madagascar might produce chocolate with different 'notes' and aromatics. How cool huh! This is especially evident if you taste-test the chocolate all at the same time. I did it with a few chocolates and oh my, in some chocolates you can even taste honey! My pastry god, Pierre Herme also swears by Valrhona of course :p

The next question that comes to mind now is, where can I get this widely raved about chocolate? Well, I believe the below is a comprehensive list of shops which sell Valrhona in Singapore.

Prices for Valrhona cocoa powder:
  • BIY - $39.80 for 1kg (no smaller quantities)
  • Kitchen Capers - $4.20 for 80g, $34 for 1kg
  • Shermay's Cooking School - $9.95 for 200g, $18.90 for 400g (but they frequently have 20% off)
  • Sun Lik - $8.50 for 250g, $16 for 500g 
  • ToTT (under Euraco Fine Foods Store) - $90 for 3kg (no smaller quantities)

Please note that I'm not paid by any of the stores I've listed above (I wish!), but as you can see, Sun Lik sells Valrhona cocoa powder for the cheapest if you are buying in small quantities. So now you know where to get your Valrhona fix in Singapore! This is of course, subject to many other factors, like where on the island you live and how convenient it is for you to get to these places. Only Kitchen Capers is located in the East, BIY and ToTT are both located along Bukit Timah (but at least a 10 minute car-ride apart), Shermay is in Chip Bee Gardens, which is opposite Holland Village, and Sun Lik is opposite Raffles hotel, near Bras Brasah. Btw, nowhere in Johor is it being sold (trust me I've checked). 

When reading recipes, you might also encounter the phrase "dutch-processed cocoa powder" and wonder what in the world is it? Well, David Lebovitz has a really good FAQ - simply put, dutch-processed cocoa powder is less acidic. It is also known as an alkalized unsweetened cocoa powder, and since it's neutral, you'll need to use it alongside baking powder. Brands of natural cocoa powder include Nestle and Hershey's, Ghirardelli, and most other American brands of cocoa powder. Most European cocoa powders are Dutch-processed, so Valrhona and the rest I've listed below are usually Dutch-processed. Just keep a lookout for the words "natural" on the packaging - if it is natural, it's not dutch-processed, and vice-versa. Joy of Cooking provides a substitution between dutch-processed and natural cocoa but I haven't tried it out myself.

The below list is an almost comprehensive list of the types of cocoa powder available in Singapore. You will notice that like Valrhona, the Belgian cocoa powders cost quite a bit too - remember: you get what you pay for!

Other types of cocoa powder available in Singapore
  1. Brandless cocoa powder (from Malaysia)
    • Phoon Huat - $4.10 for 250g
    • Sun Lik - $1.50 for 100g, $5.50 for 500g, $10.50 for 1kg
  2. Van Houten cocoa powder
    • Mustafa - $7 for 250g 
    • Sun Lik - $3.60 for 125g, $6.50 for 250g, $10.50 for 1kg
    • NTUC/Cold Storage - $5.75 for 250g
    • (for comparison) in any Jusco supermarket in JB - RM7.50 for 125g, RM13.50 for 250g
  3. Hershey's Cocoa Powder (226g carton)
    • Kitchen Capers - $6.85
    • Mustafa - $5.90 
    • NTUC - $6.62 
    • Cold Storage - $8.60 
    • Sun Lik - $7.30 
    • (for comparison) in any Jusco supermarket in JB - RM16.90 for 125g
  4. Cacao Barry 
    • This is a Belgian chocolate which similarly has a wide range of chocolate and cocoa products. I first encountered them in Belgium with their cocoa nibs and they're good!
    • Kitchen Capers - $3.50 for 80g or $25 for 1kg
    • Delicia - $20 for a 1kg pack 
    • (for comparison) in Perling Indah in JB - RM58 for 1kg 
  5. Belcolade 
    • CocoaOrient - $37.50 for a 3kg pack of Premium Dutch Cocoa Powder (but you must buy a carton which contains 2 3kg packs - i.e., $75 for 6kg)
  6. Nestle 
    • Not available in Singapore, but I bought a can in Australia for about A$4 - it tastes better than Hershey's in my opinion but not as complex as Valrhona!

***


Bittersweet chocolate (70%)
As I have alluded to earlier, not only are there different brands of chocolate available in the market, these chocolates have varying percentages of cocoa solids as well. Basically, the chocolate bars you see are actually a combination of cocoa beans, cocoa butter and sugar (mainly). So the percentages you see refer to the amount/percentage of cocoa solid (beans) within that block of chocolate.

For the purposes of price comparison, I have decided on the 70% chocolate, which I often buy because of its bittersweet qualities. I find it the most value for money, because if you want a bittersweet chocolate, you can just use the chocolate by itself, but should you want a semi-sweet type of chocolate, you can combine this with a chocolate with a lower percentage (say 40% or even a milk chocolate) and you'll get a semi-sweet combination easily.

The 70% chocolate (Guanaja) is available at 
  • BIY - $27 for 500g (only 1 size)
  • Kitchen Capers - $40 per 1kg block, $106 for 3kg. 
  • Sun Lik - $14 for 300g (couvertures), $40 for the 1kg block
  • ToTT - $114 for 3kg (only 1 size)
  • Shermay's - $12.95 for 250g, $24.90 for 500g

Cacao Barry also has a 65% Madagascar chocolate, which Kitchen Capers sells at $8.30 for 200g and the 76% Equateur Chocolate which retails at $33.80 per kg. Another place that sells Cacao Barry is Delicia, an online retailer which I found through googling. They sell the 76% Equateur for $26, which is substantially cheaper than KC, but note that you have to pay for delivery charges (not sure how much though?) unless you have a minimum order of $160. Sun Lik has the 70% Cacao Barry at $8 for 250g pack and $29.80 for the 1kg original pack.

Callebaut has a 70.4% dark bittersweet chocolate, which retails at Sun Lik at $7 for a 250g packet.

ToTT also sells another brand, Belcolade, another type of Belgian chocolate which they sell for $25.20 for a 1kg pack. The cocoa content for the bitter chocolate is 71%. If you want this same brand for cheaper, you can head down to Admiralty, to CocoaOrient, which sells it for $17.50 for the same 1kg pack. They are a wholesaler, but I called to ask if they sell to walk-in customers and they do :] Just email them in advance to let them know your order before self-collecting! They open from 0830-1800hrs. Again, Sun Lik also sells Belcolade, for $23.50 per kg.

The cheapest bittersweet chocolate will be the Strong Bitter Couverture droplets by Bakeway - sold in Phoon Huat. They have a 73.5% cocoa content, and only costs $14.20 for 1kg. I personally have not tried this, but when I was in the Chip Bee Gardens and Bencoolen branch, I saw many people loading up on the chocolate when it came in stock.

Btw, if you are desperate, you can also use those confectionary chocolates - for e.g., NTUC has the Cadbury Old Gold block chocolate, which has 70% cocoa content. They also sell Lindt block chocolates with the same cocoa content. For couvertures, Cold Storage, NTUC and other supermarkets also sell this brand called "Choco Line" which has a 53% dark couverture at $4.90 for 150g. Again, they work well when you're desperate or when you're baking to satisfy a craving at say, 11pm and you run out of chocolate and there's a 24h NTUC near you :]


***


Butter 
I never knew the importance of using good quality butter until I tried it myself. I have come to realize that it isn't that much more expensive. I don't always use French Butter, because it's quite expensive to use on a daily basis, but I substitute it for unsalted butter by the brand of Saputo, which retails at Phoon Huat for $4.80 per 454g. 

Other brands of butter that are available include (I've listed the more common brands towards the bottom of the list):
  • Elle & Vire 
    • $3.20 for a 200g block (Sun Lik)
    • $3.50 for 200g block (ToTT)
    • $4.32 per block for a pack of 3 250g blocks (Shermay)
    • $3.49 per block for a pack of 6 (Shermay)
  • Saputo  
    • $1.90 per 200g block (Phoon Huat)
    • $4.10 per 454g block 
  • Greenfields
    • $2.40 for 250g (Phoon Huat)
  • Goldtree
    • $2.40 for 250g block (Phoon Huat)
  • President salted/unsalted butter 
    • $4.50 for 250g (Delicia)
    • $5.45 for 250g (Cold Storage)
    • $5.40 for 250g (Shop & Save)
  • Lurpak salted/unsalted butter 
  • Anchor salted/unsalted butter
  • Golden Churn salted butter 
    • $4.70 per 250g block (Cold Storage)
    • $4.50 (Sun Lik)
    • $4.55 (NTUC/Shop & Save)
  • SCS unsalted butter 
    • $5.30 per 250g block (Cold Storage)
    • $3.50 per 250g block (Sun Lik)
    • $4.75 per 250g block (NTUC)
    • $5.15 per 250g block (Shop & Save)
  • SCS salted butter 
    • $2.85 per 125g block (Cold Storage)
    • $2.80 per 125g block (Shop & Save)
  • Fairprice Pure Creamery butter 
    • $3.50 per 250g block (but NTUC usually has offers for this)
  • Cowhead
    • $3.80 for 250g block (NTUC)
    • $3.25 for 250g block (Shop & Save)
  • Liv unsalted butter 
    • $4.50 for 250g block (Shop & Save)
  • Tinned Golden Churn Butter (no need to refrigerate)
    • $8.60 for 454g (found in the baking needs section) 

Btw, if you are confused about all the various brands available, you can check out a butter taste test conducted by Weylin 2 years ago in 2009. Although I have not conducted a similar taste test, I have used most of the brands I've stated above, and like I've mentioned, if your pocket can take it, do use the Normandy French butters (Elle & Vire) because you'll get the best buttery, creamy flavor from it. If the places which sell it is not accessible, Lurpak is an often used alternative - it's a Danish butter, but the results are good. SCS is also a common brand used by many, especially in Malaysia (or rather, JB where I stay in) which might not have a similar wide range of expensive butters.

My mom used to buy Buttercup because it was cheap, but note that this isn't exactly real butter - the reason why it's so cheap is because it's a mixture of oils - it is actually termed as "dairy spread" and costs $2.25. There is a cheaper brand called Goldenmaid that retails for $1.90. The ingredients usually include butter flavor and vegetable oils.


***


Cream 
Cream is also an essential ingredient if you want to make a ganache or certain types of icing or butter creams. I love the ones at Phoon Huat, because I think they're thick and cheap. 

Beware of different types of cream - there's the non-dairy type, which typically retails for cheaper and the dairy type of creams. I prefer the dairy types, because it's just hard to replicate that creaminess that comes from cows. 

The supermarkets also sell this Nestle sterilized cream, which retails at $2.15 for a 170g tin, which works perfectly fine when you need cream urgently. This is the only cream that retails in almost every supermarket, even the tiny small NTUC near my house. I've used the cream in my caramel making and it tastes almost as good as those made with fresh cream. 

Just a tip, you can freeze cream, especially the non-dairy ones - what I do is to freeze them in ice cube trays so that I can pop them out when I need them, so don't worry about buying huge cartons of cream because they can last pretty long! Do note that if you refrigerate it, once you open the carton, it has to be used within 2 weeks or it will start souring and smelling! Also, the dairy whipping cream, once frozen, tend to look curdled and will be quite difficult to whip up into soft/hard peaks, so I'd suggest using them in ganaches etc where you melt them. Non-dairy whipping creams don't have such a problem though! The visible difference between the both is probably first the color - dairy whipping creams tend to be off-white or cream in color whereas non-dairy creams are pure white. Also, dairy whipping creams taste, naturally, like milk (more dairy) whereas non-dairy doesn't have that 'cow' taste and tastes sweetener. Nevertheless, if you are lactose-intolerant, non-dairy is the way to go!

Types and prices of cream: 
  • Elle & Vire (35.1%)
    • $9.50 for 989g (ToTT)
    • $8 for 989ml (Sun Lik)
    • $9.95 for 989ml (Shermay)
  • President Dairy Whipping Cream (35.1%) 
    • $8 for 1000ml (Sun Lik)
    • $8.80 for 1000ml at Kitchen Capers
    • $11.80 for 1000ml at Cold Storage (although the packaging looks different)
    • $11.75 for 1000ml at Shop & Save
    • $4.55 for 200ml at Cold Storage (the UHT whipping cream, light cream and extra light all retail at the same price)
  • Dairy Farmer Thickened Cream 
    • $3.80 for 300ml at Kitchen Capers
    • $3.75 for 300ml at Cold Storage 
    • $3.65 for 300ml at NTUC
    • $3.55 for 300ml at Mustafa
  • Bulla Fresh Thickened Cream (35.1% fat)
    • $4.10 for 300ml at Cold Storage
    • $4.05 at NTUC
  • Bulla Fresh Pure Cream (45% fat)
    • $4.30 for 200ml at Cold Storage
  • Emborg Whipping Cream (38%)
    • $3.35 for 200ml at Mustafa
    • $3.40 for 200ml at NTUC/Cold Storage
  • Millac Dairy Whipping Cream 
    • $6.45 at Phoon Huat 
  • Greenfields Whipping Cream 
    • $10.05 for 1000ml at Cold Storage 
  • Lescure UHT Whipping Cream (made in France)
    • $7.05 at Phoon Huat 
  • Rich's Pride Topping/Value Pride (non-diary whipping cream)
    • $5.50 (or $6) for 1000ml at Sun Lik 
  • Redman Whipping Top Cream (non-diary whipping cream)
    • $5.60 for 1000ml at Phoon Huat 

***


Buttermilk 
Many chocolate cake recipes require this. What is buttermilk? It basically is the by-product of churning butter out of cream. Of course, it'll be dumb for us to do that ourselves, so many have come out with substitutions for buttermilk, such as the addition of vinegar or lemon juice to milk. For a long time, I used those substitutions (including a mixture of yogurt and milk), but I find that using buttermilk itself does make a difference - cakes and pancakes are a tad fluffier, and have a creamier taste to them.

There is probably just one brand available in Singapore (but I may be wrong) - Dairy Farmers, a blue carton - it retails at Mustafa, NTUC, Cold Storage, Phoon Huat, Shop & Save and Giant for the same price of $3.95 for 600ml. You can probably make over 50 cupcakes with that amount, or a huge amount of buttermilk pancakes (which are awesome btw). Btw, I did notice that there are some price variations across certain supermarket outlets even if they are the same supermarket - so prices might vary a little!


***

Almonds
If you venture into baking French cakes or pastries, you'll realize that many many recipes require almonds - just take financiers or the ever-so-welcomed macarons. The French use copious amounts of almonds, and I think this stems from the fact that bakers of yesteryear had an abundance of almonds to bake with - hence you see almonds being used in the staples of French cooking, like joconde, dacquoise and praline!

Macarons are always a popular item, and they require the use of ground almonds, which some refer to as almond meal or almond flour. You can always ground your own from whole almonds, but it's quite a troublesome process, even though whole skinned almonds are the cheapest almond product you can get.

These are the prices for almond meal across various places in Singapore. You can probably deduct about 10-20% for the price of almond flakes, nibs and whole almonds (with skin or without). If you are really desperate, you can probably head to your nearest NTUC or Cold Storage branch and they'll be likely to sell whole almonds (blanched or otherwise) which you can grind up yourself.

  • Phoon Huat -  $16.05 for 1kg, $4.40 for 250g 
  • Sun Lik - $4 for 250g 
  • ToTT - $19.80 for 1kg 
  • NTUC - $4.03 for 100g Bake King pack, $2.55 for 100g whole almonds (Pasar brand)
  • Cold Storage - $4.40 for 100g Bake King pack 
  • (just for comparison sake) In JB - RM17.50 per 500g

***

Silpat Mat
The market is permeated with all types of 'silicone mats' nowadays, but I believe the forerunner was Silpat, which was created by Demarle in France back in the late 1960s. Nowadays, any type of silicone mat is also referred to as a 'silpat', even though they might not actually be a Silpat. The benefit of a silicone mat is of course, its non-stick surface. I've one which I use for baking cookies, sponge cakes, macarons and rolling out dough when I need a non-stick surface. After you're done, you just wipe it down and it's clean! 

In Singapore, the 2 places that retails Silpat (that I know of) is Sun Lik and Shermay's. The 12x16 inch retails at $49.95 whereas the 11¾ by 8¼ inch goes for $29.95. Over at Sun Lik, the 12x16 inch (the only size they have) retails for $35.

Over the Phoon Huat, they have their own brand of silpat, which retails for slightly cheaper, around $20 or so (I can't remember the sizes or prices sorry). Over at ToTT, they have another brand, Pavoni, which is an Italian brand. They have 3 sizes, the smallest of which is 30x40cm, and retails for $18, the medium is 51x31cm and the large is 58x38cm, which retails at $34.80.

For those without the budget for a Silpat, don't worry - greaseproof baking paper works just as well. I also like the silicone baking liners that ToTT sells - it's a pre-cut liner which you can use to line your cake trays (it's more malleable for a cake tin than the Silpat) and it works the same way. It's frequently out of stock and costs $7-8 for a square or round piece (around 30x40cm for the rectangular piece). Alternatively, just stick to those brands of baking paper you can get from NTUC or Cold Storage - they work perfectly as well. I use them for baking cookies and sponge cakes, etc. 

***

And that's the end of this list! It's a really long read, but I hope this short list of the seven most common baking ingredients available in baking supplies stores in Singapore will be useful for you!

Wednesday, March 30, 2011

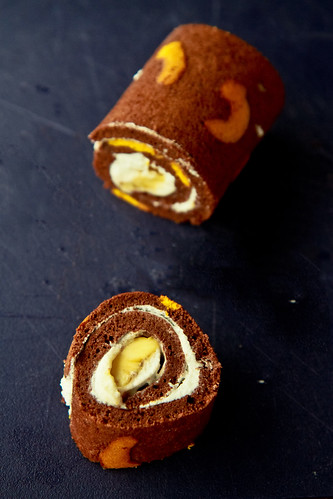
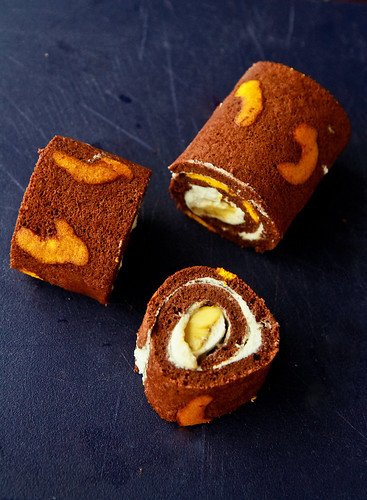
Banana-patterned Chocolate Swiss Roll with Caramelized Banana

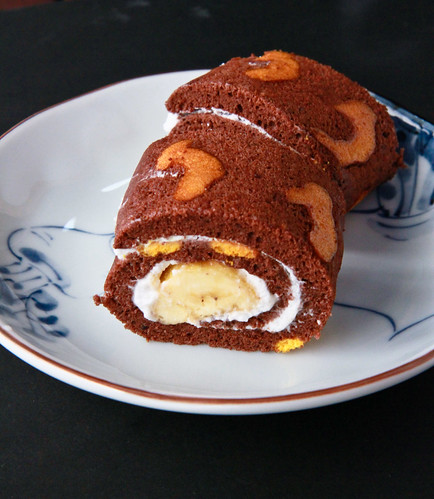
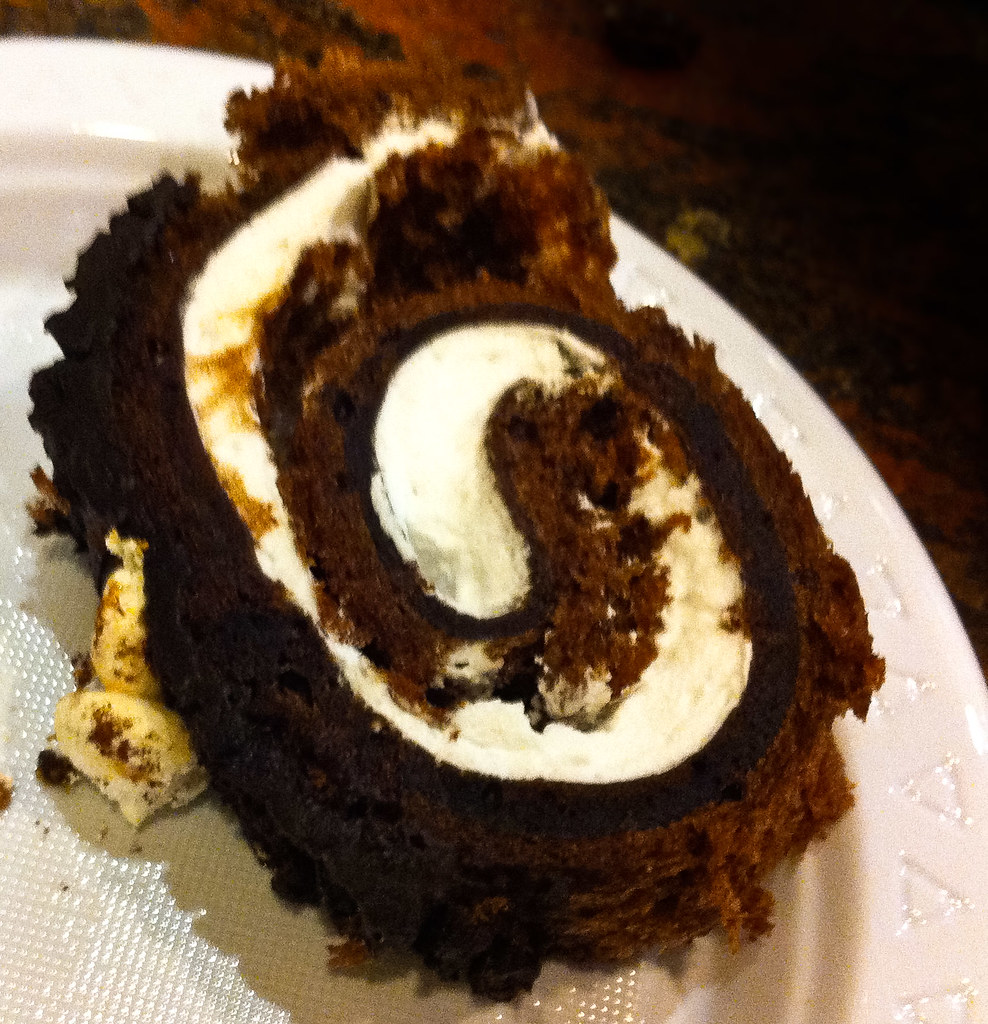
I'm thinking the longer and more accurate name of the cake should be "Banana-patterned Chocolate Swiss Roll with Vanilla Whipped Cream and Caramelized Banana with Whisky". Anyway, I've been wanting to try out a swiss roll recipe for ages, and when I saw a particular strawberry printed swiss roll appeared on the blogosphere, I couldn't resist coming up with my own version of it. I first saw it on Reese's blog here, who got the idea from 小本 and I couldn't wait any longer! This is a preview of what I came up with ------------------------>

I'm not much of a plain swiss roll fan, so I decided to incorporate some cocoa powder into the cake. This meant a little more work for me to do however, since I had to separate some of the egg yolk and white mixture such that I could color it yellow for the bananas later. Anyhow, as with all baking experiments, this was another huge learning curve, although I did get good reviews from my family about the swiss roll. After I got the cake out of the oven, I realized it was a little thin for a swiss roll, so here's my post-mortem of my mistakes - which hopefully will help someone else who's new at swiss roll making.

Things that went wrong: 
    <---- Note the mistakes committed!
  • I'm not blaming anyone, but I think the blogger whose recipe I followed wrote her instructions wrongly, because I later realized when I saw the original recipe in Chinese that some of the instructions were translated wrongly. This was because the instructions were to mix in the flour with a mixer even after adding the whipped egg whites (which meant that I was effectively deflating them) - as I was doing that particular step, I was really doubtful of it, but I decided to stick to it to a T, since I know from experience how deviations from the recipe don't result in good things. Anyway, I've commented on the blogger's post to clarify (if I was wrong), but she still hasn't got back to me, so we'll see :] I've included the original recipe from 孟老师 which I've translated into English.
  • This of course meant that my swiss roll did not rise sufficiently - you can see from the pictures that the swiss roll is rather thin (or deflated) in size. I tried the same recipe the second time the next day (since I hate failures) but using my amended method and it got me a cake twice the thickness - really yummy and fluffy!
  • This was my first time in the year making a swiss roll (and second time in my 'baking life'), and I was rather unsure how to spread the whipped cream such that it would appear even after rolling. Turns out I was a little stingy with the cream and everything got squeezed out at the end =X 
  • Also, I initially wanted to put a whole banana in the centre, but chickened out in the end as I thought it would be too large. Needless to say, half a banana in the centre (as seen in the photo) looks rather measly. 

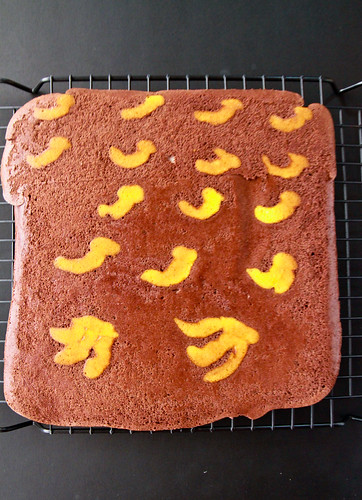
Anyway, this is one of my more successful 'overhead' photograph that I have taken this year, even thought the subject matter isn't exactly too pretty. I've been trying really hard to learn different techniques in photography and I'm glad to say that I do think I have improved marginally! I would, of course, appreciate any helpful critique/comments about how to improve my photography!


Recipe for 
Chocolate Swiss Roll 
Adapted from 孟老师的美味蛋糕卷, makes a 36x26cm roll

Ingredients: 
25 g butter
72 g egg yolks (about 4)
10 g castor sugar
20 g cold water
20 g cocoa powder, unsweetened
45 g low protein flour (use cake/TOP flour)

90 g egg whites (about 3)
60 g castor sugar 

Method: 
  1. Melt butter in the microwave. Set aside to cool. 
  2. Whisk egg yolks together with 10g castor sugar, until the mixture pales in color and doubles in size. 
  3. Sieve the cocoa powder and mix well, before adding cold water to the mixture. 
  4. Beat the egg whites until foamy, and add remaining sugar. Beat until stiff peaks are achieved. 
  5. Add 1/3 of the egg white into the egg yolk mixture in [3]. Mix gently with a spatula - don't worry about deflating the egg whites because you are tempering the mixture. 
  6. Fold the remaining meringue into the batter. 
  7. Sift in the flour in three portions, folding well each time. 
  8. Add in the butter into the batter. 
  9. Bake at 170 degrees for 15-20 minutes before removing the cake to cool. 


Caramelized banana
2 ripe bananas
4 tbl sugar
1 tbl whisky
3 tbl water

  1. Place the water, whisky and sugar in a small saucepan on medium-high heat. 
  2. Once the sugar starts to dissolve, add in the bananas, stirring gently until all the sugar has dissolved and mixture starts to brown. 
  3. Remove from heat and let bananas macerate in the mixture whilst preparing the whipped cream. 

Whipped cream
100 g cream
10 g   castor sugar
1 tsp  vanilla extract

  1. Place cold cream and vanilla extract in a clean bowl. Start whipping the cream.
  2. Add the castor sugar gradually into the cream, whipping the mixture until soft peaks are reached. 

To assemble:
  1. After cooling the cake, spread whipped cream generously on one side of the cake (prefably the uglier side). 
  2. Place the caramelized banana on the bottom edge of the cake where you wish to start rolling
  3. Roll up the cake and there you have it - a perfectly made swiss roll :]


Janine's jots:
  • I used 孟老师's 分蛋式海绵蛋糕体 method, which loosely translates to "separated egg sponge cake" method. This basically just means that the egg yolks and whites are whipped separately. I am still having problems with this method, so expect more experiments coming this way!
  • I'm not sure if I'm reading the instructions wrongly, but I thought the sieving of cocoa powder into the egg yolk mixture before adding the water was rather superfluous. On hindsight, I think mixing the cold water with the cocoa powder to form a paste first sounded more logical since then I wouldn't deflate the egg yolks that much. 
  • I haven't provided instructions on how to make the 'banana' print - but it's basically the same as Reese's instructions here. It's slightly more troublesome here because you have to separate the batter right from the start since once you add the cocoa powder, the batter will be brown and hard to color. 
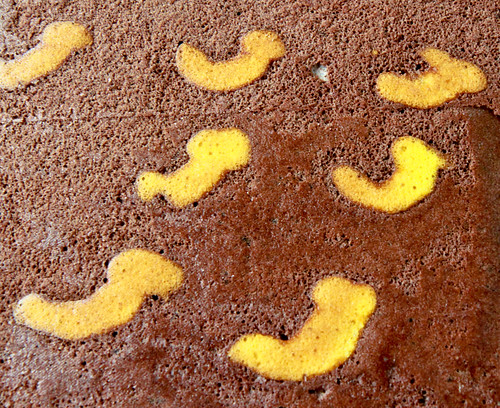
  • Instructions on making light prints on a chocolate cake: Basically, before adding the cocoa powder, take out a few tablespoons worth of egg-yolk batter and set aside. Do the same for the egg white meringue, flour and melted butter, setting aside a proportionate portion of each. I eyeballed everything, so no measurements here! It doesn't really matter as long as the portions are more or less proportionate. Add a few drops of yellow coloring and place into a piping bag to pipe our your desired banana shapes on the baking pan (which you have lined). Bake the 'bananas' in the preheated oven for about 3 minutes, before pouring the remaining batter and proceeding to bake for another 15 minutes, or until a skewer comes out clean. 

In pictures: 
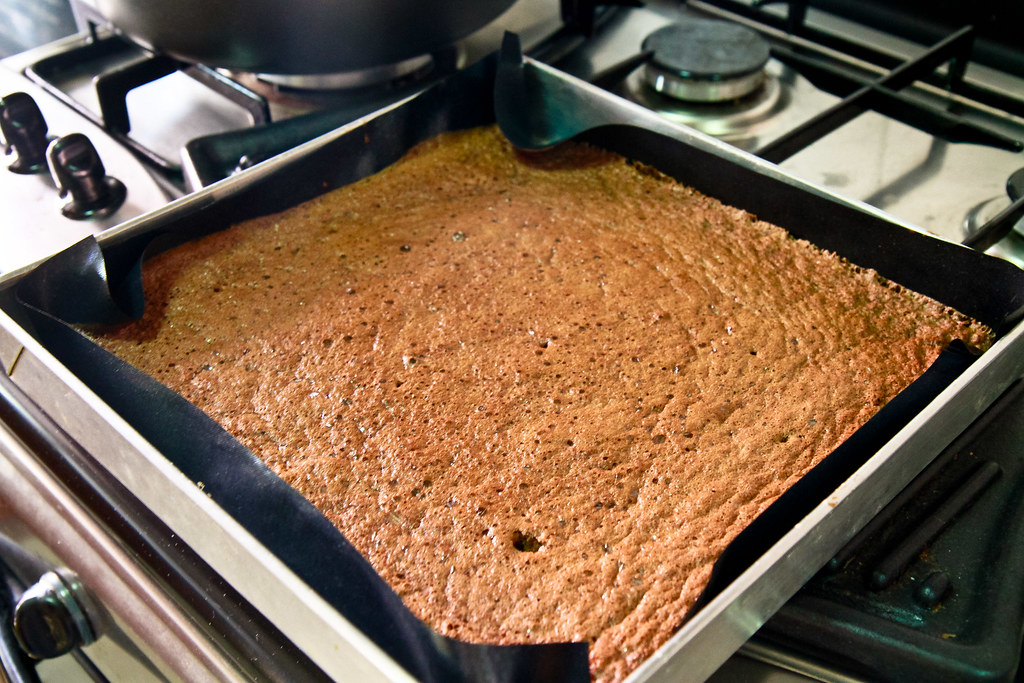
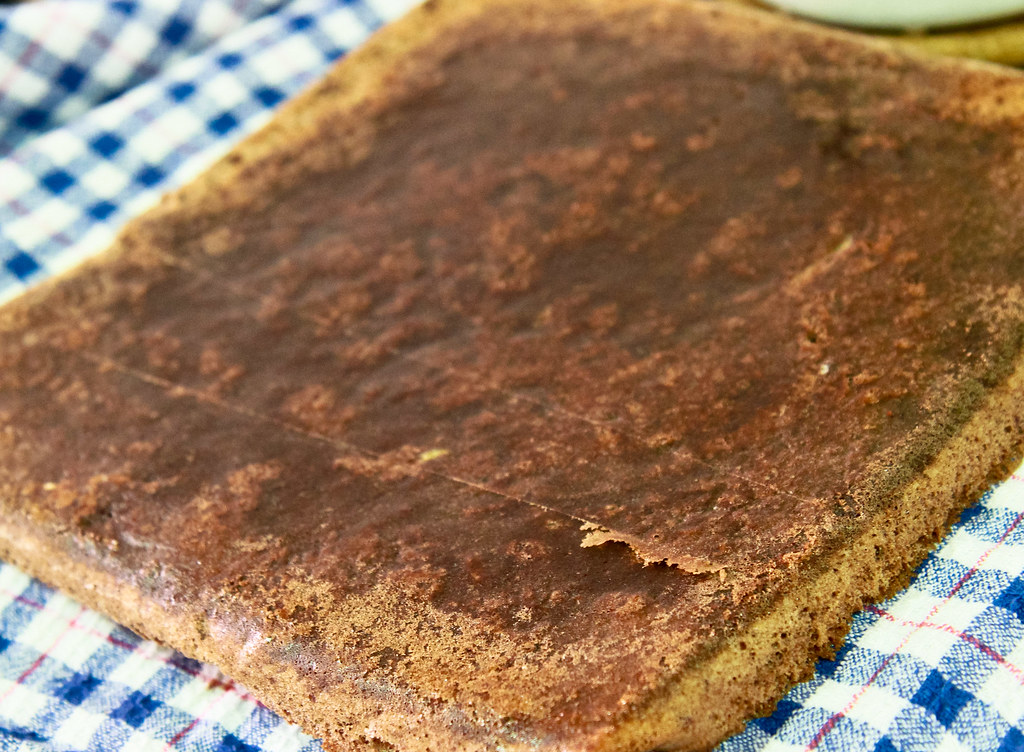
Cooling the cake. My baking paper gives me odd textures on my cake. 
YUMMO. Looking a little flat, but still yummy nevertheless! 
Maybe it's my sub-conscious, but my bananas look like letter "J"s to me, which is just fine since that's my name. It's like a cake dedicated to myself! :] 
Whew! Making this just in time for the deadline of Aspiring Bakers #5 : Fruity March (March 2011) hosted by Jess of Bakericious! Can't wait to see what the round-up for this month, and the reveal for the theme for the next month, although I might not be particularly active because I'm starting my finals this coming month and I'll be setting everything aside to focus on the last hurdle. Yes, these will be the finals, as in final exams for my final year in university! I will continue to get baking done, and updating my twitter with pictures of my baking, but it'll be pretty quiet around the blog, unless I can't resist the urge to blog =p 

Monday, December 27, 2010

Chocolate Swiss Roll with Whipped Cream Filling and Dark Chocolate Ganache

Chocolate Swiss Roll with Whipped Cream Filling and Dark Chocolate Ganache
Adapted from here and Rose Levy Beranbaum's The Cake Bible

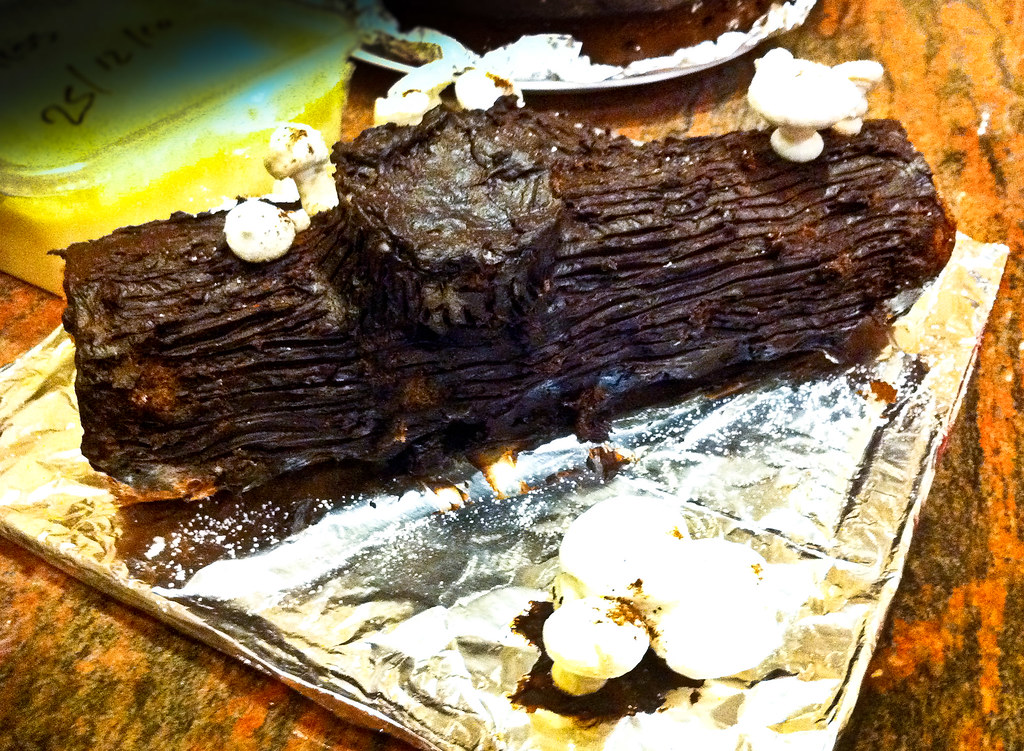
Hastily taken photo of my first-ever decorated Christmas Log for the Xmas party

Ingredients for Cake Roll
60g    cake flour (I used 55g all-purpose flour and 5g corn flour, sifted thrice)
15g    cocoa powder
95g    castor sugar
30g    butter
25g    fresh milk
200g  whole eggs (I used 4 whole eggs)
20g    egg yolk (1 egg yolk)

Method:
  1. Preheat oven at 180°C. Place rack in middle of oven. 
  2. Sift all-purpose flour, corn flour and cocoa powder. Set aside. 
  3. Beat the whole eggs and egg yolk together on low speed. Once foamy, stream in the castor sugar before increasing the speed to high. 
  4. Meanwhile, melt butter with milk in a microwave for about 20 seconds on low.
  5. Continue beating the egg and sugar mixture until 'ribbon' stage. This is when the batter leaves a ribbon-like trail which takes at least 10 seconds to disappear back into the batter. Once this stage is achieved, continue beating the mixture for another 1 minute on low speed to stabilize the mixture. 
  6. Fold 1/3 of the sifted flour/cocoa into the batter, turning the bowl a quarter-turn (90°) in the opposite direction (anti-clockwise in my case). 
  7. Continue folding the remaining flour in two portions until all the flour is well incorporated. The mixture will turn slightly brown, with dark brown spots - this is fine. 
  8. Temper the butter/milk mixture (in step 3) by adding a small amount of the batter (about 2 tablespoons or so) and mix. This is to ensure that the egg batter will not curdle when the butter/milk mixture is added. 
  9. Pour the mixture slowly into the batter and continue folding until well combined. 
  10. Pour batter into a lined pan and bake for 12 minutes at 180°C (my oven runs slightly hotter, so I bake at 160°C for 16 minutes). 
  11. For those with thermometers, the cake is done when the internal temperature reaches 90 -100°C. For the more conventional method of testing, insert a wooden satay stick (or toothpick) and if it comes out clean, the cake is done. 
  12. Remove the pan from the oven and allow to cool for about 5 minutes. 
  13. Place a tea towel (or any cloth) onto the cooling rack. Sprinkle some water, just a few drops to slightly dampen the cloth. This will ensure that the cake is just slightly moistened to ensure easy rolling. Turn the cake out of the pan and onto the tea towel. Starting from one end of tea towel, start rolling the cake into a roll and leave it on the rack to continue cooling before spreading with desired filling. The cake is rolled when still warm to enable easier rolling (and no cracking) later. 
    In Pictures

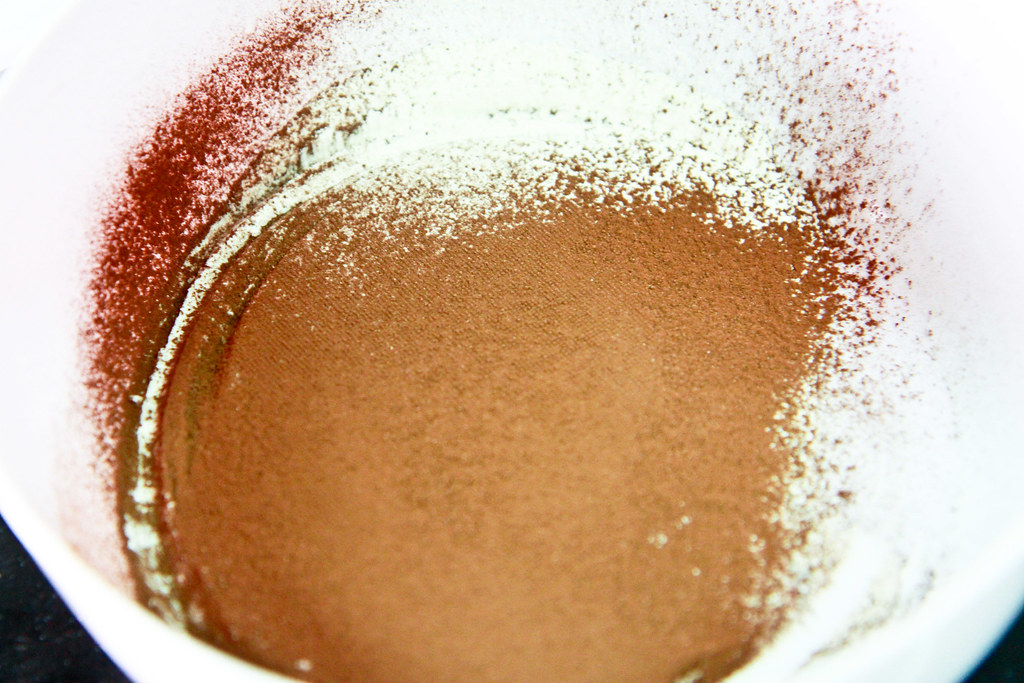
    Sift flour and cocoa powder twice.

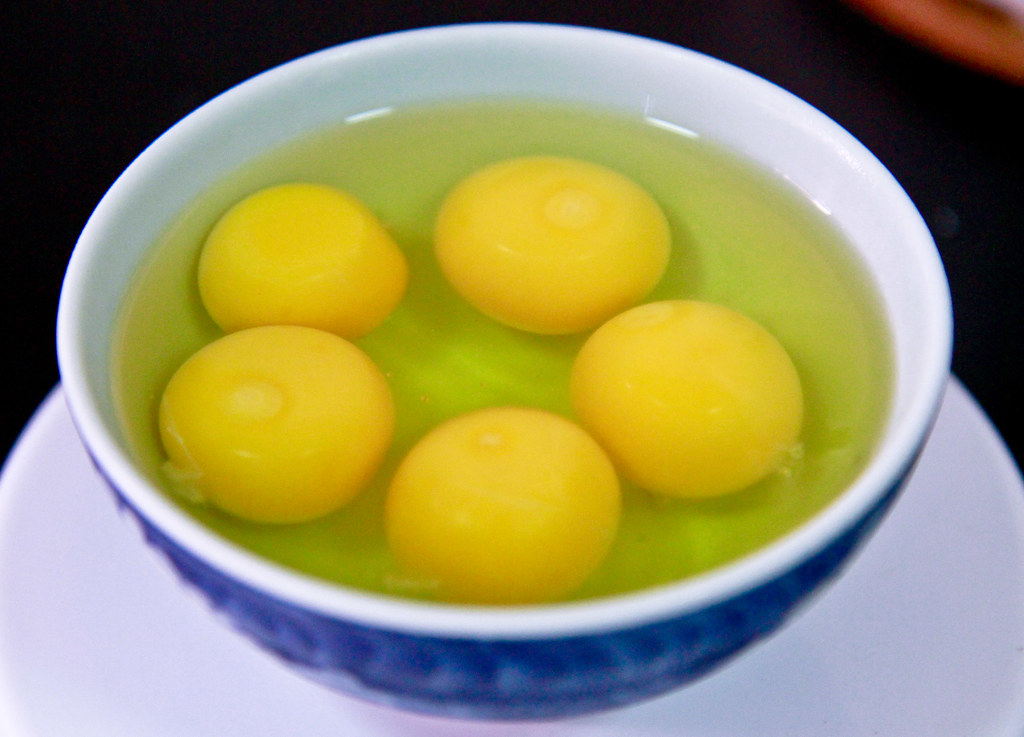
    Crack 5 eggs (but only use 4 whole eggs and 1 egg yolk).
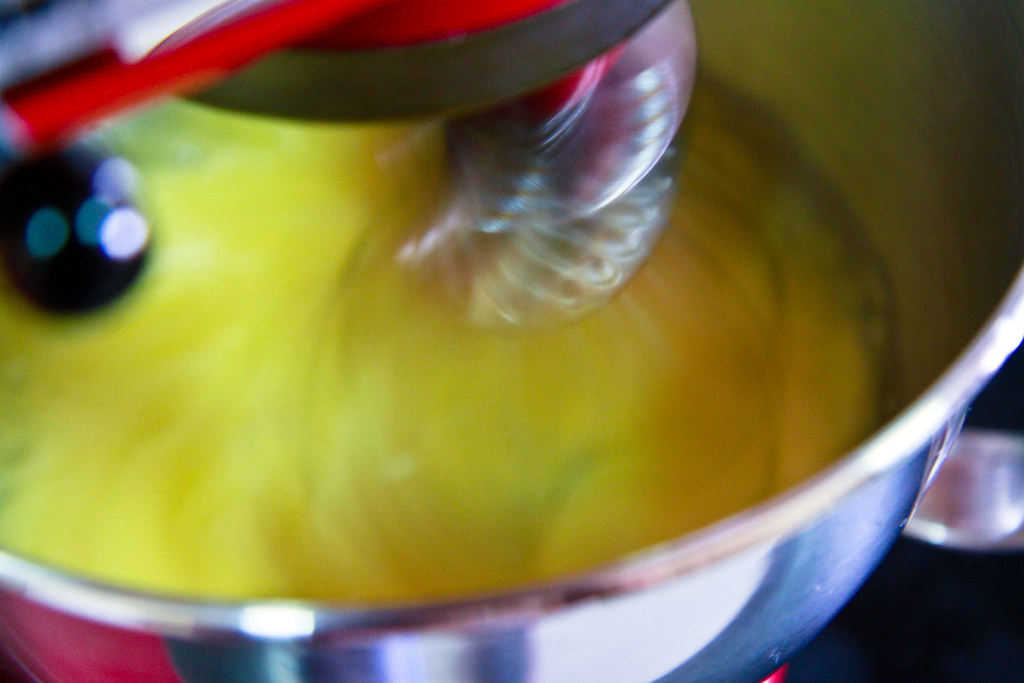
    Put the eggs in your stand mixer and whisk them!
    Mixture will slowly lighten in color.
    This batter is still too 'watery'.
    This batter is ready for folding - the ribbon-like trail should take about 10 seconds to disappear. Once this stage is reached, beat for another minute on low speed to stabilize the mixture. 
    Dump 1/3 of the flour/cocoa mixture into the batter and fold. 

    Fold until all the flour/cocoa mixture has been incorporated. 

    To the butter and milk mixture, add some of the folded batter to temper before adding it into the batter. Give it a few folds to incorporate before pouring into the prepared pan.
    The cake is in the oven!

    Halfway through, opening the oven to turn the pan around for even heating.
    Once the cake springs back when touched, it is done! Cool it for about 10 minutes on a rack.
    Remove cake from pan onto a slightly damp tea towel. Roll it up and allow it to cool on the cooling rack. Rolling it up when it is still warm reduces the chances of cracking when rolling it up with filling later. The bottom of my cake is slightly burnt because I forgot to take out the extra rack in the oven :/

    In the meantime, prepare the chocolate ganache first, followed by the whipped cream. No pictures for these, because I was in a huge hurry to get the cake assembled, but here are the recipes:


    Dark Chocolate Ganache
    Ingredients:
    257g   cream (I used 35% whipping cream)
    227g   bittersweet chocolate
    ½ tsp  vanilla extract

    Note: The original recipe calls for a food processor, but I don’t have one, so this recipe has been modified from the original version.


    Method:
    1. Chop the chocolate into small pieces, a few cm-wide and place in clean bowl. Pieces do not have to be evenly chopped. 
    2. Heat the cream to boiling point and whisk it slightly before allowing it to cool.
    3. Once the cream is slightly warm to touch (around 40-50°C), pour into the chopped chocolate pieces and stir. Stir until all the chocolate pieces are melted. 
    4. Allow it to cool completely. At this point, if you want a smoother ganache, strain the mixture over a sieve to remove any unmelted chocolate bits. You can also add in some softened butter if you desire a lighter ganache.
    5. Allow the ganache to cool and stand for about an hours until it is of frosting consistency. Whisk for a few seconds to aerate. If ganache has thickened too much, reheat using a double boiler or a microwave on low power for about 10 seconds.
    After preparing the ganache, start on 
    Perfect Whipped Cream
    Ingredients:
    232g     cream
    13g       sugar
    0.5tsp   vanilla extract


    Method: 

    1. Place the chilled cream and vanilla extract into the mixing bowl and refrigerate for at least 15 minutes. I was in a hurry, so I put the bowl and beater into the freezer for 5 minutes before adding the chilled ingredients into the bowl.
    2. Sift the icing sugar into the mixture. 
    3. Gradually beat the mixture, starting on low speed before increasing it to medium-high speed. Beat until stiff and glossy peaks form when the beater is raised. Softly whipped peaks are fine as well since this is meant for filling the cake roll. 
    Assembly
    1. Unroll the rolled-up and cooled cake before spreading the whipped cream generously onto the cake.
    2. I only applied a 1.5cm thick layer, which resulted in quite a bit of leftover whipped cream. (I have kept the whipped cream in an airtight container in the chiller compartment of the fridge for 2 days now and it still retains its whipped structure).
    Here's a cross section of the cake with the filling: 


    After I was done filling the cake, I cut a 2-cm thick portion from one end to form the knob on my tree knob and a longer 10-cm portion to form the branch. Apply the cooled chocolate ganache generously all over the log (I used some ganache to stick those cut portions to the main log). Use a spatula to spread the ganache, although a spoon will also suffice. Spreading the ganache doesn't need to be neat because the surface of the log is not smooth anyway. Once you are done frosting, use a fork to scratch some lines to mimic the lines of an actual tree log. If you have made meringue mushrooms, now is a good time to place them onto the finished log. 


    This is another side view before the chocolate ganache frosting is complete. You can use a sieve to add some icing sugar to the log to mimic snowfall :)


    Oh, and after a super long period of blog-stalking, I have finally decided to participate in something local - Aspiring Bakers #2: Christmas! (Dec 2010). I've seen many log cake entries for this, but who cares - this is my first time baking a cake requiring assembly and it was a success! And since the aim of Aspiring Bakers is to encourage local bakers to bake and go beyond their limits, I look forward to participating in #3 and foresee myself participating in many more rounds! :)
    Related Posts Plugin for WordPress, Blogger...