My blog has moved!

You should be automatically redirected in 6 seconds. If not, visit
http://www.unpastiche.com
and update your bookmarks.

Showing posts with label Breakfast. Show all posts

Sunday, September 23, 2012

The best buttery laminated pastry ever - Kouign Amann

If you asked me a couple of years ago if I would ever utter the words kouign amann (pronounced as quiee-ah-mahn) in Singapore, I would have thought you're nuts. But well oh well, with the great number of 'hipster' cafes and patisseries and bakeries popping up in Singapore lately, it appears that pastries like this king of laminated pastry has made its appearance in our sunny little island. 

I might be a bit slow on the take up since I never did patronize Tiong Bahru Bakery when it was hip since it was a tad out of the way for me, but when it opened at Raffles City, my kind colleague/roommate got me a croissant and in her words, "this thing that the staff recommended me to get". She couldn't remember the name of the pastry, but when I saw it, I had a little sneaking suspicion that this might be a kouign amann, but I wasn't very sure because from my experience, kouign amanns generally look more rustic and bread like whereas Gontran Cherrier's version looked a tad puff pastry/danish like. Nevertheless when I bit into the pastry, I was sure. Nothing else in this world can taste so sinfully buttery and sugary!
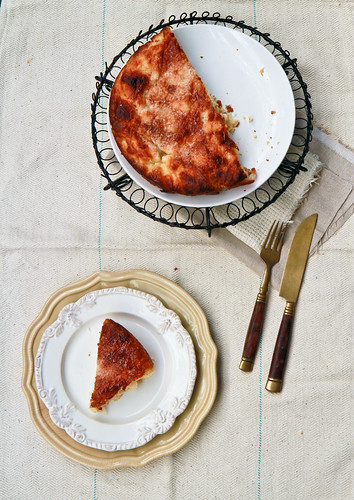


I first got a taste of this heavenly pastry when I was in Paris. I had been stuffing my face silly with macarons, entremets and sweet gâteaux and was growing quite sick of them. Although I like cakes, I'd much prefer pastries and breads. So naturally I did some googling to check what other pastry I should have other than the usual croissants and danishes, and I stumbled upon this mysterious pastry known as the kouign amann. 

Call me crazy but I still remember my first experience of the kouign amann. Jon and I had been walking along Champs-Élysées hunting for a nice leather jacket when we stumbled upon Ladurée. I guess we might have been lucky because the queue was not that long and I even managed to get a couple of photographs of the interior before the staff told me 'no photos'. I got myself the usual - a box of macarons, a croissant, and I pointed to the kouign amann. Back then, I didn't speak French and  naturally didn't want to embarrass myself by massacring the pastry's name. I remember that it smelled delicious, of caramel and butter, and even before I stepped out of the store, I had already slid it out of its paper bag to devour it. My first taste was almost like ambrosia. Until that point in time, I had never ever eaten any pastry that was so deliciously good. I knew I shouldn't have offered any to Jon because he then proceeded to demand that I share this delicious pastry with him. I don't remember where else we went in Paris that day, but I knew that the best memory of the day was walking along the Champs-Élysées, and the Arc de Triomphe whilst devouring the kouign amann. 

Last year, after mastering the art of laminated dough, I decided it was time that I make my own kouign amann and relieve those wonderful memories. You might notice that my kouign amann looks very different from the one that Tiong Bahru Bakery is selling, but I would think mine is a more accurate version - after all, kouign amann is Breton for butter cake and according to wiki, it is a "round crusty cake, made with bread dough containing layers of butter and sugar folded in" ;p
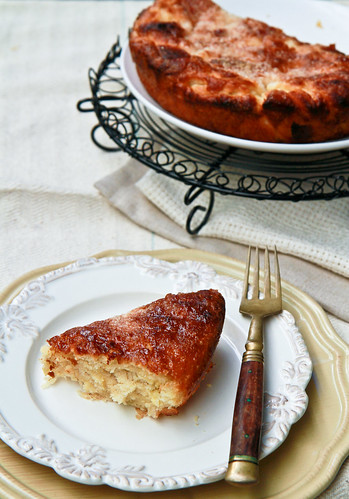


I finally decided on David Lebovitz's Kouign Amann recipe as opposed to Ladurée's because of the crazy amount of sugar and butter that Ladurée's had.  

Kouign Amann
Fills an 8" round cake pan

12g dried yeast (or 5g of instant yeast)
175g (¾ cup) warm water
260g all-purpose flour, plus extra for rolling out the pastry
½ teaspoon sea salt
200g castor sugar, divided, plus extra for rolling out the pastry
110g salted butter, cut into 2-cm pieces

Method:

  1. In a mixing bowl, dissolve the dried yeast in the water with a pinch of sugar. Stir briefly, then let stand for 10 minutes until foamy. If using instant yeast, you can skip this step and add yeast together with the flour. 
  2. Gradually stir the flour and salt into the mixing bowl. The dough should be soft, but not too sticky. Lightly dust your countertop with flour and transfer the dough onto it.
  3. Knead the dough with your hands until the dough is smooth and elastic, for about 3 minutes. If the dough is very sticky, gradually add more flour, about 10g or one tablespoon at a time, until the dough doesn’t stick to your hands. Gather the dough into a bowl and place it into a lightly oiled bowl. Cover and let it rest in a warm place for about 1 hour, or until the dough ball has doubled. 
  4. Then, on a lightly floured countertop, roll the dough into a rectangle about 12″ x 18″ (or 30 cm by 45cm) with the shorter sides to your left and right. If you would like a step-by-step illustration, do pop by David Lebovitz's page!
  5. Mentally divide the rectangle into three equal portions and distribute all the butter cubes in the centre of the dough. Sprinkle 50g of sugar together with the butter cubes. Grab the left side of the dough, lift and fold it over the center, and do the same with the right side (like a letter). 
  6. Then, sprinkle another 50g of sugar along this rectangle and mentally divide this rectangle (it should be about 15cm by 30cm) into three equal portions again. Fold the left over the centre and the right over the left, like in the previous step. You should get a 10cm by 15cm rectangle. Place this on a lightly oiled plate and place it in the fridge for 1 hour. Once chilled, remove the dough from the fridge.  
  7. Dust the countertop with sugar (instead of flour) and roll out the 10cm by 15cm rectangle into a 30cm by 45cm rectangle again. Sprinkle the surface of the rectangle with another 50g of sugar and fold it into thirds, per step 5 again. Place on a lightly oiled plate and let it rest in the fridge for another 30 minutes to 1 hour.
  8. Preheat your oven to 220°C (425°F) and brush the 8 inch cake pan with melted butter. Remove the dough from the fridge and roll it into a circle about the size of your baking pan. The dough might be sticky, so use sugar to lightly dust your countertop. Sprinkle the top of the dough with the remaining 50g of sugar. You may wish to drizzle some melted butter as well. 
  9. Bake for about 40 minutes, or until the top is brown and deeply caramelized. Remove from the oven and let it stand for 15 minutes before running a knife around the edges to release the Kouign Amann. Let it cool for at least an hour before consuming. 

Janine's jots: 
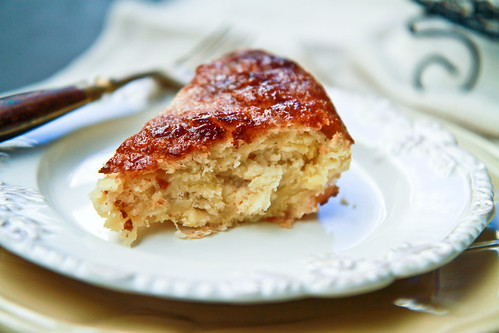
  • Note: Like what David Lebovitz recommended, be sure to use good quality salted butter because it will make a difference. If you don't have access to a good French salted butter (like say Elle & Vire being the most commonly available in Singapore and Malaysia), use normal salted butter and sprinkle some coarse fleur de sel or sea salt on the butter cubes. Also, if you have the luxury of an air-conditioned kitchen, do use it because the dough is very sticky and the sugar melts very quickly, so you have to be quick. As you can see, my layers weren't very prominent because my warm hands caused the sugar to melt soooo rapidly and the butter and sugar just leaked across the layers. 
  • Taste: I found this kouign amann to be slightly less sweet than what I recalled, and definitely not as sweet as Tiong Bahru Bakery's, but it was just nice for me. 
  • Texture: I must admit I deviated from David Lebovitz's method, which was a bad thing. I tried to be ambitious and did the letter-fold four times instead of three as prescribed, and this caused the dough to be slightly more tough and the end product more bread-like. Ideally, this should have less folds than a puff pastry or a croissant. 
  • Serving size: I'm quite used to seeing the kouign amann in this cake-slice version, but Pierre Herme does it individually in large muffin cups whereas Tiong Bahru Bakery does it like a pinwheel. Naturally, the individual portions means more caramelized bits(!) and more yumminess but this round cake version is equally tasty as well, and definitely more rustic. This recipe will feed 8 people comfortably. 
  • Storage: It keeps quite well for about 3 days at room temperature, but I would definitely recommend storing it in the fridge and heating it up with the microwave. 
  • Would I make this again?: YES definitely! If I had to pick between a danish or croissant or this, I would definitely choose this anyway. Plus, so many people who tried this sang praises of it. Jon's friend called it "the awesome thing" :] There are a couple of methods and recipes to making the kouign amann and after I work off all the extra butter and sugar, I'll get down to experimenting with those recipes, especially Ladurée's version!

Tuesday, June 5, 2012

Travel Tuesdays: Levain Boulangerie and Patisserie, Kuala Lumpur

I can’t believe this is only my 9th instalment of Travel Tuesdays! I first started this to make sure that I was diligent about uploading and sieving through my travel photographs, but I’m afraid I’ve yet to stick to that goal. I have to admit that sometimes, when I do look through my photos, I too am surprised by what I see - photographs do tend to record things that you never did notice ;p

As I have alluded to here, I went up to KL on a short impromptu trip over the Vesak Day holiday weekend, and the aim of the trip was to stuff myself silly with good food. And that I did. I always have this ‘list’ of places to eat at for almost every destination that I want to visit, so it’s no surprise that I’ve got a very lengthy list for KL, which I regard as my third home, after JB and Singapore.


High up on the list was two places – Levain Boulangerie for the breads, pastries and cakes, and Les Deux Garçons for their French entremets. I was not disappointed at each place. Maybe it’s because I’m looking at the prices with a ‘Singaporean’ eye, but everything was so darn cheap! Cakes per slice in Singapore cost anything from $6 up, so for a cake to cost in the vicinity of RM10 was a pretty good deal for me.
Sadly, I didn’t get too good photos of LDG’s cakes or the place itself, because it was pouring cats and dogs and I didn’t take my camera with me. The cakes didn’t make it back well either, but suffice to say that they are really good! I was very impressed with the care they took in the packaging and the entire look of the place, although I do hope that they come up with some new cakes by the time I return to KL in August because there were probably about 10 types of cakes and tarts in the counter and when I asked, they said that this was all the variety that they had and the flavours don't change. Huh.


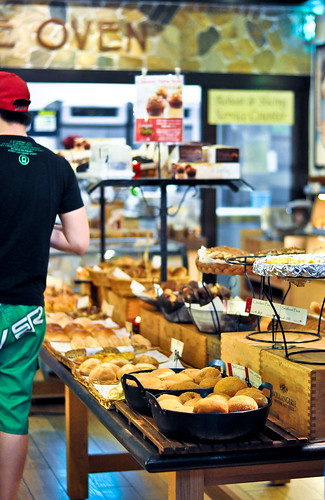
So back to Levain. Levain is my kind of bakery. It's one of those large homey refurbished colonial houses, or 'cottages' as I would like to call them, and the entire place has been renovated (for a cool million I heard). It actually reminds me of MANY such places in Australia, which have these types of bakeries in abundance, and not so much European/continental bakeries. I was half expecting for Levain to let me down in some aspect, because it sold everything – warm food, breads, pastries, cakes, and even macarons! But...I must say that I am pretty impressed on the whole! I went with a huge group of relatives, so I was able to try just about everything. Their beverages, pastries, pizzas, spaghetti, soup, cakes, macarons, breads – ALL CHECKED! Everything was more than passable, and I was very impressed with a few items.

Let’s go down to the nitty gritty shall we?

When you first walk into the bungalow cottage, (you first have to get pass the problem of very-hard-to-find-parking), you will be greeted by the cashier and the bakery proper on the left. On the extreme left, lies the bakery which contains the stone oven which they use for their breads. Mind you, I see normal commercial ovens too, so I suspect only pizzas and the crusty continental breads get their baking in the stone oven.

I liked the self-service aspect of it – if you're just getting the breads to go, you can grab a tray, then head to the cashier to pay up. If you're looking for a seat, I'll recommend you looking for a seat first, noting down the number and going down to order. There's seating downstairs and upstairs, inside and out. The view differs from room to room, so take your pick! You can (or have to) ‘chope’ your seat with a ‘reserved’ tag before making your way to get your food. As for warm food and beverages, they’ll be served to you, so be sure to remember where you are seated. Water and other cutlery are available at counters in each room.


Onto my review proper. For the clueless, levain actually refers to a starter that French bakers used in their baking. And this is perhaps the selling point of this bakery, that all their breads make use of this special levain, or natural yeast as they like to call it. I personally prefer the term sourdough, but well, to each his own. Admittedly, because I was there for the 'levain' items, I was quite disappointed to see a very small variety of actual European-styled breads. I guess that's mainly because Malaysians still like their soft and sweet buns, so European breads, which tend to be crusty, can be pretty hard to sell. Besides, other than the usual baguette, I'm sure more than half of the patrons probably have no idea what European breads I'm referring to.
I tried the 'natural yeast' baguette, which I asked them to slice and toast for me. I didn't quite like it - although it was nicely crisp and all, I expected a slight tinge of sourness or at least some complexity in the taste of the baguette but... nothing. It was a very flat taste, and very reminiscent of normal yeasted baguettes, so I was disappointed that their levain didn't taste good enough. But mind you, I am comparing to the baguettes that I had the privilege of eating in France, so it is perhaps an unfair comparison. The baguette was good, just not great. 

As for the other breads, I read that the bakers actually come up with at least 4 new items each month, which is really impressive! I managed to snitch bites of a couple of other breads, such as the walnut ring thing that you see in the background in the photo above, as well as other 'japanese' style soft sweet breads. The breads were pretty much standard, and the prices were quite hefty (at least RM 3) for each, but I guess we're paying for the experience? A good bet however, would be their sandwiches. They have quite a few varieties available, and the portions are enough for one for lunch.

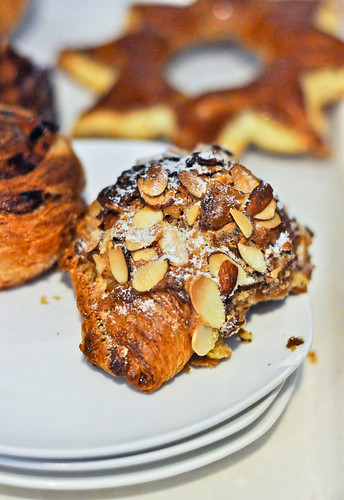
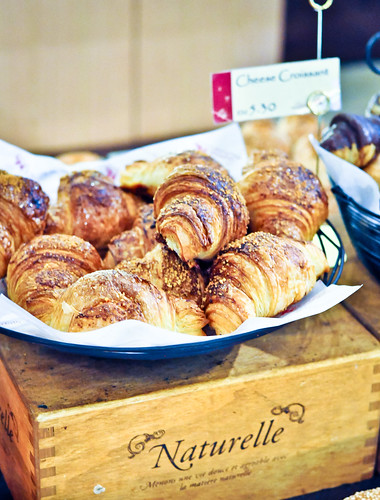
As for the pastries, I liked them :] I had the croissant, the almond croissant as well as the danish pastries (the sultana one). I liked that they used the yeasted versions of these pastries, and that each layer/lamination was very crisp and well done. The almond croissant was really good - I liked the almond paste on the inside - it didn't reek of almond extract, and the sweetness was just right. Same with the other pastries.


As for the macarons - MAJOR GRIPE. WHY WHY WHY do they spell them as macaroons? For a bakery to name themselves after something French, it is unacceptable that they got the spelling of MACARONS wrong! It’s not macaroons for goodness sake! GAH. I certainly felt that it was incongruent to sell French confections and not know how to spell them properly >.<

I can't remember the exact price of each macaron, but I was told by my cousin that the macarons here are quite costly as compared to other places. However, they are also one of the best. So I guess you're paying for good quality stuff! Levain has approximtely 15 flavors on sale each day, and out of those I tried, I was pretty impressed with the strawberry, which had fizzy candy to give it an extra pop. The other flavors were good as well, not overly sweet and overwhelming, and all very well done. I was impressed also with the fact that the feet were nicely frilled for most of the macarons and the sizes and filling quite uniform across the board. Thumbs up!


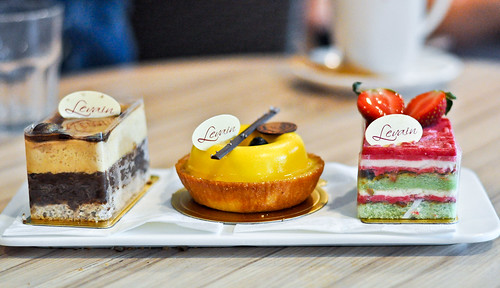
As for the cakes, I had the Noisette (Hazelnut Dacquoise, Dark 62% Mousse, Chocolate Flourless Cake, Pralinosa Mousse), Mango Passionfruit tart and Raspberry Pistachio Cake. I'm not sure if those are the exact names for the latter two, but I can't seem to find them on the website any longer. They probably are out of season by now. In any case, no loss if you want to try them because out of the three cakes I tried, I was most impressed with the Noisette. You can probably give the other two a pass since the raspberry tasted very sugary and fake, as did the pistachio (there just wasn't enough real pistachio) and the mango-passionfruit quite normal. I tend to prefer a crispier and more well baked pate sucree, so the tart crust was below par for me. Nevertheless, I think each cake cost me RM7-9, so it was pretty cheap and value for money! Do try the noisette - I really enjoyed the praline mousse and the hazelnut dacquoise - I thought the layers were very well balanced between chocolate and hazelnut.


As for the other hot meals, we had two pizzas, which are available from 12pm to 8pm, and we had spaghettis and soups as well. The pizzas start from RM14 for medium sizes and RM20 for large sizes. The large is probably enough for two people for a meal. Very decent prices, and you get to choose whether you want a thin crust or a 'roman' thick crust. The bottom pizza picture shows the thick crust. Really pretty good stuff!

As for the soups, I had the minestrone and mushroom, both to dip the sliced baguette in, nothing too fantastic to rave about, but nothing below average either. Their spaghetti was pretty good - I had the spaghetti in arrabbiata sauce, and the sauce was nicely hot with chilli padi and the spaghetti nicely al dente.

So all in all, Levain gets my two thumbs up! Definitely worth a visit if you're in the vicinity, and if you're a tourist, the place is just off Jalan Imbi, but it's quite a fair walk (especially under the harsh sun) and I'd certaintly recommend taking the taxi there if you can afford it. It's a great getaway in the middle of the city, and definitely a novel experience :]
Details

Levain Boulangerie & Patisserie

Address: 7 Jalan Delima, 55100 Kuala Lumpur, Malaysia
Contact: +603 2142 6611
Opening hours: Mondays to Sundays, 0730h to 2100h
Price: $ (starts from RM3 for a bun)

Wednesday, May 9, 2012

Homemade Granola - Food Revolution Day

I will be talking about revolutions today. When anyone talks about revolutions these days, you think about the 'Arab Spring', or the year of Arab revolutions that began in Tunisia in December 2010 and resulted in a wave of uprisings across the Arab world. And when you actually think about it (and it's been credited in many newspapers and other media around the world), then one catalyst for this widespread revolution was the act of one man. One man, by the name of Bouazizi, who decided one day to set himself on fire to protest, not against his government - no, it was not such a noble act, but it was specially against the confiscation of his goods and the humiliation he suffered under the government officials who came around his street to harass him. This then led to widespread public anger and violence, which led to the fall of the Tunisian government. This of course spread to other countries around Tunisia, most notably that of Egypt and Libya. 

This of course brings to mind a very often quoted phrase these days, that repression is the seed of revolution. 


On this note, I want to talk about Food Revolution Day. What is it you might ask? Well, if you're an avid fan of Jamie Oliver, you will know all about his series, Food Revolution. Basically, it’s about creating a movement to educate children about food and to fight against obesity. Honestly, if you look at the food that the American school children are eating, you won’t be surprised why obesity is such a great problem there. Children there are served sodas, pizzas, huge burgers, fries, and mystery meat – basically the epitome of a great American meal. The revolution has gained momentum in many states in America, and I particularly watching the series and reading the toolkits that Jamie has provided to empower parents and children to make a change in their schools.

This brings to mind a quote by Marianne Williamson “Personal transformation can and does have global effects. As we go, so goes the world, for the world is us. The revolution that will save the world is ultimately a personal one." Jamie Oliver made food education his personal revolution, and I would like to think that he has succeeded somewhat in impacting the world. Food Revolution Day is perhaps a culmination or an extension of what has been done, it goes beyond food education to school children – it is slated on 19 May 2012, and it is a day for people to recognize that we need to start thinking about where our food comes from. It is a day for parents to realize that food habits are cultivated at home, and they too have a part to play in improving the lives of both themselves and their children.

Anyhow, I’m not sure if my own consciousness about food began before or after I watched the series or heard about it, but I have been increasingly conscious of what I am eating of late. One reason is because after starting work, I’ve been eating lunch at hawker centres and elsewhere, and this, coupled with a lack of exercise, has resulted in some weight gain. What I am about to relate is probably the story of many.

Often, when I eat at hawker centres (Lau Pa Sat and Golden Shoe for example), I can’t help but feel a tad sick at the amount of oil, salt and MSG that’s going into my body. So why not eat salads you might ask? Salad shops are abundant where I work, mainly because all of us here are white collared workers, but the cost of these salads are astronomical! A bowl of bak chor mee or wanton mee will probably set me back $3 - $3.50, but salads start from at least $8! And that’s the most basic salad with NO meats! Being the cheapo that I am, I can’t help but think that for $8, I can buy buttercup, arugula, tomatoes, cucumbers enough to feed my entire family of 5! Trying to eat healthy in Singapore really is expensive! And because of my work hours (I often work till 10pm), I really don’t have the time to prepare salads or other homecooked food myself. Enter my mother. Sometimes when I don’t make it back for dinner, I get my mom to pack my dinner for lunch tomorrow, so that I can not only save money, but know that I’m eating healthy home cooked food. These are the small things that I have been doing in order to have a healthier lifestyle. For those who don’t have such nice mothers like I do, don’t fret – you can make a huge batch of pasta sauce and freeze it into meal-sized portions – I do that with my Spaghetti Bolognese which I pack to the office and heat up with the microwave in the office. You can also fry rice (not so much mee hoon and kuay teow since they don’t last long) and store it in the fridge. On weekends, I bake breads or steam paus, and these are very easily stored in the fridge or freezer.

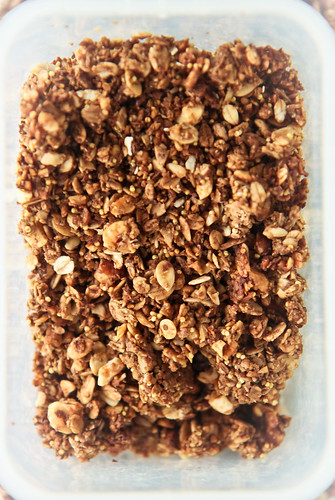
Another thing I also do is to make batches of granola which I keep in airtight containers, and this, along with the steamed paus, makes up my breakfast for the week.


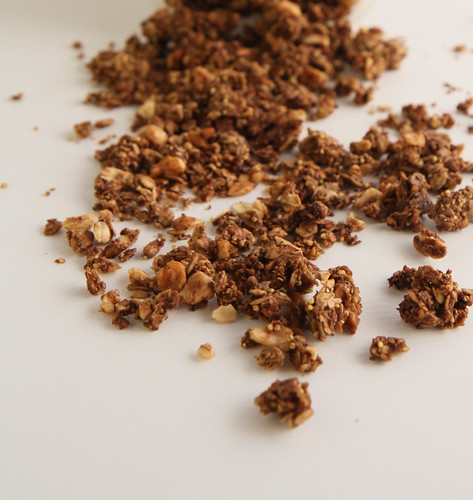
Like I mentioned in my previous post, I’ve been experimenting with many granola recipes, and I have come to realize that the beauty of granola is that there is no fixed recipe. Using the granola formula as your base, you can play around with as many add-ins as you want – some think that rolled oats are a must-have for granola, but I’m telling you that I’ve used rolled barley and rolled spelt and the granola tastes equally good. You can make yourself a chocolate granola, or a nutty granola, or a fruit & seed one – the world is your oyster when playing around with granola recipes! That said, I’m still working on a foolproof granola recipe that I can publish on the blog, so please be patient while I work out the kinks :]

This recipe below is the first granola recipe that I tried, and one that I didn’t tweak too much because I knew that the sweetness would be pretty much okay for me.

Granola Recipe with Molasses
Adapted from Cook with No Books who adapted it from Melissa 

240g rolled oats
1 cup assorted nuts/seeds (I used a combination of almonds, pecans, hazelnuts, sunflower seeds, pumpkin seeds, millet grains and quinoa)
½ tsp sea salt  
½ tsp ground cinnamon  
50g unsulphured blackstrap molasses*
10g honey
35g unsalted butter
30g water
½ tsp vanilla extract

Optional: dried fruits such as raisins

*You can find blackstrap molasses at organic food stores – it retails for about S$5 or less per jar.

Method:

  1. In a large mixing bowl, combine together the rolled oats, assorted nuts, sea salt and ground cinnamon. I am far too lazy to chop the nuts, so what I do is to take the nuts and give them a quick whirl in the food processor to get huge chunks. At the same time, I also take a quarter of the rolled oats and blend them in the processor until I get an almost fine powder. This helps to bind the rolled oats together so that you can get granola clusters.
  2. In another bowl, combine the molasses, butter and water together. Microwave on high for about 30 seconds, or until the butter has melted. Stir in the vanilla extract.
  3. Then, pour in the liquid ingredients into the large mixing bowl, stirring well until every dry ingredient is slightly moistened. It will appear as if the liquid is insufficient at first, but continue mixing and it’ll be okay. Rest the mixture for a few minutes while you prepare a baking tray lined with baking liner or a non-stick liner.
  4. Pour the granola mixture on to the tray and evenly distribute it. You should also try to flatten and compact it. Try to leave gaps in the layer so that you can easily turn over the granola layer for even baking later. Bake it at 150°C on the middle rack for about 20-25 minutes, or until the granola turns a dark golden brown. (The mixture is already a golden brown before baking because of the blackstrap molasses.) If you are afraid that the bottom of the layer is not evenly brown, remove the tray at about the 15-minute mark and gently fold over the layers from the gaps you have created earlier. Be careful not to break up any granola clusters.
  5. Remove the tray from the oven when it is a dark golden brown and allow the granola to cool thoroughly. If you desire, stir in the dried fruits at this juncture.


Janine's jots: 
  • Taste: I actually found the recipe not sweet enough, because I reduced the sugar amounts a little. I would recommend increasing the amount of honey or sugar at least 10% more. Also, if you're new to blackstrap molasses, you might wish to reduce the amount a little because the 'iron-like' taste takes some getting used to.
  • Texture: In order to get clusters, one way is to grind up some of the oats so that it forms a powder to bind the other oats. I usually grind up about 50g of oats. If you want more binding powder, do add in some flax or linseeds.
  • Serving size: This recipe makes approximately 500g of granola, which is sufficient for a fortnight's worth of breakfasts for a single person.  
  • Modifications: I have made many more modifications to this original recipe since the first time I made it - you can change up the amounts of fruits/seeds/nuts as well as the type of rolled grain - I have used rolled spelt and barley to great success as well.
  • Storage: Once thoroughly cooled, store in airtight containers in a cool and dry place. Try to consume within a month.
  • Would I make this again?: Definitely!


So anyway, the purpose of this post is not to stop you from buying cornflakes or cereal (unless I figure out a way to make them myself) or even granola right this moment, but I'm reminding you to be aware. To be aware of what you're putting in your bodies, whether it be refined products or not. And if you're interested to know what Singapore is doing on 19 May 2012 for Food Revolution Day, do check out the Singapore Food Revolution Movement here!

Thursday, February 16, 2012

[Thursday's Trio] Buckwheat Pancakes

Today I thought I’d perhaps rewind a bit and talk about how I got started with experimenting with gluten free and other non-wheat flours. (This is partly because I realized I’ve yet to post photos of these buckwheat pancakes and also because I didn’t have my camera this week to take any new photos.) As I was typing out today's post, I also decided that I shall name this new series Thursday's Trio, because for every new ingredient I'm introducing on this blog, I shall also include a trio of facts, uses and recipes for that particular ingredient (three is my lucky number, if you're wondering why trio). I had initially wanted to call it Feature Friday, but that's been used so many times, so Thursday's Trio it is. These facts and tips are usually stuff I scour the internet for when baking with something new, and is of great use to me when experimenting, so I hope it will be of use to you as well, especially if the ingredient is new to you too! :]


So today I'm starting with buckwheat

Now, I’m pretty sure I was like many of you – I frequented many blogs, especially blogs like Tartlette, La Tartine Gourmande and 101 Cookbooks. If you have the time, do click on the links because not only are the photographs exquisite, the persons behind those blogs are genial and truly have wonderful stories to tell. So anyway, visiting those blogs are definitely not good for me because I never fail to salivate each time I visit, and because I get the ‘itch’ – the itch to buy stuff and follow their recipes. All three bloggers share something in common – they believe in healthy and wholesome eating and as a result, their recipes tend not to use the white refined flours that we are used to. Now, I used to get very overwhelmed by all the new names I saw – buckwheat, sorghum, millet, etc. I used to think, what the hell are these?! There were several hurdles I had to overcome before I finally started buying some of those flours and opened a whole new world to myself. Like Sharon commented earlier, looking out of the ‘wheat’ square does tend to introduce you to new grains and flours, all of which are nutritious for you.

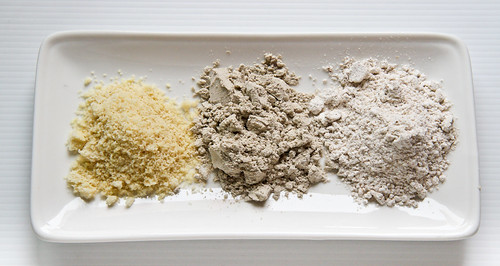
from left: almond, buckwheat and sorghum flours

Anyway, the first hurdle was my own self-inflicted fear of trying new things. Once I got over that (after convincing myself that if I failed I’d feed the stuff to my dogs), I faced another problem – where to get those weird sounding flours? At the supermarket, I only tend to see the same few flours. I managed to locate some of those flours, but then I was faced with yet another problem, these flours were sold in at least 500g quantities and were expensive! And I was afraid that I wouldn’t like the taste of them and hence waste the rest of the flour away! Sounds familiar? 

Long story short, I managed to find a pretty cheap source of unique flours (will let you all know where shortly in another post when I compile my list) and my experiments began! Most of my family members are quite ‘anti’ towards my experiments, so sadly, I am usually the only one eating it. I figured what better way to experiment than pancakes? Not only were they simple to make, I could make them in small batches enough for myself, and the taste of the flour will feature prominently, allowing me to decide if I liked the flour or not.

I decided to start with buckwheat. I have to admit that the moment I opened the flour packet, I was a little grossed out. The ‘smell’ reminded me of Indians (no offense or racist connotation intended!), and it was only after I asked my mom that I knew that buckwheat flour is a very commonly used flour in Indian cooking! No wonder I associated the smell of the flour with Indians! :] 

Anyway, most people will say that buckwheat has a nutty flavor, but it reminded me more of a grassy than nutty flavor. For bakers wanting to experiment with buckwheat, I’d strongly recommend starting small, because I found myself needing to get used to the almost smoky flavor of the flour. At first, I was wondering if it was because I got it from an Indian shop that it smelt and tasted so ‘Indian’ (I’m not being discriminatory here but I associate this smell with Indian homes), but I realized that it’s the same taste everywhere. It is an extremely earthy taste. 


Three interesting facts on buckwheat!
  1. Buckwheat is actually a plant, and not a cereal crop and the plant is usually ground with its outer bran, which is high in fiber. This gives us the dark brown color flour that we see, with dark flecks which is the bran. What’s even more interesting is that this fruit seed is actually related to rhubarb! 
  2. Buckwheat does not contain any gluten, which makes it a good flour to use for people with gluten intolerance. 
  3. Buckwheat is also an excellent source of protein. It contains all 8 essential amino acids. Low in fat and high in fibre. Basically, buckwheat is a super healthy food, and you can refer to this if you want to know more. 
Three ways of using buckwheat!
  1. It is also known as sarrasin in French, which is the base ingredient for sarrasin crêpes from Brittany, which I blogged about earlier. The same is known as blinis in Russia, which are essentially tiny egg like pancakes. Or you can just use them for these pancakes like what I’ve done. 
  2. It also makes buckwheat noodles, which are the backbone of much Japanese and Korean cuisine. Soba and naengmyeon anyone?
  3. You can also use buckwheat groats (Available at organic food stores) in porridge or in baking. They taste pretty good! 
Three interesting recipes I've bookmarked from local blogs: 

How to store buckwheat?
Most recommend storing buckwheat in a sealed, airtight container and placing it in a cool dark place. I say just put it in the fridge and it will last long enough for you to experiment with :] 

***
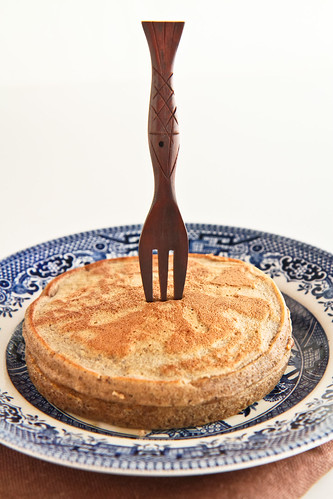
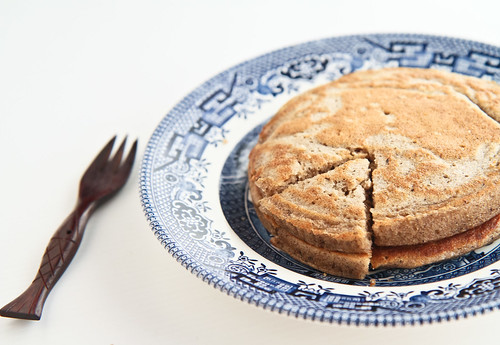
I didn’t want to use a buckwheat pancake recipe that I didn’t trust, because there are quite a few available on the internet. Instead, I modified my pancake recipe. This is my go-to pancake recipe, because I’ve modified it such that one batch below makes exactly 4 large pancakes, which I have over 2 mornings (2 each for breakfast each day).


Transitional Buckwheat Pancakes 

60g flour (30g buckwheat flour) 
2 tsp sugar 
¼ tsp salt 
½ tsp baking powder 
¼ tsp baking soda 
10g oil (I used olive oil) 
50g egg (small egg) 
85g milk 
1 tsp vanilla extract
1 tsp cinnamon powder


Method: 

  1. In a bowl, sift the flours with baking powder and baking soda. Mix in the salt and sugar. 
  2. In another bowl, mix the oil, egg, milk and vanilla extract together. 
  3. Add the liquid ingredients into the dry and give the mixture a quick mix or two. It is okay if the mixture contains a few lumps or two, do not overmix or else you will get tough pancakes! 
  4. Heat a non-stick frying pan on medium low heat. Using a 
    ¼-cup measuring spoon, ladle the 
    ¼-cup of batter on the pan and cook for 3 minutes, or until bubbles appear on the surface. Flip the pancake and cook for another 2 minute or until golden brown.
  5. Repeat with remaining batter and serve warm with maple syrup. Enjoy!


Janine's jots: 
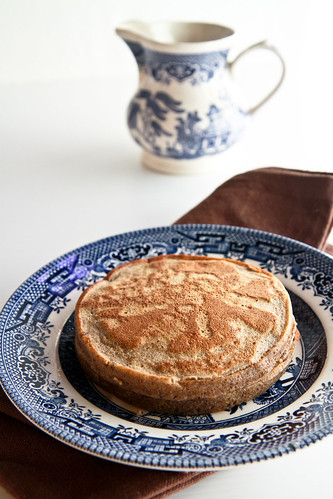
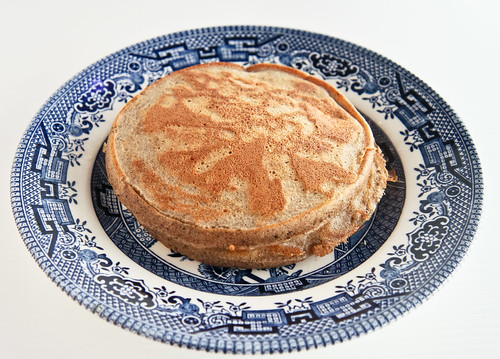
  • Note:  My pancakes may look overly cooked and not evenly brown, but that's because I use very little oil in cooking them, relying on the nonstick pan and mainly heat to cook the pancakes, hence the uneven brownness. I also like to turn up the heat at the start so that the outsides cook faster than the inside, and I get a relatively more 'crispy' texture on the outside of the pancake. 
  • Taste: I like to add an extra pinch of cinnamon to my pancakes, because I feel that it enhances the taste and especially with buckwheat, since it really did help cut down the earthy taste and ease me into taking buckwheat. Also, the pancakes will definitely taste better if you can use melted butter instead of using oil, but in the mornings, I’m usually rushing for time, so olive oil it is!
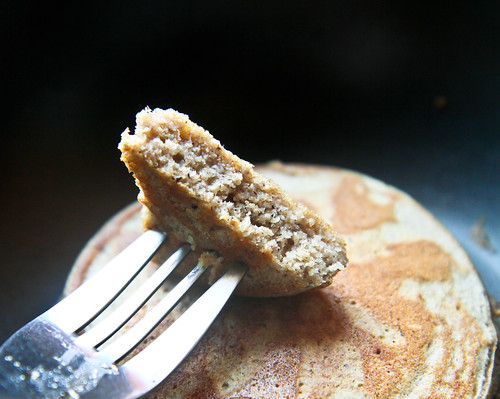
  • Texture: Because buckwheat does not contain gluten, you can actually mix the dry ingredients into the wet more vigorously and ensure that no lumps remain because they won't turn as dense anyway. This recipe is a no-fail one, and produces fluffy pancakes all the time! 
  • Serving size: This recipe makes 4 large pancakes, as pictured above. 
  • Modifications: For someone new to buckwheat, I would definitely suggest starting with a smaller quantity, say 10g out of the 60g of all-purpose flour and slowly increasing the quantities until you reach 30g. At this proportions, the buckwheat does not taste too overwhelming and are just nice!
  • Storage: I’ve use this same recipe over a month, with varying amounts of different types of flour  every alternate day when I was in my pancake craze, and since the recipe made 4, I would eat two and keep 2 in the fridge. Although freshly made pancakes are definitely nicer, the ones that are stored in the fridge taste equally delicious after a 15 second zap in the microwave. Do make sure you store them in an airtight container. 
  • Would I make this again?: Definitely!

Bon appétit! Pancakes go extremely well with maple syrup :]

Sunday, February 12, 2012

Valentine's Day Roundup 2012

Once again, the much-hated or much-awaited (depending on whether you're single or attached) Valentine's Day is here. It's a day for girls to receive free gifts from their admirers or loved ones, and for boys to spend bucketloads of money buying roses and whatnots. For those who are very much single and available, don't despair, because this is a day to celebrate your beautiful friendships with your friends, or to even celebrate your love for your family.


There's a million things I love about this picture, from pinterest 

Valentine's need not be stressful - I remember back in my secondary school days, I was in an all-girls school, so we would give each other thoughtful gifts for Valentine's - I still remember a bunch of us making trips down to Ikea and various crafts shops just to make handwritten and handmade gifts for our classmates and friends. And that is still the message of Valentine's that I carry with me today. For the past few Valentine's that I can remember, I still make it a point to have a Valentine's meal (which usually isn't on the 14th) with the best girl friends one can ever have. Besides, even if my boyfriend were here with me on Valentine's Day, I wouldn't want him to give me roses or bring me to a special restaurant to eat. For many reasons, first being everything is exorbitantly expensive on Valentine's, and there really is no purpose is trying to show off how much you love your other half on this Day and treat her/him like crap on the other days. So there. In any case, I love handmade stuff, and here are some quick last-minute gifts you can make (as cheesy as they may seem):


These are both fantastic ideas from Disney's Family Fun, and are really simple gifts, especially for children and students as gifts.

And while I'm on the topic of children and things that they can do/have, parents - you can make these for your child or even make it into a Valentine's project!

Heart shaped bento by Lisa

Teddy Bear Taco Tart by Beth

I'm not sure about you, but this meringue candy necklace reminds me of those candy I used to have as a kid - they had holes in them and were pastel colored and you could whistle through them! Anyone knows what I'm talking about?

Meringue Candy Necklace from Bakingdom

Okay, so I did a Valentine's Day roundup of some of the available ideas and recipes on the internet the last year, and I thought I'd do the same this year, because I am using some of the ideas to make some edible desserts for my family and friends and I thought it might be helpful for some of you, to perhaps spark some creativity in you for you to make your own edible gift! So bring on the reds and pinks and chocolates!

Again, starting with breakfast, what about some:

 Here are some more ideas:

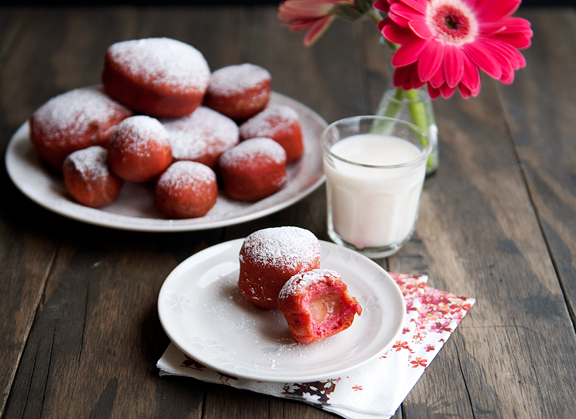
blood orange curd filled beet donuts? naturally red :]
Heart shaped french toast with stewed berries by Marina 
Heart-shaped breadsticks by mealpod
Or it could be a healthy heart-shaped granola bar!

For my gluten-free friends, there's a round-up specially for you here!

And moving onto lunch! My favorites - pizza and lasagna :]

Pizza in the shape of a heart :]

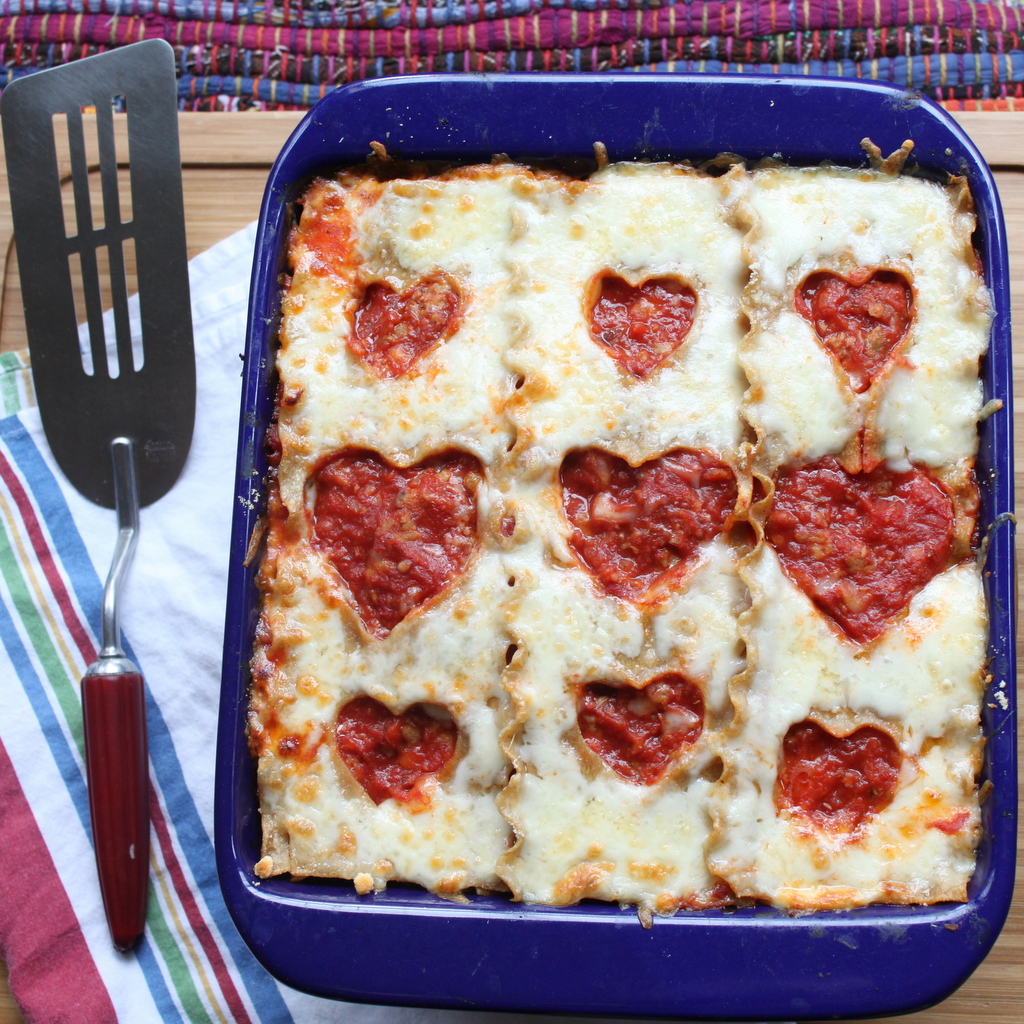
And a hearty lasagna, pun intended ;p
And this by Haniela, is ingenious. Simple, and my favorite carbohydrate.


And onto my favorite meal/dish - DESSERT :D
one of my favorite flavor combinations,  madeleines ispahan by Evan
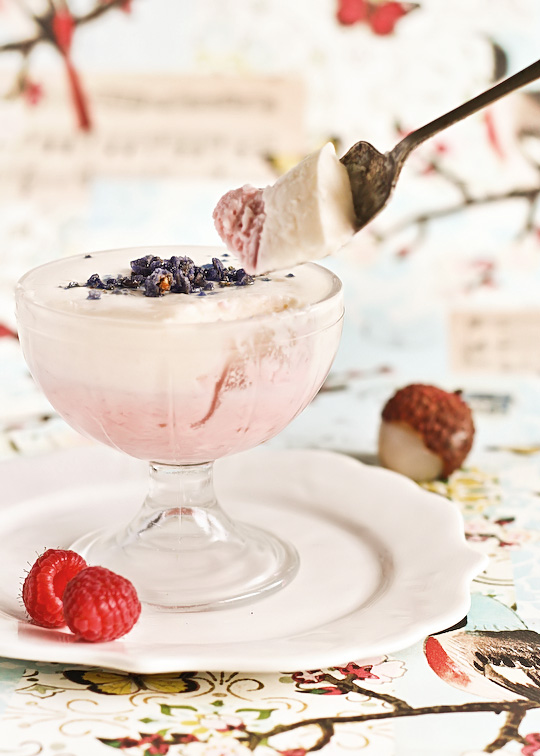
similar flavor combination - raspberry lychee mousse perhaps? 
Intertwining ring cookies - how's that for something unique?
you cannot get any cuter than with domokun hearts!
A hidden heart in a heart cupcake! From Veronica who got her idea from Desert Living Today

My favorite linzer hearts

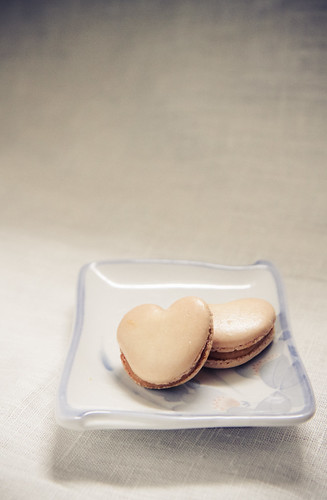
Moving onto the not so easy now, how about some heart-shaped macarons made by yours truly?


white chocolate raspberry cheesecake with hearts!
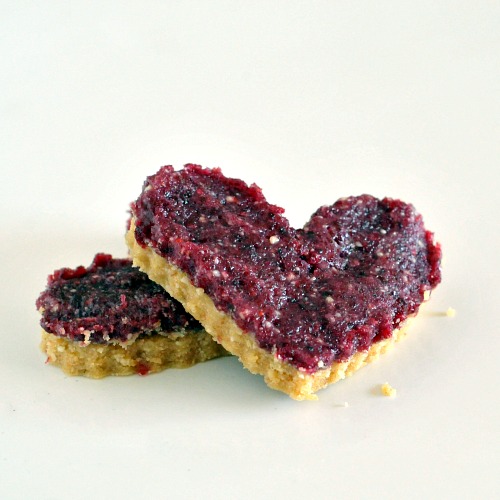
A healthy pomegranate cranberry heart?
Not forgetting a red velvet cake!
blackberry no-bake cheesecake by Yelena

And if you have the time (and skill) to make more elaborate stuff, do consider these!


lulu's rose heart cake - simply ethereal
red velvet cupcakes with roses
Another lovely entremet by Pook

Yet another one by Evan - same flavors, but in different forms


I also love these cakes - a valentine cake with a surprise and a rustic chocolate valentine cake!

And finally, my favorite ingredient of all time - chocolate. Here's a photograph of a cake I've been wanting to try from one of my favorite photographers/stylists. It's simple, fudgy and rustic, just the way I like my chocolate cakes :]

Chocolate Fudge cake by Katie

As always, all pictures are credited to their rightful owners - I don't own any of them besides the macaron photo. So get those creative juices flowing because Valentine's Day is just two days away! :]
Related Posts Plugin for WordPress, Blogger...