My blog has moved!

You should be automatically redirected in 6 seconds. If not, visit
http://www.unpastiche.com
and update your bookmarks.

Sunday, January 30, 2011

恭喜發財, 揚眉兔氣 =)

It'll be Chinese New Year on Wednesday, and this will be the first new year I'll be celebrating after coming back from Europe. I am looking forward to it, having missed it the last year - I spent it in Venice with friends, enjoying the Carnevale atmosphere.

Here's a snapshot of what I saw and experienced then - costumed people, masquerading as 15th century nobility, traipsing along the car-free streets of Venice, where the azure-ness of the water will be one sight I'll never forget. Pardon the lousy quality and underexposure - it's a photo off facebook.


Reminiscing aside, I'm definitely looking forward to the bak gua and other delicious CNY food, but not to the definite weight gain after that =/ Since I don't have any lessons on Wednesday and my Prof kindly cancelled class on Tuesday, this means that I'm free to balik kampung on Monday! I technically have almost a week's worth of holiday - good news because I get to spend more time in my kampung for CNY (we usually have to leave on the second day of CNY, because school almost always starts on the third day of the new year). Bad news because I'm not exactly free - I have to do research for my assignments which are due right after the CNY break =S 

Plus, I still have to help my mom with more baking because there are still some more people to give, and more varieties to bake! I've been helping my mom with more pineapple tarts, cashew nut cookies, nestum cookies, cornflake cookies, plus my own madeleines and macarons for the festive season =) Baking has indeed been rather fun for me, because this is the first time I've been actively helping my mother with entire batches of cookies, from start to finish (minus the washing up). Previously, I merely creamed butter and fiddled here and there before going off to do my own thing. I've also been diligently copying down my mother's treasured recipes (which have been made for the same groups of people over many many years and have always been praised) so that I can carry on my mom's legacy next time. 

Together with juggling schoolwork, I haven't had time to upload any photographs, so here's a wordy post wishing those celebrating Chinese New Year 恭喜發財, 揚眉兔氣 =)

Wednesday, January 26, 2011

Pineapple Tarts - Round #2

Technically, this is the 6th batch of pineapple tarts (consisting of both enclosed or open) that my mom and I have been churning out for the Chinese New Year, but this is the second most distinctive recipe we've been using, the first being the one here and other slight modifications on the basic recipes. This time, the recipe for the pastry has been modified from Youfei's recipe here to suit my own tastes and preferences. Basically, I halved the recipe, and instead of 1.5 egg yolks, I just used one yolk. The custard powder, which essentially is corn flour with flavoring, I left out because I didn't have any custard powder. I replaced that with more flour. I really do like the flavor that the milk powder brings to the pastry. 


I'm also posting my mom's 'guess-timate' pineapple paste recipe here for my own reference: 


Pineapple paste


Ingredients:
3 normal pineapples 
3 Honey pineapples (these are smaller and sweeter - like Sarawak pineapples)
300-500g granulated sugar (depending on sweetness of pineapples)
3 cloves 
1 cinnamon stick 
1 pandan leaf (also known as screwpine leaf)
½ tsp of anise 
½ tsp of lemon juice

Method:
  1. Cut and grate pineapples. If you don't particularly care for 'chew' (or fibers) in your pineapple paste, you can blend the cut pineapples instead. Do remember to wear gloves when you grate and cut otherwise the acid in the pineapples will eat into your cuticles.
  2. Give the grated pineapples a little squeeze to get rid of excess water, otherwise the paste will take a longer time to dry out! 
  3. Place the grated pineapples in a heavy-bottomed pan on medium fire, together with the spices, and cook until the water has evaporated. 
  4. Stir continuously, making sure that the paste does not stick to the bottom of the pan. After an hour, remove the spices and the pandan leaf and add the sugar. 
  5. Keep a close eye on the paste, making sure to continually stir it. It will slowly turn golden brown and extremely sticky. 
Janine's jots: 
  • The whole process, including the cutting and grating of the pineapples, will take up to 6 hours! Do keep a whole morning aside for making the pineapple paste. This isn't something that you can cook on the stove, and leave it until time is up because the pineapple paste will stick to the bottom of the pan.
  • As it browns, the paste will get harder to mix because it gets very sticky - lots of elbow grease is required, but don't be disheartened because you're almost done!
  • After the paste turns a golden brown (as shown in the picture below), switch off the fire. You can leave the paste in the pan to let it cool before storing it in containers. 
  • Because this is not commercially made, it does not keep well at room temperature. Use the paste on the day it is made, or refrigerate it. Most people recommend keeping it for up to 2 weeks, but my mother has tried using pineapple paste which she made a year ago and froze and it still tastes as delicious as a newly made paste =)

For the pastry: 
180 g     unsalted butter, cold
250 g     all-purpose flour
50 g       icing sugar
2 tbl       milk powder
1/4 tsp   salt

1            egg yolk
1 tsp      pure vanilla extract

Method: 
  1. Sift the flour, icing sugar, salt and milk powder together in a large mixing bowl. 
  2. Remove the cold butter from the fridge and cut it into 2-cm cubes. Add the cubes into the mixing bowl.
  3. Using clean fingertips, gradually rub the flour into the butter until the mixture resembles coarse bread crumbs. 
  4. Add the egg yolk and vanilla extract into the mixture and using your fingers, lightly incorporate them until a soft dough is formed. Do not knead anymore!
  5. Put the dough in the fridge while forming the pineapple balls. 
  6. Shape the pineapple balls to a size of your own preference (I used about a teaspoon of pineapple paste to 13g of dough - yes, I weighed them out individually.) Take the dough out of the fridge and divide them into 13g portions (I wanted small, bite-size tarts but any weight will suffice - up to your own preference). 
  7. Placing the dough in the middle of your palm, flatten it into a circle and place the pineapple ball in the centre of it. Pinch the ends of the dough together and give the dough a quick roll of your palms so that a perfect sphere can be obtained. 
  8. After lining up the completed tarts, apply an egg wash on them (you can use a 4:1 egg to water ratio, or you can simply just use milk) and bake in a 170 degree preheated oven for about 15-18 minutes. 
In pictures: 
Using your fingertips, rub the butter into the flour (or vice versa) - you do so by literally rubbing the cubes of butter together with the flour with your thumb, against your fingers. 
When the mixture resembles coarse breadcrumbs, add the egg yolk and vanilla extract (not shown) and gently incorporate it. The egg yolk might look as if it is not enough to moisten all the breadcrumbs but trust me - it is more than enough!
The finished dough should look like this - DO NOT knead it! (You don't want gluten to form, otherwise you'll have a chewy pastry!)
Press the dough into a circle, and place the pineapple ball in the centre.
Pinch the seams together and give the ball a quick roll to make sure it's uniformly spheri
Give the completed balls a light egg wash. 
Tadah! The pineapple tarts are done! They're slightly overbaked here - way too brown but still as yummy :) Leave them in the tray to cool for about 10 minutes before cooling them on a wire rack. 

I'm submitting this pineapple tart entry for Aspiring Bakers #3: My Favourite CNY Cookie (Jan 2011) because this recipe is one for keeps! My fibrous and chewy pineapple paste is encased in a crumbly pastry which literally melts in your mouth after the first bite. The mild sweetness and milkiness of the dough complements the tartness and sweetness of the paste, making this pineapple tart recipe one of my favorites so far =) However, I wouldn't use this recipe for the open-faced pineapple tarts because I prefer those tarts to be less crumbly - so I use one entire egg instead of just the yolk for the dough (my mom's original recipe). 

Two ong-lais in a pod - Gong Xi Fa Cai guys! =)
Ps: Ong-lai is hokkien dialect for pineapple, and it sounds the same as the phrase 'prosperity come' (literally) or basically, welcome prosperity to your home - which is one of the reasons why pineapple tarts are baked during Chinese New Year, so that you can welcome prosperity to your home in the new year =D

ETA: This post got featured in foodgawker here :) Whee - a first for me! This is proof that my photography skills are improving =D


Sunday, January 23, 2011

Madeleines for CNY? 烘烤玛德琳蛋糕来过新年?

She sent for one of those squat plump little cakes called petites madeleines, which look as though they had been molded in the fluted valve of a scallop shell. And soon, mechanically, weary after a dull day with the prospect of a depressing morrow, I raised to my lips a spoonful of the tea in which I had soaked a morsel of the cake. No sooner had the warm liquid mixed with the crumbs touched my palate than a shudder ran through me and I stopped, intent upon the extraordinary thing that was happening to me. An exquisite pleasure invaded my senses …at once the vicissitudes of life had become indifferent to me, its disasters innocuous, its brevity illusory… 
How wonderfully written, isn’t it? This is a translated passage from Remembrance from Things Past, written by Marcel Proust (which of course is in French), which propelled madeleines to worldwide recognition. Proust has been credited with bringing recognition to these plump and full-bellied (with a belly button too!) little cakes, but according to historians, it was King Stanislas Lesczynski of Poland who first discovered it. Madeleines are also known as Madeleine commercy, and they are so known because it is a baked treat found in the Commercy region in France. History has it that in 1730, King Stanislas was in Commercy visiting the Duke, and when it was time to serve desserts, the servants realized that the King's private chef had disappeared without preparing anything for dessert. In desperation, they took some tea cakes that a local maid had made as a replacement, hoping that the King didn't mind. Not only did King Stanislas not mind, he was so pleased with the tea cakes that he demanded to know who made it, and decided to re-name the tea cakes after her, Madeleine. 

Kuih bahulu (picture credits to Tourism Penang)
I did embellish the tale with more emotive language, but whether the original recount is true or not, we might never know but what we do know is that the madeleine is delicious, and goes especially well with a cup of afternoon tea and a good read! Funny thing is, the madeleine is not as unique as the French would like to think it is - Malaysians have something we like to dunk into our teh/kopi as well - the kuih bahulu! Also known as 鸡蛋糕, these tiny sponge cakes (usually in the shape of a shell or goldfish or a ridged turtle-shell (pardon me but I don't really know how to describe the mould in words - look at the picture on the right) are best eaten when dipped into a hot beverage and eaten after it has soaked up the hot liquid.

Having eaten both madeleines and kuih bahulus, I would say that the latter are more 'crusty' (the hard crispy crust encloses a dry, crumbly interior) whereas madeleines are denser and moister. If made traditionally, kuih bahulu is made using a metal mould, baked over a charcoal fire and only consists of three ingredients: eggs, sugar and self-raising flour (at least my grandma's recipe only has these three ingredients). In comparison, the method of making the madeleine is more time consuming, because you have to let the batter stand for at least 3 hours, or preferably overnight, for it to form the characteristic 'belly button' (this is my own description - the knob-like characteristic is typically called the hump by most bakers).

Kuih bahulu is something I will always associate with Chinese New Year and my grandmother, because when I was younger (and when my grandma had the energy), she would make hundreds of them, and these would greet us when my family went back to our kampong to celebrate the new year. We would dip them into our milo and have them for breakfast, and when it was time to go back to our own homes, my grandma would pack them into containers, and assign each family to one container of kuih bahulu.

I personally am not too fond of kuih bahulu, because I find it too dry, and I'd much prefer a treat that can be eaten on its own, which is why I'll be baking madeleines for Chinese New Year this year. This is also the reason why I'll be submitting this post for Aspiring Bakers #3: My Favourite CNY Cookie (Jan 2011) -  it might not be my favourite CNY cookie (because nothing can take the place of my much-loved pineapple tart), but it is a cookie that reminds me of Chinese New Year =) [Interesting tidbit - I referred to madeleines as tea cakes and now as cookies, and they basically mean the same thing, because cookie comes from the Dutch word koekje, which means little cake!]

ETA: The host said it didn't fit the requirements of the theme, and so this will not feature as a submission, but it's okay :)

For those who might be interested in a kuih bahulu recipe, check out Sharon's recipe here!

And enough of my verbosity, here's the madeleine recipe that I adapted from Angel:


Ingredients 
½ tsp    lemon zest (from ½ a lemon) 
60 g      castor sugar 
2           eggs (about 50g each)
20ml     maple syrup (can be substituted with honey) 
½ tsp    vanilla extract
80 g      all-purpose flour 
3 g        baking powder 
20 g      ground almond 
¼ tsp    salt
100 g    unsalted butter, melted and cooled

Method: 
  1. Place the butter in a bowl and microwave it on low for about 30 seconds, or until melted. Let it cool to room temperature. 
  2. Zest half a lemon. In a large mixing bowl, rub the castor sugar and lemon zest together with your fingertips until the sugar is fragrant. 
  3. Add the eggs to the mixing bowl and beat until the mixture turns a light yellow color, or until the sugar dissolves. Do not overbeat.
  4. Add the maple syrup and vanilla extract.
  5. In another bowl, whisk together the flour, baking powder, ground almond and salt. 
  6. Gently fold in the dry ingredients into the egg-sugar mixture, making sure all the dry ingredients are moistened (ie, no large lumps).
  7. Add in the melted butter into the batter and mix until incorporated. 
  8. Cover the batter with plastic wrap and refrigerate for at least 3 hours, or up to 2 days. When ready to bake, grease and flour the madeleine pans (I spray them with non-stick spray, then dust the insides with flour and tap out the excess).
  9. Remove your batter from the refrigerator and fill the madeleine pans up to 80%. 
  10. Bake them in a preheated oven at 170°C for about 12 - 15 minutes. 

Janine’s jots:
  • These madeleines are extremely moist, and can be eaten on their own without dunking into your tea or coffee. If you want them to be drier and more crumbly, replace the 20ml of maple syrup with castor sugar instead, because maple syrup (or honey) is extremely hydroscopic, meaning, it absorbs moisture and makes the batter more moist! 
  • You can use cake flour if you want a finer texture. 
  • I got my Madeleine pans from Daiso, which means that a pan for 5 madeleines only cost me S$2 =) They are found in the baking section together with other cake pans and they usually run out of stock fairly quickly!  
  • The ground almonds gave the madeleines a slight 'chew' which I totally loved - if you like a cake with less chew, replace the ground almonds with flour instead.


    In pictures: 

    The Madeleine Mold from Daiso - grease and flour them before use!
    Zest half a lemon for half a teaspoon's worth of zest. Pictured is one teaspoon worth of zest! 
    Rub the zest into the sugar with your fingertips. The sugar will become moist and fragrant.
    Add the eggs into the bowl and mix until egg is well incorporated and sugar crystals have somewhat dissolved.
    Whisk the flour, baking powder, ground almond and salt into the mixture above. Briefly stir, ensuring no large lumps are left. But do not overstir because you don't want too much gluten to form!
    Here's my bowl of melted and cooled butter. It looks like a disproportionate amount of butter to batter, but trust me, it's correct.
    Add the butter into the batter and give it a quick mix, ensuring it's evenly incorporated into the batter.
    This is how the final batter will look like. It's extremely liquid, but that's the way it is! My batter has tiny brown flecks because my ground almonds were from unblanched almonds which had their skins on. If you use normal almond powder, your batter should be a uniform beige-nude color. 
    After resting in the fridge overnight, fill up the madeleine mold till about 80% and bake them for about 12 minutes. You should get the characteristic humps - check out the middle one in the picture above!
    If you don't have the madeleine molds, fret not! These were baked in small cupcake liners and they also had the belly button on top of each. Some are more distinct than others because my oven doesn't distribute heat too evenly. These were as yummy as the traditional-shaped madeleines and were gone in a trace because you could pop one in your mouth without worrying about dropping crumbs!

    Monday, January 17, 2011

    Chewy Oatmeal Raisin Cookies

    I love snacking. Friends who are close to me will know that I have to have my breakfast once I'm awake, followed by lunch about 3-4h later, followed by a tea-time (or snack-time) and finally dinner by 7pm. In between, I might sneak in a cookie or fruit if I'm at home. Post-holiday, I've been putting myself on a semi-diet, where I try to cut down on eating overly unhealthy stuff. However, I still have cookie cravings - so I figured, why not bake a healthy cookie that I can munch on at will without feeling overly guilty about the calories? Plus the fact that the 1-kg packet of rolled oats which I bought last year was still lying around the cabinet untouched, it was time for me to make some oatmeal cookies!

    This recipe has been on my mind for awhile, and it calls for applesauce, which I have blogged about here. Applesauce is a healthy alternative to fats (typically oil or butter) and this substitute is perfect here because I am looking for chewy cookies, and not crisp ones. Applesauce will result in a cookie with a softer and moister texture. 

    Chewy Oatmeal Raisin Cookies
    Adapted from Nick Malgieri's Perfect Light Desserts and Cook's Illustrated here
    Makes 36 cookies

    Ingredients:
    125 g   all-purpose flour
    ½ tsp    baking powder
    ½ tsp    baking soda
    ½ tsp    salt
    30 g     butter, softened
    90 g     granulated sugar 
    80 g     light brown sugar 
    1 large  egg (about 55-60g)
    ¼ cup   unsweetened applesauce 
    1 tsp     vanilla extract
    100 g   rolled oats 
    75 g     raisins (you can substitute this with pecans, cranberries or even chocolate chunks!)

    Method:
    1. Set racks in upper and lower third of oven and preheat oven to 180°C.
    2. Whisk together flour, baking powder, baking soda and salt. Set aside.
    3. Beat softened butter and granulated sugar together. Add the brown sugar until mixture turns fluffy. 
    4. Add in the egg and beat until thoroughly mixed. 
    5. Beat in the applesauce, followed by the vanilla extract. 
    6. Add the flour mixture and mix until the dough starts to come together. Add rolled oats and raisins one at a time and continue mixing the batter. 
    7. Drop the dough using a teaspoon (or an ice cream scoop if you are so inclined), placing them 2 inches (or about 4 fingers) apart on the greased cookie sheets. Use a fork to gently flatten the mounds of dough until about 2 cm thick. 
    8. Bake the cookies for 10-12 minutes. At the halfway mark, change the positions of the pans, from top to bottom and back to front. Once the edges of the cookies start to brown, remove the pans. The centre of the cookie will look underdone, the surface will look dull, but wet and shiny in between the cracks. 
    9. Let the cookies cool on the cookie sheet for 2 minutes before sliding them onto a wire rack to cool.
    In pictures
    After whisking the dry ingredients, cream butter and sugar together until fluffy. 
    This is an example of not-so-good creaming. Cream until fluffy (a sort of yellowish-white) and use the correct sugar in the recipe! I used coarse granulated sugar - whereas fine granulated sugar was called for! =/
    Add your egg. You can beat it first before adding to your batter or crack it into your batter and use your spoon to beat it up. I prefer the latter since it means fewer bowls to wash. 
    Add your applesauce followed by the vanilla extract and mix thoroughly!
    Dump it your rolled oats! (Mine is not pure rolled oats but a mix of wheat sticks, dried fruit and some other stuff). I added in the oats before I added the flour - not sure if it affects the recipe or not =/
    Add in the flour all at once and give the batter a quick mix.  Do not overmix!
    The completed batter :)


    Scoop equal portions of batter and place them at least 1.5 inches apart on a lined baking tray. 
    At half-time, I turned the trays around to ensure more even baking. Look at these babies expand!
    Aaaannnddd.... we're done :) The cookies should be golden brown on the outside and the color of sand on top. 
    See the "moistness" on the top of the cookie? 
    Here's another closeup :)

    And the above two pictures are my slightly-failed attempts at better food-styling. I think the ribbons detracted too much from the cookies =X


    A final one:


    Nutritional information: 
    Per cookie: 54 calories, 1g total fat, 1g protein, 10g carbohydrates
    (These values are from the book but the above recipe will have lower values because I have reduced the sugar (both white and brown) by 20% as compared to the original recipe.)

    Janine's Jots: 
    • Cookies will look undone at 10-12 minutes, but this is what makes them chewy! If you want your cookies crisp, just leave them slightly longer for 15 minutes. 
    • I felt that the floury taste was still a little strong - the next time, I'll up the vanilla extract to 2 tsp, together with more rolled oats (probably up to 130g) because there doesn't seem to be enough!
    • If you want a tender, chewy cookie - you can also substitute all-purpose flour for cake flour - the lower protein content will reduce the amount of gluten formation.
    • I made a tiny batch with some chunky peanut butter and it tasted great :)
    • The original recipe calls for 110g of fine granulated sugar and 100g of brown sugar - these proportions would be apt for someone who like their cookies sweet. The reduced amounts in my recipe above makes for a less-than-normal sweet tasting cookie. 
    • Note that the use of fats (butter, in this case) is not totally eliminated because it adds flavor to the cookie. 
    This post made it onto Tasteologie here :)

    Wednesday, January 12, 2011

    Just a quote :)

    I stumbled (pun not intended) across this quote as I was surfing random websites one day, and I felt that it encapsulated the spirit one has to bring into the kitchen. Many a time, it is a fear - fear of failed and horrible tasting cookies and pastries, of wasting ingredients and time and fear of difficult recipes. Just a while ago, I failed in my first macaron attempt and was rather put off by them for a long time (okay, just 2 weeks or so, but this is because I'm stubborn and I've a never say die attitude), until I made them again - and when little feet appeared on the shells of my macaron (after squatting down by the oven to observe them for 5 minutes), I whooped up in joy. The whole day went better after that :)

    So, for all aspiring bakers and cooks out there, here's some Julia Child for you:

    "The only real stumbling block is fear of failure. In cooking you've got to have a 'What the hell?' attitude."

    Tuesday, January 11, 2011

    Applesauce - a healthier substitute

    For a while during my december holidays, I toyed with the idea of going on a low-carb diet. But as with most of my ideas, it went down the drain when I realized that I had to forgo a few of my most favorite foods - bread, pastries and cakes! So I embarked on trying to substitute one of my meals with a high protein, low carb alternative and looked towards healthier alternatives for my baking. One of the things that popped up the most was the substitution of applesauce for any oil in a recipe. I saw this substitution a lot when I was looking at muffin recipes, but it can be used in other types of bakes as well. 

    Since then, I bookmarked recipes for making applesauce but did not try it because I was attempting other more interesting recipes. It was only when I was reading Nick Malgieri's book and was entertaining a craving for oatmeal cookies that I decided to finally to try out making my own applesauce. 


    For the uninitiated, why can we substitute applesauce for oils in a recipe? 
    Fats add richness and texture. The primary function of fats in a recipe is to coat the proteins in the flour, thereby preventing them from mixing with the liquid ingredients and forming gluten, which would result in a tough texture. Applesauce is good substitute, because it is high in pectin, and pectin can also coat the protein, inhibiting the development of gluten and thus keeping the baked good tender and moist. However, applesauce has water, which is a liquid which can contribute to gluten formation. Also, applesauce is more moist than oil, which might result in a more liquid batter. One method to avoid gluten formation is to mix the liquid ingredients and sugar first, and the other dry ingredients separately before combining them together gently and as little as possible. This is because gluten begins to form as soon as flour comes into contact with a liquid and gets more active with stirring.

    General rules of thumb
    • Tenderness, moisture and flavor changes when substitutions are made. Because of its moistness, applesauce substitutions work best for cakey recipes - this includes cakes, muffins, brownies, quickbreads, chewy cookies. 
    • 
Oils in a recipe can include butter, or canola oil or shortening. Any butterfat in a recipe can be substituted. Generally, 1 cup of oil can be substituted with 1 cup of unsweetened applesauce. It is generally recommended to first substitute half of the oil in the recipe with applesauce, and slowly increasing the ratio until you are satisfied with the result.


You can completely substitute the oil, but 1 to 2 tablespoons of oil in a recipe is ideal, as it will enhance the recipe's flavour. Note that by substituting half a cup of oil with applesauce, you are already reducing calories in the recipe by 1600 calories!


    • If your applesauce is sweetened, reduce sugar in the recipe accordingly. 
    • You can also use other types of purees: pears, plums, pumpkin, banana or squash as substitutes. 
    • Since applesauce is acidic, add about 1/4 teaspoon of baking soda to smooth its flavour. 
    • Note that applesauce substitutions will result in a moister and softer texture, and is NOT suitable if you want a crisp texture (crispy cookies, for example). 
    • Do not overmix or overbake the cookies because low-fat batters tend to be dry and are prone to becoming tough and dense if overbaked. To prevent this, reduce oven temperatures by about 5°C and check the product for doneness a few minutes before the end of the usual baking time.

    Applesauce
    Ingredients
    Adapted from Nick Malgieri's Perfect Light Desserts 
    3          apples (I used a mixture of Delicious, Fuji and Granny Smith)
    30 ml   water

    For a more flavorful applesauce, add up to 30g of sugar or 1 tsp of lemon juice or a dash of ground cinnamon or all of the three. 

    Method:
    1. Peel, halve core and chop apples. 
    2. Place them in a medium saucepan with the water and cook over medium heat until the mixture comes to a boil. 
    3. Lower the heat and allow the apples to simmer in their juices for about 20 minutes, stirring occasionally so that the apples do not scorch. 
    4. If the apples become very dry before they have disintegrated, add 2 to 3 tablespoons of water and continue cooking until the apples turn into a chunky puree. 
    5. Use a whisk or potato masher to break up any large chunks. You can also use the back of your fork or spoon to do the same. 
    6. Remove from heat and let applesauce cool before using it. 

    Golden Delicious, Fuji Apple, Granny Smith (From L-R)
    Peel, halve and core the apples. Chop them into tiny pieces.
    Add 30 ml of water to the apples and bring it to a boil before allowing it to simmer. 
    The result after a 30 minute simmer - if you are fine with this texture, then there is no need to mash it up! 

    Janine's Jots: 
    • This recipe is for unsweetened applesauce - you can add up to 1/4 cup (~50g) white or brown sugar if you want a sweetened version. Unsweetened applesauce is somewhat of a misnomer because it has the sweetness of the apples - you can smell it while it's cooking! Don't follow any recipes strictly, instead, slowly add sugar to the mixture and taste it until the sweetness suits your preference 
    • You can also cook this in your slow cooker if you like - about 2-3 hours will give you the same result.
    • For a more complex version, check out Elise's recipe here.
    • I mixed the types of apples I used to increase the complexity of taste in the applesauce. Using the same type of apples is fine.
    References: here and here

    Comments: I'll update with Nick's oatmeal recipe as soon as I try it out! Right now I'm having fun eating the applesauce and using it in my apple pies as extra filling :)

    Sunday, January 9, 2011

    Pineapple tarts - round #1

    I am a little OCD sometimes. I like information, and I like lots of it. When I have a new topic to research or a question that needs to be answered, I go on this crazy Google rampage where I search the topic/question and then click on at least twenty links and open a lot more other pages to read the information that is proffered and cross-verify between the sources by googling some more. I'd like to think of this as a takeaway from my legal education - how it taught me to do research, the long-winded way. 

    Naturally, this applies to all aspects of my life. So it's not really strange that I have hundreds of cooking and baking blogs on my RSS feed and that when I find the urge to bake something, say macarons or pineapple tarts, I turn first to the search function on my RSS feed, supplemented by Google, and then supplemented by any recipe books or other resource I have on hand. I then read all the recipes, compare the reviews and results, cross-reference and then decide on which recipe (or not) to follow or to create one myself. The wannabe-scientist in me also cries out for information occasionally, so I do a bit of reading with regards to food chemistry on the side and have acquired quite a bit of knowledge as to the functions of different ingredients in different recipes. 

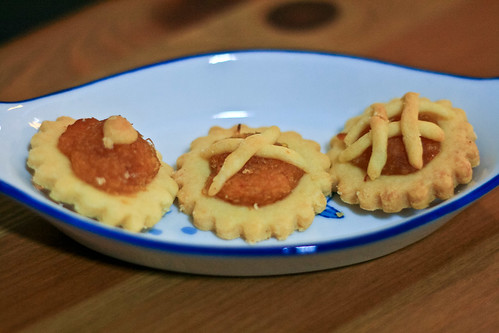
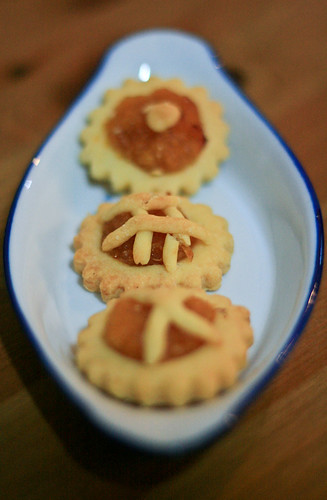
    So when I realized that Chinese New Year was around the corner and to fulfill my promise to do some baking and remove some of that burden off my mom (my mom bakes like a mad woman the month leading up to CNY because she bakes cookies as gifts for relatives, friends, neighbours, etc.), I started to do my groundwork. Nothing spells Chinese New Year to me better than pineapple tarts and bak gua. I  LOVE pineapple tarts (especially those open-faced ones) to bits. When I was younger, (and even now), my mom will restrict my pineapple tart intake to 3 tarts a day; and when I was overseas last year for Chinese New Year, I had my mom send over a whole jar of pineapple tarts for me to slowly savour. Naturally, this is a no-brainer - to herald the start of CNY baking, there is no other cookie I would bake than pineapple tarts :)


    So first, I looked at a number of recipes from the blogs I stalk on a (almost) daily basis. There are a number of pineapple tart recipes, and all of them look divine. Just an idea of what goes on 'behind the scenes' - here are some of the recipes I looked at: both recipes from Youfei here and here, another here, those with custard powder, and those without; those with baking powder here or icing sugar 
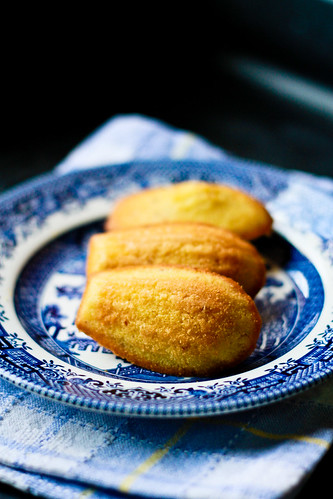
here. There are different variations on the tart itself - closed 'golden pillows' here, and open-faced one here. There are even videos on how to make them! This list of recipes is but the tip of the iceberg really - I am a hoarder of recipes =/ After accumulating all webpages, I slowly read through them and compare the recipes, at the same time comparing the notes/comments as well as the reviews on the completed tarts. I find this process very helpful, because you get tiny nuggets of information along the way, which I feel help with my baking. The comparing between recipes is also enriching - for instance, one will wonder - what is the use of baking powder in the pineapple tart recipe? What about the use of custard powder and milk powder? How about icing sugar vs castor sugar? As for the addition of cornstarch - how about using cake flour instead? These are but some of the few questions that'll race through my mind. [pssst...I think I'll thrive in America's Test Kitchen (oh how I long to work there sometimes - imagine all the testing I could do and all the questions I could entertain with near-endless resources).]

    Anyway long story short, my mom has an old recipe too which I like, and which she has been using for the last dunno-how-many years; but there are detractors, because her tarts are cakey and not the 'melt-in-your-mouth' kind of pastry. So I've decided to test a few likely candidates and see which ones I like the best. So this is the first of a few recipes that I'll be trying:  


    Pineapple tarts
    Adapted from The Little Teochew here

    Ingredients
    For the pastry
    400 g    all-purpose flour
    50 g      corn flour
    1/4 tsp  salt
    280 g   cold, unsalted butter
    3          egg yolks, beaten
    3 tbl     cold water
    6 tsp    icing sugar
    1/2 tsp vanilla extract

    Method:

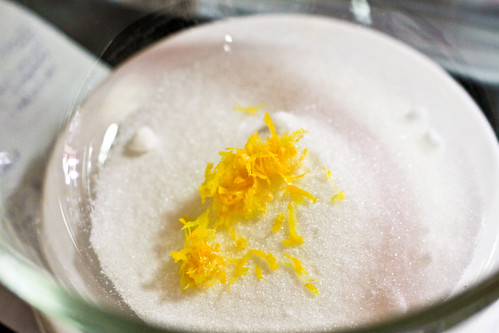
    1. Sift the all-purpose and corn flour with the icing sugar. 
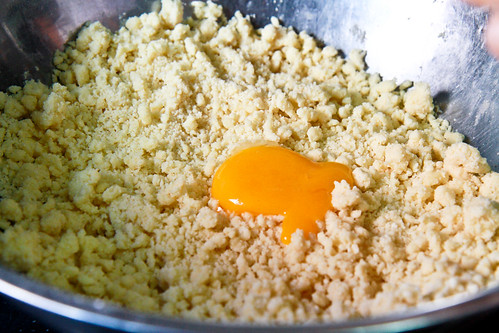
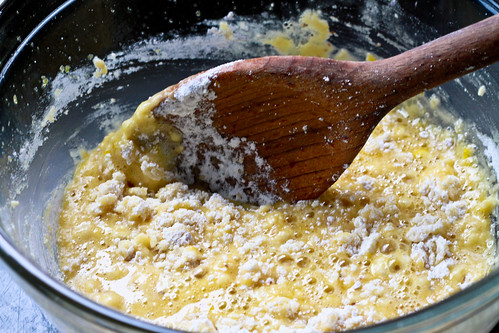
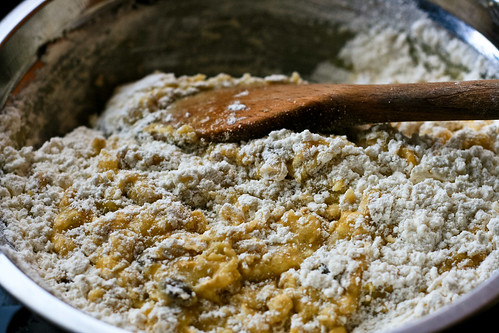
    2. Cut the cold butter into small pieces and use your fingertips to rub the butter into the flour until the mixture looks like bread crumbs. Make sure to only use your fingertips. 
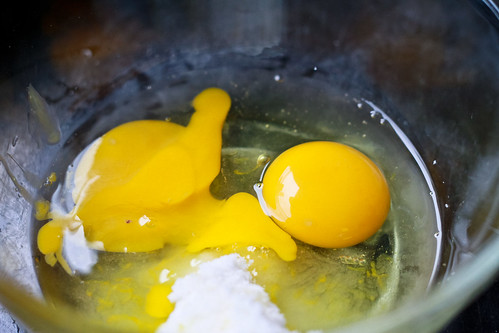
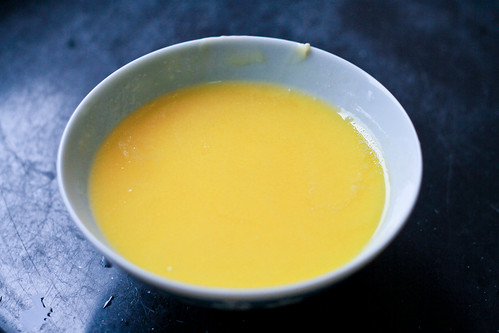
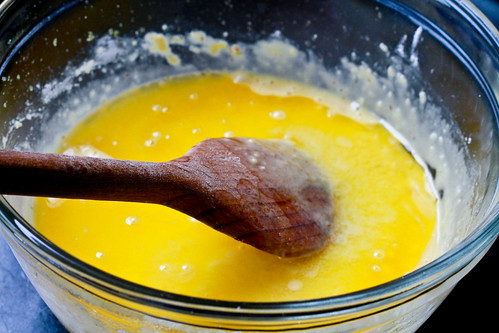
    3. Beat the egg yolks together with the cold water and vanilla extract. Add into the butter-flour mixture. 
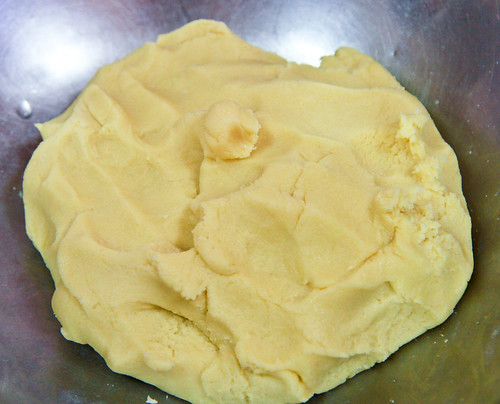
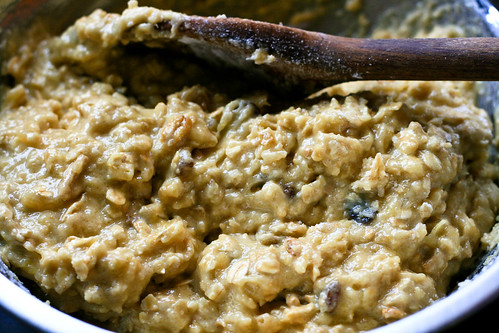
    4. Using your fingertips, gently mix the crumbs until they come together in a ball of dough. Do not knead the dough. Cover the dough and chill in the fridge for about 10 minutes. This makes the dough easier to work with when rolling and cutting later.
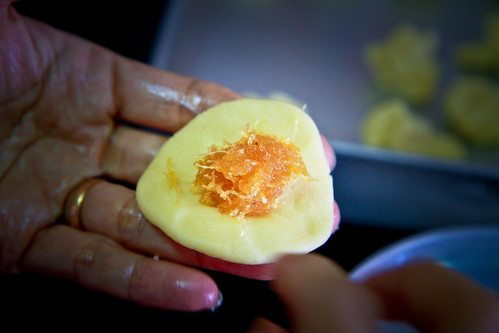
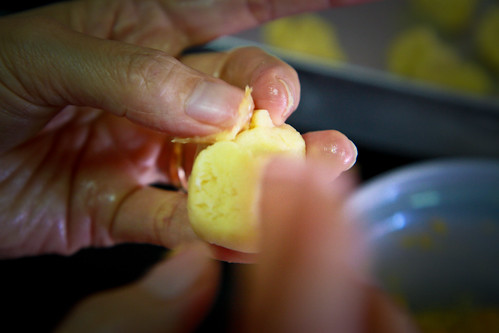
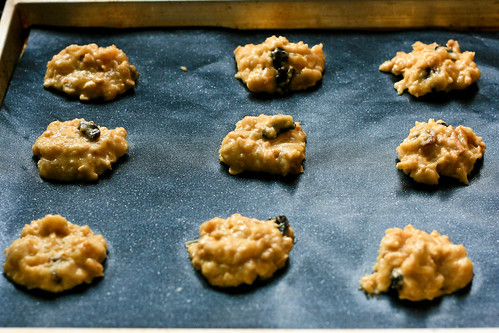
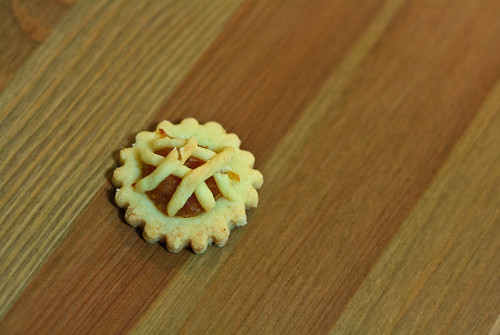
    5. Roll the dough to about 8mm thick. If making them into pineapple rolls, use a round cutter to cut the dough before encasing the pineapple filling and shaping the dough. For the open-faced tarts, use a traditional cutter to cut the dough before adding the pineapple filling on top. 
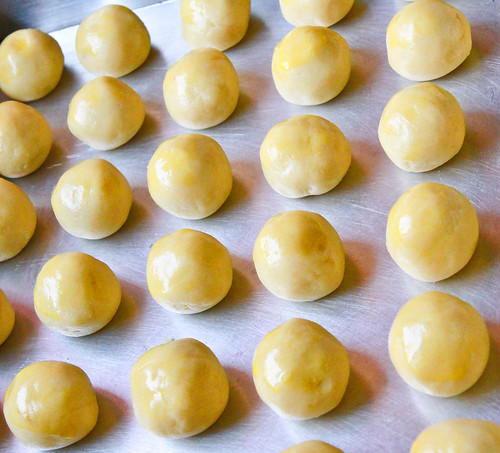
    6. Reserve some dough so that you can add some lines/patterns on your open-faced tarts. Arrange the tarts at least 2 cm apart on a pre-greased cookie tray. Glaze the tarts with egg wash. 
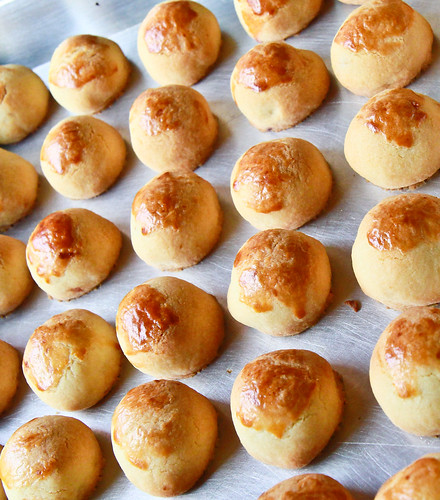
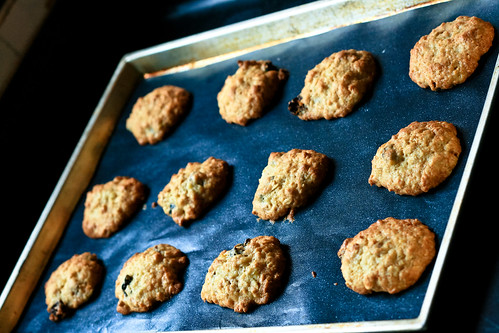
    7. Bake at 160 degree celsius for 20 minutes, until cookies turn golden brown.
    Janine's Jots: You can use a fork to 'rub-in' the butter to the flour, but using fingers are the easiest method. Just make sure your fingers aren't overly warm - if they are, dip them into some cold water before proceeding. While cutting the dough, remove a portion to work with while leaving the rest in the fridge to chill. 

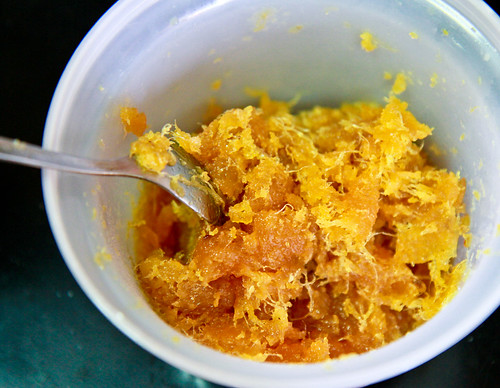
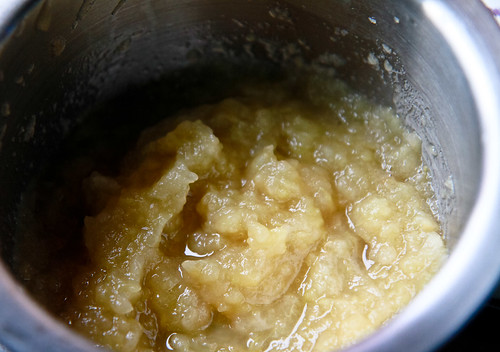
    I haven't listed the recipe for pineapple filling because my mother makes the pineapple filling by 'aggaration' - basically she doesn't use any recipe but estimates the portions by taste and sight. It contains the usual - pineapples, cinnamon sticks and sugar. 

    I am entering this post for Aspiring Bakers #3: My Favourite CNY Cookie (Jan 2011) because this really is my most favorite CNY cookie and I got this recipe from a local blogger :) Am looking forward to what the others come up with!

    PS: Sorry I don't have the usual step-by-step photos because my mom did most of the work here, and I just leeched off =X 


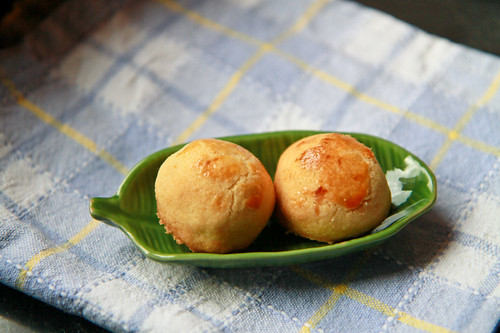
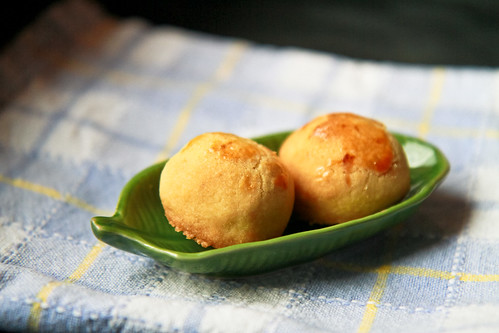
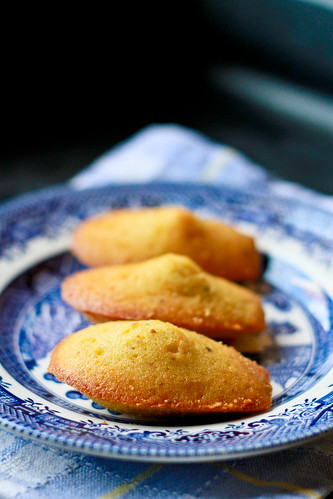
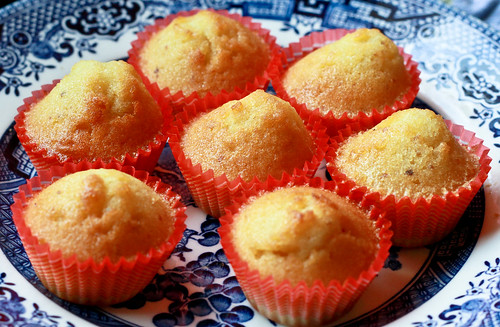
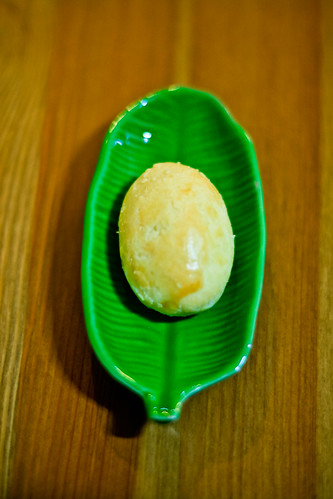
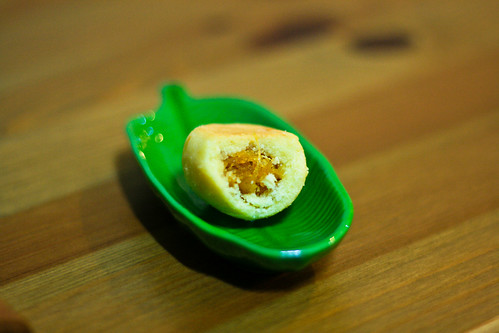
    More photos of the 'golden pillow' or tangerine-style pineapple tarts:
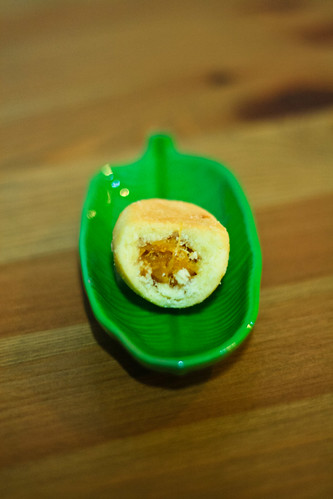
    Yum :)

    Comments: This recipe is indeed very flaky and buttery - very different from my mom's own recipe. I personally find the texture more suited towards the tangerine-style of cookie instead of the open-faced tarts but that's just my own opinion. I'll be trying out a few other recipes before deciding on which recipe I like best :)

    Related Posts Plugin for WordPress, Blogger...