My blog has moved!

You should be automatically redirected in 6 seconds. If not, visit
http://www.unpastiche.com
and update your bookmarks.

Showing posts with label Chocolate. Show all posts

Tuesday, June 19, 2012

Where to get chocolate in Malaysia [Valrhona, Barry Callebaut, Cacao Barry, etc]

Right at the start, I think I should qualify the title to state that it's mainly just Johor Bahru (which I'm most familiar with) and a little bit of Kuala Lumpur. I'm not familiar with the other states/baking places, so I really can't definitively say. For details of shops and prices of ingredients in Singapore, check out these two links. For shops in JB, here's the link.

Also, I thought there might be some confusion about the chocolate brands, so a little history might be helpful here.

Barry Callebaut is perhaps one of the world's largest chocolate manufacturer. When I was in Belgium, Callebaut was THE brand to buy, and with good reason too. The chocolate really is good, although I'm not sure how it compares to Valrhona since I didn't taste them together. The name "Barry Callebaut" actually comes from two companies - Cacao Barry and Callebaut. Cacao Barry was the French company and Callebaut was the Belgian company, and both of them merged in 1996 to form Barry Callebaut. Ironically, Barry Callebaut is now based in Zurich - neutral territory perhaps? 

To add to the confusion, Barry Callebaut, after merging, decided to come up with a new brand, SICAO, presumably to cater to the Southeast Asian consumers, retailing it as a cheaper alternative. So you can probably visualize this as a three-tiered thing, with SICAO being on the lowest tier (the cheapest brand of chocolate), followed by Cacao Barry and then Callebaut right at the top - with price and quality being the top too. 

Valrhona on the other hand, is still located in the same town it was founded in - Tain-l'Hermitage in Hermitage, near Lyon. I wish I could say I've been there before, but the most I did was to bypass Lyon twice, once on my way from Paris to Geneva, and other from Paris to Nice. Oh well, there's always next time! They also hold classes at the same place, although they have set up schools in Tokyo and Versailles as well. 

PS: Did you know that there is a Chocolate Academy in Port Klang which run chocolate-related classes and which is owned by the Barry Callebaut group? :] (and no, I am not paid to say all these)

Where to get baking chocolate in Malaysia (mainly Johor Bahru)

Common brands in Malaysia
  • Tulip
  • Nona
  • Van Houten
  • Hersheys
  • Beryl
  • SICAO
  • Cacao Barry
  • Felchlin 
  • Barry Callebaut
The first three brands I have listed are the typical brands you can find in any supermarket - relatively cheap, and not exactly 'real' chocolate since it's a compound chocolate. What do I mean by compound chocolate? Well, 'real' chocolate is made with cocoa butter and cocoa solids, but compound chocolate uses vegetable fat (like coconut or palm oil) as well as sweeteners and emulsifiers :/ Call me elitist but there is a difference in quality and taste okay! 

Anyway, something to be proud of as a Malaysia --> besides Tulip which is manufactured in Indonesia and maybe Callebaut or Cacao Barry which might be manufactured and packed in Europe, all other chocolate brands above come from Malaysia! Malaysia does have quite a number of cocoa plantations, and I hope to visit one in the near future! The chocolates are listed in increasing price. As you can see, if the chocolate retails for less than RM30 per kilogram, it is most likely chocolate compound - so don't be fooled yeah!
Now, as far as I'm aware, Valrhona is almost impossible to find in JB, but available in KL. I've listed a couple of places in JB (and KL) where you can find the chocolates:


1. Perling Indah
  • Perling Indah has the largest variety of chocolate available in JB that I know of. You might notice that I might be a little biased towards Perling Indah as compared to other baking shops in JB, but that's really because I stay near this shop and I can't say for the prices in the other shops!
  • Here are some prices: 
    • Van Houten - RM9.20 for a 150g 'baking chocolate' bar
    • Beryl white/dark/milk chocolate compound - RM15.80/kg
    • Beryl 62% chocolate buttons - RM50/kg
    • Tulip - RM16.50/kg
    • Tropica chocolate compound - RM15/kg
    • Le Bourne chocolate compound - RM16.50/kg 
    • Selbourne milk/dark chocolate compound - RM18/kg
    • Callebaut - RM140 for a 2.5kg pack (53.8%)
    • Cacao Barry - RM58/kg
    • SICAO milk/dark block - RM62 for a 1.5kg pack, RM72 for a 2.5kg pack
    • Cacao Barry amber cocoa powder - RM78/kg

2. Aeroshield JB
  • Aeroshield has its headquarters in KL at Pandan Indah (check out its website here). If getting it in  JB, contact Mr Danny Lai at 010 6623542.
  • Here are some prices: 
    • Callebaut dark coverture - RM97.50 for a 2.5kg pack
    • Callebaut cocoa powder - RM40/kg (available only in 5kg pack)
    • Cacao Barry extra brute cocoa powder - RM50/kg 
    • SICAO 70% chocolate callets - RM45 for a 1.5kg pack 

3. Pastry Pro
  • Pastry Pro is located in Kepong. Check out its website here
  • It only carries Felchlin, which is a Swiss brand. Felchlin Maracaibo 65% retails for about RM22.35 for 250g pack. 
  • Just as a comparison, Felchlin retails at ToTT in Singapore for $72/2kg, and this is the smallest size available. 

4. Gourmandines
  • This is an online only retail shop, which provides free delivery for purchases above RM250. If I'm not wrong, it is the only place in KL to get Valrhona chocolate. It sells a whole lot of other things too, such as gourmet cheeses and pasta, at pretty cheap prices. 
  • Here are some prices: 
    • Valrhona Manjari (64%) / Jivara (40%) / Ivory Buttons - RM25/200g; RM108/kg
    • Valrhona Guanaja (70%) also available but prices not online. 

5. Classic Fine Foods
  • I also found this website which appears to retail Valrhona chocolate, but the e-shopping website is under construction for the longest time, so erm..call them if you really want to know if they sell Valrhona?

6. Artisan Supplies
  • Pei-Lin graciously provided details of this shop she frequents in KL, where you can get quality branded chocolate (no Valrhona) as well as frozen purees. 
  • Their fb page is here. See her comment below for more details! 


And last but not least, I have received a number of queries and am glad to announce that if you are in Malaysia and would like me to help you in getting any chocolate products (in Singapore or in JB), I would be more than happy to help you to get them in my own time. You will have to, of course, pay for my transport, the price of the item you want to get, as well as postage fees (preferably registered/pos laju) for mailing it to you. I don't really want to discuss details here, but just email me if you have any queries!

Thursday, May 31, 2012

Chocolate Layer Cake with Cream Cheese Frosting

I'm quite a horrible procrastinator. I remember almost a year ago, seeing similar entries on Lena, Zoe and Joyce's blogs, and then realizing that they were doing a small bake-along where all three of them would try the same recipe and post them on the same day. This Bake-Along was very useful for people like me, because I am usually hesitant to try new recipes, but with three different opinions from three bakers saying that X recipe is good, I definitely felt more confident in attempting those recipes.

And I'm pretty sure that this was the experience of many other home bakers as well, who have gradually joined in the bake-along. As for me, well, I'm sure that all three hosts are quite sick of seeing my comments saying that 'I hope to join for the next bake-along', but when the next one comes along, I never do join. So....what better time to join than on their first year anniversary? :]
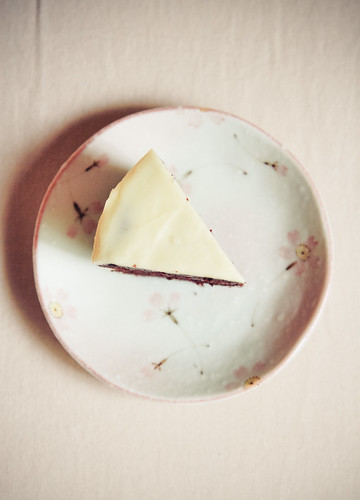
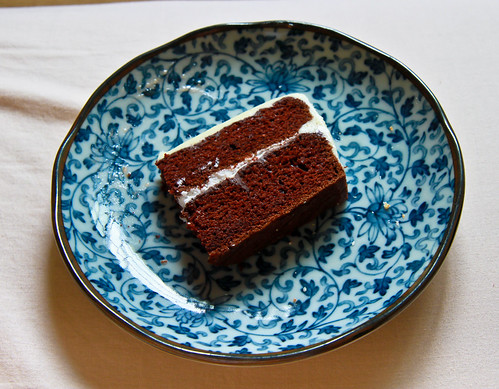
Only one slice was left for the 'photoshoot'

So here's my virgin entry to Bake-Along on their first anniversary and I really hope that I'll be punctual with the upcoming few, because I do love the upcoming ones - crumble and scones, a few of my favorite things to eat! And of course, layered cakes, which is the reason why I'm joining this time. iI love to eat layered cakes, because I love how creative you can get with just mixing and matching the layers and filling, and also because layered cakes are usually celebration cakes, my favorite type of cake to eat :]

So for this chocolate cake, I remember digging it from this treasure trove of chocolate cake recipes I found on the Bon Appétit website, 10 years of chocolate cakes, BUT the problem is that I can't exactly recall which chocolate cake recipe from Bon Appétit actually inspired this recipe, but I'm thinking it should be somewhat similar to this one. In any case, the ingredients and method has been so modified that it doesn't matter. And if you do happen to click on the first link, notice that you will only see ten pictures of chocolate cakes with the year 2000 to 2010 underneath each, but do click on the pictures because that will lead you onto even MORE chocolate cake recipes for that year.

I've been slowly baking my way through the recipes, and the reason why I chose this one below is because it was simple (only one-bowl required) and it didn't require the use of melted chocolate, buttermilk or sour cream, all of which I didn't have. It only requires pantry staples like cocoa powder and milk, which is fantastic for times when you have a chocolate cake craving.

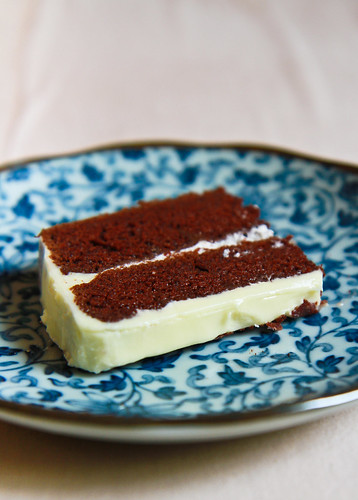
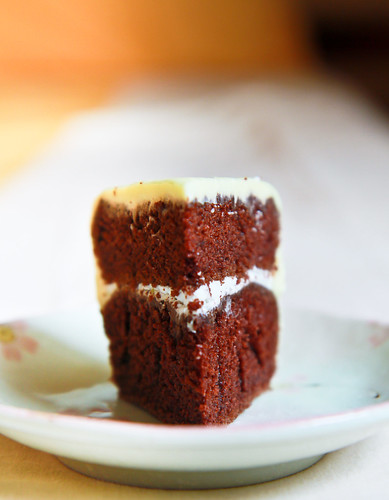
Look at those tight crumbs! YUMMY :]

 
One-bowl Chocolate Cake
Adapted from Bon Appétit
Makes a 6"/15cm cake

For the cake:
120g castor sugar
125g all-purpose flour
35g cocoa powder
1 tsp baking soda
¾ tsp baking powder
½ tsp salt
120ml milk
55g butter, melted
1 tsp vanilla
1 egg

120g boiling water
2 tsp espresso or coffee powder

For the cream cheese frosting:
120g cream cheese
55g butter
85g powdered/icing sugar

Method:
  1. In a cup or bowl, add the coffee powder into the boiling water. Allow it to steep while preparing the other ingredients.
  2. In a large mixing bowl, sift together the flour, cocoa powder, baking powder and baking soda. To that, add in the salt and sugar. 
  3. Then, add in your 'wet ingredients', the melted butter, vanilla, milk, egg and the cup of coffee from step 1. Mix together all the ingredients until no visible lumps remain. Pour the batter into a lined or greased 6-inch pan, or a cupcake pan with 8 cupcake liners.
  4. Bake at 160°C for about 30 minutes for the cake, or 20 minutes for the cupcakes. An inserted skewer should come out with almost clean with a few crumbs. Allow the cake to cool in the pan for at least 15 minutes before removing to cool on a cooling rack. You have to wait until the cake is completely cooled before attempting to slice it into two layers.
  5. In the meantime, prepare the cream cheese frosting. The cream cheese and butter should be at room temperature, but should not be too soft. I find that a good estimate is to remove them from the fridge for about 15 minutes before making the frosting. In a mixing bowl, cream the cream cheese and butter with a handheld or stand mixer, or with a wooden spoon. The mixture should appear homogenous in color (butter is slightly yellow and cream cheese is off-white, so these colors should be well-combined together) and once it appears light and fluffy, sift in the icing sugar, making sure to cream well, until all the sugar has been incorporated. If the cream cheese frosting is too 'soft', store it in the fridge while preparing the cake layers.
  6. Once the cake is completely cooled, slice it into half with a serrated knife. Add a thin layer of cream cheese frosting on one side of the layer, before sandwicing the two layers together. Add another layer of frosting on the top and sides of the cake, and refrigerate until firm. The recipe above gives you enough frosting for the 6" inch, but only for a very thin layer of frosting, so if you're a frosting monster and have a sweet tooth, I'd recommend doubling the frosting recipe for a thicker layer all around. Bon Appétit! 

Janine's jots: 
  • Taste: The cocoa powder features very prominently here, so be sure to use good quality cocoa powder, and please don't skimp on the coffee because it does bring the chocolatey-ness up a notch. Trust me.
  • Texture: The cake is moist, and doesn't have overly tender crumbs, which is good in a cake which you want to cut into layers.
  • Serving size: Enough Since it's only a 6" cake, it can only feed about 8 persons, assuming you have a tiny slice each.
  • Modifications: None! Enough have been made!
  • Storage: If unfrosted, the cake freezes very well, for almost a month. If frosted, keep in the refrigerator for not more than one to two weeks because the cake will lose its moistness after that.
  • Would I make this again?: Maybe...not because it's not a good cake, but there's so many other chocolate cake recipes to try! This will definitely be one to-go-to cake, because it's very simple to make, and you will always have the ingredients handy!
So join in for the bake-along! :]
 

Wednesday, May 16, 2012

Sable au Chocolat or Very Good Double Chocolate Cookies

I know I've complained about work tons of times, but work is getting really hectic. The very nature of my work requires me to be charging clients every hour, which means that busy-ness is a good thing, but sigh. I sometimes wish I had more time to myself to bake during the weekdays because baking during the weekends is simply insufficient!


Despite my lack of sleep, I couldn't not post today, because today's a very special day for me. It doesn't feel very special at the moment because well, the special person is not here with me and there's no one to celebrate it with besides him since this special day concerns the both of us. And this is the second year running that both of us are in different countries, and is likely to be the case for the near future :/ But I always look forward to this day, because 2 years ago to this date, I was in Paris, waiting for my special someone to arrive, and he did :] My friends always tell me that they feel like I've been in the relationship for a really long time, mainly because we were 'dating' for an extended period before making it 'official', but I guess that's the beauty of it all isn't it? Getting to know each other properly before taking that step. I'm still learning new things everyday, and I hope you are too - here's to many more years dear.


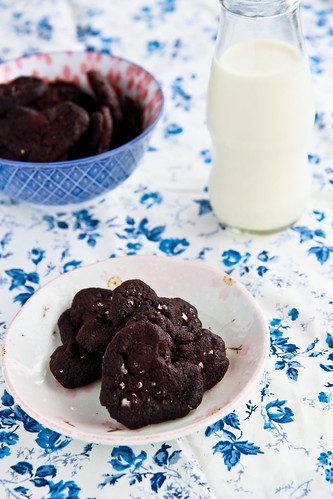
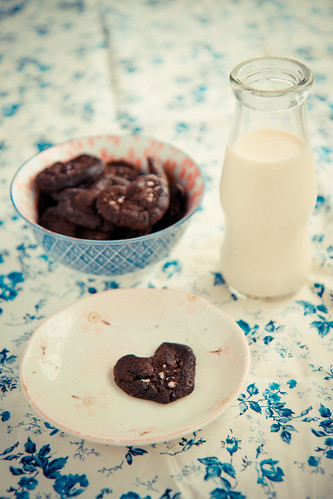
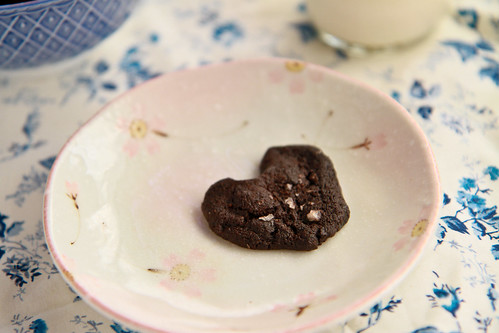
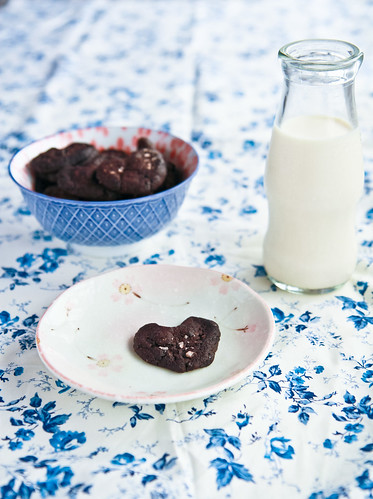
I had initially planned to post this for Valentine's Day, because it's heart shaped and all, but as usual, I didn't manage to bake it before Valentine's Day or even shortly after, but I eventually did make it, so what better day than today to post little heart-shaped cookies for my dearest? I know what he's going to say too - why am I making 'brown things' again, but hey, this is almost black, not brown! (He likes to says that everything on my blog is brown, which is not true! =p)


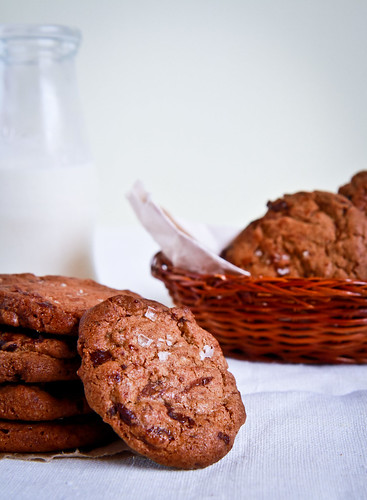
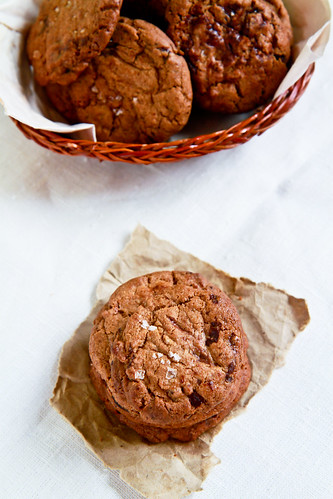
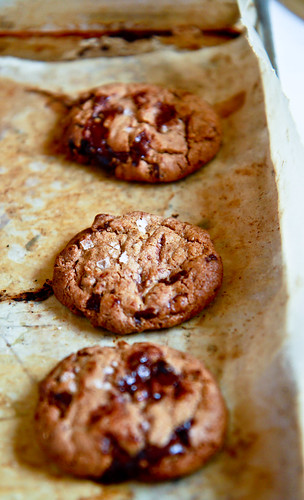
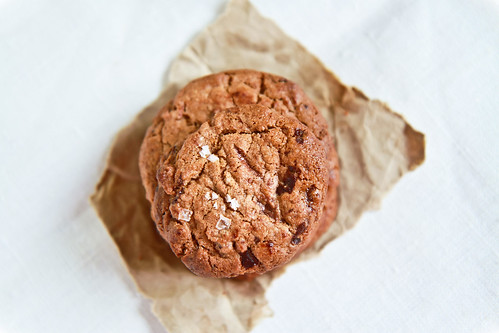
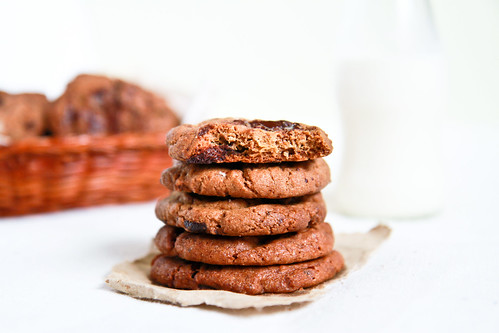
This is by far the chocolate cookie recipe I love most, for the very fact that it is very simple to make with simple ingredients and the fact that it is very very very good! It's a sable au chocolat, or very loosely translated to chocolate sand cookies - this recipe is very crisp, and not at all melty or sandy. In fact, EVERYONE I've baked this for says it's very very good. And I think it's very good too! Another thing in its favour is the very fact that it's another recipe by Pierre Herme, and you know how biased I am towards anything of his.


And I was very trigger happy with the cookies because I had just bought the new cloth and the lighting that day was pretty good. Plus I found out that I had a milk bottle prop that could be used! PS: quite a few of you have asked where I got the bottle from - my brother saved it for me after buying this bottle of milk from a convenience store in Japan, so I'm afraid you can't find anything similar here! Now, if only I can find a nice striped straw...


Pierre Herme's Sable au Chocolat
Adapted and translated from Pierre Herme's Le Larousse du Chocolat


55g butter
¼ tsp sea salt
¼ tsp vanilla extract
20g white sugar
40g brown sugar
65g all-purpose flour
½ tsp baking soda
10g cocoa powder
50g bittersweet chocolate (70%)

Sea salt, to sprinkle

Method:
  1. Roughly chop a bar of bittersweet chocolate until you get 50g of shards and pieces. 
  2. In a mixing bowl, cream the butter until light before adding in the brown and white sugars. Cream until fluffy, then add in the vanilla extract. 
  3. In another bowl, sift together the baking soda, all-purpose flour and cocoa powder. Gently the dry ingredients into the creamed butter, until all the dry ingredients are well incorporated and a cookie dough forms. Mix in the chopped chocolate until evenly distributed. 
  4. Roll the cookie dough into logs of your desired shape (circular or rectangular is good), making sure that the width/height of the log is no more than 2 inches to ensure even baking. Chill the logs for at least 30 minutes, preferably for a day for the flavors to meld. 
  5. 20 minutes before baking, remove the logs from the refrigerator and preheat the oven to 160°C. Slice the logs to about 1cm or less in thickness and lay them out on a greased cookie tray. Leave at least 2 finger spaces between each cookie because the cookie does spread a little. Sprinkle some sea salt onto each cookie if you want an extra burst of saltiness. 
  6. Bake for about 12-15 minutes at 160°C, or until the entire cookie is firm - if the centre of the cookie yields slightly to touch, do give it another minute in the oven before removing the cookies. Allow the cookies to cool on the tray for at least 15 minutes before removing to cool on a cooling rack. The cookies taste best after a while (i.e., not a few minutes out of the oven), so try not to eat too many cookies before then!


PS: see the difference in the tone and light in the photographs above by merely changing ISO and shutter speed! 


Janine's jots: 
  • Taste: Because chocolate is the star in this cookie, be sure to use good quality cocoa powder and chocolate. I usually use a Belgian cocoa powder (which is not available here) and a Nestle Premium 70% bittersweet chocolate (which is also not available here). Do use chopped bittersweet chocolate because it provides a perfect foil to the chocolate cookie. You can choose to use Valrhona if you have access to it. I have also taken the liberty of decreasing the amount of sugar to suit my tastes, feel free to use 10-20% more sugar if you like a sweeter cookie.
  • Texture: This chocolate cookie is crisp if sliced thinly enough and is simply the most awesome cookie ever. Enough said.
  • Serving size: This makes about 60 cookies, or about 2 trays worth depending on the size of your cookies.  
  • Modifications: You will get a slightly different mouthfeel depending on how thick you slice the cookies, so slice them thinly if you want a crispier cookie and thickly if you want a cookie with more heft. Do be careful if the cookies are thick because the outsides of the cookie may burn (speaking from experience) before the insides are properly crisp - cover them with an aluminium foil if the cookie turns too dark. I have also tried using brown sugar instead of white, demerara instead of white, and a combination of white and brown, all works fine, with slight differences to taste.
  • Storage: If stored in an airtight container, the cookies remain crisp for up to a month, although it will lose a bit of the original crispiness after 2 weeks or so.
  • Would I make this again?: Definitely, I have made this recipe more than 10 times now, for Christmas, for Chinese New Year, etc. My only caveat is that you have to make sure that the cookies are properly packed because they are fragile.
  • Other comments: This recipe is easily doubled or tripled, but be sure to chill it for at least 30 minutes, preferably for a day or more for the chopped chocolate to properly 'infuse' the rest of the cookie dough. Remove the chilled logs (or discs) from the refrigerator before you intend to bake, and depending on the ambient temperature and the thickness of the log, it might take 10 - 20 minutes for the log to soften. My logs are usually thin, and I wait about 10 minutes before slicing the logs - the log should still be firm and yield only slightly to touch (not as soft as room temperature butter or like bread dough) - this will allow you to slice through the log cleanly. Also, try to chop the chocolate to pieces larger than your typical chocolate chip so that you will not have problems slicing the chocolate. For the heart shaped cookies, I shaped the cookies by hand after separating the dough into balls, which works fine as well, but as you can see, the texture of the cookies will not look as smooth as sliced ones.

A final punny line - love is bittersweet and surprising at the same time (thanks to the salt) :]

Wednesday, April 18, 2012

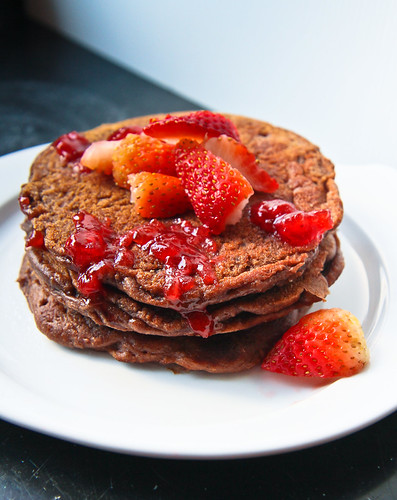
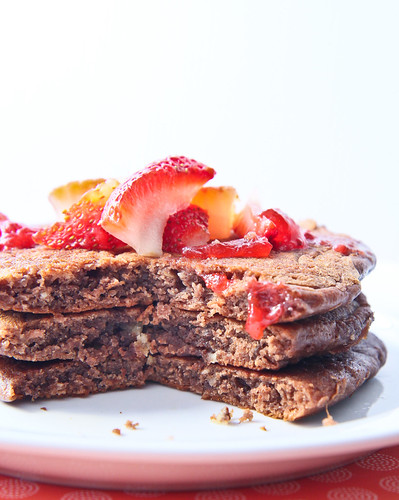
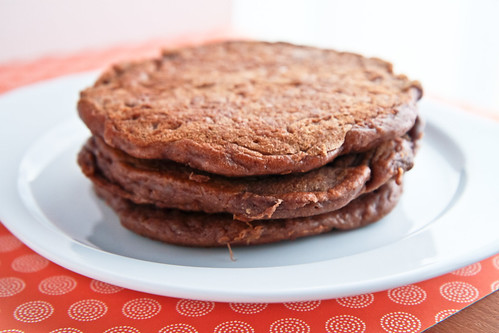
Really Good Chocolate Multigrain Pancakes

Sometimes, I'm obsessive compulsive to the point that even I get sick of myself, literally. I usually try variations on a single recipe and different recipes relating to the same thing for days on end until I satisfy myself that the recipe is the one I want as my "to go to" recipe, or the one recipe I'm willing to replicate to eat for the immediate future.


Just take bread for example. My very first post in the blog was of bread using the tangzhong method. What you didn't know was that I probably tried tens (I am not joking) of recipes before I finally settled on my bread recipe. My family members had to suffer through weeks and weeks of bad, not so good, and not bad breads just so that I could come up with 'the one'. Right now, my brother proclaims that my bread making is my "拿手好菜" (my best dish) and that I should just stick to that. Obviously I don't listen.

Right now, my current fad is granola and yogurt. I've been making my own homemade yogurt (low-fat and unsweetened) and my own granola. As for the yogurt, the experimentation was a few years back, so I've more or less settled on my usual technique. No one in the family is willing to eat my yogurt because they think it is too sour :( But that's the way I like it - natural yogurt tastes like that! So anyway, as for the granola, I've probably tried more than 10 granola recipes and am still experimenting. No one in my family eats that either, so I've to slowly make my way through the granola before making a new batch. I'm currently eating a banana-hazelnut granola and an olive oil-raisin-assorted nuts granola, both of which are so different and taste so good together!

Oops somehow the jam looks horrible on the pancakes :/

So you can probably imagine how it was with my quest for pancakes. I was so obssessed with getting THE pancake recipe that I tried pancake recipes every other day (because I'm the only one willing to eat the pancakes and one recipe of pancakes lasts me 2 breakfasts) for weeks until I finally got sick of having pancakes for breakfast :/ The result of the quest is my basic pancake recipe, which I have blogged about before, and whenever I have yogurt on hand, this is the recipe I turn to.


Chocolate Multigrain Pancakes
Inspired by Smitten Kitchen
Makes 4 thick pancakes

35g egg (about ½ an egg or a small egg)
120g unsweetened low-fat yogurt (or any storebought yogurt)
15g olive oil
½ tsp vanilla extract

¼ tsp baking soda
¼ tsp salt
1 tsp baking powder
2 tsp castor sugar

5g cocoa powder
7g oat flour (or ground oats)
15g whole wheat flour
34g all-purpose flour
15g rye flour
7g sorghum flour
(or replace with 78g of all-purpose flour and 5g cocoa powder)

Method:
  1. In a medium sized bowl, whisk together the egg and yogurt. Add in the olive oil and vanilla extract.
  2. In another bowl, sift together all the dry ingredients - the flours, sugar, baking powder and baking soda, salt and cocoa powder.
  3. Stir the dry ingredients into the wet until the dry ingredients are moistened. A few remaining lumps are okay - do not overstir!
  4. Melt some butter in your pan and ladle a scant ¼ cup batter for one pancake. Cook the pancake until the edges are firm and dry and you see the centre bubbling. This will take about 3 minutes on medium heat. Flip the pancake to the other side and cook for another 3 minutes, or until golden brown (or in this case, until dry to touch on both sides since the pancake is brown anyway)
  5. Repeat for the remaining batter. Drizzle the pancakes with some maple syrup and serve with fresh strawberries and compote. Bon appétit!

Janine's jots: 
  • Note: As with most recipes that I try, I can't help but tweak and modify it to my preference, so in actuality, you see very few similarities with the original (hence making it my very own recipe ;p) For those who want to know what I have tweaked, I have used less egg (lower cholesterol), more yogurt and obviously made it chocolate pancakes instead of normal ones. Because of that, I added a bit of baking soda. Note that this is only for natural cocoa powder. If you are using dutched cocoa powder, you have to use baking soda together with an acidic ingredient, for instance, a touch of lemon juice or vinegar OR you can just replace with an equal amount of baking powder instead.  
  • Taste: Because the yogurt is the bulk of the recipe, the resultant pancake will taste of the pancake (and chocolate of course). Be sure to use good quality cocoa powder and yogurt. I loved how the pancakes tasted - in fact, this is probably the best chocolate pancake I've ever made and eaten!  
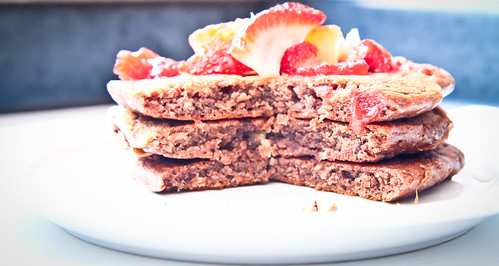
  • Texture: I also loved the texture of the pancakes here. I'm a fan of thick, almost cake-like pancakes, so these fit the bill perfectly. They are reminiscent of buttermilk pancakes, so do try these if you like the texture of buttermilk pancakes!
  • Serving size: I have tweaked this recipe such that it makes 4 pancakes - I tend to consume 2 pancakes during a single breakfast. This recipe is easily doubled.
  • Modifications: If you have thick or greek-style yogurt, do use some milk to thin it out (about 1-2 tablespoons will do). You can also refer to Deb's note on this. If the yogurt is already sweetened, you might want to reduce the sugar to 1 tsp as well. As for the combination of flours, feel free to experiment! Deb used a combination of whole wheat, all purpose and barley/rye flour. I went a step further to use a greater variety of flours. I haven't tried a gluten-free version yet, but I'm pretty sure it'll work the same :]
  • Storage: As with most pancake recipes, do not store the uncooked batter because the resultant pancake tends to be tough and does not rise well. For the cooked pancakes, try to consume them when warm, otherwise, these keep well in the fridge for a few days, when stored in an airtight container. Give them a zap in the microwave to heat them up a little.
  • Would I make this again?: Hell yeah!

Thursday, April 12, 2012

[Thursday's Trio] Absolutely Delicious Gluten-free Chocolate Chip Cookies

Finally the third instalment of Thursday's Trio! As you might have discovered, I find it rather hard to stick to a schedule - as you might or might not have realized, I have not done my Travel Tuesdays for a long long time (the last one was about Phnom Penh in June 2011) and neither have I completed my A to Z of Australia series either. In fact, I'm only at the letter E (for Eveleigh Markets), and since starting the series, I've been to Australia at least three other times. Oops.

In any case, I'm trying hard to make Thursday's Trio a monthly thing because I've gotten feedback that it's really helpful for some of you and I love reading up and researching on such things anyway. I previously talked about buckwheat and sorghum and today, I touch on millet.


Millet is often associated with bird seed, because well, it is part of bird food. It is tiny in size, and can vary in color, from white to gray to yellow to red. Technically, millet is a  a seed and not a grain.There are many varieties of millet, the most popular being finger millet and pearl millet. In fact, teff is actually a type of millet as well – Ehtiopian millet. If I'm not wrong, the yellow colored millet grains that we see in supermarkets and organic food stores in Singapore and Malaysia are pearl millets.

Similar to sorghum, millet is a staple in some parts of Asia (it apparently originates from China) and Africa, and it is very drought-resistant. Added to that is its short growing season – it can develop from a seed into a ready-to-harvest plant in less than 70 days! I guess this is yet another reason why it is grown in lands with low fertility and dense population.


Three interesting facts about millet
  1. Did you know that millet is even mentioned in the Bible as an ingredient for unleavened bread! (See Ezekiel 4:9)
  2. Remember the 5th most important crop sorghum? Well, millet is the 6th most important grain crop and it is actually related to sorghum!
  3. Millet is a good source of magnesium and phytochemicals, which helps lower high blood pressure and reduce heart attack and cancer risk. Studies have also shown that the insoluble fibre in millet also helps women avoid gallstones and protects against breast cancer! I personally enjoy millet because it is non-glutinous and is not acid forming, which helps with my digestion and gastritis.
Three ways of using millet
  1. Think of millet as similar to rice, and you can imagine just how many ways you can use it. It can be used as a flour, a grain, puffs or even flakes!
  2. You can also eat millet ‘fried rice’ – it tastes exactly like rice, just that it’s ‘shorter grained’. Cook millet as you would rice and you're set! Or cook it with more water and you can eat it as a porridge - sweet or savoury it's all up to you!
  3. Use whole millet to add an extra crunch to your muffins (think of it as large poppy seeds), bread, pancakes and even cookie recipes. I like it in my granola :]
Three interesting recipes I’ve bookmarked from blogs
  1. Tartlette's Strawberry Jelly Roll Cake (with rice and millet flour only)

How to store millet?
As with other grains/seeds, millet can last for quite a long time (two years) if properly stored. The whole seeds can be kept together with your rice or in a closed container in a cool dry place. The flour becomes rancid very rapidly after it is ground, therefore, do place the flour in the refrigerator, especially in our warm, humid environment.    

  
So as you can tell from the photographs, I'm featuring millet in my chocolate chip cookies today! I actually made a millet-only pancake, but I didn't exactly enjoy it, so I thought these chocolate chip cookies would be more convincing for those just starting to explore millet. If you notice, millet is seldom used alone (unless you're cooking the whole seed) and really tastes best when combined with a mixture of starches and flours.

I'm calling these the 36-hour chocolate chip cookies because making these cookies take at least 36 hours! After making the cookie dough, you have to allow the dough to rest in the fridge for at least 36 hours (find out why here) before taking it out to bake into morsels of heaven :]

I actually baked both the normal wheat version and gluten-free version at the same time, and conducted a tiny experiment. Those cookies which were baked a day after making the dough (ie, less than 24 hours) did not taste as chocolatey as those which were baked at least 36 hours later. As for the gluten-free and wheat versions, most tasters could NOT even tell the difference! And mind you, I gave the cookies to friends, relatives and colleagues! Some actually said that the gluten-free version was crispier and far more tasty than the wheat! I personally think so as well! So there you have it - baking gluten-free does not necessarily mean compromising on taste and texture - as long as you get your proportions right, it'll taste as good or even better than normal!

The recipe below is actually a halved version of the usual, do feel free to double the amounts - I tried out this recipe 3 times, making variations each time and I find myself liking this combination of flour and sugar the best. Do check out more detailed notes below.

36-hour Gluten-free Chocolate Chip Cookies
Adapted from David Leite's Ultimate Chocolate Chip Cookies (also known as the NY Times cookies) and sighted at Tartlette who adapted it from Shauna

50g sorghum flour
40g tapioca starch
30g white rice flour
50g millet flour
30g glutinous rice flour
15g buckwheat flour
15g hazelnut flour
10g cornstarch
(240g of flour in total)

2 teaspoons flaxseed, ground
2 teaspoons water
1 teaspoon cocoa powder
(OR 1 teaspoon xanthan gum)

¾ tsp baking soda
1 tsp baking powder (make sure it does not contain wheat)
¾ tsp sea salt

140g butter
110g brown sugar
90g white sugar
30g egg (about ½ an egg )
1 tsp vanilla extract
130g chopped chocolate (semisweet, or about 60-70%)

Sea salt, to taste

Method:
  1. In a small bowl, combine the ground flaxseed and cocoa powder together with the water and set aside.
  2. In a separate large bowl, whisk all the flours and starches together with the baking soda, baking powder and sea salt. Whisk in xanthan gum if not using the ground flaxeed combination.
  3. In the bowl of an electric mixer fitted with the paddle attachment, beat together the butter, brown sugar and white sugar on medium speed for 2 minutes until light and fluffy. Add in the egg and vanilla extract and beat until well incorporated. Beat for at least 1 minute. By now, the flaxseed-water mixture should be quite gelatinous - add it into the mixture and beat until incorporated.
  4. Add in the flour mixture into the batter in 2 batches, making sure that all the flour is incorporated before adding the next batch.
  5. Add in the chopped chocolate (and nuts if you desire) and mix briefly to incorporate.
  6. Then, scoop your preferred size of dough balls before placing into an airtight container to refrigerate for at least 36 hours. Alternatively, you can weigh your dough balls (my large ones were about 35g and small ones about 12g) OR you can refrigerate the dough and scoop them right before baking.
  7. When ready to bake, preheat the oven to 170°C and position a rack in the middle of the oven and line the baking sheets with parchment paper or a non-stick liner. Arrange the large dough balls about 3 finger spaces apart and sprinkle the tops with sea salt.
  8. Bake the cookies for about 15 minutes, or until they are golden brown and the sides are set. Allow the cookies to cool for at least 15 minutes before transferring to cooling racks.
Janine's jots: 
  • Note: If you want crispy cookies, do make the cookies small (about 10-15g) and remove them from the fridge at least 15 minutes before baking to allow them to soften slightly. Flatten them before baking and you will get nice crispy cookies, reminiscent of Famous Amos (I didn't say this - my brother did). Bake those cookies for 15-20 minutes - not only the sides but the centre of the cookie should be almost set before removing them from the oven. Conversely, if you prefer the thick chewy cookies a la Subway, portion large cookies (at least 35g in weight or an ice-cream scoop size) and bake them the moment you remove them from the fridge. The dough ball will gradually soften in the oven and remain thick. Once the sides have set (but the centre is still soft), remove them from the oven. They should take about 15 minutes or so.
  • Taste: Absolutely delicious. As stated above, I found the gluten-free cookies far more complex in taste than the normal ones - I could vaguely make out the taste of millet and hazelnut, which complemented the chocolate really well, without any addition of chopped nuts. This is definitely THE COOKIE to make when you want to introduce different flours into your diet and if you want to fool unsuspecting victims because they won't know that they're not eating gluten-free products!
  • Texture: I made a batch using xanthan gum and another without, and I found myself preferring the texture of the one without because the after-taste is less 'slimey'. Then again, that batch had more tapioca starch in it, so that could be one of the factors as well! In any case, this cookie dough is extremely versatile and can be used to make crispy OR chewy cookies - just vary the baking times and baking method :]
  • Serving size: Depending on size, the recipe above can make at least 3-4 trays of cookies. I made at least 100 small cookies with a single batch.
  • Modifications: For those who might be allergic to nuts as well, simply substitute the hazelnut powder for arrowroot starch or any other type of flour. Also, as indicated in the recipe, flaxseed can be replaced by xanthan gum and it is actually a substitute for egg as well. Feel free to increase the flaxseed amounts to 1 tablespoon to replace the egg in the recipe. The cocoa powder is added to mask the taste of flaxseed because sometimes ground flaxseed can taste nasty.
  • Storage: Store the unbaked cookie dough in the fridge for a maximum of 3 days before baking. Store in the freezer for up to 2 weeks although I wouldn't recommend this if you have egg in the dough. For baked cookies, store in airtight containers and they'll last really long! Don't store the chewy and crispy ones together though, because the crispy cookies will turn soft.
  • Would I make this again?: DEFINITELY YES!!


And finally, please note that I don't profess to be a gluten-free expert, although I have read up quite a bit on it. Most of my recipes do have gluten because I don't need to eat gluten-free, although I find it interesting as an alternative diet. Should you be a coeliac sufferer or are gluten-sensitive, please do be aware of some common pitfalls below:

Important notes for gluten-free baking in your kitchen
  • Do make sure that all the flours you use are certified gluten-free, or it is stated on the label that the flour product is processed in a mill which does not process other types of gluten flour. To be safe, you can opt for Bob Red Mills' which is gluten free or some types of flours sold in organic food stores.
  • Do make sure that the baking powder you use is gluten-free as well because some, if not most, baking powders contain wheat as one of the ingredients. You can buy a gluten-free baking powder OR you can simply make it yourself by using mixing baking soda, cream of tartar and arrowroot starch. 
  • Another source of gluten is in the chocolates. Make sure again that the chocolate you use is of good quality, and the label on it states that it does not have any wheat products or it is not processed in a factory which processes wheat or gluten products.
There are definitely far more notes on gluten-free baking but this is merely a primer. For more information, simply google "gluten-free baking" and you'll get millions of hits to blogs all over the world introducing you to the strange new world of gluten-free baking. Enjoy! :]

Tuesday, March 20, 2012

Ferrero Macarons for Macaron du Jour

Today’s Jour du Macaron or Macaron Day in France, and a couple of other places around the world. If you’ve never heard of Macaron Day, well now you have. It’s created by none other than Pierre Hermé, in a collaboration with members of the Association Relais Desserts to raise awareness for a charity. This year, the charity is Autistes sans frontiers, or Autism without Frontiers. What happens is that you can pop by any participating Pierre Hermé Paris boutique and receive a couple of macarons completely gratuit (free). All you have to do is to drop a donation of any amount in the boxes available at the boutique. Pierre Hermé also has a macaron he creates specially for Macaron Day. What’s interesting is that in the recent years, there is a ‘map’ of the participating Pierre Hermé boutiques and if you pop by every one of them, you will get a complimentary box of 25 macarons! And mind you, there are probably that many macaron flavours available at each outlet!


I really enjoy the message behind Macaron Day. While it might have stemmed from a selfish desire to promote his macarons and his boutiques (I’m just speculating here), it does promote a good cause. And I’m hoping that one day, all the macaron-selling patisseries across Singapore can band together and celebrate Macaron Day as well, whilst promoting a good cause. However, knowing how stingy Singaporeans are, the macarons cannot be sold completely free. Not that I’m shaming Singaporeans but honestly speaking, I know of many who cheat the honor system when taking transport in Europe (most transport systems there require you to buy your own ticket and random checks are done). Can you imagine selling newspapers based on the honor system? Many Swiss cantons have a newspaper box where you can grab a newspaper and drop the appropriate amount of money in the box for it. I can imagine many people paying less or even not paying anything for the newspapers! I guess our society just has not progressed to that stage of development yet? Anyway, I digress. What I mean to say is that even though macarons cannot be sold completely free, I’m sure something can be done this time next year to promote the patisseries selling the macarons as well as a chosen charity. Hopefully someone’s listening? ;)


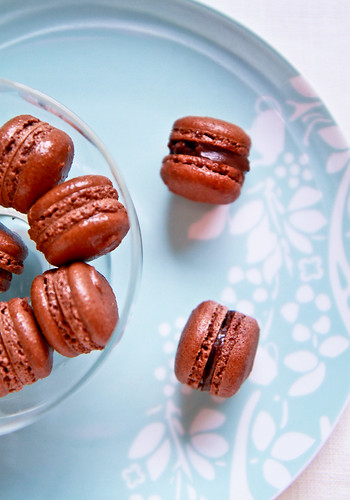
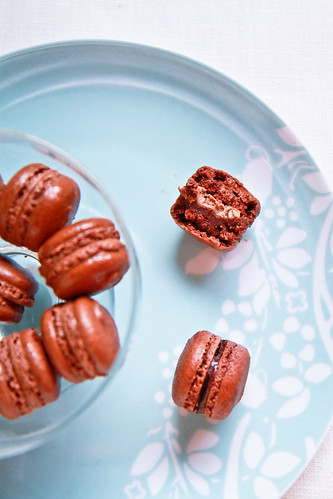
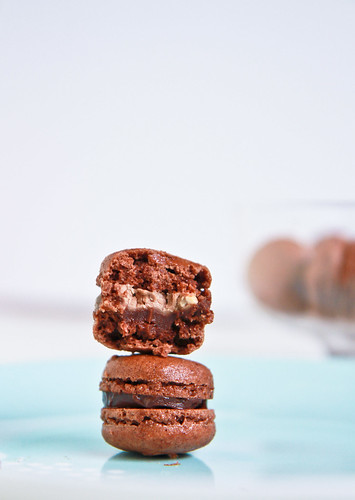
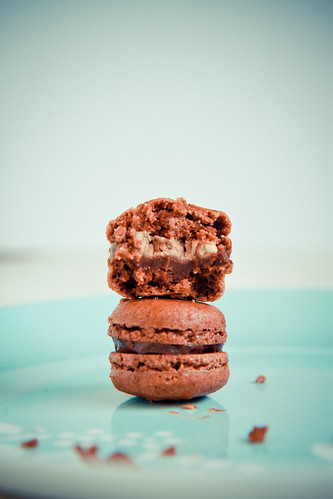
So anyway, this being Macaron Day (it's Macaron Day over at Mactweets as well!) and Macaron Month over at Aspiring Bakers (Aspiring Bakers #17 is March Macaron Madness! hosted by Alan of Travellingfoodies), I decided that it was appropriate for me to try something more interesting. And I decided to make myself some Ferrero Macarons! :] Okay, I know that this perhaps isn’t too spectacular, but this is a step up from what I usually attempt. Instead of just ground almonds, I used a bit of ground hazelnuts and instead of just one ordinary ganache, I used two! Yes nothing too fantastic but who cares, it’s my prerogative; p I love hazelnuts and chocolate (otherwise known as gianduja), and I love Nutella (which is gianduja paste) and Ferrero Rochers, so it’s only natural that I make macarons modelled after them. In fact, I guzzled down jars of nutella when I was studying in Europe, where jars were humongous and it was dirt cheap. I also have fond memories of unwrapping the gold-foil wrappers of ferrero rochers and slowly eating it layer by layer, until I got to the hazelnut at the heart of the sphere.


So without further ado, I present you my ferrero macarons (aka gianduja macarons)!

Ferrero Macarons
Adapted from David Lebovitz
Makes about 40 2-cm large macarons shells 

For the shells: 
80g icing sugar, or confectioner's sugar
20g ground almonds
20g ground hazelnuts
20g cocoa powder

50g egg whites
50g castor sugar 

For the hazelnut praline or gianduja: 

Method 1 (the lazy person method): 
30g chopped hazelnuts, toasted
50g cream
30g milk chocolate 

Method 2 (making hazelnut praline): 
30g hazelnuts
20g castor sugar
50g milk chocolate 
10g neutral oil (grapeseed or canola or olive oil)
Pinch of salt 

For the chocolate ganache: 
90g cream (at least 35% fat)
70g bittersweet chocolate (I used a mix of 66% and 70% chocolate)

Method:
  1. For the macaron shells: Toast raw whole almonds and hazelnuts (without skin) on a tray at 150°C for about 10 minutes. Allow the nuts to cool before grinding them separately. Sift the nuts individually and weigh about 20g of each. The ground nuts can be stored in the fridge for at least a week. 
  2. Sift the ground almonds, hazelnuts and icing sugar together. Sift at least twice before setting aside. 
  3. Beat the egg whites (which are at room temperature) with the castor sugar. You can put in the castor sugar right from the start. Beat until you obtain stiff peaks. This should take slightly less than 10 minutes, depending on the strength of your mixer. 
  4. Using a spatula, dump in all of the dry mixture into the stiff meringue. At first, the mixture will seem clumpy and impossible to fold, but do press on and continue to gently fold the mixture. After about 25 folds, all the dry ingredients will 'magically' be incorporated. The mixture will still seem clumpy, so continue folding until you get a shiny, viscous mixture which 'flows like magma'.
  5. Spoon the mixture into a pastry bag fitted with a plain tip and proceed to pipe 2 or 3-cm large rounds onto baking sheets lined with nonstick liners. After piping the shells, be sure to rap the baking sheets against the counter to get rid of any excess air. 
  6. Let them sit at room temperature (or air conditioner temperature would be fantastic) until they are dry to touch. You need not actually touch the shells because it will be rather obvious when they dry and form a 'shell'. This should not take more than an hour. 
  7. In the meantime, preheat the oven to 140°C (fan-assisted), with the rack in the middle, with top and bottom heating. Bake the macarons for about 16 minutes, making sure to open the oven door at around the 8th minute (or after feet have formed) to let out excess hot air and to turn the tray from front to back. Once the shells are firm to touch, remove the trays from the oven and let them cool on the trays for at least 15 minutes before proceeding to cool them on cooling racks. If you use a nonstick liner, they should be easily removed, if not, use a knife or metal spatula to release the macaron. Store the shells in an airtight container until ready to assemble. 
  8. For the chocolate ganache: Chop the chocolate into small pieces and place them in a heatproof bowl. Heat the cream in a saucepan until it starts to bubble. Take it off heat and pour the hot cream over the chocolate, making sure to mix quickly until all the chocolate has melted and you get a homogenous mixture. The mixture will appear very liquid but it will thicken after you allow it to cool for at least 30 minutes. 
  9. For the gianduja #1: Follow the same method as the chocolate ganache above by heating the cream and pouring it on the chopped milk chocolate pieces. Then, add in the chopped hazelnut pieces. For convenience, toast these hazelnuts together with those in step 1 and in fact, just use the hazelnut pieces which are too big to sift through for varying sizes. 
  10. For the gianduja #2: You first have to make a hazelnut praline, which requires you to heat the sugar in a saucepan. In the meantime, make sure you have got toasted whole hazelnuts (without skin) neatly lined on a baking tray lined with nonstick liner. Once you get a caramel, i.e. when the sugar turns a medium brown, pour the caramel on the hazelnuts and allow to cool. DO NOT TOUCH THE CARAMEL because it is very hot! If the caramel is at the right temperature, it will harden almost immediately. After it hardens, remove the praline from the nonstick liner and break it up into pieces. Place the pieces into a food processor and process until it breaks into very small pieces. Do not process too much because you still have to add in your chopped chocolate pieces and oil. What I did was to remove some of the processed praline and dumped in the chocolate, salt and oil, and processed until I got a smooth paste. I then added the processed praline back into the mixture to get those chopped pieces of hazelnut praline. 
  11. To assemble: You can choose to use a piping bag or use the lazy method and spoon the ganaches onto the macaron shells. I spooned a teaspoon worth of the chocolate ganache on one side of the shell, and about quarter a teaspoon worth of gianduja on the other shell. Match the shells together and store the shells for at least a few hours (preferably a day) before consuming. Remove the macarons 5-10 minutes before serving for the best experience :]


Janine's jots: 
  • The gianduja: I have included two recipes and methods for the gianduja which I tried. The first method can be accurately called a gianduja paste whereas the second would be more accurately called a hazelnut praline paste. For the trouble undertaken for method #2, I would definitely not recommend making such small portions. I actually made a triple batch of hazelnut praline (to use as a layer in my entremet) - it keeps very well in the fridge. Of course, the second recipe is sweeter (because of the caramel) than the first recipe. 
  • Notes on the ingredients: If you notice, I haven't used cream of tartar or salt with the egg whites in this recipe, as compared to the previous strawberry macarons. Also, I used freshly cracked egg whites here. I have found that there really is no need to dry them out or add egg white powder although that would definitely help in stabilizing the meringue. After numerous attempts at making macarons, I can safely say that it's the macaronage or technique that determines if you have feet or not, because you can use any nut (or not) with varying amounts of sugar and add-ons. So really, practice makes perfect!
  • Taste: The shells by themselves were awesome, because the toasted nuts added a different dimension. For my under baked shells (i.e. those which stuck to the paper), I felt as if I were eating chocolate hazelnut paste because the hazelnut taste was so prominent! I also enjoyed the combination of bittersweet chocolate with milk chocolate and chopped hazelnuts. Deliciously sinful! For more chocolate-hazelnut sinfulness, you can add in some Nutella in the chocolate ganache. 
  • Texture: The macarons were also undermixed this round, because they were bumpy but on the plus side, they dried out in less than 10 minutes, and I could bake them almost immediately. I enjoyed the crisp chewy shells coupled with the chocolate ganache, added to that was the fact that the gianduja paste had chopped hazelnuts in it. To really replicate a ferrero rocher, I'd suggest adding half a hazelnut in the centre of the macaron :]
  • Serving size: I got about 20 paired macarons, but my macarons were about half the standard size - about 2 cm or slightly more than an inch.
  • Modifications: As I said earlier, this is my go-to chocolate macaron recipe, but I would definitely try reducing the amount of sugar in the recipe as the shells were very sweet (too sweet for my liking). I would probably begin by reducing the castor sugar used to about 40g. The bittersweet ganache helped in cutting down the sweetness, but the gianduja had milk chocolate, so that didn't help with the sweetness. 
  • Storage: Because the filling is a ganache, the macaron lasts pretty well at room temperature - it starts to soften and slide apart only after half an hour or so.
  • Would I make this again?: Definitely! This is my 4th or 5th time using this recipe :]

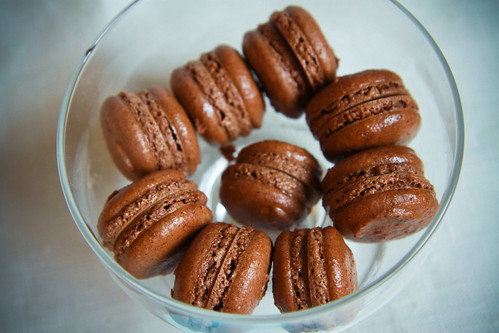
Matched up, unfilled shells :]

If you're looking for another method of making macarons - i.e., the Italian meringue method, do check out my other post on salted caramel macarons. And don't forget to participate in my strawberry powder giveaway!

Sunday, February 12, 2012

Valentine's Day Roundup 2012

Once again, the much-hated or much-awaited (depending on whether you're single or attached) Valentine's Day is here. It's a day for girls to receive free gifts from their admirers or loved ones, and for boys to spend bucketloads of money buying roses and whatnots. For those who are very much single and available, don't despair, because this is a day to celebrate your beautiful friendships with your friends, or to even celebrate your love for your family.


There's a million things I love about this picture, from pinterest 

Valentine's need not be stressful - I remember back in my secondary school days, I was in an all-girls school, so we would give each other thoughtful gifts for Valentine's - I still remember a bunch of us making trips down to Ikea and various crafts shops just to make handwritten and handmade gifts for our classmates and friends. And that is still the message of Valentine's that I carry with me today. For the past few Valentine's that I can remember, I still make it a point to have a Valentine's meal (which usually isn't on the 14th) with the best girl friends one can ever have. Besides, even if my boyfriend were here with me on Valentine's Day, I wouldn't want him to give me roses or bring me to a special restaurant to eat. For many reasons, first being everything is exorbitantly expensive on Valentine's, and there really is no purpose is trying to show off how much you love your other half on this Day and treat her/him like crap on the other days. So there. In any case, I love handmade stuff, and here are some quick last-minute gifts you can make (as cheesy as they may seem):


These are both fantastic ideas from Disney's Family Fun, and are really simple gifts, especially for children and students as gifts.

And while I'm on the topic of children and things that they can do/have, parents - you can make these for your child or even make it into a Valentine's project!

Heart shaped bento by Lisa

Teddy Bear Taco Tart by Beth

I'm not sure about you, but this meringue candy necklace reminds me of those candy I used to have as a kid - they had holes in them and were pastel colored and you could whistle through them! Anyone knows what I'm talking about?

Meringue Candy Necklace from Bakingdom

Okay, so I did a Valentine's Day roundup of some of the available ideas and recipes on the internet the last year, and I thought I'd do the same this year, because I am using some of the ideas to make some edible desserts for my family and friends and I thought it might be helpful for some of you, to perhaps spark some creativity in you for you to make your own edible gift! So bring on the reds and pinks and chocolates!

Again, starting with breakfast, what about some:

 Here are some more ideas:

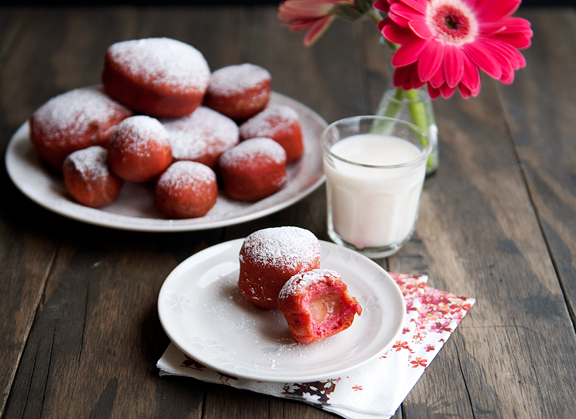
blood orange curd filled beet donuts? naturally red :]
Heart shaped french toast with stewed berries by Marina 
Heart-shaped breadsticks by mealpod
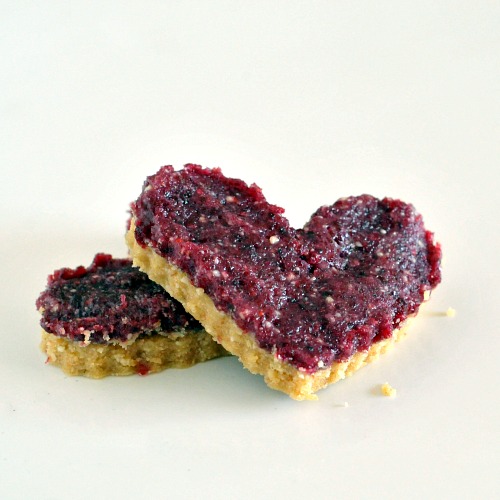
Or it could be a healthy heart-shaped granola bar!

For my gluten-free friends, there's a round-up specially for you here!

And moving onto lunch! My favorites - pizza and lasagna :]

Pizza in the shape of a heart :]

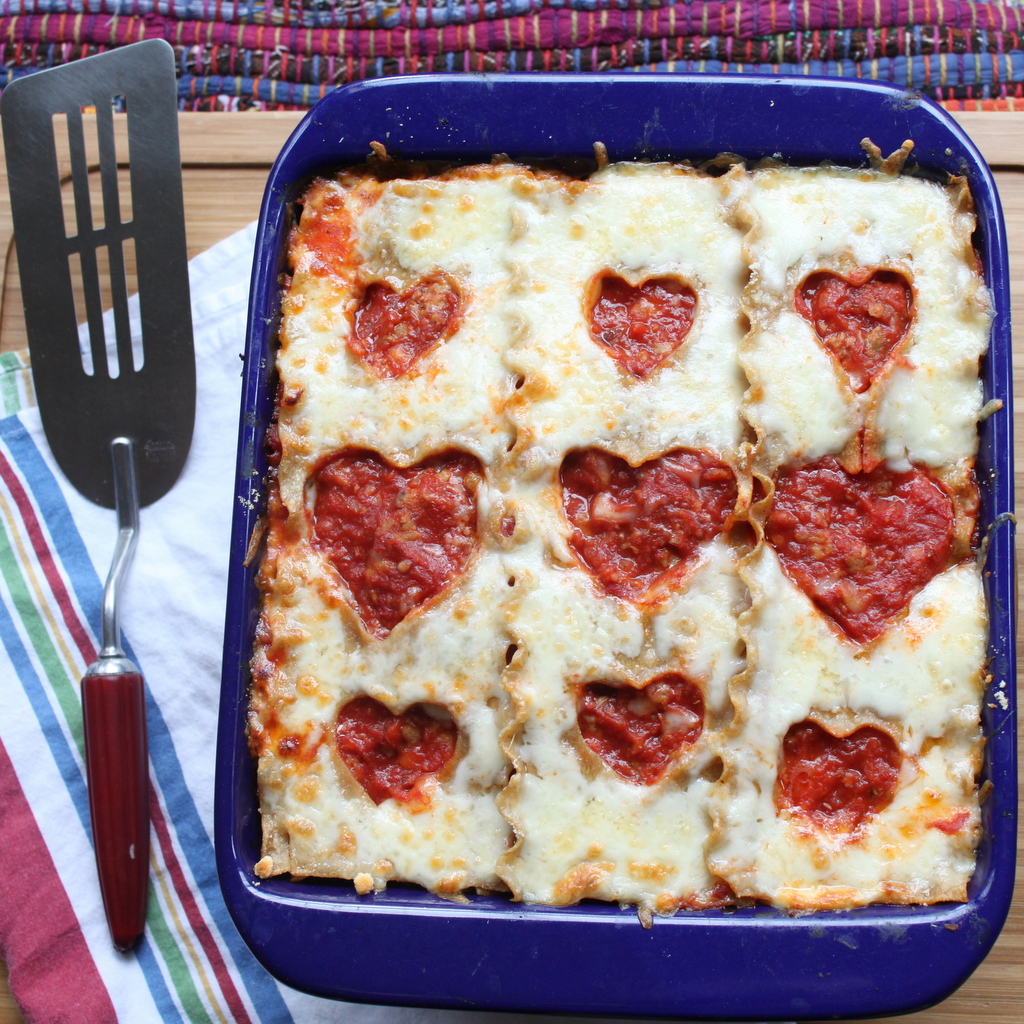
And a hearty lasagna, pun intended ;p
And this by Haniela, is ingenious. Simple, and my favorite carbohydrate.


And onto my favorite meal/dish - DESSERT :D
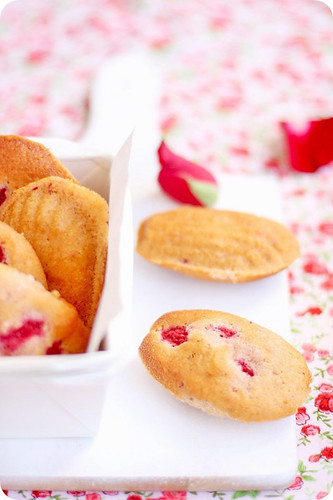
one of my favorite flavor combinations,  madeleines ispahan by Evan
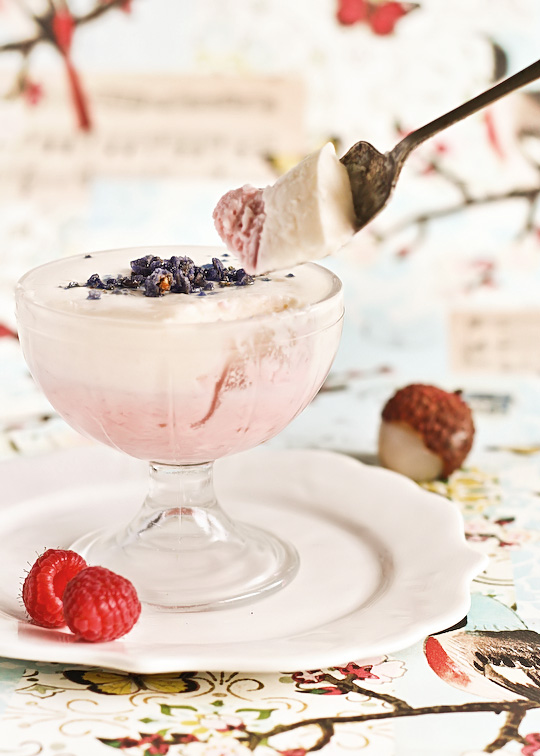
similar flavor combination - raspberry lychee mousse perhaps? 
Intertwining ring cookies - how's that for something unique?
you cannot get any cuter than with domokun hearts!
A hidden heart in a heart cupcake! From Veronica who got her idea from Desert Living Today

My favorite linzer hearts

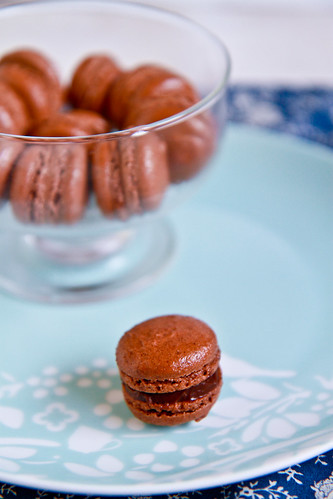
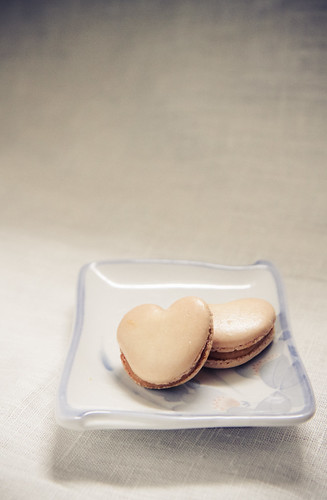
Moving onto the not so easy now, how about some heart-shaped macarons made by yours truly?


white chocolate raspberry cheesecake with hearts!
A healthy pomegranate cranberry heart?
Not forgetting a red velvet cake!
blackberry no-bake cheesecake by Yelena

And if you have the time (and skill) to make more elaborate stuff, do consider these!


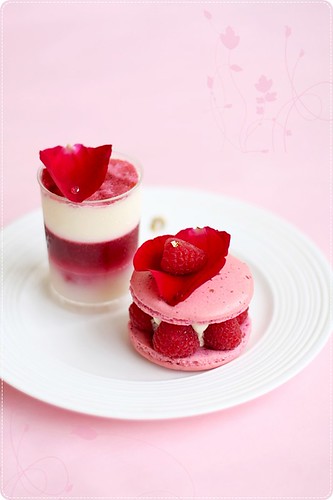
lulu's rose heart cake - simply ethereal
red velvet cupcakes with roses
Another lovely entremet by Pook

Yet another one by Evan - same flavors, but in different forms


I also love these cakes - a valentine cake with a surprise and a rustic chocolate valentine cake!

And finally, my favorite ingredient of all time - chocolate. Here's a photograph of a cake I've been wanting to try from one of my favorite photographers/stylists. It's simple, fudgy and rustic, just the way I like my chocolate cakes :]

Chocolate Fudge cake by Katie

As always, all pictures are credited to their rightful owners - I don't own any of them besides the macaron photo. So get those creative juices flowing because Valentine's Day is just two days away! :]
Related Posts Plugin for WordPress, Blogger...