My blog has moved!

You should be automatically redirected in 6 seconds. If not, visit
http://www.unpastiche.com
and update your bookmarks.

Thursday, September 29, 2011

Pierre Hermé's Ispahan Cupcakes

Ever since I anointed Pierre Hermé as my pastry god, I've been wanting to try out this particular flavor combination, but didn't because raspberries were always so expensive and I didn't want to splurge on them. Well, I'm glad I did because raspberries were on sale and boy oh boy, was my cake ispahan delicious! I really have to thank heavens for the day Pierre Hermé dreamed up of this flavor combination, because just having rose and raspberry in the cupcake was enough to make me beam from ear to ear, so I cannot imagine what I'd be like with the addition of lychees :]

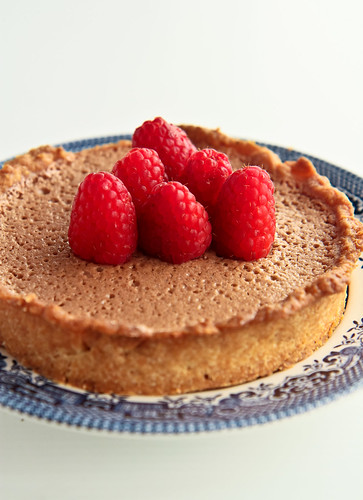
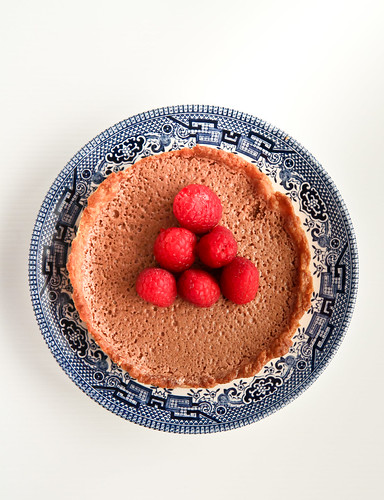
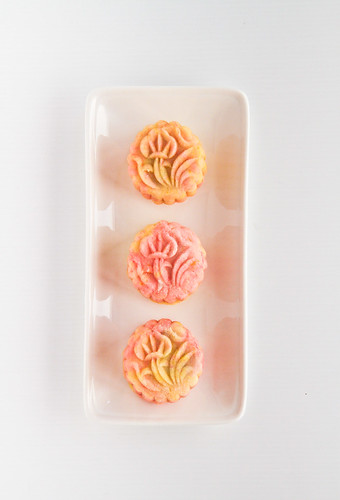
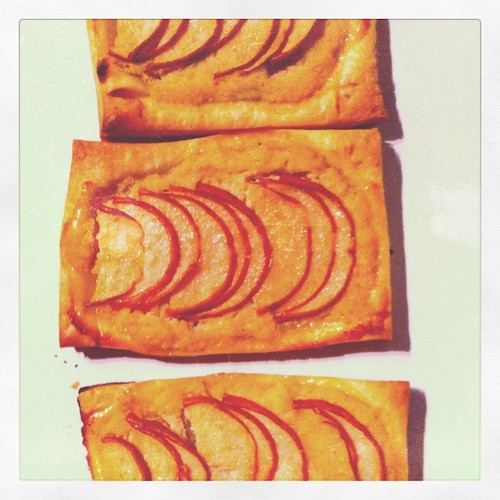
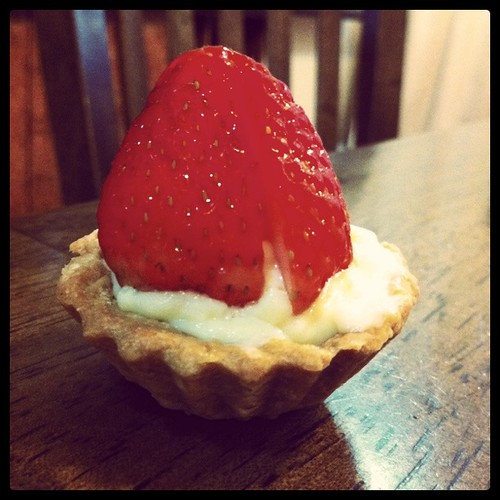
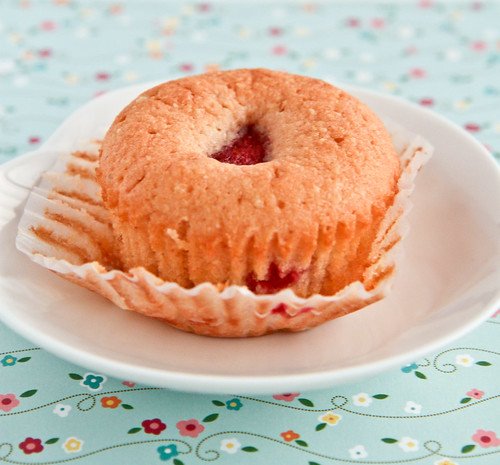
I like how the sunken raspberry looks vaguely like a heart.

I've always wanted to make an Ispahan-inspired cake, one chockfull of raspberries and roses and lychees, and I wanted an authentic recipe from the god himself. There are many ispahan-inspired desserts online, and some of my favorite (bookmarked) ones are from Swee San and Rachel, who used the interesting flavor combination to make their own versions of Ispahan petit fours. For those not in the know, well, Ispahan is both a name of a city in Turkey Iran (Isfahan) (I know it's in Iran but don't know why I wrote Turkey hmm) as well as the name of a damask-colored rose. I've read bits and pieces that Pierre Hermé was inspired by the rose to include it into his macarons, and it was at Laduree where he first combined raspberries, rose and lychees and named it the Ispahan. And he never looked back of course. The Ispahan is now synonymous with the name Pierre Hermé and I do think that in decades to come, this combination will become as commonplace as the cakes like black forest, tiramisu, opera, etc.

This was also the first recipe I tried from my newly bought Pierre Hermé book, Le livre des fours secs et moelleux de Pierre Hermé, which loosely translates to the book of petit fours and treats of Pierre Hermé. Interestingly, this book is not available in English or French, but only in Japanese and Chinese. It was of course originally in Japanese to cater to the Japanese market where Pierre Hermé has the second greatest number of stores (after France/Paris) and the Chinese being Chinese, translated it into this Chinese version I have. It's perhaps one of my cheapest Pierre Hermé's books, costing me NT$300, which amounts to around S$15/US$10. And besides this recipe, I've also tried his madeleine recipes (which can be found in his other books as well), which of course taste delicious as well. There is also a recipe for madeleine ispahan, but I need freeze-dried raspberries for that, so that's currently shelved at the moment. When CNY rolls about the corner, I'll definitely be spamming this book quite a lot for all the cookie recipes for my CNY cookie fix.


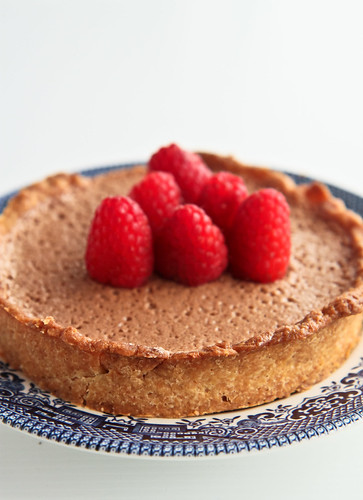
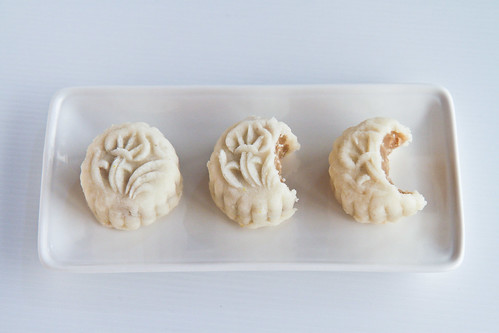
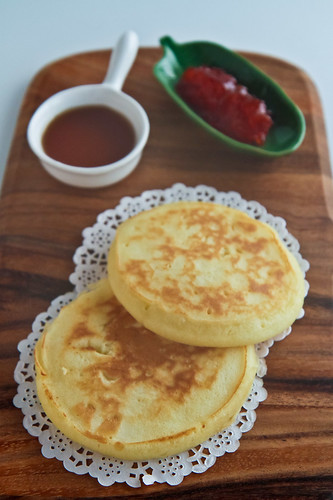
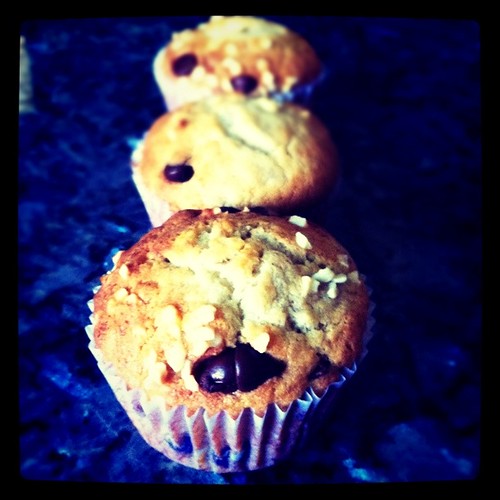
As you can see, I couldn't resist modifying the recipe into making cupcakes instead of a normal cake. The tiny bits of white you see in the picture above are actually bits of almond, which I've explained below that I left intentionally coarse for textural purposes.  

Now, having finally tried my hand at the infamous ispahan combination (and having tasted the original before), I've to say that I've got lots more work to do! Perhaps a pricier (and more exotic) rose essence (a la Yumeiro Patisserie) is in order! ;p


Pierre Hermé's Ispahan Cupcakes
Adapted from Le livre des fours secs et moelleux de Pierre Hermé
Makes a 16x5cm (6-inch) round cake or 6-8 cupcakes

Ingredients


85g     unsalted butter
60g     icing sugar
85g     almond meal/flour/powder
35g     egg yolk (about 1.5 egg)
20g     whole egg
15g     milk
3g       rose essence
45g     cake flour

45g     egg white (about 1.5 egg)
20g     castor sugar

25g     raspberries 

Method 

  1. Cream butter until fluffy. Add the icing sugar and ground almonds together, mixing until well combined. 
  2. Add in the egg yolk, followed by the whole egg. 
  3. Add the rose essence into the milk, and add red coloring if desired. Add this milk mixture into the butter mixture above, combining well. 
  4. In a clean mixing bowl, beat the egg whites until foamy. Add the castor sugar and continue beating the egg whites until stiff peaks are achieved. 
  5. Add a third of the stiff egg whites into the milk-butter mixture to lighten. Then, fold in the remaining egg white until no white streaks are left. 
  6. Pour the batter into your prepared pans. Pour until the pan is half full, before adding the raspberries in the centre and filling the pan to about 80% full. 
  7. Place the rack at the middle tier and bake in a preheated oven at 160°C for about 45 minutes for the cake or 20 minutes for cupcakes. When the top turns a light golden brown and a cake tester comes out clean, the cake is done. 

Janine's jots: 
  • Taste: Unlike other Ispahan desserts created by Pierre Hermé, this doesn't have the litchi (lychee) that we're so familiar with, and I reckon that an additional of lychee in the centre together with the raspberry would definitely complicate the flavor profile, in a totally awesome way of course. For those hoping for a stronger rose taste, you might want to increase the rose essence by a gram or so, because it's rather subtle in this cake. I like it that way though, and if you want a stronger whiff of rose, consume the cake the next day. The rose flavor is more prominent then. 
  • Texture: My almonds were ground at home and not store-bought, and I intentionally left a portion of it more coarsely ground, so this could be tasted in the cake. It tastes almost like not as dense financier. 
  • Serving size: Makes a 6-inch cake or 6-8 cupcakes, depending on how many raspberries you fill the inside with and how large your cupcakes are. I prefer the cupcakes because they're easier to consume and cuter of course. 
  • Modifications: As usual, I reduced the icing sugar from an original of 85g to 60g and I still found the cupcakes quite sweet, but note that if you have tart raspberries or you are intending to use more than 2-3 raspberries in the cupcake, you might want to increase the sugar to counteract the tartness. 
  • Storage: I wouldn't advise storing the cake at room temperature for more than a day because the raspberry inside will turn soft and gross. It stores well in the refrigerator for 3 days or more. Do warm it up before consuming to get the best flavor out of it. 
  • Would I make this again?: Yup definitely, it beats having the usual chocolate and vanilla cupcakes. But I am definitely trying out the lychee idea as well. 
  • Other comments: The original recipe calls for a fondant glacage to be poured over the top, but as I was intending this to be a un-fancy teacake, I skipped it. 

Check out the delicious innards. 
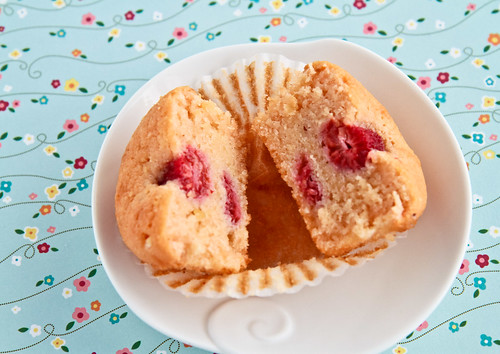
I probably shouldn't have sliced the cupcake while it was still hot because it appears rather wet and dense. Truth is, it actually is not as dense as in the first picture after letting it cool. In fact, it tastes better the next day! 
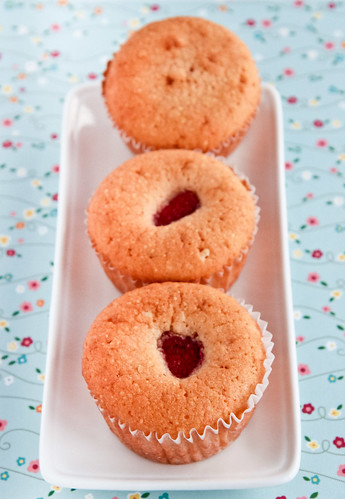
The ones with more raspberries definitely tasted better. 

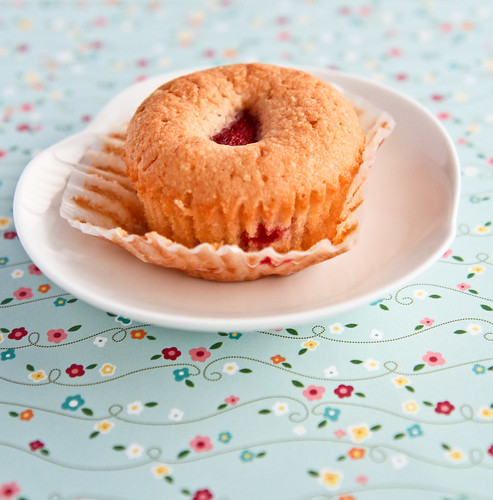
One last lingering look at my beloved ispahan cupcake.

Monday, September 26, 2011

Malaysian Monday #7: Non-baked Chinese BBQ Pork, or Char Siew (蜜汁叉烧)

The irony of this dish is that char siew literally means 'fork roast' in chinese, which is an allusion to how it was traditionally made - long strips of pork skewered on long pronged forks and then roasted over a charcoal fire; for this rendition of char siew however, I have opted to go with a non-bake method, which is essentially cooking it down on a stovetop, in a normal pot.

This of course is a perfect opportunity for me to use my Le Creuset crock pot, which I finally decided to buy after years of looking and yearning for it. I bought it at the Isetan sale for slightly under S$200, and I love it! Because it is cast iron, it retains heat really well and I've been using it to cook things like the char siew below, as well as making jams, stews and everything else you can do with a stainless steel pot :D  I foresee that this, together with my trusty Bombino, will be very good friends for many decades to come. Back to the char siew, this method is really very simple, akin to making a stew, AND if you don't particularly like those charred black bits on the baked char siew, this is perfect for you.


Non-Bake Char Siew
Method adapted from Baking Mum
*I have used metric measurements for this recipe. Refer to my previous attempt for the same recipe in cups.

Ingredients: 

500g pork, cut into 2-inch thick strips

For the marinade
40g Hoisin sauce
30g brown sugar
20g white sugar 
15g mui kai lo (玫瑰露)
10g soya sauce
1 tsp sesame oil 

½ tsp salt 
¼ tsp ground white pepper 
½ tsp 5-spice powder
3 cloves of finely minced garlic

200g water

For the glaze
10g olive oil 
10g honey 


Method:

  1. Combine all the ingredients for the marinade in a mixing bowl. 
  2. Add in the pork and marinate for at least 3-6 hours. 
  3. In a large pot, pour in 200g of water as well as the excess marinade from the pork and bring the mixture up to a boil. Once boiling, add in the marinated pork and allow the mixture to reach a boil again. 
  4. Reduce the heat to a medium-low and allow the meat to simmer until it is tender. Simmer with the lid off. This will take about 30 minutes or so. Once the meat is tender, you can increase the heat to boil off the excess water to allow the sauce to thicken. Then, add in the mixture of oil and honey so that the char siew will be glossy. 

Janine's jots: 
  • Note: If you don't have access to 5-spice powder or mui kai lo, please refer to my substitutions in the previous recipe. Also, do try to marinade the meat for slightly longer if possible, so that the meat is more flavorful. I tried marinating for an hour before cooking and the meat was not as tasty. 
  • Taste: Super duper yummy. I haven't tried comparing the char siew together, but from what I remember, the substitutions produce a char siew which is very close in taste to this method which uses the 'original ingredients'. 
  • Texture: I felt that the texture was not as tender as the baked method, but then again it could be because of the amount of fat in the meat because the fat marbling in my cut of pork this time was substantially lesser than before. 
  • Serving size: More than enough to serve a family of 5 for dinner, with extras for char siew baos :]
  • Modifications: None! I might try reducing the sugar a little just to try to make it healthier, but it's really good as it is!
  • Storage: Stores well in the fridge for a few days, but best to freeze it and thaw when you wish to use it again. I have frozen the char siew for a month and used it for a bao filling, and it still tastes as good as new!
  • Would I make this again?: Definitely! This is my 3rd time making char siew using this method - it really is so easy! 
  • And just an extra tip, if you want to use the char siew as filling for your pie, pastry or steamed buns, don't boil down the water too much, leave some sauce behind so that you can combine it together with more seasoning (because you need the mixture to be tastier if it is a filling) and cornstarch to thicken the mixture. Saves you an extra step of adding liquid for the filling!


In pictures: 

I know it doesn't look particularly appetizing, but this is how char siew looks like after you cook it.  I have reduced the water to almost nothing, so I'm left with thick delicious sauce. 
Upclose, after having added the oil+honey glaze. Some of the fatty bits are almost charred, just like the baking method. 


Unlike my mom, my hands are still unable to handle meat right out of the pot (my hands don't have enough tough skin yet), plus I had to take pictures ;p


GAWDDDDDD. I'm drooling as I type this. 

All cut up and ready to serve :]


Tuesday, September 20, 2011

Malaysian Monday #6: Chinese BBQ Pork, or Char Siew (蜜汁叉烧)

If I had to choose a meat that I had to live with for the rest of my life, it will be pork. And maybe perhaps chicken being a very close second. I love pork, in all its variations, and one of my favorite ways of preparing pork is marinating it in a BBQ-ish sauce, to give me char siew. Living in Singapore (and Malaysia), I never had to make my own char siew, because frankly speaking, it's available everywhere! Compound that with the fact that there's a super good roast pork and char siew stall opposite my estate; well, making my own char siew never occurred to me. 

At least, it never did until I was in Sydney and suddenly decided that I had to make my own char siew because I was dying to eat some proper Chinese-flavored pork. Char Siew as I know it to be, is also known as char siu, chashao (the direct translation from Chinese 叉烧) and perhaps chasu as well, which is what the Japanese call their version of roasted pork meat. Here at home, we usually consume it with rice or noodles, in pastries (叉烧酥 anyone?) or steamed buns. Anyway, I was in Sydney for a while, and I decided I had to make char siew. So off I went to first buy a dish that I could use in the oven (oh the extent I go to just for making something myself no?), then to get myself a proper cut of meat - I prefer to get the shoulder or butt which is less fatty but you can get the belly if you are in the market for something more fatty.

This is actually a picture of my second charsiew attempt, which I will blog about later. 

Of course before all these, I did my research on the recipes available on the internet, and boy did I come across many! However, I had to adapt a recipe of my own, mainly because I was working with a bare pantry, and I didn't want to buy too many ingredients only to not use it again. So ingredients like fermented tofu (taucheo), maltose (麦芽糖), Chinese Rose wine (绍兴酒 or shaoxing wine) and five-spice powder were out. Those requiring red food coloring were also out because I'm not a fan of food coloring. However, you do require the basic Chinese seasonings such as soy sauce (both light and dark) as well as Hoisin sauce. 

I am thus happy to announce that this version below is really something that anyone, especially someone overseas who doesn't have access to a very well-stocked Asian kitchen, can accomplish in a jiffy. All you have to do is to make sure you have an oven-safe dish, the requisite ingredients below, and get yourself down to your butcher (preferably the Asian butcher since the cuts of meat required will be best understood by the Asian butcher, especially if you tell him you want it for roast BBQ pork), marinate the pork and let it rest for a few hours before putting it in the oven a few hours before dinner. Trust me, I made it twice when I was in Sydney and it was DELICIOUS. I know someone else can attest to that ;p


Sorry the photos are pretty bad, because I was really very famished by the time I finished cooking and all I could think of was to polish off the charsiew, hence the blurry iPhone photographs and un-cut meat lol. 


Char Siew Recipe
Adapted from Lily 

500g pork, cut into 2-inch thick strips 

For the marinade
3 tbl Hoisin sauce
2 tbl brown sugar
1 tbl white sugar 
1 tbl rice wine 
2 tsp soya sauce
1 tsp sesame oil 

¼ tsp salt 
¼ tsp ground black pepper
¼ tsp ground white pepper 
½ tsp ground cinnamon 
¼ tsp allspice 

3 cloves of finely minced garlic

For the glaze
1 tbl dark soya sauce
1 tbl honey
1 tbl oil (I used olive oil)

Method: 
  1. Combine all the ingredients for the marinade together in a large ziplock bag. 
  2. If your cut of pork is too thick, cut it to about 2-3 inches and put it in the ziplock bag. Seal the bag and begin massaging the pork, ensuring that the marinade coats every part of the pork. 
  3. Leave it to rest for at least half at hour, preferably for 1-2 hours. In the meantime, preheat your oven to 180ºC.
  4. Place the pork into an oven safe dish and place it in the middle rack of the oven. Bake for about 10 minutes on one side before flipping the pork over to the other side to bake for another 10 minutes. Then, bast the pork using the glaze mixture and turn the heat up to about 210ºC (or up to 250ºC). Bake the pork for a further 5-10 minutes on each side until caramelized. You should be able to see almost-black charred bits on the pork. If so, remove from the oven and wait for it to cool before cutting and serving. Otherwise, turn down the heat to 150ºC and leave it in the oven until you are ready to serve. 
Look at those charred bits! And the translucent liquid is actually the rendered fat from the pork!

Janine's jots: 
  • Note: The recipe is also in cup measurements because I didn't have the benefit of a weighing machine, and spoons and cups were all I had. You can use 1 tsp of garlic powder as in the original recipe if you have it. I didn't, hence the minced garlic. 
  • Tips: Another tip is to make sure you have 2 racks in the oven, one on top and another in the centre. I found that to better aid caramelization, placing the dish of pork on the top rack with the top heating element turned on helped in caramelizing the pork faster and within a shorter time. 
  • Taste: Cooking is always an inexact science for myself, so do adjust the amount of spices and marinade according to your preferences. I have used quite a bit of sugar and soy sauce in the recipe to suit my preferences, but on subsequent attempts, have used less sugar and soy sauce and the result is still really good. 
  • Texture: The texture really depends on which cut of meat you get. As you can see, the cut I got above (probably the shoulder) was rather meaty and had quite little fat, so I should have sliced the pork into 2-inch slices as advised instead of leaving them whole because I had to bake them for a longer time to make sure they were tender. 
  • Serving size: A 500g serving will be more than enough to serve a family of 4 as the main dish. For 2, we demolished this in 2 meals. 
  • Storage: The char siew stores really well in the fridge, keeping for at least a week. You can also choose to keep it in the freezer, which is what I did when I made a lot of the charsiew. It goes well in fried rice, charsiew paos, and anything else!
  • Would I make this again?: Definitely! This is by far the cheaper method to get good quality charsiew, even in Singapore! Just do your math, a cut of pork will set you back a few dollars, and you'll be able to gorge yourself silly on the resulting charsiew, whereas buying the charsiew from a store will easily cost $5 up for quarter the weight. 

Recommended substitutions for ingredients 
  • To substitute the Chinese Rose wine (玫瑰露), many on the internet suggest that the best substitute is a dry sherry. If you happen to have sake lying around, do use that, but note that it's sweeter than shaoxing wine. In a pinch, just use a dry white wine that you might have lying around, or some Chinese rice wine (绍兴酒) will do as well. I tried both of the latter and they didn't make too much of a difference (in my opinion). 
  • For the maltose, I simply substituted it with honey. 
  • For the 5-spice powder (五香粉), you can make your own using Marc's recipe or you can just do what I did and just use whatever you have in your pantry. Basically, 5-spice powder is made up of (duh) 5 spices, although what these 5 spices are can differ somewhat. The usual suspects include star anise (bajiao), cloves, cinnamon (or Chinese cinnamon, rougui), Sichuan pepper (huajiao) and ground fennel seeds. The spices are not in equal quantities, so it's really a matter of taste. For my substitute below, I have attempted to use ground cinnamon, allspice (which contains ), some black pepper and some white pepper. 
  • If you don't have Hoisin sauce, my recommendation is for you to get it, because it's pretty inexpensive - a few dollars for about 300+g in any Asian grocery store. I can vouch that it will be available in the smallest of Asian grocers. Otherwise, a good substitution (I have tried this at home) is a combination of 4 parts soy sauce to 2 parts peanut butter to 1 part honey/sugar to 1 part white vinegar. You can also choose to add garlic powder, sesame oil, habenero and other seasonings. There are many recipes on the internet for Hoisin sauce, but honestly, it's pretty troublesome when it's so cheap and you'll have many other uses for it, like Hoisin Chicken Wings :]


        Saturday, September 17, 2011

        A Simple Raspberry Chocolate Mousse Tart, inspired by Pierre Hermé

        I made this because I was greedy and I bought a lot of raspberries which were on sale and since they rot very fast, I was thinking of ways of disposing them - eating them as they are, on tarts, and in muffins and cakes. And also because I was craving for some chocolate mousse and I wanted to try out my new tart ring. I've never had a tart ring before - it literally is a ring which you place on a baking tray and mould your tart. I so very much wanted those professional looking tarts but mine turned out rather rustic looking (that's a nice way of putting it). Needless to say, the tart ring worked like a dream, but I want those smaller ones because a 5-inch ring is too big for anyone to consume in a single sitting!


        Onto the mousse, I have to say that I really really like Pierre Hermé’s chocolate mousse. It takes longer than usual to set – taking at least 24 hours to reach a mousse-like consistency, but the results are fantastic. In a tart, they settle to form a caramel-chocolate like base with the chocolate mousse top. It is soft, pillowy, and absolutely delicious! It's really strange but the bottom layer really does taste like a rich chocolate caramel. This is however, not the recipe you would want to use if you’re looking for an aesthetically pleasing tart. The mousse should really be eaten as a mousse and is not apt as a tart filling, because it is very holey due to the air incorporated. But there's nothing that a dusting of cocoa powder wouldn't help with, isn't it? ;p 


        Chocolate Mousse Raspberry Tarts 
        Makes enough to fill 2 5-inch (12-cm) tarts 

        You will need 1 portion of the pie crust recipe (sufficient to make a 9-inch pie), a portion of the chocolate mousse recipe below as well as a few raspberries to top the pie. You can also choose to line the base of the pie with some raspberry jam, which I did with my homemade raspberry jam (same method with different ingredients) :]

        Pie Crust 
        Blind bake it your favorite pie crust recipe. My two favorites (for the moment) are Bourke Street’s and Cook’s illustrated. However, I baked this tart using my Semolina Cream Cheese Pie Crust recipe. 

        Chocolate Mousse
        adapted and translated from Pierre Hermé's Le Larousse du Chocolat
        Serves 4 small portions

        85g bittersweet chocolate 
        40g whole milk
        10g egg yolk
        60g egg whites
        20g castor sugar

        1. Chop chocolate into chunks and place it in a bowl over a bain marie, or a simmering pot. Make sure the water is simmering and not boiling. Melt the chocolate and put it aside. 
        2. In the meantime, bring the milk to a boil. Pour it into the bowl containing the melted chocolate and whisk to combine. Add in the egg yolk and whisk until fully incorporated. 
        3. Whip the eggs whites on medium speed until they reach a soft peak. Add in the sugar 'like rain' (in a slow steady stream) and increase the speed to medium until you get a firm and glossy peak. The chocolate mixture should be cooled by the time the egg whites are ready.
        4. Add a third of the egg whites to the chocolate mixture to lighten the mixture before gently folding in the remaining egg whites into the chocolate mixture. Stop folding once there are no white streaks. 
        5. You can pour the mousse into cups or into your pre-baked tarts. Chill for at least an 1 hour before consuming. It is best to chill it for at least a few hours so that the mousse can set properly. 

        To assemble: 
        1. Blind bake it your favorite pie crust recipe. Once the crust turns a golden brown, remove from the oven and allow it to cool. 
        2. Begin making the mousse once the pie crust is out of the oven, by following the method above. Once you have folded in the egg whites into the chocolate mixture, immediately pour it into your baked tart crust. Otherwise once the mousse sets, it is hard to scoop or transfer it from the cup to the tart. If you wish, spread some raspberry jam on the bottom of the crust before adding the chocolate mousse. 
        3. Allow the tart to chill in the refrigerator for at least 3-24 hours (preferably) before consuming. Garnish with some fresh raspberries before serving. 

        Check out my 'holey' tart and that strange streak of light from the top right. 

        Janine's jots: 
        • Notes: Do note that Pierre Hermé does have a number of chocolate mousse recipes, but I really like this one because of the caramel-y like layer it produces and the lack of whipping cream used.  
        • Taste: I really like the contrast of chocolate mousse and raspberries - I intentionally used a milk chocolate here, to go with the tart raspberries I had, and the combination was lovely - each bite was filled with a tart raspberry jam on the bottom, the milky sweet chocolate mousse and another tart, seedy raspberry. YUM.
        • Texture: I felt that the tart could have benefited from a more substantial tart crust, i.e., one with less bite from the semolina and with a slightly more buttery texture. Nevertheless, I liked the rustic-ness of the tart, from the hole-y mousse to the uneven tart crust and its almost-grainy texture to the tiny pyramid of raspberries which I dug into immediately. 
        • Serving size: This tart might be a tad big for one person to have for dessert, it's a nice dessert to share. I however had no such problem. The mousse was sufficiently light on the palate, and the crust being a semolina one, didn't leave me with a gelat aftertaste. Together with the tart raspberries, I found able to stomach more of the tart than expected. 
        • Modifications: This recipe has been halved from the original and the sugar amounts have been decreased. Do note that the texture of this mousse is lighter if served after the brief chilling. However, you can cover and store in the refrigerator for up to 3-4 days, the texture will be much more dense.
        • Storage: The tart keeps well in an air tight container in the refrigerator for up to 2 days. After that, the tart crust becomes soggy because of the chocolate mousse. If you wish to keep it for longer, keep the mousse and pre-baked tart crust separately before filling it with the mousse and chilling it briefly again before serving. 
        • Would I make this again?: Definitely, this is not the first time I've made this chocolate mousse recipe and is definitely not the last!
        One final look at this yummy tart :D

        Wednesday, September 14, 2011

        Homemade Strawberry Apple Jam, and the differences between jams, jellies, compotes, confitures, etc.

        My local supermarket had quite a few offers on strawberries in the past few months, where a punnet of 454g USA or Australian strawberries were being sold for slightly less than $5. I grabbed a few punnets, partly because I was kiasu, and partly because I knew I wanted to do a ton of things with them. So far, I've eaten them (duh), used them as decoration on my chocolate cakes, on my tarts, in my cakes... but I still have so many of them and I was afraid they would rot. So I did the next best thing - I decided to can them and make jams out of them! I decided to do a combination of strawberries and apples, but when I was done, I hesitated over whether to call it a jam or preserve or even perhaps a compote?

        Check out the ruby red chunk of strawberry in my 'jam' here :]

        Naturally, I had to find out what were the differences and I settled on calling this 'thing' I made a jam. I have made a tiny table of what I have found out: 
        • A jam is basically made by boiling fruit and sugar together to a thick consistency whereas a preserve is where the fruits are made into either jams or jellies and are cooked in whole or large pieces to retain their shapes. 
        • A jelly is basically sugar boiled with fruit juice and gelatin, and does not have any fruit bits. It is usually sweeter and more transparent - think of those strawberry or other fruit jellies that we can get locally in those small plastic cones with a white plastic seal on them.  
        • Of course I had to ask what a marmalade was, and it's basically a jam made with citrus fruits and has bits of rind in it. 
        • A compote (or french for mixture) is defined as a dessert made with whole or pieces of fruit in a sugar syrup - sounds like preserves to me! 
        • Similarly, conserves are known as whole fruit jams, which also strike me as the same as preserves. 
        • To makes things more difficult, there are spreads, which wiki defines as a jam or preserve with no added sugar - confusing and contradictory much?! 
        • Then of course, I'm sure some of you have stumbled across terms like confitures and gelées before - these are basically french terms for preserves/jam and jelly respectively. 
        • Finally, there's the syrup. This is pretty simple - it's basically sweetened concentrated fruit juice!
        •  There are also things we know as chutneys and relishes which involve fruit too, but I'll keep that for another day!
        And there you have it! I hope the above list was hopeful to at least someone other than me, because I finally got my doubts cleared and I also realized that many bakeries like to use the french word for jelly just to make their desserts sound a little more classy. 

        And now onto my jam! A jam is made when fruit, sugar and acid are heated together. First off, all fruits contain natural pectin, but some, like strawberries, do not contain enough natural pectin to gel (to form a jam consistency). When you cut the fruit and heat it, pectin molecules are released. The sugar added helps to bind the liquid from the fruit to the pectin molecules, bringing them closer to one another. When the mixture is brought to a rolling boil, some of that excess liquid is then boiled away, encouraging greater binding between the liquid and pectin, creating a more concentrated mixture. The acid added, in the form of lemon juice does 2 things: it helps with the pectin and it also neutralizes any 'charge' that the pectin molecules might have, encouraging closer binds between pectin and liquid once again. And that's about all there is to making jam really! If you are keen to find out more about jams, there is lots of good information floating about the net, and a good place to start is Food in Jars (she cans all kinds of things) as well as this site where I got a headstart on.

        Oops the picture's a little blurry :/


        Strawberry Apple Jam

        Loosely adapted from Ina Garten's Easy Strawberry Jam Recipe and Allrecipes.com

        Ingredients
        200g   fresh strawberries, hulled
        90g     rose apple, peeled and diced
        150g   castor sugar 
        25ml   lemon juice

        Method:
        1. Wash and drain the strawberries before hulling them. Cut them into halves or smaller pieces if you want a smoother jam. Wash, peel and dice the apple before combing with the strawberries and lemon juice in a heavy-bottomed pot. 
        2. Cover and cook gently until the fruit begin to release their juices, about 5 minutes. 
        3. Once the apples begin to break down, stir in the sugar. Once the sugar is dissolved, bring the mixture to a rolling boil over a medium heat, stirring often to ensure it does not stick to the bottom.
        4. Reduce the mixture to low heat, allowing the mixture to simmer for about 10 minutes or until it thickens. The mixture is ready when it registers 105°C on the thermometer or when it passes the gelling test*.
        5. Spoon the mixture into a sterilized glass jar before allowing it to cool to room temperature. Store covered in the refrigerator.
        And the perspective's on this a little wonky :/
        Janine's jots: 
        • *How to test the 'jellying point': There are 3 tests you can use - the 105°C temperature point I mentioned earlier, or the spoon test. Simply place a spoon in the freezer before you start jamming and when you think the mixture is thick enough, dip it into the mixture and raise the spoon out. The jelly is done when the syrup forms a sheet that hangs from the spoon. A similar test is the wrinkle test that some call it. Place a small plate in the freezer before you start and spoon a bit of the hot mixture onto the plate when you think it is done. Allow it to cool for a minute (I chill it in the fridge) and push your finger through it. If the mixture 'wrinkles', then setting point has been reached. 
        • Notes: You will realize that many jam recipes ask you to skim and discard any foam that forms but I did not indicate it above because of a few reasons - the foam is usually discarded because it is not the consistency people like in jams and also because it contains air which affects headspace which affects storage of the jam as well as food safety. Since I do not heat process the jars and consume the jams within a short time, this doesn't really affect me. Alternatively, you can prevent the foam by adding some butter or by microwaving the foam to produce normal jam again! 
        • Taste: The original recipe called for 200g of sugar, which I reduced to 150g, out of which 30g was muscovado sugar. However, I still found the jam rather sweet (I don't like overly sweet jams) - this might be because the rose apple used was very sweet. I will reduce the sugar to about 100g the next time. I also found the mixture a little too tart for my liking - I will probably reduce the lemon juice used to 15ml instead.  
        • Serving size: This makes about 250g worth of jam - which is just enough for a fortnight's worth of spread for breads and rolls for an individual like me :] Do feel free to double the recipe without any problems, because my recipe is half of the original. 
        • Modifications: If I were to do this again, I would boil the apples first before adding the strawberries because the apples take longer to lose their shape and because I want a chunkier jam (or preserve). 
        • Storage: Without heat processing, the jam will store well in the refrigerator for at least 2 weeks. If you wish to keep it for longer (up to a year), seal and heat process them. 
        • Would I make this again?: Oh yes, I foresee many lovely combinations, like strawberry rose, pineapple mango and other tropical combinations that will suit our climate perfectly!
        • Other comments: Do note that the quantities of sugar will really depend on your taste. However, beware of reducing the sugar by too much because this will interfere with the jam-forming process. Here, my strawberries were slightly tart and my rose apple was slightly crisp and sweet.  The sugar levels are thus adjusted to suit what I like. Also, if making an all strawberry jam, pectin might have to be added because strawberries are really low in pectin. I overcame that by adding apples and increasing the amount of lemon juice, both which are high in pectin. 
        ETA: Since I wrote this post (which was quite a few weeks ago), I have made this same jam recipe with a few variations - less sugar, more fruit, less lemon, different type of fruit, etc. Another variation I have tried is with just 260g of strawberries, 130g of sugar and the zest and juice of a lemon. The jam was a little on the tart side, which was probably because I added too much lemon juice AND zest. 

        Anyway, my mom loves my homemade jam and why not make more jam when there's someone appreciative of it right? :] Expect a few more variations coming your way soon!

        Sunday, September 11, 2011

        Mini Snow Skin Mooncakes with Melon Seeds and Lotus Paste (冰皮月饼)

        I can't believe Mid-Autumn Festival is upon us already. In fact, the actual day will be tomorrow, 12 September 2011! Time really flies, because when Mid-Autumn Festival is here, it'll only be a while before Deepavali, my mom's & brother's birthday, and then Christmas! Okay, I might be getting a little ahead of myself but the point is that the days really seem to fly by when you look back on the weeks but the hours just move so so slowly when you're doing mundane stuff, like studying >.<

        The full moon, gibbous moon and the fat crescent moon :]

        Mid-Autumn Festival is also loosely known as Mooncake Festival, and boy do I have wonderful memories of it. I remember carrying lanterns around the neighborhood, and feeling upset when the wind blew and the flame of my candle would burn a hole in my lantern which rapidly grew causing the whole lantern to burst into flames. I also remember competing with my brothers to see who had the most long-lasting lantern. Nowadays, parents get those battery-operated lanterns for their kids, which is rather sad because I think battery operated lanterns are just not as fun. Anyway, because I came from a Chinese secondary school, Mooncake Festival was quite a big thing. Our school would hold a concert, and because we were all under 16 years old, I remember we had to get our parents' permission to stay in school after 6pm. Our school also invited our parents for the celebration, and at 6pm, the celebration would start. After the principal's opening speech, the Chinese Orchestra would play, then the Chinese dancers would dance a traditional dance, with rabbits and all. I remember some Chinese drama group performance as well. And the highlight of the night would definitely be the moon cake  eating. Our chool would ask each class to donate a few boxes of moon cakes, and these would be laid out on a long row of tables at the back of our quadrangle, all sliced and ready to be shared. At the same time, tea would be served, and together with  猜燈謎 games, literally lantern riddles in which prizes were awarded, the students would run off to play with lanterns and sparklers. It was probably the only time when we could roam about our school campus in the dark. Many a teenage secret was shared as friends strolled around in groups, carrying lanterns or sparklers. 


        I also remember looking at the unbelievably round moon, which hung so low in the dark, star-studded sky that it looked almost fake. And we would find great joy in looking for the 'rabbit' on the moon. Have you guys seen it before? The holes on the moon really do look like a rabbit! 

        Anyway, both family, friends and teachers would all enjoy the moon cakes, and any extras could be brought home to savor. Looking back, I'm very appreciative of what my school did, for teaching us our culture in subtle ways, and making sure we still understood the essence of Mid-Autumn Festival. Mid-Autumn Festival is many ways, is like Thanksgiving, instead of giving thanks, the family, young and old, will gather and admire the moon (賞月), while enjoying each other's presence. 


        Back to way way back, when I still found joy in carrying paper lanterns around the neighborhood, I would rather have the pale green snow skin moon cake instead of the brown baked moon cake. As far as I can remember, I've never liked baked moon cakes. I've always like the cool snow skin moon cakes, and every year without fail, my mom would get a pandan flavored green snow skin moon cake for me. I also remember not liking the salted egg yolks when I was younger, but as I get older, my taste preferences lean towards the salty, and I find myself liking moon cakes with 1-2 egg yolks in them. Not 4 though, that's too little lotus filling for me =p So this year, seeing that moon cakes have increased in prices, I decided that it was high time I made some of my own. My mom has her own moon cake mould, so why not use it? In both Malaysia and Singapore, the baking supplies shops bring out their cooked glutinous rice flour packets and out comes the lotus paste, red bean paste, and various other flavored lotus pastes. I simply got myself a packet of koh fun and lotus paste and I was set!

        My recipe is more of a suggested recipe as compared to a proper recipe with fixed numbers because I made a combination of small and large moon cakes. All you need to remember is the golden ratio is 1:2, 1 part of skin to 2 parts of filling, and if you stay within this ratio, you shouldn't go wrong. 

        What you should first do is to determine how heavy a moon cake your moon cake mould will give you. To do this, simply tear off a huge piece of your snow skin dough, and stuff it into your mould. Make sure to pack it well and remove any excess peeping out of the mould. After that, un-mould the dough and weigh it. This will be the weight of the moon cake that you will get. From there, divide that weight into 3. So for example, after cramming the snow skin dough into my tiny moon cake mould, I found that it weighed 50g. I then divided it into 3, which gave me around 16 odd grams. I decided then to go with 20g of snow skin and 30g of filling. This was because I'm strange that way - I prefer to have a higher skin to filling ratio. If you wish to have more filling, simply use the 1:2 ratio, which should give you around 16g of snow skin and 34g of lotus filling. It's that simple really :]

        ***

        Mini Snow Skin Mooncakes
        Adapted from Amanda who adapted it from Aunty Yochana, here
        Makes approximately 10 5cm-diameter mooncakes

        For the snow skin dough:
        100g   koh fun (or gao fen, which is cooked glutinous rice flour)
        90g     icing sugar
        30g     shortening
        120g   cold water
        A few drops of coloring (if desired)

        For the lotus paste filling: 
        300g lotus paste (I used a store bought low-sugar white lotus paste, but you can make your own. Check out Christine's recipe which is close to what my family does)
        50-100g melon seeds (vary this amount according to how much melon seeds you like in your moon cake)

        Method: 
        1. Sift the koh fun and icing sugar in a mixing bowl. Gently rub the shortening into the flour mixture, combining until the mixture resembles coarse bread crumbs. Mix in the cold water and knead until a soft dough forms. If you wish to add in food coloring, add it in together with the cold water. Let the dough rest for at least 30 minutes before using. 
        2. After rested, divide the dough into balls of equal weight. 
        3. In the meantime, add the melon seeds to the lotus paste and mix evenly. Divide the lotus paste into balls of equal weight. 
        4. To make the moon cake, lightly dust your hands and the mould with the koh fun. Flatten the ball of snow skin until you get a rough circle. Place the ball of filling in the centre of the dough and seal the ball with your snow skin. Make sure that there is no air trapped between the dough and filling and seal the edges tightly. Put the ball seam-side up into the floured mould and pack it in gently. Then, rap it against the counter on all sides so that the moon cake falls out nicely. Chill for at least 6 hours before consuming. 


        Janine's jots: 
        • Notes: Please note that you CANNOT substitute shortening for butter. It doesn't work. Believe me I've tried. Also, if you wish to get multi colored moon cakes like those above, simply apportion your doughs and color them separately. Then, flatten each colored dough into a rectangular sheet and place the doughs one on top of the other. Proceed to roll up them, swiss roll style. Next, cut off a part of the dough, making sure that it fits your mould Proceed to then flatten the part of the dough into a round circle and proceed as per step 4 above. You will get swirls of color. Like in the 2 multicolored moon cakes above, the one of the left had more yellow than pink and one on the right had more pink than yellow. It's all a matter of preference really. The white ones are the original color. 
        • Taste: I'm not a particular fan of fancy fillings, and I particularly love white lotus paste, so this was perfect. I also don't have a very sweet tooth, so I chose the low-sugar option. The end result was fantastic, in my opinion. 
        • Texture: Although this texture certainly does not beat the smooth texture that you might get for commercial moon cakes, I find it pretty okay and I like the smooth lotus paste which I got from Malaysia. I liked that I could add as much melon seeds as I wanted to the lotus paste to give it that contrast to the smooth paste. 
        • Serving size: Each mini moon cake is about 2-3 bites worth, which is just lovely. And not to mention that buying the ingredients for the moon cakes cost me less than RM25 (S$12), and I got so many moon cakes. Definitely something to consider for the future!
        • Storage: The moon cakes store quite well in the fridge. Be sure to keep them in an airtight container and make sure they don't stick to one another. Mine lasted for about a week before they were gone!
        • Would I make this again?: This is the definitely the cheaper and better way - and what else is better than knowing what goes into what you are eating?  


        Another close up of the first photo :]

        Same photo, but I decided to use a film effect to emulate the 'shining moon' hanging in the dark sky. Not too successful with that huh? ;p

        Anyway, I am submitting this to Aspiring Bakers #11: Mid-Autumn Treats (September 2011), hosted by Happy Home Baking. Have a great Mid-Autumn Festival (中秋節) everyone - may your moon cakes be yummy and your lanterns shine brightly :D

        Wednesday, September 7, 2011

        Fluffy Pancakes III

        Classes have been coming hard and fast these few weeks. Tons of tutorials to be done, assignments to be handed in, etc. After I finish tutorial at 8pm and arrive home at about 9pm, I find that I have virtually no energy to do any more work, needless to say any baking. Nevertheless, weekends are left for baking, or rather Saturdays are, and Sundays are for some work and reading my favorite types of books. I've been baking quite a bit, baking at least 2-3 things at one go. On a few occasions in the past months, I woke up on a Saturday morning feeling like I needed pancakes, and pancakes it was! Pancakes are really the easiest things to whip up, in less than 30 minutes, you should be able to mix the batter and make yourself delicious hot pancakes :]


        I've been experimenting with a couple of recipes, and will be posting them up one at a time. These are really quite delayed because I really can't find time to blog, and I foresee that things are just gonna get worse :/ Anyway, I got this recipe bookmarked after Sonia left a comment in my previous post telling me that she had found a way for fluffy pancakes without beating the egg whites. Needless to say, I was intrigued and immediately went to her blog to check out her recipe. Her recipe indeed is really simple - most of us probably already have these ingredients in our pantry - flour, sugar, salt, milk, egg and oil. It's really that simple! 

        I actually have my own recipe for pancakes which have approximately the same proportions as Sonia's but using all-purpose flour and baking powder instead, as well as having a lower sugar ratio and higher liquid ratio. So on a fine Saturday morning, I decided that I very much would like pancakes to go with  my freshly made strawberry-apple jam, and decided to give her recipe a go. This was yet another perfect chance to try another fluffy pancake recipe!

        Fluffy pancakes with maple syrup and homemade strawberry-apple jam :]

        Fluffy Pancakes III
        Adapted from Sonia
        Makes 6 pancakes

        Ingredients:
        150 g        self-raising flour
        50 g          sugar
        1/4 tsp      salt
        110 ml      fresh milk
        55 g          egg (about 1 large egg)
        1 tbl          corn oil

        Method:
        1. Mix flour, sugar and salt in a mixing bowl.
        2. In a separate bowl, mix together the egg, milk and corn oil. Pour this mixture into the flour mixture and mix until they briefly come together. You may still have tiny lumps of flour but this is okay!
        3. Heat a non-stick frying pan on medium low heat. Using a 
          ¼-cup measuring spoon, ladle 
          ¼-cup of batter on the pan and cook for 2 minutes, or until bubbles appear on the surface. Flip the pancake and cook for another 1 minute or until golden brown.
        4. Repeat with remaining batter and serve warm with maple syrup. 


        Janine's jots: 
        • Cooking Notes: Because these pancakes are rather thick, do remember to use low heat to cook them otherwise the outsides will brown far too quickly before the insides are properly cooked!
        • Taste: Pancakes were sufficiently sweet, such that they could be consumed on their own. Of course, nothing beats pancakes with jam and maple syrup :]
        • Texture: You will first realize how thick the batter is, which is quite unlike a pancake batter but this is CORRECT - do not add anymore liquid to it! Just proceed to ladle the batter onto your pan and you should get a thick pancake. I think this helps with the fluffiness of the pancake, because you'll get pancakes with an almost sponge/chiffon-cake-like texture. Seriously good!
        • Serving size: Depending on how large or small you want it to be, you should get around 6 thick yummy pancakes!
        • Modifications: I would probably try decreasing the sugar and increasing the fresh milk in the recipe to see where it'll get it. And the next time, I'd probably use butter instead of corn oil because I much prefer the taste of melted butter. Otherwise, this recipe is pretty close to perfect for me! 
        • Storage: Pancakes should preferably be consumed right after they are made, especially these which had a nice crusty exterior but a soft fluffy interior. They also didn't last beyond breakfast, so I have no idea how long they last stored at room temperature. My guess is that you can store them in the fridge and zap them up when you want to eat them, although it won't taste as nice. 
        • Would I make this again?: Definitely! This is yet another winner after my last fluffy pancakes attempt!

        In pictures: 


        Fluffy cake-like inside :D

        Saturday, September 3, 2011

        Some Instagram updates

        I've been busy baking lately, but have been too lazy to take proper photographs or blog about them. And after looking through my iPhone albums, I decided to post up some of my instagram photos to remember what I've been up to. These photographs are taken with Instagram, which is an awesome app, and I'm quite a fan of instagram, because I often find myself without a proper camera and just with my phone. The effects are really awesome and they even have a tilt-shift effect which replicates the small aperture effect on dslrs. Some pictures below of course, are kinda noisy because of the lighting conditions, but other than that, there's nothing much instagram won't fix!

        These are some of the photographs from quite some time ago. No recipes this time around, these photographs are just here for me to note how far I've progressed thus far in my baking journey :]


        Ebony & Ivory - White and Dark Chocolate Chip (naked) Cupcakes

        Banana Chocolate Chip Muffins with Almond Nibs

        Pear & Ricotta Puff Pastry Tarts


        Chai Latte


        PS: If you're interested in any baked goods below, don't worry - I'll be posting recipes of them up as soon as I have some free time from school/work to do so!

        And here are some other picture-perfect photos from my Aussie trip (aka my nicer Instagram photos):

        Sunset at Sunshine Coast

        The ever-iconic Sydney Opera House, with the tilt-shift effect

        Entitled "In Her Eyes", taken by my dearest at Bondi Beach <3
        Related Posts Plugin for WordPress, Blogger...