
As I'm typing this entry, I'm munching on my homemade wheat thins and boy are they addictive! I've to admit I've never eaten Wheat Thins, because I don't think they're available locally, but I have eaten other types of wheat crackers. Like Arnotts shapes!! Anyone remember them? They have flavors like Pizza and Cheddar - I remember loving the Pizza flavored ones to bits! But horrors! Each cracker contains 12% of saturated fat and 10% of sodium - a definite no-no! These homemade ones are by far the better choice. I'm no calorie counter, but I'm pretty sure that the saturated fat and sodium content is much lower and better yet, there's no preservatives!
I saw this recipe while I was blog surfing on Xiaolu's blog, and I've bookmarked it until a suitable time to attempt them. The time came sooner than I expected when my daily oatmeal chocolate chip cookie snack ran out! I do have a bad habit when it comes to snacking - I tend to get sick of one type of biscuit/cookie really easily. In fact, I usually just open a packet of biscuits to eat one or two before I leave them languishing in the cookie jar until the air has gone out of them :/ Bad habit I claim to have inherited from my mom who shares the same bad habit! :p
Homemade Wheat Thins
Adapted from Xiaolu, from King Arthur Flour Whole Grain Baking Book
Makes 6 dozen crackers
Ingredients:
For the crackers:
150 g wholemeal flour (or whole wheat flour)
20 g castor sugar
½ tsp salt
½ tsp vanilla extract
60 g unsalted butter, cold
60 g water
For the topping:
1 tsp cinnamon powder
2 tsp icing sugar
(sift both together)
Granulated sugar for additional sprinkling
Granulated sugar for additional sprinkling
Method:
- Combine the flour, sugar and salt together.
- Cut the butter into 3-cm large cubes and use your fingers (or a fork) to cut it into the dry ingredients.
- Once a bread-crumb texture is achieved, add in 40g of water, making sure to fully incorporate it into the dough. If the dough remains dry, slowly add in the water a tablespoon at a time, until all the bread crumbs have been incorporated into the dough. You might not need to use the entire 60g of water! Cover and chill the dough for 10 minutes.
- Preheat the oven to 190 degrees. Line your baking sheets with parchment paper.
- Lightly flour your counter and your rolling pin. Grab a fist-sized portion of the dough, making sure to keep the dough covered under a damp tea towel to prevent it from drying out. Roll the piece of dough, as thin as you can (about 2mm thick). Using a pizza cutter or sharp knife (I used the edge of my bench scraper), cut the pieces into squares approximately, 3-5cm wide (or whatever shapes you want your crackers to be).
- Sprinkle the squares with your cinnamon-sugar topping, or any desired sweet or savoury topping. Repeat the process with the remaining dough.
- Bake the crackers for about 5-10 minutes, or until they are crisp and brown. Check on the crackers after 5 minutes, making sure to rotate the tray if your crackers don't brown evenly. If some of your thinner crackers have already browned, use a spatula to remove them and continue baking.
- Once ready, remove the crackers form he oven and cool on the pan for about 10 minutes before they're ready for consumption! Store the crackers in airtight containers.
Janine's Jots:
- I didn't exactly bother to make sure that my crackers were uniform in size, but if you are the OCD type, you can trim the edges of your rolled out dough and proceed to cut into uniform rectangles.
- Tips: You can actually roll the dough out on your pre-cut parchment paper, cut it into pieces and transfer the paper onto your baking tray without having to bother with excessively flouring your countertop. Just be sure not to cut into your parchment paper. You don't have to even separate the pieces after you've cut them because they don't expand and are easily snapped off at the lines you've cut.
- Texture: If you manage to roll out your dough thin enough, the crackers will be nicely thin and crisp. They don't expand AT ALL. Try not to re-roll your scraps too many times because it'll give rise to layers and the crackers won't be as crisp!
- Storage: I've stored the crackers in an airtight container, and so far, it's been more than a week and the crackers are still as crisp as before :]
- Serving size: Like Xiaolu, I highly recommend doubling the recipe, because 6 dozen crackers is really a small amount! They're really addictive and you can finish a number of them at one go!
- Modifications: This recipe is easily adaptible and really easy to make! It only took me about 10 minutes of active preparation and about an hour in total before I got to eat the cooled crackers! You can easily make savory versions. In fact, the original poster made a savory one with paprika, turmeric, garlic and onion powder added into the dough. Salt was also sprinkled on top. I did a herb version along the same lines.
- Taste: If you are not much of a fan of wheaty textures and tastes, I'd recommend subbing at least 30g of the wholemeal flour with all-purpose flour, which is what the original recipe called for.
- Would I make this again? DEFINITELY. There aren't many cinnamon flavored crackers available in our local supermarkets because I don't think it's favored by locals, but I love cinnamon to bits! I can imagine myself making different versions of this cracker - BBQ, cheddar cheese - the variations are endless. And it goes really well with salsa, dips and cheeses and ham too! And I can't stress enough how easy it is to make the dough and bake them! Be sure to keep an eye on the crackers though, some of mine turned a tad too brown and had the chao-tah (burnt) taste, which was awful.
In pictures:
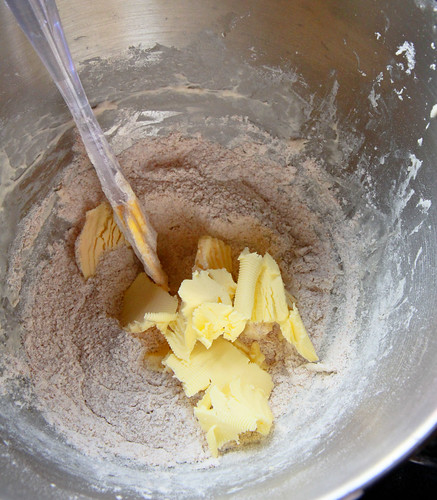 |
| Combine the dry ingredients. Excuse the dirty bowl - I used it for other purposes earlier :/ |
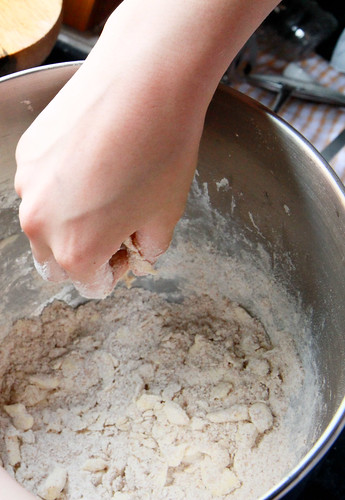 |
| Incorporate the butter into the dry ingredients, using your fingers., until you get coarse breadcrumbs. |
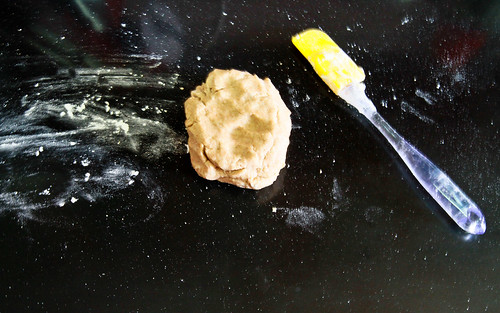 |
| Lightly flour your counter so that you can roll your dough on it. Shaky hands for this picture, sorry! |
 |
| A close-up of how the dough looks like - it's not wet like bread dough, and not difficult to handle like most pie doughs. |
 |
| See the rolled out dough? This is still not thin enough! It has to be as thin as how you imagine you want your crackers to be - really really thin! |
 |
| What I've done here is to separate the pieces on the baking paper - there is no need to do so because the pieces totally do not expand and do not stick to one another! See the big piece on the right? I used my bench scrapper to cut it into pieces on the tray rather than moving the pieces from the countertop to the tray :] |
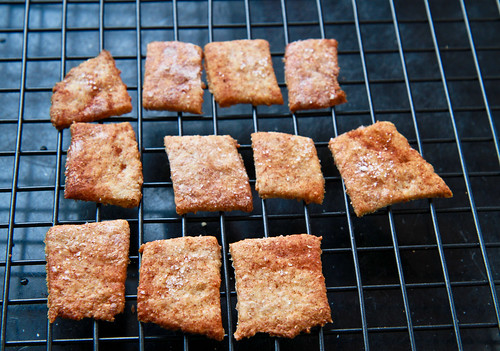 |
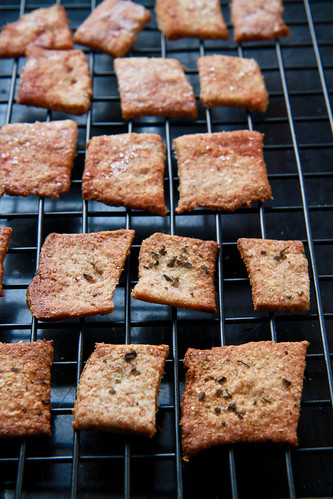
| These are my cinnamon-sugar topped ones. They look a tad browner than the herb ones. As you can see, I don't really care much for regular sizes. |
 |
| These are the herb-topped ones. Be sure to press the herbs into the crackers before baking, otherwise they'll all fall out when baked! |
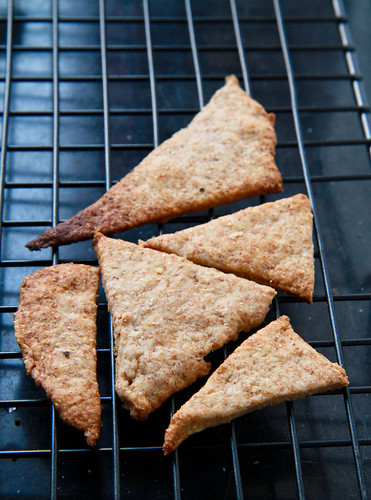 |
| My attempt at making plain triangular ones for dipping sauces heh :] Note the top triangle tip? That's way too brown - it'll have the burnt taste which is a no-no unless you like that type of smells. |
I haven't exactly raved much about recipes I've attempted, but I've to admit that this will be one of the recipes that I'm sure I'll be repeating many many times this year. They're really easy to make, and I also like the fact that I can control the amount of sugar and fat going into this cracker - so that I know exactly what I'm snacking on. And the best part is the ability to change the flavours of this cracker according to your preference! I thinking along the lines of perhaps making a rice cracker version - subbing the wheat flour for rice flour instead, and perhaps making a thick cracker, with some cheese or other sweet filling inside, just like those weetbix cereal I eat in the morning! Will see how that goes :] Do try out this recipe everyone! It's definitely one for keeps!
7 comments:
I like the look of these! and the fact that they are not so fattening and most of all, so easy peasy to make:D
i love this! easy peasy!
We love wheat thins in our house. That's so neat that you made your own and added a new sweet twist on them. I have a sweet treat linky party on my blog this weekend and I'd be delighted if you'd stop by then and link your yummy crackers up. http://sweet-as-sugar-cookies.blogspot.com
@jeannie and jess: do try it! it's really yummy :) And easy to make too! I made it while waiting for my buns to proof hehe
@lisa: thanks for dropping by and I'd love to link up :)
I love anything that is easy to make. This is it!
Those look very good. I love crispy, cinnamon treats.
Yay! I'm so glad these worked out for ya -- they look and sound aaaamazing (even better than the original =D)
Post a Comment