My blog has moved!

You should be automatically redirected in 6 seconds. If not, visit
http://www.unpastiche.com
and update your bookmarks.

Wednesday, August 31, 2011

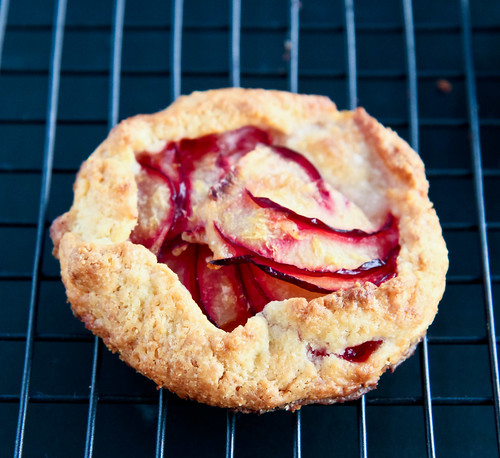
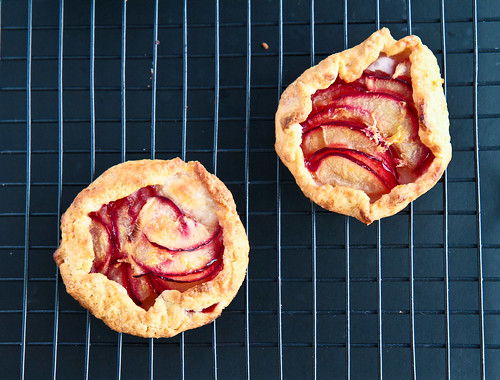
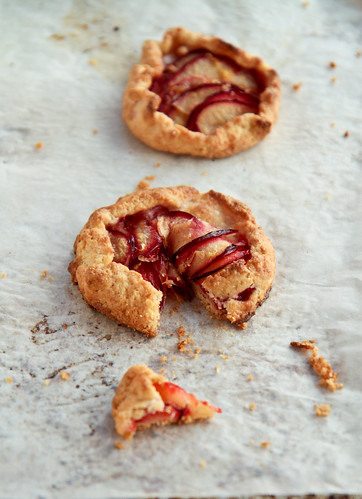
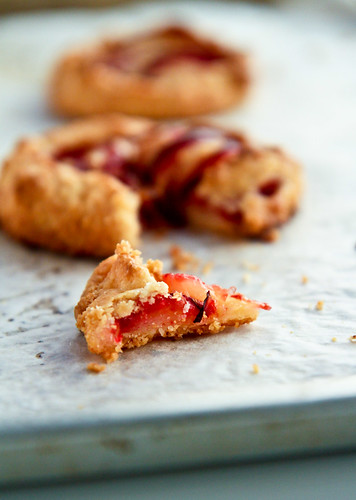
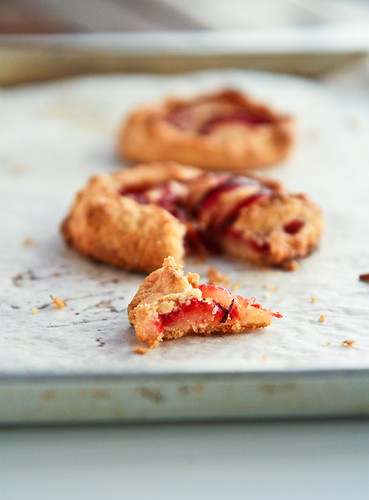
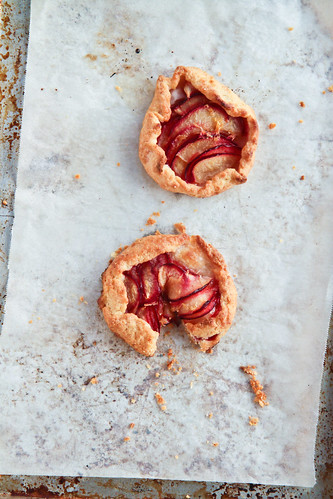
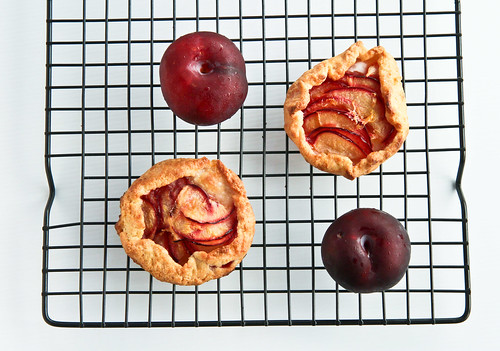
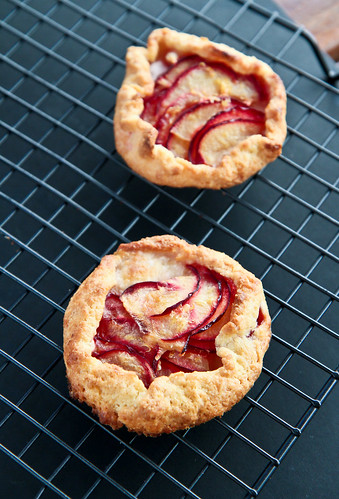
Plum Galettes, with a Semolina Cream Cheese Pie Crust

I made these plum galettes some time ago, together with my onion galettes in fact, but my workload's really killing me. Nowadays, I can only bake once or twice per week, and hardly have the time to write up blog posts or even visit other blogs. What I hate most are that the deadlines are so close together and I never know what is expected of me until the very last moment. The administration really is the dumps and I hate the uncertainty of it all. Being the excessive planner that I am, I hate the fact that I don't know what I'll be doing next year or what will await me the following weeks. 

Sigh. Anyway, this post is really rushed because I'm trying to make it for the deadline for Aspiring Bakers #10: Easy as Pie (August 2011), which ends today! I actually attempted a few more pie and tart recipes, including another recipe of Portuguese egg tarts, puff pastries and croissants, but I really don't have the time to edit the photos and write out the recipes properly, so I figured I'd just take my time with posting them. 


On a separate note, I just remembered that today's 31 August, and that it's Malaysia's National Day! Having studied and been in Singapore for a majority of my life, most of my friends find it strange that I'm still so attached to Malaysia, a country who, besides being my birthplace, has hardly had a hand in my growth or education. In fact, I'm rather ashamed to admit that I only know 2 lines of my national anthem and didn't know that a pledge existed until I was 15, when we had a Malaysia Day celebration in the boarding school I was in. Nevertheless, my roots remain firmly entrenched in Malaysia, and I know that no matter where I'm at, I'll always feel at home in Malaysia, and I'll always be proud of Malaysia (parts, but not all of it). I read somewhere that the Malaysian person is a strange creature - most of us are deeply in love with our country, but have no faith in our government. Perhaps this might be true of other citizens of other countries, but I'm sure this statement is one that many overseas Malaysians can identify with. Sometimes I wish more is being done to lure Malaysians back, because what is a country without its citizens right? The brain drain Malaysia is suffering is no joke, and it stems from neglect really. It pains me to know that so many have left Malaysia, some for good, because of better brighter opportunities elsewhere. However, I also know so many overseas Malaysians who would go back in an instant, only if chances were better and if the environment weren't so discriminatory. Anyway, since this blog of mine focuses on baking, I shall not delve more into the whole politics and government issues, as interested as I am in them, and leave you with my plum galettes.


I basically used the same cream cheese pie crust recipe as the one you've seen in my onion galettes because I had cream cheese expiring and I wanted to get rid of it (I made cream cheese muffins with them as well), so this seemed like a good idea. Also, plums were on sale in many supermarkets around the island, so that was a no-brainer, since plums are one of my favorite stone fruits around! Okay this is a lie, because I like all sorts of stone fruits - apricots, nectarines, cherries, peaches - I <3 them all!

Rustic Plum Galettes

Semolina cream cheese pie crust
Adapted from Rose Levy Beranbaum’s cream cheese pie crust recipe
85 g       cold butter
100 g     all-purpose flour
40 g       semolina
⅛ tsp     salt
⅛ tsp     baking powder
64 g      cream cheese
14 g      water, cold
7 g        vinegar

Plum filling
6 small tart plums, pitted and sliced (about 2kg)
Zest from one lemon
30g cornflour
80g sugar

Method: 
  1. Place a mixing bowl in the freezer to chill. Combine the flour, semolina, salt and baking powder together in the chilled metal bowl. Add in the cream cheese and rub the mixture between your fingers to blend the cream cheese into the flour until it resembles coarse meal. Add the cubes of cold butter into the flour mixture and continue to combine. Sprinkle the mixture with water and vinegar and briefly knead the mixture until it just comes together. Wrap the dough with plastic wrap and flatten it into a disc. Refrigerate for at least an hour, or preferably overnight. 
  2. While the pie crust is chilling in the refrigerator, pit and slice the plums. Gently toss the plums together with the lemon zest, as well as the cornflour and sugar. Leave it to macerate for 15-30 minutes.
  3. Preheat the oven to 190°C. Remove the dough from the refrigerator and let it rest for 5 minutes before rolling it out on a well-floured surface. Use an appropriately sized round cutter to cut circles of your desired size. Arrange the plum slices in the centre of the circle, leaving about a 3-cm border around the edges. Fold up the edges of the pastry over your plum filling. Make sure to seal any holes and cracks as you roughly pleat around the edge. 
  4. Place the galettes on a sheet pan lined with baking paper and bake for 15-25 minutes, depending on the size of your galettes. Once the crust browns and the filling is bubbly, your galette is done! Remove to cool for 10 minutes on the tray before cooling on the wire rack for another 20 minutes before consuming. Bon Appétit!

    Janine's jots: 
    • Taste:  I used a combination of Demerara and white sugar, which probably explains why the plum galettes were not sweet enough. Or it could be because my plums were slightly under-ripe. I would suggest increasing the sugar to about 100g for extra sweetness. 
    • Texture: Again, the bite from the semolina crust provided a nice contrast to the gooey soft plum filling. I feel that the galette could have benefited from more crunch, perhaps with some almonds as in the original recipe. 
    • Serving size: This recipe makes enough for 1 huge 9-inch galette or many small ones. I managed to make about a dozen 2-inch galettes with the recipe. I loved the fact that the small ones were really bite sized and easy to bring to work. 
    • Modifications: Like the onion galette, I felt that the crust could have benefited from some sugar for added sweetness. 
    • Storage: Unbaked, the pie crust stores well frozen for up to 1 month. I stored mine in the fridge for a week before using it. After baking, do consume it within a day or two, because at 3 days at room temperature, the crust of the galette was not as flaky as before, and did not crisp up in the toaster as well as other types of crust. 
    • Would I make this again?: Definitely! I've already made plum and onion galettes using this recipe, and have other savory and sweet ideas in mind!

    Friday, August 26, 2011

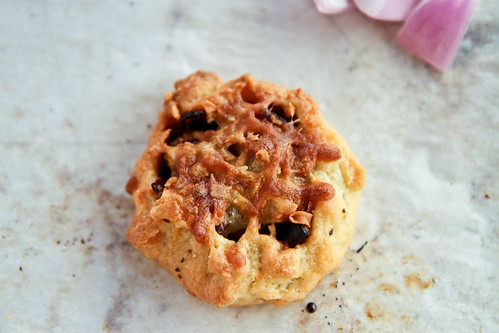
    Galettes with Balsamic Onions and a Cream Cheese Semolina Crust

    Galettes are perhaps the easiest form of a "pie" you can do. I actually never knew galette meant a free-form tart, but it appears to be just that. My first encounter with a galette was slightly different. A galette in French crêperies is actually Breton galette (or crêpe) made of sarasin. These are perhaps the best types of crêpes you can have, savory or sweet. I remember the ones I had while in Lausanne and in France - DELICIOUS. And these crêpes or galettes as they call them, go really well with cider. The way this cider is served is really unique as well, and is very different from Irish or English cider, because it is definitely more tannic and it's usually served in a huge teacup. What's equally interesting is that most diners will order a savory crêpe as the main, and a sweet crêpe as dessert later. Despite having the same batter, they can't taste more different! For those interested in trying these types of crêpes, I do know that Singapore has 2 such crêperies, but I haven't been able to head down despite wanting to a few years ago, so I can't comment on whether they're good or not!

    On a more related note, when I saw this children's song about galettes on wikipedia, an irrational joy welled up in me. Why? Because the song goes like this: "J'aime la galette, savez-vous comment ? Quand elle est bien faite, avec du beurre dedans." I could understand what it meant without having to look at the English translation! :] Translated, it means, I like galette, do you know how? When it is made well, with butter inside. 

    I'm really thankful and glad that I decided to take that huge step to take French lessons, and I can't believe how far I've come with learning French. Learning a language really does help me understand a culture better, and in turn, understand the cuisine and the passion with which French patissiers and chefs have. Anyway, these galettes are perhaps an apt ode to French cuisine. A simple free-form pie crust, made with flour, and semolina, together with cream cheese.


    Rustic Onion Galettes

    Semolina cream cheese pie crust
    Adapted from Rose Levy Beranbaum’s cream cheese pie crust recipe

    85 g       cold butter
    100 g     all-purpose flour
    40 g       semolina
    ⅛ tsp     salt
    ⅛ tsp     baking powder
    64 g      cream cheese
    14 g      water, cold
    7 g        vinegar

    Onion filling
    Adapted from Elise at Simply Recipes

    3 medium sized red onions
    2 Tbl olive oil
    1 Tbl butter
    1 Tbl balsamic vinegar
    Salt, to taste
    Basil, to taste
    3/4 cup shredded assorted cheeses

    Method: 
    1. Place a mixing bowl in the freezer to chill. Combine the flour, semolina, salt and baking powder together in the chilled metal bowl. Add in the cream cheese and rub the mixture between your fingers to blend the cream cheese into the flour until it resembles coarse meal. Add the cubes of cold butter into the flour mixture and continue to combine. Sprinkle the mixture with water and vinegar and briefly knead the mixture until it just comes together. Wrap the dough with plastic wrap and flatten it into a disc. Refrigerate for at least an hour, or preferably overnight. 
    2. While the pie crust is chilling in the refrigerator, peel and slice the onions. Heat olive oil and butter in a large, heavy-bottomed sauté pan on medium heat. Once the butter has melted, add the onions and sprinkle a little salt over them. Cook, stirring occasionally for 10 minutes, until the onions have softened and are translucent. Reduce the heat to medium low and cook for an additional 30 minutes, stirring occasionally, until the onions are well browned. Add balsamic vinegar and cook for 10 minutes more, until onions are completely caramelized. Add some basil to taste and remove from heat. Allow the onion filling to cool. 
    3. Preheat the oven to 190°C. Remove the dough from the refrigerator and let it rest for 5 minutes before rolling it out on a well-floured surface. Use an appropriately sized round cutter to cut circles of your desired size. Place some onion filling (about 1 tablespoon worth for a 3-inch circle to make a 2-inch galette) in the centre of the circle, leaving about a 3-cm border around the edges. Fold up the edges of the pastry over your onion filling. Make sure to seal any holes and cracks as you roughly pleat around the edge. You can choose to put your shredded cheese before you pleat or top it on the galette after you are done folding the edges. It's okay if the sides aren't even since this is meant to be a free-form tart!
    4. Place the galettes on a sheet pan lined with baking paper and bake for 15-25 minutes, depending on the size of your galettes. Once the cheese and crust browns, your galette is done! Remove to cool for 10 minutes on the tray before cooling on the wire rack for another 20 minutes before consuming. Bon Appétit!

      Janine's jots: 
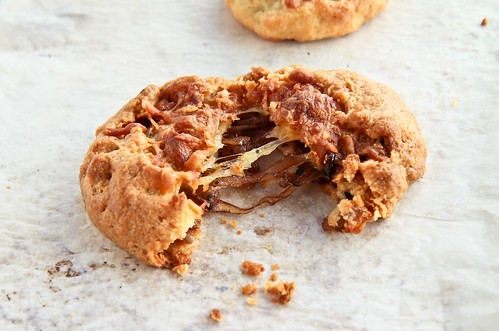
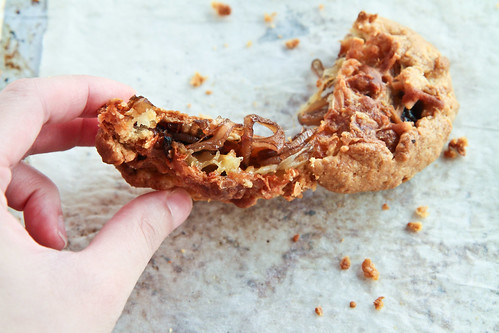
      • Taste:  I used a combination of mozzarella and parmesan cheese, but you can use any type you like. I think the galette would have benefited from a more savory cheese to complement the sweet/sourness of the balsamic onions. I also liked how the cream cheese crust complemented the onion filling and did not 'fight' with it in terms of taste. The cream cheese gave a richer taste to the pie crust, and it was quite evident that this was not an all-butter crust because the buttery taste was not as strong. 
      • Texture: The tart is as rustic as you can get - the semolina gives a very distinct "bite" to the crust, so do decrease that amount (or you can use all-purpose flour for everything) if you want a smoother mouthfeel. The tart is still very flaky though. 
      • Serving size: This recipe makes enough for 1 huge 9-inch galette or many small ones. I managed to make about a dozen 2-inch galettes with the recipe. 
      • Modifications: I added basil and upped the salt and balsamic vinegar amounts, mainly because I'm a fan of balsamic vinegar and basil together. Do omit basil and lower the balsamic vinegar if you are not a fan of them. I also felt that there should have been at least 5g of sugar in the crust because the crust did not taste 'sweet' enough. 
      • Storage: Unbaked, the pie crust stores well frozen for up to 1 month. I stored mine in the fridge for a week before using it. After baking, do consume it within a day or two, because at 3 days at room temperature, the crust of the galette was not as flaky as before, and did not crisp up in the toaster as well as other types of crust. 
      • Would I make this again?: Definitely! In fact, I made another variation of this galette - with plums this time :D

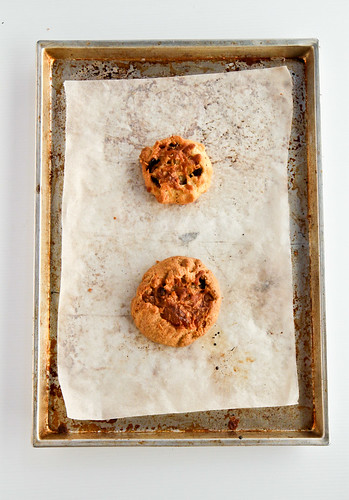
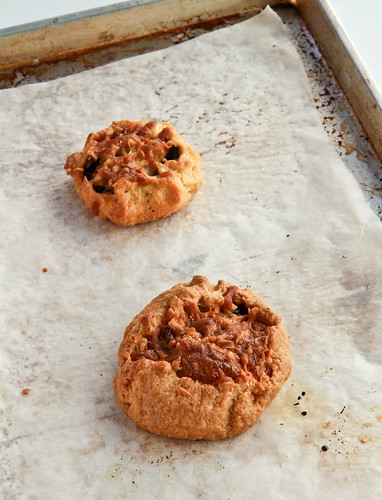
      Pardon my dirty baking tray. I ruined it by baking it with water last time =X


      YUMMM look at that onion filling!

      Sunday, August 21, 2011

      Cherry-Rhubarb Mini Hand Pies

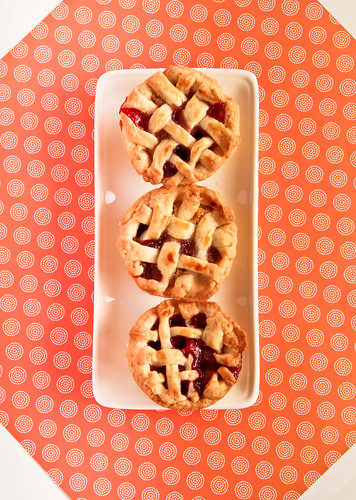
      This is actually my first attempt at making pies. I had to make them, because I am the host of Aspiring Bakers #10: Easy as Pie (August 2011), and since I claimed that making pies are "as easy as pie", I thought I'd better prove it to myself before trying to convince others. What are pies in my opinion? I tend to view pies as those which have a bottom crust, and a proper top crust, and by proper I mean either the same crust that the bottom is made of, or a shortcrust/puff pastry top. Anything short of that, like a crumble or streusel topping shouldn't really be categorized as a pie, but that's just me of course. Of course, some might beg to differ, and a clear exception would be “shepherd’s pie”, which really isn’t a pie nor a tart.

      Anyway, it’s spring in the Northern hemisphere, and with that comes an abundance of spring fruits like berries and cherries. I absolutely love this season, because all my favorite fruits are in season. I love the berries and the stone fruits, and it's times like this that I totally appreciate living in Singapore, because we get an abundance of fruits from all over the place, be it Iran or Israel, or America. And what tops all of this off is that we get the best of both worlds - when it's spring in the Northern hemisphere, we get to enjoy seasonal fruits imported from those places. And when it changes to winter there, we can easily turn to the Southern hemisphere which is enjoying spring for our cravings for any spring produce.

      Anyway, I had a last bit of pie crust left, and I decided that I had to do a pie, even if they were mini ones, just to try it out. The dough is made with the Bourke Street Bakery recipe I shared earlier, and the filling is a mixture of only cherries or a combination of cherries and rhubarb, both of which are heavenly. I got the rhubarb imported from Australia, after I saw that they were retailing at close to S$20/kg here :/ Thankfully a friend was coming back for his vacation, so it was perfect timing! As much as I love snacking on Bing cherries, I would have preferred a more sweet-sour experience, but I guess we can only achieve that with sour Morello cherries, which we sadly do not get here. 


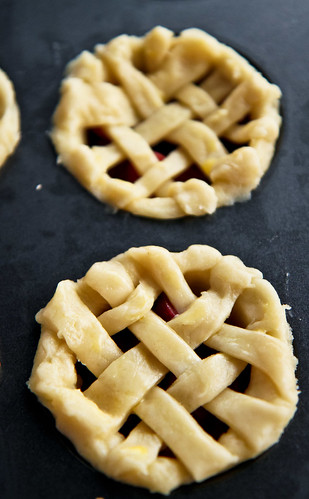
      Making the lattice layer is pretty easy actually, I didn’t manage to take any photos myself, but this slideshow by Bon Appétit is pretty helpful, although I've to admit that these pictures by Jenny got me convinced that it wasn't that difficulty. My lattice tops weren't too even because I didn't have that much pie crust left  >.<


      Cherry-Rhubarb Pie
      Very loosely adapted from Dorie Greenspan's Cherry Rhubarb Cobbler in Baking: From My Home to Yours
      Makes 4 muffin-sized pies

      For the pastry dough
      I used a quarter portion of the Bourke Street Bakery recipe for pate brisee

      For the fruit filling 
      85g cherries 
      55g rhubarb
      15g brown sugar
      5g cornstarch
      1g ground ginger
      1g ground cinnamon
      Zest from half a lemon
      Pinch of salt 


        Preparing the pastry dough,
        1. If working from frozen dough, let the dough thaw in the refrigerator overnight or at least 4 hours before following instructions below. 
        2. Remove the pastry dough disc from the refrigerator 20 minutes before you wish to roll it.
        3. After flouring your work surface and rolling pin, roll out the disc to about 3-5mm thick. It is best to start rolling from the centre and rolling the dough away from you, rotating the dough whilst you are at it. Do not attempt to stretch the dough overly, because the pastry will just shrink in the oven later.
        4. After rolling, use a round pastry cutter to cut rounds into the pastry. Fit these rounds on top of your muffin tin and use your fingers to gently push the pastry into the mould. At the same time, even out the thickness of the pastry all around. Roll the leftover pastry into a ball to roll out for the top crust later. 
        5. Leave the muffin tin in the refrigerator for about 20 minutes to relax the gluten. 
        6. In the meantime, prepare the filling. 
        Preparing the filling,
        1. Pit and halve the cherries. Trim, peel and cut the stalks of rhubarb into 3-5cm long slices. Mix both fruits together in a large bowl. 
        2. In another bowl, combine the brown sugar and salt together with the lemon zest. Rub the zest together with the sugar using your fingers to release the maximum amount of 'lemony-ness'. Sift together the cornstarch, ground ginger and ground cinnamon into the bowl. Mix well. 
        3. Sprinkle the dry ingredients over the fruit and toss until all the fruit is evenly coated.
        Putting them together,
        1. Place equal portions of the fruit into each muffin hole. If the fruit has macerated and there is a substantial amount of liquid, do not put the liquid into the pie. 
        2. With the leftover dough, roll it out and using a bench scrapper or pizza cutter, cut out strips of even width. 
        3. Using the pictorial instructions here, begin your lattice tops for your pies. Fold in any overhang and trim away the excess lattice for a neat pie. Brush a simple egg wash (half an egg + 1 tablespoon of water) on the tops of the pie. 
        4. Bake for 20 minutes in a preheated oven of 180°C. 
        5. Once the tops have turned golden brown, remove from oven and allow to cool for at least 10 minutes in the pan before removing to cool on a wire rack. Let it cool for at least 30 minutes because the juices and filling will be very hot. 

          Janine's jots: 
          • Notes: The moment the fruit touches the sugar, it will begin to macerate. Therefore, it is best not to prepare the fruit filling too early. If there is lots of liquid when you're ready to fill the pie, do not use all the liquid because the filling will soften and liquefy when baked. 
          • Taste: I loved the contrast between the sweet Bing cherries, the slightly sour rhubarb stalks and zest from the lemon. However, I felt that it could do with a slight more sourness and less sweetness. But that's just my personal preference. Friends I gave this too loved it :]
          • Texture: Perfect flaky crust which gives way to a warm, thick filling which retained its shape still - delicious. 
          • Serving size: Although these hand pies fit into your palm easily, they're definitely not bite-sized. It takes at least 5 bites or more to slowly savor them and they make a pretty substantial snack!
          • Modifications: Perhaps a tad more zest and a little more sugar the next time, because I felt that although the fruits were sweet, the filling lacked sugar. You can also make all-cherry fillings, because I made 2 with all-cherry filling and they were delicious too!
          • Storage: The pies store really well at room temperature, kept in an air-tight container for a week. Do zap them in the oven or toaster for a while to crisp them up again, because they're best eaten when warm. 
          • Would I make this again?: Of course, but I definitely need more work on my lattice-making skills. 

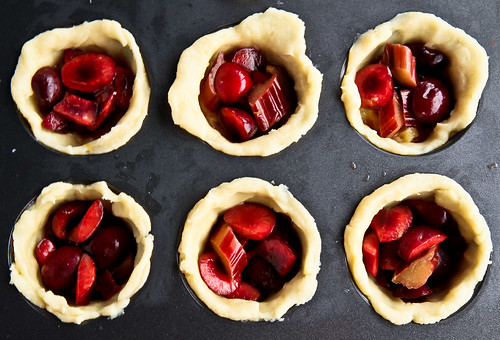
          Insides of the pies, before topping them. 

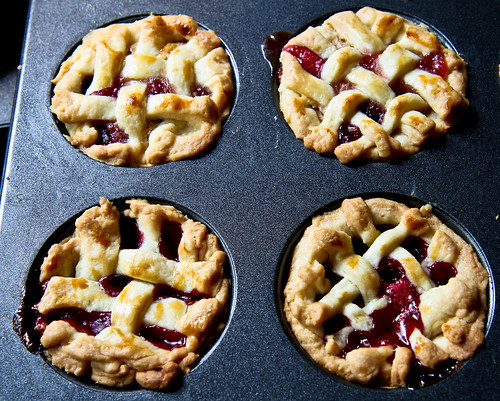
          You can tell which pie I attempted making first. The lattice tops get marginally better looking in a clockwise fashion heh.
          Lattice tops for the cherry-rhubarbs and crumble tops for the apples :]
          Ooh yum check them out, all crispy and oozy! Also, my filling oozed out of the pie because I tilted the pan when removing it from the oven, allowing the 'juice' to overflow :/
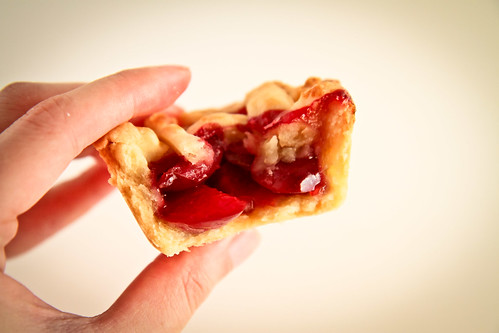
          Mmm yum. You can see how flaky the pie crust is. 
          Upclose. I prefer a thick crust all around, hence the thickness. You can choose to go thinner if you want!
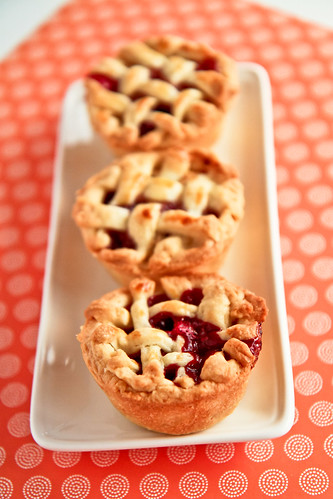
          A final picture to end this post :]

          Thursday, August 18, 2011

          List of Baking Supplies Shops in Johor Bahru, Malaysia

          Following the popularity of my list on baking supplies stores in Singapore, I figured it was high time I posted a similar list of such baking stores in Johor Bahru, Malaysia, for any of you who might be interested in heading down to JB or are in JB to buy some cheaper baking supplies.

          For the benefit of those who might not know what JB is (this means the list will not be useful for you) - it stands for Johor Bahru, which is the capital city of the southern-most state of Johor. JB can be spelt in various ways and is the second largest urban area in Malaysia after KL, but I guess what it's best known for is (sadly), its proximity to Singapore. Being a Johorian myself, (technically I'm from Melaka but I stay in JB), I feel sad that there's nothing much constituting a "tourist attraction" in JB. Whenever people ask me what there is to do in JB, I can only think of two things, cheap and good food, and cheap shopping. And note that cheap and good is only relative to Singapore, and cheap shopping the same, because Malaysians will know that prices in JB are definitely not cheap compared to the rest of the peninsular. I guess we can attribute the inflated prices to the influx of our Singaporean neighbors. Of course there are other things to do, like Desaru or Kukup, but for my friends wanting to take a day-trip into JB, eating, shopping, doing manicures and spas are about all I can think of. Sad but true.

          Although I'm now staying in Singapore, since my home in JB is less than an hour away (if there is no traffic jam on the causeway, which is notorious for massive jams), I go home very often, as often as every week during the weekend. And what I usually do, being the cheap that I am, is to buy some of my baking supplies in JB and either bake in JB or bring them into Singapore.

          Do note that there are certain custom restrictions, so things like eggs and poultry are restricted items, but besides that, everything in moderation should be fine! Like my Singapore list, I've highlighted several places that I shop at, and indicating under comments what can be found there, or what I usually buy from those places. I am only highlighting the shops within JB, and not the greater Johor which includes Muar, Pontian etc because well, I haven't been to those shops myself so I can't say much about them! For those other places, you might want to refer to this list I found which is pretty helpful for baking shops outside Johor as well!


          List of Baking Supplies Shops in Johor Bahru, Malaysia
          1. General Supermarkets
            • Giant, Carrefour, Jusco, Tesco. 
            • These are the main supermarkets in JB, and can be found all over the place. Jusco is especially prevalent nowadays, but do note that Jusco tends to be more expensive compared to the other supermarkets, except for price controlled items like sugar. If you're unaware, sugar, oil and flour are government-controlled items in Malaysia. Just off the top of my head, I think sugar is slightly less than RM3 for 1kg and flour is about RM2.50 or so. I like Jusco because they have an organic department and they tend to sell a greater variety of products which include sea salt, flaxseed, whole wheat flour, etc. 
            • Depending on the supermarket, they'll sell the bare basics which include baking mixes, food coloring, cocoa powder (Van Houten is a popular brand in Malaysia), and Nona, which is a local brand. I like to visit Tesco, because they sometimes have really good deals and they occasionally have Waitrose and other English products. They also sell frozen puff pastry sheets and frozen berries, for example. 
            • As a rule of thumb, prices are generally half of that in Singapore. However, don't expect to find anything too out of the ordinary. 
          2. Perling Indah
            • Address: 11 Jalan Persisiran Perling, Taman Perling, 81200 JB
            • Contact: 07 236 9763
            • Webpage: http://perlingindah.blogspot.com/
            • Directions: The shop is located along the main stretch of shops that cars will pass by on the way to and from the Tuas Second Link. If you're headed towards the Second Link, you can see it on your left, a few buildings away from Perling Mall. 
            • I wouldn't trust their blog much because it looks rather uninviting, but this is a seriously big shop filled with tons of baking items, like the equivalent of the Singapore Phoon Huat. Many people from all over JB flock here to buy baking supplies, and lucky for me, I stay nearby ;p I particularly like their selection of pans and moulds and cupcake liners, etc. It's much better stocked than an average Phoon Huat. 
            • Things they sell include a wide range of dairy products (different cheese, whipping creams), Wilton products, cake boards, all sorts of pans, probably 20 types of flours and nuts and many other ingredients. All you need for a baking business is here really, and I can tell many such home-bakers come here to purchase in bulk. Only things you can't find would be the more expensive stuff, things like Valrhona chocolate, etc - these are not found anywhere in JB. Believe me, I've searched. Also, for the imported products like Wilton, they might be the same price or a tad more expensive here. 
            • They also hold baking classes, with some rather big names like Kelvin Chai and Alan Ooi. 
          3. Ng Ming Huat
            • Address: 116, Jalan Harimau Tarum, Century Garden, 80250 JB
            • Contact: 07 3349999, 3344581, 3344582
            • Webpage: None 
            • Directions: This shop has a tiny storefront, and is located next to Crystal Crown Hotel. You will have to open your eyes to look for it because it is rather easy to miss. If you're coming from the causeway into JB, it'll be located on your left, it is opposite the second nearest petrol station from the causeway ;p
            • My first impression of this shop was many many years ago, when my mom dropped by to purchase some nut flours which she couldn't find anywhere. The store hasn't changed much, and still stocks loads of stuff. It contains about the same stuff as Perling Indah, so it really depends at which end of town you're at. They also sell a bunch of Chinese/Taiwanese recipe books. 
          4. Precia Trading 
            • Address: 19 & 19A Jalan Besi, Taman Sri Puteri, Skudai 81300 JB
            • Contact: unknown, but appears to be 07 334 9999 as well? 
            • I haven't been here before, so I can't comment much. From what I heard though, it's similar to the first 2 shops, albeit on a smaller scale with fewer varieties. 
          5. Bakewell Ingredient Centre 
            • Address: 67, Jalan Susur Larkin Perdana 1, Larkin Perdana 80350 JB.
            • Contact: 07 2343633
            • Webpage: http://www.bakewell.com.my
            • This is similar to the first two stores listed, but they provide a smaller variety of products. They tend to stock products that caters to a Malay clientele, and by that I mean lots of fondant, packaging for home bakers, and the basic varieties of baking ingredients. It's a bit far from where I stay, so I seldom head down. 
          6. Bakers Zone
            • Address: 11, Jalan Dato Jaafar 1, Larkin, 80350 JB
            • Contact: 07 2268958
            • Webpage: http://www.bakerszone.com.my
            • This is situated pretty near to Bakewell, and will be really accessible for visitors from Singapore. Again, they are very similar to Bakewell in terms of the goods they stock. Even their websites look so similar that I suspect they might have the one and same management? 


          Well, that's it for my list. There's perhaps several more, but these are the ones that I know of, and the ones that I go to on a regular basis. My favorite, is of course the one nearest my home. It also happens to be the cheapest. That being said, I still go to places in Singapore to purchase items like Valrhona chocolate, Nordic Bakeware, etc. 

          Please note that as per my previous list, I am not reimbursed in any form or way by any of these places and this list is compiled for sharing only. If you know of any more shops, I'd be more than happy to add them in, provided they are in JB. Also, if you wish to copy any of the information above, please link back to this page or have the courtesy to give credit when it is due. 

          Monday, August 15, 2011

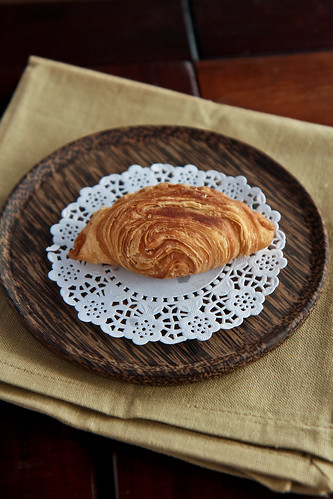
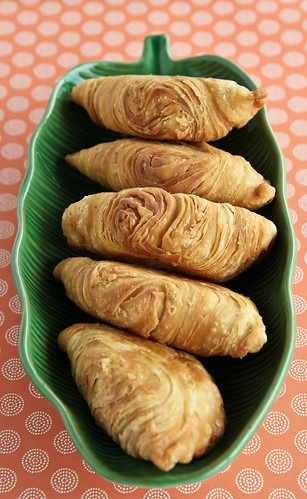
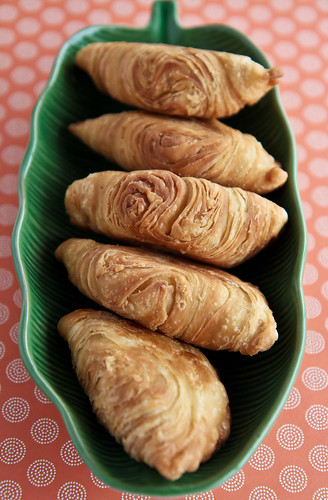
          Malaysian Monday #5: Curry Puff, or Epok Epok

          I tend to associate food with certain incidents or memories in my life, and this particular food is no different. I still remember the mornings when I would hear this little Malay boy walking across the back alleys on our rows of houses, shouting/singing a tune which till today, I can sing: "kuih kuih, nasi lemak". This phrase was then repeated a million times as he walked from one house to the another. I remember this little Malay boy rather vividly, because I would rush out of the house and hail him to stop. He would then lift the paper towels lining his bright red basket, and uncover the golden crescents of curry puffs, the banana leaf-and-newspaper covered nasi lemak packets, and other assorted kuihs. I still remember he had both kentang and sardin curry puffs, and I would buy an assortment of 5 for RM1. I remember the curry puffs eventually becoming smaller in size, until they became 4 for RM1. Of course, prices today have risen to about 3 for RM1, or worse still, 1 puff for RM0.40.


          I remember those times rather fondly, because my mom would chastise us (myself and my brothers) for being lazy, and she would use that little Malay boy as an example. At a really young age (about 10 years or less), he would be wide awake selling his mother's kuih muih as early as 7am in the morning! I used to remember my mom telling us what a hard life that boy leads and how we should be thankful and shouldn't begrudge helping her mop the floor or perform other errands around the house. That lesson is still very much engrained in my memories, and I wonder sometimes, what happened to that little Malay boy? He should be close to 30 years old now. Hmm. 

          Curry puffs are also known as epok-epok or karipap pusing or simply karipap among the Malay community, whereas us Chinese typically call it  咖哩角. Another name that I've always heard brandished about it "kari-pok" which is typically said by my less-educated relatives, who cannot pronounce "puff" and hence refer curry as "kari", as a direct Chinese translation, and well, as for pok, it's a bastardized English for puff I guess heh. 


          I love curry puffs, but the ones I love more, and also the ones I'll be featuring today, are actually the 千层咖哩角, or many layered curry puff, which typically cost more than the usual normal curry puff. This has been on my bookmarked list of recipes since forever, but I decided that this month was a good time for me to attempt it, because the theme of this month's Aspiring Bakers #10 is pie/tarts, which includes puff pastry. It might not strike some of you that this oil and water dough combination is our very own Asian/Chinese form of puff pastry! So many other Chinese treats make use of this quintessential oil and water dough - Shanghainese moon cakes and char siew sous are some that come to mind. 

          Anyway, since this was a spur of the moment decision, I didn't have my camera at home in Malaysia with me (I can only deep fry things in Malaysia, remember?) and I'll have to direct those who are hoping for step-by-step photos to several outstanding bloggers whose posts I referred to in the process of making these puffs. Florence was the master I first turned to, and her instructions and step-by-step tutorial is perfect! For those who can read Chinese, Jane was another person I turned to - in fact, she has made them so many times in so many variations on her blog that she's a master of them already! Finally, another step-by-step I referred to is none other than the host for MMM, Suresh!


          Curry Puffs
          Loosely adapted from Florence's recipe 
          Makes 16 medium sized curry puffs 

          For the pastry
          Oil Dough
          150 g   all-purpose flour
          40 g     butter
          35 g     shortening

          Water Dough
          205 g   all-purpose flour
          1 tsp     vinegar
          50 g     shortening
          30 g     sugar
          95 g     water

          For the vegetarian curried potato filling
          3 small potatoes
          1 onion, diced
          3 cloves of garlic, finely minced
          2 tbl garam masala
          1 tbl chicken curry powder
          Some curry leaves


          Method: 
          1. For the filling, par boil the potatoes. Peel and cube them into small pieces. Stir fry the onions until fragrant and add in the garlic followed by the cubed potatoes. Add in the seasoning and cook for about 1-2 minutes, or until the potato softens to your preference. Leave aside to cool until room temperature. 
          2. Meanwhile, prepare the water dough. In a bowl, combine the flour and sugar. Add in the shortening and mix well with the dry ingredients. Add in the vinegar followed by the water and knead until you get a soft and pliable dough. It should take you about 10 minutes or less. Wrap the dough in cling wrap and leave it to rest for 30 minutes while you prepare the oil dough. 
          3. For the oil dough, in the same bowl, add shortening to the flour and mix well. Next, add in the cubed butter and mix everything well until you can compact everything into a ball. 
          4. Divide the water dough into 2 pieces of approximately 170-180g each, and divide the oil dough into 2 pieces of approximately 75-85g each. Working on one piece each of oil dough and water dough and wrap the other 2 pieces of dough separately in cling wrap to prevent them from drying out. 
          5. Using a floured rolling pin, roll out the water dough until it is big enough to enclose the oil dough. Seal the oil dough within the water dough. With the sealed seam facing upwards, roll the dough into a rectangular sheet of approximately 1cm in thickness. Roll the rectangular sheet up from the shorter side, as if rolling up a swiss roll. You should get a horizontal scroll. Now, turn this horizontal scroll 90 degrees until it is vertical. Roll this out until you get another thin rectangular sheet of about 1cm in thickness. Again, roll the sheet up from the shorter end until you get a swiss roll. Let the dough rest for about 15 minutes before cutting the 'swiss roll' up into 10 portions. For each portion, you should be able to see the swirling of the water and oil dough. 
          6. To fill and shape the curry puff, flatten the disc using a rolling pin until you get a rough circle big enough to place your filling. Place about 1-2 tablespoons of filling in the centre and fold the circle into two. You should get a rough semicircle. Press the edges of the dough together and beginning from the bottom, pinch the edge of the puff with your thumb before bringing it upwards to the front. Repeat the process of pleating until the entire semi-circle is sealed.  
          7. Repeat the same process for the remaining pieces of dough. 
          8. Repeat steps 5 and 6 for the other 2 pieces of dough.
          9. Heat up a wok with at least 2 inches of oil. Deep fry the puffs on medium heat until they turn golden brown. Before removing the puffs from the oil, be sure to turn up the heat to medium-high to make sure that the oil does not leach inside the puffs. 
          10. Drain on paper towels and cool for at least 15 minutes before serving. 


          Janine's jots: 
          • Taste: For the filling, be sure to add more spices and flavor than you normally will, because the filling needs to be really flavorful. I loved how the curry leaves gave the filling that extra punch - YUM! 
          • Texture: I absolutely love the textural layers on the outside which are so very crisp after frying. You are then greeted with a hot, spicy potato filling which is almost mushy, with some 'bite' from other bits of potato which I purposely left un-mushy. 
          • Serving size: I divided the dough into half and made 10 curry puffs out of a half portion of dough because I wanted smaller puffs and more crispy surface area ;p I think 12 is perhaps the smallest you can go because otherwise there is not enough dough to wrap enough filling for 3 small bites of a small curry puff. 
          • Modifications: You can choose to add chicken, carrots or peas or even hardboiled eggs into the filling - any variation including sardines is fine! Just make sure to make the filling extra tasty so that it will taste normal after frying. Also for the oil dough, I will probably try using more butter and less shortening the next time because I felt that the dough was slightly too crumbly for my preference. 
          • Storage: The curry puffs taste best on the day they are fried, but they keep well at room temperature for up to 3 days if stored in an air-tight container, and briefly reheated before consumption. You can also keep them in the fridge for up to a week, but the curry puff did not crisp up well in the toaster after that period of time. 
          • Would I make this again?: Although it was insanely delicious and rewarding to eat my own curry puffs, I'm definitely staying away from curry puffs for a while - I consumed more than 4 curry puffs within 2 days and looking at the huge amount oil that I used to fry them gives me the heebies jeebies. SO MUCH OIL and fats going to my hips!
          • Notes on frying: Do do make sure that you have enough oil in the wok. I had too little oil in the wok, and my heat was cranked up a little too high, which resulted in my first batch of puffs turning golden brown too quickly, and the inside layer of the puffs was not cooked through. 


          Now that I know how much work goes into making a single curry puff, I'll never grouse paying RM1 for the large curry puff (with half an egg) I always buy from the makcik near my house! I'll be sending this onto Muhibbah Malaysia Monday hosted by Shaz of Test With Skewer and Suresh of 3 Hungry Tummies :]


          Friday, August 12, 2011

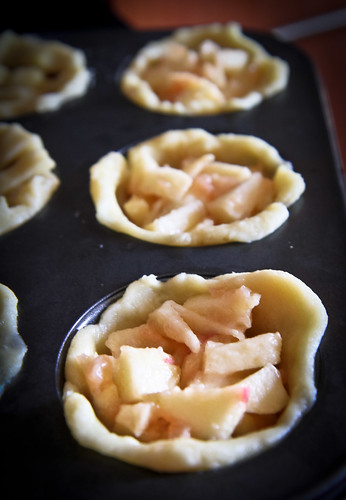
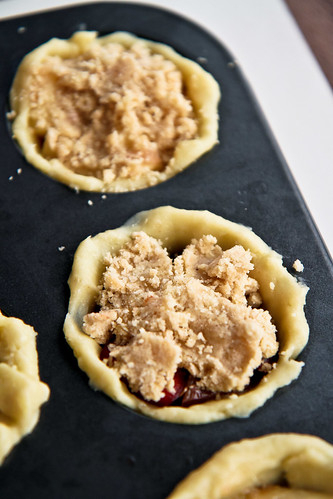
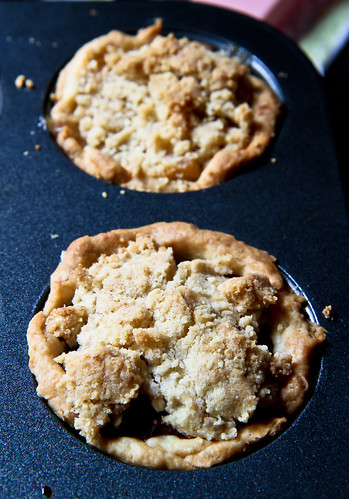
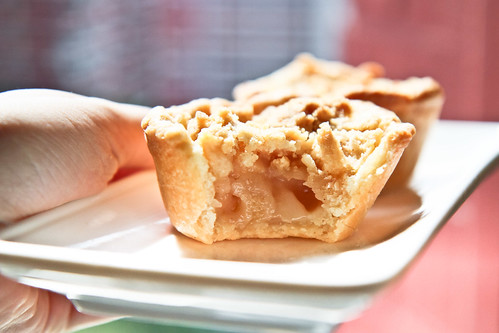
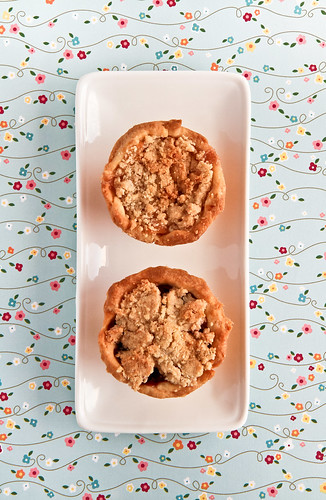
          Mini Apple Crumble Tarts

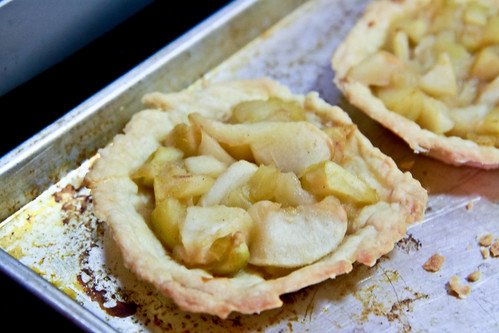
          And as promised, here is the photo of my very first tart, an apple tart which turned not so pretty in so many ways. I knew that the recipe required blind baking, but I decided to be smart about it and skipped it - this is the result my friends - horribly shrunk pastry with awful looking sides. The tart was barely deep enough to contain some apples. Talking about the apples, look at how 'dry' they look. I forgot what recipe I used, but it's definitely too dry because the apples dried out after further baking in the oven. The tart crusts are also a tad too pale for my liking. And for this particular photo, I believe I blind baked the tarts before adding the filling. In the recipe below, you bake the filling together with the crust, so you save time because you don't have to blind bake!

          My tart-making skills have only marginally improved now, considering how 'rustic' looking my tarts still look. Anyway, I just wanted showcase how versatile muffin trays can be and how the lack of pie/tart tins shouldn't stop you from making tarts or pies. I just used my 12-hole muffin tray and placed the circles of pie dough into each hole before filling each of them with apple filling. It's that easy really! 


          Apple Crumble Tart
          Makes 6 muffin sized pies

          For the pastry, 
          Refer to Bourke Street Bakery's Pate Brisee recipe. I used about 25% of the dough here. Instructions below are assuming you have already thawed the frozen dough.

          For the apple filling, 
          Adapted from Grandma Ople's recipe 

          30 g     unsalted butter
          6 g       all-purpose flour
          15 g     water
          20 g     white sugar
          20 g     brown sugar
          2          apples, peeled, cored and sliced.
          1 g       ground cinnamon

          For the crumble topping, 
          30g brown sugar
          30g butter
          45g flour
          15g ground almonds
          3g   ground cinnamon


          Method: 
          1. To make the apple filling, melt the butter in a saucepan. Stir in the flour to form a paste before adding water, white and brown sugars. Bring the mixture to a boil before reducing the temperature and letting it simmer for about 2-3 minutes. Add in the ground cinnamon and any other spices you wish to add. The mixture should have thickened considerably by now. Add in the sliced apples in the mixture and remove from heat. 
          2. To prepare the crumble topping, sift together the flour, ground almonds and ground cinnamon. Add in the brown sugar. Dice the butter into small cubes before cutting them into the flour mixture. Use your fingers to rub the butter into the flour mixture until you get large breadcrumb-like sizes. Store in the fridge until the tarts are ready to be topped. 
          3. To make the tart crusts, remove the pastry dough disc from the refrigerator 20 minutes before you wish to roll it. After flouring your work surface and rolling pin, roll out the disc to about 3-5mm thick. Using a round cutter, cut rounds of pastry dough to fit into your muffin holes. If you don't have an appropriately sized cutter (like me), leave your dough slightly thicker (about 8mm or more) before cutting the rounds. You can then use your fingers or a rolling pin to roll the dough till it is thinner. Fit them into your muffin holes. Cut away the excess dough from the lip of the muffin hole or you can fold them inwards. 
          4. Put the muffin tray into the freezer for at least 20 minutes to relax the dough. In the meantime, preheat the oven to 180°C. Make sure that the apple filling has cooled to room temperature before you portion them into each tart. Add about a tablespoon of crumble topping to the top of each tart and be sure to press them into the filling before baking. 
          5. Bake for 25-30 minutes, or until the edges of the crust are a deep golden brown. Remove from the oven and cool in the muffin tray for about 15 minutes before placing them on the wire rack to cool for a further 30 minutes or more. The filling inside will be very hot if you consume the tarts any earlier (voice of experience speaking), so do take care!

          Janine's jots: 
          • Note: To make sure that the crust is thoroughly baked, it is best to work with an oven with two racks, one placed at the bottom and another placed in the middle. Begin baking with the rack at the bottom and bake for 15 minutes before moving the tray up for the last 10-15 minutes. Also, my muffin tray is non-stick and dark colored, which I think helped with the browning of the bottom of the tarts. The bottoms were a lovely golden brown and were not soggy at all!
          • Taste: I initially thought the apple filling was a little too thick and contemplated adding more water but I was glad I didn't. After baking, the apples became really soft and sweet and the filling wasn't at all dry - in fact, it was super moist and delish! The only thing I would change is probably adding a pinch of salt because I felt the apple filling tasted a tad bland with just unsalted butter. I will also use a Granny Smith together with my Pacific Rose apples the next time for greater complexity of taste from the filling.
          • Texture: I loved how there was the crunch of the crumble topping (I purposely left my ground almonds quite coarse), the warmth and gooey apple filling and then the flakiness of the pastry all around. Quite a delight for the mouth really!
          • Serving size: The quarter recipe of pie dough is sufficient to make about 6 muffin sized pies only, or slightly or less depending on how big/small your muffin tray is. 
          • Modifications: I'm not entirely happy with my recipe for the crumble topping, which I put together on a whim. I find that it's not textural enough - I might probably add more butter and use some oats the next time round. For the apple filling, I'll also try adding some lemon zest the next time round for a tad more zippiness. 
          • Storage: The tarts taste best on the day itself, but I kept some at room temperature for about 3 days and they still tasted great. Be sure to give them a zap in the microwave or toaster to heat them up for the best results. Also, I kept one in the fridge for a week and it still tasted great after being heated up. 
          • Would I make this again?: Definitely! With the pie dough ready and frozen, it takes about 2 hours from start to finish (making the filling, the pie crusts and finishing baking). That's just 2 hours standing between you and a yummy apple tart! 
          • Other comments: When making the apple filling, the syrup crystallizes rather easily, so be sure to use low heat. You can opt to place the apples in the pie first before pouring in the mixture, but I prefer to coat the apples with the mixture first to ensure that every apple slice is coated. You have to press the crumble topping into the filling because otherwise, the crumble topping will fall off very easily from the tarts after they're baked! For the crust, you can also use the 'patching' method, i.e., peel bits of the dough to patch up the inside of the muffin hole - this method works well if you don't have a round cutter. 
          In pictures: 

          For the bottom tart, I used my fingers to compact the crumble before adding it, hence the less crumbly look.

          Doesn't matter if you have uneven crusts - it contributes to the rustic look!
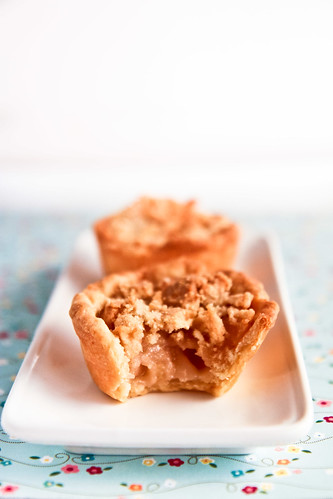
          Be generous with that crumble topping!

          The same tarts, now baked. 

          Look at the gooey apple filling. Absolutely delicious! And tastes better than McD's Apple Pie :p

          Oh and I forgot to add that I'll be submitting this as my second entry to Aspiring Bakers #10: Easy as Pie (August 2011), hosted by myself. For those who haven't got tart tins, there's no reason for you not to bake any tarts now, so do join in the fun :]

          Tuesday, August 9, 2011

          Pâte Brisée for any Occasion (All-purpose Short Crust Pastry)

          It's Singapore's 46th birthday today, and sadly, I'm stuck at home doing work for lessons tmr. I indulged in a spot of baking today, and no surprises, it was tarts again! Anyway, although I've received some mouthwatering entries for Aspiring Bakers #10: Easy as Pie (August 2011), entries have generally been trickling rather slowly. As the host, I guess I should provide the lead by showing you that pastry crust are really not that difficult! (In a later post, I'll show you my very first attempt at an apple pie (which was a failure) and my new, second attempt at it - it looks and tastes much better this time!)

          I know many novice bakers tend to stay away from making pies and tarts, and for good reason too. Pastry can be a really finicky thing to work with, and over here in Singapore, the problem is magnified because of our warm and humid weather. Butter softens within minutes of being taken out of the fridge, and with heat from our hands, it melts as quickly as an ice-cream under the summer sun. I still remember the first batch of shortcrust pastry which I attempted myself - I quartered the recipe because I didn't want to waste two whole block of butter should I fail. I even read up many different sites and books on the techniques of pastry making, but really, nothing prepares you better than actually trying it out for yourself. From that very first attempt, I was addicted. Addicted to the variations that could be done with not only the pastry recipe, but to the fillings. Addicted to what could be the loveliest smell on earth, after the smell of baking bread - that of tarts baking in the oven. A buttery sinful aroma will waft through your kitchen and permeate your home.

          Also, strangely enough, I initially thought that pies and tarts might not be an Asian thing, but then again, I realized that hey, we have egg tarts and who can forget about the pineapple tarts that most of us love during the Chinese New Year?! Pineapple tarts are really something unique to Southeast Asia - besides Malaysia, Singapore and maybe Indonesia, I believe no other place in the entire world can pride itself on having pineapple tarts for Chinese New Year. That itself is made using a pâte sucrée, or sweet dough, which has more sugar and maybe an egg added as compared to the pâte brisée, which literally means 'broken dough', or just shortcrust pastry for any other type of tarts or pies. Most recipes tend to advocate the use of the pâte sucrée for sweeter fillings and the pâte brisée for savory fillings but really, I think it's all up to you.

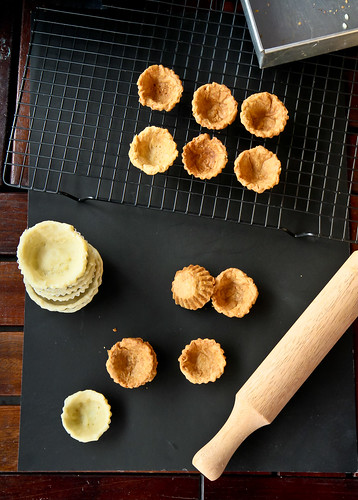
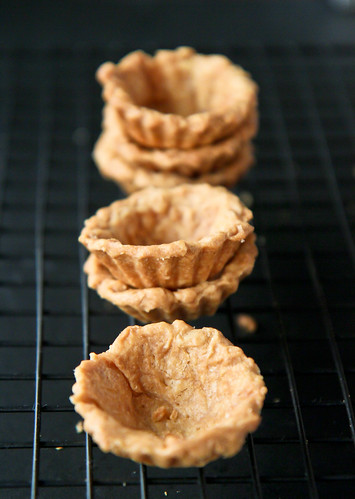
          'Rustic' looking tart crusts

          Today, I'll be sharing with you the other shortcrust pastry (pâte brisée) that I've tried and love - the Bourke Street Bakery's pâte brisée. I have to admit that I did have the book some time ago, but didn't attempt any recipes from it because I read online that some of their recipes didn't work and I was rather put off by that. However, after my trip to the bakery itself in June, I was a convert. Their shortcrust pastry was flaky, and smelt so buttery, and not to mention that ginger brûlée tart. I'm still dreaming about it even now. I know I should try to make it, but the lack of a chef's torch is my excuse for not attempting it yet. I guess I don't want to fail and mar my impression of the tart :p

          Anyway, I decided to be daring and made the entire recipe, which calls for an entire 400g of butter! I made sure the butter was well chilled and I handled the dough as little as possible and in a few minutes, I was done. I split the dough into four discs, cling wrapped three of them really well and popped them into the freezer immediately. And yes, this was done about 2 months back, so I can safely say that the frozen dough still produces lovely tarts 2 months after freezing. I reckon with this quarter recipe, I got 12 mini tartlets (3-cm diameter) plus a few more larger ones.

          FYI, I used this recipe for half of my fresh fruit tartlets (the other half using the remainder of my foolproof pie recipe) and filled with Pierre Herme's pastry cream. Both pie recipes are equally delicious, but this one might just beat the foolproof one for its ease (instead of vodka, vinegar is being used). Although there is a lower proportion of butter in this recipe, the buttery taste is more prominent here, maybe because of the amounts of sugar, but in any case, this recipe is good! :]


          Sweet Shortcrust Pastry (Pate Brisee)
          Sufficient for 20 8-cm tarts or 1 9-inch pie recipe

          This is the forward from Bourke Street Bakery - "The following recipe for sweet shortcrust pastry will leave you with a slightly uneven edge around the rim of the tin when you line it, resulting in a tart that looks rustic and home-made, which is what we aim for at Bourke Street Bakery. If you are looking for a perfectly even effect, this is not the correct recipe to use. The fact that this dough has water in it means it will shrink as the water evaporates during baking; the following method is to help counteract this shrinkage. This recipe makes enough pastry for twenty 8 cm (3 1/4 inch) tarts with a little left-over. The number of tarts is going to vary from baker to baker depending on how thin the pastry is rolled. The pastry can be frozen for up to 2 months, so it makes sense to line all the shells, freeze them and simply blind bake them as you need them."


          Ingredients:
          400 g unsalted butter, chilled, cut into 1.5 cm cubes
          20 ml (1 tbsp) vinegar, chilled
          100 g caster sugar, chilled
          170 ml (2/3 cup) water, chilled
          665 g all-purpose flour, chilled
          5 g (1 tsp) salt


          Preparing the dough,
          1. Put the vinegar and sugar in a bowl and add the water. Stir to combine and make sure the sugar is completely dissolved. What I do is actually to use warm water combined with the vinegar and sugar and then chilling the mixture in the fridge for at least half an hour ahead.
          2. Remove the butter from the refrigerator 10 minutes before you start mixing (the original recipe calls for 20 minutes but butter melts quickly in our environment). The butter should be just just soft but still very cold so it doesn't melt through the pastry while mixing.
          3. Mix the flour and salt in a bowl. Add the cubes of butter and using your fingertips, rub the cubes of butter into the flour to combine. In your bowl, you should see bits of flour and butter, as well as flakes of butter. 
          4. Turn this out onto a clean work surface and sprinkle the chilled sugar mixture over the mixture. You can know begin to fraisage* the mixture. This is basically using the heel of your hand to smear the mixture away from you across the work surface, and then gathering it all up into a bowl and repeating. Make sure to work quickly and repeat this smearing process twice. You should still be able to see streaks of butter marbled through the pastry. 
          5. Divide the dough into even sized portions (I did 4) and shape them into flat round discs of about 2-cm thick. Wrap each disc in cling wrap and refrigerate for at least 2 hours or overnight. 


          Preparing to bake 
          1. Remove the pastry dough disc from the refrigerator 20 minutes before you wish to roll it. 
          2. After flouring your work surface and rolling pin, roll out the disc to about 3-5mm thick. It is best to start rolling from the centre and rolling the dough away from you, rotating the dough whilst you are at it. Do not attempt to stretch the dough overly, because the pastry will just shrink in the oven later.
          3. After rolling, transfer the dough into a tray and put it in the fridge to relax the gluten, for 2 hours. 
          4. For 8cm tart tins, cut the pastry using a round pastry cutter with an 11cm diameter. Place the pastry on top of the mould and use your fingers to gently push the pastry into the mould. There should be about 1cm of dough hanging over the sides. 
          5. Fold the overhang onto the sides until there is no pastry left protruding. This will help counteract the pastry shrinking when it has baked. 
          6. Put the tart tins into the freezer for at least 20 minutes to relax the gluten. In the meantime, preheat the oven to 200°C. 
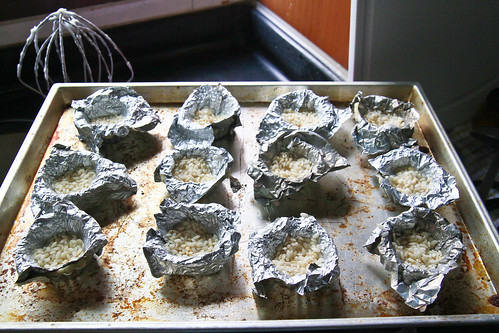
          7. Now, you are ready to blind bake the tarts. Blind baking simply means pre-baking the pastry before filling it. You can use pie weights, dry beans or rice. I opt for using rice, because that's the only thing I have in my pantry that's suitable. 
          8. Be sure to line the pastry with a layer of aluminum foil, making making sure the foil is pushed well into the corners. Pour in the rice grains to fill up the case and bake for about 20 minutes. The done pastry should be a golden brown color. 
          Note: The forward and ingredients list have been copied from the book itself, but the method is entirely written in my own words, with liberal adaptation from the book.


          Janine's jots: 
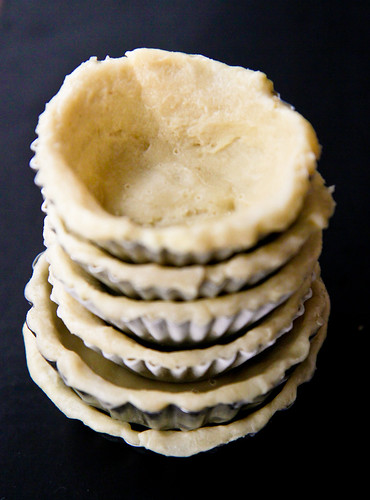
          Frozen tart crusts ready to be baked!
          • *Note: To get a better idea of how to 'fraisage' or smear the dough, do look at this video here. It helps to work in small portions. 
          • Taste and texture: I've exalted this crust more than enough times in my post - it's buttery (the smell when it's baking in the oven is one of my favorite smells in the world!) and is extremely flakey. In fact, it's quite a forgiving recipe. One portion of my dough sort of melted when I was prepping the other tins and what I did was to chill it in the fridge again and it was good to go. There was no obvious difference between the un-melted tarts save for a little less flakiness. 
          • Modifications: Another way of baking which I find helpful but a little more troublesome is to bake it with the aluminum foil for the first 15 minutes, then taking the tarts out to remove the rice grains and the aluminum foil before placing it back into the oven to bake for the remaining 10 minutes. This will make sure that your tarts will crisp up and brown perfectly. 
          • Storage: If left unfilled, the tarts store well in an airtight container for a week before starting to 'lose air'. If filled, please consume within the day otherwise the crust will turn soggy. For the frozen dough, I have tried storing it in discs as well as freezing the tart tins which have already been lined with pastry. The latter method is faster because then you can just blind bake the tarts at any time without having to wait for the dough to thaw before you roll it out. Both methods work fine. Be sure to freeze the tarts individually first, before stacking them up and keeping them in a ziplock bag, otherwise they'll stick to one another and the surface will dry out excessively!
          • Would I make this again?: Definitely! But I'm also going to try other recipes to see how they compare to this :]
          • Other comments: I find it useful also to chill the bowl that I am using to mix the pastry in. I cheat by placing the bowl together with the flour+salt in the freezer for about 10 minutes while I'm dicing the butter to save time. Also, when in doubt, chill! Chill meaning always err on chilling your dough more than you should - it helps with the shrinking problem. As you can see, some of my tarts are quite misshaped because they didn't spend enough time in the fridge (and because I'm still learning how to properly place my pastry into the tins). 

          In pictures: 
          Preparing to blind bake my tarts. 
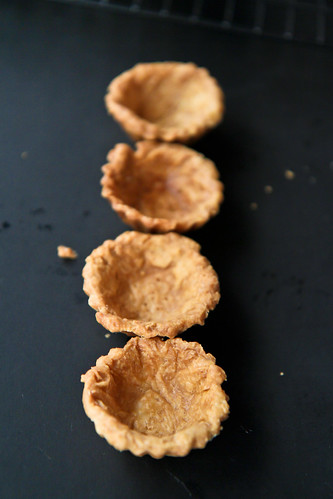
          Baked tart crusts cooling in their tins in awful yellow kitchen light. Be sure to cool them for about 10 minutes in their tins before popping them out to cool for another 30 minutes before filling them. 
          Related Posts Plugin for WordPress, Blogger...