This post is long overdue. I had wanted this post to be the third installment of my Focaccia series (see focaccia genovese and the potato focaccia) and to tie up with my post on pizza in Naples, but somehow other baking got in the way and I didn’t particularly like the photos from this pizza-making since it was done in the evening for dinner and by the time the pizza was done, it was night and all the photos were taken with artificial light which I’ve grown to hate by now. Nevertheless, I decided to put this post up despite the horrible pictures, mainly because this recipe is really good and it should be shared. I’ve used Peter Reinhart’s pizza recipe for more than 10 times now, either for pizza or focaccia, and my family members and friends have nothing but good comments for it. My brothers have claimed that pizza to be my forte and I should just stick to it and not do anything else (a compliment and a snide remark both in one - brothers, tsk!), but of course I’m not listening.
An interesting thing about pizza – no one actually knows the name of the first person to combine tomato, cheese together with the flat bread that was already widely available, but one very popular instance of a person doing that is of course Raffaele Esposito, who combined the pizza crust together with tomato sauce, mozzaerella cheese and basil in 1889 in honor of Queen Margherita’s visit and this pizza, of course, is now the famed Pizza alla Margherita in Naples and everywhere else in the world. Some food historians suggest that the word pizza derives from the old Italian word pizzicare, which I found really interesting because if you learn music – you’ll know that most of the directions are found in Italian, and for string instruments especially, there is the term pizzicato, which means, to pluck the string, instead of bowing. And these food historians suggest that pluck could mean how the pizza is plucked from the oven or how the ingredients are plucked and placed on the pizza. Another random fact was that while in Italy, I actually realized that a lot of the musical directions/terms I had learnt (such as più (more)) actually came in handy!
Okay, I probably have mentioned this before, but I really do like Peter Reinhart’s books. I’ve read all of his books (although I just own one), and what I particularly like is the concise explanation that goes on before each recipe. After reading his books, I feel like I've accumulated this wealth of experience on bread-making and everything else related to it. What I don't like is that as with a lot of books, measurements are not provided in weight, so I've converted them below.
***
Pizza Napoletana
Adapted from Peter Reinhart's The Bread Baker's Apprentice, page 207-212
285g bread flour
6g salt
2g instant yeast
30g olive oil
195g cold water
Method:
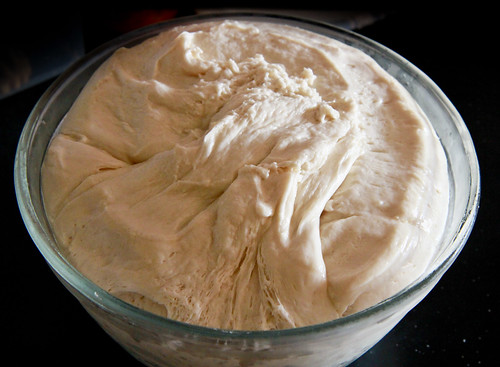
- Stir together the flour, salt and instant yeast in a bowl. With a large spoon, stir in the oil and cold water until the flour is all absorbed. Using the spoon, work the dough into a smooth mass, making sure to alternate directions to develop the gluten further. Do this for about 5 minutes, or until the shaggy dough becomes smooth.
- Sprinkle flour on your countertop and transfer the dough to the counter. Using a dough scraper, cut the dough into 6 equal pieces and shape them into balls. Be sure to flour your hands as well, so that the dough will not stick to your hands. Then, mist the dough generously with spray oil and store them into ziplock bags (with sufficient space to expand) or into a large container.
- Store them in the refrigerator to rest the dough overnight.
- On the day you plan to make the pizza, remove your desired number of dough balls from the refrigerator 2 hours before making the pizza. Dust the countertop with flour before placing the dough balls on top. Gently press the dough into flat disks of about 1-2 cm thick and 10-15 cm wide (to your preference) and cover the dough loosely with a tea towel and let rest for 2 hours.
- Generously dust your sheet pan with semolina flour or cornmeal (or just flour). Flour your hands thoroughly. Lift the piece of dough and place it across your fists, gently stretching it by bouncing the dough by moving your fists up and down. Once the dough has expanded, you can begin tossing the dough (like how the prata man does it). If this method fails, you can use your rolling pin to stretch the dough out, although it won't be as effective (and fun) as the toss method.
- When the dough is stretched to about 20-30 cm in diameter, lay it on the pan and lightly top it with tomato sauce and other toppings.
- Place your rack in the lowest tier of your oven, and preheat your oven to your highest possible - the recommended temperature is 260 degrees (I used 210 degrees on mine). Place the pizza inside and bake for 10 minutes, or until the cheese caramelizes.
- Remove from the oven and wait for 5 minutes before slicing and serving, to allow the cheese to set slightly.
***
Tomato sauce
Loosely adapted from allrecipes here
170 ml tomato paste
170 ml warm water
15 g grated Parmesan cheese
3 g minced garlic
3 g diced onion
30 ml honey
1 tsp salt, to taste
1 tsp dried oregano
1 tsp dried marjoram
1 tsp dried basil
¼ tsp ground black pepper
¼ tsp cayenne pepper
Method:
- Combine the tomato paste and water.
- Mix in the remaining ingredients.
- Let the sauce sit for at least 30 minutes for the flavors to settle before spreading over the pizza dough.
Notes:
- If you've onion and garlic powder, do feel free to use them instead of using fresh ones.
- If you don't have honey, feel free to use a mixture of brown and white sugar, melted in some hot water. Do reduce the amount of warm water accordingly.
- I have more than doubled the herb amounts from the original recipe, because I like the taste of herbs. Do feel free to substitute the herbs as you wish with fresh ones or with just a single type of herb. The black pepper and cayenne pepper gives the sauce a little kick, so feel free to omit it as you wish.
- You will realize that this sauce is a little watered down, but this is perfectly fine because the sauce will thicken while baking to a perfect consistency.
***
In pictures:
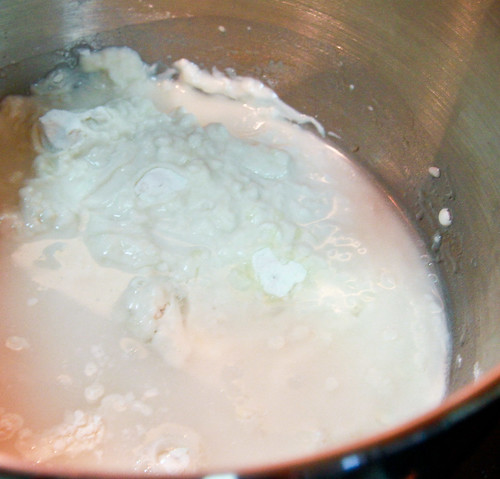 |
| Mix the water and oil into the flour and mix until you get a smooth dough. |
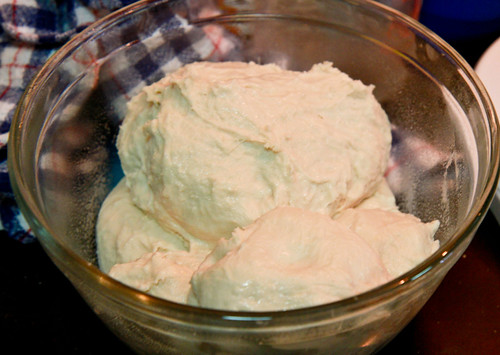 |
| Do NOT do this - huge dough balls stuck together in a container is a big no-no! |
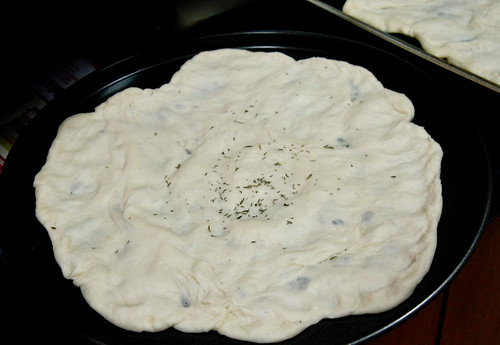 |
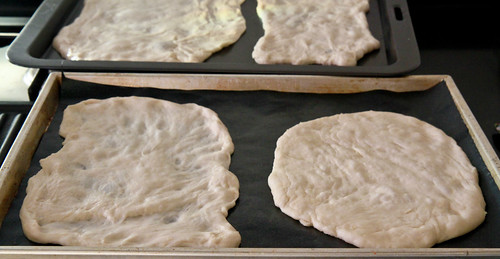
| The same disc from above, after step 5. Yes, I know I need more work on my "tossing" method because the dough is all uneven. |
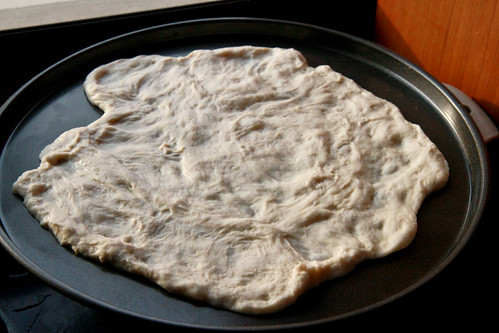 |
| Here's another look at how uneven it is. DO NOT follow this bad example. This is taken in the rays on the setting sun. |
 |
| The left shows the tomato sauce (beginnings on a normal pizza) and the right shows my focaccia variation - with some cheese and onion and thyme :] |
 |
| A topped and ready to go pizza! It looks more pizza-like already! |
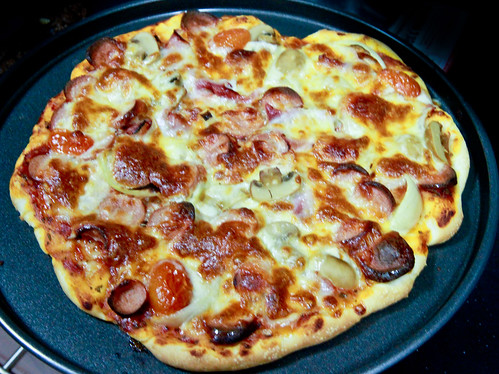 |
| In less than 15 minutes, it's DONE :] Sorry this photo's a little out-of-focus and YELLOW :/ |
Janine's jots:
- Taste: I've tried making the pizza on the day of making the dough itself, but I do find that the dough acquires a better taste after the overnight fermentation, so like Peter Reinhart, I highly recommend the overnight fermentation if you're not in a hurry! Also, it helps to shape and stretch the dough when it's cold especially in our humid weather because the dough is less sticky and more malleable.
- Texture: Just the right amount of elasticity and 'bite' you need from a pizza crust.
- Serving size: This is the halved recipe, and it serves a family of 5 voracious adults more than comfortably for dinner, plus some extra for breakfast the next day.
- Modifications: If you're making the pizza crust for consumption on that day, you'll have to double the amount of yeast so that the dough will be able to rise in the short amount of time. I also like to add a little bit of sugar (about 1 teaspoon worth) into my dough because I like how it adds to the complexity of taste in the crust - I usually make a plain focaccia using this dough and eat it with nothing but balsamic vinegar and olive oil because the salt and sugar in the crust makes it tasty enough without anything! The next time, I'd probably substitute a bit of the flour with wholemeal flour just to try out an alternative mentioned in the book.
- Storage: I have tried doing this before, and it works - you can keep the dough in the refrigerator for up to 3 days and the dough tastes as good. If you wish to freeze them, do store the balls separately in ziplock bags, oiling each properly, and they can be kept in the freezer for up to 3 months according to the book. I've only frozen my dough for about a few weeks before consumption, and I'd probably make the full batch and freeze the unused dough if not for the lack of space in the freezer!
- Would I make this again? Definitely! And again, and again, and again!
- Other comments: The dough's really versatile - for pizza itself, you can make the crust as thick or thin as you want it to be - I'm not sure if it's clear from my pictures, but I made both thin and thick crusted ones and both were well-received. This dough can also be used to make focaccia or any other rustic bread. Also, I prefer to make pizza dough by hand, so instructions below are for hand mixing but an electric mixer can be used as well. If you have a pizza peel and stone, please do use them, but I've modified my instructions below to using a sheet pan so that most home bakers can use this recipe too. I've not included any recipes for the topping because mine's just a mishmash of whatever I have in the fridge that day, so feel free to experiment! You can even make dessert pizzas!
***
I do hope that this entices someone to try this recipe out, because I honestly do think this is one of the better tasting crusts I've tried and I really like the fact that so little yeast is being used, and everything else is kinda natural. And this will also double up as my show of support for Jean's Aspiring Bakers #6: Say Cheese! (April 2011). I'm really sorry that I haven't been able to support the event as much as I'd like to, because I was really overcome with studying, but now that I'm free - I'll be sure to post more often! :]

