My blog has moved!

You should be automatically redirected in 6 seconds. If not, visit
http://www.unpastiche.com
and update your bookmarks.

Monday, February 28, 2011

A little update on my homemade vanilla extract

Time really flies, it really does.

I first started making own homemade vanilla extract when I started the blog, and now, my blog is already 2 months old! I still remember thinking, gosh, it'll take ages for the vanilla extract to start smelling like a real vanilla extract. Fast forward to today, 28 February - my vanilla extract is 2 months (+2 days) old and is ready to be used! And I've to say that minus the vodka hit that I got from first opening the bottle, the extract smells exactly like Tahitian one I have :)

Here's how my baby looked last month (at 4 weeks old):

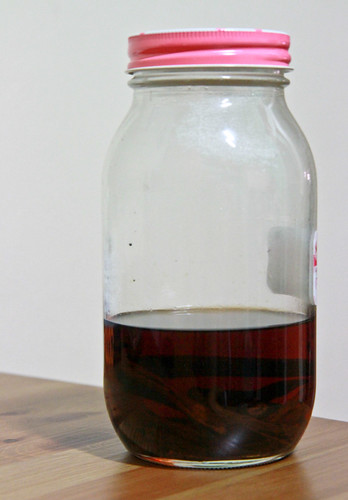
Here's how my baby now: 

And yes, I've upgraded it to a larger jar (which is $2 from Daiso), so that I can submerge the vanilla beans with ease and add more vodka when needed. Although the color difference isn't too great from one to two months, the flavor really does intensify - I occasionally open the jar up to smell the vanilla extract and it really smells better and better! Whoever said that vanilla was like wine was right on the money! It really is better with age - it becomes more mature, and there is more depth to the smell. Taste-wise, I can't tell yet because I haven't tried it in my baking, because I intend to age it for a little while more, AND finish using my existing bottle of vanilla extract before I strain this extract (to get rid of the fibres from the pod) and start using it :]

I might even do a giveaway when this vanilla extract is mature enough (in my opinion), so do stay tuned!  If you want to make your own homemade vanilla extract, all you need is a jar, a knife, some strong alcohol, and some vanilla beans! And lots of patience of course! It really is that simple!

Thursday, February 24, 2011

Wholemeal Yogurt Buns

I used to think that I wasn’t a really lovey-dovey kind of person, but this entire month, I’ve been baking/making things related to love or hearts. Maybe it’s partly because Aspiring Bakers’ theme for February has been at the back of my head, so I was racking my brains as to what I could make that was heart-shaped. But I do think it’s more of the former than the latter, mainly because my valentine is more than 7000km away, and he can't try my food like how he did when he was around, so these posts are a virtual feast (I hope) for him. 

Anyway, after my wholemeal tangzhong rolls, I embarked on yet another bread recipe because I was in search of the world’s softest bun! One blog linked to the other, and I landed on Zurin’s blog. She says that it is the world’s softest buns and boy, her pictures do look like it! But I have to admit that I was a teeny weeny disappointed because my buns weren’t as soft and fluffy as I anticipated them to be. Yes, they were soft (and remained soft even 3 days after!) but they were not as soft as those you can get from bakeries. My mom tells me that there is no way I can get bakery-quality buns, because those breads have bread improvers and softeners in them, but so many other blogs have claimed that they managed to get bakery-quality breads with their recipes. So I’m wondering if we are comparing the breads with different bakery standards? Or is it because of the way I knead the bun, or my oven or the lack of egg wash on the buns? There are so many variables involved, but I think I can cancel out the oven bit because I have bought an oven thermometer and have been ensuring that the temperature is super duper accurate – unless those other bakers have inaccurate temperature ovens lol. But as for the kneading bit, I’m definitely going to try kneading with my Bombino (long story, but it’s the name of my KA mixer) and see if there is any visible difference. Rest assured, I will definitely attempt this recipe again because I do see its potential for bakery-quality soft rolls and will come back with a post-mortem, to dissect where I think I went wrong/right. I'm probably gonna combine this yogurt recipe together with the water-roux/ tangzhong method to see where it takes me =]

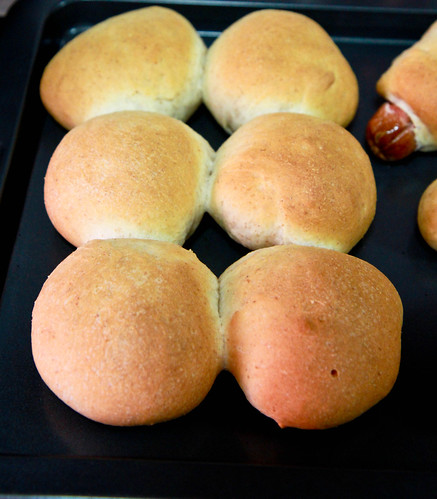
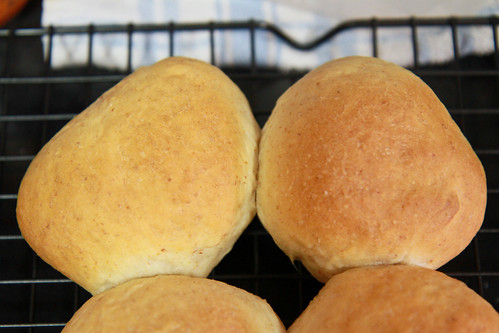
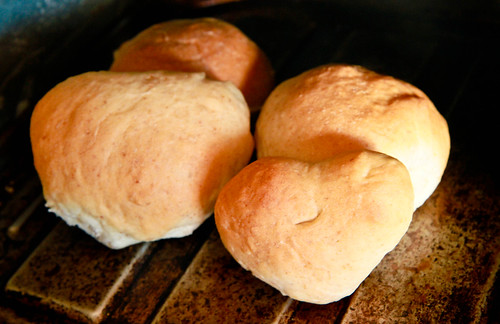
Instead of making normal round shaped rolls this time, I experimented with all sorts of mini rolls – I made braided nutella buns, bite-sized buns with sausages, buns with nutella inside, and normal plain heart-shaped buns. The other buns are not aesthetically pleasing at all, so you only get a glimpse of the normal and filled round buns as well as the sausage bun (see it sticking out on the right below). The heart-shaped buns weren’t that successful however, because they kind of lost their shape after the second proofing and I didn’t really dare to shape them after that, for fear that the bread would be dense from my shaping. I have newfound admiration for those bloggers who managed to get such lovely heart shaped buns! 

Buns just don't look as nice without an egg wash, don't they?

Yogurt Rolls (hand kneaded)

Ingredients 
220 g    bread flour 
30 g      wholemeal flour (you can use all 250g of bread flour if you like) 
15 g      castor sugar 
3 g        salt 
3 g        yeast 
120 g    yogurt 
40 g      milk 
25 g      egg 
30 g      butter 

Method: 
  1. Sieve the flours, salt, yeast and sugar in a mixing bowl.
  2. In a saucepan, add your milk, yogurt and butter and allow it to warm over a medium heat. Once the mixture turns lukewarm (about 45deg), take it off the fire and allow it to cool slightly to about 40deg. You don't need a thermometer for this - as long as your bare finger is able to stand the warmth, it should be about right.
  3. Crack the egg into a separate bowl and pour some of the liquid mixture to temper the egg. This is to ensure that the egg will not curdle when you add it into the warm liquid mixture.
  4. Mix the egg mixture into the rest of the liquid mixture until fully incorporated. 
  5. Make a well in the dry ingredients and pour the wet ingredients in, stirring with the wooden spoon until the flour is incorporated and you start getting a shaggy mass of dough. 
  6. Lightly flour your work surface and turn the dough out onto it. Knead for about 10 minutes, until the dough becomes smooth and elastic. 
  7. Once it passes the window pane test, round up the dough and rest it inside a lightly oiled bowl. Cover with a tea towel and allow the dough to rest until it doubles in size (approximately 45 minutes in our hot weather). 
  8. Punch down the dough and knead it for a few minutes before dividing your dough into your desired number. This recipe ideally makes 6 rolls, but I divided mine into small bite size buns and rolls weighing about 40g each. 
  9. Once shaped, place the buns into a greased pan, leaving about an inch gap in between each roll and allow them to rest and proof for another 45 minutes, or until they have doubled in size. 
  10. Preheat the oven to 170degrees, and if you wish, apply an egg wash onto your rolls once they have doubled in size. 
  11. Bake for 20 minutes, or until golden brown and leave to cool for at least 10 minutes before consuming your buns =)
In pictures: 
This is the size of the dough after it has proofed for about 45 minutes. To test if the proofing is sufficient, simply poke a hole in the dough (see the hole on the right?) and see if the hole remains there. If it does, proofing is done and you can proceed to the next step! If not, cover the bowl and wait for another 10 minutes before trying the 'poke' test again.
My attempt at making heart-shaped buns. They still resemble heart shapes here, but wait till you see the next photo :/
No longer so lovey-dovey huh? :(
My only consolation - one bun which resembled a heart - ps it has a nutella surprise inside! :)
This will be my last show of support to Ellena for Aspiring Bakers #4: Love is in the Air (Feb 2011), because I'll be doing tarts next and there ain't gonna be no hearts there, just lotsa 'buttah' =)

Monday, February 21, 2011

Strawberry & Pistachio Financiers

I am working my way up the French pastry food chain, slowly and steadily. Over the span of the last year, I’ve attempted choux puffs, éclairs (which are essentially choux puffs with cream and chocolate), tuiles and macarons, and I’ve diligently noted down the recipes that work for me and other comments in my handy little spiral bound notebook.

I am a girl on a mission, really. I am on a mission to master baking techniques, and I think French pastry is a good way to start. Nowhere else have I encountered such need for precision and skill as I have in the making of French pastry. The fact that I love French pastry is a huge plus, of course. I still remember the day when Jon and I stepped into Ladurée, and I bought a huge box of macarons, as well as this tiny delightful pastry, which I forgot the name of, because I was so bedazzled by all that variety of pastries. But nevertheless, the first bite into the pastry brought me to pastry heaven. I realized then why I paid 3 euros for a tiny little thing which was half the size of my palm, and why Ladurée is as famous as it is today. The outside was crispy, but the moment you bit into it, the crisp exterior gave way to a soft flakey, buttery interior which contained just the right amount of sugar and flavor within those layers. (Not that its macarons were not good, but that tiny pastry left a deeper impression on me than the macarons because I’m not too much for overly sweet pastries.) I want to accomplish that one day – that something of mine will evoke such great enjoyment on another that it will leave an indelible impression in that person’s memories. That, to me, is the epitome of good baking.

Anyway, rambles aside, I’m working my way down my imaginary pastry list and today, I can tick financiers off it. I’m actually moving onto viennoiserie items such as pains (which is French for bread and not pain as in ouch) and croissants pretty soon because I’ve been buoyed up by the fact that the flakey piecrust I made was a huge success with my parents and puff pastry has been calling my name for the longest time! After that, I’m gonna hop on back to harder types of French pastry (in my opinion), like the croquembouche (which figuratively killed many contenders in Masterchef Australia), mille-feuille and most importantly, those complicated gateaus that I’ve been dying to try!
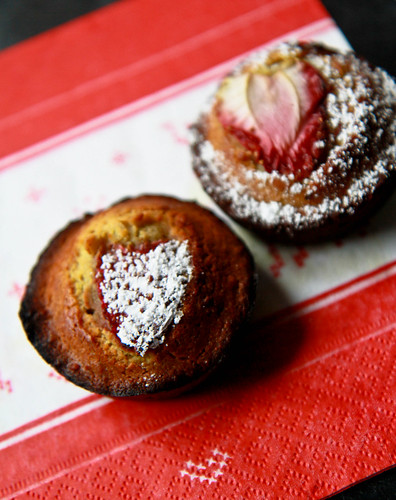
Now, time for a little history. You can skip this entire part if you’re not history-inclined but I am a history buff and information junkie, and I really like to research extensively about any new ‘thing’ I’m trying out. Well according to Dorie Greenspan in Paris Sweets and here as well, “The financier is a pure-bred Parisian, having been created in the late nineteenth century by a pastry chef named Lasne, who had a shop on the rue Saint-Denis near the Bourse, the city's stock exchange.  Lasne had a bead on his clients:  he knew that they were rich, discriminating and always in a hurry, so he designed his little unglazed cookie-cake so that it could be eaten without a knife, fork or spoon and without risk to suit, shirt or tie.  It was an early and classy form of fast food.”

Now, I do believe it was intentional on Lasne’s part, that he did a number of intelligent things with the financier. First, he named it financier, which we all know in plain English means someone (usually rich and a big shot) in the finance industry – this must have really piqued those financiers’ (the person) attention! Second, he baked these cakes in shallow rectangular pans, such that they resembled ingots or gold bars, lending itself to its namesake. And most importantly, he used really rich and expensive ingredients like butter and almond (back in those days they were luxurious and rich), and I can bet my money that those financiers got a kick out of being able to afford these ingot-like tea cakes which plebian people could not afford!

Onto the cake itself – the main reason I attempted this recipe was because I had pistachios lying around which I had originally intended for pistachio macarons, but I decided on financiers instead because I wanted to try something different, something cakey instead. Usual financier recipes use almond meal - like you see in Dorie's recipe which I've linked above. The other attractive thing about the financiers was the fact that they used browned butter, and that they would be tiny cookies with a crispy exterior giving way to a nutty, not-so-crumbly interior. This was what drew me in the most. I love food with hard or crispy or crunchy exteriors!

Now for my blasphemous admissions - I’ve to admit that though I did try chouquettes and madeleines in France, I never did come across a financier. It might be because my eyes weren’t exactly on a lookout for them or maybe because I was too eager hoping into boulangeries to get baguettes and croissants that I didn’t have much time for financiers. So I’m actually making these financiers with no basis of comparison. Second, I didn’t have those shallow rectangular pans which are characteristic of a financier, so I settled for my muffin pan instead. And, I used a recipe which asked for whipped egg whites despite reading that a quick mix with normal egg whites will do =/ Nevertheless, I thought this recipe turned out pretty well!

Strawberry & Pistachio Financiers 
Makes 6 6-cm (Ø) financiers, adapted from Leemei (do check out her photos of these financiers - they look awesome!)

Ingredients:
25 g ground almonds
50 g ground pistachios
45 g unsalted butter
40 g icing sugar
15 g all-purpose flour
45 g egg whites (about 1.5 eggs)
tsp salt
¼ tsp vanilla extract 

Method:
  1. Grind the pistachios and almonds into powder. You can roast them for about 10 minutes at 160°C if you want a nuttier taste to emerge in your financiers.
  2. In the meantime, place the butter into a saucepan and put it on medium heat to start ‘browning the butter’. This basically is melting down the butter until it turns slightly brown and emits this nutty aroma. Take off heat once it’s done and allow it to cool.
  3. In a bowl, sieve the ground nut powders, together with flour and icing sugar.
  4. Beat the egg whites until you get soft peaks.
  5. Make a well in the centre of the dry ingredients and add your vanilla extract. Mix in the whipped egg whites. Once incorporated, mix in the cooled browned butter. Be sure to only use the liquid from the browned butter and not the solids. *In my ingredient proportions above, I’ve taken into account the loss of weight from browning the butter (the original recipe only needs 37g worth of melted butter).
  6. After mixing everything, you should get a batter which is almost similar to a madeleine batter. Cover this up and put it into the refrigerator to chill for at least 2 hours. (I left mine overnight.)
  7. Preheat your oven to 180°C. In the meantime, take your batter out of the fridge and spoon your mixture into the mould. 
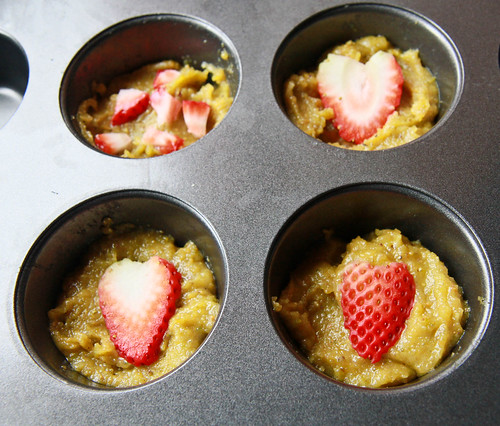
  8. Wash, hull and slice your strawberries before placing them on top each of your financier. If you wish, you can chop up some more pistachios to sprinkle on top. 
  9. Bake for 20 minutes or until the tops of the financiers turn golden brown and are dry to touch. Remove from the moulds and allow to cool for at least 15 minutes before consuming them. You can add some icing sugar atop each for decorative purposes (or added sweetness) if you like =)
Janine’s tips: 
  • Be sure to mix the batter as little as possible, because you don’t want the gluten in the flour to form extensively and give you a tough financier. Some recipes require a resting period for the financier (like this recipe), but others do not. I’m not too sure why, but I suspect it’s to enhance the contrast between the crusty outside and a soft, moist inside. 
  • After chilling your mixture in the fridge, you might have to wait for a couple of minutes before the batter is amenable to scooping because the batter hardens a fair bit after it's chilled! Also, you don’t need to grease your moulds because the batter is quite rich and should come off easily when the financiers are baked.
  • Some people don't recommend the use of strawberries, because its high moisture content might result in it sinking to the bottom of the batter. I didn't face such a problem but if you are afraid of sinking strawberries, one tip is to bake the batter for about 2-3 minutes, before opening the oven door to add your strawberry slices. You don't need to be afraid of sinking tops because there isn't any rising involved for financiers!
  • Most importantly, pay attention to your butter when you’re browning it! Because of the small quantity of butter, it melts really quickly and the entire process is but a few minutes! Keep your nose close to the saucepan to smell for that ‘nutty’ aroma and once you do, take the pan off the heat! If you get a dark brown liquid, my advice is for you to throw it away and to start again, because it’ll taste bitter.
  • I also discovered something amazing you can do with your food processor (or in my case, my chopper!) I used my mini food chopper to grind up my nuts, and because I saw that some recipes required whipped egg whites and some did not, I wasn't too concerned about clean bowls and equipment for the egg whites, so I dumped the whites into the same chopper I'd used before and pulsed it for about 5 minutes. The egg whites emerged softly whipped, similar to what you get from a mixer! The only downside is that my chopper did get pretty heated up and it is small, so perhaps whites from 3 eggs would be the maximum it can take.  
In pictures: 
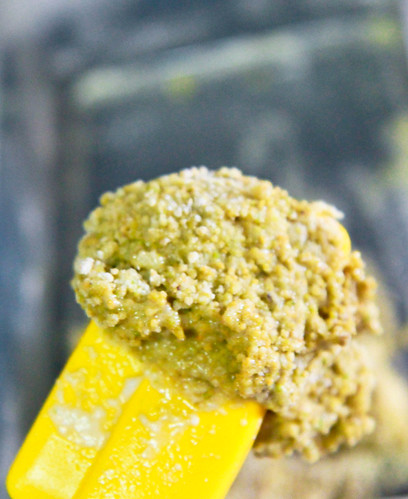
The batter before I started folding in the egg whites. My dry ingredients look a little gravelly because I didn't grind the nuts finely since I wanted a more 'chewy' texture
Spoon the batter into the moulds and place your sliced strawberries on top! You can slice them or chop them, as you wish =)
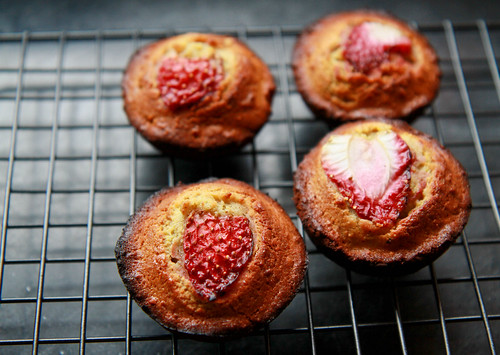
And here's another photo, just because the light was soooo good today :)
Some of my financiers were a little overbaked - spot the black parts? =/


Also, from what I’ve read, friands are like an Australian relative – I’ve compared several recipes and friands basically contain almost the same proportion of nut meal to butter as do financiers. The only difference it seems is that friands are typically baked in small oval pans.
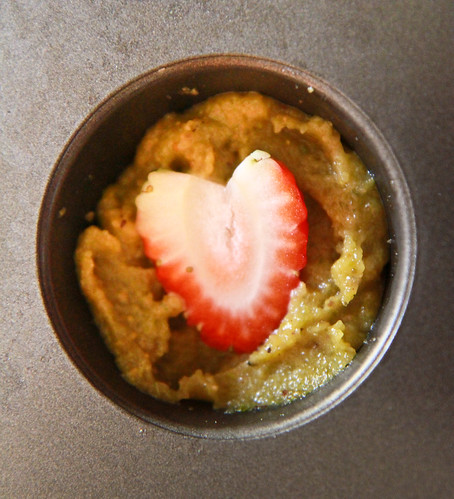
See the heart shape from the strawberry?
Strawberries lend themselves really well to Valentine's and I think it's partly because of its shape! If you slice the strawberry properly, you’ll get an instant heart shape! 

But most importantly, I think strawberries depict love and what it entails very well - they are actually really ugly looking on the outside - I mean, come on, look at those pits with seeds and tiny hairs sticking out of them! but if you bite into them, you'll be rewarded with this sweet, and sometimes tart, flesh. And so, because I believe that love should not be celebrated merely on Valentine's, this is another post dedicated to my valentine, assuming he still has the time to read my blog. I hope you are eating your mandatory 4 pancakes every morning! I'm also submitting it to Aspiring Bakers #4: Love is in the Air (Feb 2011), which is hosted by Ellena this month. 

Sunday, February 20, 2011

=)

Here's a smiley face for the upcoming week (because I don't have classes)
Yes, I did take the photo on top of the lid of the lock&lock container I was storing the macarons in.

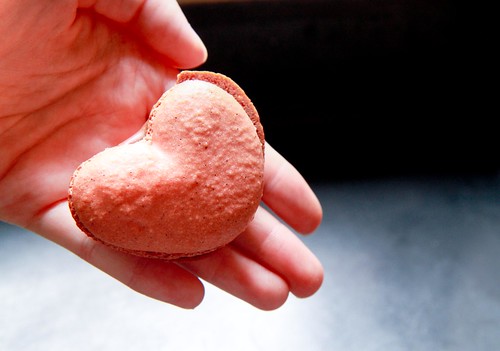
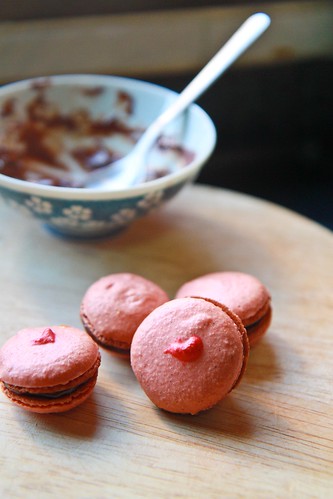
I'm still quite bad at apportioning filling for the macarons because as you can see, one of the macarons above has ganache flowing out of it and the heart-shaped one doesn't seem to have enough! And I did have a problem with matching heart-shaped shells because although I tried to pipe them uniformly, they turned out uniform BUT unsymmetrical, which meant that none of the shells actually matched one another =S And it's pretty obvious from this close-up picture that my macarons were the teeniest bit undermixed. Btw, here's the link to my vanilla bean macaron recipe if anyone's looking for it!

Here's to a 'light heart' this week!
I finally gave these macarons to my girlfriends when we met over Korean BBQ (2D1N Soju Bang - which was really value for money at $22 per head for a meat buffet) for our belated Valentine's day meal and the verdict was that it was not bad =) I bet they were confused by the filling of the macaron, because it not only contained mint chocolate, it also contained little bits of my salted caramel, which made it minty and salty at the same time! (I quite like the weird combination, btw)

I always look forward to meeting my girlfriends, because like the macarons, they are the nearest and dearest friends that I'll ever have; and my heart immediately lightens whenever I'm out with them because of the great company. On a side note, I'm definitely going to try macarons out a few more times at the very least, because I have yet to come up with a satisfactory filling/buttercream and there are a couple more variations on flavor and technique that I wanna experiment with!

Have a great week everyone!

Thursday, February 17, 2011

Wholemeal Bread Rolls, using tangzhong (汤种全麦面包)

I'm a person of contradiction, on one hand, I really like order and neatness (in terms of how I put my things, have folders for various things, etc) and yet my mom can attest to my lack of order, especially in my bedroom. I'm the same baking wise, for certain recipes, I'm quite the stickler for following instructions to a T, and for others, I just go by feel, which isn't exactly the best way for things like pastries. I'm also quite of a spur-of-the-moment kind of baker, so this bread was the product of my fancies during the weekend. 

I was studying, as usual, when it crossed my mind that I haven't been baking bread for a while now, since I had the necessary ingredients in the pantry (plus I needed to use up my wholemeal flour), I went to the kitchen to pound out some of my frustration on the dough. Btw, I highly recommend manual kneading of bread for anyone feeling highly stressed. I personally find it highly therapeutic and I usually do all my breads by hand, with no aid from the mixer or breadmaker. 

This recipe uses tangzhong, or what some bloggers have coined as the water-roux starter. In any case, it really helps with softer buns. For more information, please refer to my first ever post here! This recipe was adapted from Pei-Lin’s blog where she was making a wholemeal loaf. I’ve halved her recipe and made wholemeal rolls instead of a loaf but it’s still as yummy! They are still pretty soft the following day, as compared to usual bread recipes. This was also my first time using wholemeal flour to bake, and I really do like the taste of wholemeal, and I especially like the fact that I'm eating something with fiber and much healthier than just bread flour, which has all of its essential nutrients stripped away from it.


Wholemeal Bread Rolls, using the Tangzhong method (汤种全麦面包) 

Ingredients
[A]
140g  bread flour 
100g  wholemeal flour (I used organic wholemeal flour, which is the same thing but organically grown)
4g      instant dried yeast 
25g    sugar 
1g      salt 

[B] 
30g egg, beaten (about half an egg) 
50g milk, at room temperature 
20g low fat yogurt 
60g tangzhong, at room temperature* 

[C] 
25g salted butter, softened 

*Refer here on how to make tangzhong - here, I used a proportion of 10g of bread flour to 50ml of water, to give me 60g worth of tangzhong for the recipe. 

Method:
  1. Combine all the dry ingredients in [A] together. I used a sieve with larger holes so that the bran bits in the wholemeal flour could be sifted together with the other ingredients as well. 
  2. Whisk together the egg, milk, yogurt and tangzhong (ingredients in [B]). 
  3. Make a well in the centre of the dry ingredients and add in the wet ingredients. Mix until a dough comes together and pulls away from the sides of the mixing bowl. 
  4. Turn the dough out onto your work surface and knead using the heel of your hands and knuckles. 
  5. Once gluten has developed, knead in the softened butter until it is incorporated. I usually just take out the butter from the fridge, weigh it and put it in the microwave for a quick zap of about 15 seconds. 
  6. This step is where lots of elbow grease is needed. Continue kneading the dough with the heel of your hand and your knuckles. The dough is initially not too cohesive and very oily, because of the addition of the softened butter. You should reach a point where the dough becomes slightly sticky. 
  7. At this point, grab a small thumbsize portion of dough and gently pull the dough in opposite directions and check if a thin membrane can be formed. If such a ‘window’ can be formed without the dough tearing, it means that your dough has passed the windowpane test and is ready for proofing! 
  8. Tuck in the ends of the dough and put in into a greased bowl (I just use the mixing bowl I used previously), cover with a tea towel and let it proof for about an hour, or until doubled in size. To check if it has proofed sufficiently, poke your finger into the dough and if the indentation doesn’t bounce back, it means that your dough has proofed sufficiently! If the ‘hole’ bounces back, let it proof for a couple minutes more and try poking again. 
  9. Deflate the dough and divide it into 8 equal portions. Mine weighed about 55g on average. Shape them into rolls and tuck in the ends, placing the tucked in part on the bottom. You don’t need to flour your surface because the dough isn’t particularly sticky and this can be done without a work surface. 
  10. Arrange the rolls in a round pan (I used my 9-inch cake pan) and leave some space (about 3cm) in between the rolls for them to proof for the second time. Cover the pan with a tea towel and allow them to rest for about 30 minutes, or until the rolls double in size and meet each other. 
  11. Brush some egg wash (some of the egg left from above mixed with water) onto the tops of the rolls and bake them in a preheated oven at 170 degrees for 15-20 minutes. 
  12. When the bread is golden brown (or a skewer comes out clean), remove from the oven and place the rolls on a wire rack to cool.
Janine’s jots: 
  • If you see the original recipe, I have decreased the amount of yeast because I was afraid of the buns having the yeasty taste which I don't really like. 
  • I've also reduced the amount of salt because salted butter was used here instead of unsalted butter. 
  • I also replaced some parts of the milk with yogurt because I feel that yogurt imparts a richer texture to bread. 
  • Now, if you are lazy, you should use your bread machine to do the work from you right from the start, or your mixer with a dough hook. The recipe below is for completely hand-kneaded because I needed to punch my stress out on some inanimate objects. For the bread machine version, simply place the ingredients in as required by your machine (usually yeast is left right on top), and simply click on the program which suits you. For your mixer, just use it to replace all the steps requiring manual labour - until step 7 where you take the dough out to knead for a minute or two before performing the window pane test. 
  • For some pictorial guidance on the entire process, please take a look at Carol's blog here which I found helpful. 
  • If you’re making a loaf, the suggested temperature is 180deg for 30 minutes. I forgot that I was making rolls and baked at 180deg, which resulted in the tops of the buns browning way too quickly. As result, the buns turned out a little drier than I would have liked. I’d suggest baking the rolls at 170 deg for about 15-20 minutes. 
  • If you are following the original recipe with 70ml milk, you might experience the dough being stickier, which will require you to flour your work surface so that you can knead without the dough sticking. If you flour your work surface, oil your hand so that the flour:fat proportion stays roughly the same. 
  • If you don't have wholemeal wheat flour, simply replace the entire amount in the recipe above with normal bread flour. You might find it that it takes a shorter time to knead because for wholemeal flour, the bran bits in the flour cuts the gluten strand, impeding the formation of gluten strands.
In pictures: 
This is step 3, where you add B to A. Notice that the tangzhong has been thoroughly mixed into the wet ingredients before adding it in.
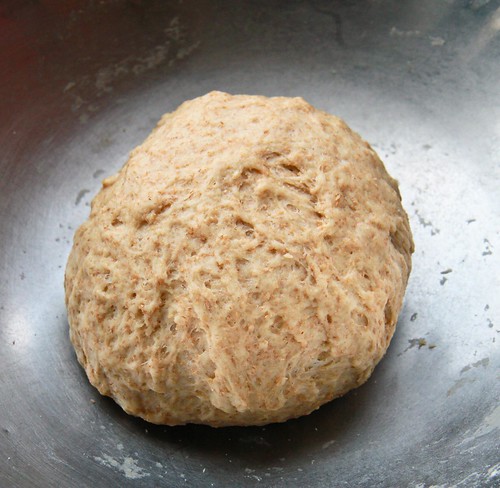
This is after step 8, where I've already finished kneading and tucked the ends of the dough in to form a tight ball. It's ready for its first proofing!

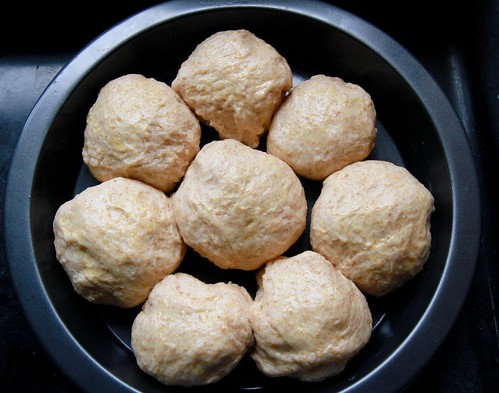
These are the rolls after the second proofing. I've put the egg wash on and it's ready to go into the oven! Notice that the rolls have begun sticking to one another after the proofing, but that's okay because I want yummy pull-apart rolls! :]
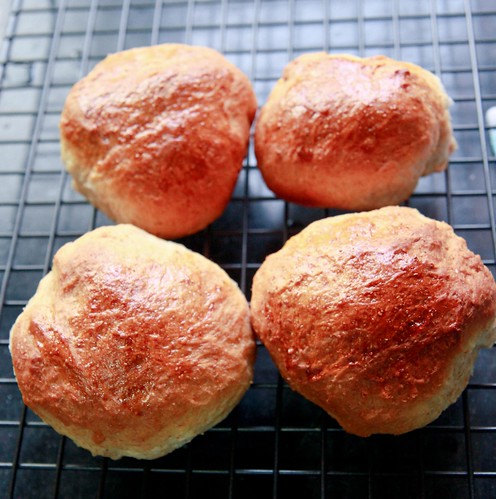
The rolls look rather horrible in this photo, but trust me, it was delicious because the moment it came out of the oven, I took about this long before eating one and so did my family members. Which explains why there's only 4 left in this photo >.< Note that the rolls are a little overbaked (too brown in my opinion), so keep an eye on your rolls once it's 15 minutes! (especially if your oven runs a little hot, like mine)

Sorry once again for the lack of detailed pictures because it's pretty hard to take photographs when you're kneading (especially since I've no tripod and I'm alone at home) and also sometimes my greed to taste my baked creations get the better of me and I forget that I should take some photographs for my blog. But since this blog is set up to indulge my personal food fantasies, I guess it's apt that I should devour them when they're the best tasting, and not after they're cold from excessive photo-taking =p

Tuesday, February 15, 2011

Pink Vanilla Bean Macarons, for Valentine's

I've been thinking about macarons all week along, after my successful attempt with David's macaron recipe here for my cousins on Chinese New Year. I knew I wanted something pink, for Valentine's, and something heart-shaped, so the only thing left was to decide on the flavor of the shell and the filling! I hemmed and hawed, and finally decided on using my vanilla beans (so that I can put the pod into my vanilla extract jar here) in the shell for a vanilla flavor, and a salted caramel buttercream. 

You might notice that in some of the photos, my macarons look as if they have a black, chocolatey filling - well, that's because my salted caramel buttercream was a flop! Although I managed to make a nice salted caramel, I failed making the actual buttercream because I just couldn't get my butter to whip properly. So I used just the salted caramel in some macarons, while using a chocolate mint ganache in others. 

Oops there's extra caramel on the top of the shell!

I'd also like to apologize because I don't have any photos of the macaron-making process and I know how important these are when you are new to making something. Trust me, I've looked at tens (maybe even hundreds! And I'm not exaggerating) of blogposts on how to make this elusive little cookie and looked at many more videos. I've been thinking of writing a post compiling all these tips I've garnered (with the right attributions of course), plus what I myself have learnt, but I just haven't got the time! Plus the fact that I did start on it but my computer gave up on me, swallowing that post up with it, has made me balk a little at re-starting.

Anyway, I was in a real hurry to complete the macarons to give to my friends - I only had about 3 hours to spare, and thankfully, I took 2 hours from start to end (from measuring and sieving the ingredients to finally filling them up with ganache and photographing them)! Hence even the 'end product' photos are quite gross. The amateur photographer in me was practically cringing at the bad exposure and shadows in almost ALL the photos :/ 

Okay, onto the macaron recipe I've used. I won't be sharing the salted caramel buttercream recipe I've used because it was a failure. 

Janine's jots: I've halved the original recipe, which apparently is the same one Canele uses for its macarons. For the life of me, I can't remember where I got this recipe from, but I think I've adapted and edited it sufficiently to call it my own :) The macarons are quite good, and not as sweet as other recipes that I've tried previously. For my next try, I'll try to decrease the icing sugar a little more and increase the ground almond portion.
Vanilla Bean Macaron
Makes approximately 40 shells, or 20 macarons

Special equipment needed: 
Baking paper to line your baking tray
Spatula 
Piping bag with large round tip

Ingredients for the shell: 
50 g almond meal
90 g icing sugar
44 g egg whites
12 g castor sugar 
Seeds from 1 vanilla pod
2-3 drops of red food coloring


Method: 
  1. Weigh the almond meal and icing sugar and sieve them together. If you have a food processor, place both ingredients inside and pulse it a few times to combine. 
  2. Split the vanilla pod in half, and remove the tiny black seeds from the pod, adding it into your almond-sugar mixture. 
  3. Beat the egg whites with your mixer, starting at low speed until it froths and switching to high speed. Once the egg whites start to 'whiten' (the soft peak stage), add in your castor sugar gradually, mixing until stiff peaks are reached.
  4. Using a spatula, start folding your almond-sugar mixture into the stiff meringue. Once it is semi-incorporated, add in 2-3 drops of food coloring and continue folding until everything is fully incorporated. Do not mix the batter because this will break down the air inside the meringue which enables you to get your feet!
  5. The resultant mixture should be shiny, and what people describe as "flowing like lava". My own gauge is that the mixture should be the viscosity of a thick exfoliating facial scrub (those facial washes with beads in them), and if you fold over a trail on the surface of the batter, it should take longer than 30 seconds to disappear. 
  6. Using the spatula again, scoop the mixture into a prepared piping bag and start piping your shells onto your baking sheet. You should try to pipe uniformly, so that the shells bake evenly. My shells are about 1.5 inch in diameter, on average.
  7. Once you are done piping, gently rap your baking sheets in order to remove any extra air bubbles in the shells. 
  8. Here's the important bit - leave the macarons at room temperature for 30 minutes until a skin is formed. This means that when you touch the surface of the shell, it should not stick to your finger and there really is a 'skin' that is formed. What I do to speed up the process is to blow my stand fan directly at the trays so that the top of the shells will dry, inducing the skin to be formed. 
  9. In the meantime, start making the filling of your macaron. After 20 minutes, you should start to preheat your oven to 150 degrees.
  10. The macarons should be baked using the middle rack, so only one tray of macarons in the oven at any single time please! At about 3 minutes, the shells should have rose and the feet formed already. What I do to reduce the steam and humidity in the oven is to open the oven a little at the 6th minute, placing a chopstick in between the gap; then removing the chopstick after 30 seconds. You can also rotate your tray if you see that one side of your tray is baking faster than the other. I repeat the chopstick process at the 10th minute. 
  11. The macarons take about 12 -15 minutes to be done, depending on your oven. Remove them from the oven, and leave them to cool on the tray for 5-10 minutes before lifting them up from the baking paper to cool on a wire rack. 
  12. Fill them with your desired filling once the shells are cooled (about 20-30 minutes) and pair similar-sized shells together. 
  13. And there you have it - a French macaron =D
Here's a few more photos for posterity's sake :]
As you can tell from the shadows, this was taken as the sun was setting! I was in a hurry to get these done for the party in the evening! And as you can see, the shells are not very smooth - because I didn't ground my almond meal fine enough, and the batter could have been mixed just a little more!
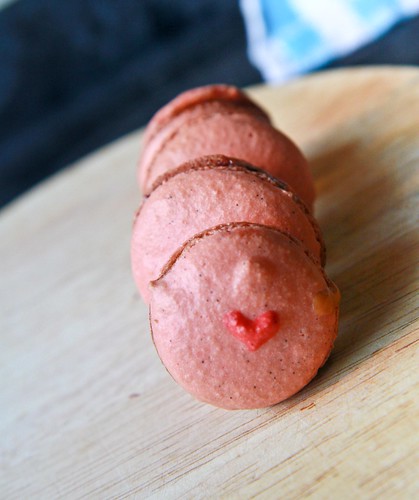
Oooh lovely feet (but oh so horrible shadows). The bumps that you see are actually the hearts I added onto the shells. I kept some meringue and made it a deeper pink, and used a chopstick to draw the heart onto the shell. The hearts rose while baking too :) And yes, my shells are not exactly uniform in size =X

And I'm submitting this to Aspiring Bakers #4: Love is in the Air (Feb 2011)! I also made some heart-shaped macarons, as you can see here, but they kinda were packed for my friends before I remembered to take a photo of them :/

ETA: I've finally plucked up the courage to submit this post to Mactweets Mac Attack Challenge #16 here. Mactweets was started by Jamie and Deeba, both of whom have wonderfully written blogs, and they hold a monthly macaron challenge with a theme. Hopefully this will be the start of many challenges that I'll be joining! :)

Sunday, February 13, 2011

Just a little sneak :)

These little sneak peeks were hastily taken with my phone after piping them and while I was waiting for them to form a skin :) Yes, I do know that exposure and lighting are all very off, but it usually happens when I'm all impatient to snap a photo before I forget. 

The tiny black dots are vanilla bean seeds. It's my first time using gel food coloring and I overestimated how much to use, resulting in a slightly garish pink :/


I've made a chocolate mint ganache for them, as well as a salted caramel buttercream. Friends and family who tried them say they're getting better =D Am thinking of getting fresh strawberries tomorrow to try the strawberry buttercream for some of the shells. Whee :)

Saturday, February 12, 2011

Valentine's Day Roundup

As Valentine's Day rounds the corner, the blogosphere is inundated, really, with posts about Valentine food and gift ideas. I like looking at "food porn", plus I do like the inspiration which comes to my mind when looking at these imaginative and creative food creations, so I decided to do my very first Valentine's Day Food Roundup for this blog =)

These are a few ideas, food ones of course, for you to make for the coming Valentine's Day. Of course, you don't really have to make it on 14 February itself, because love between two people should be celebrated every day, all year round. But if there's a special day that the world set aside just for celebrating love, jump in and celebrate! I'm not one for a restaurant meal on Valentine's, because all the hype results in superly inflated prices everywhere. A few days again, the telly was just telling me that a romantic dinner for 2 on the Singapore Flyer is in the region $300-$400. Like what?!! Well, maybe because I'm still a student and also because I'm particularly stingy, but $400 for a meal just seems over the top, especially if it's not a hatted meal. 

Onto the pictures - I claim no ownership for any of the pictures or ideas - all pictures have been linked to their respective blogs and recipe pages, so click on! 

I'll be doing a roundup of what I have been doing at home (all heart-related) at a later date, because I'm just too lazy to take out my CF card to upload the photographs for the time being. Also, I know that all the pictures below are "heart" related, which is cliched, but I really do like hearts (and butterflies) and what better time than Valentine's to have heart-shaped food? =)

Surprise your loved one with a hearty breakfast (pun-intended):
French toast perhaps? 


Or some crepes if you are so inclined?
Mmmm chocolate pancakes!
Sweet Potato pancakes


Or some red velvet pancakes?

And perhaps for lunch, what about some heart-shaped pasta? =)
Heart ravioli?

A simple pasta, shaped in a heart

A heart-shaped pizza
Heart-shaped pizza AND heart-shaped pepperoni?


And for tea, here's a smorgasbord of ideas!


Hot cocoa with a pink hearted marshmallow?

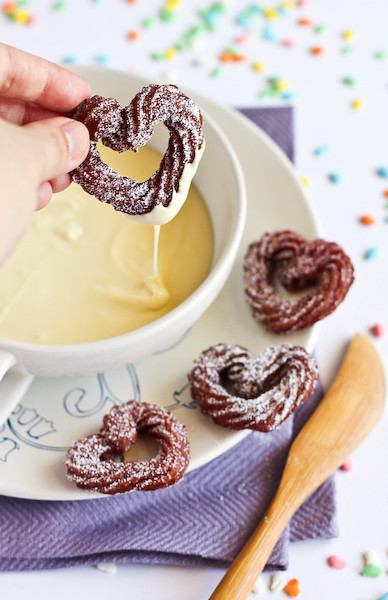
Churros
Some jelly pops for you?
YUMMO donuts!

Sweet heart pies
An apple hand pie perhaps?
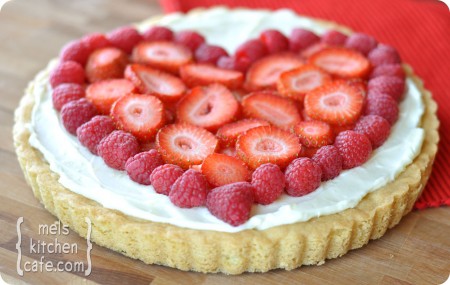
Fruit pizza decorated with fresh fruit? 
Simple puff pastry hearts!


And onto my favorite parts - dessert!!!
Red velvet cupcakes - the recipe is similar to the one I use
Or a simple chocolate cupcake with heart-shaped sprinkles?
I love this two-in-one red velvet cake idea
Gosh - it's a cake within a cake!

I like the two-tone frosting here :)
Perhaps give a hint with your Valentine ring cupcakes?
I'm pretty sure this cupcake flower bouquet will pretty much trump any bouquet if your guy bought it for you!

If you're really short of time, why not just dip some strawberries into chocolate - just be different :)
Give strawberry roses instead of roses


Some ladybug-berries maybe?
And who can forget cookies?

A vanilla version here
A chocolate version here
Conversation heart cookies by Annie's Eats - she has really good tutorials on icing and I follow her sugar cookies recipe for any cookie I want to ice!

NOT forgetting my craze at the moment - macarons!
Conversation heart macarons are so dear :)
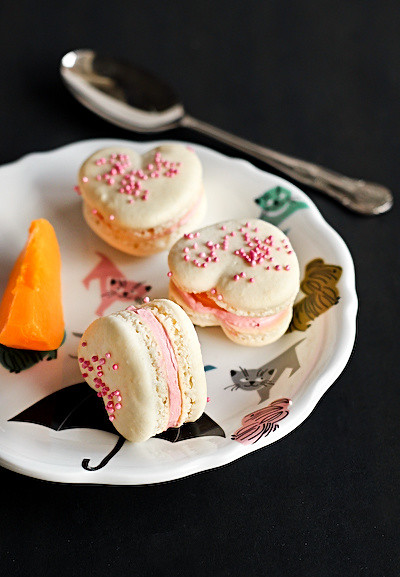
Be more literal with heart-shaped macarons perhaps? Btw, do check out Steph's blog - she has really creative ideas and wonderful photographs to match :)

For those who love flowers and cupcakes, why not this? 
Give flowers AND cupcakes at the same time!
Or cakes disguised as chocolate truffles

Finally, a little crafting to end the post
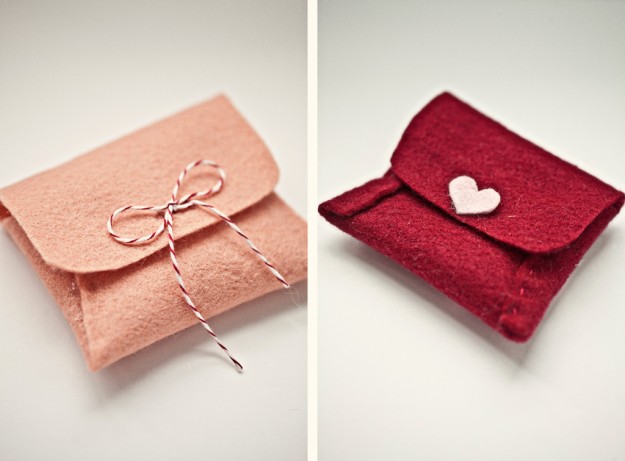
Use felt to make an envelope to keep a note for your loved one

There's tons of ideas on the internet to give you inspiration, so have a wonderful Valentine's! If you are without a valentine of the opposite sex, it's no time for consternation - use the opportunity to spend more time with your family, or your besties! They too deserve (and enjoy) love from you!

PS: I've not done any round up from local blogs because I believe most of them will be entered into Aspiring Bakers #4 and that round up will be done by Ellena at the end of the month!
Related Posts Plugin for WordPress, Blogger...