My blog has moved!

You should be automatically redirected in 6 seconds. If not, visit
http://www.unpastiche.com
and update your bookmarks.

Friday, August 5, 2011

Fresh fruit tartlets

Since I'm the host of this month's Aspiring Bakers', I figured I should post a little more than usual, and cover different types of pies and tarts to start you guys going. I've already received quite a number of entries, and all of them entice me to bake more tarts and pies! Hopefully I'll be able to find the time between my French classes and work! =S

First up, I have one of my favorite types of tarts, the fresh fruit tart. I can't remember when was the first time I tried them, but these tarts are always the first things I'll take when there's a catered event in my school. I still remember sitting through boring workshops, and looking forward to the "light refreshments and finger food" at the end. The caterer would most definitely serve this, with kiwi, peaches, blueberries, etc. But now that I've learnt to make my own, I've realized just how simple they are to make. All you need to do is to make the crust, bake it, add the cream and top it with some fruit and you're good to go! Alright I've to admit that it's quite time consuming, but what I usually do is to freeze my pie doughs (they freeze really well and I've kept some for up to 3 months!) and some are already pressed into tart tins, so when I'm ready to bake them, I just take them out, crank up the oven and I'm good to go. I also make the pastry cream ahead of time, so all I need is just to assemble on the day of baking!

In fact, the tarts you see in the photos are the result of a last-minute decision to make fruit tarts for a small birthday celebration. I had pie dough in the freezer and pastry cream in the fridge, as well as strawberries in the abundance, so these were the answer!
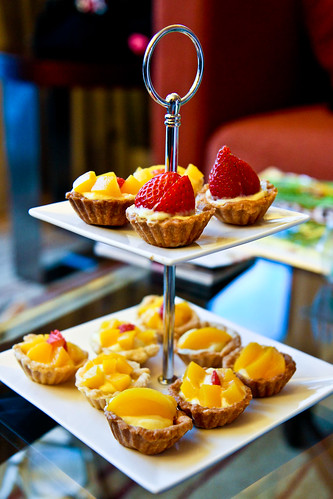
I know I could use some help with decorating the tarts. Just some of the tarts on my newly bought dessert stand :D

It was my cousin's big three-oh, and he didn't want anything huge and fancy, so he basically booked a room at MBS for the night with his fiancée, and invited my family and his to have a look around since most of us haven't step foot there. It was a small gathering of just two families, and we were supposed to head out to eat, so these were my perfectly imperfect "rustic looking" tarts which served as appetizers. I didn't have much clue how to place the peaches nicely on the tarts, so I merely diced them up. Doesn't look too appetizing but it was good!

And confession time - being a mountain tortoise (swaku) that I am, this was the first time I ever stepped foot into Marina Bay Sands! Yes really - it was also the first time to Marina Bay Shoppes for me as well >.<  

Anyway, we were lucky, because it happened to be a Saturday, and Singapore being kiasu Singapore, was having the 1230759th rehearsal for this year's National Day Parade and we had a bird's eye view of what was happening. What was even more exciting was it was a full dress rehearsal, complete with fireworks. Needless to say, we had superb "live" entertainment because the fireworks were set off THIS close to us. Spectacular really. And it was just a few fireworks but entire minutes worth of them! I couldn't get good shots of the fireworks mainly because the room was lit and the full-length glass windows were extremely reflective, but oh well, I'm glad it's captured in my mind :]

Check out the fireworks!

Because there were at least 8 of us dying to go upstairs to walk about in the Sky Garden, I really didn't have time to dilly dally. Plus the fact that tripods are not allowed up here for security reasons, most of my shots were pretty bad. I did like this photo below though, which I converted to black and white because the colors were rather washed out. The lady's enjoying her solitary time at the edge of the pool, looking out into the urban jungle that is Singapore. 



Fresh fruit tartlets
Makes 24 1.5-inch (or 4-cm) tartlets

For the pastry crust: 
I used half of my Foolproof Pie Dough recipe. 

For the pastry cream: 
I used a quarter of the Pierre Herme's recipe.

For the topping: 
Fresh fruit or canned fruit, of your own preference.
I used 2 whole canned peaches and about 80g of strawberries.

For the glaze (optional):
1 tbl apricot jam
1 tsp hot water

To assemble: 

  1. Prepare the pie dough according to instructions in the recipe. After resting in the fridge, line the tart tins with the dough and freeze for 30 minutes before baking. Line the tarts with pie weights or dried beans and bake for 25 minutes at 170°C, or until golden brown. 
  2. While waiting for the tarts to bake, prepare the pastry cream if you haven't. You have to refrigerate the pastry cream for at least 2 hours before using. 
  3. Cut and wash the fruits that you wish to use on top of the tarts. 
  4. In the meantime, prepare the glaze for the tarts. Add the jam into the hot water and mix until well combined. Allow to cool to room temperature. 
  5. After cooling the tarts, spoon the pastry cream into the tarts (I prefer using a piping bag), and top with the fresh fruit. Add the glaze to the fruit and you're all done! :]
Janine's jots: 
  • Taste: Like I said in my previous entry, I love the pastry cream. I also like this pie crust a lot. Be sure to use good quality butter because the buttery taste is very evident in pie crusts. The combination of a sweet, slightly sour strawberry, with sweet pastry cream and a buttery crust is heavenly. 
  • Texture: Like the melding of tests, you get different textures in one bite - the slight give of the fruit, the silkiness of the cream, and the flakiness of the crust. LOVE. 
  • Serving size: The guys were able to finish this whole, as in, one bite per tartlet. This actually made for neater eating because then the fruit and pastry cream wouldn't threaten to spill out. You can easily finish one in three small bites and they're really addictive too :] Be sure to make more if you're serving it for more than 5 people. 
  • Storage: After assembling the tart, do sure to refrigerate it and consume within the day. This is because the pastry cream does not hold up well in heat and will liquefy, resulting in topsy fruit toppings. The crust will also begin to absorb the moisture of the pastry cream. Separately, the components will keep well for at least a week in the refrigerator. 
  • Would I make this again?: Fo' sho! [street speak for "for sure" if you didn't get it.]
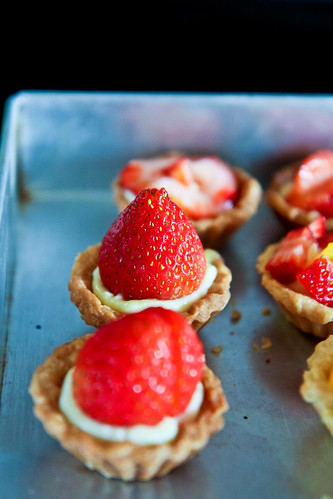
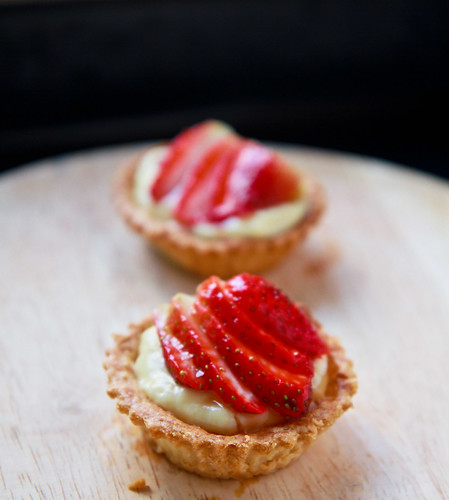
Whole-strawberry tarts. Delicious. 
Messily arranged tarts, packed in my tupperware ready to go to MBS!

This will be my first entry to Aspiring Bakers #10: Easy as Pie (August 2011), hosted by myself. I have actually made a few other types of pies and tarts, but I just don't have time to upload the photos and do up blog entries for them, so fingers crossed! I'm hoping to clear my work before the National Day holiday so that I can indulge in more baking! 

Wednesday, August 3, 2011

Baking Basics: Pastry Cream (or crème pâtissière)

I've been wanting to do a series of posts entitled Baking Basics for a long time, because I know that I only started seriously baking (or rather, baking anything at all) since last December and since then I do believe I've improved by leaps and bounds and I know that this invaluable experience should be shared, so that other novices like myself can learn and not commit the mistakes I did, and at the same time, have in their repertoire basic recipes for anything. BUT, I somehow never got around to doing it because ... I don't know why. I have many of such posts saved as drafts on my dashboard but none of the photos I took made the cut. I figured that number 1, with the insane number of photos I took of my process making my pastry cream, or crème pâtissière, there was a higher chance of nicer photos and number 2, since I'm hosting Aspiring Bakers #10: Easy as Pie (August 2011), and many would be attempting tarts, it would be selfish of me not to share this wonderful recipe that I love.

This recipe is from my pastry idol, Pierre Hermé. I've tried a number of his recipes including puff pastry, macarons, mousses, and he has never failed me. I have tried quite a few recipes for pastry cream, mainly because I make a small amount each time (see the one by Donna Hay here), but I find myself returning to this recipe time and again. I especially like the silkiness and lightness of this cream.

Anyway, to share a little bit of happy news, I've also started taking up French lessons, which has been a dream of mine since forever! I've always wanted to learn French, in fact I still remember when I fell in love with the language - it was the first time I heard French being spoken in Switzerland. The fascination continued when I actually stepped foot into Paris and the rest of France. And the fascination has grown. I love the culture, the food (especially the pastry!), the romanticism of the language and especially the history. Although France is no longer the superpower that it once was decades ago, singlehandedly building up the European Union with the other 'pioneer members', vestiges of France still remain - you see it in the bakeries in Vietnam and the straight wide roads in Cambodia.

So, digression aside, I actually translated the recipe below (just the ingredients since the method is entirely in my words) from the French tome which I'd bought earlier this month. My dad called it counting my eggs before they're hatched, but I call it a culmination of a childhood dream. Having a huge expensive French book lying around and me unable to understand it just forces me to want to know more French, so that I can understand and unlock the mysteries of the recipes before me. I know it'll be some time before I'll be able to read or write fluently, but I know I'm getting there, and for that, I'm really happy that I finally bit the bullet...after a decade of procrastination. (Really, I myself can't believe it's been 10 years?!) Previously I didn't have the money nor the time to learn, but now that I do (not really actually but who cares, I'll fit it in anyhow), no one's going to stop me! In fact, if I'm lucky, I just might be able to visit Paris again sometime this year or next, so I'll have opportunity to practice my French!

Till then, here's the step-by-step (kinda) photographic method followed by the somewhat bastardized version of the recipe below!

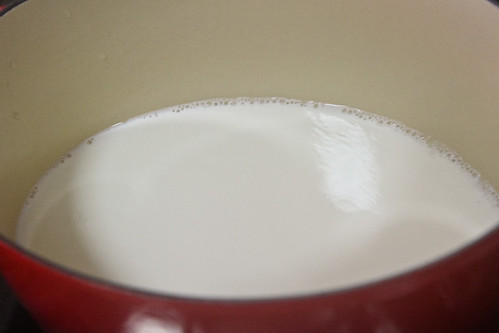
In a saucepan, heat up your milk until it boils. 
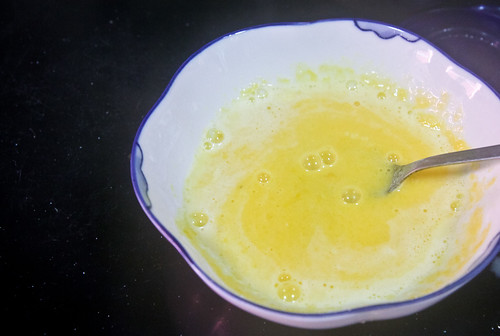
In another bowl, combine the yolks together with the sugar and cornstarch. Here, I've already begun to temper my boiling milk with the yolk mixture. Do whisk continuously to prevent the yolks from cooking!
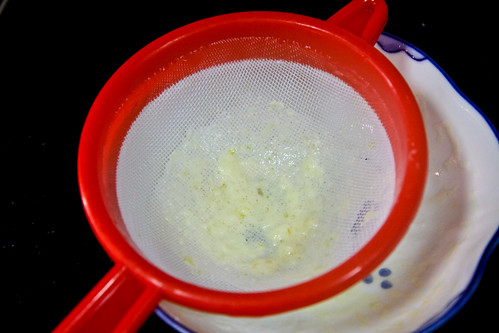
Having whisked it all the boiling milk, strain the mixture back into the saucepan. See the scrambled bits left on the sieve!
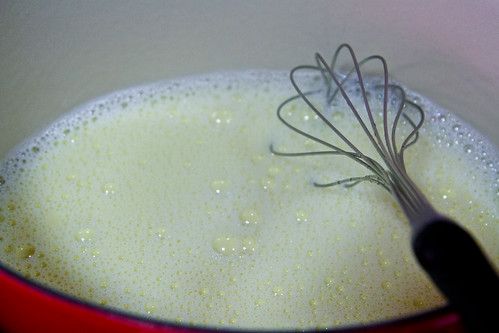
Continue whisking the mixture again, bringing it up to a boil. 
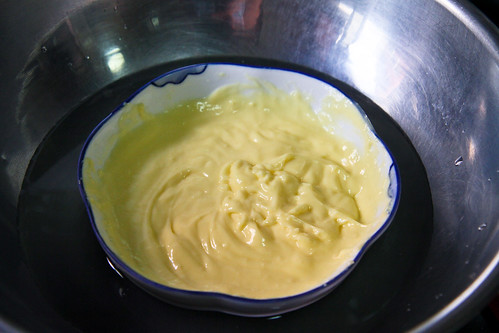
Remove the mixture from heat the moment it reaches this texture. I placed the mixture into a bowl and into the ice bath to stop the cooking. 
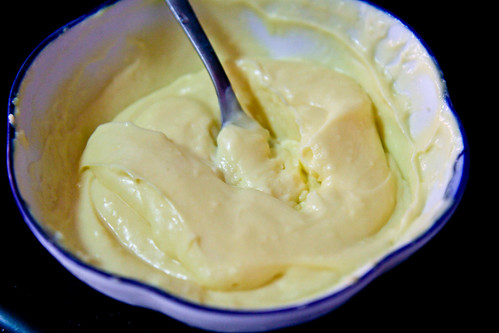
This is the mixture after adding the butter. See that the mixture is lighter in color and slightly thicker than the previous photo. 

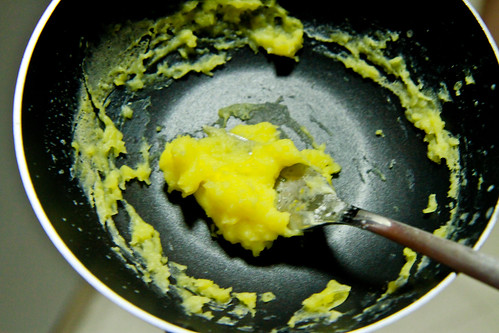
And here's what NOT to do. The white balance in the photo is a little off because I had to take it with flash and it's really blur since it's my phone photo. Anyway, this is the result if you try to speed up the process by using a medium-high heat - which is an absolute NO-NO because the pastry cream thickens way too fast for you to control the heat and it basically just clumps like what you see below. Now you know!

Fully cooked eggs in the pastry cream :/

Pastry Cream
Makes 2½ cups or 900 g
Translated from La Larousse du Chocolat by Pierre Hermé

2 cups (500 g) whole milk
4 egg yolks (about 80g)
6 tbsp (75 g) granulated sugar
3 tbsp cornstarch, sifted
2½ tbsp (40 g) unsalted butter, at room temperature
½ tsp vanilla extract


Method:
  1. In a small saucepan, bring the milk to a boil.
  2. In another bowl, combine the yolks, sugar and cornstarch together and whisk well.
  3. Once the milk has reached a boil, temper the yolks by whisking in a small portion of the boiling milk into the yolk mixture.
  4. Continue whisking in the rest of the hot milk into the tempered yolk mixture.
  5. Strain the mixture back into the saucepan using a sieve to remove any scrambled bits of egg.
  6. Heat the saucepan over a medium fire and whisk vigorously until the mixture returns to a boil.  Continue whisking for 1-2 more minutes over medium heat until the cream thickens. You will notice your whisk leaving trails in the cream. Once the cream has thickened, take it off heat and pour it into a bowl in an ice bath to stop it from thickening further. Continue whisking the mixture until you get a smooth mixture.
  7. Once the cream has cooled to about 30°C (use your finger to test and it should be slightly warm – around your body temperature), slowly add in the cubed butter gradually in a few portions and stir in the vanilla extract.
  8. Once the butter is fully incorporated, cover it with plastic wrap and store it in the fridge until you are ready to use it. Make sure the plastic wrap touches the surface of the cream so that a film will not form over it.

Janine's jots: 
  • Taste: I like the small addition of vanilla and I find it indispensable because I'm not an avid fan of an eggy test. HOWEVER, I do have to say that the addition of the butter does help and I've tried skipping out on the vanilla and the cream doesn't taste as eggy as other recipes. 
  • Texture: Silky, smooth, creamy, what more should I say? 
  • Serving size: What you see above is the full recipe which I actually seldom follow since I don't bake that much anyway. I have tried halving and quartering the recipe and it stills works perfectly! A word of caution though, make sure you use an appropriately sized saucepan for the smaller amounts otherwise it'll be pretty hard. 
  • Modifications: None really. 
  • Storage: This can be made 2-3 days in advance and stored in the fridge. I do not advance freezing it or keeping it for more than a week in the fridge.
  • Would I make this again?: Definitely - it's my go-to recipe for pastry cream and I've been using it in tarts, in profiteroles, eclairs, etc!
PS: If you've read till this part of the long post, thank you! I tend to write rather lengthy sentences sometimes and I apologize!

Monday, August 1, 2011

Aspiring Bakers #10: Easy as Pie (August 2011)

Time really flies! I never expected my turn to be the host of Aspiring Bakers to come so soon but it has and I'm glad to announce that this month's theme is "Easy as Pie". I'm sure some of you would have heard of this saying or simile before, as easy as pie, which is strange, because I know that making pies is not the easiest thing for a new baker to do! Therefore this month, I hope to challenge you to bake up any type of pie you can think of! Bake any type of pie you can think of - apple pie, pecan pie, pumpkin pie, chicken pie or be creative and come up with new combinations! I will also be expanding this "pie category" to include tarts, quiches, crostatas and galettes. This includes anything with a pâte brisée, pâte sucrée or pâte feuilletée (pastry dough, sweet dough or puff pastry for you non-Francophiles). Basically anything with a crust (either top or bottom or both), so put your creative caps on and bake away! If you are unsure if what you are baking falls within this month's theme, simply just email me!

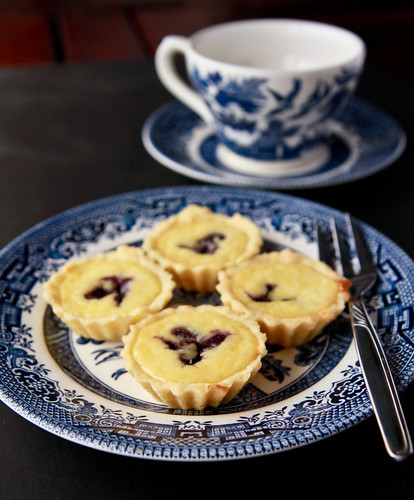
Try some blueberry cream cheese tarts perhaps? 


For those 'old hands' who have made numerous tarts and pies already, I hope to challenge you to come up with new combinations (try savoury pies if you haven't!) or try new recipes. For those novice and new bakers (like me), don't be intimidated by the thought of making pie or tart crusts (or even puff pastry) - it really isn't that difficult and trust me, you'll get addicted to homemade pies after you've tried! Hopefully, after the month of August, each Aspiring Baker will realize that baking pies are really, as easy as pie :]

Or some fresh fruit tart?

Now onto the details of this event:

Who can participate? 
Everyone who is interested! If you don't have a blog, just send me a photograph and the recipe and I'll post it up in the roundup.

How to participate? 
  1. Bake a pie or tart or pastry for this August's theme. 
  2. Post it on your blog between 01 August 2011 and 31 August 2011. Your post should include the recipe or the link to the original recipe. Any entries posted outside this date range will not be accepted. The roundup will be posted on 01 September 2011. 
  3. Please copy and paste the following sentence when posting your blog entry. Entries which do not include this sentence will not be accepted. The sentence is: "I am submitting this to Aspiring Bakers #10: Easy as Pie (August 2011), hosted by Janine of Not the Kitchen Sink!" Please include the links back to this entry here. 
  4. When you have posted your entry, please send me an email with the subject title "Aspiring Bakers #10" and email me at ask.thekitchensink@gmail.com in the following format:
Your name or nickname:
Your blog name: (omit this if you do not have a blog)
Name of your bake:
URL of your post:
URL of your photograph: (One photo for each entry, preferably less than 500kb) - or you can attach a photograph in the email.


Have fun baking!
Saturday, July 30, 2011

3-ingredient Chocolate Swiss Roll

I have a really bad habit. I tend to go grocery shopping when I'm hungry. And it's bad because this is why - you end up buying a whole lot of groceries and stuff that you don't need and probably won't use until it's reaching its expiry date. Take my desiccated coconut for example. I bought it months ago when I was grocery shopping and had my mind on eating some Anzac cookies, but well, it never happened :/

Another bad habit I have, which is related to the previous one is that I tend to bake when I'm hungry. Which is really really bad. I try to speed the process of baking a lot by upping the temperatures sometimes (which is always a bad thing and explains why I get burnt tops) and when the baked product is done, I take it out of the oven, give it a few blows in a bid to cool it so that I can sink my teeth into it. I have burnt my tongue and throat more than a few times because of this. But what can I do? I'm ravished by the time it's baked!

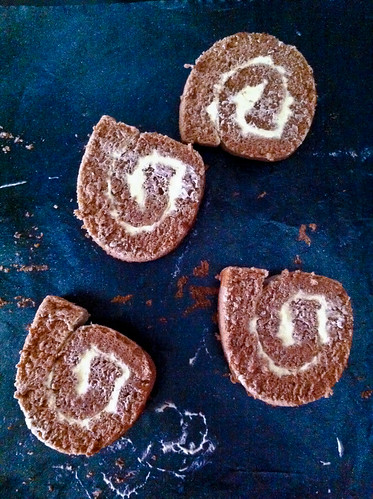
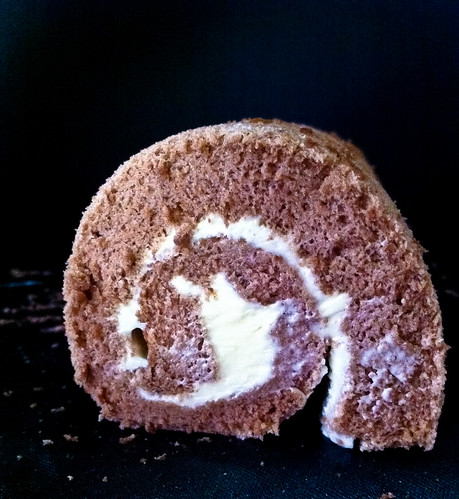
The point of saying this is well, I know the photos from the swiss roll previously weren't that pretty, and I specifically reminded myself to take nicer photos this time, but guess what? I happened to bake right before tea time, and by the time the cake was cool and rolled together with the filling, I was so hungry I could have eaten an elephant! So what happened was that I whipped out my phone from my pocket, hastily took a few shots before gobbling the slices down. And well, my brother had my camera, so that was another excuse ;p I wasn't alone in gobbling the slices down though, my parents were also stuffing themselves crazy with the slices because they were really fluffy and yummy and well, it was tea time!

I'll be submitting this swiss roll for this month's Aspiring Bakers #9 Swiss Rolling Good Times, hosted by Lyn. It's using the same recipe I posted here, but with a slight chocolate variation. 

This is what happens when you become so hungry you don't have time to put the slices on a nice plate to take a photo. 

For the benefit of those lazy to click on the link to my basic sponge cake recipe, I reproduce it here, complete with how to make it a chocolate sponge cake. 

Basic Chocolate Sponge Cake
Adapted from an unknown, very popular Japanese recipe a long time ago
Makes a 30cmx30cm cake

4       large eggs 
60g   castor sugar
30g   all-purpose flour
10g   cocoa powder 


Method: 
  1. Separate the egg whites from the yolks. 
  2. In a bowl, whisk 30g sugar into the yolks. Sift the flour together with the cocoa powder, before sifting them into the yolks. Mix all together until you get a smooth paste. 
  3. In another bowl, whip up the egg whites until foamy, before adding the remaining 30g of sugar. Continue whipping until you get shiny, stiff peaks. Mix some of the whipped egg whites into the yolk mixture to lighten it up before folding the remaining whipped egg whites into the yolk mixture. 
  4. Pour into a lined baking tray and rap the tray against the counter to get rid of any air bubbles. Bake in a preheated oven at 180°C for 10 minutes. 
  5. Leave the cake to cool in the tray for about 10 minutes before removing it to cool on the cooling rack. 


To make it a swiss roll: 


Swiss Meringue buttercream filling
Adapted from Martha Stewart here

80g castor sugar
60g egg whites
160g unsalted butter, diced into 3-cm cubes
A few drops of vanilla extract

Method:

  1. Prepare a bain marie. The pot of water should be simmering and not boiling. 
  2. Dice the butter into 3-cm cubes and allow them to stand at room temperature or until softened. 
  3. In a mixing bowl, whisk together the egg whites and castor sugar. Place the mixing bowl over the bain marie and whisk constantly, until the sugar has completely dissolved and the egg whites are warm. You can use your fingers to rub the mixture in between your fingers to ensure that there are no undissolved particles left. 
  4. Remove the mixing bowl from heat and beginning whipping the mixture at high speed until it becomes thick and glossy. Once soft peaks are achieved, beat at medium speed and begin adding the butter cubes one at a time until it is fully incorporated. The mixture will first appear curdled before reaching a smooth silky texture. At this point, add in the vanilla extract. 
  5. Continue beating until you get soft peaks and there you have it - swiss meringue buttercream! At this point, it will be a little soft because of our humid hot temperature, so do refrigerate it until needed. 


Janine's jots: 
  • Notes: You can choose to use cake flour instead of all-purpose flour if you want a finer crumb. For the filling, you can use a basic whipped cream filling or anything that is your fancy. I used Swiss Meringue buttercream because I was using it later to top some cupcakes and it was convenient. 
  • Taste: The sponge cake by itself may not be sweet enough for some, so I suggest upping the sugar in the recipe to a maximum of 100g. Alternatively, just use a sweeter filling if you're making it into a swiss roll. That's what I did. Note that the buttercream recipe produces buttercream that isn't overly sweet, so do fill free to add more sugar - the original recipe calls for about 120g of sugar. 
  • Serving size: This recipe fits the 30cm by 30cm tray perfectly. As you can see, this cake is definitely 'thicker' than the previous one because I used the right tray for the recipe!
  • Storage: The cake keeps well for weeks in the fridge! I've tried keeping it for a month before using it and it still tastes as good. At room temperature, it stores well for about 3-5 days (without any filling). If you have a whipped cream or buttercream filling, do store the cake in the fridge. 
  • Would I make this again?: Definitely! I can imagine so many other variations I can do with this recipe - substituting the cocoa with nut flours, matcha powder, black sesame, etc. Just make sure that the total 'powder' weight is 40g. 

In pictures: 
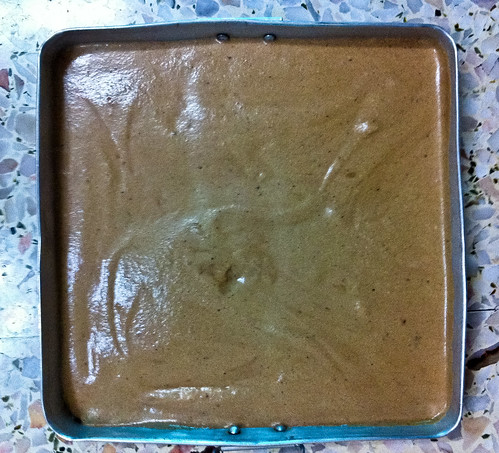
All ready for the oven!
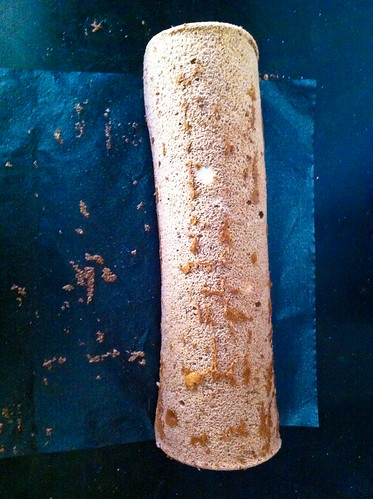
Remember to remove the 'skin' if you want a nice-looking swiss roll!
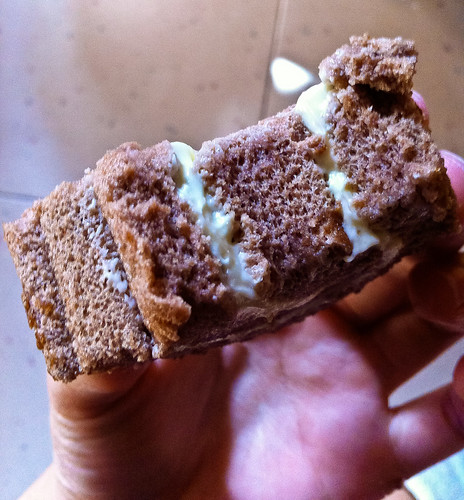
Check out the innards - it really feels as if it can go boing-boing!
And a final side view of my swiss roll.

Friday, July 29, 2011

Basic Sponge Cake, rolled.

I've been rather uninspired to bake any type of cake lately, content to make muffins and cupcakes instead; but luckily for me, I took a look at Aspiring Bakers and was inspired again. This month's theme is Swiss Rolling Good Times, and it's the 9th edition, hosted by Lyn. I'm actually quite amazed at how our little group has grown and how active I've been in participating. To date, I have tried to submit at least one post for each theme, and I'm always excited to see what the other Aspiring Bakers come up with, because I tend to get inspired when blog-surfing. 

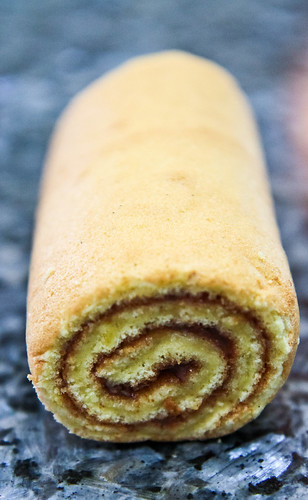
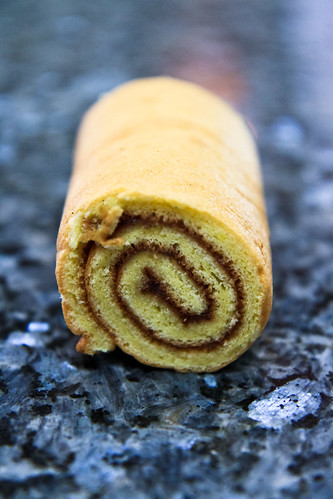
I have to admit that I'm not a huge fan of swiss rolls, which is kind of strange, because I like sponge cakes, which are essentially swiss rolls but flat. Anyway, I really like this sponge cake recipe a lot - I've been using this for a while now and been alternating this with another basic recipe when I need sponge cakes as a base for my other cakes. This recipe is probably the shortest you'll see anywhere - it only consists of 3 ingredients! I'm not sure why though, when I finally decided to make a swiss roll out of it, the sponge cake didn't turn out too good - it's supposed to be a lot thicker than what you see in the photos but it turned out rather flat. I think it might be because I used a different sized pan and downsized the recipe incorrectly?


Basic Sponge Cake
Adapted from an unknown, very popular Japanese recipe a long time ago
Makes a 30cmx30cm cake

4       large eggs 
60g   castor sugar
40g   all-purpose flour


Method: 
  1. Separate the egg whites from the yolks. 
  2. In a bowl, whisk 30g sugar into the yolks. Sift in the flour, stirring until you get a smooth paste. 
  3. In another bowl, whip up the egg whites until foamy, before adding the remaining 30g of sugar. Continue whipping until you get shiny, stiff peaks. Mix some of the egg whites into the yolk mixture to lighten it up before folding the remaining whipped egg whites into the yolk mixture. 
  4. Pour into a lined baking tray and rap the tray against the counter to get rid of any air bubbles. Bake in a preheated oven at 180°C for 10 minutes. 
  5. Leave the cake to cool in the tray for about 10 minutes before placing it on the cooling rack. 


To make it a swiss roll, 
  • To make your rolling easier, do roll up the cake while its still warm, right after removing it from the tray. Roll it together with your lined baking paper and leave it to cool, rolled up, on the cooling rack it's cool enough to add your filling. 
  • As with any swiss roll, you can use any form of filling you want. If you wish for a whipped cream or buttercream filling, do prepare it while waiting for the cake to bake. I chose to go with my homemade strawberry-apple-rhubarb jam, which was slightly sweet and tart. Be generous with the filling, because otherwise, the cake will taste rather plain. 
  • You can choose to put your swiss roll in the fridge for the flavors to meld together or you can choose to slice it up and consume it right away!


Janine's jots: 
  • Notes: I weigh my egg whites and yolks, and I tend to use about 120-130g of egg whites and 70-80g of egg yolk. Also, if you want a cake with a finer crumb, do swap the all-purpose flour with cake flour or substitute a little cornstarch with the all-purpose flour.
  • Taste: If you're not a huge fan of the 'egg-y' smell, I would advise adding about 1tsp or less of vanilla extract. Otherwise, this makes a really nice sponge cake. 
  • Serving size: This recipe fits the 30cm by 30cm tray perfectly. I've tried using 3 eggs instead, and using a smaller 10-inch rectangular tray (the cake you see below).
  • Storage: The cake keeps well for weeks in the fridge! I've tried keeping it for a month before using it and it still tastes as good. At room temperature, it stores well for about 3-5 days. 
  • Would I make this again?: Definitely! I have been using this sponge cake recipe a lot, because I like the fact that it doesn't use any form of oil or butter but still tastes as good, or it not better than those with!

Oops I can't slice my swiss roll properly :/

I know the photographs aren't too pretty and aren't too convincing, mainly because I made this just before tea, so I was scrambling to get it done so that I could eat it! The other reason is really, I'm not that good at making swiss rolls. The many times I've tried, the cakes turn out to be failures - either they are too thin, or cracked, or just inedible. Although not too aesthetic, I've to say that this was a pretty good attempt on my part, after the many failures. I'll definitely do trying this again (making my recipe into a swiss roll) so that I can convince some of you out there to try this. It's a really simple and short recipe, and produces fantastic results! 

Wednesday, July 27, 2011

Som Tam ส้มตำ, or Easy Thai Salad

I read CNNGo's list of the worl'd 50 most delicious foods with much joy and pride, mainly because a number of Asian delicacies, especially those of my home country and country of residence made it to that list. And although I might not agree with them on everything, I do agree that Massaman curry (their #1) is absolutely delicious, and so is som tam, which made it to #46 of the list.

And coincidentally, this is the same thing I'm going to attempt from Stephane Reynaud’s 365 Good Reasons to Sit down to Eat – the Easy Thai Salad. It’s rather ubiquitous here in Singapore and Malaysia, and is really easy to whip up considering that we would probably have most, if not all the ingredients in our kitchen. I remember when I was in Thailand, I would order the Thai Mango Salad or Papaya Salad (generally referred to as Som Tam (ส้มตำ)) as a starter each and every time because it really “wakes up your palate”, or what the Chinese call 开胃, literally 'opening your appetite'.

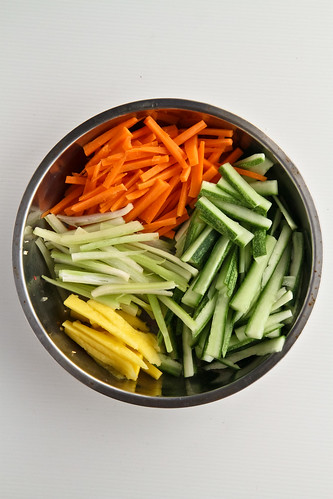
What I love about som tams in general is that they are slightly spicy, slightly sweet and slightly sour, with lots of crunch and and different textures, and this recipe fits the bill perfectly. I have to say that I was slightly doubtful given that this was an Asian recipe written by a non-Asian, but Reynaud got it right :] For this recipe, I omitted the prawns, scallions and vermicelli as I wanted the salad to accompany my meal which contained chicken, and I didn't want it to be overly filling. This recipe really is flexible, in fact, all that is constant is perhaps the "sauce" - you can do a fruit som tam if you wish! 

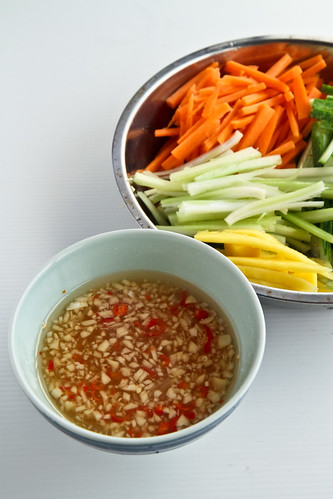
Components of the salad before mixing them together :]

As with my vacherin post, the recipe below is from the book, but do note my modifications below!

Easy Thai Salad

Ingredients: 
200g chicken breast fillet
2 carrots
2 bulb spring onions 
3 garlic cloves
1 celery stalk
1 bird’s eye chilli
300g rice vermicelli
1 tablespoon sugar
3 tbl fish sauce
3 tbl sunflower oil
1 tbl lemon juice
200g fresh-shelled prawns

Method:
  1. Chop the chicken breast into small cubes, cook it in boiling water for 5 minutes.
  2. Peel the carrots, shred them finely.
  3. Slice the spring onions and celery, peel and finely chop the garlic and chilli.
  4. Cook the vermicelli according to the instructions on the packet.
  5. Combine the sugar, fish sauce, sunflower oil, lemon juice, garlic and chilli.
  6. Mix all ingredients with the prawns. 


Janine's jots: 
  • General comments: As with most of Reynaud's recipes, his instructions are rather brief. Some changes I would have made were to shred the chicken breast instead of cubing them, and boiling them first, followed by the prawns, and finally the vermicelli. 
  • Taste: For a more authentic Thai meal, do use palm sugar instead of normal granulated sugar. Some additions I would suggest, which I added in my salad would be a couple of dried shrimp, as well as chopped peanuts as garnishing. If you have a mortar and pestle, do pound the garlic and chillies (I used more than 1) together to 'release' the flavors, and gradually add the others. Do use lime juice instead lemon juice if possible, and add a couple of tomatoes, green papayas and tamarind juice to the mix for a more "thai" flavor. 
  • Storage: This salad stores well in the fridge for 1-2 days only, because the vegetables tend to lose their crispness. Best to consume right after, once you've combined the paste together with the vegetables. 

A vegetarian Thai Salad (minus the fish sauce of course)

Well, there is a reason why som tam made it to the list, and seriously, besides fish sauce, most of the ingredients are really easily available, especially if you're located in Southeast Asia. If you're not, fret not - I bet the Asian grocer nearest you will definitely have fish sauce, as it's a commonly used condiment not only in Thai but in other cuisines as well. If you are trying to recreate what you've eaten in Thailand, do note the suggestions I have made. I didn't have the opportunity to use my mortar and pestle which is located back home in Malaysia, so I had to make do, but the salad still tasted good.  

If you're a cook and you have problems deciding what to cook everyday, I highly suggest buying Reynaud's book - (I'm not paid to say this) - I find that although this book is pitched to an audience of more experienced chef (for instance the preparation time for this salad stated 10 minutes but I took a lot longer than that just to chop my veggies) and his instructions are sometimes brief, looking at the recipes each day does give you inspiration to cook, and indeed, reasons for you to sit down to eat :] 

Monday, July 25, 2011

Vacherin with seasonal fruit


This is my second recipe from 
Stéphane Reynaud’s 365 Good Reasons to Sit down to Eat book, as part of the 365 challenge. This was suppose
d to be made on the 15 July, but is rather belated (again) because I’ve been inundated with lots of work and haven’t been able to blog as much as I would have liked although I still am baking quite a bit.

Anyway, I 
first chose this recipe without knowing much of what it was. In fact, I had heard of a cheese by this name, 
but never knew th
at "vacherin with seasonal fruit" meant meringues with fruit. Of course, I have since rectified this by ordering vacherin desserts at some of the French establishments I visited here and there, so I now have 
quite a good idea of what a vacherin tastes like, and the different ways you can plate it. 

A vacherin (pronounced as vash-ran) is basically a dess
ert consisting of meringue shells, layered with whip
ped cream, ice cream, fruit, etc. It's a classic French dessert and this vacherin is no different. Reynaud called for a vacherin with all of the above actually, but since I didn't have a fruit sorbet complimenting the fruit in the vacherin, I decided against it and had crushed meringues with fruit and whipped cream instead :]

As for seasonal fruit, well berries are in season now, but since most of them are expensive, I decided to go with strawberries as well as a local fruit, the mango. Mangoes are in season now, together with durians, rambutans and mangosteens, but I decided to get myself a Malaysian mango. It's slightly greener than its Thai or Indian counterparts, and tastes slightly different from them too. A little astringent is what I would describe it. I thought the mango was sufficiently sweet, as I often find Indian mangoes a tad too sweet. 


***

Note: This is the exact recipe from the book. I found it rather vague, so please read comments below for some of my modifications. 

Vacherin with seasonal fruit 
Preparation time: 10 minutes
Serves 6 


800g fresh fruit
Juice of 1 lime
Fruit liquer (use the same as the fresh fruit)
3 store-bought meringues
300ml whipping cream
100g sugar
Fruit sorbet 

Method: 
  1. Cut all the fresh fruit into cubes, puree half of it with the lime juice and the liquer. 
  2. Crush the merigues, whip the cream into a chantilly with the sugar. 
  3. In glasses, arrange layers of fruit, coulis, meringue, chantilly and finish with a scoop of sorbet.

Janine's jots: 
  • General comments: As store-bought meringues are not easily available here (I doubt they even are), I made my own meringues by using a recipe from Donna Hay. Please see below for recipe. Also, to make the chantilly, whip the cream using a mixer and gradually add in the sugar, whipping until soft peaks are achieved.  
  • Taste: I found the dessert a tad too sweet and I'll definitely be reducing the amount of sugar used in the chantilly. 
  • Texture: I liked how the crispness of the meringues contrasted with the sweetness of the chantilly and the tartness of the fruits. The different textures melded really well. I can imagine how wonderful the vacherin will taste with an additional scoop of sorbet on top! Ps, apple sorbet with diced poached apples work really well (I had that in a French bistro!) :]
  • Serving size: As you can see in the pictures, 1 meringue disc, 1 strawberry and some mangoes actually formed 3 layers in my tiny vacherin. I poured the whipped cream in between these layers, alternating with the pureed fruit and repeated the layers. Do halve the recipe as this recipe will produce a lot of vacherins!
  • Storage: The meringues store pretty well at room temperature - be sure to store them in an air-tight container and they should last for a week before turning soft. Once you have assembled the vacherin, do consume it immediately as it does not keep well - the meringues will soften because of the liquid in the dessert. 

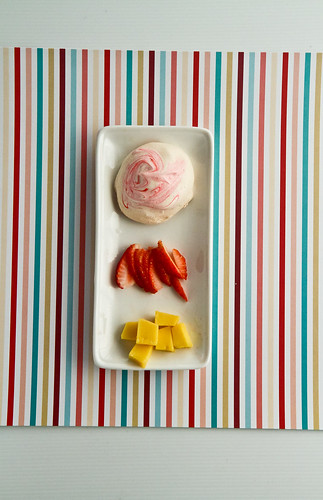
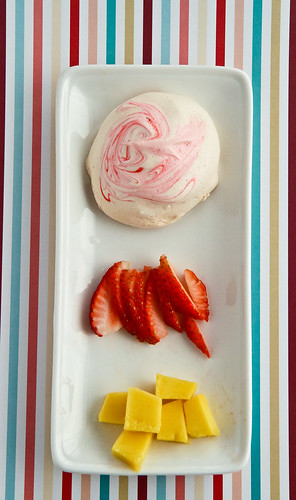
Part of the components of the vacherin.
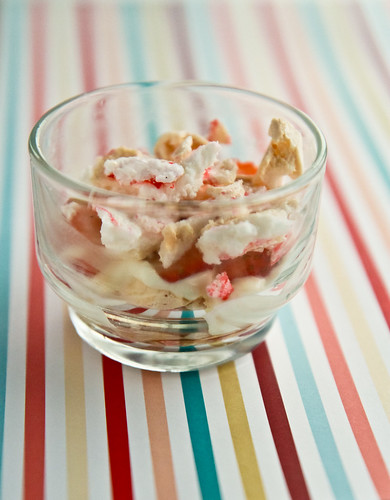
Half a vacherin serving, sans the sorbet.

*Note: The Aussies and Kiwis call this a pavlova, but it's basically the same thing, meringues with whipped cream (or chantilly if you must) and fruit. This recipe produces 10 fist-sized meringue discs, which is perfect for 2-3 servings of vacherin above. 

Pavlova
Adapted from Evan who adapted it from Donna Hay's Modern Classics Book 2

2 egg whites
80g caster sugar
1/4 tsp vanilla extract
2 tsp cornstarch
1/2 tsp white vinegar
Red food coloring 

Method: 
  1. In a bowl, whisk the egg whites until foamy. Gradually add in the vanilla extract and fold in the cornstarch and vinegar. Whip until you get soft shiny peaks. 
  2. Using a spatula, dollop the meringue onto a baking tray lined with baking paper. To create colored swirls, dip a toothpick into red coloring and swirl it into the meringue. 
  3. Bake the meringues in a preheated oven of 120C for 50-60 minutes and leave the meringue in the oven to cool. 

I really enjoyed making this, as it meant stepping out of what I was comfortable with and exploring new foods. The meringue recipe is a keeper as it does produce meringues which are crisp on the outside and chewy on the inside - in essence, the perfect meringue. I can imagine all the other things I could do with this meringue recipe - Eton's Mess is something else that comes to mind that is really very similar to a vacherin. Anyway, if you're interested in what other dishes the other cooks are whipping up in their kitchen, do head down to Murdoch Books’ 365 Challenge Blog to have a look!

Tuesday, July 19, 2011

A to Z of Australia: C is also for Cakes!

I was thinking about cakes the other day. (Who am I kidding? I think about cakes all the time!)

Anyway, as I was saying, I was thinking of chocolate layered cakes, or entremets for my dad's upcoming birthday and a few cakes that I tasted whilst in Melbourne occurred to me. I decided to take a look at them once again, and naturally, I started salivating and mooning over them, again. During my short stay in Melbourne, I think I consumed at least 3 servings of cake and macarons per day, all in the name of 'research'. And this was on top of my daily meals, where I scouted out the best food that Melbourne could provide!

I decided that these exquisite cakes (and bakeries) required a post all of their own, so this is yet another C for my A to Z of Australia, in addition to the one about Chokolait. Do scroll down for more details on the stores!

A common sight outside the bakery.

Remember the cup of hot chocolate I had from Chokolait? Well, after that cup of hot chocolate, I found myself wandering further down Little Collins Street, and lo and behold, I found myself in front of a slate-grey, nondescript storefront which bore the words Le Petit Gateau in cursive grey writing. It really reminds me of the French bakeries, which are similarly located in buildings with straight boring lines (office buildings) and surrounded by other similar buildings.

You can't see from this photo on the right, but there are huge panes of glass for you to peer inside the bakery to see what goodies they have for the day (which are the same everyday actually).

Having seen quite a few bakeries in my trip so far, I wasn't too impressed with the prices of the cakes - each slice retails at $8 and tarts around $5-6 (I can't remember exactly). Because I was so full from the hot chocolate, I decided on having just one cake, and I decided on the brownie and passionfruit chocolate gateau even though I'd just consumed a copious amount of chocolate. This was because I'd seen rave reviews on urbanspoon. And mainly because I also fall prey to any chocolate cakes in display cases. Seriously - at any bakery - the cakes which never fail to draw my attention are the chocolate ones, especially those chocolatey-nutty-praline type of cakes with just the right amount of fruit. I'm predictable that way.

Anyway, back to the cake.

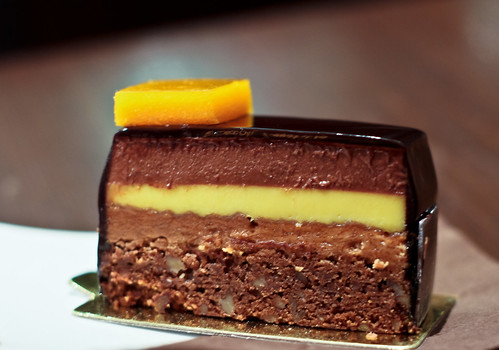
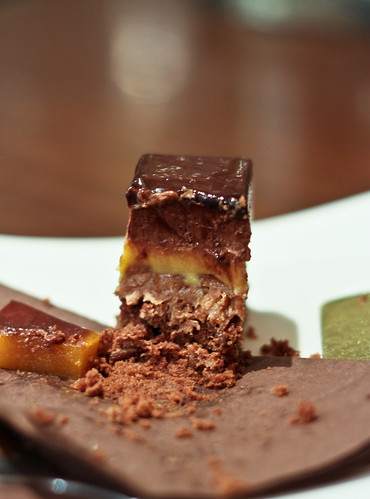
As its name suggests, it has a brownie base, followed by a layer of crunchy praline, passionfruit custard, chocolate mousse and finished off with a chocolate ganache topping with a passionfruit jelly. The flavour combination was phenomenal. I've to admit that till now, I've never had a passionfruit-chocolate combination anything, be it a tart or bread or any other dessert, so I was really very impressed with how well this combination went. The tanginess of the passionfruit went perfectly with the richness of the mousse and the brownie. I also liked the fact that they didn't go with the normal jocondes or dacquoises here but went instead with a walnut-laden brownie, which provided a lovely contrast to the other textures - especially the mousse in the cake.


Le Petit Gateau's Brownie and Passionfruit Chocolate Gateau


Look at how gooey the mousse is. LOVE.


Of course, my dessert journey doesn't end there although it was a darn good start. The next day, I mapped out my route pretty precisely because it was my last full day in Melbourne! After visiting some markets and other touristy attractions, I headed first to the Parisian Patisserie Boulangerie (where I had the best almond croissant outside of Paris) and then to Burch & Purchese followed by LuxBite. I'll write about PPB another day, since I'm not sure where those photos are. Anyway, all these places are slightly North of the city centre, and are not exactly accessible by foot from the city centre. There are however many bus services that ply the area of South Yarra.

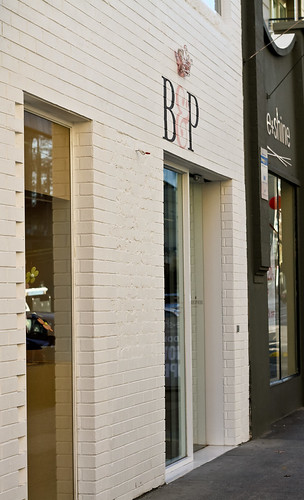
So, I'd read quite a number of blog posts on this place - Burch & Purchese, which is essentially the surnames of the 2 patissiers who decided to open a sweets wonderland. Like with many other bakeries in Melbourne, they have a very inconspicuous outside, but walk in, and be impressed. It was the first time I saw a wall of ingredients in a shop. I didn't count, but their blog states that there are more than 250 ingredients there where you can choose to go into your made-to-order cake. B&P is a lot about molecular gastronomy as well, so you also see cool things like edible greeting cards, sprays in addition to the traditional offerings of cookies and meringues.

Yet another normal shopfront. I like their logo colors though!
Check out this wall! It's only 25% of their wall because well I only had my 50mm lens and this was all it could capture without me stumbling into some shelves. 

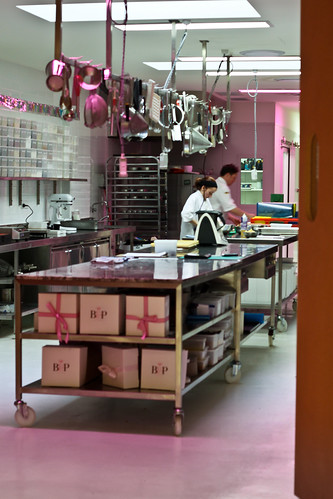
Some bloggers have described B&P as akin to Willy Wonka's, but since I wasn't privileged enough to go behind the doors, I can't say much for the magic that goes into the sweets, except to say that I was really really impressed with the clean layout of the 'studio' and with the desserts. In fact, I found it really really really hard to make my decision, but I had to make do with just one, because I was so full from consuming so many other goodies before (think Lebanese pizza, etc). I was also very happy that they were very nice about taking photographs in the bakery, very unlike other bakeries which have staff staring down at you like a hawk.


Part of where the magic happens!
These are edible flowers in edible soil!

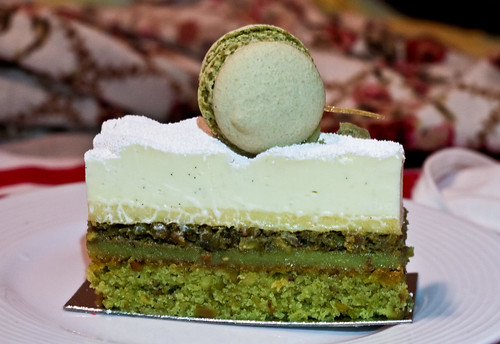
I was seriously wowed by all the cakes they had on offer because they had really traditional ingredients in unique combinations and unique presentation. In the end, I chose to have the  vanilla-pistachio-lemon-green tea, which is essentially "white chocolate & vanilla mousse | crunchy green tea meringue | lemon cream | pistachio cake | green tea macaroon | brilliant white chocolate spray" (copied verbatim from their webpage). I have to admit that in retrospect, I should have bought a few more cakes, because I kinda regret not having them after I tasted a bite of the cake when I was back at home with my friend. Beware though that a trip to B&P will not be easy on your pocket - each slice costs $9 apiece, but I think it's really worth it for the quality ingredients that go in, and the number of layers in each cake!

Oh look, that's my scarf in the background ;p

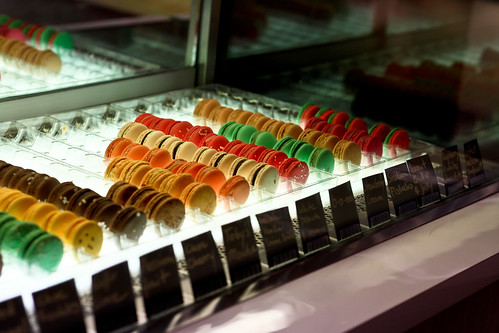
After purchasing the cake to-go at B&P, I then drove myself to LuxBite (yes I had the luxury of having a friend's car on top of staying with said friend) and got myself some macarons. I really like the image of the shop - apparently the owners of LuxBite were so enamoured of the Pierre Herme macarons that they decided to open a shop selling macarons themselves. Pretty cool huh? Good thing was that they decided against the sweet, floral French patisserie theme and instead went for French understated elegance, from their black and white finishings to white furniture and backlit macarons in a beautiful glass case. 

Today's macarons selection. 

At any one time, LuxBite has more than 16 types of macarons available, and each and every one of them look delicious! Adjacent to this display case is another storing the typical French desserts and sweets, including some unique ones, but none of them caught my eye, having been to B&P prior. I did like their macarons though - there were some pretty innovative flavors - like kaya toast and watermelon yogurt. Each macaron is uniformly in size, and cost about $2.50 each, I think. They also have tea sets where you can enjoy your macarons with tea, but I was buying them back to share, so no tea set for me!

Some of the macarons I had were the kaya toast and the raspberry&white chocolate, as well as the salted caramel. I've to say that the latter two were not too memorable - of course the shells were the right amount of crispness and chewiness, and the fillings right on the money, but I very much preferred the caramel from Baroque and these combinations were just, well,  run-of-the-mill. The one that left a really really deep impression on me however, was the kaya toast macaron. It's an absolute treasure! The shell had little bits of toasted bread mixed into it, so you not only have the taste of having kaya with bread, you also have the mouthfeel! The house-made kaya is perfect too, tasting as delicious as the kaya that I usually have at home, with the right amount of pandan scent. On top of that, there's  a surprise bit of butter sandwiched between the cookies. Absolute heaven. I really felt like I was having kaya toast back in Singapore - the only thing missing was my teh.

So if you ever hop by Melbourne, do give these places a visit. I assure you that you will not regret any minute trying to get there.


Details


Le Petit Gateau
Address: 458 Little Collins Street, Melbourne
Contact: (03) 9944 8893
Opening hours: 7.30am-5pm, weekdays only.
Website: http://www.lepetitgateau.com.au/
Price: $ (cakes from $8)


Burch & Purchese Sweet Studio
Address: 647 Chapel Street, South Yarra, Victoria 3141
Contact: (03) 9827 7060
Opening hours: 10am to 6.30pm everyday except Monday
Website: http://www.burchandpurchese.com/ and http://www.burchandpurchese.blogspot.com/
Price: $ (cakes from $9)

LuxBite
Address: 38 Toorak Road, South Yarra
Contact: (03) 9867 5888
Opening hours: 8am-8pm, Wednesday to Monday
Website: http://www.luxbite.com.au/
Price: $ (cakes from $7. They also serve hot meals)


Related Posts Plugin for WordPress, Blogger...