
This is perhaps a very delayed post considering that I baked this some time ago when there was a fad to make this Ogura or Xiangsi cake on the local blogosphere but well, better late than never! Work is gradually slowing down, which is fantastic, because I will be going on leave from 21 December for a short holiday to clear leave (and to relax)! This will be my first Christmas spent in Australia, which should be pretty interesting since it's hot blazing summer there now and in contrast to the hot chocolate, mulled wine and whathaveyou in cold wintery Europe (and the rest of the Northern Hemisphere), Australia will probably celebrate with lots of seafood, fresh berries, light trifles, and loads of chilled wine. YAY! I might even be barbequeing my Christmas away, so I definitely cannot wait for 21 December to arrive! Hopefully the world doesn't end on 20 December or I will die a very sad soul.
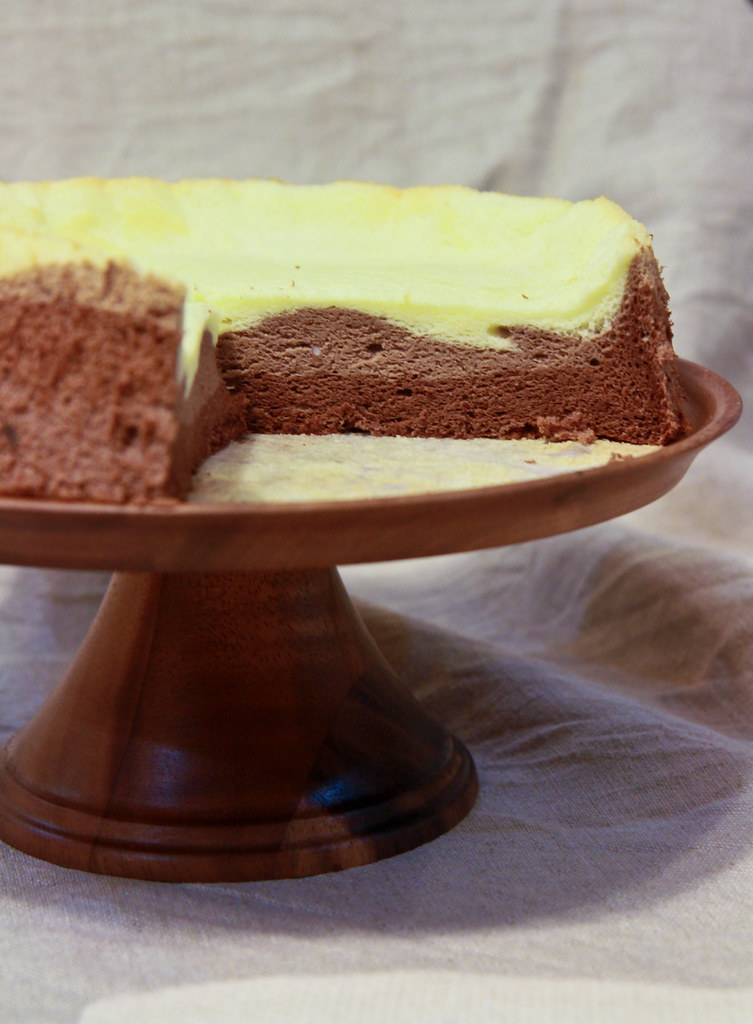
Back to the xiangsi cake. As usual, I am not particularly cautious when it comes to new recipes, especially when it is a recipe which has been raved about by others. So what I did was to gungho-ly try my hand at making my own version of a tricolor chocolate xiangsi cake.
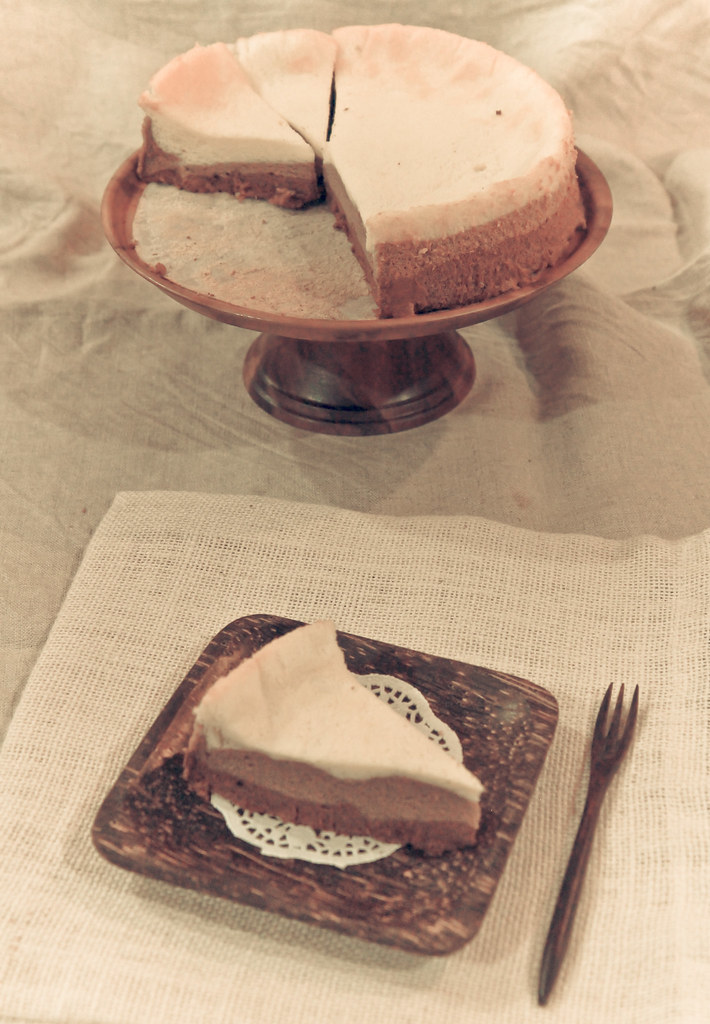
I must say that given that it was my first try, the texture of the cake was pretty good, although the centre deflated because I didn't follow instructions closely enough and inverted the cake right after I took it out of the oven instead of waiting for a while before doing so. Subsequently for my other tries, I have merely cooled the cake in the tin without inverting and results have been great - no deflation, and the cakes are tall, fluffy and super cottony! My mom (and family) has given the (rare) thumbs' up for this cake! :]

For those not in the know, this cake probably originated from Family Bakery (芳鄰西點蛋糕) in Batu Pahat, in the state of Johor. It is about an hour's drive from where I stay, but alas, I have not been able to try the original version of this cake. Apparently, it is called Ogura Cake, but in Chinese, that translates to 相思蛋糕. 相思 literally means pining after someone or being lovesick. The phrase always reminds me of the Chinese poem (唐诗) of the same title, which I used to learn in primary school. I hope that the primary school kids now are still learning the poem, amongst others, and that it has not been removed from the syllabus because it is 'too difficult'.
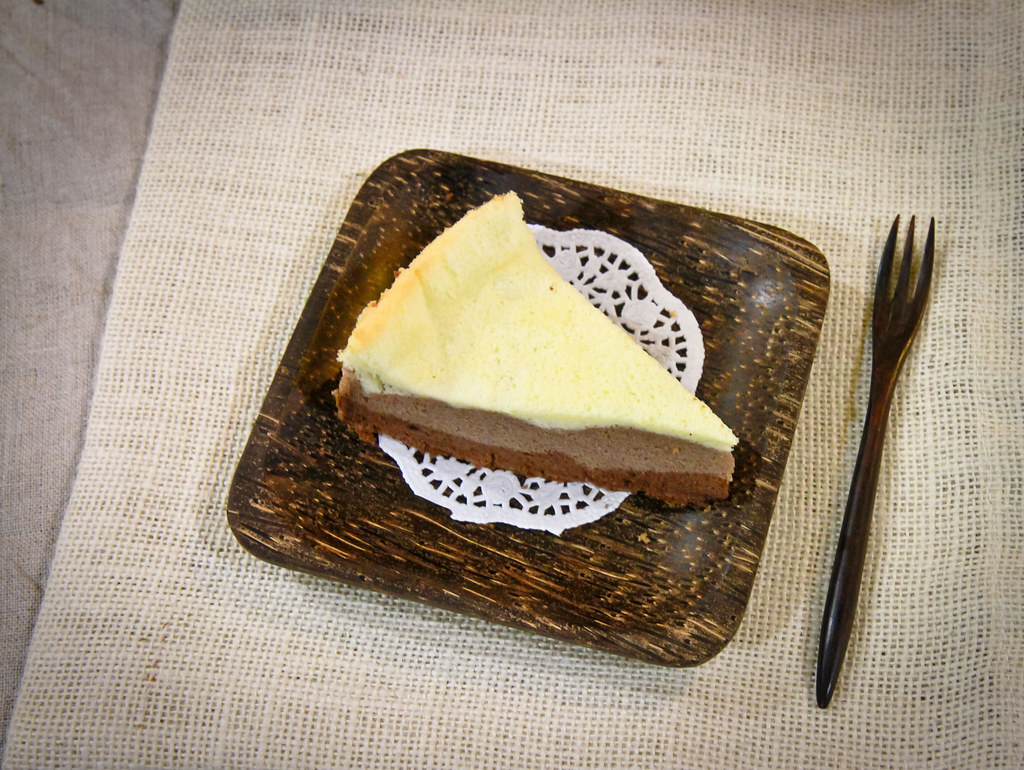
Anyways, because this sponge cake is baked using the steam bake method, it has a similar texture to the japanese cheesecake or any other cake which is made using the same method. Check out the cottony texture below:

Makes a 7" square cake
Adapted from Siew Hwei, but do check out Sonia's for very useful pictures and tips for a successful cake
A:
 45g neutral-flavoured oil (I used sunflower oil)
55g milk
¼ tsp salt
100g egg yolks (or yolks from 5 eggs)
65g all-purpose flour
½ tsp vanilla extract
150-170g egg whites (or whites from 5 eggs)
65g castor sugar
½ tsp lemon juice
C:
3g cocoa powder
10g hot water
D:
7g cocoa powder (about 1 tbl)
10g hot water
E:
10g milk
Method:
- Place the rack at the second-lowest (slightly below the middle) position and preheat the oven at 160°C. Set the other rack at the lowest position.
- Place all the ingredients in A in a small mixing bowl. Mix well and separate the batter into 3 equal portions/bowls. Mix the cocoa powder and hot water (from C) together, making sure there are no lumps. Mix it into one portion of the batter and set aside. Repeat for D and another third of the batter. Finally, add milk into the final third of the batter and set aside. You should now have three bowls of batter in 3 different shades - yellow, light brown and brown.
- Place all the ingredients in B into another mixing bowl, and using your handheld or stand mixer, beat until you get stiff peaks. Divide the meringue into three equal portions and fold each third into each of the three bowls of batter, making sure to fold gently until all the meringue has been incorporated.
- Starting with the darkest batter, pour it into a lined square pan (I used a 7" square pan). Next, pour in the light brown batter followed by the yellow batter. Lightly tap the pan against the counter to remove any air bubbles.
- If you have two racks, place a tray of water on the lowest rack, and place your cake on the second-lowest rack to bake. If you only have one rack, you can place your cake into the tray of water and bake on the second-lowest rack or you can use small tart moulds or microwave safe bowls filled with water at the side of the pan to bake.
- Bake for approximately 45 minutes at 160°C, or until a cake skewer comes out clean. Remove the cake and allow it to cool in the pan for at least 15 minutes before inverting it and removing the pan and liner. This is to ensure that the bottom does not deflate and that moisture does not collect on the liner, making the bottom of the cake wet and sticky. Allow the cake to cool completely on a wire rack before consuming.
Sorry the photos are quite bad this time because it was at night and I had to make use of my dining table which has the most horrible spot lights and yellow lights :/ (Hence the different color tones in different pictures)
Janine's jots:
- Taste: I love the sweetness of the cake, which means that it probably is not sweet enough for most people. For the chocolate variation, I would recommend using at least 70g of castor sugar or more.
- Texture: I love the texture. It makes the cake very light and very addictive! And the texture of the refrigerated cake is equally yummy!
- Modifications: For a normal chocolate cake, just replace ingredients from C, D, E with 10-15g of cocoa powder and 25g of hot water. Use 10g for a less intense chocolatey cake and use 15g for a more chocolatey cake. You can also slice the cake in half to add cream if you don't want a plain cake. Also, as I have not used 6 eggs as most other recipes have recommended, my cake will not be as high should you choose to use a 8" square pan.
- Storage: As the cake has a high moisture content, do try to consume it within 2 days for the best texture. Otherwise, it would be best to keep the cake refrigerated. It can keep in the fridge for a week or more.
- Would I make this again?: Definitely! I have gone on to make this a couple more times, but without the tricolour effect and with other flavour variations. This is essentially a sponge cake with endless possibilities!

10 comments:
Good try, and Thanks for the mentioned. After my last attempted, till now i have yet to make this cake again, because i still have long list to try,hehehe..
I lost count of celebrating Christmas here in Australia. Welcome you to join us. :)
Your cake looks very soft though. Love steamed cake.
Hi Janine! Actually I've not heard of ogura cake, but it's certainly a very pretty and delicious-looking cake! Love the tri-colour effect, really pretty! Have fun and have a Merry Christmas in Australia!
i have yet to try this cake
yours really looks lovely and soft!
good try! I love the second photo of the cake where you can really see the crumb and the closeup of all the texture and colours! yum! and I love steam-baked sort of cakes, they are just so fluffy and soft and moist, and I also like not having to use the whole oven!
Lovely cake! Looks so soft and spongy, have not tried this cake yet! Enjoy your break! Happy Holidays!
Seems like an interesting recipe. Bookmarked!:)
hi janine, i've seen a couple of ogura cakes in blogs too and first time seeing a tri colour one. well done!
I have never had a ogura cake...yours looks absolutely gorgeous. Really love the tri-colour.
what a lovely cake!!
Post a Comment