
There was a time, not too long ago, when my life merely revolved around white flour and wholemeal flour. Like I mentioned in my previous Thursday’s Trio post on buckwheat, it was blog surfing that introduced me to looking outside the “wheat box” and boy am I glad I did!
Today’s flour of the day or Thursday's Trio is sorghum flour, or jowar flour as it is known to many Indians. In my last post, some asked me what is sorghum and hopefully this post today will answer all your queries and perhaps whet your appetite to try out sorghum for yourself!

As with many cereals and crops, sorghum was originally cultivated in Egypt, and it continues to be a staple food source in Africa. I guess one main reason why it has lived through the ages is because of its sturdiness and resistance to drought. Over in India, it is commonly used, and appears in foods like jowar roti and other flatbreads (chapattis) all over India. You can check out some jowar roti recipes here here and here. They use pretty much the same proportions. And yes, I bought my pack of sorghum flour from the Indian shop as well :]
Sorghum has gained popularity recently because it is gluten-free and people suffering from celiac disease can safely enjoy foods made with sorghum. Sorghum is seldom used alone, because it is bland (flavourless). That being said, its neutral flavour and light colour is also precisely the reason why it is used as a substitute for wheat flour since it does not alter the taste and smell of the finished product. It does alter texture however – it results in a crumbly end product because of its lack of gluten, so it is usually used in tandem with rice or corn starches or more fat.
Three interesting facts on sorghum
- Sorghum is the 5th most important cereal crop grown in the world! It is typically used as a replacement for wheat in India and Africa. And what’s even more interesting is that it is also known as “Milo” in Spanish!
- There was once when the nutritional benefits of sorghum were not known – in fact, the UNFAO found them to have “poor nutritional quality”. Nowadays, sorghum is known as the next “superfruit” for its high antioxidant power – studies have shown that it has 4-12 times MORE antioxidants than fruits like pomegranates, acai berries, and blueberries!
- Sorghum is also high in insoluble fibre, which is helpful for improving digestion and bowel movement. Also, the starch in sorghum is more slowly digested than other cereals, which makes it friendly for diabetics because it controls blood glucose.
Three ways of using sorghum
- Sorghum is also used to produce sorghum sorghum syrup or molasses, which is used as a sugar substitute. The stalks of the sorghum plant are harvested, crushed like sugar cane to produce the syrup. Just check out this recipe for instance.
- Sorghum grains can be ‘popped’ just like popcorn, and they taste even better!
- You might not know this, but sorghum grains are usually found in the ten-grain mixes (十谷米) that you can find in organic food stores.
Three interesting recipes I’ve bookmarked from blogs
I couldn’t find local blogs using these recipes, so I’ve picked some from my favourite blogs, and I’ve cheated a little by including three of each category below to show you how versatile sorghum can be!
- Chocolate chip cookie using sorghum flour, millet flour and tapioca and corn starches
Most recommend storing sorghum (and all other flours) in a sealed, airtight container and placing it in a cool dark place. If you're afraid that it'll deteriorate under the tropical heat, just store it in an airtight container and place it in the fridge :]

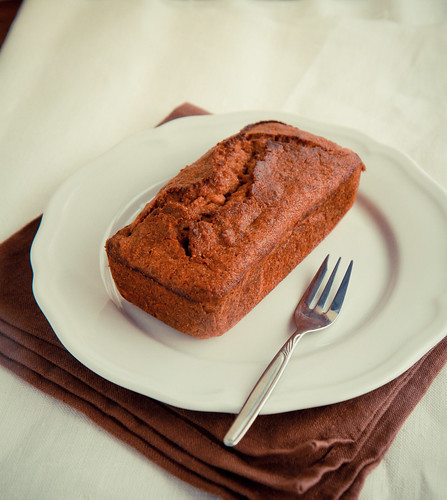
Gluten-Free Banana Loaf
Makes a 6" round cake or 15cm loaf and a couple cupcakes

50g butter
45g brown sugar
25g castor sugar
55g egg (without shell)
150g banana, mashed
90g gluten-free flour mix*
¼ tsp xanthan gum
¼ tsp baking soda
½ tsp baking powder
½ tsp cinnamon
½ tsp vanilla extract
50g milk
*I used a mixture of the following: 15g almond flour, 15g millet flour, 15g sorghum flour, 15g rice flour, 15g tapioca flour, 10g corn starch and 5g ground flaxseed.
Method:
- Preheat oven to 160°C.
- Sieve the various flours, xanthan gum, baking powder, baking soda and cinnamon together. Set aside.
- Cream butter until softened. Add in the sugars and cream until fluffy. Add in the egg and beat well, for about 1 minute or until mixture does not appear too curdled.
- Next, add in the mashed banana and mix well.
- Sieve in half of the dry ingredients, beating until all traces of flour disappear. Add in half of the milk and mix well. Repeat with a quarter of the dry ingredients and the remaining half of the milk, and end with the last quarter of the dry ingredients. You should get a smooth cake batter at this stage.
- If baking as a round cake or loaf, bake for about 30-35 minutes until a skewer comes out clean. If baking as cupcakes/muffins, bake for about 20 minutes, or until the tops turn golden brown. Let cool for about 15 minutes on wire racks before serving. The cake tastes best the next day, after it is fully cooled and the cake has had time to develop its rich banana flavor.


Janine's jots:
- Taste: I upped the cinnamon this time around and I much prefer this cake because of the added spiciness.
- Texture: Because of the lack of gluten, the loaf is slightly more compact and moist in the centre. But this could also be because of the greater amount of liquid (I used 50g milk instead of 20g per my previous recipe), greater amount of mashed bananas (150g instead of 120g) and smaller amount of sugar (70g instead of 90g). The batter is slightly more liquid than usual as well.
- Serving size: I used a small loaf tin and made tiny cupcakes with the rest of the batter. If you want a nice and tall loaf, I suggest using a 15cm or (4 x 7) loaf tin!
- Modifications: I would probably stick to the original liquid and banana amounts (about 20g milk and 120g banana) because I found this gluten-free version a little dense in the centre for my liking. I much prefer a breadier texture for my banana loaves. But this purely be because of the lack of gluten here. I haven't had enough attempts to determine my optimum proportions yet ;p But my mom did enjoy its moistness and said the extra banana made it super yummy.
- Storage: Because the cake contains banana, it only stores well for a day at room temperature in our tropical climate. After that, the cake will feel a little sticky. I would advise keeping the cake in the fridge, and it will taste good for at least a week. If you prefer, give the cake a quick 5s zap in the microwave and it will be slightly warm, perfect with a cup of tea in the morning :]
- Would I make this again?: Yes definitely! Check out my previous recipe here!
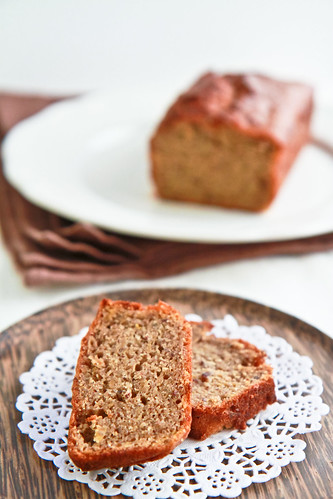
 |
| Check out the dense (and moist) crumb! |

4 comments:
Wow! Sorghum meal... I'd not even heard of it until I read your post! Lotsa more to learn!
Wow! Sorghum meal... I'd not even heard of it until I read your post! Lotsa more to learn!
I've ben interested in trying out gf recipes lately, so this sounds really good! i have the rest of the flours already, but have no idea how to get hold of sorghum flour though, might have to hit the health shop.
I've ben interested in trying out gf recipes lately, so this sounds really good! i have the rest of the flours already, but have no idea how to get hold of sorghum flour though, might have to hit the health shop.
Post a Comment