My blog has moved!

You should be automatically redirected in 6 seconds. If not, visit
http://www.unpastiche.com
and update your bookmarks.

Sunday, May 20, 2012

List of Baking Ingredients in Singapore [Names of Flours in Mandarin, Malay and Tamil]

A rose by any other name would smell as sweet.

This is a slightly bastardized translation of what is perhaps the most famous star-crossed lovers play in the world - Romeo & Juliet. This quote might not have a direct link to the post, but it just popped up in my head when I was thinking of how to start off this post. My point was, in a multi-racial society such as Singapore, ingredients will most likely than not be available in a variety of names - English, Malay, Mandarin, Tamil or perhaps their native names, whatever that may be. To further compound the problem, the same product might even have TWO different names, such as linseed and flaxseed (they are the same thing).

Earlier last year, I was on the hunt for a variety of flours, especially whole grain ones in a bid to build up my whole foods pantry and to introduce new flours/grains/seeds into my diet. I had some difficulty at first trying to identify flours, especially at Mustafa whose flours were mainly in Tamil/Hindi/Urdu, so I decided to compile a list after meticulously counter-checking with not only the staff, but other internet sources and native speakers of the language.

The following list is by no means comprehensive, but it has been of utmost help to me when grocery shopping, not only in Singapore, but in Malaysia and even Taiwan! (where I had to struggle with not just Mandarin names, but traditional Chinese :/) If there's anything wrong or if you have anything to add to the below table, please comment and let me know! :]

If time permits, I'll be coming up with a companion list to this, by indicating where in Singapore you can get your hands on some of these flours. It's still a work in progress so wait for it!

Simple Legend: 
[m] stands for malay
[j] stands for japanese
[i] stands for tamil or hindi or any other indian dialect (sorry I don't know which is which)


English Name
Chinese Name
Other names
More common flours


All- purpose flour, plain flour, rose flour
麵粉, 中筋麵粉
Tepung Gandum [m]
Tepung seberguna [m]
Bread flour, high protein flour
高筋麵粉, 筋麵, 根麵, 高根粉
Tepung roti [m]
Cake flour, pastry flour, superfine flour
低筋麵粉, 低根粉
Hakurikiko, 薄力粉 [j]
Pau flour, Hong Kong Flour
香港面粉

Self-raising flour
自發麵粉
Tepung naik sendiri [m]


Almond flour /meal
杏仁粉

Amaranth
苋菜, 苋米
Rajgira [i]
Arrowroot
葛粉
Tikora/Paniphal [i]
Kuzuko [j]
Barley Flour
大麦面粉, 薏仁粉
Jav flour [i]
Black gram/lentil
黑鹰嘴豆
Urid/urad dhal [i]
Black Chick Pea
黑鹰嘴豆
Kala Chana [i]
Brown Rice Flour
糙米粉

Buckwheat
乔麦粉, 苦蕎麥
Kotu/Kottu/Kuttu [i]
Bulgur
小麦片

Cassava flour
木薯粉
Gari flour [Nigerian]
Chestnut flour
栗粉

Chickpea flour
鹰嘴豆面粉
Also known as Garbanzo
Besan/gram /chana [i]
Coconut flour, dessicated coconut
椰絲, 椰茸, 椰子粉
Kelapa[m]
Cornstarch/flour
生粉, 玉米澱粉, 粟粉, 粟米粉, 玉米粉, 玉米澱粉
Makai (white corn flour) [i]
Tepung jagung [m]
Cornmeal/polenta
粗玉米豆粉
Makka (coarser) [i]
Masa harina [Spanish]
Corn flour, blue

Harinilla [Spanish]
Durum Flour
硬粒小麦面粉

Flaxseed flour
亚麻籽
Also known as linseed
Jawas [i]
Garbanzo
鹰嘴豆面粉
Kabuli chana/besan/chana dhal [i]
Green Bean flour, mung bean
綠豆粉

Hoen Kwee: roasted green bean
Glutinous Rice Flour
糯米粉
Shiratamako 白玉粉 [j]
Glutinous Rice Flour, cooked
熟糯米粉, 糕粉
gao fun [Cant.], koh fun
Kamut flour
-

Millet, common, white
粟 (糯小米)

Millet, finger
稗, 䅟子
Ragi [i]
Millet, pearl, black
黍 (糯米黍), 珍珠稷, 珍珠黍
Bajra/kambu/bajri/Bajara [i]
Mugwort flour
艾蒿粉
Yomogiko 蓬粉 [j]
Multi-grain flour
雜糧預拌粉

Oat flour
燕麦粉
Jow/Jai/Jaun [i]
Potato flour/starch
生粉, 太白粉, 地瓜粉
Katakuriko 片栗粉 [j]
Pumpernickel
黑麦粉
Also known as dark rye flour
Polenta
玉米粥
See corn flour.
Quinoa flour
藜麦面粉, 藜籽, 小小米, 奎藜籽

Rice Flour (white rice flour)
粘米粉, 粘米粉, 黏米粉, 在來米粉, 在萊米粉, 再來米粉
Jyoshinko, 上新粉 [j]
Idli Rava [i] (raw rice)
Rye Flour
黑麦粉
Medium rye
Sago flour
沙谷粉
Tepung Sagu [m]
Semolina
粗粉
Suji/Sugee/Sooji [i]
Spelt
斯佩尔特小麦面粉
Vartani [i]
Sorghum
高粱面粉
Jowar/Jwar/jowari/juwar [i]
Soy, soya flour
豆粉
Kinako きな粉 [j]
Sweet Potato flour
蕃薯粉, 地瓜粉
Tepung ubi keledek [m]
Sweet Rice Flour
糯米粉
Mochiko [j]
Tapioca Starch
樹薯粉, 木薯粉, 茨粉, 菱粉, 泰國生粉, 太白粉, 地瓜粉
Tepung ubi kayu [m]
Teff flour
画眉草面粉

Triticale flour
小黑麦

Water chestnut flour
荸荠粉
Singhada atta /Singoda [i]
Wheat bran
麦麸

Wheat germ
小麥胚芽, 麥芽粉

Wheat gluten
麵筋粉

Wheat starch
澄麵粉
Tung min
Whole wheat flour
全麥麵粉
Also known as wholemeal flour

Wednesday, May 16, 2012

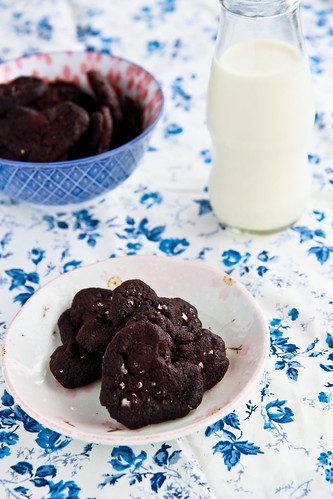
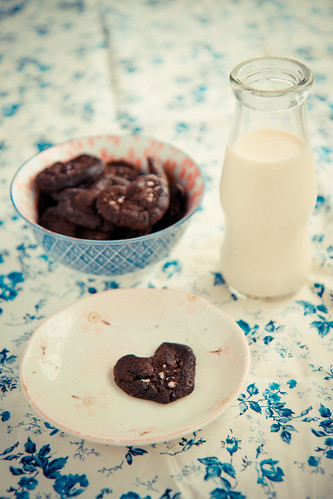
Sable au Chocolat or Very Good Double Chocolate Cookies

I know I've complained about work tons of times, but work is getting really hectic. The very nature of my work requires me to be charging clients every hour, which means that busy-ness is a good thing, but sigh. I sometimes wish I had more time to myself to bake during the weekdays because baking during the weekends is simply insufficient!


Despite my lack of sleep, I couldn't not post today, because today's a very special day for me. It doesn't feel very special at the moment because well, the special person is not here with me and there's no one to celebrate it with besides him since this special day concerns the both of us. And this is the second year running that both of us are in different countries, and is likely to be the case for the near future :/ But I always look forward to this day, because 2 years ago to this date, I was in Paris, waiting for my special someone to arrive, and he did :] My friends always tell me that they feel like I've been in the relationship for a really long time, mainly because we were 'dating' for an extended period before making it 'official', but I guess that's the beauty of it all isn't it? Getting to know each other properly before taking that step. I'm still learning new things everyday, and I hope you are too - here's to many more years dear.


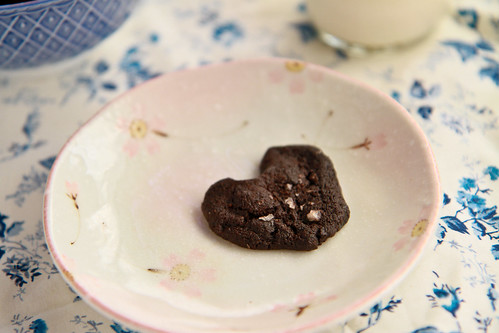
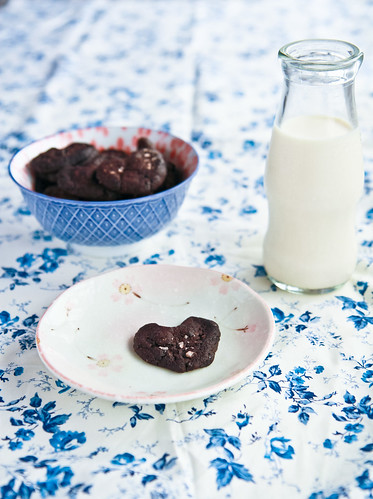
I had initially planned to post this for Valentine's Day, because it's heart shaped and all, but as usual, I didn't manage to bake it before Valentine's Day or even shortly after, but I eventually did make it, so what better day than today to post little heart-shaped cookies for my dearest? I know what he's going to say too - why am I making 'brown things' again, but hey, this is almost black, not brown! (He likes to says that everything on my blog is brown, which is not true! =p)


This is by far the chocolate cookie recipe I love most, for the very fact that it is very simple to make with simple ingredients and the fact that it is very very very good! It's a sable au chocolat, or very loosely translated to chocolate sand cookies - this recipe is very crisp, and not at all melty or sandy. In fact, EVERYONE I've baked this for says it's very very good. And I think it's very good too! Another thing in its favour is the very fact that it's another recipe by Pierre Herme, and you know how biased I am towards anything of his.


And I was very trigger happy with the cookies because I had just bought the new cloth and the lighting that day was pretty good. Plus I found out that I had a milk bottle prop that could be used! PS: quite a few of you have asked where I got the bottle from - my brother saved it for me after buying this bottle of milk from a convenience store in Japan, so I'm afraid you can't find anything similar here! Now, if only I can find a nice striped straw...


Pierre Herme's Sable au Chocolat
Adapted and translated from Pierre Herme's Le Larousse du Chocolat


55g butter
¼ tsp sea salt
¼ tsp vanilla extract
20g white sugar
40g brown sugar
65g all-purpose flour
½ tsp baking soda
10g cocoa powder
50g bittersweet chocolate (70%)

Sea salt, to sprinkle

Method:
  1. Roughly chop a bar of bittersweet chocolate until you get 50g of shards and pieces. 
  2. In a mixing bowl, cream the butter until light before adding in the brown and white sugars. Cream until fluffy, then add in the vanilla extract. 
  3. In another bowl, sift together the baking soda, all-purpose flour and cocoa powder. Gently the dry ingredients into the creamed butter, until all the dry ingredients are well incorporated and a cookie dough forms. Mix in the chopped chocolate until evenly distributed. 
  4. Roll the cookie dough into logs of your desired shape (circular or rectangular is good), making sure that the width/height of the log is no more than 2 inches to ensure even baking. Chill the logs for at least 30 minutes, preferably for a day for the flavors to meld. 
  5. 20 minutes before baking, remove the logs from the refrigerator and preheat the oven to 160°C. Slice the logs to about 1cm or less in thickness and lay them out on a greased cookie tray. Leave at least 2 finger spaces between each cookie because the cookie does spread a little. Sprinkle some sea salt onto each cookie if you want an extra burst of saltiness. 
  6. Bake for about 12-15 minutes at 160°C, or until the entire cookie is firm - if the centre of the cookie yields slightly to touch, do give it another minute in the oven before removing the cookies. Allow the cookies to cool on the tray for at least 15 minutes before removing to cool on a cooling rack. The cookies taste best after a while (i.e., not a few minutes out of the oven), so try not to eat too many cookies before then!


PS: see the difference in the tone and light in the photographs above by merely changing ISO and shutter speed! 


Janine's jots: 
  • Taste: Because chocolate is the star in this cookie, be sure to use good quality cocoa powder and chocolate. I usually use a Belgian cocoa powder (which is not available here) and a Nestle Premium 70% bittersweet chocolate (which is also not available here). Do use chopped bittersweet chocolate because it provides a perfect foil to the chocolate cookie. You can choose to use Valrhona if you have access to it. I have also taken the liberty of decreasing the amount of sugar to suit my tastes, feel free to use 10-20% more sugar if you like a sweeter cookie.
  • Texture: This chocolate cookie is crisp if sliced thinly enough and is simply the most awesome cookie ever. Enough said.
  • Serving size: This makes about 60 cookies, or about 2 trays worth depending on the size of your cookies.  
  • Modifications: You will get a slightly different mouthfeel depending on how thick you slice the cookies, so slice them thinly if you want a crispier cookie and thickly if you want a cookie with more heft. Do be careful if the cookies are thick because the outsides of the cookie may burn (speaking from experience) before the insides are properly crisp - cover them with an aluminium foil if the cookie turns too dark. I have also tried using brown sugar instead of white, demerara instead of white, and a combination of white and brown, all works fine, with slight differences to taste.
  • Storage: If stored in an airtight container, the cookies remain crisp for up to a month, although it will lose a bit of the original crispiness after 2 weeks or so.
  • Would I make this again?: Definitely, I have made this recipe more than 10 times now, for Christmas, for Chinese New Year, etc. My only caveat is that you have to make sure that the cookies are properly packed because they are fragile.
  • Other comments: This recipe is easily doubled or tripled, but be sure to chill it for at least 30 minutes, preferably for a day or more for the chopped chocolate to properly 'infuse' the rest of the cookie dough. Remove the chilled logs (or discs) from the refrigerator before you intend to bake, and depending on the ambient temperature and the thickness of the log, it might take 10 - 20 minutes for the log to soften. My logs are usually thin, and I wait about 10 minutes before slicing the logs - the log should still be firm and yield only slightly to touch (not as soft as room temperature butter or like bread dough) - this will allow you to slice through the log cleanly. Also, try to chop the chocolate to pieces larger than your typical chocolate chip so that you will not have problems slicing the chocolate. For the heart shaped cookies, I shaped the cookies by hand after separating the dough into balls, which works fine as well, but as you can see, the texture of the cookies will not look as smooth as sliced ones.

A final punny line - love is bittersweet and surprising at the same time (thanks to the salt) :]

Wednesday, May 9, 2012

Homemade Granola - Food Revolution Day

I will be talking about revolutions today. When anyone talks about revolutions these days, you think about the 'Arab Spring', or the year of Arab revolutions that began in Tunisia in December 2010 and resulted in a wave of uprisings across the Arab world. And when you actually think about it (and it's been credited in many newspapers and other media around the world), then one catalyst for this widespread revolution was the act of one man. One man, by the name of Bouazizi, who decided one day to set himself on fire to protest, not against his government - no, it was not such a noble act, but it was specially against the confiscation of his goods and the humiliation he suffered under the government officials who came around his street to harass him. This then led to widespread public anger and violence, which led to the fall of the Tunisian government. This of course spread to other countries around Tunisia, most notably that of Egypt and Libya. 

This of course brings to mind a very often quoted phrase these days, that repression is the seed of revolution. 


On this note, I want to talk about Food Revolution Day. What is it you might ask? Well, if you're an avid fan of Jamie Oliver, you will know all about his series, Food Revolution. Basically, it’s about creating a movement to educate children about food and to fight against obesity. Honestly, if you look at the food that the American school children are eating, you won’t be surprised why obesity is such a great problem there. Children there are served sodas, pizzas, huge burgers, fries, and mystery meat – basically the epitome of a great American meal. The revolution has gained momentum in many states in America, and I particularly watching the series and reading the toolkits that Jamie has provided to empower parents and children to make a change in their schools.

This brings to mind a quote by Marianne Williamson “Personal transformation can and does have global effects. As we go, so goes the world, for the world is us. The revolution that will save the world is ultimately a personal one." Jamie Oliver made food education his personal revolution, and I would like to think that he has succeeded somewhat in impacting the world. Food Revolution Day is perhaps a culmination or an extension of what has been done, it goes beyond food education to school children – it is slated on 19 May 2012, and it is a day for people to recognize that we need to start thinking about where our food comes from. It is a day for parents to realize that food habits are cultivated at home, and they too have a part to play in improving the lives of both themselves and their children.

Anyhow, I’m not sure if my own consciousness about food began before or after I watched the series or heard about it, but I have been increasingly conscious of what I am eating of late. One reason is because after starting work, I’ve been eating lunch at hawker centres and elsewhere, and this, coupled with a lack of exercise, has resulted in some weight gain. What I am about to relate is probably the story of many.

Often, when I eat at hawker centres (Lau Pa Sat and Golden Shoe for example), I can’t help but feel a tad sick at the amount of oil, salt and MSG that’s going into my body. So why not eat salads you might ask? Salad shops are abundant where I work, mainly because all of us here are white collared workers, but the cost of these salads are astronomical! A bowl of bak chor mee or wanton mee will probably set me back $3 - $3.50, but salads start from at least $8! And that’s the most basic salad with NO meats! Being the cheapo that I am, I can’t help but think that for $8, I can buy buttercup, arugula, tomatoes, cucumbers enough to feed my entire family of 5! Trying to eat healthy in Singapore really is expensive! And because of my work hours (I often work till 10pm), I really don’t have the time to prepare salads or other homecooked food myself. Enter my mother. Sometimes when I don’t make it back for dinner, I get my mom to pack my dinner for lunch tomorrow, so that I can not only save money, but know that I’m eating healthy home cooked food. These are the small things that I have been doing in order to have a healthier lifestyle. For those who don’t have such nice mothers like I do, don’t fret – you can make a huge batch of pasta sauce and freeze it into meal-sized portions – I do that with my Spaghetti Bolognese which I pack to the office and heat up with the microwave in the office. You can also fry rice (not so much mee hoon and kuay teow since they don’t last long) and store it in the fridge. On weekends, I bake breads or steam paus, and these are very easily stored in the fridge or freezer.

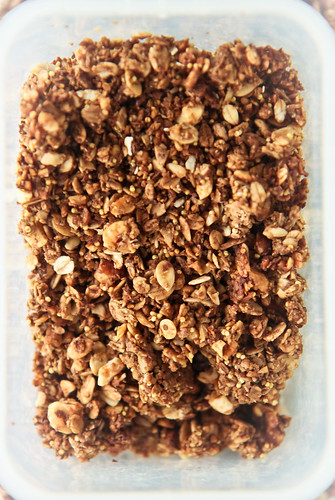
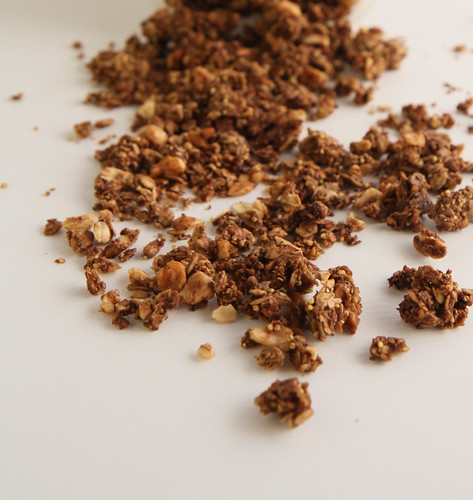
Another thing I also do is to make batches of granola which I keep in airtight containers, and this, along with the steamed paus, makes up my breakfast for the week.


Like I mentioned in my previous post, I’ve been experimenting with many granola recipes, and I have come to realize that the beauty of granola is that there is no fixed recipe. Using the granola formula as your base, you can play around with as many add-ins as you want – some think that rolled oats are a must-have for granola, but I’m telling you that I’ve used rolled barley and rolled spelt and the granola tastes equally good. You can make yourself a chocolate granola, or a nutty granola, or a fruit & seed one – the world is your oyster when playing around with granola recipes! That said, I’m still working on a foolproof granola recipe that I can publish on the blog, so please be patient while I work out the kinks :]

This recipe below is the first granola recipe that I tried, and one that I didn’t tweak too much because I knew that the sweetness would be pretty much okay for me.

Granola Recipe with Molasses
Adapted from Cook with No Books who adapted it from Melissa 

240g rolled oats
1 cup assorted nuts/seeds (I used a combination of almonds, pecans, hazelnuts, sunflower seeds, pumpkin seeds, millet grains and quinoa)
½ tsp sea salt  
½ tsp ground cinnamon  
50g unsulphured blackstrap molasses*
10g honey
35g unsalted butter
30g water
½ tsp vanilla extract

Optional: dried fruits such as raisins

*You can find blackstrap molasses at organic food stores – it retails for about S$5 or less per jar.

Method:

  1. In a large mixing bowl, combine together the rolled oats, assorted nuts, sea salt and ground cinnamon. I am far too lazy to chop the nuts, so what I do is to take the nuts and give them a quick whirl in the food processor to get huge chunks. At the same time, I also take a quarter of the rolled oats and blend them in the processor until I get an almost fine powder. This helps to bind the rolled oats together so that you can get granola clusters.
  2. In another bowl, combine the molasses, butter and water together. Microwave on high for about 30 seconds, or until the butter has melted. Stir in the vanilla extract.
  3. Then, pour in the liquid ingredients into the large mixing bowl, stirring well until every dry ingredient is slightly moistened. It will appear as if the liquid is insufficient at first, but continue mixing and it’ll be okay. Rest the mixture for a few minutes while you prepare a baking tray lined with baking liner or a non-stick liner.
  4. Pour the granola mixture on to the tray and evenly distribute it. You should also try to flatten and compact it. Try to leave gaps in the layer so that you can easily turn over the granola layer for even baking later. Bake it at 150°C on the middle rack for about 20-25 minutes, or until the granola turns a dark golden brown. (The mixture is already a golden brown before baking because of the blackstrap molasses.) If you are afraid that the bottom of the layer is not evenly brown, remove the tray at about the 15-minute mark and gently fold over the layers from the gaps you have created earlier. Be careful not to break up any granola clusters.
  5. Remove the tray from the oven when it is a dark golden brown and allow the granola to cool thoroughly. If you desire, stir in the dried fruits at this juncture.


Janine's jots: 
  • Taste: I actually found the recipe not sweet enough, because I reduced the sugar amounts a little. I would recommend increasing the amount of honey or sugar at least 10% more. Also, if you're new to blackstrap molasses, you might wish to reduce the amount a little because the 'iron-like' taste takes some getting used to.
  • Texture: In order to get clusters, one way is to grind up some of the oats so that it forms a powder to bind the other oats. I usually grind up about 50g of oats. If you want more binding powder, do add in some flax or linseeds.
  • Serving size: This recipe makes approximately 500g of granola, which is sufficient for a fortnight's worth of breakfasts for a single person.  
  • Modifications: I have made many more modifications to this original recipe since the first time I made it - you can change up the amounts of fruits/seeds/nuts as well as the type of rolled grain - I have used rolled spelt and barley to great success as well.
  • Storage: Once thoroughly cooled, store in airtight containers in a cool and dry place. Try to consume within a month.
  • Would I make this again?: Definitely!


So anyway, the purpose of this post is not to stop you from buying cornflakes or cereal (unless I figure out a way to make them myself) or even granola right this moment, but I'm reminding you to be aware. To be aware of what you're putting in your bodies, whether it be refined products or not. And if you're interested to know what Singapore is doing on 19 May 2012 for Food Revolution Day, do check out the Singapore Food Revolution Movement here!

Tuesday, May 1, 2012

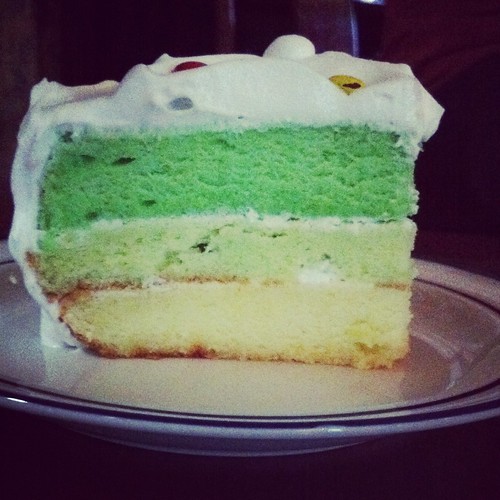
Green Ombre Pandan Chiffon Layered Cake

I have been in a blogging rut of sorts this past week. No oomph to post anything even though I have got a couple of recipes that I've tried later that I should blog about. The other reason is work I guess. I’ve been going home at about 10pm everyday, which means I’ve only got energy left to bathe and sleep when I get home. Even exercise plans have been put on hold because I can’t bring myself to wake up at 6am for my run. And plans to run near the office have not materialize because I much rather complete my work and get home than run and work later. Like today, I slept in late till 8am (because of my darn body clock) and finally am going out for lunch with the girls later. But after that, it's back to work - yes, even though it is Labour Day :/ 

Anyway, I really wanted to support Aspiring Bakers this month in April (cos it's 1 May today!) because layered cakes are really a favorite of mine to make, and I had a couple of birthdays this month to bake cakes for, but sometimes the best laid plans of mice and men go awry. Plans to make a chocolate entremet were also put on hold, even though I've already got the joconde and feuilletine layer done. As Benjamin Franklin once said, diligence overcomes difficulties, sloth makes them.


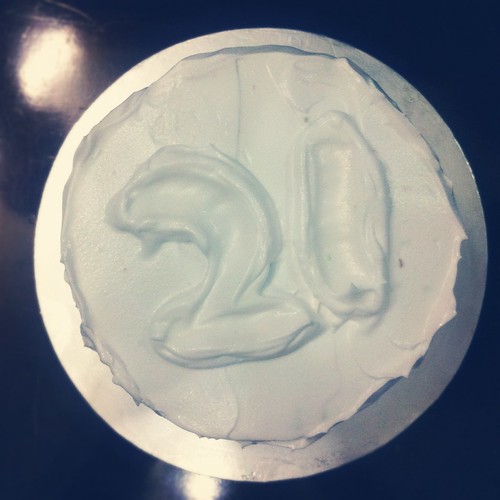
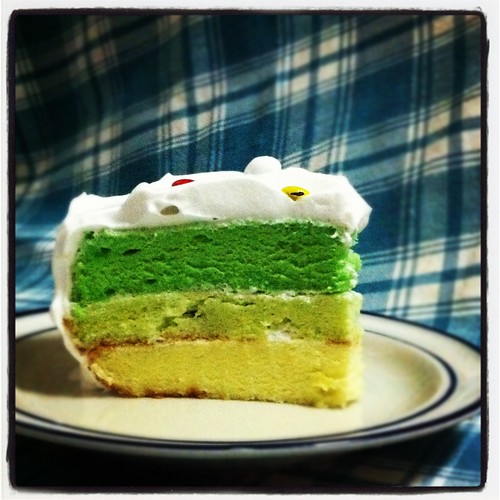
SO even though I've missed the deadline for Aspiring Bakers, I have decided to exercise some diligence by posting up some instagram photos (with various effects) of this layered chiffon cake that I made for my brother for his 21st birthday earlier this year. This was when I was in my ombre craze - cue the pink ombre layered cake I made for my mom and perhaps a ton other color gradients (brown, blue, yellow, etc) which I experimented with :]

Since my brother doesn’t usually like to eat my cakes, I actually had no plans to make any for him, but I was back at home idling and itching to make a cake, so I decided to make him one anyway even if he didn't want it. I don't have much baking equipment back in my home in Malaysia, so I had to make do with what I had. So that meant that chocolate cakes were out since I didn't have any cocoa powder back home. What I had however, was lots of pandan because my mom has a pandan plant in the garden. So I decided on a green ombre cake, made using pandan leaves and a tad of green coloring for the darkest green layer. This was perfect, because I know my brother loves traditional flavors and since he's in the army, what better color to represent him that green? :]


I try to stick with as natural coloring as possible, so the bottom two layers are made completely with natural pandan extract pounded with a mortar and pestle whereas the final layer had a little help from a few drops of green coloring. I know the cream sandwiching the layers are very meagre, but that's really because my brother is not a fan of cream of any sorts, and would scrap off any cream he sees on a cake, so I decided to save him the trouble by putting minimal cream in between and very 'scrapable' whipped cream on the outside. 

My Mother's Pandan Chiffon Cake 
Makes 3 x 6 inch round cakes or a 23cm chiffon cake 

5 egg yolks
60g olive oil or melted butter
70g castor sugar
 ¼ tsp salt
110g pandan juice*
125g all-purpose flour
Green coloring, where required

6 egg whites
140g sugar
⅛ tsp cream of tartar

*Make pandan juice by pounding at least 20 pandan leaves with 100g of water or milk. I make mine with milk. You can blitz the leaves if you don't have a mortar and pestle. 

Note: I have not compared my mom's recipe with other recipes, but I'm pretty sure that this recipe is similar to many other pandan chiffon recipes out there. Nevertheless, I still stand by this being my mom's original recipe because the amounts are derived from my mom's twenty years of experimentation in the kitchen. Also, the method below outlines the traditional method of making the pandan chiffon cake. How I actually made the layered cake will be outlined in my jots below. 

Method:  
  1. Preheat the oven to 170°C. 
  2. Place the egg whites, sugar and cream of tartar into a mixing bowl and beat with an electric mixer until stiff peaks form. This should take about 5 minutes or more depending on the power of your mixer. You should be able to overturn your bowl without anything falling out of it. 
  3. In another large mixing bowl, mix the egg yolks with oil, salt and sugar. Do not add the sugar directly onto the yolks because it will turn lumpy. Mix the yolks with oil first before adding the salt and sugar. Then, add in the pandan juice and all-purpose flour. Mix well until you have a smooth paste.
  4. Spoon a tiny portion of the egg white mixture (about ⅛ or 2 spatulas worth of egg white) and mix it into the egg yolk mixture to loosen the mixture. Then, lightly fold in ⅓ of the egg white into the yolk mixture. Continue folding in the remaining egg whites, making sure that it is well combined and you get a homogeneous pale green batter.
  5. Pour the batter into 3 6-inch round tins (ungreased and unlined) or a 23cm chiffon tin. Give the tin a few raps against the kitchen counter to ensure that there is no trapped air. 
  6. For the 6-inch rounds, bake for about 25 minutes. For the 23cm chiffon, bake for about 35-40 minutes. The top of the cake should be a light brown and an inserted skewer should come out clean. 
  7. After removing the tins from the oven, invert the tins immediately over a cooling rack. Allow the cake to cool for at least 20 minutes before unmoulding and serving. 


Janine's jots:  
  • How to make a layered ombre cake: If you are lazy like me and don't wish to repeat the same processes above three times just to get three different colors, you can opt for the lazy method by making the above recipe and dividing it into three batters. First, you have to make a 'concentrated pandan juice'. I did this by pounding the pandan leaves with 50g of water, which gave me a very dark green liquid. I then diluted this with varying amounts of milk to get three different color gradients. What I did then was to combine the egg yolk mixture with all the ingredients except the pandan juice, then dividing the portions equally into three bowls before mixing in the pandan juice. For the darkest mixture, I added in a few drops of green coloring to get the dark green color. You cannot get such a color with just natural pandan extract, trust me. As for the egg whites, I was lazy too, so I measured the weight of the bowl before and after mixing the whites and then apportioned the stiff egg whites between three bowls and folded them in gently. Bake as per above. As for the whipped cream in between the layers on the outside, you can use a stabilized whipped cream recipe or you can opt for the lazy method (like I did here) and whip 200g of cream together with 30g of icing sugar. Whip until you get almost stiff peaks and you're done. 
  • Taste: I'm not quite a fan of pandan chiffon - I tend to prefer orange chiffons, but I could tell that my brother and my family enjoyed the cake a lot and I thought the pandan flavor was not too overwhelming. Just perfect :]
  • Texture: Because I used round tins instead of the standard chiffon tin, the chiffon cake was slightly more compact than usual, mainly because the cake requires metal in the centre to assist it in rising. Nevertheless, the chiffon cake was still delicious. 
  • Serving size: This makes a 3 layered 6-inch cake, which is just enough for a family of five to have about 1-2 servings each.
  • Modifications: None. If you want a more traditional taste, you can opt for coconut milk instead of normal fresh milk. Or you could use kaya to sandwich the layers.  
  • Storage: The cake was consumed right after I constructed it, but usually chiffon cakes without any cream can last a couple of days at room temperature.  
  • Would I make this again?: Definitely! This pandan chiffon cake is one of my mom's hand-me-down recipes to me, and is definitely something I treasure because no further tweaking to it is needed :]

I know the picture quality is rather crappy but in my defence, these are iPhone pictures captured in low light and were extremely hastily taken. I'll come back with nicer pictures of other cakes next time! If I can find the time to...
Related Posts Plugin for WordPress, Blogger...