My blog has moved!

You should be automatically redirected in 6 seconds. If not, visit
http://www.unpastiche.com
and update your bookmarks.

Wednesday, April 18, 2012

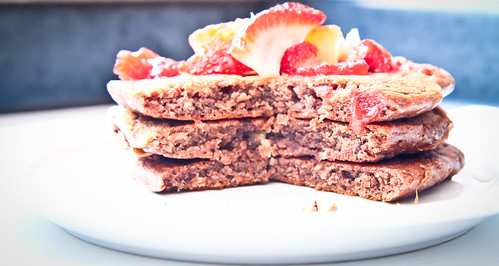
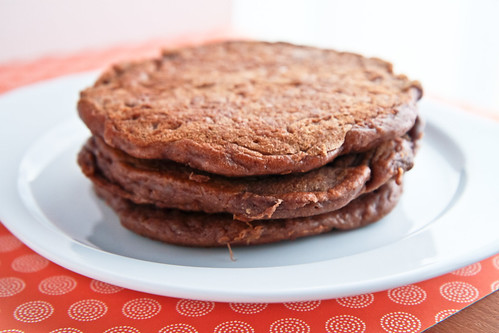
Really Good Chocolate Multigrain Pancakes

Sometimes, I'm obsessive compulsive to the point that even I get sick of myself, literally. I usually try variations on a single recipe and different recipes relating to the same thing for days on end until I satisfy myself that the recipe is the one I want as my "to go to" recipe, or the one recipe I'm willing to replicate to eat for the immediate future.


Just take bread for example. My very first post in the blog was of bread using the tangzhong method. What you didn't know was that I probably tried tens (I am not joking) of recipes before I finally settled on my bread recipe. My family members had to suffer through weeks and weeks of bad, not so good, and not bad breads just so that I could come up with 'the one'. Right now, my brother proclaims that my bread making is my "拿手好菜" (my best dish) and that I should just stick to that. Obviously I don't listen.

Right now, my current fad is granola and yogurt. I've been making my own homemade yogurt (low-fat and unsweetened) and my own granola. As for the yogurt, the experimentation was a few years back, so I've more or less settled on my usual technique. No one in the family is willing to eat my yogurt because they think it is too sour :( But that's the way I like it - natural yogurt tastes like that! So anyway, as for the granola, I've probably tried more than 10 granola recipes and am still experimenting. No one in my family eats that either, so I've to slowly make my way through the granola before making a new batch. I'm currently eating a banana-hazelnut granola and an olive oil-raisin-assorted nuts granola, both of which are so different and taste so good together!
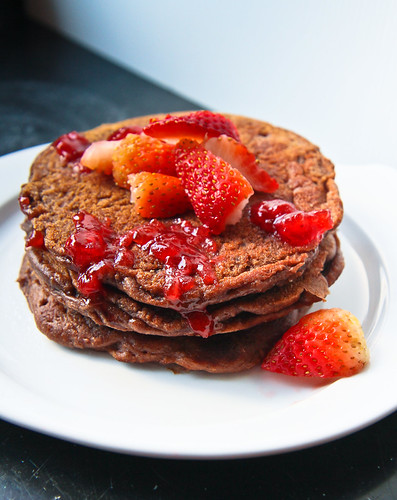
Oops somehow the jam looks horrible on the pancakes :/

So you can probably imagine how it was with my quest for pancakes. I was so obssessed with getting THE pancake recipe that I tried pancake recipes every other day (because I'm the only one willing to eat the pancakes and one recipe of pancakes lasts me 2 breakfasts) for weeks until I finally got sick of having pancakes for breakfast :/ The result of the quest is my basic pancake recipe, which I have blogged about before, and whenever I have yogurt on hand, this is the recipe I turn to.


Chocolate Multigrain Pancakes
Inspired by Smitten Kitchen
Makes 4 thick pancakes

35g egg (about ½ an egg or a small egg)
120g unsweetened low-fat yogurt (or any storebought yogurt)
15g olive oil
½ tsp vanilla extract

¼ tsp baking soda
¼ tsp salt
1 tsp baking powder
2 tsp castor sugar

5g cocoa powder
7g oat flour (or ground oats)
15g whole wheat flour
34g all-purpose flour
15g rye flour
7g sorghum flour
(or replace with 78g of all-purpose flour and 5g cocoa powder)

Method:
  1. In a medium sized bowl, whisk together the egg and yogurt. Add in the olive oil and vanilla extract.
  2. In another bowl, sift together all the dry ingredients - the flours, sugar, baking powder and baking soda, salt and cocoa powder.
  3. Stir the dry ingredients into the wet until the dry ingredients are moistened. A few remaining lumps are okay - do not overstir!
  4. Melt some butter in your pan and ladle a scant ¼ cup batter for one pancake. Cook the pancake until the edges are firm and dry and you see the centre bubbling. This will take about 3 minutes on medium heat. Flip the pancake to the other side and cook for another 3 minutes, or until golden brown (or in this case, until dry to touch on both sides since the pancake is brown anyway)
  5. Repeat for the remaining batter. Drizzle the pancakes with some maple syrup and serve with fresh strawberries and compote. Bon appétit!

Janine's jots: 
  • Note: As with most recipes that I try, I can't help but tweak and modify it to my preference, so in actuality, you see very few similarities with the original (hence making it my very own recipe ;p) For those who want to know what I have tweaked, I have used less egg (lower cholesterol), more yogurt and obviously made it chocolate pancakes instead of normal ones. Because of that, I added a bit of baking soda. Note that this is only for natural cocoa powder. If you are using dutched cocoa powder, you have to use baking soda together with an acidic ingredient, for instance, a touch of lemon juice or vinegar OR you can just replace with an equal amount of baking powder instead.  
  • Taste: Because the yogurt is the bulk of the recipe, the resultant pancake will taste of the pancake (and chocolate of course). Be sure to use good quality cocoa powder and yogurt. I loved how the pancakes tasted - in fact, this is probably the best chocolate pancake I've ever made and eaten!  
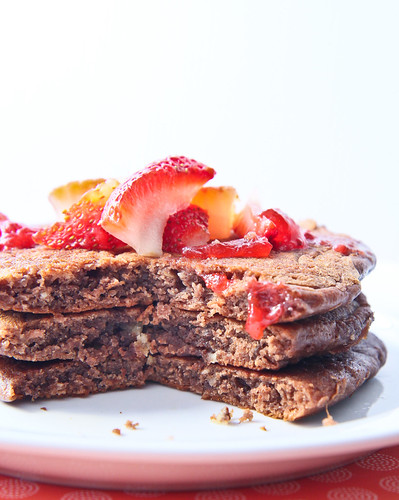
  • Texture: I also loved the texture of the pancakes here. I'm a fan of thick, almost cake-like pancakes, so these fit the bill perfectly. They are reminiscent of buttermilk pancakes, so do try these if you like the texture of buttermilk pancakes!
  • Serving size: I have tweaked this recipe such that it makes 4 pancakes - I tend to consume 2 pancakes during a single breakfast. This recipe is easily doubled.
  • Modifications: If you have thick or greek-style yogurt, do use some milk to thin it out (about 1-2 tablespoons will do). You can also refer to Deb's note on this. If the yogurt is already sweetened, you might want to reduce the sugar to 1 tsp as well. As for the combination of flours, feel free to experiment! Deb used a combination of whole wheat, all purpose and barley/rye flour. I went a step further to use a greater variety of flours. I haven't tried a gluten-free version yet, but I'm pretty sure it'll work the same :]
  • Storage: As with most pancake recipes, do not store the uncooked batter because the resultant pancake tends to be tough and does not rise well. For the cooked pancakes, try to consume them when warm, otherwise, these keep well in the fridge for a few days, when stored in an airtight container. Give them a zap in the microwave to heat them up a little.
  • Would I make this again?: Hell yeah!
Thursday, April 12, 2012

[Thursday's Trio] Absolutely Delicious Gluten-free Chocolate Chip Cookies

Finally the third instalment of Thursday's Trio! As you might have discovered, I find it rather hard to stick to a schedule - as you might or might not have realized, I have not done my Travel Tuesdays for a long long time (the last one was about Phnom Penh in June 2011) and neither have I completed my A to Z of Australia series either. In fact, I'm only at the letter E (for Eveleigh Markets), and since starting the series, I've been to Australia at least three other times. Oops.

In any case, I'm trying hard to make Thursday's Trio a monthly thing because I've gotten feedback that it's really helpful for some of you and I love reading up and researching on such things anyway. I previously talked about buckwheat and sorghum and today, I touch on millet.


Millet is often associated with bird seed, because well, it is part of bird food. It is tiny in size, and can vary in color, from white to gray to yellow to red. Technically, millet is a  a seed and not a grain.There are many varieties of millet, the most popular being finger millet and pearl millet. In fact, teff is actually a type of millet as well – Ehtiopian millet. If I'm not wrong, the yellow colored millet grains that we see in supermarkets and organic food stores in Singapore and Malaysia are pearl millets.

Similar to sorghum, millet is a staple in some parts of Asia (it apparently originates from China) and Africa, and it is very drought-resistant. Added to that is its short growing season – it can develop from a seed into a ready-to-harvest plant in less than 70 days! I guess this is yet another reason why it is grown in lands with low fertility and dense population.


Three interesting facts about millet
  1. Did you know that millet is even mentioned in the Bible as an ingredient for unleavened bread! (See Ezekiel 4:9)
  2. Remember the 5th most important crop sorghum? Well, millet is the 6th most important grain crop and it is actually related to sorghum!
  3. Millet is a good source of magnesium and phytochemicals, which helps lower high blood pressure and reduce heart attack and cancer risk. Studies have also shown that the insoluble fibre in millet also helps women avoid gallstones and protects against breast cancer! I personally enjoy millet because it is non-glutinous and is not acid forming, which helps with my digestion and gastritis.
Three ways of using millet
  1. Think of millet as similar to rice, and you can imagine just how many ways you can use it. It can be used as a flour, a grain, puffs or even flakes!
  2. You can also eat millet ‘fried rice’ – it tastes exactly like rice, just that it’s ‘shorter grained’. Cook millet as you would rice and you're set! Or cook it with more water and you can eat it as a porridge - sweet or savoury it's all up to you!
  3. Use whole millet to add an extra crunch to your muffins (think of it as large poppy seeds), bread, pancakes and even cookie recipes. I like it in my granola :]
Three interesting recipes I’ve bookmarked from blogs
  1. Tartlette's Strawberry Jelly Roll Cake (with rice and millet flour only)

How to store millet?
As with other grains/seeds, millet can last for quite a long time (two years) if properly stored. The whole seeds can be kept together with your rice or in a closed container in a cool dry place. The flour becomes rancid very rapidly after it is ground, therefore, do place the flour in the refrigerator, especially in our warm, humid environment.    

  
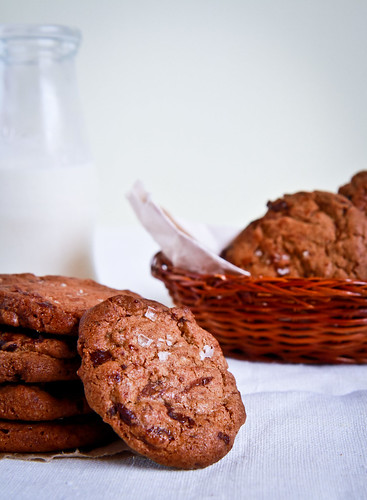
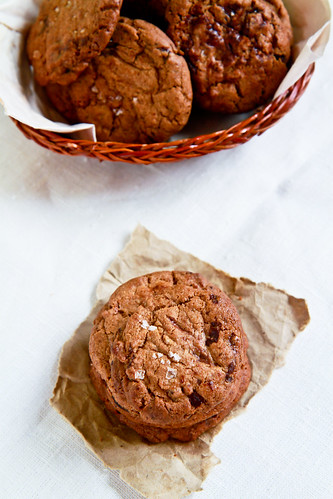
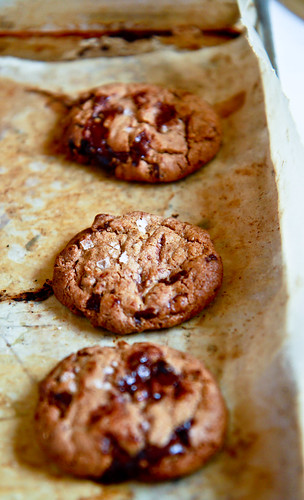
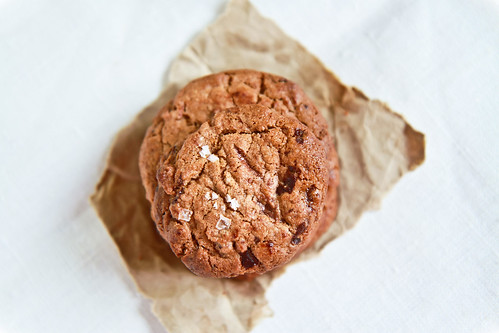
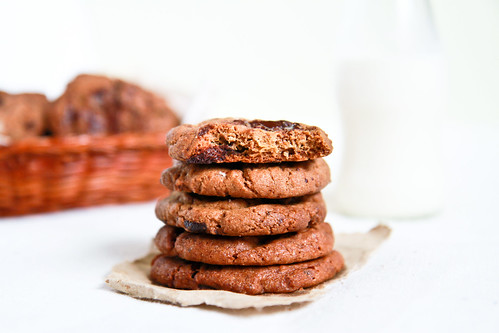
So as you can tell from the photographs, I'm featuring millet in my chocolate chip cookies today! I actually made a millet-only pancake, but I didn't exactly enjoy it, so I thought these chocolate chip cookies would be more convincing for those just starting to explore millet. If you notice, millet is seldom used alone (unless you're cooking the whole seed) and really tastes best when combined with a mixture of starches and flours.

I'm calling these the 36-hour chocolate chip cookies because making these cookies take at least 36 hours! After making the cookie dough, you have to allow the dough to rest in the fridge for at least 36 hours (find out why here) before taking it out to bake into morsels of heaven :]

I actually baked both the normal wheat version and gluten-free version at the same time, and conducted a tiny experiment. Those cookies which were baked a day after making the dough (ie, less than 24 hours) did not taste as chocolatey as those which were baked at least 36 hours later. As for the gluten-free and wheat versions, most tasters could NOT even tell the difference! And mind you, I gave the cookies to friends, relatives and colleagues! Some actually said that the gluten-free version was crispier and far more tasty than the wheat! I personally think so as well! So there you have it - baking gluten-free does not necessarily mean compromising on taste and texture - as long as you get your proportions right, it'll taste as good or even better than normal!

The recipe below is actually a halved version of the usual, do feel free to double the amounts - I tried out this recipe 3 times, making variations each time and I find myself liking this combination of flour and sugar the best. Do check out more detailed notes below.

36-hour Gluten-free Chocolate Chip Cookies
Adapted from David Leite's Ultimate Chocolate Chip Cookies (also known as the NY Times cookies) and sighted at Tartlette who adapted it from Shauna

50g sorghum flour
40g tapioca starch
30g white rice flour
50g millet flour
30g glutinous rice flour
15g buckwheat flour
15g hazelnut flour
10g cornstarch
(240g of flour in total)

2 teaspoons flaxseed, ground
2 teaspoons water
1 teaspoon cocoa powder
(OR 1 teaspoon xanthan gum)

¾ tsp baking soda
1 tsp baking powder (make sure it does not contain wheat)
¾ tsp sea salt

140g butter
110g brown sugar
90g white sugar
30g egg (about ½ an egg )
1 tsp vanilla extract
130g chopped chocolate (semisweet, or about 60-70%)

Sea salt, to taste

Method:
  1. In a small bowl, combine the ground flaxseed and cocoa powder together with the water and set aside.
  2. In a separate large bowl, whisk all the flours and starches together with the baking soda, baking powder and sea salt. Whisk in xanthan gum if not using the ground flaxeed combination.
  3. In the bowl of an electric mixer fitted with the paddle attachment, beat together the butter, brown sugar and white sugar on medium speed for 2 minutes until light and fluffy. Add in the egg and vanilla extract and beat until well incorporated. Beat for at least 1 minute. By now, the flaxseed-water mixture should be quite gelatinous - add it into the mixture and beat until incorporated.
  4. Add in the flour mixture into the batter in 2 batches, making sure that all the flour is incorporated before adding the next batch.
  5. Add in the chopped chocolate (and nuts if you desire) and mix briefly to incorporate.
  6. Then, scoop your preferred size of dough balls before placing into an airtight container to refrigerate for at least 36 hours. Alternatively, you can weigh your dough balls (my large ones were about 35g and small ones about 12g) OR you can refrigerate the dough and scoop them right before baking.
  7. When ready to bake, preheat the oven to 170°C and position a rack in the middle of the oven and line the baking sheets with parchment paper or a non-stick liner. Arrange the large dough balls about 3 finger spaces apart and sprinkle the tops with sea salt.
  8. Bake the cookies for about 15 minutes, or until they are golden brown and the sides are set. Allow the cookies to cool for at least 15 minutes before transferring to cooling racks.
Janine's jots: 
  • Note: If you want crispy cookies, do make the cookies small (about 10-15g) and remove them from the fridge at least 15 minutes before baking to allow them to soften slightly. Flatten them before baking and you will get nice crispy cookies, reminiscent of Famous Amos (I didn't say this - my brother did). Bake those cookies for 15-20 minutes - not only the sides but the centre of the cookie should be almost set before removing them from the oven. Conversely, if you prefer the thick chewy cookies a la Subway, portion large cookies (at least 35g in weight or an ice-cream scoop size) and bake them the moment you remove them from the fridge. The dough ball will gradually soften in the oven and remain thick. Once the sides have set (but the centre is still soft), remove them from the oven. They should take about 15 minutes or so.
  • Taste: Absolutely delicious. As stated above, I found the gluten-free cookies far more complex in taste than the normal ones - I could vaguely make out the taste of millet and hazelnut, which complemented the chocolate really well, without any addition of chopped nuts. This is definitely THE COOKIE to make when you want to introduce different flours into your diet and if you want to fool unsuspecting victims because they won't know that they're not eating gluten-free products!
  • Texture: I made a batch using xanthan gum and another without, and I found myself preferring the texture of the one without because the after-taste is less 'slimey'. Then again, that batch had more tapioca starch in it, so that could be one of the factors as well! In any case, this cookie dough is extremely versatile and can be used to make crispy OR chewy cookies - just vary the baking times and baking method :]
  • Serving size: Depending on size, the recipe above can make at least 3-4 trays of cookies. I made at least 100 small cookies with a single batch.
  • Modifications: For those who might be allergic to nuts as well, simply substitute the hazelnut powder for arrowroot starch or any other type of flour. Also, as indicated in the recipe, flaxseed can be replaced by xanthan gum and it is actually a substitute for egg as well. Feel free to increase the flaxseed amounts to 1 tablespoon to replace the egg in the recipe. The cocoa powder is added to mask the taste of flaxseed because sometimes ground flaxseed can taste nasty.
  • Storage: Store the unbaked cookie dough in the fridge for a maximum of 3 days before baking. Store in the freezer for up to 2 weeks although I wouldn't recommend this if you have egg in the dough. For baked cookies, store in airtight containers and they'll last really long! Don't store the chewy and crispy ones together though, because the crispy cookies will turn soft.
  • Would I make this again?: DEFINITELY YES!!


And finally, please note that I don't profess to be a gluten-free expert, although I have read up quite a bit on it. Most of my recipes do have gluten because I don't need to eat gluten-free, although I find it interesting as an alternative diet. Should you be a coeliac sufferer or are gluten-sensitive, please do be aware of some common pitfalls below:

Important notes for gluten-free baking in your kitchen
  • Do make sure that all the flours you use are certified gluten-free, or it is stated on the label that the flour product is processed in a mill which does not process other types of gluten flour. To be safe, you can opt for Bob Red Mills' which is gluten free or some types of flours sold in organic food stores.
  • Do make sure that the baking powder you use is gluten-free as well because some, if not most, baking powders contain wheat as one of the ingredients. You can buy a gluten-free baking powder OR you can simply make it yourself by using mixing baking soda, cream of tartar and arrowroot starch. 
  • Another source of gluten is in the chocolates. Make sure again that the chocolate you use is of good quality, and the label on it states that it does not have any wheat products or it is not processed in a factory which processes wheat or gluten products.
There are definitely far more notes on gluten-free baking but this is merely a primer. For more information, simply google "gluten-free baking" and you'll get millions of hits to blogs all over the world introducing you to the strange new world of gluten-free baking. Enjoy! :]

Saturday, April 7, 2012

Steamed Banana Cupcakes

Only now do I understand the joys of public holidays falling on a Monday or a Friday because it means long weekends yo! A few days ago on Monday, I was thinking that three days is a lot of time to bake, but was struck by sudden inspiration to head up north to KL! I asked my brother if he wanted to and lo and behold, a plan was formulated within minutes :] I do so love impromptu-ness! 

So now my brothers, mom and I are in KL over the long weekend for a food trip! :D We initially wanted to drive up to Penang to gorge ourselves silly, but decided we didn't have enough time to do so, so we've limited ourselves to KL (and Selangor) to stuff ourselves. Thus far, I've had Rakuzen for lunch, damn good fruit rojak with tofu and sotong, dropped by Ben's Independent Grocer at Republika and had really good pork ribs/pizza/risotto for dinner. This morning I had really damn good nasi lemak for breakfast (Najib goes there for his nasi lemak fix as well yo!), then an assortment of bread for lunch, Taiwanese dessert and there's still French patisseries, seafood and pizza left on the to-eat list!


Malaysia Sayangi. Having spent more than half of my life in Singapore, my friends always ask, why not be a Singaporean since you're more than halfway there already? Singapore might be my second home, and I might know the Singaporean national anthem better than the Malaysian one, but well, Malaysia Sayangi sums it up pretty well. It's my country, and it's where I call home.

Coming up to KL always makes me proud of my country. Singaporeans like to say that Singapore is a cosmopolitan country and all, but honestly speaking, I always feel that KL (and Selangor) beats Singapore hands down. Granted, KL might have its dirty and unsightly areas, but in my opinion, it's like an unpolished gem which still hasn't seen its fullest potential. Anyway this mini-rant arose because of discussions with my relatives about corruptness, politics and the plethora of good food one can find in KL.


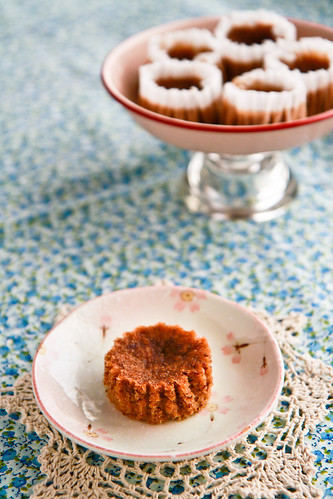
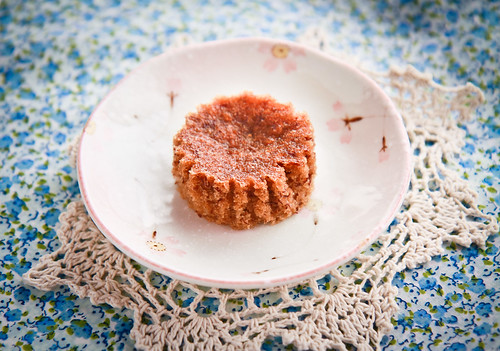
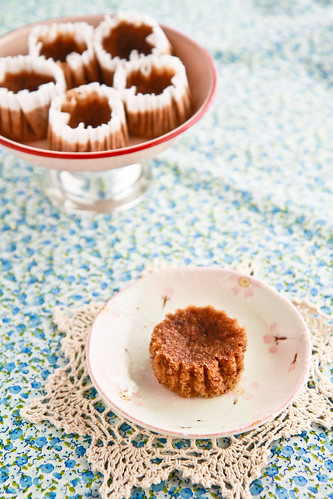
The following cake however, has nothing to do with anything. I was hoping to eat this really good banana leaf curry rice (literally on a banana leaf) and I thought of eating these steamed banana cakes which are really simple to make. I first made this a few weeks ago, when it was too hot to switch on the oven, and I didn't want to fire up the huge oven just to bake a couple of muffins. I also wanted something fast, so steaming is really the fastest way to achieve something 'cakey' in the shortest time.

The cupcakes are a little sunken, because I used a tad too little raising agent and I didn't have enough metal tins to go around, so some of the cupcakes turned out as banana pancakes, but they were yummy all the same.  

Steamed Banana Cupcakes
Very slightly adapted from Aunty Yochana

100g banana, mashed
½ tsp vanilla extract
½ tsp baking soda
⅛ tsp salt

65g egg
45g brown sugar
50g all-purpose flour
½ tsp baking powder
30g olive oil


Method: 

  1. Whisk the mashed banana, vanilla extract, baking soda and salt together in a bowl and set aside. 
  2. In another bowl, whisk the egg and brown sugar until pale and fluffy. 
  3. Then, fold in the flour and baking powder (sifted together once) into the egg and sugar mixture. 
  4. Gently fold in the mashed banana mixture and finally, fold in the olive oil. 
  5. Pour into lined cupcake moulds (preferably metal ones) and steam them for about 10-15 minutes on high heat until a tested skewer comes out clean. 

Janine's jots: 
  • Taste: Do use very very ripe bananas because somehow steaming makes the banana taste more prominent than usual. I would also prefer using less vanilla to allow the banana taste to show through even more. 
  • Texture: Extremely soft and spongy. 
  • Serving size: Makes about 8 small cupcakes.
  • Modifications: Like I said, I probably would add a tad more baking soda to allow a slightly more raised end-product because sunken cupcakes don't look so attractive :/
  • Storage: These keep well in the fridge (they don't store well at room temperature because the tops will turn moist and sticky after a while). Just give them a short zap in the microwave or steam them at 5 minutes on medium heat. 
  • Would I make this again?: Definitely - it really is a good alternative to baked banana muffins on a hot day :]


Alright, short break between teatime and dinner is over - I'm off for a yummy seafood dinner now :]


Related Posts Plugin for WordPress, Blogger...