My blog has moved!

You should be automatically redirected in 6 seconds. If not, visit
http://www.unpastiche.com
and update your bookmarks.

Saturday, May 28, 2011

Moist Chocolate Cake, steamed.

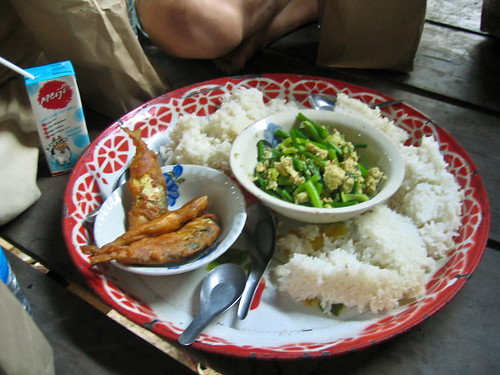
So I'm finally back in Singapore after a 17-day volunteer trip to Cambodia, specifically, Phnom Penh. The trip was extremely fruitful, to say the least. I managed to do a spot of shopping, and visited the Angkor Wat as well (which was spectacular). Not only did I immerse myself in Khmer food for 17 days, I even had the privilege of cooking AND baking for 150+ people! I'll definitely post more about that once I've sieved through the tons of photos I took! I've been really busy ever since I've got back - going for my brother's convocation and editing those photos, doing admin stuff for my own convocation, shopping for some travel essentials for my next trip, and filling myself up with missed foods - leaving me little time to bake. I only managed to bake an orange chiffon cake which my family had for breakfast and tea yesterday. In fact, I'm actually flying off again tomorrow, for a really really long holiday this time, to Australia. I'll be spending 5 whole weeks in Australia, mainly in Sydney where I'll be staying with Jon <3 

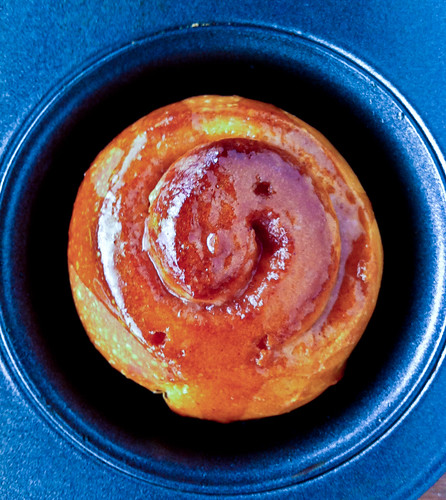
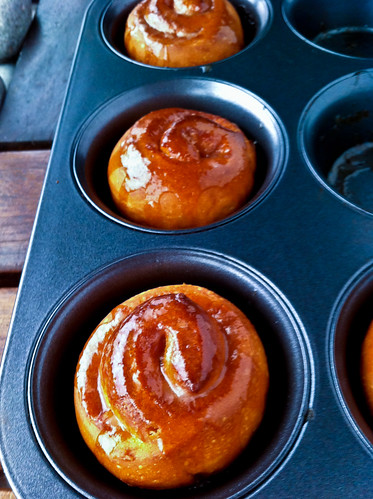
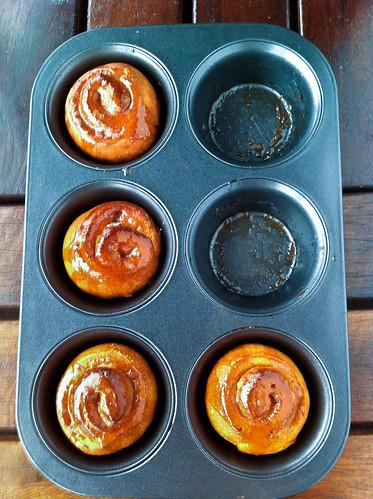
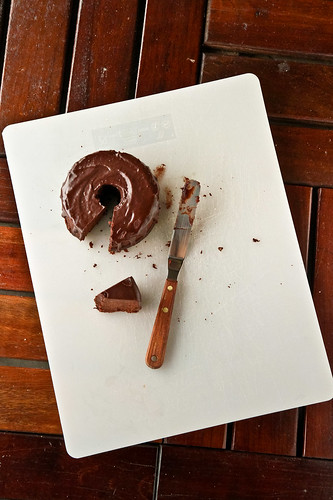
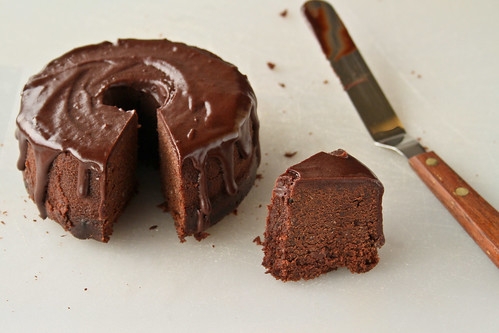
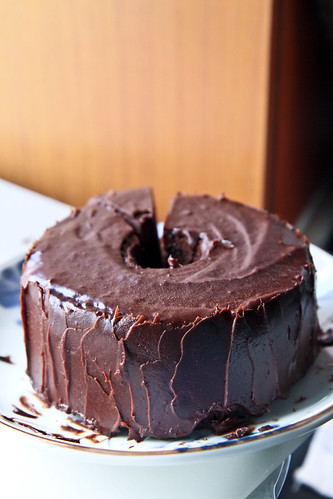
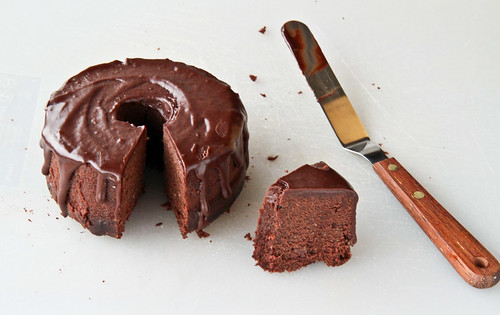
This post is long overdue, because I'd actually steamed this chocolate cake before I left for Cambodia, in the early bits of May. I promise I'll stop lazing around in June and get more food posts up because I now have a hefty backlog of recipes! This is a fantastic recipe by the way, for the times when you don't feel like firing up your oven and just want to do something simple. This chocolate cake is deliciously moist (even more so than normal oven-baked chocolate cakes), and is superb even without any ganache or topping. Of course, having a ganache is the icing on the cake, literally and figuratively speaking. I also tried my hand at doing some food styling in the picture below, which is quite a feat considering I usually snap a few obligatory photographs before gobbling up the food. Food styling does take quite a bit of thought and pre-planning, and I've to say that despite the lack of props, I was quite satisfied with the shot below, deficiencies aside. As usual, I'm open to any forms of critique :]


Steamed Moist Chocolate Cake
Loosely adapted from Ju

For the cake batter
70 g    butter
10 g    heavy cream
80 g    castor sugar
90 g    fresh milk
¼ tsp  vanilla extract
1         egg
65 g    all-purpose flour
20 g    cocoa powder
10 g    dark chocolate, melted
¼ tsp  baking powder
¼ tsp  baking soda

For a simple chocolate ganache
100 g chocolate (I used a mixture of dark and milk chocolate)
90 g   cream 

Method: 
  1. Combine and heat the sugar, milk, vanilla extract, butter and cream in a saucepan until the sugar has dissolved and butter has melted. Ingredients need not come to a boil. Remove from heat and leave it to cool once ingredients have melted. 
  2. Once cooled, whisk in the egg, beating until the egg is well combined. 
  3. Sift the cocoa powder, flour, baking powder and baking soda in a large mixing bowl. 
  4. Pour the liquid mixture into the dry ingredients and mix well, making sure the batter is free of lumps. 
  5. Pour the batter into a prepared pan and place it in the steamer. You need not preheat the steamer. Steam over medium heat for about 30 minutes and make sure that the top of the pan is covered loosely with a sheet of aluminum foil. Insert a skewer to test for doneness. If it comes out clean, remove from the steamer, otherwise continue steaming for a further 5 minutes before testing again.
  6. Let the cake cool for at least 20 minutes before adding the chocolate ganache. 
  7. In the meantime, prepare the ganache by heating the cream until it boils. Remove from heat once it has boiled and pour it over the chopped chocolate, whisking rapidly to ensure that the chocolate melts. Allow the ganache to cool slightly before pouring over the cooled chocolate cake. Decorate as desired. 


Janine's Jots: 
  • Note: I've modified the recipe a fair bit - I substituted some of the butter for cream, reduced the sugar, changed the evaporated milk for fresh milk and some of the cocoa powder for melted dark chocolate.
  • Taste: The cake is just sweet enough for me. I had to make the chocolate ganache a tad sweeter so that the cake would be more palatable to others who tried the cake. Because I'd used fresh milk instead of evaporated milk, I shouldn't have reduced the amount of sugar too much. Chocolate taste-wise, I felt that the cocoa taste in the cake was not strong enough. This was saved by the chocolate ganache, which gave the cake a much-needed chocolate boost (in my opinion). My family thought the cake tasted chocolatey enough by itself. I would probably increase the amount of cocoa powder the next time, as well as add some coffee/espresso powder to punch up the chocolate taste. I would probably add in a dash of salt as well.
  • Texture: It was pretty fine, because I substituted 5 g of the all-purpose flour for cornstarch. For a finer texture, I'll definitely try using cake flour the next time. Also, I still felt that the cake was a little oily for my liking - I'll try reducing the amounts of butter used. However, I noted that this oiliness receded after storage in the fridge and it actually helped to keep the cake moist. 
  • Serving size: This halved recipe makes enough for a 12-cm chiffon pan and 2 7-cm wide cupcakes. Do use the original full recipe if you wish to make a full 8-inch cake. 
  • Modifications: For people with a sweeter tooth, you might wish to increase the proportion of milk to dark chocolate, and to add in icing sugar to the ganache. You can also whip the cooled ganache to have a fluffier frosting. 
  • Storage: The cake keeps really well in the fridge - one week later, the cake still retains its moisture. Do make sure that you remove it from the fridge at least 15 minutes before serving to ensure that the cake softens a little and tastes its best :]
  • Would I make this again?: Having tried a number of moist chocolate cakes, I think this one takes the cake (pun unintended) in terms of moisture. The preparation method is also simple, and can be done within an hour. Definitely gonna make this again, but with more variations the next time ;p
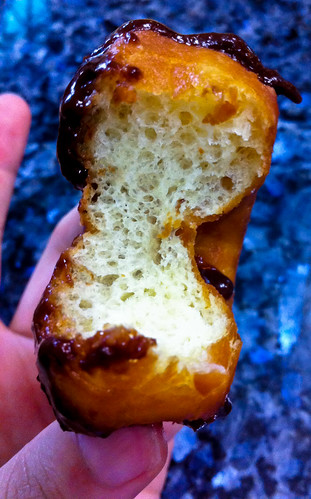
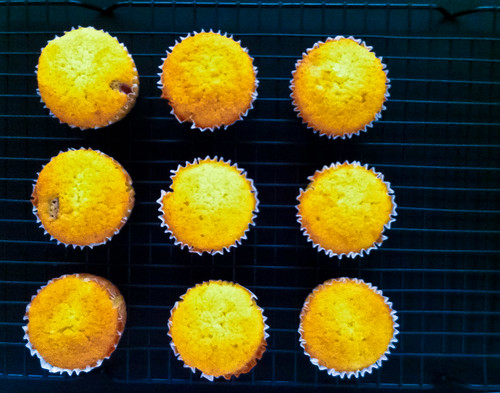
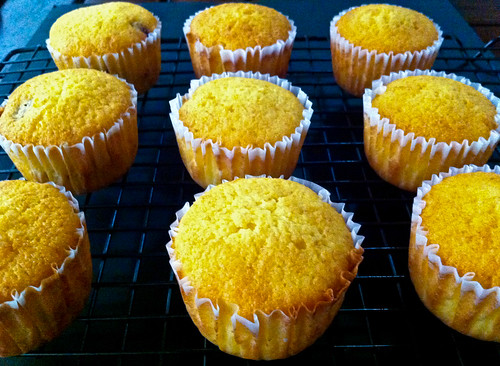
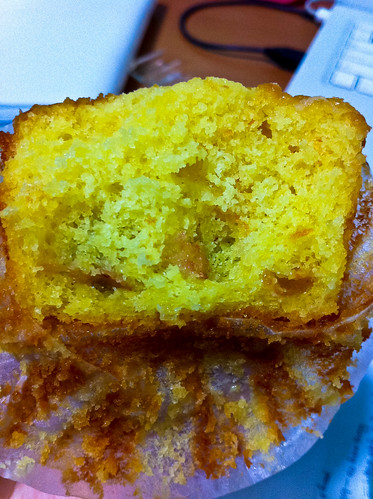
  • Other comments: Make sure to thoroughly beat the batter before steaming. I didn't, and you can see the disastrous results below. You can steam the cake in a cold steamer - all you need to do is to factor in an extra 10 minutes. This halved recipe only requires about 30 minutes or so - the cupcakes were done in slightly under 25 minutes and the chiffon cake took a few minutes more. The aluminum foil helped keep the tops of the cake dry from the water droplets condensing on the wok.
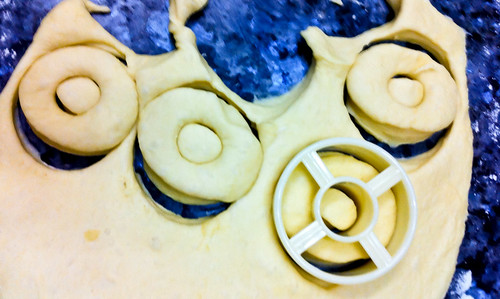
In pictures: 

This is the result of not mixing your batter properly - the lumpy bits rise to the surface!


Chocolate is one of my favorite ingredients and foods, and I'd planned to participate more actively in Aspiring Bakers but because of my schedule, this will probably be my one and only submission to Aspiring Bakers #7 – Chocolate Delight (May 2011), hosted by Doris. I really hope that once I'm settled in Sydney, I'll be able to continue my baking and cooking because I'm really missing them dearly!


Tuesday, May 17, 2011

Travel Tuesdays #6 - The City of Lights


Paris is known by many names, but the most famous two would probably be the City of Lights and the City of Love. This photo in essence actually encapsulates both names rather well, though the latter is less obvious. You can see that the entire city below is illuminated, although the name La Ville-Lumière was originally given because Paris was the hub for ideas during the Age of Enlightenment, it was later reinforced by the city's adoption of street lighting (it was among the first few cities to do so). The City of Love label, however, I think is attributed to good advertising and popular culture. 

Nevertheless, I did succumb to good marketing and I went up the Eiffel Tower with my loved one to take this very picture. There we stood, in an isolated corner of the Eiffel Tower (really hard to find such spots since the queues to get up the Eiffel are always long and snaking!) - I mounted my camera on the tripod and in the biting wind we stood (it was already May, but temperatures would still drop below 10 degrees in the evening, especially with wind and high up on the Eiffel Tower), waiting for the 30-second long exposures, waiting to see if they would give me the result I wanted. It may not be any surprise, but my significant other is not that into photography; but the very fact that he was willing to wait with me even though I knew he was chilled to the bones, speaks volumes. This photo is the product of that.  Ironically, you can't see the very icon that is so distinctively Paris - the Eiffel Tower, because well, I'm standing in it! 

Credits to Jinna
To get the typical postcard shot of Paris,  you can snap a photo (for free) either at Basilica du Sacré-Cœur, but you'll have to utilize a zoom lens since the Eiffel looks like a pea from there or on the terrace of Galeries Lafayette, where you can sip a cup of coffee at the roof-top restaurant and snap some scenic views of Paris at the same time (this is a place which few tourists have found out about in my opinion, because most just visit Lafayette to shop). Alternatively, for the most iconic view of the city - the one that you always see in postcards (see Jinna's photo for an example) you've to head to Tour Montparnasse (which is the second tallest building in Paris for a reason) but you'll have to pay an entrance fee - about 10 euros if I'm not wrong.


Many might consider me lucky - I have been to the City of Lights, not once, not twice, but thrice. And each time, I spent a considerable amount of time there. There were also a few other times when I had to take the train into Paris for a short transit, but those times don't count. To me, Paris was a dreary place actually, undeserving of its name as the City of Love. Maybe that was because the first two times I went, it was winter, and Paris in winter, is in short, really unromantic. Yes the Eiffel Tower and other monuments look beautiful covered in snow, but traipsing around in snow is no fun feat. Besides, the snow quickly turns into slush thanks to the volumes of tourists, and this makes for really dirty boots and hazardous slippery paths. And Paris is a really cold place. I've experienced below-zero temperatures and teeth-chattering winds in Paris, and those times, I wondered why Paris was so deserving of the City of Love label. Maybe it was because those times too, I was single and with my other girl-friends, and we were all bitter from the fact that we saw couples in throngs smooching everywhere, especially under the Eiffel Tower. I'm jesting here okay - I had lots of fun with my beloved girl-friends too, eating our way through Paris and doing nonsense along the streets of Paris.

But finally, I saw the beauty of Paris, when I visited in Spring, when the weather was lovely and sunny, with the lovely flower-scented breeze, and because it was finally time to meet him, after a year of long skype and msn conversations, and a copious amount of planning for our 'Epic European' trip. I still vividly remember how it felt like, to welcome him at Charles de Gaulle, to finally hug him after thinking about it for so long, and how different it felt to wander around familiar attractions with a special someone. (To those Louvre-lovers, I've been there thrice, and I'm sorry to say that I still don't like it - I much prefer the Orangerie and other smaller museums.) Paris was but the first of our many stops in Europe, but it's definitely one of my top 5 favorite destinations for now. The reason why I chose to recall my Paris trip now, is because I know Paris holds a special spot in both of our hearts. And this picture is especially meaningful to me, because it was the first time I actually had a tripod to use and the first successful long-exposure shot that I took. And because he was there with me. Also, I'm currently in Cambodia doing some volunteer work and have no internet access, so I thought this scheduled post for my dearest, with whom I had an anniversary yesterday, would be a nice surprise since I know he reads the blog. I'm really sorry that we weren't able to 'celebrate' it properly, but it's for a once-in-a-lifetime good cause and I'll be seeing you real soon!

In other news, if my plans work out, I might be able to head to Paris some time again this year, and I'll spend every waking moment I have eating all the cakes my body can consume - just like what Adam has done in Paris Patisseries (this is the site to go to if you want to know where in Paris to go for all the popular pastries and more). But if my plans don't work out, it's okay - I know that sooner or later, the allure of Paris will be too much for me to stand, and I'll be back. Surely. 

Ps: Just a question, which do you guys think is better? The original photo at the start of the post, or this cropped version? 

Tuesday, May 10, 2011

Cinnamon ronuts? (Cinnamon rolls made with donut dough)

The other day, I made myself some donuts. I ate a whole bunch of them, but one can only eat that many donuts, so I decided to freeze up a third of the donuts and brought it along with me back to Singapore. Like I said earlier, my mother enforces the no-frying rule in Singapore with an iron spoon, so frying donuts were not an option. I can't say that it took a large amount of brainstorming because sticky buns were on my mind and have been for some time now (I love cinnamon rolls from a local bakery and from St Cinnamon which is extinct in Singapore and only has one outlet that I know of in Mid Valley). It was no surprise that I decided to make myself some cinnamon rolls, using the frozen donut dough. Having made cinnamon rolls before, I knew that the dough required was a sweet enriched one, and I figured that the donut one would be a good substitute. Indeed it was :]

I wasn't left with that much dough, so I could only make myself 6 cinnamon rolls, each roughly about the size of a large muffin since these were made in my large muffin pan. 


Cinnamon Rolls
For the dough
Use the donut dough recipe here

For the cinnamon filling
100 g brown sugar 
10 g ground cinnamon 
35 g butter, melted  

For the glaze
Loosely adapted from Peter Reinhart's Caramel glaze for sticky buns 

50 g castor sugar
50 g brown sugar 
1 g   salt 
40 g butter, at room temperature 
40 g corn syrup 


Method: 
  1. Make the cinnamon filling: Combine the sugar and cinnamon in a small bowl and set aside. 
  2. Shaping the rolls. Remove the dough from the freezer and allow to thaw until room temperature, for about 30-45 minutes. Once thawed, roll out the dough into a rectangle on a well-floured surface. Brush the dough with the melted butter, leaving a 1-cm border along the edges. Sprinkle the cinnamon-sugar filling over the melted butter. Beginning with the longest edge nearest to you, roll the dough into a tight cylinder, and firmly pinch the seam to seal the cylinder. Place it seam side down and using a dough scraper or serrated knife, slice the cylinder into even rolls. 
  3. Arrange the rolls cut side down in the muffin pan, and allow to proof for 30-45 minutes, or until doubled in size. 
  4. Bake the rolls in a preheated oven for 15 minutes at 170°C, or until the rolls turn golden brown. 
  5. Make the glaze: Combine the sugars, salt and softened butter. Cream for 2 minutes on high speed, and gradually add in the corn syrup. Continue to cream for 5 minutes, or until the mixture turns light and fluffy. 
  6. Remove the rolls from the oven and spread the glaze onto the tops of the rolls and allow to cool before serving. 

Janine's jots: 
  • Taste: The cinnamon filling recipe gives an extremely 'spicey' roll - do halve the cinnamon proportions if you prefer a less pronounced cinnamon taste - the original recipe calls for a 5% cinnamon ratio to sugar (ie, 5 g of cinnamon to 100 g of sugar).
  • Texture: The dough makes a drier than usual cinnamon roll, which wasn't too surprising given that the dough was meant to be fried as donuts. Thankfully, the syrup saved the rolls from being overly dry, and on the whole, the rolls were more than passable :]
  • Serving size: A third of the donut recipe makes 6 cinnamon rolls comfortably. The frozen dough thaws very quickly as well, so everything was made and done within 2 hours. 
  • Modifications: The original recipe calls for the caramel glaze to be baked together with the rolls - it should be placed at the bottom of the pan and the rolls placed on top for a true sticky bun, but I didn't do so. In fact, I cheated slightly by using the excess cinnamon-sugar that I had, and mixed it together with some melted butter as well as additional icing sugar and a squeeze of a lemon to make a glaze for my cinnamon rolls. There are other recipes which call for a cream cheese or white icing glaze - both of which will also taste delectable with the cinnamon roll.  
  • Storage: The cinnamon rolls do not keep well unrefrigerated (and they invite lots of ants too), so keep them refrigerated if you are unable to consume them within the day. 
  • Would I make this again?: I prefer the normal cinnamon roll recipe that I use (either the Pioneer Woman's or Peter Reinhart's), but this is a handy alternative should I be attempting donuts again and have excess dough!

In pictures: (taken as usual, with the iPhone)

Thoroughly glazed ronuts :]

Oops I needed two of them for the energy to take photos!
If you compare them to the donut 'innard' in the earlier post, you'll realize that this looks less holey. It certainly is more dense than the donut, because this was baked rather than fried, but nevertheless, it is still one tasty cinnamon roll!


This is actually a scheduled post while I'm away in Cambodia, so do bear with me if there are no replies to the comments cos there's no internet connection where I'm at! :)

Thursday, May 5, 2011

Light-as-air Donuts

I like donuts. A lot. And I like you tiao and ‘butterfly buns’ too. I used to go for long runs just so that I could treat myself to a butterfly bun and you tiao and ham chim peng afterward. So after salivating over many a post on donuts, I decided to finally take the plunge and try my hand at making them when I knew I was going back to Malaysia for the weekend. This was because of two main reasons – my mom abhors any form of frying while we’re in Singapore (the ventilation in our small kitchen is horrible), so there is absolutely no frying allowed. Back in Malaysia however, we have an outdoor wet kitchen, so I could fry my heart's out (to quote my mother). Second, I knew that I'd be bored out of my senses while in Malaysia because there’s no internet connectivity, so making some donuts for tea would be the perfect excuse to while some time away!

The donut-cutter in action!
Naturally, something had to go wrong. First, I had no donut cutter, and there was no other form of round sharp instrument which I could use as a substitute. Thankfully, I managed to get myself a smallish plastic donut cutter in the nearby Giant for a mere RM2.50! Second, I realized that I was out of bread flour only minutes before making the donuts, so I had to make do with all-purpose flour. I merely kneaded the dough a little longer to try to compensate for the lower gluten content. Lady Luck has been on my side for these last few bakes, because my forgetfulness gave rise to yet another happy mistake. The donuts turned out to tiny fluffy clouds and were a joy to consume. I shall not deny that I finished 8 donuts in a single sitting – I had donuts that were cinnamon-sugar coated, sugar glazed and also chocolate glazed. And ALL of them tasted oh so delicious! And because they were so light, I didn’t feel the greasy after-taste that you’ll sometimes get after consuming too many fried goods. 


Fried Donuts 
Lightly adapted from allrecipes and Lara’s recipe 
(PS Lara has a book all about doughnuts! Lovely recipes accompanied by lovely photographs - do check it out!)

Makes 27 donuts with a 9-cm wide donut cutter

For the donuts
7 g        yeast
30 ml    warm water
180 ml  warm milk
25 g      sugar
½ tsp    salt
1 whole egg + 1 yolk
25 g      shortening or butter
320 g    all-purpose flour

For the sugar glaze 
25 g    butter
80 g    icing sugar
½ tsp  vanilla
30 ml  water

For the chocolate glaze 
Adapted from Alton Brown's recipe, made only 10% of the given quantities


Method: 
  1. In a bowl, dissolve the yeast into the warm water until foamy, for about 5 minutes. 
  2. Add milk, sugar, egg and yolk, salt, shortening and 160g of flour into the bowl, mixing well. Once a smooth paste is achieved, add in the remaining flour. 
  3. Knead the dough, for about 15-20 minutes, or until a smooth dough is achieved. Cover the bowl and let it rest in a warm spot for 45 minutes or until doubled in size. 
  4. Punch down the dough and roll it to about 3-cm thick before using the donut cutter to cut out the donuts. Place the doughnuts on the baking sheet at least 3-cm apart and cover with plastic wrap. 
  5. Allow the donuts to rise until doubled in size, about 30-40 minutes, testing at five-minute intervals. To test whether the dough is ready, touch lightly with a fingertip. If it springs back immediately, it needs more time. If it springs back slowly, it is ready. If it doesn’t spring back at all, it has overproofed and you should punch it down and re-roll it. 
  6. Using at least 10-cm of oil, heat your wok or pot up to 175 degrees and gently drop the donuts into the oil. Fry for about 1 minute per side, until they rise to the top and turn golden brown. 
  7. Remove with a slotted spoon and drain on a wire rack over a paper towel, and let cool slightly before glazing. 

Janine’s jots: 
  • Taste: I’ve reduced the amounts of sugar required in the donut, so by itself the donut is pretty much very plain and not sweet as all – in other words, not too palatable if you eat it on its own. I highly recommend a glaze or sugar coating at the minimum to enhance the flavor profile of the donut. The sugar content in the glaze is also greatly reduced, do feel free to add up to 125g of icing sugar into the glaze. 
  • Texture: The all-purpose flour definitely gave the donut its ‘airy’ texture, much like how Krispy Kreme and J.Co donuts taste like, so for those who prefer more bite in their donut, you’ll have to substitute the all purpose flour for bread flour instead. 
  • Serving size: I'd probably halve the recipe in the future, because 27 donuts are a tad too many for a family to have for tea, but then again, the dough freezes rather well, so it makes sense to make an entire recipe and keep some for a quick fix next time!
  • Modifications: Egg whites provide structure, while egg yolks provide tenderness – so since I went the route of all-purpose flour and ‘cloud-like-ness’, I decided to use an extra yolk instead, to further add to the tenderness of the donut. You can see that in Lara’s recipe, she uses a maximum of 3 yolks to tenderize her donuts, but her recipe calls for bread flour, so do note the subtle differences! 
  • Storage: Although the dough freezes well (you can freeze it before the first proofing, but it's best if you freeze after the punch down so that you save time on proofing the next time), the quality of the fried donut deteriorates rather rapidly after a day. I tried a day-old donut and it just didn't taste as good as when it was eaten hours after it was fried. So, do consume these babies asap!
  • Would I make this again?: I would probably not repeat this any time soon, not because I didn’t like it, but because it’s way too addictive. Like I said previously, the lightness of the donut is rather deceptive and makes you eat more than you should! 
  • Other comments: Do feel free to substitute a bread machine or electric mixer for the first few steps of the recipe. You will realize that it’ll take some time for you to achieve a smooth dough because all-purpose flour has less gluten content and will take longer to form those gluten chains. 


In pictures: (photos again taken with my trusty sidekick, the iPhone)

After the first rise - to check if the dough has sufficiently proofed, press a finger into the dough. If the dough bounces back, it is not sufficiently proofed. If the indentation remains, you can begin punching down the dough and shaping :] As you can see, I was a little over-zealous with the checking :p
Using my donut cutter. I removed the donut holes and actually re-rolled them into sheets for more donuts because I don't really like donut holes :p I don't think the textures of the donuts were affected much by the re-rolling.
All cut and ready for the 2nd proofing. They kinda look outta shape cos they're pretty fragile with the holes in the centre and I don't exactly have a light touch =X
I chose to fry them in a wok instead of a pot because my mom says that woks use less oil than required.  My oil is a little too hot here because some of the donuts wrinkled immediately after I slid them into the oil and are turning wayyyy too brown!
Ooooohhhh look at these lovely donuts - all brown and sugary :] And look at the difference between this shot which is taken outdoors and two photos before this which was taken indoors. Bleh :/
Here's a close-up - my donuts are a tad too brown because I can't control my fire properly - it's my first time frying something! 
Not a pretty picture with icky shadows, but just wanted to show you the sugar and chocolate glazed donuts. Those are not oily donuts but my sugar glazed ones! Really really good - I like the glazed ones better than the normal sugar sprinkled on ones. 
And a picture of the inside before it disappears into my tummy. Look at those holes - LIGHT AS AIR I tell you!

I actually only made 18 donuts with my dough, because I kept a third of the dough in the freezer since I felt that 18 donuts were way too many for a family of 5 to have for tea (I was wrong). Like I mentioned, I combined what I thought was good about both recipes to get the recipe above. I thought that it was a pretty good primer into the world of making donuts, and I definitely have much more to learn - but I'll have to wait until I can get my hands on a wok of hot oil again (in Malaysia), so that I can fry myself some more donuts! If you're wondering about the excess frozen dough - here's a hint, I didn't fry it and no, it wasn’t donuts! ;p

Tuesday, May 3, 2011

Travel Tuesdays #5 - Chiang Mai

I had initially wanted to do a post about this last Tuesday, because last Tuesday marked a rather momentous day of my life. I finished my last exam in university, ever. It was momentous, because it really does mean that I'm heading to a next stage in life - that of a working adult. Having done many holiday jobs, I know that working life is a misnomer, one hardly has the time for a "life", especially for my profession - my seniors have all warned us of the late nights, and even late weekends(!) that lie ahead for us. Nevertheless, the end of exams was marked with celebrations - a good meal spent with good company - the only thing missing was the alcohol (which I couldn't take since I was driving). 

Anyway, before any of that 'working thing' starts, I’ve a three-month long break and naturally, I’m going on holiday! Many of my peers have chosen to go to America, both USA and South America, as well as Europe or Korea for their grad trip, but I've decided to do something different. Partly because I don't have enough finances for another grand trip, and partly because I thought this would be a great time to do something meaningful, something that I'd probably won't have the chance to do when I was working. I decided to join a student group heading to Phnom Penh for some volunteer work. I doubt when I start work, I'd be willing to spend my precious 14 days of annual leave on doing volunteer work, so this is a great opportunity, and I do think I need to get in touch with the less affluent world again, having travelled to developed nations (Europe in particular) rather extensively the past year. 


I took a number of photographs during that trip, because it was the first time I had a digital camera! Previously, I used a film camera so having a point-and-shoot was really great because I didn't have to worry about 'wasting film'. I still remember the camera - a Canon Ixus 5 - and I remember that during that time, it was the top of the line - back then, 5 megapixels and 3x optical zoom were the best that money could get you. Fast forward to today, 12 megapixels is merely a drop in the bucket, and 3x optical zoom? Extinct! Don't you find it amazing how fast technology moves? The speed at which science and technology progresses is one that amazes and frightens me at the same time - it frightens me because I'm afraid that people of the next generation might eventually forget how to live their lives without technology, and that is a scary scary thing indeed!

Anyway, back to the photograph - I know I typically post one photograph per Travel Tuesday post, but I thought I should buck the trend by posting a few photos I thought were especially meaningful. I regret that my photographs don't really tell a story by themselves, but these were taken with unskilled hands (which still are unskilled today - I'm really bad at portraits), so bear with me as I tell you the stories behind each photo :] The photograph above was taken when we first visited the children - as you can see, they were wary of us, but 'thankfully', because they had never seen a camera before, they were staring at it and I managed to get this shot of them. I remember two distinct feelings when I first saw them - fear and helplessness - fear because I didn't know how I could help, and helplessness because I knew that whatever help I could render, would merely be superficial and limited. After spending a whole 3 weeks interacting with the children and attempting to teach them basic English, they grew really close to us and were really sad to see us leave. When it was time for us to get onto the songthaew to leave, the children started to cry and seeing them cry made us tear as well, because this outburst of pure emotion from the kids made us realize how treasured our presence was. What was especially touching was our goodbye gifts from these children - each of them gave us little bracelets they had made with twine and seeds - till this day, I still keep my bracelet I got from my little boy :]


I know there are some of you out there who'd say, why waste the money going there when you can donate that money to them directly? To that, I'll first say - this ensures that your money is going to the right places and through the right channels. Second, I think it's important that the beneficiaries actually see who the donors are, in person. That's the difference between a larger donation of say $10,000 and a smaller donation of $5,000 coupled with volunteers helping out for a while at that place. This is what many of the VWOs here believe, and I believe the same too, especially for the teaching of English in these places - when these children see the faces that accompany the monetary donation, they see that their teachers are proficient in English, and they see the importance of learning English. This is why we try to equip them with basic English, because this will expose them to a wider scope of jobs - they'll be able to take on jobs in tourism if they wanted to. Also, for parents who are cynical about their children going for such overseas CIP trips, I'd like to say - please do let them go. It's a learning experience like no other. Nowhere in Singapore will you get living conditions like what you have in these places, be in Cambodia, or China or Thailand, which are the usual OCIP places. My kampong used to have almost similar living conditions, so it wasn't a big shock for me, but I could tell that it was for some of my team mates - no flushing toilet (we had to throw our papers in the makeshift dustbin outside), no toilet light (we had to bathe in the dark and in the cold) and no waste disposal system (we had to dig holes to dispose of our rubbish). It might be true that the airfare and other costs incurred in reaching these places could have translated into donations, but it's not called a service-learning trip for nothing - you want to be able to serve the community, and to learn at the same time. As I flip through the pages of the journal I kept then, I'm amazed at the amount of self-reflection that occurred. Some of my ideals got shattered, and among other things, I got bullied by some of my team-mates, so much so that I'd cry myself to sleep wondering why. Nevertheless, I learnt to pick myself up, and at the same time, I managed to serve the community to the best of my ability. Much was gained during that trip, and I hope for the same this trip - not the bullying, but the journey of self-discovery and helping others. 


Since this is a food blog, I decided to end off with a picture of the food that my host family prepared for us - this is by their standards, an extremely lavish meal - 2 sides to accompany the heaping portion of rice. As you can see, there is a Meiji milk packet on the left, which was a luxury we brought from Singapore. Every night, each family will gather around the 'living area' in their stilted homes, (stilted so that they can rear chickens and pigs underneath, not because of water since they lived on the mountains), which is basically an area which didn't have their sleeping mats and enjoy a meal together. There are no bowls or utensils - the metal spoons you see are specially for us - they dig in with their fingers and partake in the food. Meat, or fish, is a luxury that comes along once a week or for special occasions. This photo reminds me of many long-forgotten memories - things like how each child was so proud to introduce us to their family and their modest home, the pride they took in preparing their meal and offering it to us, as well as giving us the best spot in the home to sleep in. All these little actions simply showcase the boundless generosity of these people. It's perhaps proof to some that there is still good in this world, that people do not always act with ulterior motives. We, the so-called educated and better-off people, have many things to learn from these villagers - family values and benevolence are but a few that I've highlighted above.

I know I said I wanted to end off with the picture above, but I couldn't resist adding this one last photograph below. The little boy 'won' this packet of lollies from a game we played, and having unwrapped his lolly, he immediately offered it to his sister, without even having had a lick from it himself. I'm not really good with emotive words, but I always feel this overwhelming sensation when I think about this incident - perhaps it's awe that one can show such selflessness at such a young age (or is it that we are only able to show such unadulterated selflessness at that young age)? It makes me question if I'm able to be as selfless and generous as these people I've highlighted today. So today, I'd like to challenge you - you who are reading this - when was the last time you performed a selfless or altruistic act? If you have done so recently, good for you; if you haven't, challenge yourself - it could be as simple as giving up a seat for someone needy on the bus, or even dropping a coin for the destitute/homeless. Remember, love and kindness are never wasted. They always make a difference. They bless the one who receives them, and they bless you, the giver (Barbara de Angelis).

Have a great week ahead, my friends :] And apologies in advance if this sounded preachy or too cynical.  And sorry if the title conned you into thinking that I'd be writing about Chiang Mai today - this post is indeed the essence of what I did in Chiang Mai. I did manage to do the touristy thing in Chiang Mai, and for those contemplating visiting somewhere other than Bangkok and Phuket, do consider Chiang Mai - much of it is still untainted by tourists and it's a total change of scene from the hustle and bustle of Bangkok and the sun/sand/sea of Phuket.

Sunday, May 1, 2011

Sicilian Orange Cupcakes

I made these some time ago, while I was studying for my exams. This will be the first of my many backlog posts, because I baked like a mad woman while I was studying - baking de-stresses me really well, especially if I'm making bread. I find that the repetitive motions of creaming butter with sugar, and mixing flour into the batter soothing and helpful for emptying thoughts.

I first saw this Sicilian Orange Cake from Jess, who got it from Ellie. Since I'm particularly fond of citrus fruits, I bookmarked the recipe right away and have been waiting for the right time to make this widely-raved-about cake. The right time came about when I was craving orange cake one day for tea and I badly needed some time out from studying. The original recipe makes for a 22-cm cake, and required 45 minutes of baking, but since I was too impatient to wait that long to sink my teeth into the cake (tea time was fast approaching!) I decided to halve the recipe, and make cupcakes instead!

I have to admit that this cake almost turned into a flop for me. Why? Well because as usual, I didn't have my mise en place since it was a spur-of-the-moment decision and I needed a quick fix, so I basically took out the ingredients one at a time from their spots in the kitchen while weighing and mixing them into the bowl. This meant that I had to cheat by placing the butter in the microwave for a little while to soften it. It also meant that while I was busy zesting the orange, the yolk mixture curdled rather horribly and I had to beat the batter like a mad woman to get rid of those curds. Also, I mentally halved the recipe instead of writing down the halved proportions, and this of course, is a recipe for disaster! As it turns out, I remembered to halve all my ingredients, except for the orange juice, and worse still, I had added a little more orange juice because I'd wanted a moister cake - this meant that there was 100 ml of juice in the batter when I should have only added 43 ml of it! =X And I only realized this after I'd placed the cupcakes into the oven and going over my recipe notes, so I immediately plonked myself in front of the oven, fervently praying that the oven gods would make my cake rise. It turned out into a beautiful disaster =] The structure from the flour and eggs were indeed strong enough to support all that liquid in the cupcake and the cupcake turned out to be superbly moist and orangey!

***

Sicilian Orange Cupcakes
Makes about 12 cupcakes

125 g     unsalted butter, softened
100 g     caster sugar 
2           eggs
1 tsp      orange zest
1 tsp      salt
125 g     self-raising flour
100 ml   freshly squeezed orange juice


Method: 
  1. Preheat the oven to 160°C. 
  2. Using a wooden spoon, cream the butter and sugar together for 5 minutes, until pale and fluffy. 
  3. Beat in the eggs, one at a time, making sure that it is fully incorporated after each egg. Add a tablespoon of flour after the last egg to prevent the batter from curdling.
  4. Beat in the flour all at once, mixing the batter well. 
  5. Finally, pour in the orange juice and mix well. 
  6. Spoon the mixture into the prepared cupcake liners and bake on the middle shelf for 20-25 minutes or until a skewer, inserted into the centre of the cake comes out clean. 
  7. Remove the cupcakes from the oven when done, and allow to cool for at least 10 minutes before consumption. 

Janine's jots: 
  • Taste: I loved how orangey the cake tasted, and for those which I added cranberries, the contrast between the textures and tastes of the cranberry and orange cake was sublime. I'd probably add in some lemon zest to get an extra tanginess in the future. Be sure also to use good butter, because it's a major flavor contributor in this recipe. 
  • Texture: The crumb was really really moist - I was surprised the cake could actually hold that much orange juice. The only drawback was that the centre of some of the cupcakes were a little moist to touch even after baking, so I would probably dial down the amount of juice by 10% the next time. 
  • Modifications: I reduced the amount of sugar in the recipe and still found the cake rather sweet. The amount of orange zest was increased, and so was the orange juice, so please do follow the original recipe if you don't like an overly orange taste. I lowered the baking temperature to 160°C, because I knew that with that much liquid in the cake, I had to make sure that the cake rose slowly so that it could support the liquid and not sink afterwards. The method worked :]
  • Storage: The cake keeps well at room temperature for about 2 days but I'll advise storing it in the fridge. The cupcake will be denser after keeping it in the fridge, so do give it some time to warm up to room temperature before consumption.  
  • Would I make this again?: This will be my to-go-to orange cake recipe from now on :] The many raves from many blogs are not wrong - this really is a delicious cake!

Photos are taken with the iPhone, so the noise level is rather high for some pictures. 
Notice the cranberries peeping out of some of the cupcakes? ;p
The cupcakes are not as yellow in real life - I think I overdid the brightness level here. See below for the more accurate representation!
I know I said that the recipe makes 12 - but 3 cupcakes were consumed (just in time for tea) before I took photographs,  so only 9 were left for these photos >.<
As usual, I forgot to take a proper picture of the inside, so this is one that I took while having my breakfast the next day. You can see my laptop in the background - I was hard at work! :p Btw, the funny looking moist bits and holes are actually remnants of the cranberries. As you can see, overall, the crumb is really tight and moist. 

Oh, and Happy Labour Day weekend guys :] I hope you're enjoying the long weekend, because I know I am - at this time, I should already be at my aunt's place in Malaysia, enjoying a rural weekend and eating all the yummylicious kuihs I can stomach!
Related Posts Plugin for WordPress, Blogger...