
I have a really bad habit. I tend to go grocery shopping when I'm hungry. And it's bad because this is why - you end up buying a whole lot of groceries and stuff that you don't need and probably won't use until it's reaching its expiry date. Take my desiccated coconut for example. I bought it months ago when I was grocery shopping and had my mind on eating some Anzac cookies, but well, it never happened :/
Another bad habit I have, which is related to the previous one is that I tend to bake when I'm hungry. Which is really really bad. I try to speed the process of baking a lot by upping the temperatures sometimes (which is always a bad thing and explains why I get burnt tops) and when the baked product is done, I take it out of the oven, give it a few blows in a bid to cool it so that I can sink my teeth into it. I have burnt my tongue and throat more than a few times because of this. But what can I do? I'm ravished by the time it's baked!
The point of saying this is well, I know the photos from the swiss roll previously weren't that pretty, and I specifically reminded myself to take nicer photos this time, but guess what? I happened to bake right before tea time, and by the time the cake was cool and rolled together with the filling, I was so hungry I could have eaten an elephant! So what happened was that I whipped out my phone from my pocket, hastily took a few shots before gobbling the slices down. And well, my brother had my camera, so that was another excuse ;p I wasn't alone in gobbling the slices down though, my parents were also stuffing themselves crazy with the slices because they were really fluffy and yummy and well, it was tea time!
I'll be submitting this swiss roll for this month's Aspiring Bakers #9 Swiss Rolling Good Times, hosted by Lyn. It's using the same recipe I posted here, but with a slight chocolate variation.
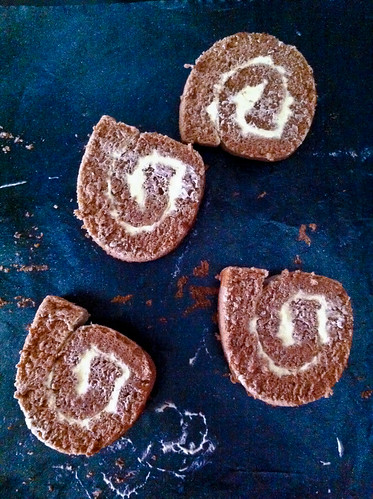 |
| This is what happens when you become so hungry you don't have time to put the slices on a nice plate to take a photo. |
For the benefit of those lazy to click on the link to my basic sponge cake recipe, I reproduce it here, complete with how to make it a chocolate sponge cake.
Basic Chocolate Sponge Cake
Adapted from an unknown, very popular Japanese recipe a long time ago
Makes a 30cmx30cm cake
4 large eggs
60g castor sugar
30g all-purpose flour
10g cocoa powder
Method:
- Separate the egg whites from the yolks.
- In a bowl, whisk 30g sugar into the yolks. Sift the flour together with the cocoa powder, before sifting them into the yolks. Mix all together until you get a smooth paste.
- In another bowl, whip up the egg whites until foamy, before adding the remaining 30g of sugar. Continue whipping until you get shiny, stiff peaks. Mix some of the whipped egg whites into the yolk mixture to lighten it up before folding the remaining whipped egg whites into the yolk mixture.
- Pour into a lined baking tray and rap the tray against the counter to get rid of any air bubbles. Bake in a preheated oven at 180°C for 10 minutes.
- Leave the cake to cool in the tray for about 10 minutes before removing it to cool on the cooling rack.
To make it a swiss roll:
Swiss Meringue buttercream filling
Adapted from Martha Stewart here
80g castor sugar
60g egg whites
160g unsalted butter, diced into 3-cm cubes
A few drops of vanilla extract
Method:
- Prepare a bain marie. The pot of water should be simmering and not boiling.
- Dice the butter into 3-cm cubes and allow them to stand at room temperature or until softened.
- In a mixing bowl, whisk together the egg whites and castor sugar. Place the mixing bowl over the bain marie and whisk constantly, until the sugar has completely dissolved and the egg whites are warm. You can use your fingers to rub the mixture in between your fingers to ensure that there are no undissolved particles left.
- Remove the mixing bowl from heat and beginning whipping the mixture at high speed until it becomes thick and glossy. Once soft peaks are achieved, beat at medium speed and begin adding the butter cubes one at a time until it is fully incorporated. The mixture will first appear curdled before reaching a smooth silky texture. At this point, add in the vanilla extract.
- Continue beating until you get soft peaks and there you have it - swiss meringue buttercream! At this point, it will be a little soft because of our humid hot temperature, so do refrigerate it until needed.
Janine's jots:
- Notes: You can choose to use cake flour instead of all-purpose flour if you want a finer crumb. For the filling, you can use a basic whipped cream filling or anything that is your fancy. I used Swiss Meringue buttercream because I was using it later to top some cupcakes and it was convenient.
- Taste: The sponge cake by itself may not be sweet enough for some, so I suggest upping the sugar in the recipe to a maximum of 100g. Alternatively, just use a sweeter filling if you're making it into a swiss roll. That's what I did. Note that the buttercream recipe produces buttercream that isn't overly sweet, so do fill free to add more sugar - the original recipe calls for about 120g of sugar.
- Serving size: This recipe fits the 30cm by 30cm tray perfectly. As you can see, this cake is definitely 'thicker' than the previous one because I used the right tray for the recipe!
- Storage: The cake keeps well for weeks in the fridge! I've tried keeping it for a month before using it and it still tastes as good. At room temperature, it stores well for about 3-5 days (without any filling). If you have a whipped cream or buttercream filling, do store the cake in the fridge.
- Would I make this again?: Definitely! I can imagine so many other variations I can do with this recipe - substituting the cocoa with nut flours, matcha powder, black sesame, etc. Just make sure that the total 'powder' weight is 40g.
In pictures:
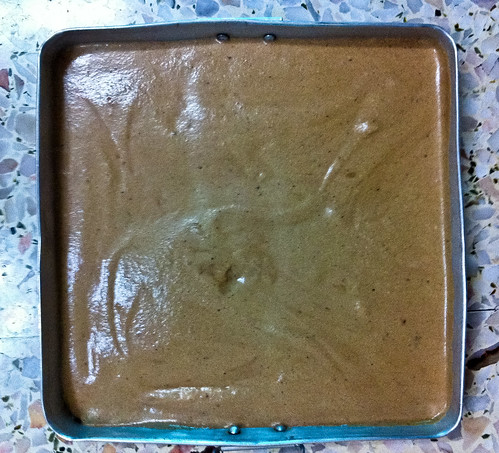 |
| All ready for the oven! |
 |
| Remember to remove the 'skin' if you want a nice-looking swiss roll! |
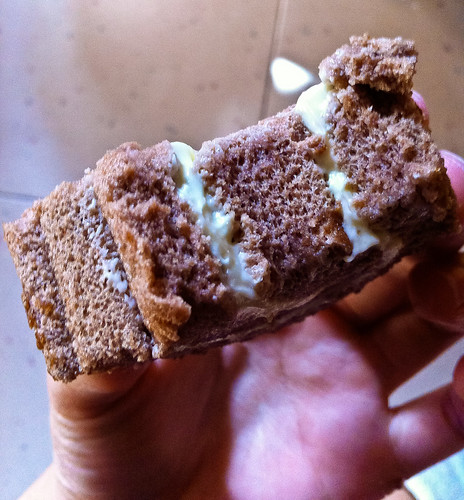 |
| Check out the innards - it really feels as if it can go boing-boing! |
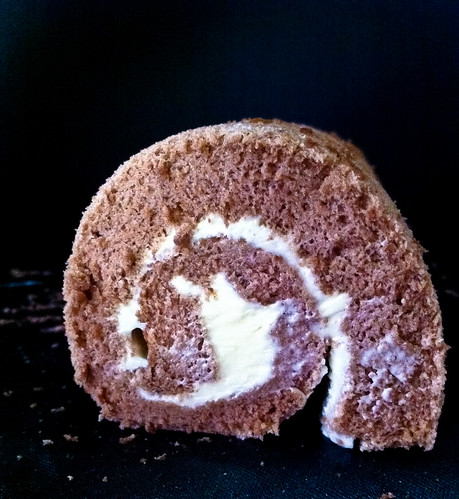 |
| And a final side view of my swiss roll. |
11 comments:
I love the chocolate roll, it looks very soft!!
I also have the same bad habit of buying a lot of things randomly on impulse and store them till they hit their expiry date. Oh dear...
Love its neatly roll shape.
wow, it looks 'bouncy' indeed! love the texture!
The texture is really great, you can see it's not dry or anything...
Looks really tasty ♥
You know you're gonna make me make a roll, you know :D
I have seen some lovely Swiss rolls these past month but it's yours that has me convinced to try one out myself. :)
oh janine, you just reminded me of that block of cheese that i just thrown away 2 days ago, felt really bad. Initially wanted to make a second bake for that AB cheese theme but never happened too! Thanks for sharing such a simple recipe for the sponge roll!
hey ladies, thanks for your super sweet comments :)
@Tina and Shaz: Yay I hope you guys do try a swiss roll recipe out! They are really the simplest and prettiest things to do, besides cupcakes :)
@lena: it happens to me all the time >.< I buy things and don't use till it's too late!
oh yummm i definitely wanna try making my own swiss roll!
Your swiss roll looks good and very simple ingredients is used. Thanks for sharing.
Your swiss roll looks amazing. It's definitely one of my favorite childhood afternoon snacks. :) Thanks for sharing your simple recipe.
@Rita: do try!
@Amelia: thanks :)
@Amy: thanks!
Post a Comment