My blog has moved!

You should be automatically redirected in 6 seconds. If not, visit
http://www.unpastiche.com
and update your bookmarks.

Thursday, December 30, 2010

Fluffy Pancakes

This will probably be my last post of the year 2010. Though the blog is still young, I'm bursting with ideas and the oomph to bake has not died out (yet). Hopefully I will be able to venture into baking other things before I start school proper, especially since CNY is coming up and I'll have many more guinea pigs to test on soon.

So, Happy New Year, to the rare few people reading my blog :) I usually have my resolutions down on the eve, but I've realized that they usually revolve around the same few things - so this year it's gonna be simple - improve myself, and accomplish the things I've set out to accomplish. Sounds vague, but it encompasses all that I want for myself in the new year. 2011 will see me first, at the start of a long-distance relationship, then ending my education (hopefully with the results I want), and later, teetering at the cusp of working-adulthood. It will be a year of many changes, so I can only hope that I'll be able to better myself each time, and most importantly, never to settle but knowing when to be satisfied.

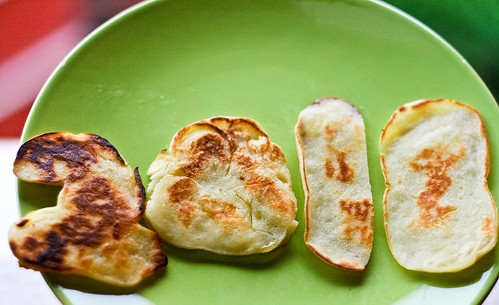
Happy 2011 (Looks a little like 2010 but it's 2011 okay!) And I know that the pancakes are not evenly browned :/

Onto the food - I was inspired by the previous pancakes post, so I decided to make pancakes for myself for tea. I've been using this recipe for a few times now, and I found that it gives me nice fluffy pancakes which I totally love with maple syrup. 

Janine's notes: I've quartered the original recipe, such that it makes 4 pancakes, but I usually like my pancakes small, so this recipe makes enough for 2 (not ravenously hungry) people. I cook my pancakes with minimal amounts of butter on the pan, which explains why they are spotty and not evenly browned. If you want a uniformly brown pancake (see the pancake post below), just use a generous amount of butter (or oil) and you will get nice brown pancakes :) I tried to make the pancakes as healthy as possible, so I used low-fat milk, reduced the sugar to as minimal as possible, and used minimal oil to cook the pancakes. You can use up to 2 teaspoons of sugar if you like your pancakes sweeter. A note about the sour cream - this, together with buttermilk, are rarer commodities (and more expensive) in Singapore, so I usually use yogurt cheese instead. Yogurt cheese is basically plain yogurt which I have strained over a cheesecloth overnight (will do a post on it soon!). Also, I find that the pancakes kept well in the fridge, because I kept a few for breakfast the next day and although not as nice as those I had for tea, they were still okay after a few seconds in the microwave!

Fluffy pancakes
Adapted from Cook's Illustrated

Ingredients:
½ tsp     lemon juice (or white vinegar)
120 ml   milk, room temperature
66 g       all-purpose flour
½ tsp     baking powder
⅛ tsp     baking soda
⅛ tsp     salt
½ tsp     sugar
14 g      egg
8 g        sour cream (or yogurt cheese)
5 g        butter, melted. 

Method:
  1. Put the milk in a bowl and add the lemon juice (or white vinegar) and let it stand. I usually take out my milk, measure it and let it warm to room temperature before adding vinegar. This is to mimic buttermilk, so if you have buttermilk handy (which I believe is a rare commodity in Singaporean fridges), feel free to use that instead. I sometimes use Chinese rice vinegar, and it doesn't affect the taste of the pancakes too much. 
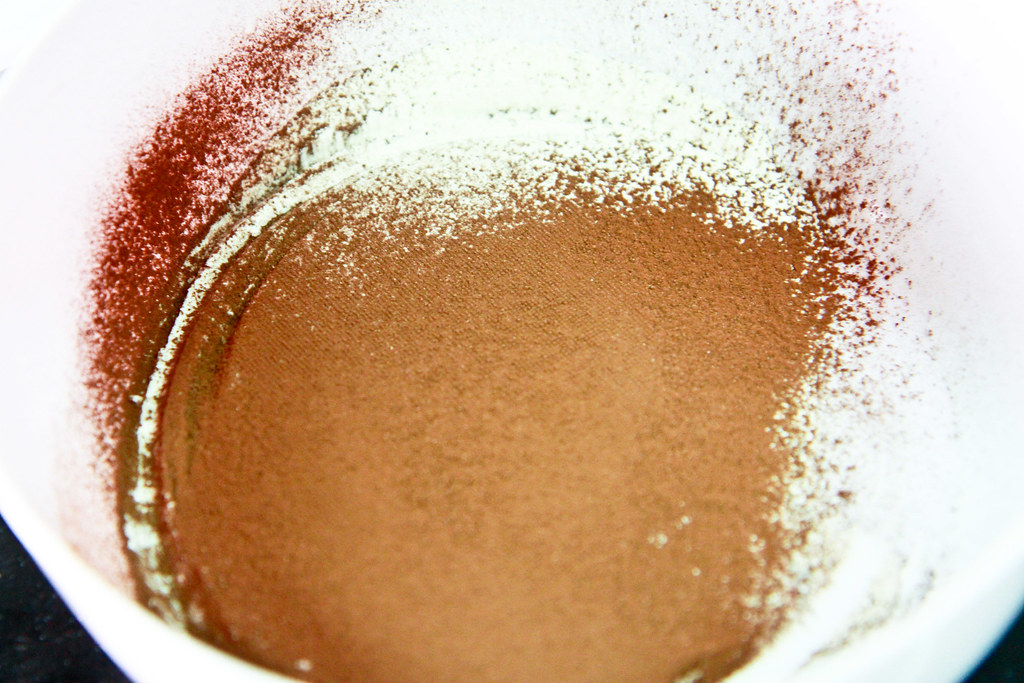
  2. Whisk all the dry ingredients together (flour, baking powder, baking soda, salt and sugar). 
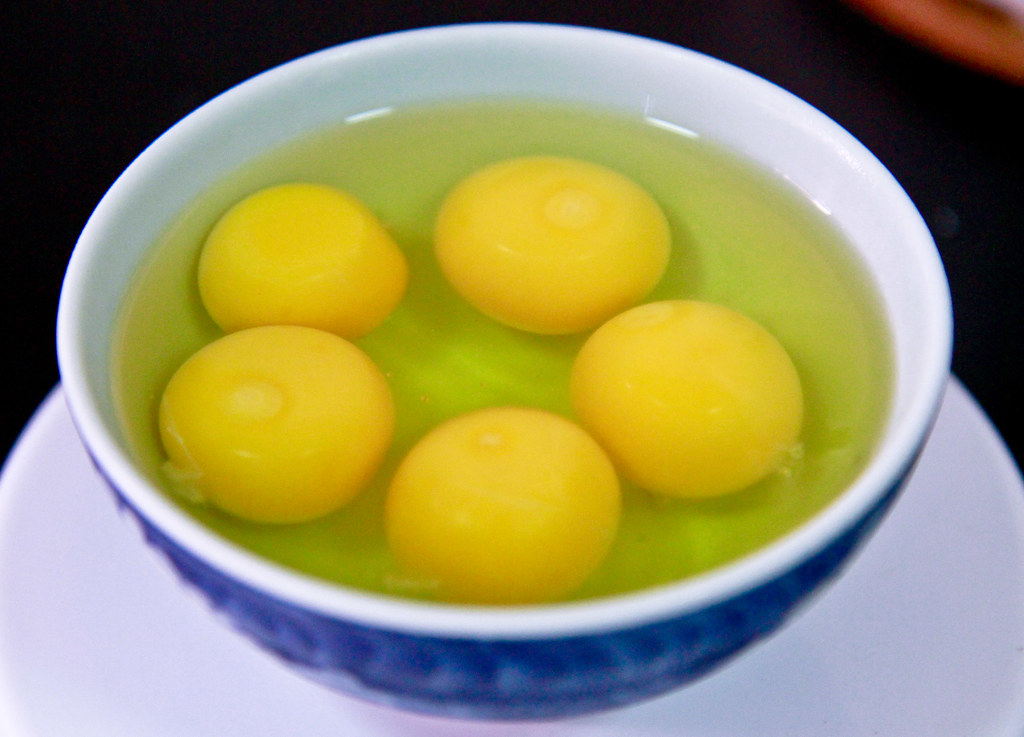
  3. Crack the egg into the milk and whisk. 
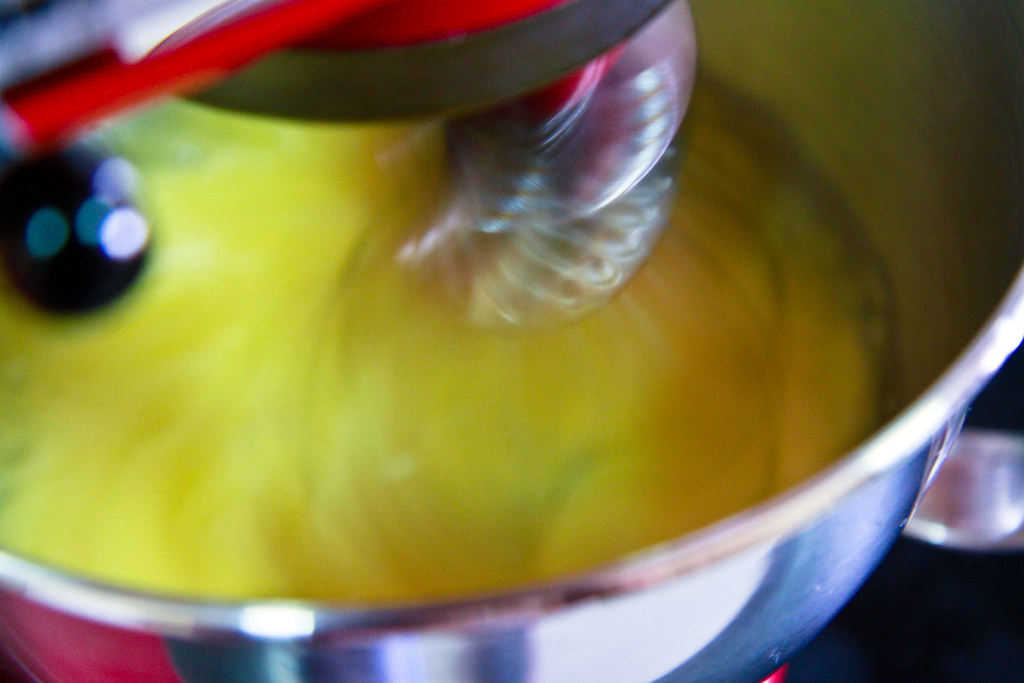
  4. Melt the butter (I zap it in the microwave for about 8 seconds) and add it into the milk-and-egg mixture. Whisk again. 
  5. Add the sour cream into the milk mixture and whisk to combine well. All my 'wet' ingredients basically go into one bowl and the dry ingredients into another. 
  6. Make a well in the dry ingredients and quickly mix the wet ingredients (the milk mixture from step 5) into the dry ingredients. 
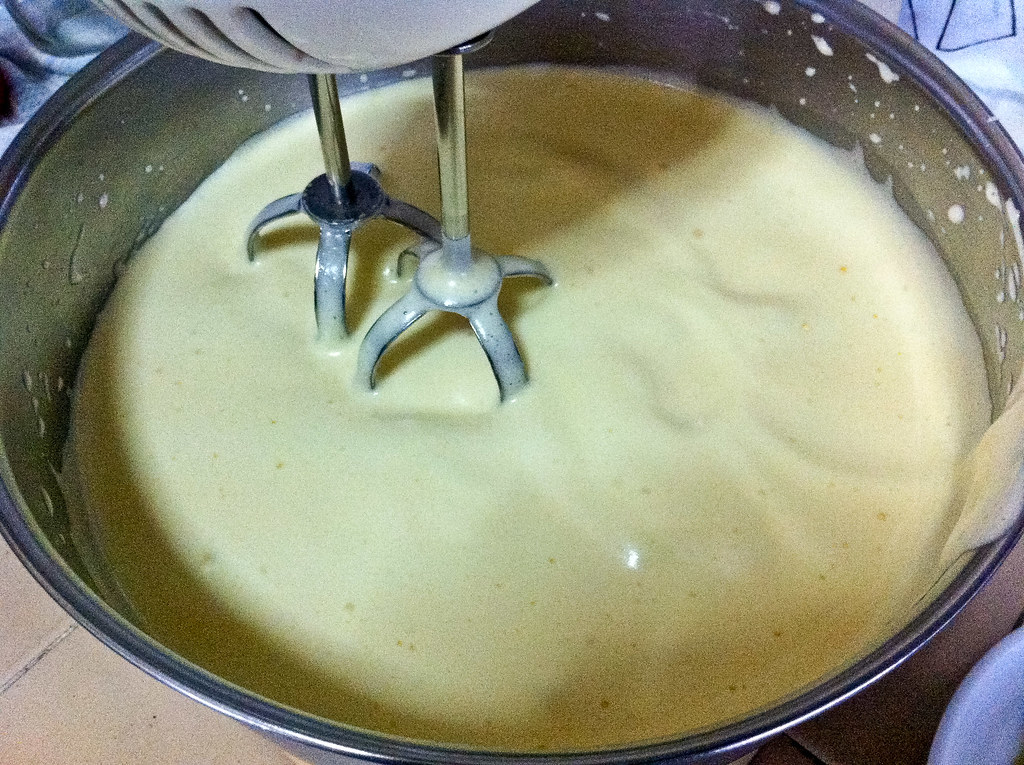
  7. Do not overmix - the batter will look lumpy but it's okay. 
  8. Heat up your pan and you can choose to use any type of oil (I prefer to use butter, because it adds to the flavour of the pancakes) and using a tablespoon, dump a dollop of batter onto the pan. The batter spreads a little, so make sure that's enough space between the pancake batters. 
  9. Once you see the edges whitening and firming, use your spatula to flip the pancakes over to continue cooking. I like to flip my pancakes thrice, but for the lazier people, you can wait until the edges are browning before flipping them over, then you won't have to flip it the extra 2 times to make sure that the pancakes are thoroughly cooked. 
  10. Once both sides are evenly browned, serve them on a plate, with generous amounts of maple syrup and butter (or jam) on the side. Pancakes taste the best when they're fresh from the pan!
In pictures
Wet ingredients in one bowl, and dry in the other. (Very reminiscent of quick breads)
Quickly mix the mixture once you've added the wet ingredients.
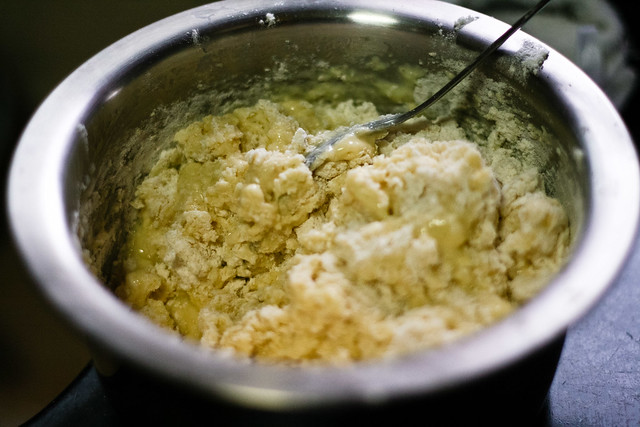
This is just about right - yes, the mixture will still be lumpy, but the lumps will disappear once you start cooking them.  To reduce the lumps, you can sift the dry ingredients together (minus the sugar) beforehand. It helps!
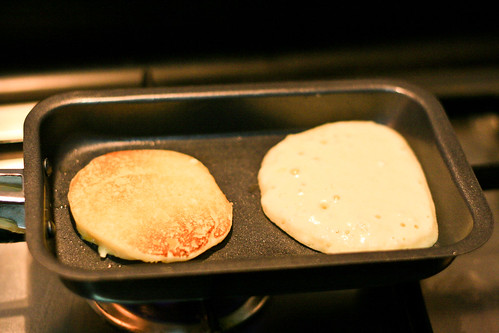
I flip the pancake when the edges start to brown (see the pancake on the right) - and you'll get the pancake on the left. It's not completely brown because I'm stingy with the butter. 
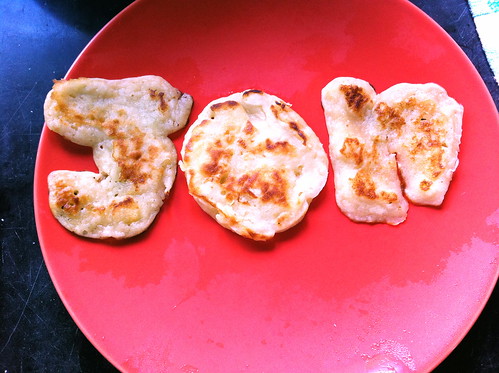
You can make letters too with the pancake batter! I made this for Jon (obviously), but I ate it the next morning instead (this photo was taken with my iphone in the morning after I zapped it in the microwave) =X
It looks like roti prata (Indian bread) because I was experimenting with using as little oil as possible (the pancakes just take much longer to brown, and you HAVE to use a non-stick pan)! 


Tuesday, December 28, 2010

Strictly Pancakes

Reminiscent of Pancakes on the Rocks in Sydney, Strictly Pancakes is the first dedicated pancake establishment in Singapore. Jon and I decided to eat there since he had an errand to run nearby. 

Jon decided on the DIY pancakes, which allows you first to select the stack size - you have a choice of 2,3 or 4 pancakes, followed by a choice of type of butter (salted, unsalted, garlic&herb or rum&raisin) and maple syrup. Jon decided on the short stack (2 pancakes), with unsalted butter plus 2 additions of bacon and scrambled eggs (costing $2.50 each), which amounted to a total of $10.50. The maple syrup was the real deal, fyi, and not overly watered-down. 

DIY Pancakes ($10.50) (Please ignore the yellow-ness of the picture)
Maple syrup and unsalted butter for the DIY stack

I, on the other hand, had The Druggie ($11), which is described as the ultimate chocolate fix with chocolate pancakes served with chocolate ice cream, sprinkled with chocolate flakes and sliced strawberries and topped with homemade chocolate sauce. I substituted the chocolate ice cream with vanilla because I didn't want a chocolate overdose and I think that was an extremely good move on hindsight. I'm not sure if the ice-cream is homemade, but the sight of tiny black specks (vanilla beans) tell me that this is not the usual run-of-the-mill vanilla ice-cream! 
The (chocolate) Druggie ($11)

Both of us felt that the normal pancakes were awesome - they were sufficiently fluffy and the portion of maple syrup and butter given was adequate. I personally think that the pancakes are as nice as those served in Wild Honey and Riders, for a fraction of the price! And this is way better than Hatched's pancakes. The scrambled eggs were normal, with some ground black pepper for flavor, but the bacon was far too crisped and had overly black bits, which we didn't like. For the chocolate pancakes however, they were a tad dry, (must be because of the cocoa powder in it), and there wasn't enough 'sauce' to go around. I had to resort to siphoning some of Jon's maple syrup on my pancakes. Also, three chocolate pancakes were wayyy too much, so sadly, there was half a pancake leftover. 

I also like the fact that fresh batter is used each time someone orders, we went on a weekday at around noon, but there weren't many customers, so we got our orders rather quickly. Am not too sure if service is much slower on say, weekday brunch though. Given the dearth of parking over at Prinsep, finding parking on a weekend morning might be a pain in the ass, which I don't really plan to find out. 

Prices of drinks are average - I had plain water (FOC) and Jon had a latte ($4?). There were brunch specials for weekends as well, which increased the variety of pancakes available. I felt that the selection was rather small, but then again, I'm comparing to the menu in Pancakes on the Rocks, which has a crazily extensive menu with I think >50 types of pancake dishes. You can view their menu (with prices) on their website. Strictly Pancakes has 2 floors, and I liked that there was cohesion between the logo as well as the color scheme in the interior. 

All in all, I enjoyed my meal (although it really was a chocolate overdose), and would love to go back for brunch, and for some savory pancakes in the future!

Details
Strictly Pancakes
Address: 44A Prinsep Street
Contact: 63334202
Opening hours: opens till midnight on certain days - see here

Price: $$ ($10-$20 per person)

PS: After much online blog-stalking (of both baking and food review blogs), this review marks the first of (I hope) many food reviews on the local food scene in Singapore, which I've grown to deeply appreciate after spending some time overseas.

Disclaimer: This food review contains my own personal opinions and I am not reimbursed by any establishment or individual in any manner. Also, photos are taken with my iPhone, which may/may not have impacted photo quality. 

Monday, December 27, 2010

Chocolate Swiss Roll with Whipped Cream Filling and Dark Chocolate Ganache

Chocolate Swiss Roll with Whipped Cream Filling and Dark Chocolate Ganache
Adapted from here and Rose Levy Beranbaum's The Cake Bible

Hastily taken photo of my first-ever decorated Christmas Log for the Xmas party

Ingredients for Cake Roll
60g    cake flour (I used 55g all-purpose flour and 5g corn flour, sifted thrice)
15g    cocoa powder
95g    castor sugar
30g    butter
25g    fresh milk
200g  whole eggs (I used 4 whole eggs)
20g    egg yolk (1 egg yolk)

Method:
  1. Preheat oven at 180°C. Place rack in middle of oven. 
  2. Sift all-purpose flour, corn flour and cocoa powder. Set aside. 
  3. Beat the whole eggs and egg yolk together on low speed. Once foamy, stream in the castor sugar before increasing the speed to high. 
  4. Meanwhile, melt butter with milk in a microwave for about 20 seconds on low.
  5. Continue beating the egg and sugar mixture until 'ribbon' stage. This is when the batter leaves a ribbon-like trail which takes at least 10 seconds to disappear back into the batter. Once this stage is achieved, continue beating the mixture for another 1 minute on low speed to stabilize the mixture. 
  6. Fold 1/3 of the sifted flour/cocoa into the batter, turning the bowl a quarter-turn (90°) in the opposite direction (anti-clockwise in my case). 
  7. Continue folding the remaining flour in two portions until all the flour is well incorporated. The mixture will turn slightly brown, with dark brown spots - this is fine. 
  8. Temper the butter/milk mixture (in step 3) by adding a small amount of the batter (about 2 tablespoons or so) and mix. This is to ensure that the egg batter will not curdle when the butter/milk mixture is added. 
  9. Pour the mixture slowly into the batter and continue folding until well combined. 
  10. Pour batter into a lined pan and bake for 12 minutes at 180°C (my oven runs slightly hotter, so I bake at 160°C for 16 minutes). 
  11. For those with thermometers, the cake is done when the internal temperature reaches 90 -100°C. For the more conventional method of testing, insert a wooden satay stick (or toothpick) and if it comes out clean, the cake is done. 
  12. Remove the pan from the oven and allow to cool for about 5 minutes. 
  13. Place a tea towel (or any cloth) onto the cooling rack. Sprinkle some water, just a few drops to slightly dampen the cloth. This will ensure that the cake is just slightly moistened to ensure easy rolling. Turn the cake out of the pan and onto the tea towel. Starting from one end of tea towel, start rolling the cake into a roll and leave it on the rack to continue cooling before spreading with desired filling. The cake is rolled when still warm to enable easier rolling (and no cracking) later. 
    In Pictures

    Sift flour and cocoa powder twice.

    Crack 5 eggs (but only use 4 whole eggs and 1 egg yolk).
    Put the eggs in your stand mixer and whisk them!
    Mixture will slowly lighten in color.
    This batter is still too 'watery'.
    This batter is ready for folding - the ribbon-like trail should take about 10 seconds to disappear. Once this stage is reached, beat for another minute on low speed to stabilize the mixture. 
    Dump 1/3 of the flour/cocoa mixture into the batter and fold. 

    Fold until all the flour/cocoa mixture has been incorporated. 

    To the butter and milk mixture, add some of the folded batter to temper before adding it into the batter. Give it a few folds to incorporate before pouring into the prepared pan.
    The cake is in the oven!

    Halfway through, opening the oven to turn the pan around for even heating.
    Once the cake springs back when touched, it is done! Cool it for about 10 minutes on a rack.
    Remove cake from pan onto a slightly damp tea towel. Roll it up and allow it to cool on the cooling rack. Rolling it up when it is still warm reduces the chances of cracking when rolling it up with filling later. The bottom of my cake is slightly burnt because I forgot to take out the extra rack in the oven :/

    In the meantime, prepare the chocolate ganache first, followed by the whipped cream. No pictures for these, because I was in a huge hurry to get the cake assembled, but here are the recipes:


    Dark Chocolate Ganache
    Ingredients:
    257g   cream (I used 35% whipping cream)
    227g   bittersweet chocolate
    ½ tsp  vanilla extract

    Note: The original recipe calls for a food processor, but I don’t have one, so this recipe has been modified from the original version.


    Method:
    1. Chop the chocolate into small pieces, a few cm-wide and place in clean bowl. Pieces do not have to be evenly chopped. 
    2. Heat the cream to boiling point and whisk it slightly before allowing it to cool.
    3. Once the cream is slightly warm to touch (around 40-50°C), pour into the chopped chocolate pieces and stir. Stir until all the chocolate pieces are melted. 
    4. Allow it to cool completely. At this point, if you want a smoother ganache, strain the mixture over a sieve to remove any unmelted chocolate bits. You can also add in some softened butter if you desire a lighter ganache.
    5. Allow the ganache to cool and stand for about an hours until it is of frosting consistency. Whisk for a few seconds to aerate. If ganache has thickened too much, reheat using a double boiler or a microwave on low power for about 10 seconds.
    After preparing the ganache, start on 
    Perfect Whipped Cream
    Ingredients:
    232g     cream
    13g       sugar
    0.5tsp   vanilla extract


    Method: 

    1. Place the chilled cream and vanilla extract into the mixing bowl and refrigerate for at least 15 minutes. I was in a hurry, so I put the bowl and beater into the freezer for 5 minutes before adding the chilled ingredients into the bowl.
    2. Sift the icing sugar into the mixture. 
    3. Gradually beat the mixture, starting on low speed before increasing it to medium-high speed. Beat until stiff and glossy peaks form when the beater is raised. Softly whipped peaks are fine as well since this is meant for filling the cake roll. 
    Assembly
    1. Unroll the rolled-up and cooled cake before spreading the whipped cream generously onto the cake.
    2. I only applied a 1.5cm thick layer, which resulted in quite a bit of leftover whipped cream. (I have kept the whipped cream in an airtight container in the chiller compartment of the fridge for 2 days now and it still retains its whipped structure).
    Here's a cross section of the cake with the filling: 


    After I was done filling the cake, I cut a 2-cm thick portion from one end to form the knob on my tree knob and a longer 10-cm portion to form the branch. Apply the cooled chocolate ganache generously all over the log (I used some ganache to stick those cut portions to the main log). Use a spatula to spread the ganache, although a spoon will also suffice. Spreading the ganache doesn't need to be neat because the surface of the log is not smooth anyway. Once you are done frosting, use a fork to scratch some lines to mimic the lines of an actual tree log. If you have made meringue mushrooms, now is a good time to place them onto the finished log. 


    This is another side view before the chocolate ganache frosting is complete. You can use a sieve to add some icing sugar to the log to mimic snowfall :)


    Oh, and after a super long period of blog-stalking, I have finally decided to participate in something local - Aspiring Bakers #2: Christmas! (Dec 2010). I've seen many log cake entries for this, but who cares - this is my first time baking a cake requiring assembly and it was a success! And since the aim of Aspiring Bakers is to encourage local bakers to bake and go beyond their limits, I look forward to participating in #3 and foresee myself participating in many more rounds! :)

    Sunday, December 26, 2010

    Christmas 2010

    This year for Christmas, I received the most wonderful gift ever. Jon surprised me with a huge wrapped box, and to his dismay, I guessed that it was a stand mixer! Anyhow, he tried to bluff and tell me that it was Kenwood and when I saw that it was a Kitchenaid, I literally jumped for joy and squealed with glee. He then tried to bluff me that it was white and for a moment I really believed it was white. But nooooooo, it was in my favouritest (I made this word up) color - LOVELY RED. Gosh. The plan I had for myself was to slowly save up for the Kitchenaid mixer, and perhaps reward myself with it about 1-2 years down the road. So I guess there's no reason not to bake harder cakes (or meringues) any longer. I shall christen my mixer Bombino, after boms (a private joke) and bambino, which is Italian for baby. 

    To herald the start of my baking journey, I made a chocolate swiss roll, which was then transformed into a Christmas log cake for a Christmas party I was attending. Recipes and pictures later!


    Oh and here's the picture of my bombino :)
    Oooh look mommy it's so shiny (and new and red)!

    My Bombino (I tried to blur the hodgepodge of things I have on my countertop)


    Saturday, December 25, 2010

    Japanese Soft Rolls (tangzhong method)

    Writing the first entry for my virgin food blog is harder than I thought it would be. First, I had to decide which pictures made the final cut, and considering how much I fumble around in the kitchen, there weren’t a great variety of photographs to choose from. Then, I had to edit some of the photos because of the white balance; and finally, the actual crafting of this blog entry which took eons since this is the first time I’m writing something like this. I have been procrastinating over writing (or doing anything productive), but I figured that Christmas would be a good time to mark this virgin entry (although this entry was written a few hours before 25 December itself). Let this be 2010’s Christmas gift to myself, and may it still be in my life when Christmas 2011 comes around, considering the short lives of my many other pursuits.

    So, back to (baking) business. This is perhaps the first recipe that had all around approval from my family members. God knows it’s the first recipe where I didn’t have any leftovers to deal with. And this comes at an opportune time, when I’m disappointed in other areas of my life (cue: results from school). I’ve been wanting to try out this tangzhong method that I’ve been reading about in some of the baking blogs I stalk on a daily basis, and I finally got my buns (pun intended) down to doing it yesterday night.

    Here's the recipe for Japanese soft rolls using the tangzhong method.

    First, what is the tangzhong method?
    Tangzhong is hanyu for 湯種法, also known as the water-roux method. This technique was created by Japanese bakers (known as Yukone method) to increase the water content in breads. I’ve been blog-stalking a huge bit lately, and it appears that this method has been circulating ever since 2003 when Yvonne Chen’s “Bread Doctor” book was published.

    How does the method work? In short, the heating of the 1:5 flour and water mixture encourages more water to be absorbed. To indulge the food chemist in me (and anyone else), the longer explanation is that starch is present as granules in flour. Starch is a mixture of two carbohydrate polymers, amylose and amylopectin. Different starches contain these two polymers in different proportions. Wheat contains about 25% amylose and 75% amylopectin.

    I have illustrated the process in the diagram below.

    1. Starch granules are insoluble in cold water.
    2. When heated in water, they gradually absorb water and swell in size, causing the mixture to thicken. 
    3. Amylose migrates out of the granule. 
    4. With continued heating, the granules take in more water and finally, fragment, resulting in the mixture becoming less thick. This process of granule swelling and fragmenting is called gelatinization
    Once gelatinized, the granules cannot be recreated. Starches from different plant sources vary in the rate of gelatinization as well as the temperature at which they gelatinize. The film formed on top of the paste or the water that is ‘exuded’ is the result of retrogradation, which happens because these starch gels lack stability. An example of retrogradation is the phenomenon of stale bread. 
    (Sources: here and here - this is in chinese)

    The tangzhong is made when the paste reaches 65°C. However, for most people without a thermometer handy, it is not necessary to achieve such an accurate temperature. Basically, gelatinization occurs anywhere from 55°C to 85°C, depending on the type of starch, so just place 1:5 flour to water in a small pot on low heat, and stir, either with a whisk or even a spoon. A few things to note: put on low to medium heat because it doesn’t take too long for the paste to reach 65°C! I made a mistake and placed my first attempt on medium to high heat, and the mixture turned lumpy because I did not have a chance to mix the flour and water well before it thickened.

    Once your whisk leaves tracks, the paste is done! It takes about a minute or two, and don’t worry if the mixture is slightly runny – it is meant to be that way! The picture below shows my cooled tangzhong which is ready to use in the recipe. If you are a graphic person, this link provides more photos to indicate what the final product should look like. 

    Final Product


    Lengthy explanation aside, here’s the recipe for Japanese Soft Rolls (adapted from here)

    For the tangzhong:
    25g        bread flour
    125ml    water

    Method (for tangzhong):


    1. Mix flour with water thoroughly to remove lumps. Place over low to medium heat and stir consistently with a whisk.
    2. Mixture will thicken and once tracks appear, the tangzhong is done. Remove from heat.
    3. You can either transfer the paste to a clean bowl and cover with a cling wrap to let cool or personally, I just place the lid on top of the pot to let it cool, because the film that might form when the mixture cools does not affect the final product much anyway. Note that this paste is not like a sourdough starter or sponge, so letting it ‘age’ in the fridge will not enhance the flavour.
    4. This produces slightly more than 120g of tangzhong required below.

    For the bread:
    350g     bread flour (I didn’t have enough, so I replaced 100g with all-purpose flour which worked fine)
    55g       castor sugar
    1 tsp      salt
    56g        egg (or equivalent of 1 large egg)
    7g          milk powder (optional)
    125ml    milk
    120g      tangzhong (from above)
    5g          instant yeast
    30g        butter, softened and cut into small pieces


    Method (for bread):
    1. Combine all dry ingredients (flour, salt, sugar and yeast) together in a clean bowl. In another bowl, combine the wet ingredients (milk, egg and tangzhong).
    2. Make a well in the centre of the dry ingredients and add in the wet ingredients.
    3.  Knead until the gluten has developed – when you can pull apart the dough without it falling apart, and add in the butter. Continue to knead until the dough comes together and is not sticky.
    4.  This takes about 10-15 minutes of hand kneading and it is a very very messy process. I transferred the dough to knead on the counter top, and liberally added flour on the surface to help in my kneading.
    5. Once the dough passes the ‘window pane’ test, knead the dough into a shape of a ball and place it in a greased bowl and cover with a damp tea towel (or cling wrap).
    6. Let it proof until doubled in size (it takes close to an 1 hour in my kitchen)
    7.  Once doubled, transfer the dough to a floured counter top and divide the dough into equal portions (these will dictate how many buns you will have). I divided mine into 6 portions and kneaded them into ball shapes to rest for 15 minutes. This is to allow the gluten to relax a little.
    8.  At this juncture, if you want funny shapes, proceed to roll the portions into whatever shapes you want. I shaped the portions into tighter balls by pulling the ends towards the centre and placed them seam-side on the tray. Let them proof for another 40 minutes to an hour, until doubled in size.
    9. Brush some milk (or whisked egg) on the surface of the balls (this will give it a nice browned shine) and bake in a pre-heated 180°C oven for 20 minutes.
    10. Remove from the oven and transfer to a wire rack to cool before eating :)


    In pictures
    1. Mix wet ingredients into dry ingredients and knead. 

    2. After adding butter, knead until dough comes together.

    3. Knead dough into a ball shape and proof in a well-greased bowl. I used the same bowl that I used for proofing because I'm lazy to wash too many dirty bowls :/

    4. After an hour, the dough would have doubled in size. 


    5. Remove from bowl and reshape it as desired.

    6. Shape into logs (I rolled in a sausage in them) or balls (these are plain) and add a wash of milk or whisked egg (as shown above).

    7. And Voilà! The buns are done after 20 minutes or so in the oven :)


    PS: The initial kneading process really is very messy, so if you have a bread machine, do feel free to use it to do the initial kneading for you! I'll come up with a slightly modified recipe for those with bread machines sometime later!


    Related Posts Plugin for WordPress, Blogger...