My blog has moved!

You should be automatically redirected in 6 seconds. If not, visit
http://www.unpastiche.com
and update your bookmarks.

Friday, April 29, 2011

Focaccia #3: Pizza Napoletana (or Homemade Pizza with Everything on it!)

This post is long overdue. I had wanted this post to be the third installment of my Focaccia series (see focaccia genovese and the potato focaccia) and to tie up with my post on pizza in Naples, but somehow other baking got in the way and I didn’t particularly like the photos from this pizza-making since it was done in the evening for dinner and by the time the pizza was done, it was night and all the photos were taken with artificial light which I’ve grown to hate by now. Nevertheless, I decided to put this post up despite the horrible pictures, mainly because this recipe is really good and it should be shared. I’ve used Peter Reinhart’s pizza recipe for more than 10 times now, either for pizza or focaccia, and my family members and friends have nothing but good comments for it. My brothers have claimed that pizza to be my forte and I should just stick to it and not do anything else (a compliment and a snide remark both in one - brothers, tsk!), but of course I’m not listening. 

An interesting thing about pizza – no one actually knows the name of the first person to combine tomato, cheese together with the flat bread that was already widely available, but one very popular instance of a person doing that is of course Raffaele Esposito, who combined the pizza crust together with tomato sauce, mozzaerella cheese and basil in 1889 in honor of Queen Margherita’s visit and this pizza, of course, is now the famed Pizza alla Margherita in Naples and everywhere else in the world. Some food historians suggest that the word pizza derives from the old Italian word pizzicare, which I found really interesting because if you learn music – you’ll know that most of the directions are found in Italian, and for string instruments especially, there is the term pizzicato, which means, to pluck the string, instead of bowing. And these food historians suggest that pluck could mean how the pizza is plucked from the oven or how the ingredients are plucked and placed on the pizza. Another random fact was that while in Italy, I actually realized that a lot of the musical directions/terms I had learnt (such as più (more)) actually came in handy! 

Okay, I probably have mentioned this before, but I really do like Peter Reinhart’s books. I’ve read all of his books (although I just own one), and what I particularly like is the concise explanation that goes on before each recipe. After reading his books, I feel like I've accumulated this wealth of experience on bread-making and everything else related to it. What I don't like is that as with a lot of books, measurements are not provided in weight, so I've converted them below.  

***

Pizza Napoletana
Adapted from Peter Reinhart's The Bread Baker's Apprentice, page 207-212

285g  bread flour
6g      salt
2g      instant yeast
30g    olive oil 
195g  cold water

Method: 
  1. Stir together the flour, salt and instant yeast in a bowl. With a large spoon, stir in the oil and cold water until the flour is all absorbed. Using the spoon, work the dough into a smooth mass, making sure to alternate directions to develop the gluten further. Do this for about 5 minutes, or until the shaggy dough becomes smooth. 
  2. Sprinkle flour on your countertop and transfer the dough to the counter. Using a dough scraper, cut the dough into 6 equal pieces and shape them into balls. Be sure to flour your hands as well, so that the dough will not stick to your hands. Then, mist the dough generously with spray oil and store them into ziplock bags (with sufficient space to expand) or into a large container. 
  3. Store them in the refrigerator to rest the dough overnight. 
  4. On the day you plan to make the pizza, remove your desired number of dough balls from the refrigerator 2 hours before making the pizza. Dust the countertop with flour before placing the dough balls on top. Gently press the dough into flat disks of about 1-2 cm thick and 10-15 cm wide (to your preference) and cover the dough loosely with a tea towel and let rest for 2 hours
  5. Generously dust your sheet pan with semolina flour or cornmeal (or just flour). Flour your hands thoroughly. Lift the piece of dough and place it across your fists, gently stretching it by bouncing the dough by moving your fists up and down. Once the dough has expanded, you can begin tossing the dough (like how the prata man does it). If this method fails, you can use your rolling pin to stretch the dough out, although it won't be as effective (and fun) as the toss method. 
  6. When the dough is stretched to about 20-30 cm in diameter, lay it on the pan and lightly top it with tomato sauce and other toppings. 
  7. Place your rack in the lowest tier of your oven, and preheat your oven to your highest possible - the recommended temperature is 260 degrees (I used 210 degrees on mine). Place the pizza inside and bake for 10 minutes, or until the cheese caramelizes. 
  8. Remove from the oven and wait for 5 minutes before slicing and serving, to allow the cheese to set slightly. 
***

Tomato sauce
Loosely adapted from allrecipes here

170 ml   tomato paste
170 ml   warm water
15 g       grated Parmesan cheese
3 g         minced garlic
3 g         diced onion 
30 ml     honey 
1 tsp      salt, to taste
1 tsp      dried oregano
1 tsp      dried marjoram
1 tsp      dried basil
¼ tsp     ground black pepper
¼ tsp     cayenne pepper

Method:
  1. Combine the tomato paste and water. 
  2. Mix in the remaining ingredients. 
  3. Let the sauce sit for at least 30 minutes for the flavors to settle before spreading over the pizza dough. 
Notes:
  • If you've onion and garlic powder, do feel free to use them instead of using fresh ones. 
  • If you don't have honey, feel free to use a mixture of brown and white sugar, melted in some hot water. Do reduce the amount of warm water accordingly. 
  • I have more than doubled the herb amounts from the original recipe, because I like the taste of herbs. Do feel free to substitute the herbs as you wish with fresh ones or with just a single type of herb. The black pepper and cayenne pepper gives the sauce a little kick, so feel free to omit it as you wish. 
  • You will realize that this sauce is a little watered down, but this is perfectly fine because the sauce will thicken while baking to a perfect consistency. 
***

In pictures: 

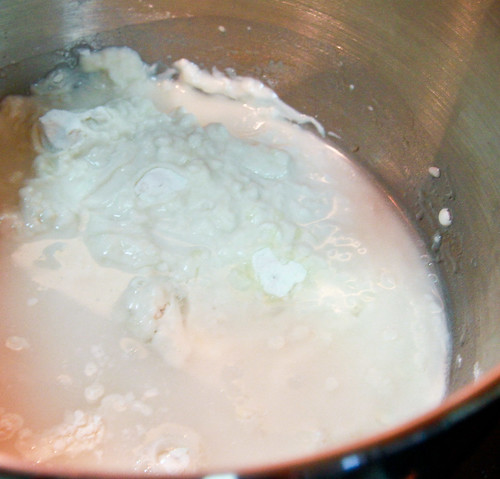
Mix the water and oil into the flour and mix until you get a smooth dough. 
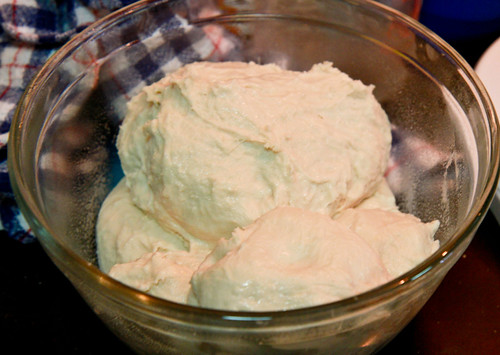
Do NOT do this - huge dough balls stuck together in a container is a big no-no!
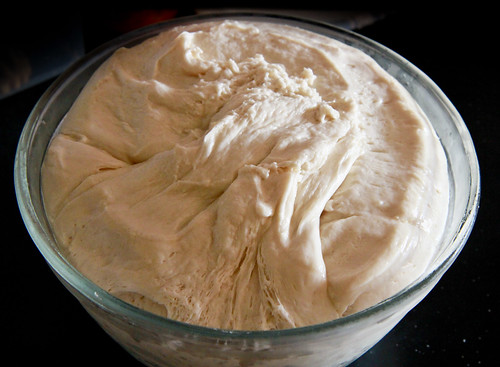
Oops the separate dough balls have fused to become one after a day in the refrigerator. They even popped the lid off my container! This is why the instructions say to store them in separate ziplock bags! :/
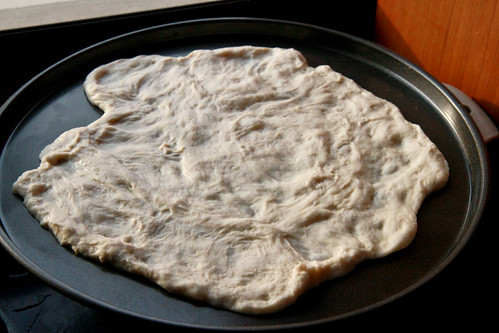
This is step 4 - 2 hours before making the pizza, knead your pizza into a small disc and allow it to rest and warm up to room temperature. At the back you see my ingredients, which include onions, mushrooms, sausages, pork, ham, bacon and fresh cherry tomatoes (cannot be seen). Yes I know it's like the kitchen sink here. Less ingredients is more sometimes!
The same disc from above, after step 5. Yes, I know I need more work on my "tossing" method because the dough is all uneven. 
Here's another look at how uneven it is. DO NOT follow this bad example. This is taken in the rays on the setting sun. 
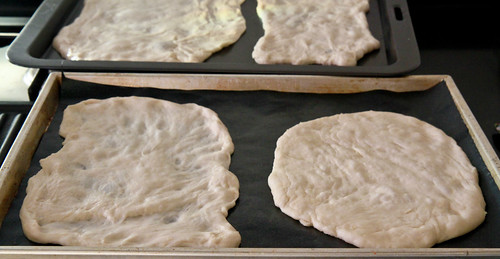
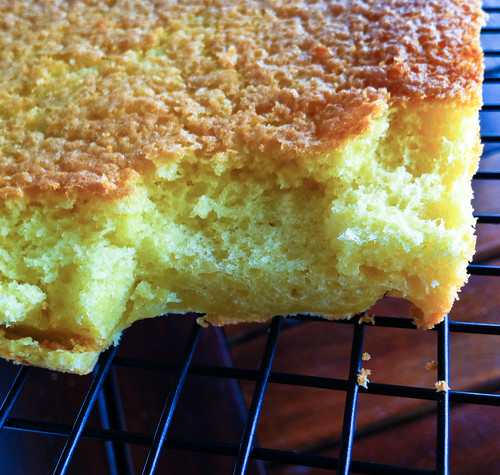
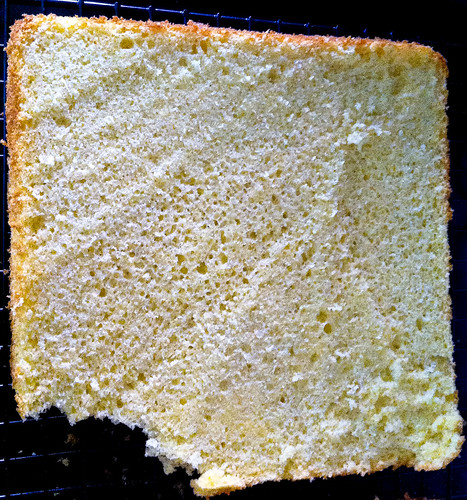
Here's pictures of more crusts - can you see the difference in thickness? The left is my "thin" crust (which is more of an in-between) while the one on the right is a thick crust pizza. Really horrible shapes, I know. 
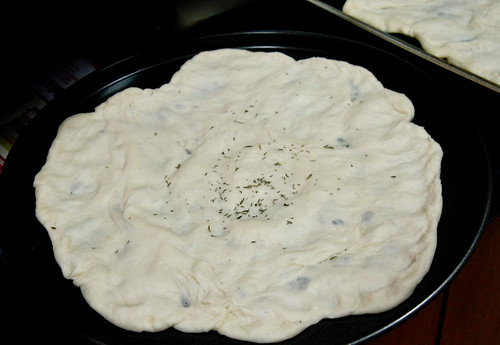
The left shows the tomato sauce (beginnings on a normal pizza) and the right shows my focaccia variation - with some cheese and onion and thyme :]
A topped and ready to go pizza! It looks more pizza-like already!
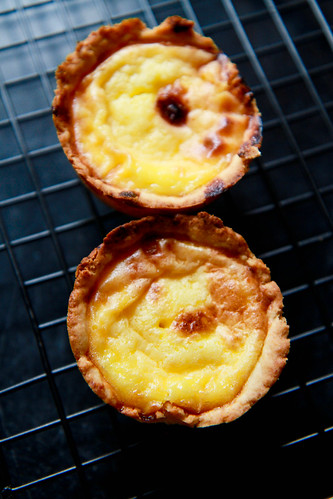
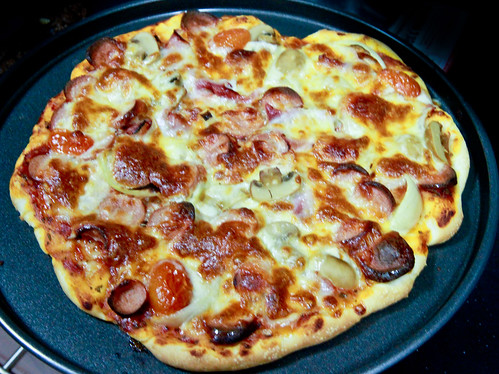
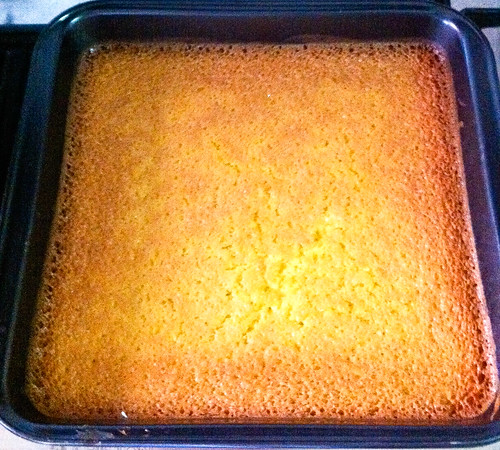
In less than 15 minutes, it's DONE :] Sorry this photo's a little out-of-focus and YELLOW :/

Janine's jots: 
  • Taste: I've tried making the pizza on the day of making the dough itself, but I do find that the dough acquires a better taste after the overnight fermentation, so like Peter Reinhart, I highly recommend the overnight fermentation if you're not in a hurry! Also, it helps to shape and stretch the dough when it's cold especially in our humid weather because the dough is less sticky and more malleable. 
  • Texture: Just the right amount of elasticity and 'bite' you need from a pizza crust. 
  • Serving size: This is the halved recipe, and it serves a family of 5 voracious adults more than comfortably for dinner, plus some extra for breakfast the next day.  
  • Modifications: If you're making the pizza crust for consumption on that day, you'll have to double the amount of yeast so that the dough will be able to rise in the short amount of time. I also like to add a little bit of sugar (about 1 teaspoon worth) into my dough because I like how it adds to the complexity of taste in the crust - I usually make a plain focaccia using this dough and eat it with nothing but balsamic vinegar and olive oil because the salt and sugar in the crust makes it tasty enough without anything! The next time, I'd probably substitute a bit of the flour with wholemeal flour just to try out an alternative mentioned in the book. 
  • Storage: I have tried doing this before, and it works - you can keep the dough in the refrigerator for up to 3 days and the dough tastes as good. If you wish to freeze them, do store the balls separately in ziplock bags, oiling each properly, and they can be kept in the freezer for up to 3 months according to the book. I've only frozen my dough for about a few weeks before consumption, and I'd probably make the full batch and freeze the unused dough if not for the lack of space in the freezer!
  • Would I make this again? Definitely! And again, and again, and again!
  • Other comments: The dough's really versatile - for pizza itself, you can make the crust as thick or thin as you want it to be - I'm not sure if it's clear from my pictures, but I made both thin and thick crusted ones and both were well-received. This dough can also be used to make focaccia or any other rustic bread. Also, I prefer to make pizza dough by hand, so instructions below are for hand mixing but an electric mixer can be used as well. If you have a pizza peel and stone, please do use them, but I've modified my instructions below to using a sheet pan so that most home bakers can use this recipe too. I've not included any recipes for the topping because mine's just a mishmash of whatever I have in the fridge that day, so feel free to experiment! You can even make dessert pizzas!
***
I do hope that this entices someone to try this recipe out, because I honestly do think this is one of the better tasting crusts I've tried and I really like the fact that so little yeast is being used, and everything else is kinda natural. And this will also double up as my show of support for Jean's Aspiring Bakers #6: Say Cheese! (April 2011). I'm really sorry that I haven't been able to support the event as much as I'd like to, because I was really overcome with studying, but now that I'm free - I'll be sure to post more often! :]

Tuesday, April 19, 2011

Travel Tuesdays #4 - Belém, Lisboa, Portugal.

A pastel de nata or pastel de Belém, as I've alluded to, is a Portuguese egg tart or pastry. They are common in Portugal (duh), and places like Brazil (bet you didn't know that Brazil is the only Portuguese-speaking country in the whole of South America, didn't you?). Closer to Asia, it's particularly popular in Macau, which as we all know, was a Portuguese colony. This then spread to Hong Kong, which is just an hour ferry ride away and of course down to Singapore and Malaysia. I'm sorry to inform you guys however, that even the best egg tarts I had in Macau, which were pretty dang good (whose name I can't remember since the tour guide brought me there), are beaten hands down by the pastel de nata made in the Belém bakery, in Lisbon. 

Egg tarts are a common sight in Lisbon. They may look black and unappetizing, but they're goooddd.

For those who have visited Lisbon (or Lisboa) before, you'll realize that the area of Belém is a totally different creature from the rest of Lisbon city. I know Portuguese people (who are really nationalistic) will kill me for saying this, but it does remind me of the Albayzín area in Granada - hilly, with buildings with higgledy piggledy rooftops (which are incidentally in lovely shades of tan) and lovely shaded and cooling alleyways. [I'm a tad lazy to post more photos of the area since I'm lazy to do the necessary editing, so I'll leave it for another post.] Anyway, it was believed that the Catholic nuns from the Jerónimos Monastery in Belém created these tarts, and the first place to sell these tarts (since the nuns weren't supposed to sell them and the monastery sadly closed in the 19th century) was the Casa Pastéis de Belém. Now, they are being sold by the dozens in Antiga Confeitaria de Belem. Actually, it should be being sold by the hundreds or thousands, because there is always a queue outside the place. The tourists come by the busloads literally - tour buses stop them outside the place so that they can take a tea break and devour the tarts! You can eat in (which I did), or you can takeaway, in those distinctive hexagonal boxes (which I did, as well). In fact, they were so yummy that my friends and I tapao-ed a dozen of them to munch on for the rest of the day.

I didn't get a picture of the inside, but do check out Heather's blog post here to have a look of the inside - even her pictures don't show it, but the place is HUGE. It's basically like a cavern (imagine Batman's Batcave) and hemispherical ceilings and the place just goes on and on inside - the walk to the toilet is like 5 minutes away! Okay I exaggerate but you get what I mean. The walls are tiled with the distinctive blue tiles, which I term a Portuguese blue, since it's found everywhere around the city, and of course, there's the distinctive Portuguese rooster on some of those tiles. If you're curious, just google Galo de Barcelos to understand why the rooster is so prevalent in Portuguese culture - and Portuguese make real good peri-peri chicken! In fact Nando's originated from Portugal, if you didn't know =p


Even the takeaway boxes are in the distinctive blue and white, and each box states that this place has been making them Pastéis de Belém since 1837! That's 174 years - holyschmoly! A place that has made egg tarts for that long must be damn good, and yes they are. Period. They have a website, and you can see how the inside and outside of the shop looks like. They even had a short video of how the tarts are made. Each table has a cinnamon and icing sugar shaker, which you can use to top your tart, but seriously, only do it after you've taken a bite of the original. The tarts come out fresh by the dozens from the oven, so do try to get those - a bite into each is like a bite of custard heaven! Like I mentioned in my egg tart post here, the pastry is actually made of puff pastry and not normal tart dough, so it is a little oily and after popping like three of them, I did get a little gelat; BUT it was nevertheless still the best thing I've ever eaten. The custard is smooth and silky, with just the right amount of eggyness and the puff pastry acts as a perfect foil to the custard because it's just so flaky and buttery. Paradise in your mouth, as my Polish friend would put it. Most importantly, they never sell the tarts cool or lukewarm (since all of them get sold out anyway) so every tart is kept warm in the oven if you're eating in. If you're taking it away, they take the tarts which are cooling on the counter so that it doesn't burn through the box. How's that for thoughtfulness? I don't remember exactly how much they cost, but I recall them not being cheap for their size (they're pretty small), so probably around 1,50 - 2 euros?

PS: Europeans use a comma instead of a full stop to separate dollars and cents, so it's not a typo ;] As you can see in my photo, they do sell other Portuguese desserts, but I honestly can't remember their names, even though they were quite delicious, they paled in comparison to the tarts. 

The yummylicious egg tarts (plus some more to-go) and other sweet treats whose names I don't remember >.<

So long story short, if you ever plan a trip to Portugal, please please please do not leave out Lisbon, or Belém for that matter, because it's worth a trip there. Plus, you can take the cute little red trams that Portugal has running around the city. #15 goes to Belém in particular =]

Sunday, April 17, 2011

Portuguese Egg Tarts/ Pastéis de Nata

Okay, I've to admit that these are not exactly in the style of Pastéis de Nata, otherwise known as THE Portuguese egg tarts or Pastéis de Belem (Belem pastries), since my crust is a pâte brisée whereas the 'correct' crust should be a pâte feuilletée (puff pastry). Nevertheless, I find that the custard is really quite close in texture and taste. A little more about the names - Nata is basically means cream in Portuguese (and Spainish as well) whereas Belem means well, Belem, a place in Lisbon (not the one in Brazil) where these egg tarts supposedly originated, hundreds of years ago. I'll post about them in my Travel Tuesdays segment on Tuesday since I realized I've a lot to say about them!

I'm proud to announce that this is an original recipe by yours truly, although it was the largely the result of lack of ingredients that led me here. I did look at several recipes for Cantonese egg tarts online, and I found that many of them required evaporated milk, which I didn't have. So like how I did for my blueberry cream cheese tarts, since I saw that the purpose of evaporated milk was to thicken the custard, I decided to substitute it with heavy cream which I had on hand (about 30-48% fat content is fine). I also note that Duncan has a similar recipe here, but he uses flour and milk to thicken the custard instead. I actually have a lot of what I term 'original recipes' - since I like to brainstorm a lot and I tend to cook and bake by feeling (I know it's quite blasphemous for pastry making but I'm quite guilty of making cakes and breads without proper measuring instruments and they've turned out pretty well) and I'm finally confident enough to put this recipe up, mainly because I've made these tarts many many many times and each time my mom literally BEAMS from ear to ear because she says that these are the best things to come out of my oven and the best tart she's eaten :D But of course, she hasn't tasted the wonders which is Pastél de Belem - which is truly amazing I tell you but like I said, sans the crust, this is pretty close to the real deal!

Recipe for Portuguese Egg Tarts
For the crust

Use the Foolproof Pie Dough recipe here or use your favorite pie crust recipe, or better yet, use a puff pastry recipe for a more authentic egg tart!


For the custard filling
20g egg yolks (or 1 egg yolk equivalent)
10g castor sugar
20g heavy cream
20g milk

Method: 

Preparing the tart crusts. If preparing from frozen tart dough, thaw the dough until malleable, before pressing the dough into the tart moulds. Once done, place the tart moulds into the fridge while preparing the filling. 

Preparing the custard filling. Making sure that all ingredients are at room temperature, add the sugar into 
the egg yolks and mix well with a fork. Add in the heavy cream and milk and mix well. 

Making the tarts.
 Pour the filling into each tart pan, making sure each is about 80% or 90% full. 

Bake the tarts in a 170 degrees preheated oven for about 12 minutes for the smaller tarts and 15-20 minutes for the larger tarts. Once the custard starts to brown, the tarts are done. 


    Janine's jots: 
    • Taste: If you are fond of an eggy-tasting tart, do follow the recipe to a T! If you are not particularly fond of the eggy taste, do add some vanilla extract to the mixture (up to 1 tsp per 80ml of milk) - it'll help mask the eggy taste a bit. 
    • Texture: If you want a smooth textured custard, do take the time to strain the filling before filling up the tarts. Alternatively, you can use a hand blender to mix up the ingredients if you so prefer. 
    • Serving size: Note that for the amounts I've stated above, it is only enough to make 2 large tarts that you see in the first picture above, so do double or triple or quadruple the recipe to meet your needs. If you quadruple the recipe, it'll be enough to make about 10 large 6-cm wide tarts.  
    • Modifications: Note that the sugar amounts are quite low in my recipe, so if you like a sweeter tart, you can double the sugar amounts and it'll still be okay. Also, if you are not particularly fond of a wrinkly texture (the Belem tarts are wrinkly - gives it that rustic feel), do pre-bake the tarts first and then lower the temperature to continue baking the egg custard - just like how I did my blueberry cream cheese tarts (but with a lower temperature!). 
    • Storage: These tarts taste the best on the day they are baked. Store in an airtight container for a maximum of 2 days, unrefrigerated. I have kept it in the fridge for a maximum of a week, giving it a quick zap in the microwave or in the toaster oven to heat it up again and it tastes almost as good as a freshly baked one. 
    • Would I make this again? Definitely - in my mother's words, these are my 拿手好饼 =D

    I've been very intrigued about the chemistry behind cooking and baking, from a really young age, but what I particularly remember is a number of lessons I had during my JC times. I was doing Chemistry for my As, and my option topic for the paper was naturally, food chemistry, and my awesome chemistry teacher actually played a video of Nigella Lawson, the domestic goddess, pottering around her kitchen baking. I don't remember what dish she was doing, but I vividly remember what my teacher wanted to illustrate - the Maillard reaction, which is basically a browning process when heat is introduced to a food. Of course this was translated into a reaction between the carbonyl ground of the sugar and the nucleophilic amino group of the amino acids (I don't actually remember this chemistry portion, it's from my good friend Wiki), but it just goes to illustrate how important teachers and teaching methods are to your learning, doesn't it? 

    Anyway, the point of talking about the food chemistry portion is that understanding the purposes of why certain ingredients are being used or certain techniques being done are key to better baking, in my opinion. This is the reason why I like this recipe, because it represents how far along I've come in baking - putting together ingredients based on an understanding of what I want and a vision of the end product. This is also the reason why I've written down the recipe down as such, for it to act as a ratio for those who are courageous enough to try the recipe. I doubt you can make any less than what I've stated, and it's multiplied easily - I've baked quadruple the recipe and the end product is still fine. And the exciting thing about food chemistry I think, is the flexibility you have. For instance, I can foresee a time when I might not have cream available, so this can be easily substituted with evaporated milk, or even butter (in smaller amounts) with additions of cornstarch or even more egg yolk! This is the reason why I love baking so much - following recipes and replicating masterful creations is one thing, but what I love best is the ability to create your own - to channel your own creative juices into making a masterpiece you can call your own. 

    What usually happens is - I get a craving to eat egg tarts - so I head to my freezer to thaw my pie dough (sometimes I freeze the dough in the tartlet pans themselves, which speeds up the process even more), while making the filling at the same time. The 20g portion is sufficient to make myself 6 mini tartlets, just for your information :] Preheat the oven in the meantime, and press the thawed dough into the pans, fill them up about 80% full, and they're ready to be popped into the oven. After about 10-15 minutes, they're done and after cooling for a little while, they're ready to be eaten :] The whole process takes probably 30-45 minutes MAX, which is probably equivalent to the time that is required for me to drive out to get a good egg tart to satisfy the craving. The pictures below are two separate occasions when I decided to make large and mini egg tarts. 


    Occasion #1:


    A failed attempt at a styled shot :/ Just look at those horrible shadows!!


    Occasion #2: 


    You can bake it rustically - by placing the pie dough into a muffin pan like I did for occasion #1, or you can use proper tart pans - large or small. Do try this recipe should you have an egg-tart craving one day! And let me know how the recipe goes! ;p

    Monday, April 11, 2011

    Blueberry Cream Cheese Tarts

    I finally got down to using the last of my pie dough (or Pâte brisée for the finicky) from a really long time ago. Believe it or not, the finished tart crusts still taste as good even after staying frozen for close to two months! This proves that pie/tart doughs can be frozen for really long periods of time without any compromise in taste or texture! Thanks to the 35+ degrees weather as well, the dough thaws in no time (actually about 15 minutes before they are malleable) and you can have a tart, or many tartlets if you so desire, assembled and ready to bake and ready to eat in less than hour!

    This is my very own rendition of the blueberry cream cheese tart, which is quite popular locally. The recipe is very loosely adapted from Aunty Yochana’s recipe and an old clipping from the newspaper (no source) I found in my mom’s recipe book:

    Recipe for Blueberry Cream Cheese Tartlets 
    Makes 15 5–cm tartlets 
    Ingredients:
    For the tart crust: 
    Use the Foolproof Pie Dough recipe here

    For the cream cheese filling: 
    125 g    cream cheese
    30 g      icing sugar
    ½ tsp    lemon zest
    ½ tsp    vanilla extract
    25 ml    evaporated milk
    1 tbl      cornstarch
    1           egg
    Some blueberry jam (or fresh blueberry compote)

    Method:
    1. Prepare the tart shells. If preparing from frozen tart dough, thaw the dough until malleable, before pressing the dough into the tart moulds. Once done, place the tart moulds into the freezer for about 5-10 minutes to allow the dough to harden so that you don’t have to blind-bake the tarts. After freezing, place the tarts directly into a preheated oven at 180 degrees for 10-15 minutes until yellow-golden in color and remove to cool on the wire rack.
    2. Prepare the cream cheese filling. Allow the cream cheese to soften before beating in the sugar until creamy. Crack the egg into the mixture, together with the lemon zest and vanilla extract, mixing well. Pour in the evaporated milk and mix until well incorporated.
    3. Completing the blueberry cream cheese tart. Pour the cream cheese filling into the cooled tart shells, until about 80% filled. Spoon some blueberry jam into the tart shells. To create a marbled effect, use a toothpick to draw the blueberry jam in the cream cheese in a swirly motion. Bake the tarts at 180 degrees for another 10-15 minutes, or until the cream cheese filling is set and the tart crust is golden brown in color. Remove from oven and cool for at least 30 minutes before consuming.
    Janine's jots:
    • Taste: The lemon zest and vanilla extract were not too overwhelming - they provided a subtle twang and sweetness to the cream cheese filling. I felt that more lemon could be used to up the tanginess of the tart, and more blueberry compote used to complement that tanginess. 
    • Serving size: Each tart was almost bite-size - my mouth wasn't that huge, so I had to have two bites before the tart disappeared. This recipe has been downsized, and recipes I've seen easily double or quadruple the amounts you see here. If you wish to use larger tart pans (ie, not tartlet sizes), just increase the baking time appropriately. 
    • Modifications: Some recipes call for whipping cream to be used instead, but since the cream is not whipped before use, the purpose is the same as evaporated milk here - to provide a thickness and sweetness to the mixture. So just use whichever you have ready in your pantry. 
    • Storage: Because the tarts contain cream cheese, I'd advise storage in the fridge. The tarts store well in the fridge - I ate a few the day after and the following day - all you need is to give it a quick zap in the microwave to warm it up or in a minute in a toaster oven. 
    • Would I make this again? Maybe - I'm not a fan of cream cheese tarts - I prefer fresh fruits in a tart, but nevertheless, this recipe is yet another keeper because it was well-received by my family =) I'll definitely make it again without hesitation should my family request it - the fact that it's so easy to make helps too!
    • [ETA] Comments: Now I know the reason for my wrinkly tops - overbaking! I saw that Lena used a really low temperature of 115 degrees to 'cook' the cream cheese filling - am definitely trying out the low temperature thing next time!

    Tartlets for tea? The teacup in the background is purely for propping purposes - notice that it actually is empty! =p
    Finally, I get a nice overhead shot of my food without my shadow on them =)
    Experimenting with yet another angle - the light coming from the left has changed somewhat? 

    As you can see, I still need (a lot of) work with my swirling. Most people actually use blueberry jam, so it's actually much easier to swirl it together with the cream cheese filling. I tried to be smart - I didn't have blueberry jam on hand, but I did have fresh blueberries, so I basically cooked the fresh blueberries together with some sugar syrup before adding them into the cream cheese filling. Because I didn't strain the skins, the blueberry jam I was working with was not smooth and was much harder to swirl since it promptly sank to the bottom once I added it into the filling. Nevertheless, the blueberries were still awesome!

    Baking-wise, can anyone enlighten me - why do the nicely domed tops of my tarts (when they just come out of the oven) turn wrinkly and deflated once they cool? 

    Photography-wise, I'd appreciate comments as to which of the photos above was the best/worse. I know that I have 5 photos of the tarts with the same black background on the same plate, but bear with me - I'm still experimenting with angles and apertures. I know there's a lot of blank space in the photos, and I hope to eventually be able to overcome my laziness to actually style my food properly before greedily consuming them =p
    I'll be submitting this to Aspiring Bakers #6: Say Cheese! (April 2011), hosted by Jean.

    Tuesday, April 5, 2011

    Travel Tuesdays #3 - Still in Hvar, Croatia + Giveaway winner!

    First, I'd like to thank everyone who kindly left a comment in my vanilla bean giveaway. I was delighted by all the suggestions made by everyone. Using the random word generator, I found myself a winner! I was thinking if I should printscreen the results of the word generator, but I thought nah, since this is a small giveaway and rather informal anyways. I've to admit that coincidentally, the result was my favorite number (mainly because my birthday falls on that number) and coincidentally, the winner's suggestion was one that I was really interested in seeing - number #3, which was Alan! I've tasted the original PH Tarte Infiniment Vanille, and sorry I've to use this word, but... it was orgasmic. Crude word, yes, but the tart was really really really heavenly. I'm not a food writer, so I can't fathom the words suitable to describe the explosion of tastes and textures in my mouth. So Alan, I'll be contacting you very shortly and will be eagerly awaiting for your post on the tart/macaron :] As for the others who kindly commented, I'm sorry I couldn't give each and everyone of you vanilla beans, but I do have some more ideas up my sleeve once I'm done with my exams, so do stay tuned!

    Back to Travel Tuesdays - I decided to stay on Hvar since I think it's a place that few people outside Europe would think of travelling to. Like I said earlier, Croatia is like an unpolished gem of the Mediterranean - not as popular as Greece, but equally beautiful (or even more so). What's amazing is what a long way it has come from the war that plagued it (as well as Serbia and Bosnia) in the 1990s. You can still see reminders of the long drawn war in the bullet-hole-ridden walls and buildings, but it doesn't detract from and merely adds to the rich history that places like Dubrovnik and Hvar brim with.

    Anyway, on the lighter side of things - I'd like to think of this picture as one of my better 'flower/insect' photographs. What they say is true, sometimes the best photo opportunities come to you at the most opportune moments. Kel and I were cycling along the island of Hvar, when I stopped to smell the lavender flowers. There were many bees hovering around, but one tiny one just happened to buzz by and hover over the very plant I was near. I grabbed my camera which was already hanging on my neck (yes, I cycled with one hand on the handlebar and one protectively holding my camera) and took a couple of shots. Everything was on Auto Mode (blasphemous when using a DSLR I know, but cut me some slack - I was (and am still) a noob) but the photo turned out pretty good (in my opinion). All I had to do for the photo below was to brighten it up a little. It's also one of the rare times where I managed to get my focus right, on the flower and on the bee. Although upon closer inspection, there seems to be that flower on the bottom that seems to be in focus as well and the 'in focus' flower isn't as sharp as I'd like it to be. 

    Lavender flowers in Hvar, Croatia

    As usual, any comments and critique will be most welcome!

    Sunday, April 3, 2011

    How to save cake failures - make cake pops!

    Just a short post since I'm supposed to be studying. I wanted to remind you guys that my vanilla bean giveaway will be ending tonight, so please enter if you want to stand a chance to get some vanilla beans :] I'll be selecting a winner thereafter, but please don't expect an immediate announcement because I doubt I'll be able to do so until midweek.

    I also wanted to document a baking failure I had a few days ago. I tried out a new sponge recipe, but no thanks to my folding technique, the cake turned out dense and almost inedible. All pictures below are taken with my iPhone, which I've been using to document recent bakes since my brother took the camera with him for travelling.

    When I saw this end product, my heart sank. Why are there so many large holes all around the edges? :/ Not to mention the fact that I kinda overbaked it a little.
    HORRORS: the cake has a jelly-like hard, inedible bottom layer! 
    I made the executive decision to slice the cake into half... (slicing skills need work I know)
    The top layer's still salvageable although the air holes are rather big. 
    OHMYGAWD. Here's an example of a cake inside you never want to get. Holey, with uncooked flour bits = complete FAIL

    Thankfully, the uncooked flour bits were only on the bottom of the cake, and I actually retained the top half in a container, hoping to eat it with my morning milo. The bottom half, went straight into my dogs' bellies because I doubt any human being would have been able to consume it. Then, as luck would have it,  I saw Cathy’s post on her truffles, which she had made from her failed apple cake on the very same day. And a light went off in my head - just like a Eureka! moment. I could make cake pops out of the dry sponge cake! Some call it cake truffles, but truffles bring to mind chocolate balls with chocolate or other liquer or nut filling, so I'd rather call these cake pops. And of course, I went off to look at my  favorite cake pop website, Bakerella.

    For the uninitiated, cake pops are basically little balls of cake, mixed together with frosting or chocolate and covered with melted chocolate or candy melts. They're called cake pops because well, just like lollipops, they're little round bits of cake on a lollipop stick! Cake pops are usually covered in candy melts because people make stuff with the cake pops - Disney characters, faux cupcakes and icecreams and other gift ideas! Here's a picture of her book (which is available in Popular, Kino and other local bookstores) taken from her website! Look at the tiny chick cake pops and snowmen cake pops - the possibilities are endless I tell you!

    Basically what is required is simple - some cake, some frosting, and something to coat it with. You might need lollipop sticks, but I just used some toothpicks since I don’t have lollipop sticks lying around. Also, you need Styrofoam boards to prop the balls up so that you can let the coating set and to chill the balls, but since I didn’t have them, I made do with….you’ll never guess it…. lettuce! =] basically I stuck the toothpick into a head of lettuce and it was placed in my fridge. It worked brilliantly I’ve to say :]

    Recipe for cake pops
    Ingredients:
    1 batch failed cake
    Suitable amount of frosting (should be roughly the same as icing the cake – you can choose to use melted chocolate, any form of buttercream or icing – try not to make the icing overly sweet because you’ll be coating the cake ball with another layer of candy/chocolate)

    Method:
    1. Break the cake into a large bowl. You can crumble it with your bare hands or with the tines of the fork. 
    2. Pour frosting (which has been left standing at room temperature) into the bowl and mix it into the cake crumbs. 
    3. Once incorporated, use clean hands to press the cake crumbs and mould the cake balls. If you require extra moisture in the 'batter', add some milk to the mixture. Refrigerate the balls for at least 15 minutes or until firm. 
    4. In the meantime, melt your chocolate (over a bain-marie or in a microwave like I did) and let chocolate cool to room temperature. 
    5. Roll your chilled balls in the melted chocolate and attach the balls to a lollipop stick. Keep the cake ball upright (ball side up) and allow to cool on a styrofoam board so that the chocolate coating can cool and harden. 
    6. For best results, chill the cake ball again for at least half an hour before consuming. This will give a pronounced hardened chocolate exterior, which will give way to a soft and moist cakey inside. 

    What I did: 
    I mixed my frosting with the cake crumbs, and made them into balls. Chill them until firm. 
    Melt some chocolate - I melted some strawberry Rittersport together with Dove dark chocolate and rolled the cake balls around the melted chocolate mixture. Make sure the chocolate isn't too hot. Stick them onto your styrofoam/lettuce until the chocolate sets a little before chilling them again. If you see here, the cake pops are well chilled and starting to 'sweat' from the heat already!
    NOMNOMNOM =D It's really nice for something which I'd written off as a cake failure!

    As a new baker, I have more failures than successes than I dare to count. Also because my family aren't too receptive to my baking sometimes, it's up to me to finish everything, and the cake/bread tends to stale after a while, so I give those to my dogs too. My dogs have benefited tremendously of course. I don't know why the cake pop idea never ever entered my mind even though I look and salivate at pictures of cake pops all the time!?!

    The best thing about the cake pop is, you just need to use a yummy frosting - I used a cream cheese swiss meringue buttercream which was left over from my carrot cupcakes - it gave the sponge cake, which was plain vanilla the additional oomph. And I've to say using a mix of milk chocolate with strawberry filling (Rittersport) and dark chocolate was a brilliant idea because the strawberry flavour came through to complement the cake and the chocolate, as always, is delicious with anything. The next best thing is, every baker will have these ingredients lying about their kitchen! You can use any form of chocolate, baking or normal confectionary ones, any form of icing - buttercreams or what have you, and as I've demonstrated, you can use toothpicks and lettuceheads for props! If you find it troublesome, just roll your chocolate-coated cake pop in a bath of cocoa powder and put them into pretty little cupcake liners and you'll have an equally beautiful result, sweetness complemented with an extra bitterness from cocoa powder. 

    So lesson learnt friends - don't throw your cake failures away because you'll never know what you can do with them! :]
    Related Posts Plugin for WordPress, Blogger...