My blog has moved!

You should be automatically redirected in 6 seconds. If not, visit
http://www.unpastiche.com
and update your bookmarks.

Wednesday, March 30, 2011

Banana-patterned Chocolate Swiss Roll with Caramelized Banana

I'm thinking the longer and more accurate name of the cake should be "Banana-patterned Chocolate Swiss Roll with Vanilla Whipped Cream and Caramelized Banana with Whisky". Anyway, I've been wanting to try out a swiss roll recipe for ages, and when I saw a particular strawberry printed swiss roll appeared on the blogosphere, I couldn't resist coming up with my own version of it. I first saw it on Reese's blog here, who got the idea from 小本 and I couldn't wait any longer! This is a preview of what I came up with ------------------------>


I'm not much of a plain swiss roll fan, so I decided to incorporate some cocoa powder into the cake. This meant a little more work for me to do however, since I had to separate some of the egg yolk and white mixture such that I could color it yellow for the bananas later. Anyhow, as with all baking experiments, this was another huge learning curve, although I did get good reviews from my family about the swiss roll. After I got the cake out of the oven, I realized it was a little thin for a swiss roll, so here's my post-mortem of my mistakes - which hopefully will help someone else who's new at swiss roll making.

Things that went wrong: 
    <---- Note the mistakes committed!
  • I'm not blaming anyone, but I think the blogger whose recipe I followed wrote her instructions wrongly, because I later realized when I saw the original recipe in Chinese that some of the instructions were translated wrongly. This was because the instructions were to mix in the flour with a mixer even after adding the whipped egg whites (which meant that I was effectively deflating them) - as I was doing that particular step, I was really doubtful of it, but I decided to stick to it to a T, since I know from experience how deviations from the recipe don't result in good things. Anyway, I've commented on the blogger's post to clarify (if I was wrong), but she still hasn't got back to me, so we'll see :] I've included the original recipe from 孟老师 which I've translated into English.
  • This of course meant that my swiss roll did not rise sufficiently - you can see from the pictures that the swiss roll is rather thin (or deflated) in size. I tried the same recipe the second time the next day (since I hate failures) but using my amended method and it got me a cake twice the thickness - really yummy and fluffy!
  • This was my first time in the year making a swiss roll (and second time in my 'baking life'), and I was rather unsure how to spread the whipped cream such that it would appear even after rolling. Turns out I was a little stingy with the cream and everything got squeezed out at the end =X 
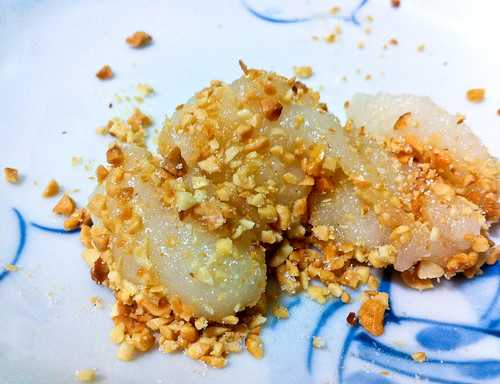
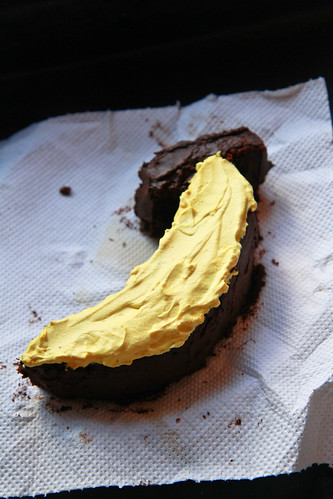
  • Also, I initially wanted to put a whole banana in the centre, but chickened out in the end as I thought it would be too large. Needless to say, half a banana in the centre (as seen in the photo) looks rather measly. 

Anyway, this is one of my more successful 'overhead' photograph that I have taken this year, even thought the subject matter isn't exactly too pretty. I've been trying really hard to learn different techniques in photography and I'm glad to say that I do think I have improved marginally! I would, of course, appreciate any helpful critique/comments about how to improve my photography!


Recipe for 
Chocolate Swiss Roll 
Adapted from 孟老师的美味蛋糕卷, makes a 36x26cm roll

Ingredients: 
25 g butter
72 g egg yolks (about 4)
10 g castor sugar
20 g cold water
20 g cocoa powder, unsweetened
45 g low protein flour (use cake/TOP flour)

90 g egg whites (about 3)
60 g castor sugar 

Method: 
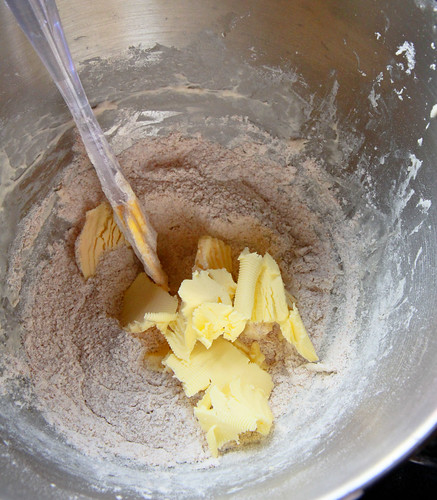
  1. Melt butter in the microwave. Set aside to cool. 
  2. Whisk egg yolks together with 10g castor sugar, until the mixture pales in color and doubles in size. 
  3. Sieve the cocoa powder and mix well, before adding cold water to the mixture. 
  4. Beat the egg whites until foamy, and add remaining sugar. Beat until stiff peaks are achieved. 
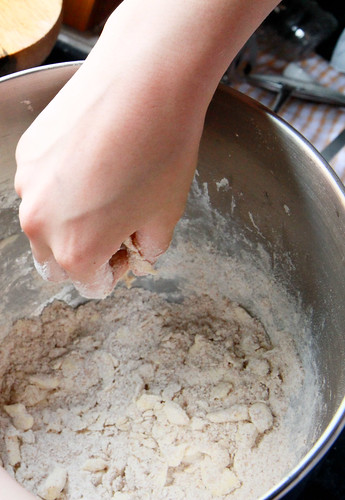
  5. Add 1/3 of the egg white into the egg yolk mixture in [3]. Mix gently with a spatula - don't worry about deflating the egg whites because you are tempering the mixture. 
  6. Fold the remaining meringue into the batter. 
  7. Sift in the flour in three portions, folding well each time. 
  8. Add in the butter into the batter. 
  9. Bake at 170 degrees for 15-20 minutes before removing the cake to cool. 


Caramelized banana
2 ripe bananas
4 tbl sugar
1 tbl whisky
3 tbl water

  1. Place the water, whisky and sugar in a small saucepan on medium-high heat. 
  2. Once the sugar starts to dissolve, add in the bananas, stirring gently until all the sugar has dissolved and mixture starts to brown. 
  3. Remove from heat and let bananas macerate in the mixture whilst preparing the whipped cream. 

Whipped cream
100 g cream
10 g   castor sugar
1 tsp  vanilla extract

  1. Place cold cream and vanilla extract in a clean bowl. Start whipping the cream.
  2. Add the castor sugar gradually into the cream, whipping the mixture until soft peaks are reached. 

To assemble:
  1. After cooling the cake, spread whipped cream generously on one side of the cake (prefably the uglier side). 
  2. Place the caramelized banana on the bottom edge of the cake where you wish to start rolling
  3. Roll up the cake and there you have it - a perfectly made swiss roll :]


Janine's jots:
  • I used 孟老师's 分蛋式海绵蛋糕体 method, which loosely translates to "separated egg sponge cake" method. This basically just means that the egg yolks and whites are whipped separately. I am still having problems with this method, so expect more experiments coming this way!
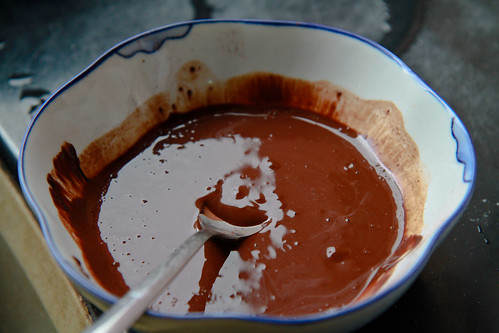
  • I'm not sure if I'm reading the instructions wrongly, but I thought the sieving of cocoa powder into the egg yolk mixture before adding the water was rather superfluous. On hindsight, I think mixing the cold water with the cocoa powder to form a paste first sounded more logical since then I wouldn't deflate the egg yolks that much. 
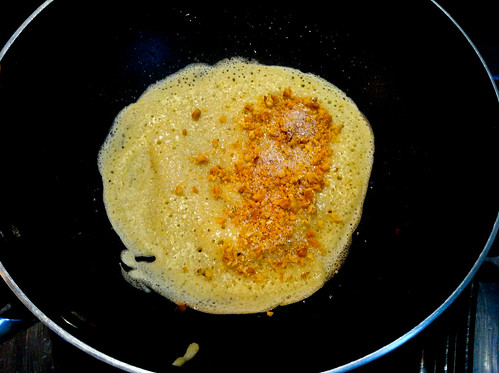
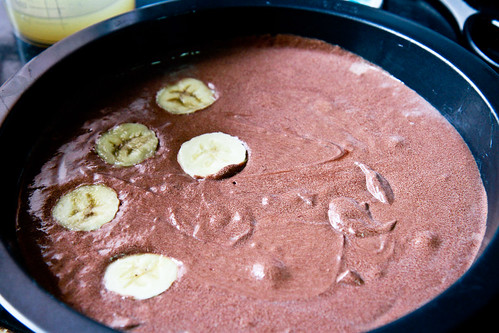
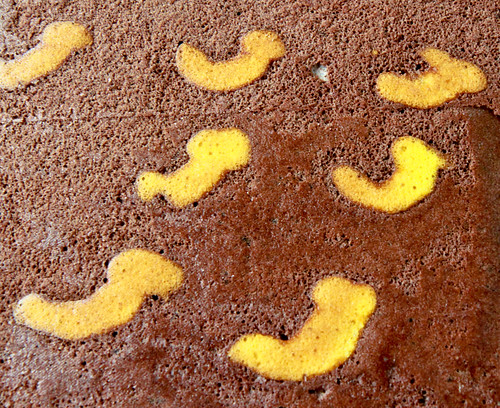
  • I haven't provided instructions on how to make the 'banana' print - but it's basically the same as Reese's instructions here. It's slightly more troublesome here because you have to separate the batter right from the start since once you add the cocoa powder, the batter will be brown and hard to color. 
  • Instructions on making light prints on a chocolate cake: Basically, before adding the cocoa powder, take out a few tablespoons worth of egg-yolk batter and set aside. Do the same for the egg white meringue, flour and melted butter, setting aside a proportionate portion of each. I eyeballed everything, so no measurements here! It doesn't really matter as long as the portions are more or less proportionate. Add a few drops of yellow coloring and place into a piping bag to pipe our your desired banana shapes on the baking pan (which you have lined). Bake the 'bananas' in the preheated oven for about 3 minutes, before pouring the remaining batter and proceeding to bake for another 15 minutes, or until a skewer comes out clean. 

In pictures: 
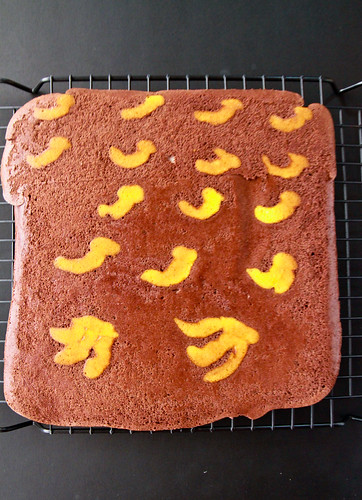
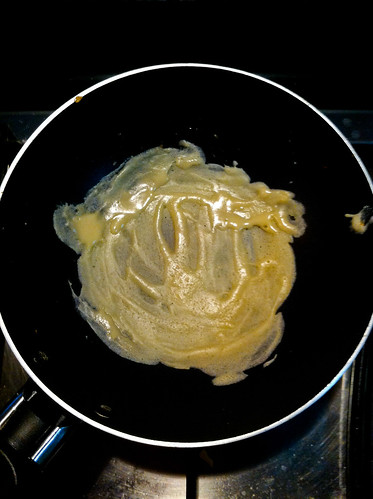
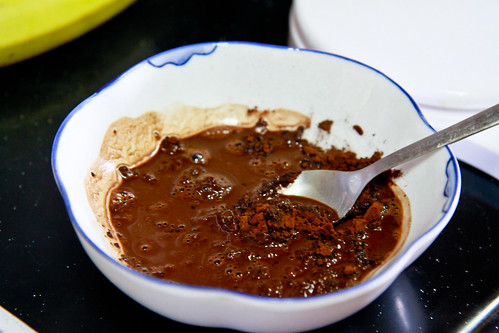
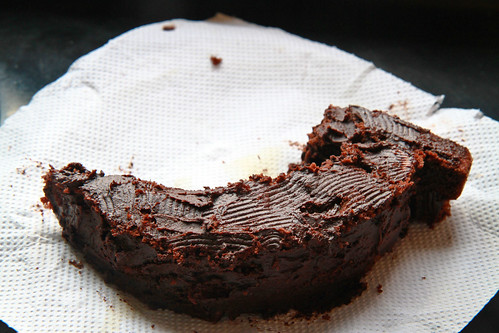
Cooling the cake. My baking paper gives me odd textures on my cake. 
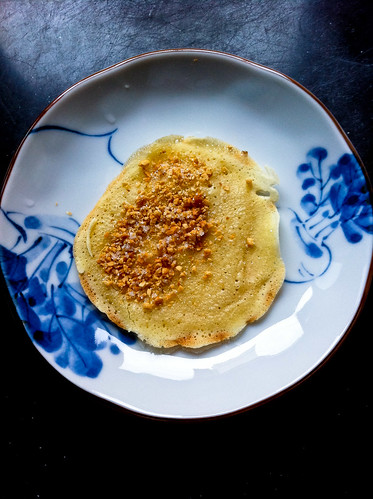
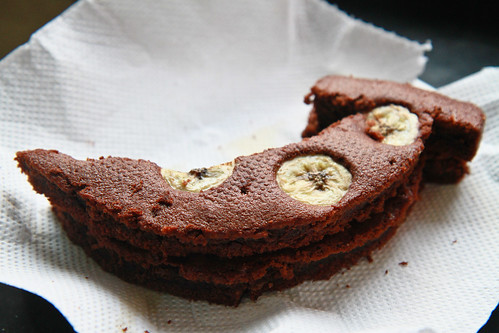
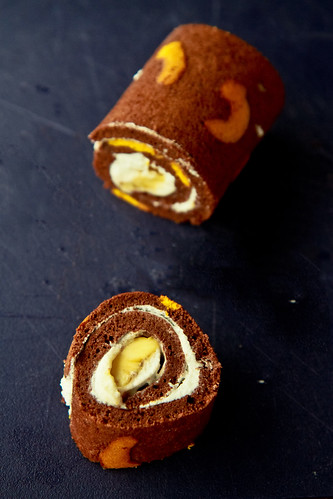
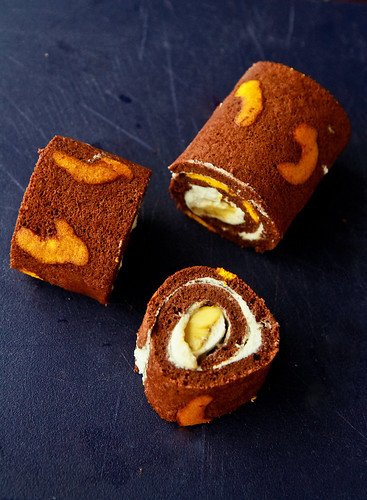
YUMMO. Looking a little flat, but still yummy nevertheless! 
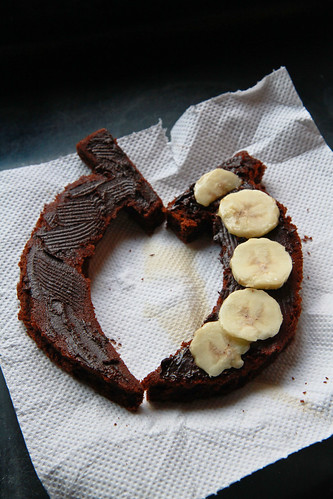
Maybe it's my sub-conscious, but my bananas look like letter "J"s to me, which is just fine since that's my name. It's like a cake dedicated to myself! :] 
Whew! Making this just in time for the deadline of Aspiring Bakers #5 : Fruity March (March 2011) hosted by Jess of Bakericious! Can't wait to see what the round-up for this month, and the reveal for the theme for the next month, although I might not be particularly active because I'm starting my finals this coming month and I'll be setting everything aside to focus on the last hurdle. Yes, these will be the finals, as in final exams for my final year in university! I will continue to get baking done, and updating my twitter with pictures of my baking, but it'll be pretty quiet around the blog, unless I can't resist the urge to blog =p 

Tuesday, March 29, 2011

Travel Tuesdays #2 - Hvar, Croatia

For this week's Travel Tuesday, we cross the Adriatic Sea and land upon the shores of Croatia. Hvar is an island off the main coast of Croatia, and it's about half the size of Singapore. In the short amount of time that I was there, I visited the more populated and touristy side of Hvar - known as Hvar city. What I like about Hvar is how un-densely populated the island is, unlike Singapore. In the day, there are a whole lot of tourists island-hopping from the mainland, but at night, the island is so much quieter and serene, and still as beautiful. The only way to get to Hvar is by ferry, from the mainland or from other islands. Within the island itself, there are buses, but we made our way mostly by foot because we hung around in Hvar city. We also rented bicycles for an entire day and made our way around the island. This photo in fact, is taken from the southeastern side of the island - you can see the old city in the photo below. 

This picture was actually taken at one of the many beaches in Hvar. We cycled for about 15 minutes to get to this beach, and it was almost empty. The water is seriously blue (really close to the color in the picture, just a tad darker), and the beaches are semi-sandy/pebbly. It's unlike the beaches in Nice, which are horribly pebbly and rather polluted (with people). Croatian beaches are a joy to suntan on. My friend and I randomly cycled to where our hearts took us (literally, since we didn't really follow any map) and we stopped as and where we wanted to, stripped to our bikinis, put out our beach towels and took out our books to suntan and read. It was June when I was in Croatia, but the waters were still a little chilly for dipping (we had to steel ourselves and rush into the water to acclimatize for a while) but the sun was a welcome warmth. My friend and I enjoyed wonderful sunkissed skins (and tans) after a short week in Croatia. 


The image above was rendered in Photoshop some time ago - it was bleached and then spliced into thirds. I have no idea where the original is now. Sadly, one of the splices actually cuts away the cathedral located in St Stephen's Square. The cathedral is nowhere as majestic as say, the ones in Italy, but it is quaint and I love how almost every building in the old part of the town is more or less made with the same colored material - a light sandy colored brick. 

My only regret from Hvar is not spending more time there. We only had 2 days, of which one was spent randomly walking around and visiting the Pakleni islands nearby, and the second was spent tanning on random beaches. There wasn't much opportunity to explore the wilder Northern side which it is well known for its lavender fields. At night, the night air is permeated with the soothing smell of lavender which is sold in bunches and in oils and in soap products by road hawkers. 

Foodwise, Croatian cuisine is rather typical of Mediterranean cuisine - game, seafood - it reminds me of a mix of Italian, French, Eastern European and even German influences! We had some rather good risotto in Croatia - they are famous for their squid ink/black risotto (which was seriously delish!) and we also had the liberty of tasting local wines at local restaurants. Pricewise, Croatia still uses its own currency, kuna, and food costs about the same as in Italy.

Sunday, March 27, 2011

Malaysian Monday #2: Muah Chee

Posting a little early for MM, but here's something which you can whip out in less than 10 minutes (if you have the ingredients available in your kitchen) and best thing is, it's gluten-free! :]

Muah chee is a treat right out of my childhood. I will always buy it (or rather my parents would buy it for me) when we were out and about on weekends and if we chanced upon random roadside uncles/aunties hawking this delectable treat. Also, I love everything to do with peanuts. I love peanut pancakes, peanut snowballs, peanut soup, peanut tang yuen, peanut ang koo kuehs - you get my drift, basically anything peanut = my favourite. My mom usually dry fries the peanuts, grinds them up and keeps them in a jar in the fridge, so that whenever we want say, peanut toppings, we can easily whip the jar out of the fridge and add them in. She also has a jar of whole peanuts, which we pop when we have a craving for peanuts. This is also used when we have our traditional "thunder rice tea" or (客家擂茶) since my mom is Hakka :] My mom also uses the same ground peanuts (with peanut butter and sugar) in her peanut baos, which I absolutely love. I'm somewhat of a picky bao eater, so I only eat my mom's peanut and vegetable baos. Peanut bao is not something you can find anywhere - anyone knows where you can get nice ones in Singapore or Malaysia? Anyway, the point of the story is: always keep peanuts in your fridge, you never know when you need them - like when you have a craving for apam balik or muah chee :]

I specifically searched for a recipe which didn't require steaming, because my craving had to be satisfied now! So microwaveable muah chee it was! (Btw, I use my microwave for many other purposes, including making sausages and instant noodles when I'm lazy.) These photos are again, taken with my iPhone, because the muah chee was done in minutes (literally) and went into my stomach within seconds! So, there was absolutely no time to take the camera out =p

What was left of my muah chee after I remembered to take a photo of it.

Muah Chee
Makes enough to serve one 
Ingredients
25 g glutinous rice flour
40 g water

25 g peanuts, toasted and chopped (or ground)
  5 g sugar, or to taste

Method:
  1. Combine the peanuts and sugar together in a bowl. Set aside.
  2. In a microwave safe bowl, add the glutinous rice flour and water. Mix well and ensure that there are no clumps. Place it into the microwave (I used power at 70w) for 2 minutes. The mixture should be sticky but not gooey. 
  3. Using a fork (or spoon), drop the microwaved dough onto your peanut mixture and use a pair of scissors or knife to cut the dough into smaller pieces and roll it about the peanut mixture. 

Janine's jots: 
  • Modifications: The original recipe is from Ju. If you are serving the muah chee to a family, do use the original recipe which should serve 5 or more people for a light snack.  
  • Taste: I left out the shallot oil, because I didn't have any, but in the future, I'd probably add a little bit of vanilla extract to make the muah chee more fragrant :]
  • Texture: Just like those selling on the streets! You can microwave it on high (100w) for 2 minutes and it's fine as well. I tried microwaving it for 3-4 minutes and there was no visible change to the texture (ie, it didn't harden). 
  • Storage: I doubt the muah chee can be stored in the fridge because it has to be continually steamed or kept warm for it to be soft and chewy. In any case, whipping up this dish takes less than 5 minutes if you have all the ingredients on hand!
  • Would I make this again? Definitely! All you need to do is place everything in a microwave and that's more than half the dish done already :] On top of that, it's so much cheaper to make this at home (peanuts cost well, peanuts and the glutinous rice flour is <$2 for 500g!) and you know exactly what goes into the muah chee!


This is my second entry for the Muhibbah Malaysia Monday event hosted by Shaz of Test With Skewer and Suresh of 3 Hungry Tummies

Friday, March 25, 2011

Three months on + a fragrant [vanilla bean] giveaway!

Boy I finally got a breather after a few weeks of intense reports, assignments, presentations and what-nots. Finally managed to indulge in some baking after having churned out more than 10,000 worth of words, and I only have one last report left to do before it's time for the long-awaited exams! It's long awaited because I've 2 full months of holidaying waiting for me after that =D I just took 3 jabs today, 2 on my arms and another on my butt, in preparation for Cambodia, where I'll spend 3 weeks doing some volunteer work. Though my arms are all achy now, it makes me happy to know that I'm this much closer to getting there!

Anyway, I know that people usually only do posts like this after reaching milestones like the 100th post or the first year anniversary, but I wanted to write a little something after having a food-related blog for 3 months, since it's my blog anyway. I've always wanted to have a food-related blog, but I never was able to find the time or patience to blog consistently. However, after living aboard and being exposed to different food cultures and coming back with the ability to cook and bake, I found the need to keep a recipe book (which I do keep - a spiralbound notebook where I jot down my ideas and recipes) and because I wanted to improve my photography skills, a blog seemed like an apt solution. Besides, I used to spend a copious amount of time online previously, tending to customers for my now-defunct online business, and when I came back, I didn't want to continue, because I knew that I’d be busy with school - I'm in my final year after all, and I wanted to pursue my new dream – that of a baker. So I pushed the dream of being a businesswoman back, and brought the baker dream to the fore. [Perhaps one day, I can kill two birds with one stone and be a baker-businesswoman] So anyway, I had too much time on my hands - I would spend time surfing the net aimlessly, and admiring other peoples' photography and writing, whilst thinking, if only I could photograph/write like that. And why not? So this blog was born on Christmas Day, after a week of waffling about and thinking whether I should or should not start a blog. I almost didn't start, because the first words were just so very hard to write. I had to write and edit and delete countless of times before I thought the post was ready to see the world. The pictures were of course, another pain in the ass.

But I’m glad that I’ve been blogging consistently for 3 months, proving that I'm not what my parents call hangat hangat tahi ayam. Malaysians will probably know what it means - literally meaning for as long as the chicken shit is hot (which is not very long) or in proper English, a short-lived pursuit. Not only have I made new virtual friends, having a blog makes me want to challenge myself continually, to not stick to the recipes I’m used to, but to venture out and try new recipes. The fact that I visit other blogs rather frequently (on a daily basis actually) helps too! And most importantly, I'm fulfilling my three main aims for the blog - to hone my baking/cooking skills, to improve on my photography skills, and to keep a digital record of recipes I've attempted (especially my mom's passed-down ones).

I'm giving away these Madagascar Vanilla Beans :)

To congratulate myself on passing the 3-month mark, and to thank you for supporting me on this journey, my dear blogger friends and readers, I figured a vanilla bean giveaway would be apt. If you recall, I bought a number of Madagascar vanilla beans last year, to make some homemade vanilla extract and for use in my recipes. Well, thing is, I bought close to a hundred beans, because they were cheaper in bulk. I was just using my vanilla bean the other day and when I saw how many I had left, I thought, I’d better give some away in case they deteriorate in quality =X (I assure you that they still smell as fragrant as before!) I've to admit that I'm not too sure if these are the top grade vanilla beans, because I know that there's grade A and it wasn't stated if these were or not. However, grade A or not, these are pretty decent beans! Just leave one bean out in the open and the vanilla fragrance will permeate the room in a few minutes! You don't even have to slice it open! An inch of vanilla bean is equivalent to one teaspoon of vanilla extract, and trust me, this will be the best substitute you’ll ever use in your baking because the difference in depth of fragrance and taste you get is phenomenal! 

So to start one of you off on your vanilla bean journey, I’ve decided to give 5 vanilla beans away to one lucky winner. Hopefully, these five vanilla beans will provide you with a springboard into using vanilla beans in your recipes. You’ll be able to attempt at least 5 recipes requiring vanilla beans – think of crème patisserie or vanilla bean cookies or vanilla bean pound cake or even vanilla ice cream - the possibilities are endless really! If you're particularly courageous, you can try Adriano Zumbo's V8 cake here - it's vanilla paradise for any vanilla lovers :] If you don't win this giveaway, don't worry because I have a few ideas up my sleeve and I just might have another giveaway sooner than you think :] Also, you can get the vanilla pods from local baking supply stores at about S$6 for 2 thereabouts. Or psssst if you'd like to help me cut down on my supply of vanilla beans, I'd be more than happy to sell some to you at the price I got them for. Just drop me an email here!

All you have to do to enter the giveaway is drop me a comment with your email address and name, and tell me what item you will make with the vanilla bean if you win it and you’ll stand a chance of winning :] I would love it if you actually did bake that particular something after winning the beans and shared it with me. Or it could be anything else you baked with the vanilla bean. I'd love to include you (and your recipe) in my series on vanilla-related posts (coming soon!) on the blog! This giveaway to both Singapore and Malaysia residents, and will close on 3 April at 3pm, and I'll choose a winner using a random number generator after that :]

In the meantime, happy baking everyone!

Tuesday, March 22, 2011

Travel Tuesdays #1 - Pizza Napoletana, from Napoli

Pizza Napoletana, from Sorbillo - check out the lovely thick cornicione (crust) omg!

I've decided to abandon the Wordless Wednesdays endeavour - yup it was really short-lived BUT I've decided to start my very own Travel Tuesdays! I was very privileged to spend a year traveling around Europe a while back, and it was a year well spent, even though my bank account is quite bare now. Because I've been wanting to chronicle my adventures and scrapbook them ever since - I still have more than 10,000 unsieved and unedited photos lying about somewhere =X - plus I do want to share little nuggets of information about each place, so Travel Tuesdays it is! I love planning trips, and many of my friends have approached me to ask about their itineraries or to help them plan one, and it's a task I absolutely love! In fact, my childhood dream was to become a tour guide, but that dream quickly got deflated when I realized that I'd only be able to visit probably one or two places repeatedly. Although air stewardesses get to fly to different places, I never did aspire to become one, because I don't have the figure to be one =X Anyway, I love the fact that when I'm helping someone plan a trip, I'm helping them save money by giving them tips, tailoring a trip to their needs, and most importantly, living vicariously through them :] So if any of you need help planning a trip to continental Europe, feel free to approach me!

Alright, onto the photo. This is a rather badly taken photo, in more ways than one. And my excuse is that this was when I first got my DSLR in order to take photos of my travels in Europe, and I was still mostly using the Auto function (a lot) and venturing into the aperture and shutter speed dials just a little. Most of my photos are quite horribly taken, in fact, I cringe when I see them now. Everything that can go wrong in a picture has and have gone wrong in my pictures. On top of that, this was an indoor shot, so lighting was a pain. As always, food is extremely important to me - so much so that it's more important to eat it first before taking any photographs. My excuse is that I waited close to an hour to get served at Pizzeria Sorbillo, so I was super duper hungry by the time we got seats. This pizzeria was one of the pizzerias which we went to in the old quarter of Naples. There are a number of more popular establishments, such as Da Michele (the very same one which Julia Roberts went to in Eat, Pray, Love) but that's a little outside the centre, so we settled on Sorbillo since I'd gotten recommendations from a Napoli native :]

As with most pizzerias in Italy, you are forced to order a pizza each. Yes - each person HAS to order one pizza, even though one pizza, as you can see is freaking huge! It's about 10-11 inches wide (which is the standard size) For the life of me, I can't remember what the other pizza was, but the one in the foreground is the authentic Pizza Napoletana. Made with only the most basic of ingredients, fresh basil, bufala fresh mozzarella (or Flor di Latte), with San Marzano plum tomatoes, they very aptly represent the colors of Italy and are matches made in heaven! You also have to order a drink each, and I highly recommend ordering beer because it goes so well with pizza. And sorry Italians, you gotta stick to the pizza and pasta making because making beer just isn't your forte =/

I'll probably share a little more about Naples in my next few posts, but I just wanted to say that Naples, right now, isn't too popular with Asian tourists yet, as compared to Rome or Milan or Florence or Venice, but you should make an effort to visit Naples if you've the luxury of time. Naples is what many call the underbelly of Italy, and I do think that it's a good representation of what the South of Italy is like. If you like history, it's only 1h away from Pompeii and so many other wonderful historical sites. Most of the artifacts from Pompeii are exhibited in the Naples National Archeological Museum. Besides, you get to eat truly authentic Napoletana pizza! This is the very birthplace of modern-day pizza! And trust me, you cannot get a similar quality pizza anywhere else in Italy because pizza making differs across regions in Italy (Rome has thin crust pizzas for example). The fresh buffalo mozzarella and tomato sauce are revelations in themselves - nowhere else will you get such creamy mozzarella and tomato sauce which is a perfect balance of sweet and sour.

I've been to a few places in Singapore ever since Naples, and most of these places sell the Roman style pizza - La Nonna in Holland Village has pretty good pizza, and I love the fact that they have a lunch promotion (not sure if it's still valid) which means that you get pizza for half the price (<$12 after discount!)! I don't remember the name of the pizza, but they have a goat cheese topped pizza which is super yummyyyy :] I also tried Bella Pizza, which also has a thin crust pizza, and although delicious as well, it's nowhere similar to the ones from Naples, I'm afraid. You can check out ladyironchef's review here. I've read Dr Leslie Tay's review on Sole Pomodoro Pizzeria in Singapore, and this appears to be the closest replica of pizza napoletana, together with l'operetta (who has VPN accreditation!), and I've been wanting to go there ever since!

Anyways, for those interested to have a pizza eating fest in Naples, do check out these websites (here and here) which give a list of the best pizzas to eat in Naples. I can attest to the quality of the pizzas from Sorbillo, Da Michele and Di Matteo - absolutely the best pizzas you'll eat anywhere!

Monday, March 21, 2011

Malaysian Monday #1: Apam Balik/ Min Jiang Kuih

I suddenly was craving apam balik a few days back, so I googled and found myself on Lily's blog. Her blog is a veritable trove of Malaysian/Singaporean dishes, and she even had three variations of apam balik! Min Jiang Kuih is typically thicker and you can tell from the name that it's the Chinese version - this is the version that is selling in Jollibean and Mr. Bean - the "peanut pancake" version. Of course, there's all sorts of variants to the name - Ban Jian Kuih and whatnot, but my parents called it Min Jiang Kuih, so it's Min Jiang Kuih for me too! Apam balik means the same thing - apam = pancake and balik = turnover or folded, so it's just Malay for folded pancake! I tend to think that there's the thick version of apam balik with peanuts, sugar and creamy corn (YUMMEH) and the thin crispy version, which is oh so delicious as well. This tends to be sold by Malay uncles on those motorbikes in Malaysia, but can also be found in pasar malams. I lovex100000 apam balik, especially those hybrid types which are not too thick, and yet crispy on the outside, and they've this "sweet spot", typically in the centre, with the highest concentration of peanuts and butter. Anyone know what I'm talking about? :)

PS: I have this really amusing story about apam balik. I've been eating it for ages, since I was a little kid, and I always thought it was called "Abang balik" which means big brother come back in Malay. And NO ONE corrected me when I ordered apam balik, until a few years ago, when this toothy old (seriously very very old) uncle told me, abang balik - salah lah dik, abang tak mahu balik! Basically, he was joking with me, saying that it was the wrong name, and big brother doesn't want to go back. LOL. 


Apam Balik
Ingredients:
Adapted from Lily's recipe here

For the pancake: 
85 g   all-purpose flour
50 g   rice flour
15 g   cornstarch
1 tsp   double action baking powder
¼ tsp  baking soda
¼ tsp  salt
1        egg, about 55g
60 g   castor sugar
1 tsp  vanilla essence
90 ml water
10 ml milk

For the filling:
50 g melted butter
30 g granulated sugar (castor sugar is fine too)
60 g roasted peanuts, chopped

Method:
  1. Prepare the filling by melting the butter, mixing it together with sugar and peanuts. 
  2. Add the sugar into the egg and mix until sugar dissolves. Add in the vanilla essence and mix well.
  3. Sieve all the dry ingredients together (all-purpose flour, rice flour, cornstarch, baking powder, baking soda and salt). 
  4. Mix together the water and milk and add it into the egg mixture. 
  5. Gradually add the dry ingredients into the wet ingredients, making sure to stir well to avoid clumping. Strain the mixture if you cannot get rid of the lumps. 
  6. Set the ingredients aside in the fridge for at least 3 hours for it to thicken. I left it overnight in the fridge. 
  7. Heat a crepe pan or small nonstick pan - and add a little bit of oil/butter to coat the pan. Using a ladle or tablespoon (for small pancakes), quickly spread the batter onto the pan, making sure the batter is uniformly thick. 
  8. Cook until you see the edges of the pancake starting to brown. At this point, add in the filling on one half of the batter. This makes sure that the filling will adhere to the pancake better when it's ready to be folded. 
  9. Once the bottom is golden brown, using a heatproof spatula to lift up the half of the pancake without the filling and fold it into half. 
  10. Repeat the process for the next pancake. 
  11. Allow the pancake to cool for a minute or two before consuming!
Janine's jots: 
  • Taste: The pancake is slightly too eggy for me, but that might be due to the fact that I'm using organic virgin eggs. 
  • Texture: This yields a pancake with a crispy texture, so if you're looking for a thick chewy version of apam balik - this is not it!
  • Serving size: The original recipe is twice that noted above, but this halved portion is more than enough to make 10 pancakes (at least!) I managed to churn out close to 20 mini 4-inch pancakes. 
  • Modifications: The batter is slightly thick, even after sitting at room temperature for a while. I'd probably put more milk in the future and reduce the amount of water to give the pancake for flavour. 
  • Other comments: Be sure to let the batter sit for at least 20 minutes to let it reach room temperature so that it will be easier to spread. If you're greedy (like me) and can't wait for 20 minutes, simply add a teaspoon or two of milk to the batter and incorporate thoroughly such that the batter is more fluid and spreadable. 
  • Storage: The batter is able to last pretty long in the fridge. I managed to eat pancakes every day for breakfast for 4 days. However, note that there's an egg in the batter, so if you're icky about leaving a raw egg in a batter for 5 days, I'd advise you to consume the batter at one sitting. 
  • Would I make this again? Definitely! It's almost too easy to whip up if you're having an apam balik craving! You just need to have rice flour in your kitchen :]
In pictures: 
Spread the batter on your pan as thinly as possible. As you can see, I'm not really good at spreading it thinly and my pan is a little small >.<
Once the edges start to brown, you can add your peanut filling. I cheat by adding the butter directly to the batter without melting, and then sprinkling the sugar and peanuts.
Mmmmmm =D Be sure to fold it into half the moment you get it off the pan because it hardens very quickly when cooled and will crack if you try to fold it then!
Oooh thin crispy goodness! You can make a thicker version (a min jiang kuih version) with the same batter!
Or you could be more 'French' and add nutella to the apam balik instead! It tastes as good as the ones with peanuts, seriously!

PS: All these photos are taken with my iPhone, with minor adjustments done on the computer. Looks not bad eh? I've been using my phone to take a number of my photos, mainly because I don't have the camera with me sometimes, or am too lazy to take it out.


Also, this marks my first entry into Muhibbah Malaysia Monday event hosted by Shaz of Test With Skewer and Suresh of 3 Hungry Tummies. My mom is a really good cook, and I do hope to gradually write all her recipes down so that I can cook equally delicious meals for myself in the future and possibly pass it on! So may this be the first of many entries into MMM :]


Wednesday, March 16, 2011

Banana-shaped Chocolate Banana Cake

I've been on a baking dry spell recently. My mind has been filled with tons of ideas, but because of the failure of my matcha macarons and mango souffle earlier in the week, I've been a little sian or wary of trying new recipes. People always say that it's okay to fail, but maybe because I've always been a results-oriented person, I get particularly dejected when something I imagine inside my head doesn't translate into what I am baking. This puts me off baking for quite some time, until something I see gets stuck in my head again and I decide to bake it, knowing that the worse I can do is to fail, which I've already done anyway. Thing is, the pantry is running dry, literally. The flour has been running out and so has a number of other ingredients, and I've been too lazy to get out to stock up the pantry. So I'll have to wait for the weekend until my mom is willing to buy them for me. 

The original cake in Rose's book, Rose's Heavenly Cakes, was actually a chocolate banana stud cake - chocolate cake which had a banana flavour, and with chocolate studs (or chips) decorating the exterior. It really is quite a pretty looking cake, but I wanted the end product to be more banana-y (if there's such a word), and I thought, why not add banana slices into the banana and present the cake as a banana too! This was actually made some time ago, as it was meant to be a surprise for Jon who especially likes bananas and the color yellow :] This was my first attempt at cutting cakes into shapes and second attempt at doing a ganache exterior, so the result's still pretty messy =/

BANANA chocolate cake :]

Chocolate Banana Cake
Adapted from Rose's Heavenly Cakes
Makes an 8 inch round cake 


Janine's jots: 
  • Taste: The banana taste isn't too obvious actually - the cake should be able to hold at least twice as much banana. Be sure to use good quality cocoa, because the cocoa is really the star of the cake. 
  • Texture: The cake is not as light as a sponge cake, but not as dense as butter cakes or brownies. It isn't too heavy - which some chocolate cakes are. 
  • Storage: The cake keeps well in the fridge - just be sure to let it cool to room temperature before consuming. 
  • Would I make this again? Definitely! The recipe is really easily adaptable - I did the same recipe at least twice more, in the form of cupcakes and they tasted equally heavenly. The amount below makes about 8 cupcakes. 
  • Modifications: The only thing is that the original recipe calls for a whole lot of sugar, but I've reduced this to a mere 70g in my adaption below. My cakes tend to be less sweet than normal, so do increase this up to 100g if you like a sweeter cake. 


Ingredients

21 g unsweetened cocoa powder
44 g boiling water
56 g large ripe banana, peeled and mashed (about half a banana)
Slices of banana (the remaining half of the banana)
45 g sour cream
50 g egg (about 1 large egg)
½ tsp vanilla extract
78 g all purpose flour
70 g sugar
½ tsp baking soda
3/8 tsp baking powder
1/8 tsp salt
70 g butter, softened

Method:
  1. Mix the cocoa and water: In a medium bowl, whisk the cocoa and boiling water until smooth. Cool to room temperature before using.
  2. Preheat the oven: Set an oven rack in the lower third of the oven and preheat the oven to 175°C.
  3. Mix the liquid ingredients: Mash the banana together with the sour cream until smooth. Add in the cocoa mixture, egg and vanilla extract and mix well.
  4. Make the batter: In the bowl of a stand mixer fitted with the flat beater, mix the flour, sugar, baking soda, baking powder, and salt on low speed for 30 seconds. Add the butter and half the banana-cocoa mixture. Mix on low speed until the dry ingredients are moistened. Raise the speed to medium and beat for 1.5 minutes. Scrape down the sides of the bowl. Starting on medium-low speed, gradually add the remaining banana-cocoa mixture in two parts, beating on medium speed for 30 seconds after each addition to incorporate the ingredients and strengthen the structure. The batter will be light but creamy. Using a silicone spatula, scrape the batter into the prepared pan and smooth the surface evenly with a small offset spatula. You can add in banana slices into the batter at this point. 
  5. Bake the cake: Bake for 30 minutes, or until a wire cake tester inserted in the center comes out clean and the cake springs back when pressed lightly in the center. The cake should start to shrink from the sides of the pan only after removal from the oven.
  6. Cool and unmold the cake: Let the cake cool in the pan on a wire rack for 10 minutes. Run a spatula between the sides of the pan and the cake, pressing firmly against the pan, and invert the cake onto a wire rack that has been coated lightly with nonstick cooking spray. To prevent splitting, reinvert the cake so that the top side is up. Cool completely.


Chocolate ganache
110 g dark chocolate, chopped (60% cacao)
110 ml heavy whipping cream
1 tsp pure vanilla extract
  1. Chop the chocolate into fine pieces and place into a bowl.
  2. Scald the cream in a saucepan (small bubbles will form around the edges).
  3. Pour the cream onto the chopped chocolate and whisk rapidly. Add in the vanilla extract at the same time. 
  4. Allow the ganache to cool to room temperature until the mixture reaches a frosting consistency.
Tip: The ganache stores well in the fridge - Rose recommends keeping it for a maximum of 3 weeks refrigerated and 6 months frozen.


Whipped cream topping
Makes enough to frost at least 3 'bananas'


55ml heavy cream
½ tsp vanilla extract
1 tsp confectioners’ sugar
½ tsp yellow coloring
  1. In a large bowl, whip the cream until soft peaks form. 
  2. Gradually add in the vanilla extract, yellow coloring and sugar until stiff peaks form.

Assembling the cake
  1. When the cake is completely cool, cut your desired shapes from the cake. Be sure to cut two of the same shape so that you can stack them up. 
  2. Spread the cooled ganache on either side of the banana shapes before sandwiching them together. You can add more sliced bananas here if you wish for a more banana-y taste :]
  3. Add more ganache all around the sides and top of the cake - this will be your crumb coating. Put the cake into the freezer for about 5-10 minutes and continue with a second coat of ganache. 
  4. Using a spatula, add some of the yellow whipped cream onto the top of your banana cake and you're done!

Mix the cocoa with the boiling water - this really helps the cocoa powder bloom and achieve maximum flavor. 
Once you get a smooth paste, add in your mashed banana and sour cream, egg and vanilla extract. 
Pour the batter into a greased pan. You can choose to add banana slices if you wish. Use a spatula to smooth the top of the cake, otherwise you'll end up with bumpy bits like I did :/
The cake is baking in the lower third rack of my oven =]
I've cut out two (almost) identical banana shapes from the cooled cake. 
Apply the chocolate ganache onto either side of the banana shape. Line up more slices of banana if you desire. 
Sandwich both sides together and apply the first layer of crumb coating. This will ensure that the second layer of ganache will go on properly without crumbs sticking to it.  
The end product, complete with ganache and yellow whipped cream. Looks almost like a real banana no? ;]

I'll be submitting this for Aspiring Bakers #5 : Fruity March (March 2011) hosted by Jess of Bakericious!  

Monday, March 14, 2011

Happy π (pie) day!

It's 14 March today, and to all the geeks (and math-tormented souls out there), Happy π Day :]

For those who have no idea what this sign π means, either you didn't get an education which revolved around learning about areas of circles or you forgot! It's the Greek letter for "pi" or typically pronounced as "pie", which is the ratio of the circumference of a circle to its diameter. Why is today π day? Well, because π is 3.14159 (and it goes on and on and on since it's an irrational number - anyone remember the tune that goes: sine sine cosine sine 3.14159?) and today's 3.14 :]

Anyway, I wanted to bake a pie in commemoration of pie day - but I decided on a tart instead because it's easier and I think strawberries taste nicer in a tart than in a pie. What's the difference you might ask? Well, I always thought the only difference was that pies had a top crust and tarts did not, but boy was I wrong. The differences are quite aplenty, and subtle, so much so that I became more confused than enlightened after reading a few websites. Some talk about sloping sides and amount of filling and flavor of crust and so on. According to thekitchn, both the pie and tart can be sweet or savory. However, the tart usually only has a bottom crust, whereas a pie can have a bottom, or top or both crusts. This apparently is the consensus among most people. I tend to agree that this is the key difference - this is affirmed by Oxford Companion to Food, which states that "the difference between a tart and a pie is the former does not contain a top crust." In fact, the Oxford Companion provides an interesting primer to the word pie - "The derivation of the word may be from magpie, shortened to pie. The explanation offered in favour or this is that the magpie collects a variety of things, and that it was an essential feature of early pies that they contained a variety of ingredients.... Early pies had pastry tops, but modern pies may have a topping of something else...or even be topless."

I tend to think that sometimes, names and terminology just gets confusing because people don't really use appropriate names to name their foods - think of galettes and tortes and linzertortes and tarte tatins and cobblers - there are so many variants of pastries using basically the same two things - filling and crust! Think of misnomers like boston cream pie which is technically a cake and not a pie at all! I proffer another reason as to why pies and tarts appear so different - I think it's basically a matter of where they originated from - pies originated in Medieval England, popularized in American culture today (considering early American settlers were English), whereas tarts probably originated in Medieval Europe. Of course, I have to put in a disclaimer here that this is mere speculation on my part since I really have not checked if tarts really did originate from Medieval Europe or elsewhere. 

PS: anyone remember the nursery rhyme Sing a song of sixpence which has the line "Four and twenty blackbirds baked in a pie"?


Anyway, geeky me wanted to make a pie with a π cut-out on top, but lazy me decided not to since it was too troublesome and I wanted to make use of my strawberries instead of making an apple pie or other fruit pie. I previously tried out a few pie crusts, which I didn't like because they were pretty difficult to handle, so this time round, I turned to a source which has yet to fail me for a number of recipes that I've tried - Cook's Illustrated :] I'm not sure if I've said this before, but I really do like the concept of America's Test Kitchen and if I had the opportunity to work there, I most definitely would. I cannot imagine anything better than testing out a number of recipes over and over again, just to find out what works the best and for what reason. The ultimate marriage of baking and food science! 

I've to admit that the recipes do get troublesome sometimes - for instance, the chocolate chip cookie recipe requires uneven numbers of egg whites and yolks, and some require a mix of flours, which some people might find a chore. But think of it this way - if it yields the best (insert whatever item you are baking here), then it should be worth the try! At least it'll be better than trying another mediocre recipe and failing, no? The Cook’s Illustrated pie dough recipe is no different, it requires the use of vodka, which not many people have at home, and requires the use of shortening as well, which again, not many people have ready at home. The recipe also uses a food processor, which I believe most locals do not have. In any case, I too don't have a food processor (although I'd love to have one) and I didn't use shortening in the recipe, but I believe the use of vodka did help in making a flaky crust :] If the technique I use for the pie crust looks familiar, it's because it's largely adapted from Rose Levy Beranbaum's technique of cutting the butter into flour for pies.

Foolproof Pie Dough
Adapted from Cook's Illustrated 
Makes enough for one 9-inch double-crust pie

Ingredients: 
300 g   all-purpose flour
1 tsp    sea salt
2 tbl     sugar
280 g   cold unsalted butter, cut into 3-cm cubes
70 ml   cold vodka
80 ml   cold water

Method: 
  1. Divide the butter roughly into thirds, keeping one-third in the freezer (about 100g).
  2. Weigh and sieve flour, salt and sugar together, placing them in a clean mixing bowl. Add the remaining unfrozen butter into the flour mixture. Either use a fork, pastry cutter or your clean fingertips, begin cutting the butter into the flour, until it resembles coarse breadcrumbs. 
  3. Spoon the mixture into a large ziplock bag and add the frozen butter into the bag. Expel any air from the bag and close it. Use a rolling pin to flatten the butter into flakes. You should get flattened "breadcrumb" bits and butter flakes. Place the ziplock bag into the freezer for about 10 minutes to make sure that all the butter is firm. 
  4. Transfer the mixture to a chilled bowl. Slowly add 50ml of the cold vodka and 50ml of the cold water and incorporate them into the dough. At this point, I like to use a spatula to gather the dough together instead of using my fingertips. Add the remaining vodka and water, until you get a shaggy dough. 
  5. Put the mixture back into the ziplock bag and use the heel of your hand to knead the mixture until it comes together and feels stretchy. 
  6. At this point, divide the dough into 2 or more discs (depending on whether you are making tarts or tartlets), and refrigerate for at least 45 minutes, preferably overnight before using. 


What I did was to divide the dough into 4 discs, because I was making tartlets and didn't did that much dough at one time. I froze 3 discs, and after refrigerating one disc for 45 minutes, I proceeded to use them for my tartlets. I use my lazy-person method of making tart cases - which is, to grab a small portion of the dough, press it out with my fingers such that it is thin enough (about 4mm thick), and press it into the tart case. If the dough is too small for the case, I take additional bits of the dough to fill up the spaces. After making a few, I kept all of the tart cases (with dough in them) in a ziplock bag, and froze them. The reason why I'm doing this is because I had to bake the tarts without any filling since I was making strawberry tarts, and since I was lazy to blind bake, this was the only other method. If you bake the tarts once you remove them from the freezer, there is no need for you to blind bake them - that's a tip from Rose! ;] Before removing them from the freezer, be sure to preheat your oven to 190 degrees, and bake the tarts for about 15 minutes or until golden brown. 


**
For the creme pâtissière (pastry cream), I used Donna Hay's recipe which I obtained from Evan's post here. It's really simple and good :]

Creme Pâtissière
Ingredients: 
240 ml milk
1 tsp vanilla extract
2 egg yolks
30 g castor sugar
25 g cornstarch (or cornflour)

Method: 
  1. Place the milk and vanilla extract in a saucepan over medium high heat and bring to a boil before setting aside. 
  2. Whisk together egg yolks and caster sugar in a bowl until the sugar dissolves and it becomes a pale yellow color. Add in the cornstarch and whisk until combined. 
  3. Slowly pour in the milk, making sure to whisk continuously. Pour the mixture back into the saucepan and heat over medium high heat. Continue whisking constantly until the mixture thickens. Once thickened, remove from heat and set aside to cool. 
  4. Once cooled, spoon into cooled tart shells and serve with fresh fruits of your choice. 

Janine's jots: 
  • Taste: The crust itself is very flakey and buttery because it is an all-butter crust. Therefore, be sure to use good quality butter. 
  • Serving size: I managed to make about 25 mini tartlets (1.5 inch diameter) with one disc of dough. 
  • Modifications: If you don't have vodka, you can use vinegar to the same effect as well. Rice vinegar is fine too as the smell disappears after baking. Basically vodka or vinegar evaporate when baking, and they do not add to gluten formation since it does not react with the flour, thus giving you a flaky crust! Also, you might not have to use all the water and vodka, so sprinkle them in slowly after the first addition. 
  • Storage: I've kept the pie discs in the freezer, in a ziplock bag and each separately packaged for over a month and I take one disc out whenever I feel like using it. It takes less than half an hour to be malleable enough to roll and the tart crust tastes as good as before. The dough keeps really well! I've still got a disc left, and I'll be doing a comparison by baking it after having storing it for 3 months vs another newly made pie dough (same recipe) to see if there's any difference. 
  • Would I make this again? Most definitely!
  • Other comments: Make sure that all your equipment used is cold, so that the butter does not melt excessively. I have warm palms, so having cold water and vodka helps to neutralize the effect my fingers have on melting the butter. 
This post is getting rather long and convoluted, because this is perhaps the first time I'm doing a recipe with multiple components and my verbosity is getting the better of me :/ Anyhow, here are some more pictures of the completed product. I'm glad I finally did try out the pie dough recipe, because I do think that it's a keeper (although I changed a lot of the steps - thus making it mine hehe) and it's really versatile! I even made egg tarts with them which my mother proclaimed the best thing I've ever made!


This will be my first submission for Aspiring Bakers #5 : Fruity March (March 2011) hosted by Jess of Bakericious! This post has also been tastespotted here :]

Thursday, March 10, 2011

Homemade Cinnamon Sugar Wheat Thins

As I'm typing this entry, I'm munching on my homemade wheat thins and boy are they addictive! I've to admit I've never eaten Wheat Thins, because I don't think they're available locally, but I have eaten other types of wheat crackers. Like Arnotts shapes!! Anyone remember them? They have flavors like Pizza and Cheddar - I remember loving the Pizza flavored ones to bits! But horrors! Each cracker contains 12% of saturated fat and 10% of sodium - a definite no-no! These homemade ones are by far the better choice. I'm no calorie counter, but I'm pretty sure that the saturated fat and sodium content is much lower and better yet, there's no preservatives!

I saw this recipe while I was blog surfing on Xiaolu's blog, and I've bookmarked it until a suitable time to attempt them. The time came sooner than I expected when my daily oatmeal chocolate chip cookie snack ran out! I do have a bad habit when it comes to snacking - I tend to get sick of one type of biscuit/cookie really easily. In fact, I usually just open a packet of biscuits to eat one or two before I leave them languishing in the cookie jar until the air has gone out of them :/ Bad habit I claim to have inherited from my mom who shares the same bad habit! :p


Homemade Wheat Thins
Adapted from Xiaolu, from King Arthur Flour Whole Grain Baking Book
Makes 6 dozen crackers

Ingredients:
For the crackers:
150 g    wholemeal flour (or whole wheat flour)
20 g      castor sugar
½ tsp     salt
½ tsp     vanilla extract 
60 g      unsalted butter, cold
60 g      water

For the topping: 
1 tsp cinnamon powder
2 tsp icing sugar
(sift both together)
Granulated sugar for additional sprinkling

Method: 
  1. Combine the flour, sugar and salt together. 
  2. Cut the butter into 3-cm large cubes and use your fingers (or a fork) to cut it into the dry ingredients. 
  3. Once a bread-crumb texture is achieved, add in 40g of water, making sure to fully incorporate it into the dough. If the dough remains dry, slowly add in the water a tablespoon at a time, until all the bread crumbs have been incorporated into the dough. You might not need to use the entire 60g of water! Cover and chill the dough for 10 minutes. 
  4. Preheat the oven to 190 degrees. Line your baking sheets with parchment paper.
  5. Lightly flour your counter and your rolling pin. Grab a fist-sized portion of the dough, making sure to keep the dough covered under a damp tea towel to prevent it from drying out. Roll the piece of dough, as thin as you can (about 2mm thick). Using a pizza cutter or sharp knife (I used the edge of my bench scraper), cut the pieces into squares approximately, 3-5cm wide (or whatever shapes you want your crackers to be). 
  6. Sprinkle the squares with your cinnamon-sugar topping, or any desired sweet or savoury topping. Repeat the process with the remaining dough. 
  7. Bake the crackers for about 5-10 minutes, or  until they are crisp and brown. Check on the crackers after 5 minutes, making sure to rotate the tray if your crackers don't brown evenly. If some of your thinner crackers have already browned, use a spatula to remove them and continue baking. 
  8. Once ready, remove the crackers form he oven and cool on the pan for about 10 minutes before they're ready for consumption! Store the crackers in airtight containers.

Janine's Jots: 
  • I didn't exactly bother to make sure that my crackers were uniform in size, but if you are the OCD type, you can trim the edges of your rolled out dough and proceed to cut into uniform rectangles. 
  • Tips: You can actually roll the dough out on your pre-cut parchment paper, cut it into pieces and transfer the paper onto your baking tray without having to bother with excessively flouring your countertop. Just be sure not to cut into your parchment paper. You don't have to even separate the pieces after you've cut them because they don't expand and are easily snapped off at the lines you've cut. 
  • Texture: If you manage to roll out your dough thin enough, the crackers will be nicely thin and crisp. They don't expand AT ALL. Try not to re-roll your scraps too many times because it'll give rise to layers and the crackers won't be as crisp!
  • Storage: I've stored the crackers in an airtight container, and so far, it's been more than a week and the crackers are still as crisp as before :]
  • Serving size: Like Xiaolu, I highly recommend doubling the recipe, because 6 dozen crackers is really a small amount! They're really addictive and you can finish a number of them at one go!
  • Modifications: This recipe is easily adaptible and really easy to make! It only took me about 10 minutes of active preparation and about an hour in total before I got to eat the cooled crackers! You can easily make savory versions. In fact, the original poster made a savory one with paprika, turmeric, garlic and onion powder added into the dough. Salt was also sprinkled on top. I did a herb version along the same lines. 
  • Taste: If you are not much of a fan of wheaty textures and tastes, I'd recommend subbing at least 30g of the wholemeal flour with all-purpose flour, which is what the original recipe called for.  
  • Would I make this again? DEFINITELY. There aren't many cinnamon flavored crackers available in our local supermarkets because I don't think it's favored by locals, but I love cinnamon to bits! I can imagine myself making different versions of this cracker - BBQ, cheddar cheese - the variations are endless. And it goes really well with salsa, dips and cheeses and ham too! And I can't stress enough how easy it is to make the dough and bake them! Be sure to keep an eye on the crackers though, some of mine turned a tad too brown and had the chao-tah (burnt) taste, which was awful. 


In pictures: 
Combine the dry ingredients. Excuse the dirty bowl - I used it for other purposes earlier  :/
Incorporate the butter into the dry ingredients, using your fingers., until you get coarse breadcrumbs. 
Lightly flour your counter so that you can roll your dough on it. Shaky hands for this picture, sorry!
A close-up of how the dough looks like - it's not wet like bread dough, and not difficult to handle like most pie doughs. 
See the rolled out dough? This is still not thin enough! It has to be as thin as how you imagine you want your crackers to be - really really thin!
What I've done here is to separate the pieces on the baking paper - there is no need to do so because the pieces totally do not expand and do not stick to one another! See the big piece on the right? I used my bench scrapper to cut it into pieces on the tray rather than moving the pieces from the countertop to the tray :]
These are my cinnamon-sugar topped ones. They look a tad browner than the herb ones. As you can see, I don't really care much for regular sizes. 
These are the herb-topped ones. Be sure to press the herbs into the crackers before baking, otherwise they'll all fall out when baked!
My attempt at making plain triangular ones for dipping sauces heh :] Note the top triangle tip? That's way too brown - it'll have the burnt taste which is a no-no unless you like that type of smells.

I haven't exactly raved much about recipes I've attempted, but I've to admit that this will be one of the recipes that I'm sure I'll be repeating many many times this year. They're really easy to make, and I also like the fact that I can control the amount of sugar and fat going into this cracker - so that I know exactly what I'm snacking on. And the best part is the ability to change the flavours of this cracker according to your preference! I thinking along the lines of perhaps making a rice cracker version - subbing the wheat flour for rice flour instead, and perhaps making a thick cracker, with some cheese or other sweet filling inside, just like those weetbix cereal I eat in the morning! Will see how that goes :] Do try out this recipe everyone! It's definitely one for keeps!
Related Posts Plugin for WordPress, Blogger...